
As someone who’s spent countless hours tinkering with code and text files, I can vouch for the importance of organizing your work effectively. The tips you’ve provided are not only helpful but also a great way to make our lives easier when working with Notepad.
In Windows 11, you can utilize an upgraded edition of the well-known Notepad tool. Despite being created as a basic text editor, it comes equipped with various features that you might not be utilizing due to lack of knowledge or forgetfulness.
In the latest updates, Microsoft has equipped Notepad with spell-checking abilities, along with an option to automatically correct errors. Additionally, it boasts a more robust search-and-replace function. Furthermore, users can personalize the default font size and style, modify start-up behavior, switch to a dark color scheme, and utilize various other settings to optimize Notepad’s functionality.
In this step-by-step tutorial, I’ll showcase for you ten underutilized functions within the Notepad application on your Windows 11 system that you might be overlooking.
Notepad features you should try out on Windows 11
Take a look at these useful tools designed to enhance your efficiency when utilizing the widely-used note-taking application.
1. Spell check and autocorrect
In simpler terms, Notepad has the ability to identify and underline misspelled words and automatically fix typing errors. However, it’s important to note that this function works only for text files, and it does not support files containing coding languages like HTML and CSS.
To turn the spelling feature on or off in Notepad, use these steps:
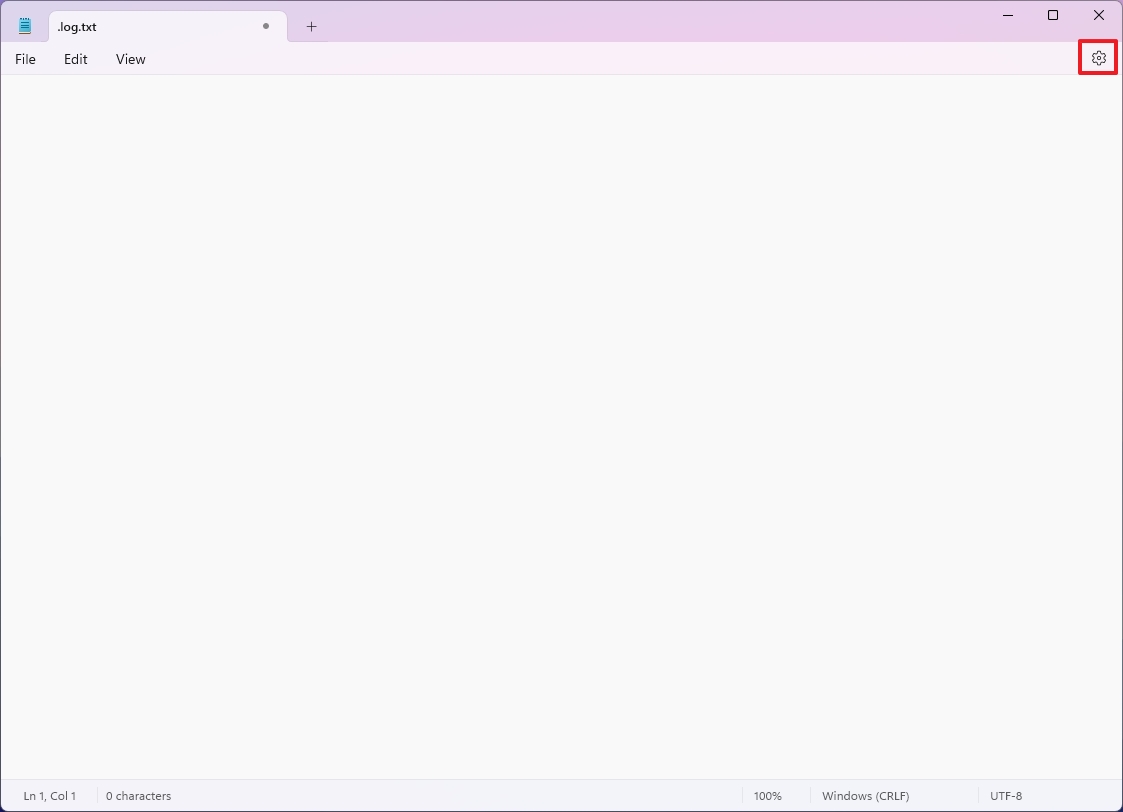
- Open Notepad.
- Click the Settings button on the top-right corner.
- (Option 1) Turn on the Spell check toggle switch to enable the feature.
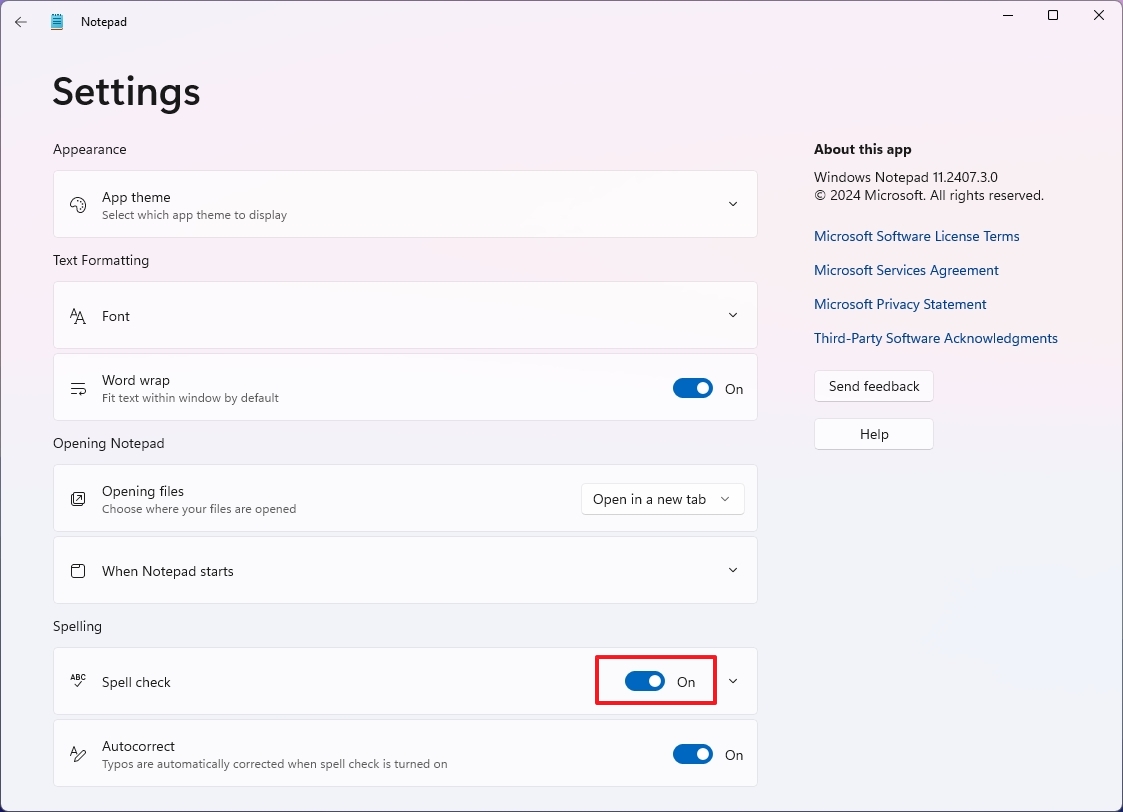
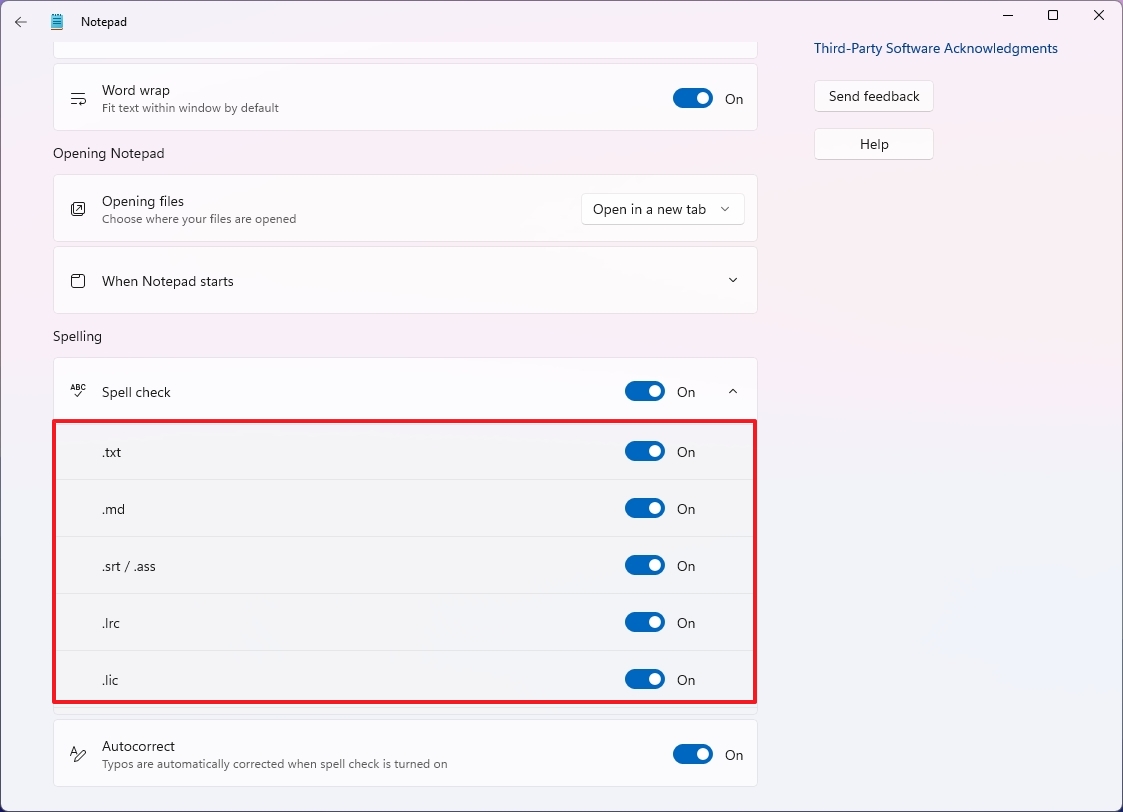
- Click the Spell check setting.
- Turn on the file types that Notepad should be able to check for spelling.
- (Option 2) Turn off the Spell check toggle switch to disable the feature.
- (Option 1) Turn on the Autocorrect toggle switch to allow the app to correct typos automatically.
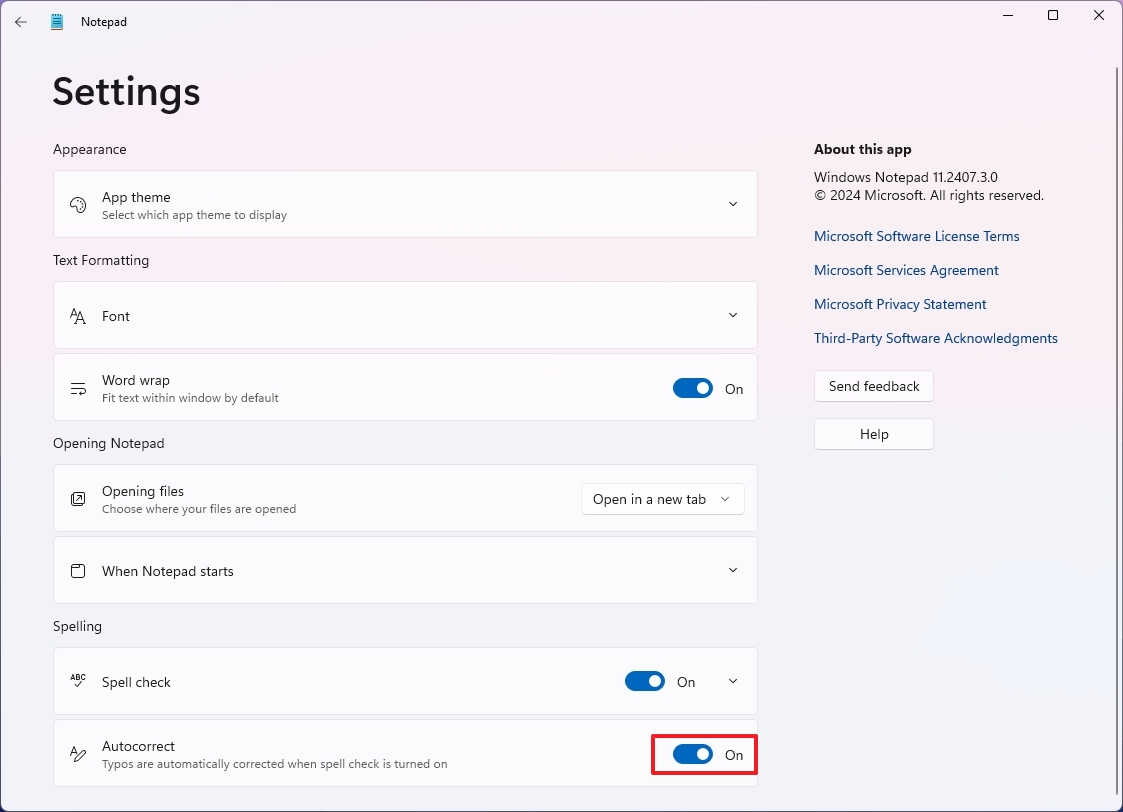
- (Option 2) Turn off the Autocorrect toggle switch to disable the feature.
Once you complete the steps, Notepad will highlight spelling mistakes and autocorrect typos.
When the app underscores a word, you can simply right-click it and choose the right spelling from the “Spell Check” option instead.
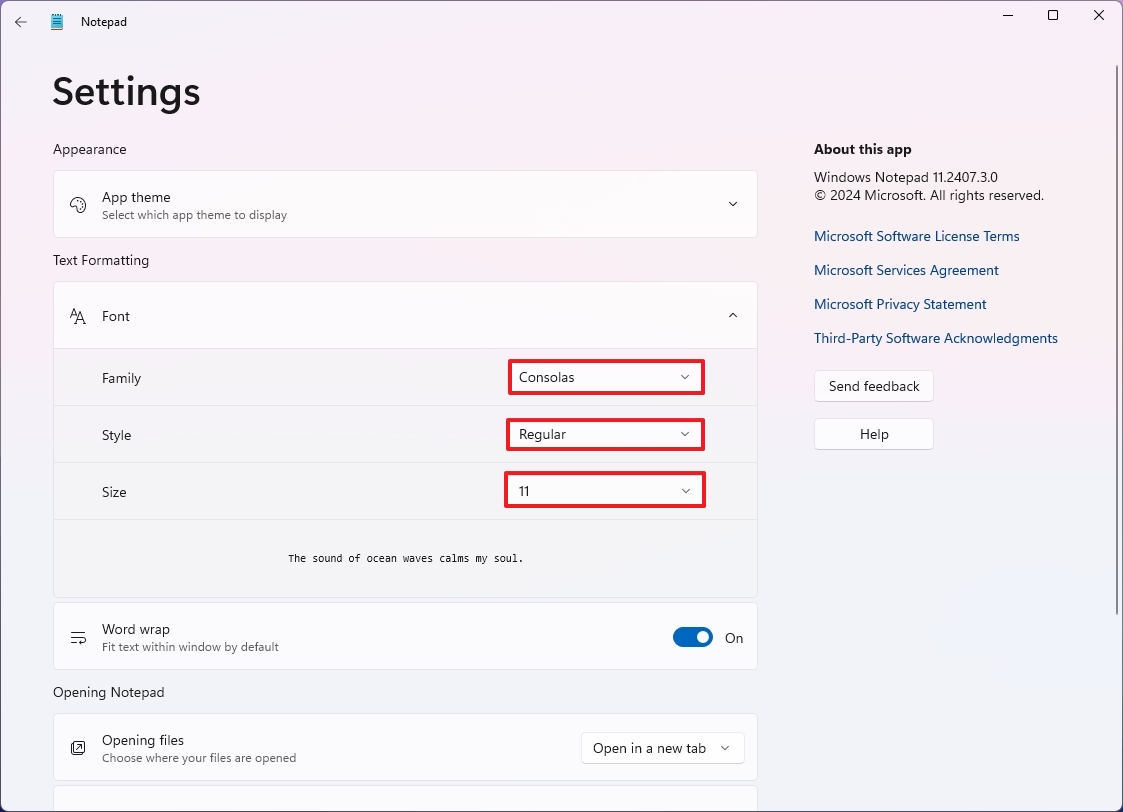
2. Change font size and style
As part of the customization settings, you can set the default font size and style. Here’s how:
- Open Notepad.
- Click the Settings button on the top-right corner.
- Click the Font setting.
- Choose the default font family, such as Arial, Bahnschrift, etc., in the “Family” setting.
- Select the font style, depending on the font family you’re using, in the “Style” setting.
- Choose the default font size using the “Size” setting.
After you complete the steps, the new settings will apply automatically.
You can also use the “Ctrl + scroll mouse wheel up or down” to zoom in and out quickly while typing on Notepad.
3. Find and replace
One of the most underrated features of Notepad is find and replace since it allows you to find a specific string or replace text quickly.
To find and replace text on Notepad, use these steps:
- Open Notepad.
- Open the Edit menu and choose the Find option.
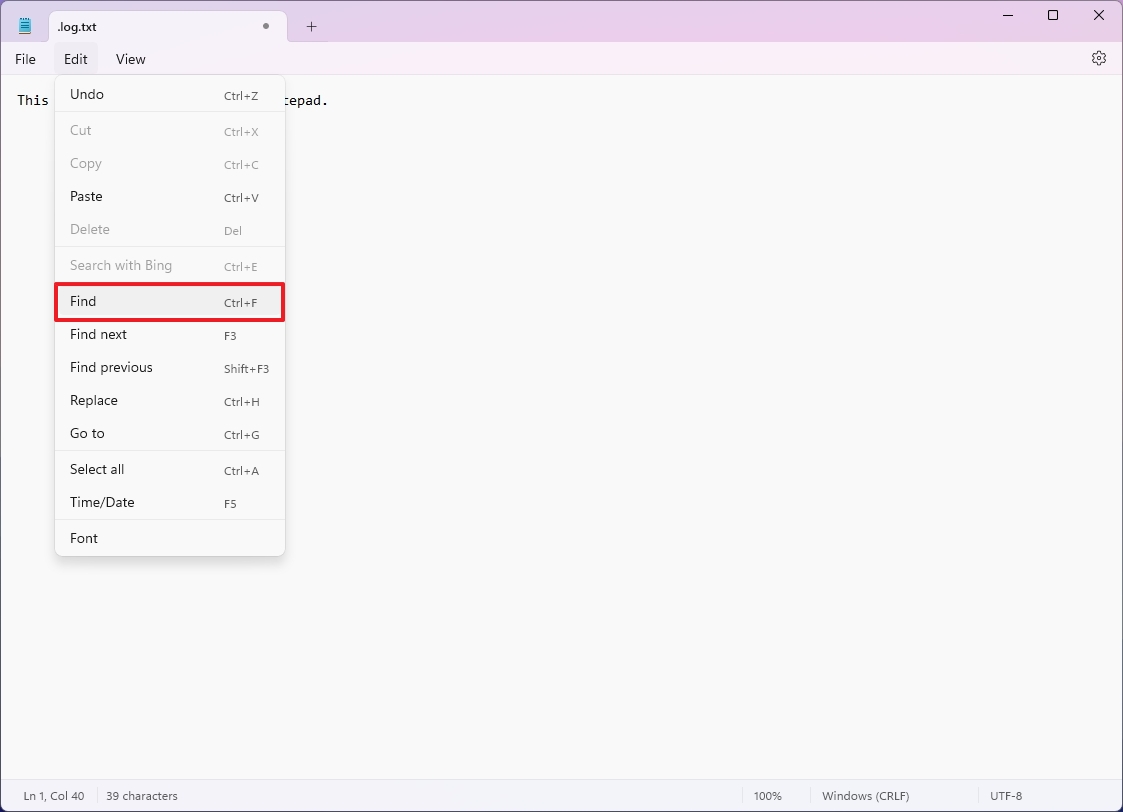
- Quick note: You can also use the “Ctrl + F” keyboard shortcut. You can also use the “Ctrl + H” shortcut to open the “Replace” interface, but the “Find” interface also includes the Replace feature, so this is not necessary.
- (Option 1) Confirm the text in the box.
- Click the arrow up or down button to search up or down.
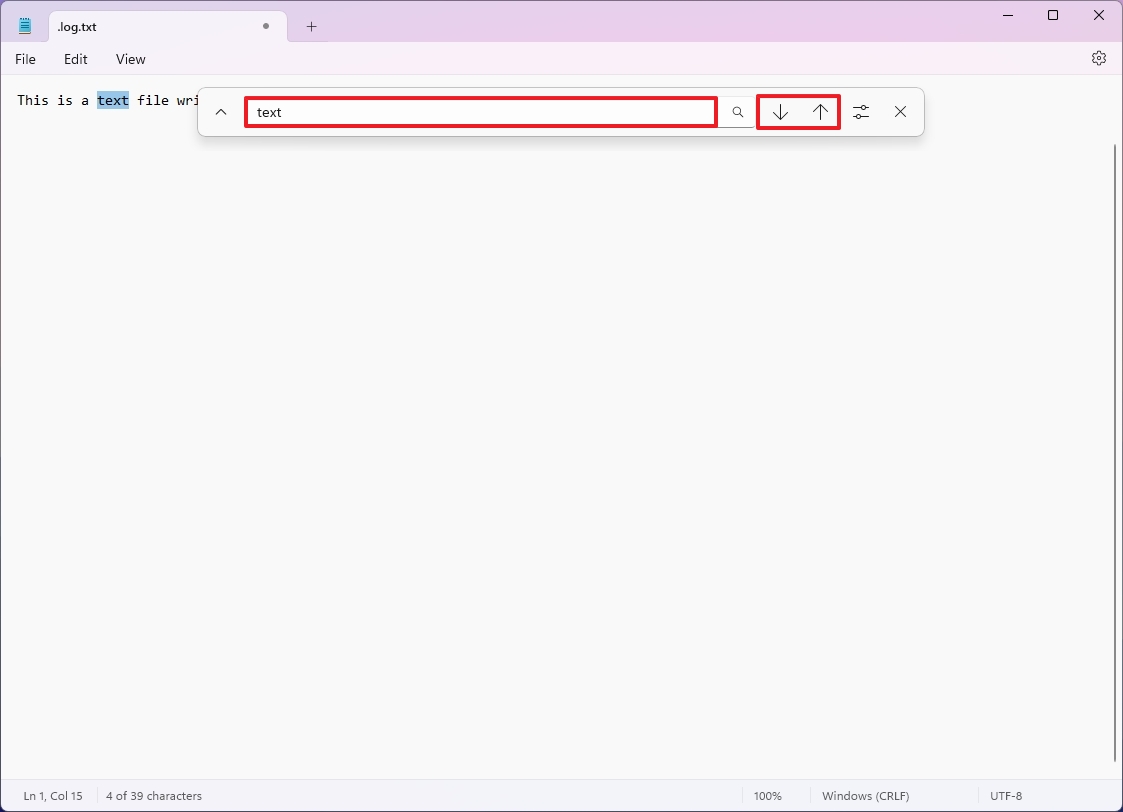
- Quick tip: You can also click the magnifier button or press Enter to search.
- (Option 2) Click the up arrow button to open the Replace experience.
- Confirm the text to replace in the first box on the top.
- Confirm the new text in the second box, on the bottom.
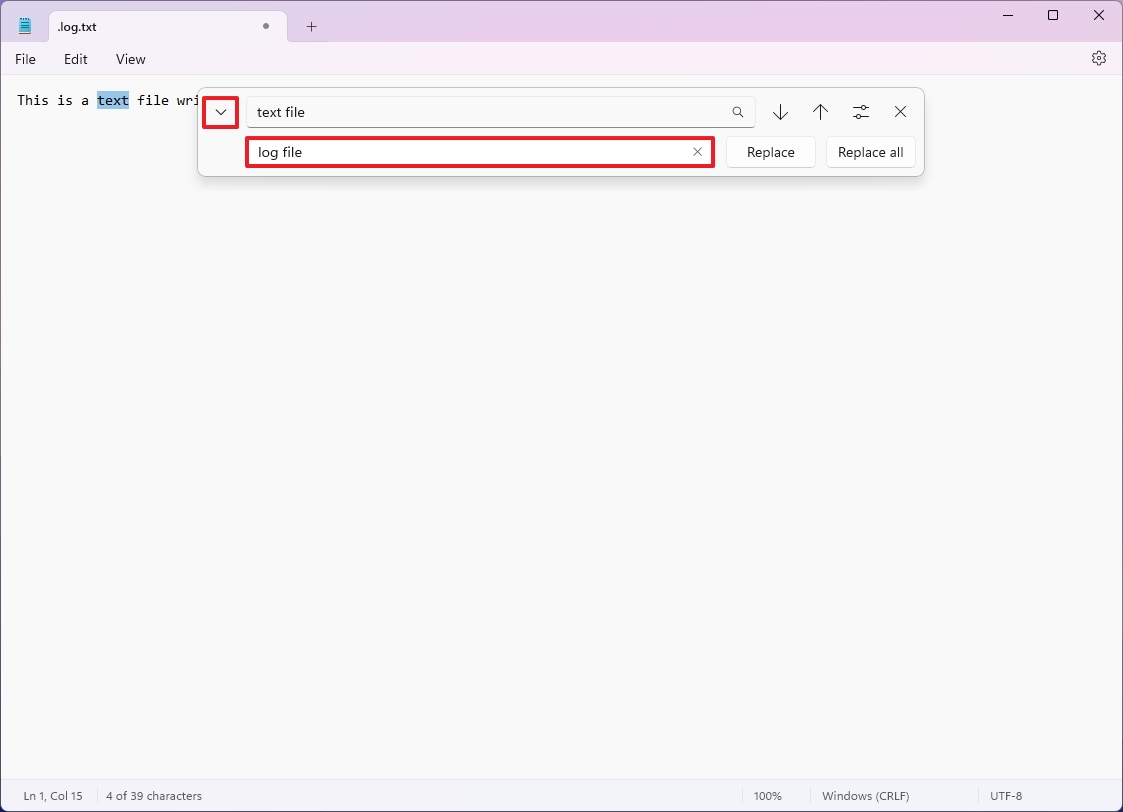
- Click the Replace button to change one match at a time.
- Click the “Replace all” button to change all matches simultaneously.
Although Notepad lacks complete support for regular expressions, it offers some fundamental wildcard options such as the asterisk (*), which matches any sequence of characters, and the question mark (?), which stands for any individual character.
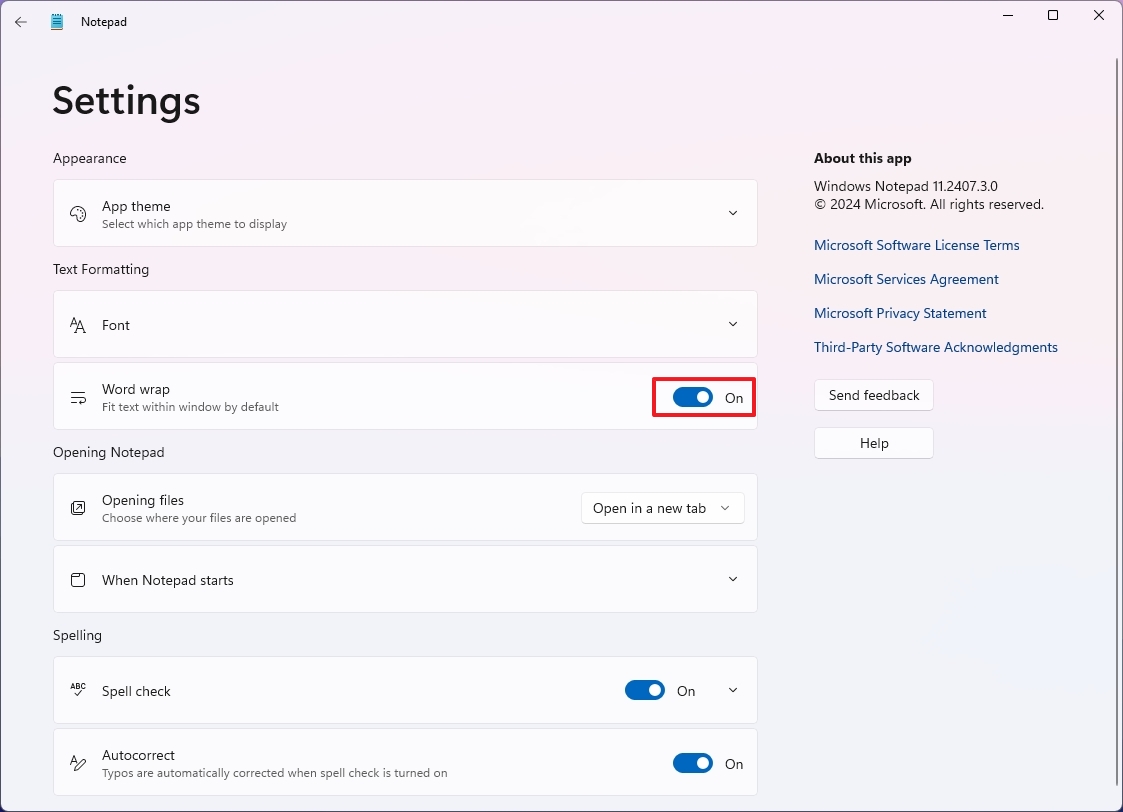
4. Enable word wrap
In Notepad, there’s an useful function called word wrap. This means the text will automatically jump to the new line as soon as the existing one hits the edge of the screen. This way, lines can be kept relatively short, making them simpler to peruse.
To enable word wrap in Notepad, use these steps:
- Open Notepad.
- Click the Settings button on the top-right corner.
- Turn on the Word wrap toggle switch.
After following the given instructions, I’ll find myself with a neatly formatted text where the lines automatically wrap at the edge of my screen, just like magic!
It’s important to note that you can also find the option from the “View” menu.
5. Change startup behavior
In Windows 11, you have the option to configure Notepad’s startup behavior. You can either start a fresh session or pick up where you left off by resuming your previous sessions with tabs still open.
To change the start settings of Notepad, use these steps:
- Open Notepad.
- Click the Settings button on the top-right corner.
- Click the “When Notepad starts” setting.
- (Option 1) Check the “Continue previous session” option to pick up where you left off.
- (Option 2) Select the “Start new session and discard unsaved changes” option to launch an empty session on startup.

After you complete the steps, the text editor will launch with the specified startup configuration.
6. Change text alignment
Using Notepad in languages that are written from right to left, like Arabic, Hebrew, or Persian, the application offers a function for text direction going from right to left (RTL) to ensure smooth usage.
To change the text alignment in Notepad, use these steps:
- Open Notepad.
- Right-click on the text and choose the “Right-to-left reading order” option.
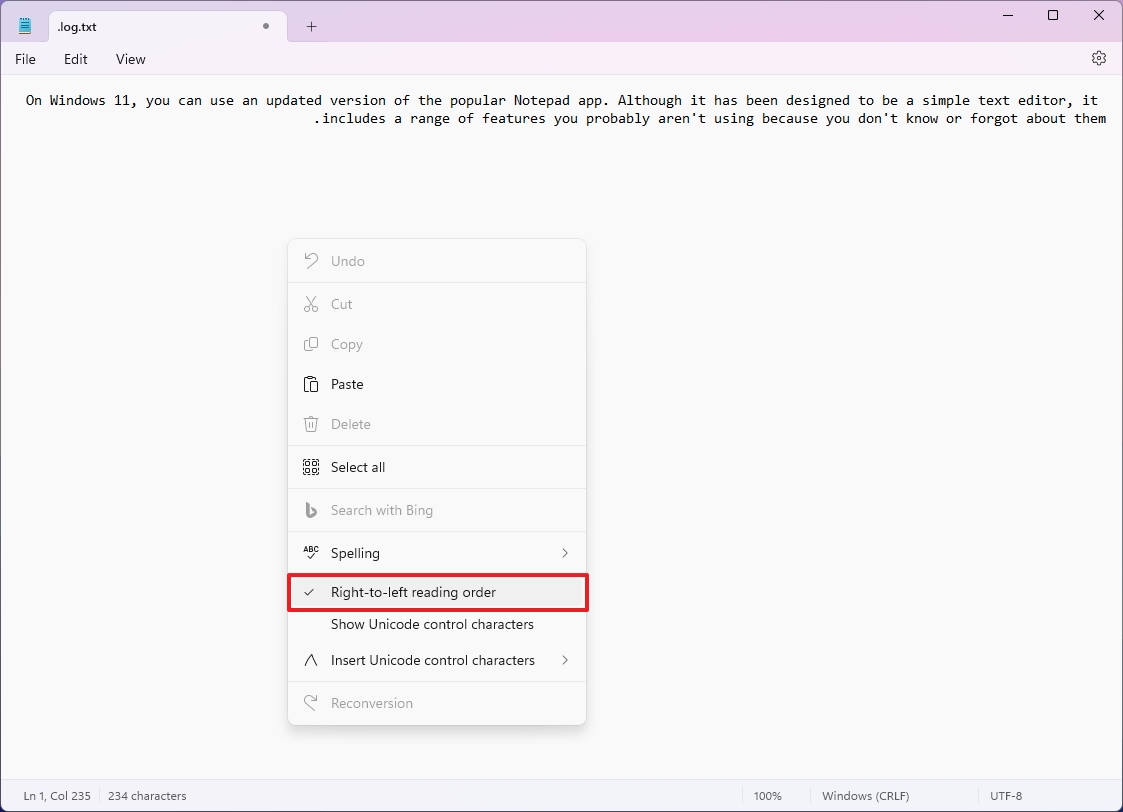
After finishing the steps, the text will be positioned to the left if it’s currently lining up on the right. To achieve a left-to-right flow when the text is automatically aligning to the right, ensure that the “Right-to-left reading order” option is disabled.
7. Switch color mode
You can personalize Notepad to a dark color theme by adjusting it manually, or you could opt for a setting that lets the app mimic the system’s color settings instead.
To enable the dark mode for Notepad, use these steps:
- Open Notepad.
- Click the Settings button on the top-right corner.
- Click the “App theme” setting.
- (Option 1) Select the Dark option to force the dark color mode.
- (Option 2) Select the “Use system settings” option to change the color mode when you change the system color.
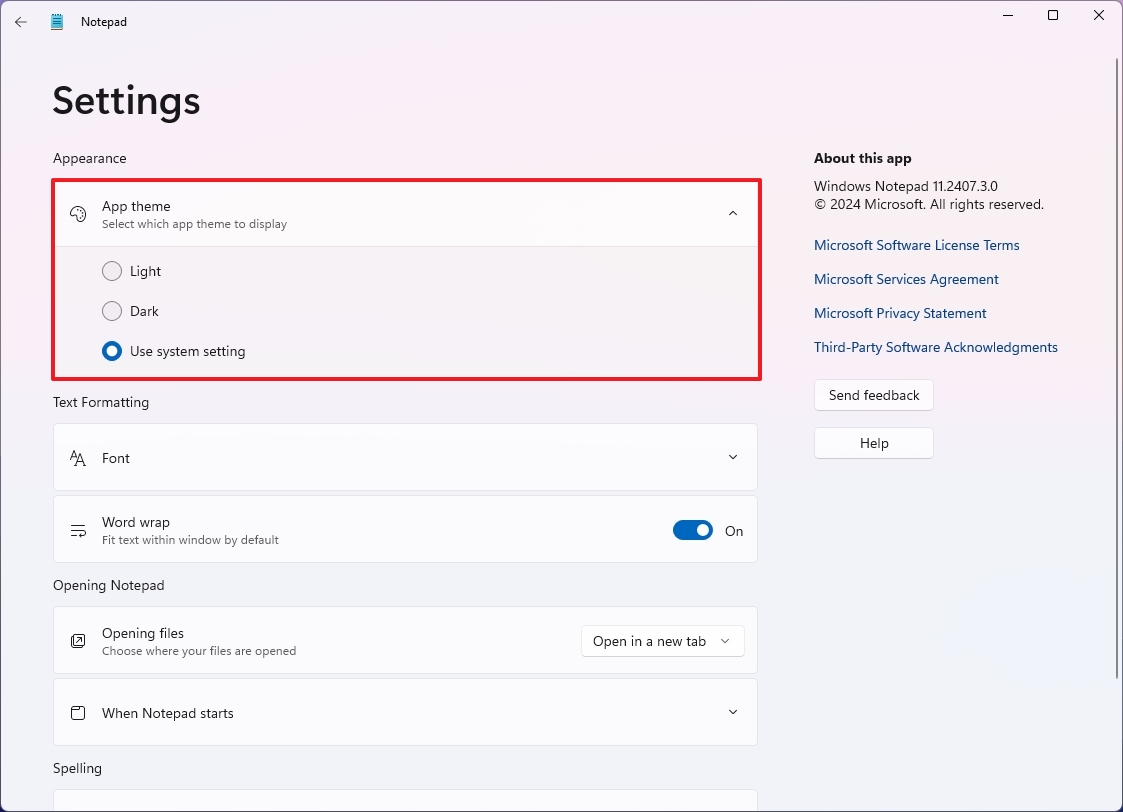
Once you finish the process, the Notepad will automatically adjust its color scheme to a dark mode based on your chosen settings.
8. Insert time shortcut
To log modifications for an application, script, or similar entity using Notepad, you can set up the software such that it automatically adds a timestamp at the start of a fresh line whenever you open the file.
To insert a timestamp in Notepad, use these steps:
- Open Notepad.
- Type the following in the first line: .LOG
- Continue with the contents of the text file in the second line.
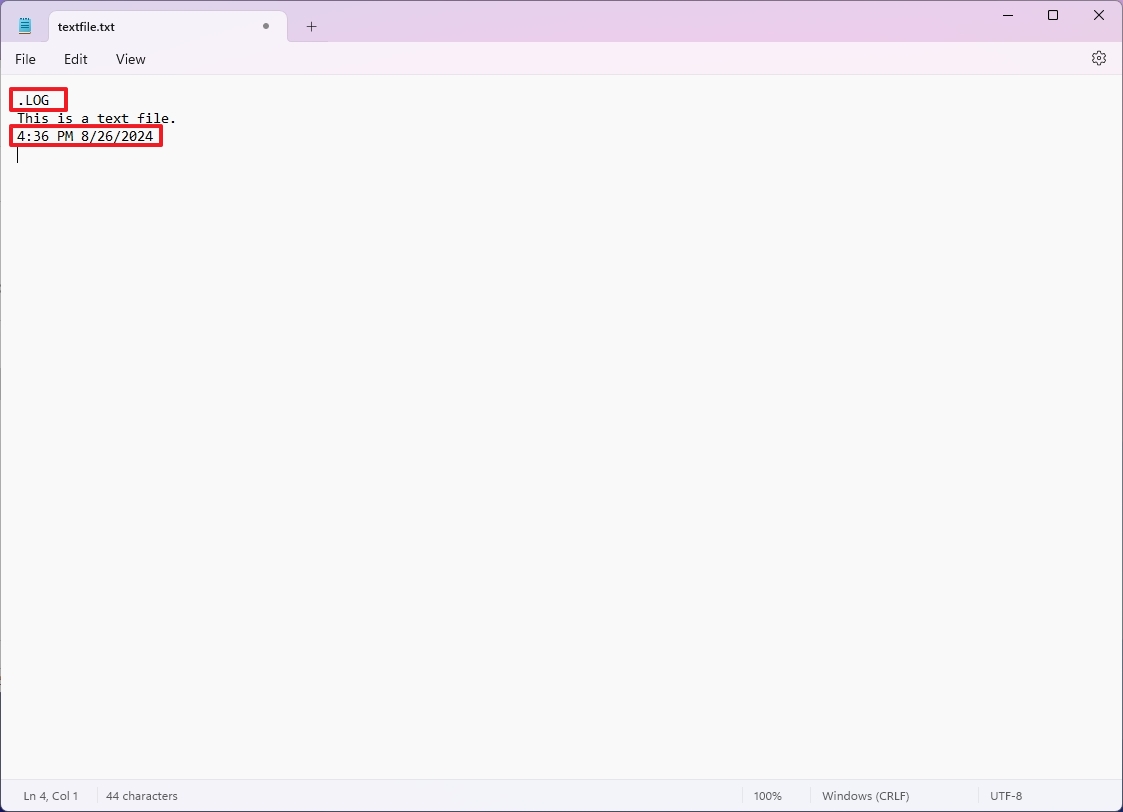
- Save the the text file.
After following the given instructions, when you reopen the file later, Notepad will automatically add a new line containing the current date and time (such as 2:14 PM 8/26/2024).
In order for this option to function properly, you must have selected the “Start a new session and discard any unsaved changes” option within the “Session start settings.”
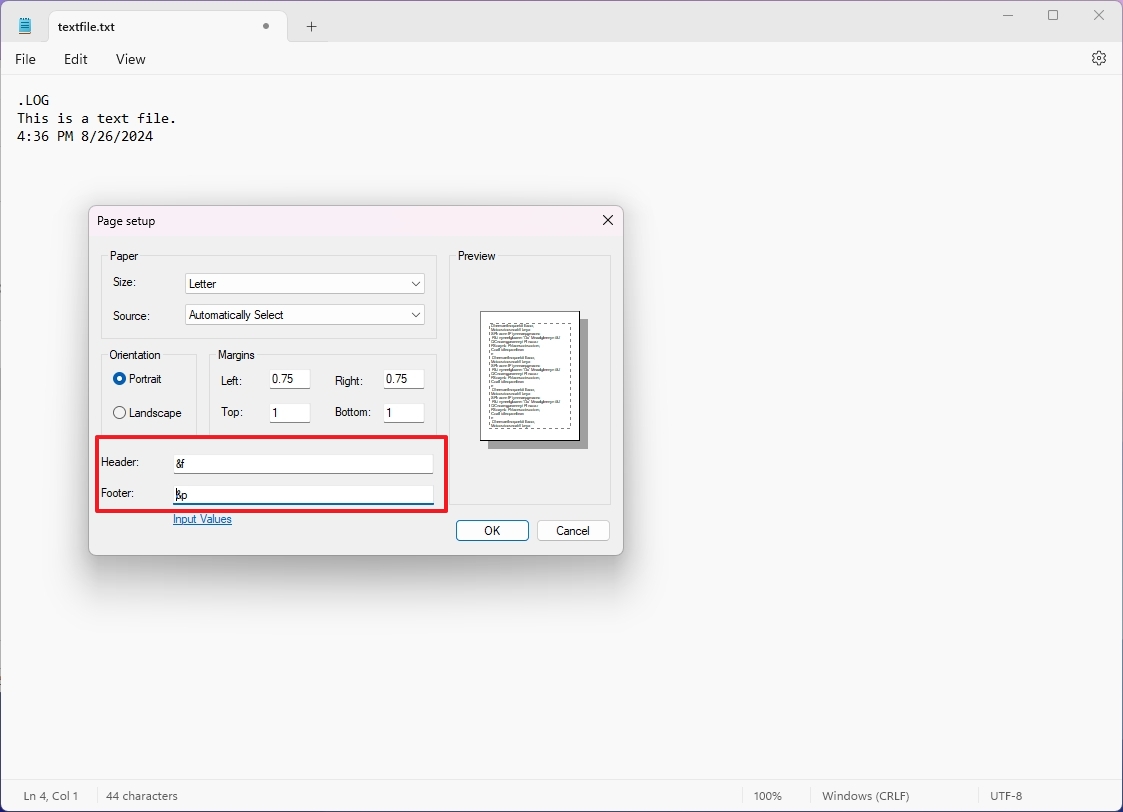
9. Custom header and footer
When you print a page from Notepad, you have the option to personalize both the header and footer. This means you can add details such as the file name, page number, the current date, and even adjust the alignment to suit your needs.
To change the header and footer for a text file in Notepad, use these steps:
- Open Notepad.
- Open the File menu and choose the Page setup option.
- In the “Header” setting, you can use the &f to print the filename at the top.
- In the “Footer” setting, you can use the &p to print the page name.
You can also use these other variables:
- &l: Left-align the characters that follow.
- &c: Center the characters that follow.
- &r: Right-align the characters that follow.
- &d: Print the current date.
- &t: Print the current time.
- &f: Print the name of the document.
- &p: Print the page number.
Once you’ve finished the steps, the printer will incorporate the actions you outlined for both the header and footer.
It’s important to note that Notepad doesn’t save these settings, meaning that you must specify them on every print.
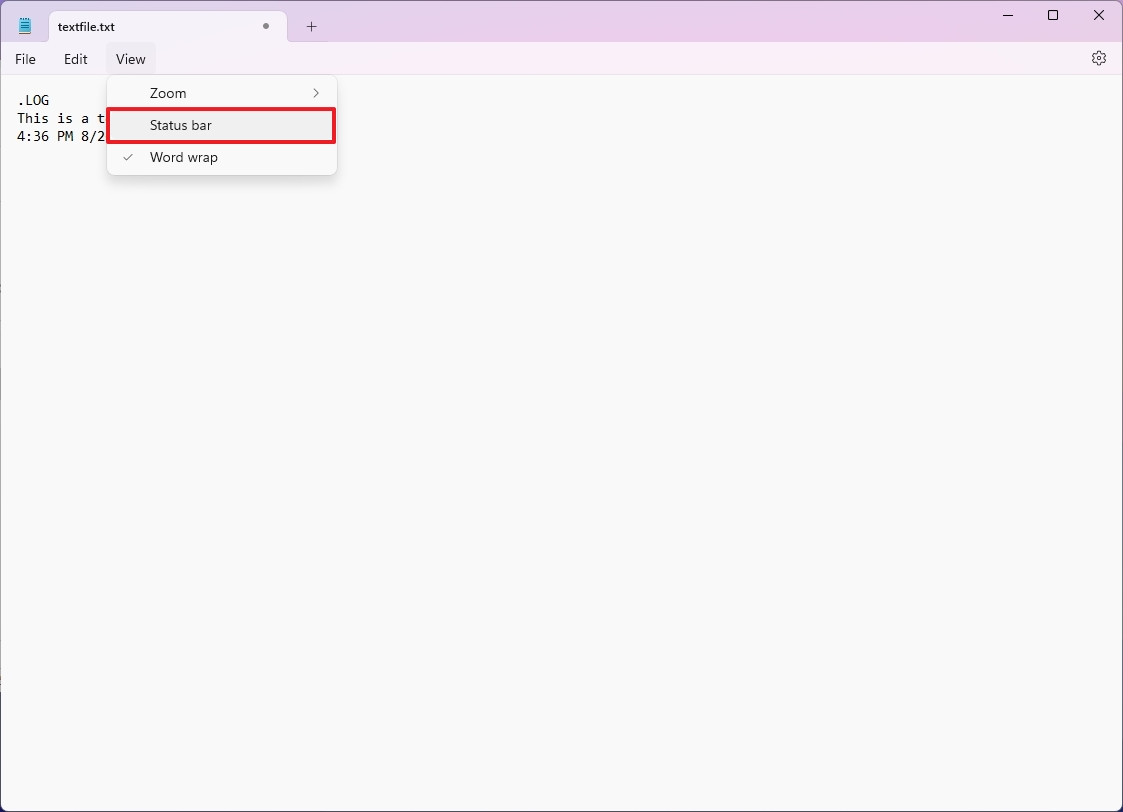
10. Disable status bar
In the Notepad software, there’s a line located right at the footer of the window called the status bar. This bar offers helpful details about the active document, including the line and column numbers, as well as the insert mode. If you don’t find it beneficial for your work, you can choose to turn it off.
To turn off the status bar, use these steps:
- Open Notepad.
- Open the View menu and click the Status bar to clear the option.
Once you complete the steps, the status bar will no longer appear at the bottom of the page.
You can always select the option from the “View” menu to re-enable the feature.
More resources
Read More
- The Bachelor’s Ben Higgins and Jessica Clarke Welcome Baby Girl with Heartfelt Instagram Post
- WCT PREDICTION. WCT cryptocurrency
- Royal Baby Alert: Princess Beatrice Welcomes Second Child!
- SOL PREDICTION. SOL cryptocurrency
- PI PREDICTION. PI cryptocurrency
- Sea of Thieves Season 15: New Megalodons, Wildlife, and More!
- PGA Tour 2K25 – Everything You Need to Know
- ETH Mega Pump: Will Ether Soar or Sink Like a Stone? 🚀💸
- Shrek Fans Have Mixed Feelings About New Shrek 5 Character Designs (And There’s A Good Reason)
- `SNL’s Most Iconic SoCal Gang Reunites`
2024-08-27 14:39