As an avid RPG enthusiast, I can tell you that the epic moments in any role-playing game usually revolve around the formidable battles with bosses. These challenging adversaries put players’ understanding of the game mechanics, character development, and strategic planning skills to the ultimate test. The game you mentioned is packed with thrilling boss fights, although some are undeniably tougher than others. For instance, areas like the Ghost House can be extremely difficult, yet they don’t quite fit the definition of a traditional boss fight. Some battles pit you against one powerful enemy, while others become demanding due to an overwhelming number of smaller enemies.
The outcome of battles largely depends on a player’s character build and their current team composition. In some instances, characters with casting abilities may swiftly defeat bosses, whereas other encounters necessitate tougher, durable characters to endure for extended periods. Towards the end of the game, players will encounter numerous demanding obstacles, particularly if they aspire to conclude each character’s narrative, accomplish every task, and secure top-tier equipment.
Not Too Terrible With Preparation, However

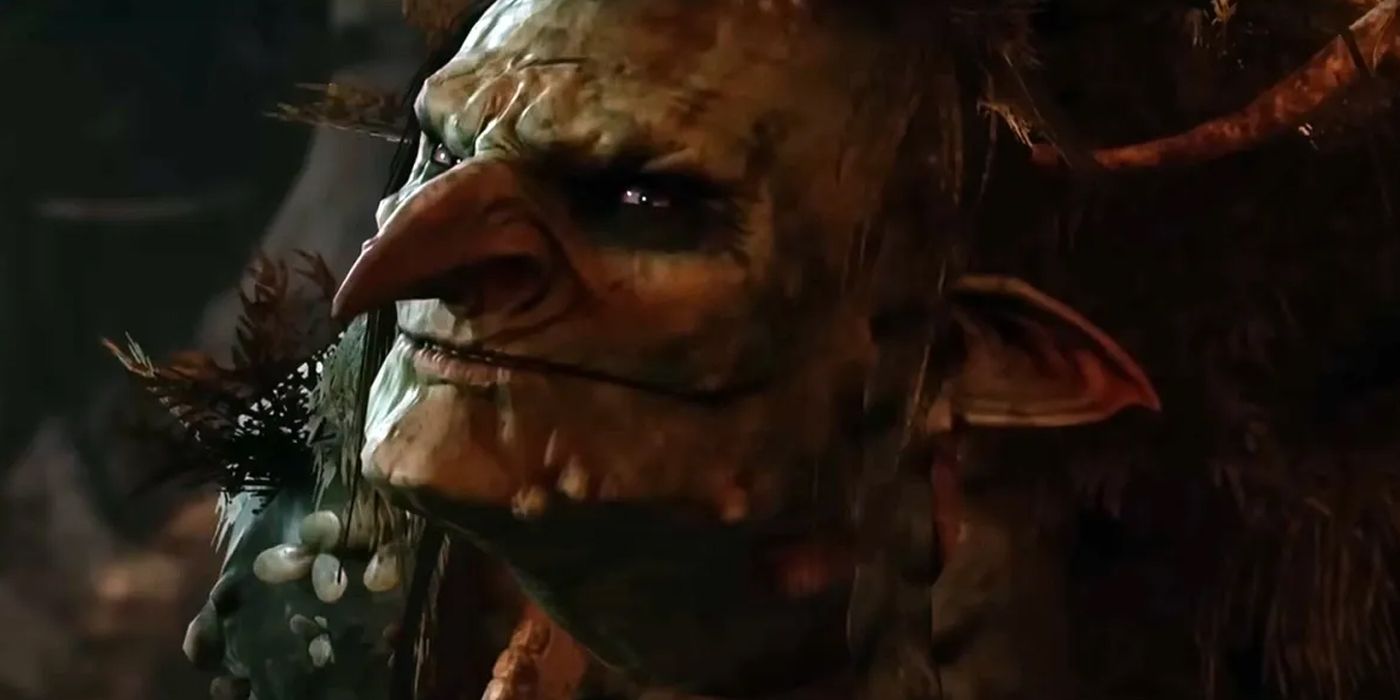

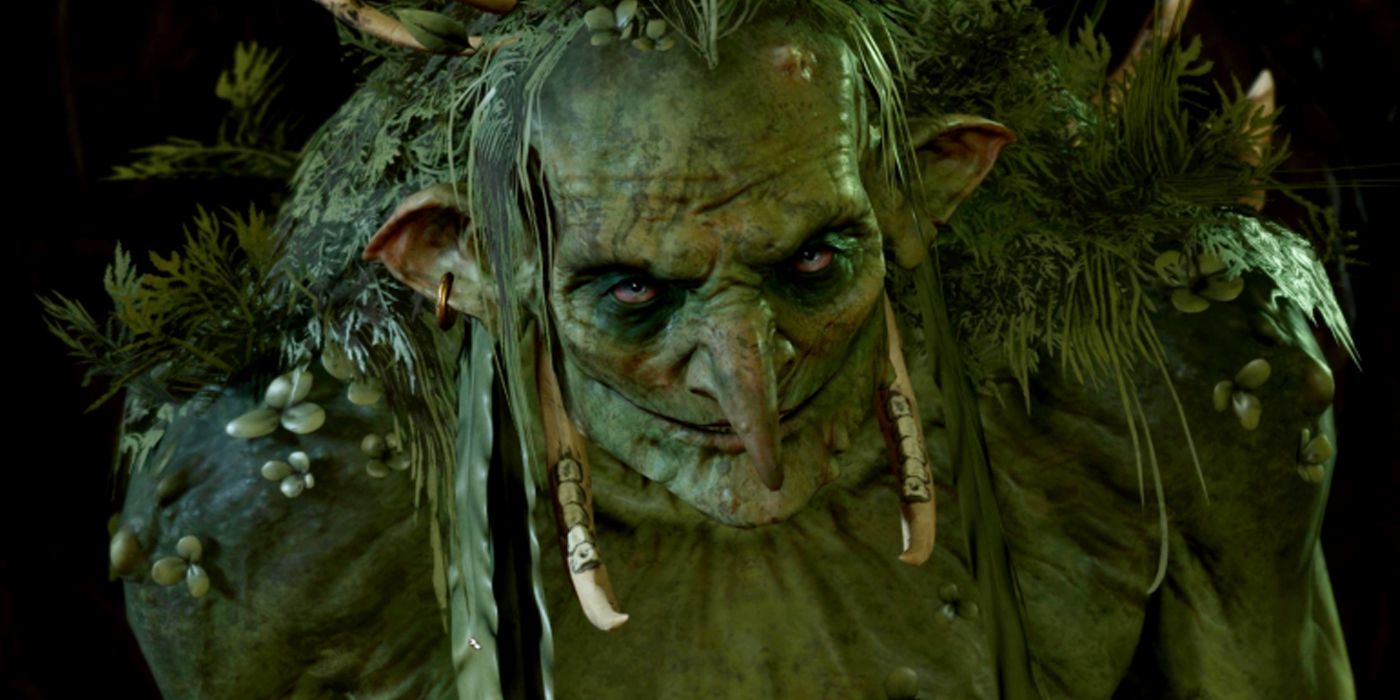
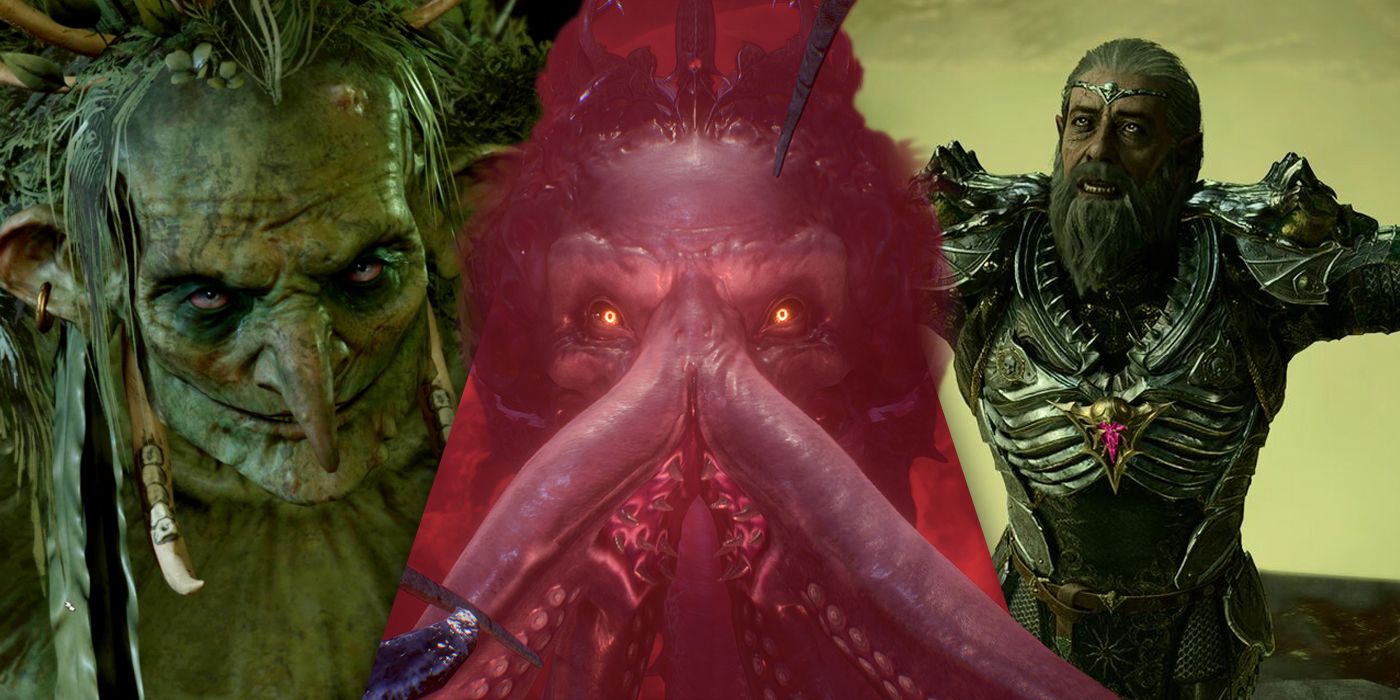
Initially appearing in Act 1, Auntie Ethel presents as a witch who deceives Mayrina into relinquishing her newborn child to revive her husband. In truth, this child would transform into a witch, and he would return as a zombie. The game’s players have the option to rescue Mayrina by vanquishing Ethel following their exploration of her stronghold. This battle poses a challenge in the early stages of the game, but it becomes more difficult when faced again later on, reflecting Ethel’s increased power.
In the third act of the game, the character you’re seeking can be found beneath The Radiant Siren tavern. Here, she has abducted a child with the intention of reincarnating them as a witch. To rescue the child, players should first undertake the “Save Vanra” mission before finishing the “Assist the Hag Survivors” quest. This sequence allows them to obtain a potion which can be thrown at her during combat, causing Ethel to expel Vanra. The battle primarily revolves around three Pearlspore Chimes. If these aren’t destroyed prior to defeating Ethel, they will heal her upon her defeat. Failing to understand this could make the fight more challenging than necessary.
The Finale to Shadowheart’s Story
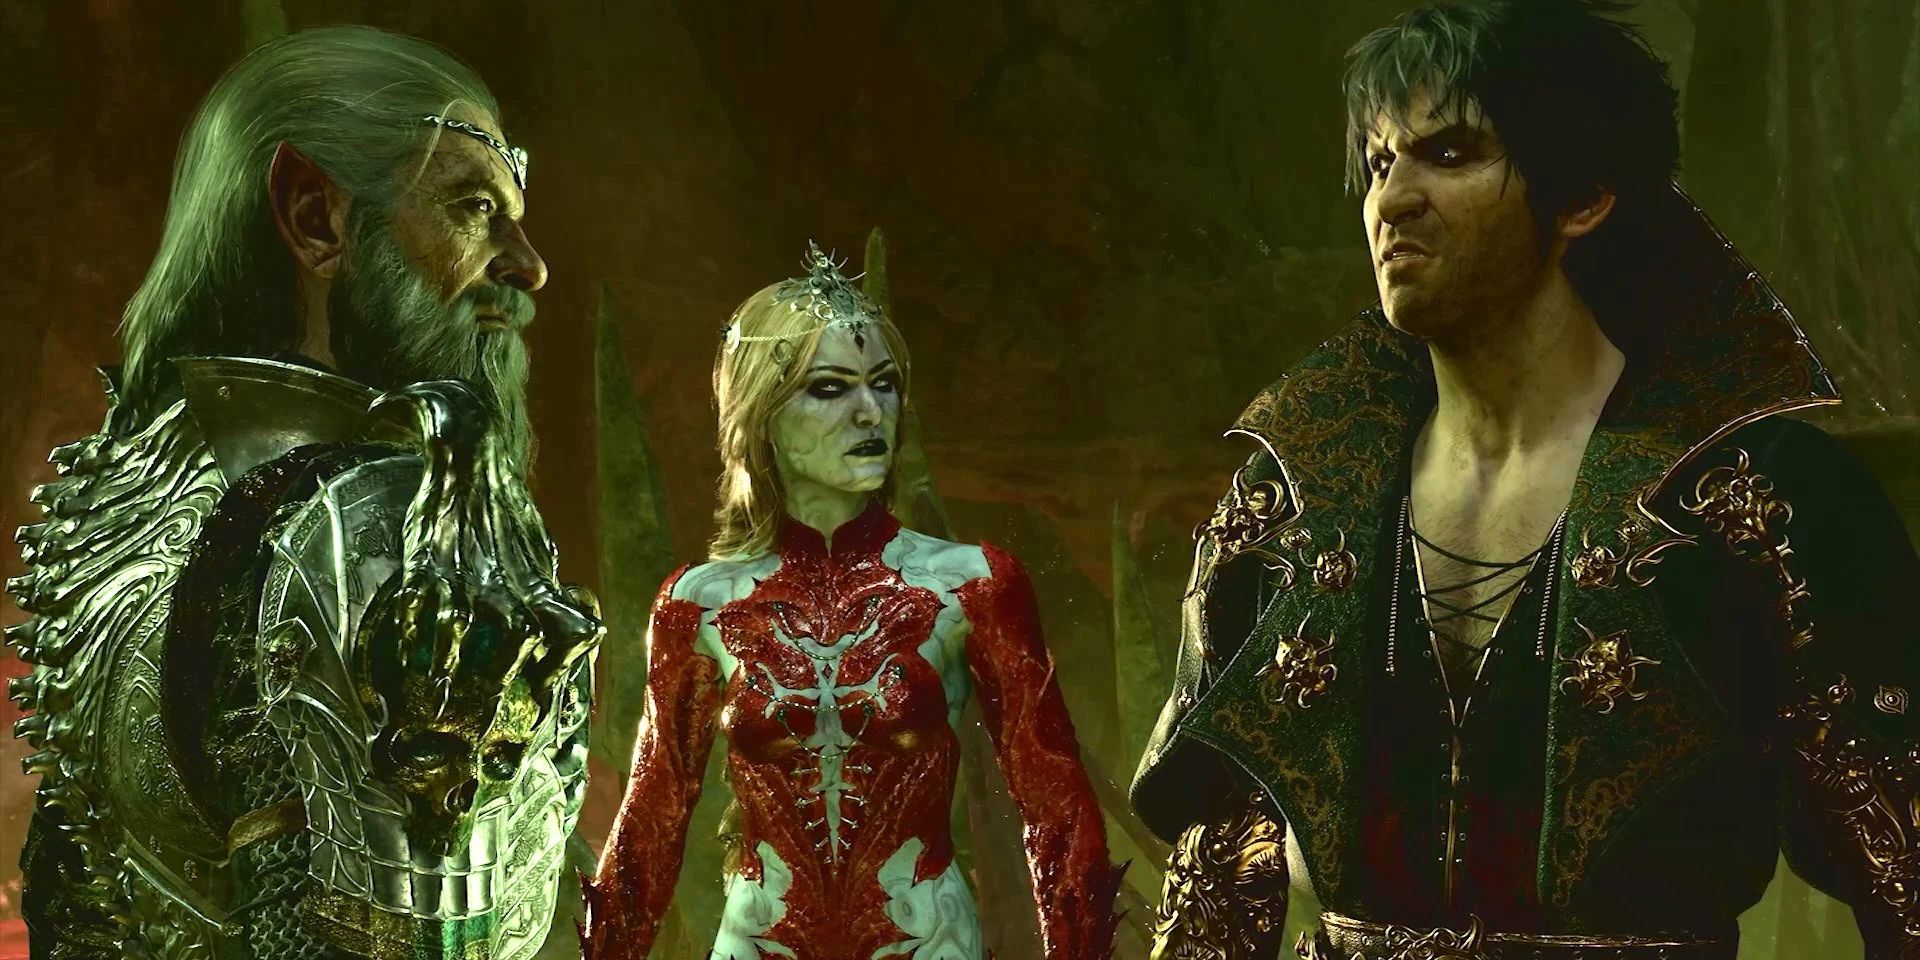
In the games Baldur’s Gate 1 and 2, Viconia DeVir was a potential ally, now serving as the head of the Sharan enclave in Baldur’s Gate. She assigns Shadowheart on a mission to recover the Astral Prism. Depending on the player’s and Shadowheart’s decisions, Viconia becomes the climactic adversary in Shadowheart’s companion questline. While she may seem sympathetic, she is accompanied by a large force of Sharans that the player must also confront.
Over time, this battle has grown increasingly challenging because before Patch 3, cultists were susceptible to radiant damage, making them easier to eliminate. Now, however, it might be wise for players to skip the cutscene and attack immediately to inflict some initial damage. The key issue, though, is that the battle drags on endlessly, as there are numerous combatants who each have a turn, resulting in a lengthy engagement.
Otherwise, the Vampire is Tough as Nails
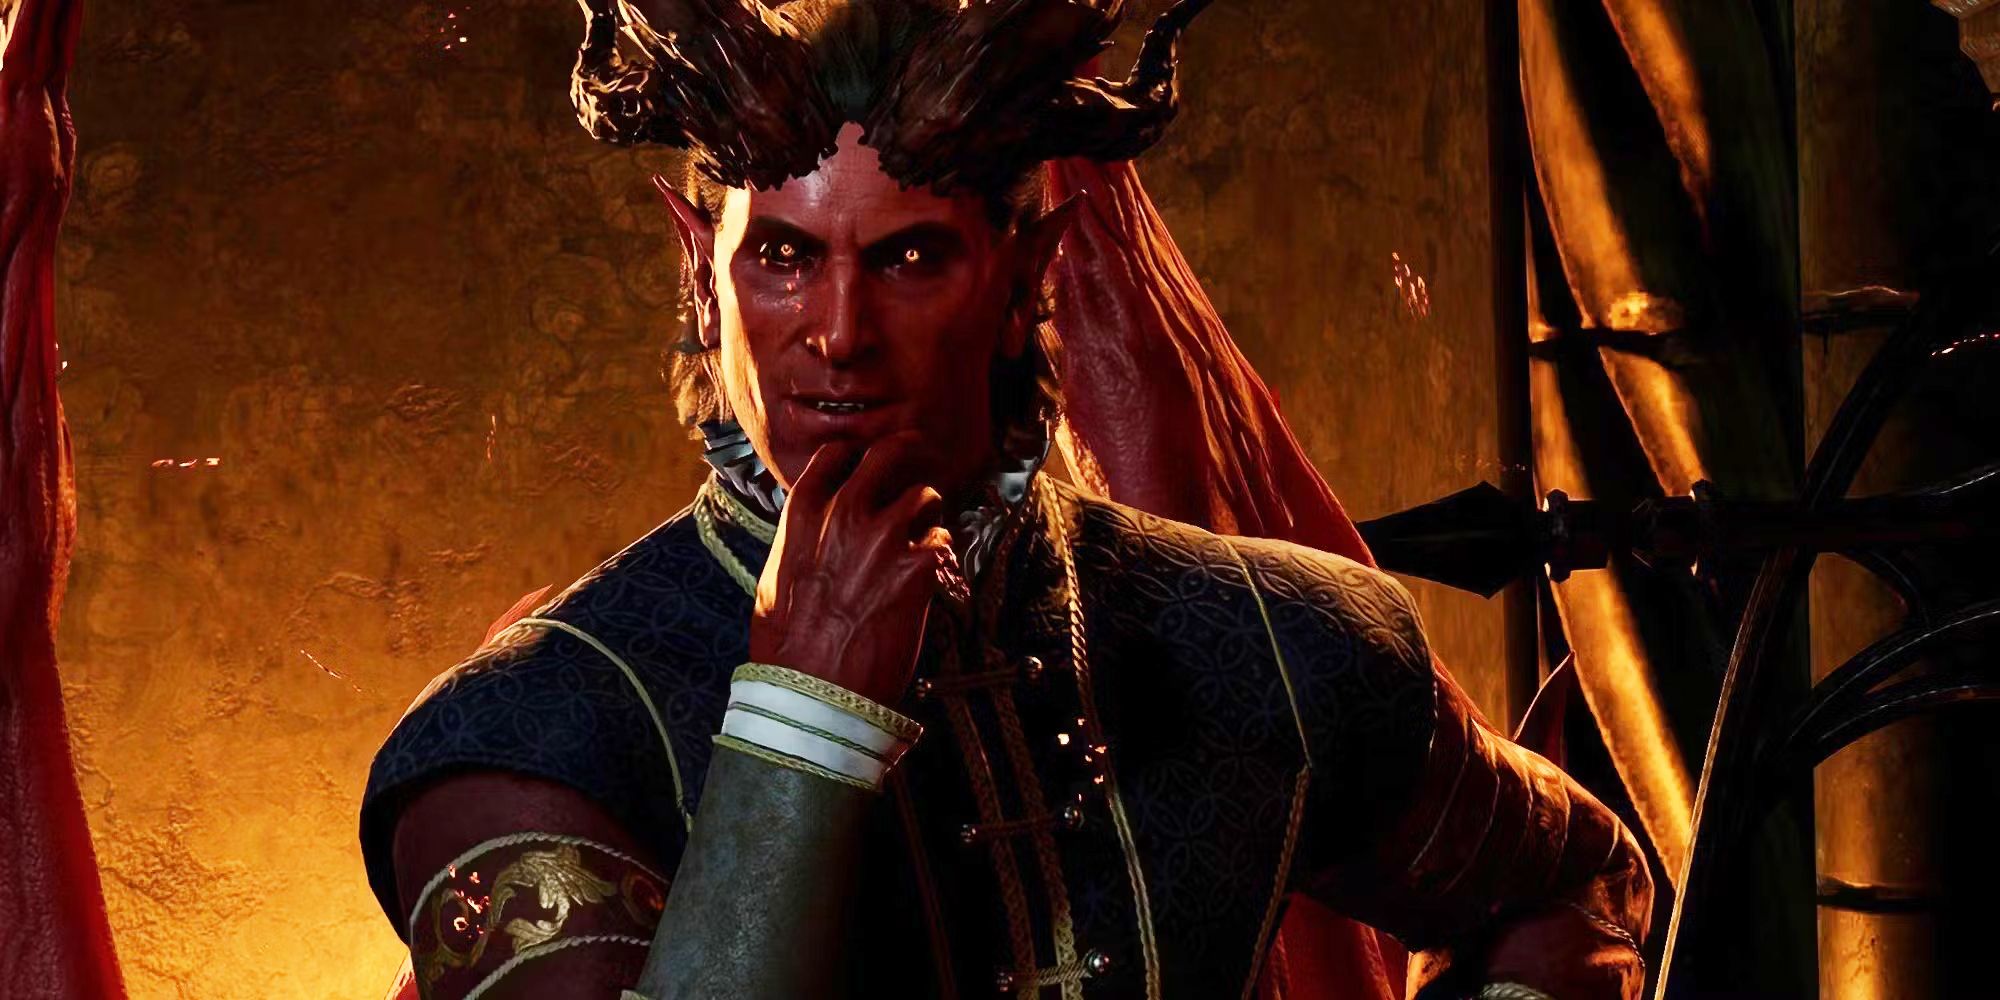
In Baldur’s Gate 3, the character named Cazador is frequently mentioned, particularly if players choose to recruit Astarion. He’s the antagonist in Astarion’s storyline. Players have the opportunity to venture into his secret castle within Baldur’s Gate with the aim of defeating him and liberating Astarion from his oppressive rule. However, this is no simple task, as Cazador is a formidable adversary in combat. The fight against him occurs during a Black Mass ceremony, the successful completion of which would lead to the deaths of thousands and further empower Cazador.
It’s regrettable that involving Astarion in this battle might backfire, for Cazador may employ magic to immobilize him and initiate a timer for his demise. On the flip side, leaving Astarion out could lead to him departing from the group later on. Therefore, it’s wise to eliminate Cazador before he initiates the ritual. Keep in mind that this was more straightforward in earlier updates, but as a vampire, Cazador is exceptionally susceptible to radiant damage. Players can make an otherwise challenging battle much simpler by employing spells like Sunlight to take advantage of this vulnerability.
She Seems to Have a Deathwish
In the course of completing the “Find the Nightsong” mission, you finally encounter the mage, Loroakan. It turns out that the Nightsong isn’t a magical artifact, but rather Dame Aylin, daughter of Selune. At this juncture in the game, players find themselves with two options: either handing Aylin over to Loroakan or confronting and defeating him. If you opt for the latter, Aylin will temporarily join your party as an uncontrollable NPC. However, her programming makes her quite hostile.
1. During the battle, it becomes quite simple for Loroakan to perish, rendering the triumph somewhat irrelevant.
2. In the fight, Loroakan is accompanied by one representative from each of the elemental Myrmidon groups. Each surviving Myrmidon grants a spell slot to Loroakan. It would be advantageous to eliminate the Myrmidons initially since they will empower and shield Loroakan. However, players must do so swiftly or with sufficient healing to maintain Aylin’s life as she fights extremely recklessly.
A Tragic Villain
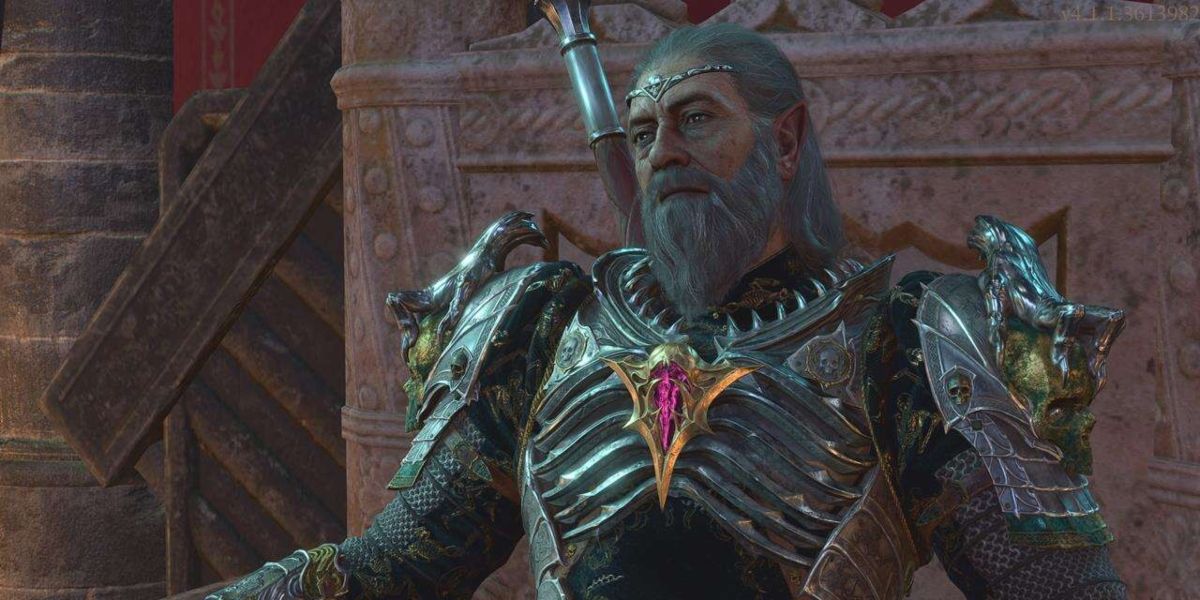
In the game, Ketheric Throm is initially introduced as the initial trio of main antagonists that players face. He is chosen by Myrkul and first appears in Moonrise Towers, where an intriguing twist reveals his invincibility. The majority of Act 2 revolves around finding a way to make him mortal, which sets off a chain of battles leading ultimately to his downfall. Ketheric Throm is fought in three distinct stages: once at the peak of Moonrise Towers, then in the Mind Flayer Colony, and finally as the Apostle of Myrkul in the same location.
Ketheric’s three stages each present their own set of difficulties. While the second can be bypassed through clever dialogue, the third stage proves to be the toughest. He wields a colossal scythe that inflicts damage on multiple party members simultaneously and denies healing to those in close combat. Furthermore, players must face an increasing horde of extra foes, including mindflayers, making it a challenging battle indeed.
See Invisibility Makes the Fight Doable
In this rephrased version: Yurgir is a formidable fiend called an Orthon. The game’s players are instructed by Raphael to return Yurgir to the Nine Hells in order to obtain valuable information for Astarion. Players often come across him within the Gauntlet of Shar, usually by locating his Displacer Beast, named Nessa, first. Throughout their encounter with Yurgir, players may have the opportunity to listen to and potentially break his contract, persuading him to spare the party, discover a flaw in his contract, and even convince him to end his own life.
If the player does not pass these checks, they’ll find themselves compelled to battle Yurgir. As soon as the fight starts, Yurgir will vanish, unleashing his horde of minions upon the player. He’ll periodically reemerge to launch attacks, causing significant harm before disappearing once more. The player can expose his position using the See Invisibility spell or an enchanted eye, but in reality, it often seems to have bugs and may not function properly at all.
Not Exactly a Boss, But One of the Toughest Encounters in the Game
In Act 3, the characters’ mission involves saving the Gondians who are held captive. Some of these Gondians are forced into labor in a factory producing the Steel Watchers, with collars that can be fatal if disobeyed. Thus, it’s crucial for the players to free all the Gondians before attempting a liberation at the factory. This journey leads them to the underwater Iron Throne. When they arrive, a timer will start ticking, and once it runs out, their submersible will fill with water and explode, posing a threat to anyone still on board.
To successfully save all the Gondians, it’s crucial that the party divides and tackles different areas simultaneously. This approach could make battles more challenging and time-consuming, or necessitate skipping certain fights. The duration of the countdown is influenced by the game’s present difficulty level, so careful planning is essential to ensure a successful rescue mission for all the Gondians. It’s strongly advised that players save their progress beforehand, as rescuing everyone and returning them to the ship may prove tougher than expected.
A Worthy Final Boss
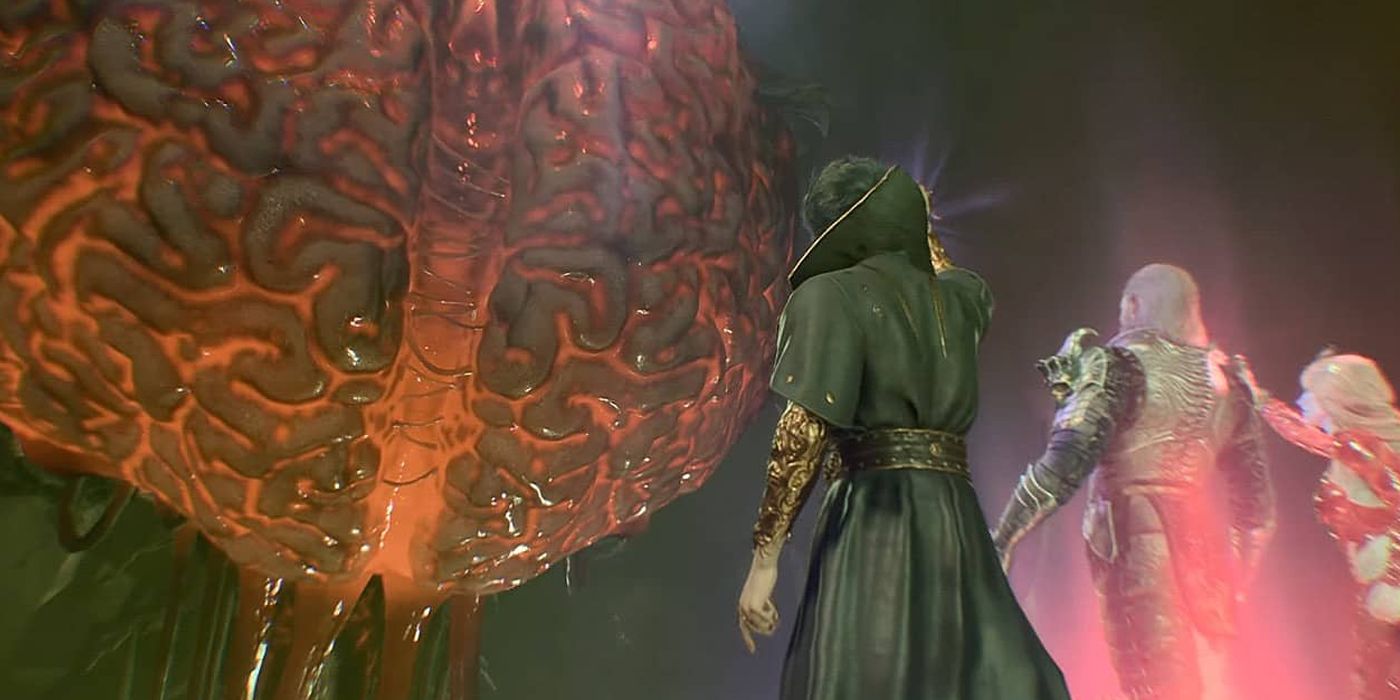
In essence, the ultimate adversary in Baldur’s Gate 3 is none other than that. Reaching the brain itself could prove to be the most challenging aspect of the game, for it summons a red dragon and mindflayers to impede progress. Upon arriving at the Netherbrain’s gate, players must invest several turns activating the Netherstones to unlock it. To navigate swiftly towards the portal, they should stock up on speed potions, Misty Step, Dimension Door, or any other means of quick transportation.
Inside, players will discover themselves standing on various platforms encircling the Netherbrain. Each round, one of these platforms will vanish, immediately eliminating any character still present on it. To make matters worse, the first player to assault the brain during a turn will also be counterattacked by it. Players must strategically employ their strongest spells to destroy the brain before it annihilates them, assuming they haven’t already been weakened by its minions outside.
The Hardest Dragon Fight in the Game
In the immersive world of Baldur’s Gate 3, adventurers will find Ansur hidden beneath its depths during Wyll’s storyline, following successful completion of the Wyrmway Trials. Upon discovery, a dragon corpse is unveiled, revealing it as a cherished comrade of the emperor. This sets off a challenging battle against the Undead Bronze Dragon. While susceptible to radiant damage, he possesses the ability to instantly eliminate almost any character in your party at his discretion. Sadly, during the game’s initial update, the ice walls designed to dodge this attack proved ineffective.
As an ardent enthusiast, I can’t help but feel the anticipation building as I prepare myself for the impending battle against Ansur. Regardless of the ice fortifications being in place, one would be eager to pull out all the stops, ensuring a well-rested and spell-prepared self before stepping into the fray. The fight is more about enduring long enough to gradually whittle down his health rather than devising a specific strategy. This challenging encounter is undeniably worth the effort, or at least it provides an intriguing glimpse into the enigmatic past of The Emperor.
Out Come the Claws

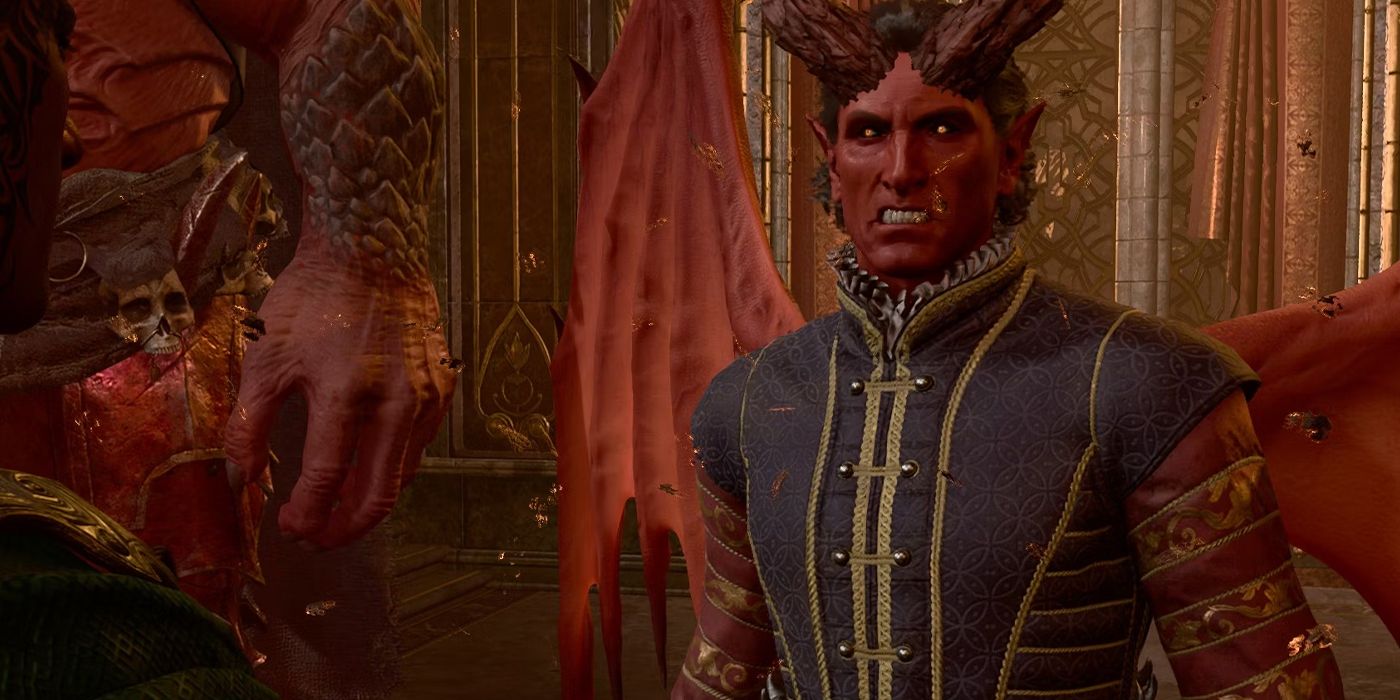
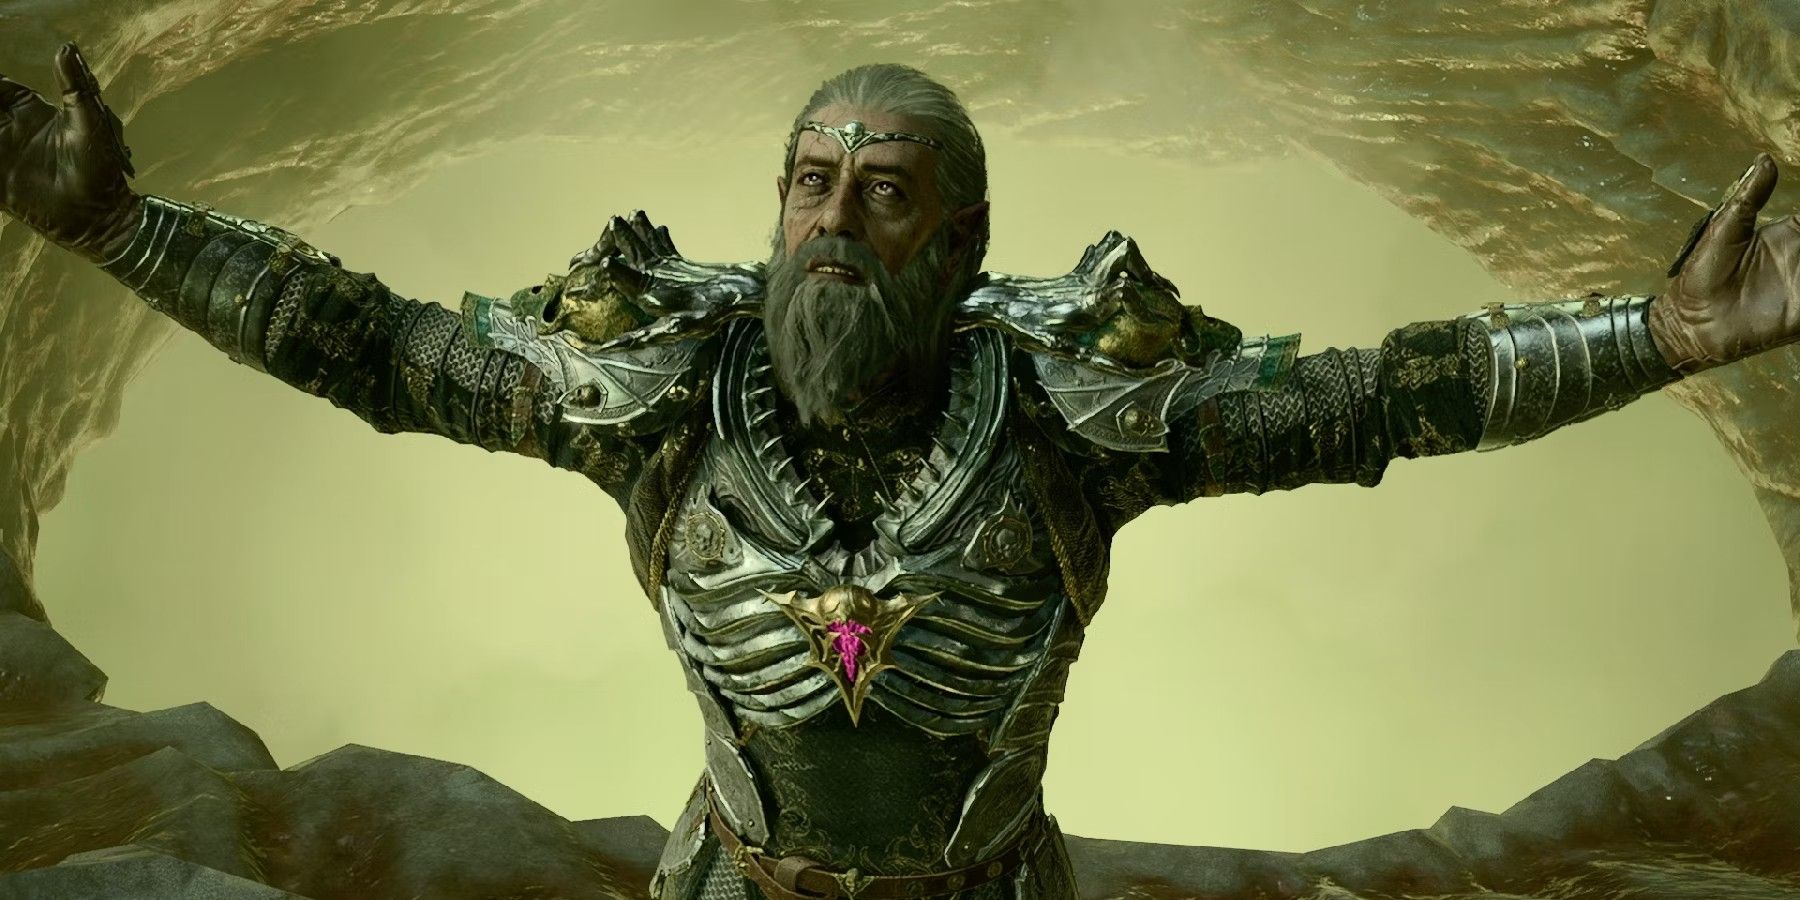
As a dedicated gamer, I can’t help but feel tormented throughout the entire game by this formidable foe named Raphael. He seems to always hold the upper hand, leaving me in a state of frustration. However, near the end of the game, there’s a glimmer of hope – a chance to retaliate against his smug visage by sneaking into his House of Hope in Hell. Here, my mission is clear: locate a weapon that can unlock a magical cage within the Astral Prism and rescue a Dwarf named Hope. But beware, for upon doing so, I’ll face Raphael in an intense boss battle that tests my skills to the limit during the escape attempt.
Raphael boasts an array of potent spells and companions who join him in battle, such as Yurgir, but this depends on the player’s decisions. In the initial stage, Raphael is indestructible, and players must vanquish four Soul Pillars scattered across the arena to inflict damage on him eventually. However, eliminating these pillars will cause a permanent transformation in Raphael, turning him into his Ascended Fiend form, making him even stronger. This battle is tough, and your team needs to be at its best to have any chance of success.
Read More
- The Bachelor’s Ben Higgins and Jessica Clarke Welcome Baby Girl with Heartfelt Instagram Post
- WCT PREDICTION. WCT cryptocurrency
- Royal Baby Alert: Princess Beatrice Welcomes Second Child!
- The Elder Scrolls IV: Oblivion Remastered – How to Complete Canvas the Castle Quest
- AMD’s RDNA 4 GPUs Reinvigorate the Mid-Range Market
- Chrishell Stause’s Dig at Ex-Husband Justin Hartley Sparks Backlash
- Guide: 18 PS5, PS4 Games You Should Buy in PS Store’s Extended Play Sale
- New Mickey 17 Trailer Highlights Robert Pattinson in the Sci-Fi “Masterpiece”
- Sea of Thieves Season 15: New Megalodons, Wildlife, and More!
- SOL PREDICTION. SOL cryptocurrency
2025-04-20 05:23