While Windows 11 comes with a variety of in-built tools, several of them tend to be underwhelming, either missing key features or providing subpar performance. Luckily, there are more capable and feature-rich alternatives from open-source projects, third-party developers, and even Microsoft itself, which often surpass the default offerings in terms of functionality and efficiency.
If you’re searching for a powerful file manager, a sophisticated disk analyzer, a notes application geared towards productivity, or a top-tier coding tool, there are numerous alternatives available to provide improved functionality, user-friendliness, and personalization options.
These tools don’t just boost your efficiency, they also offer functionalities that are usually absent in the built-in applications of Windows 11.
In this step-by-step tutorial, I’ll point out various applications that I typically install during the initial setup of Windows 11, be it on a completely fresh machine or after a clean installation.
The 12 apps to install on every installation of Windows 11
This list doesn’t focus on a particular group such as videographers, artists, or financiers because each profession typically needs specific software. Rather, it offers a universal collection of fundamental tools that most people might find beneficial to have installed as a starting point.
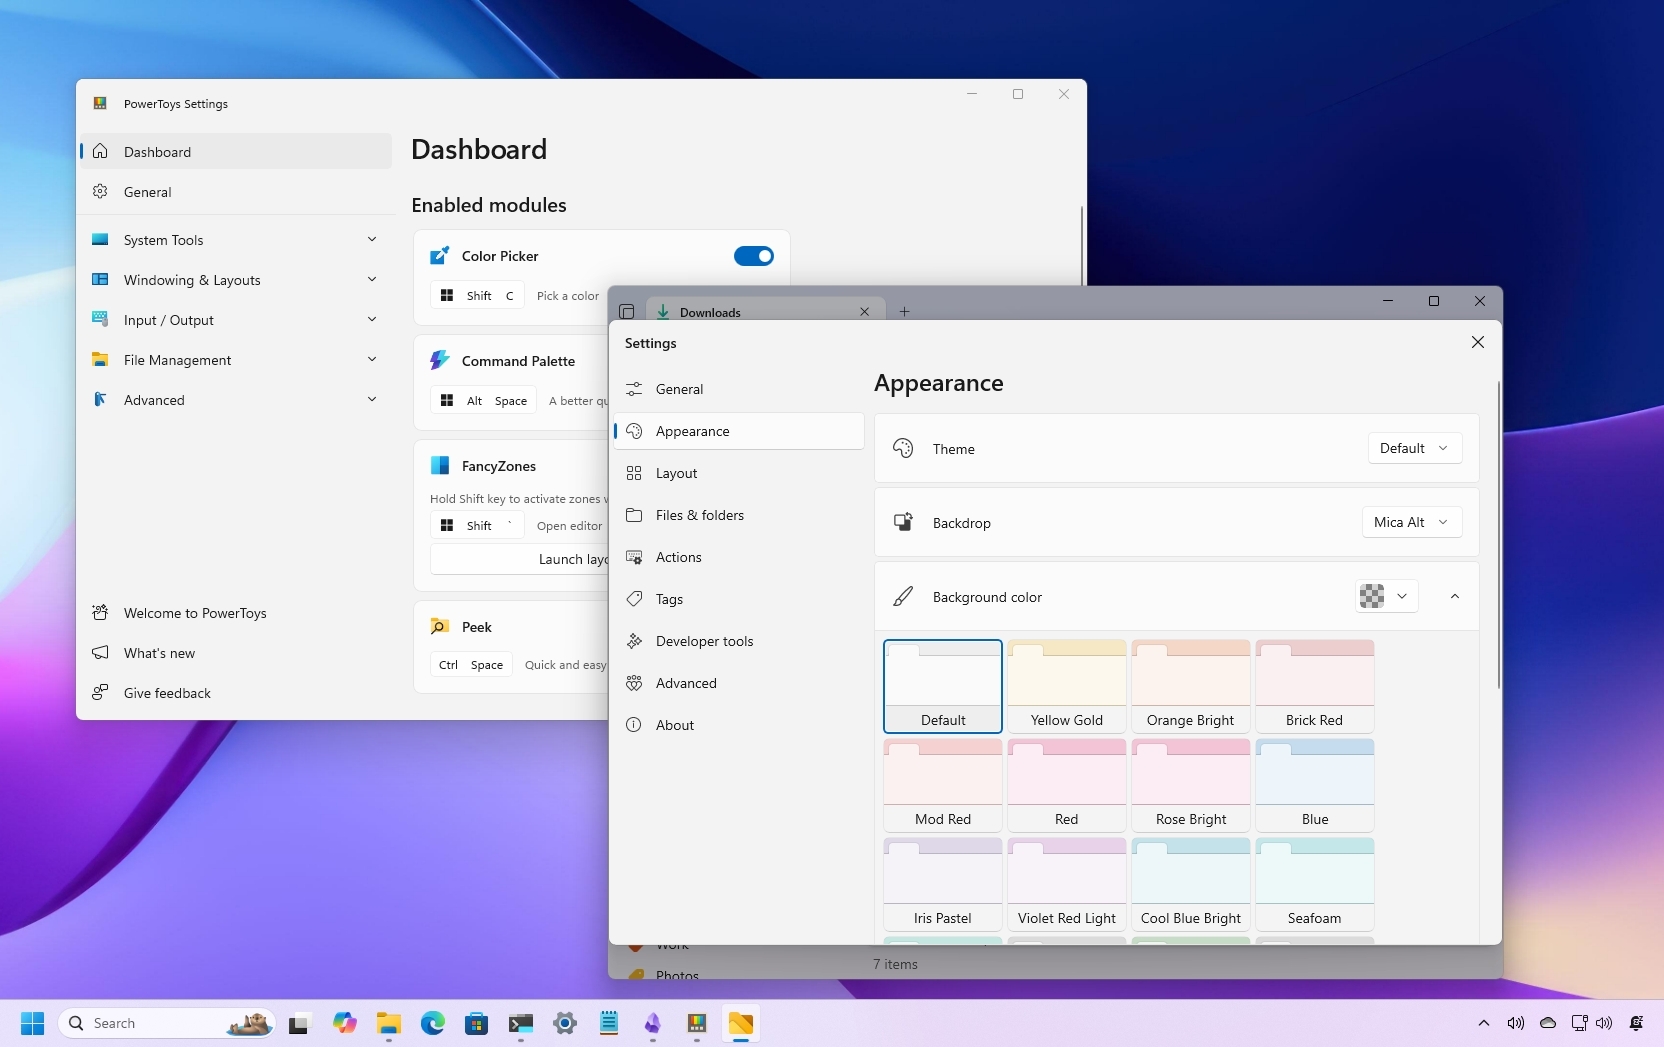
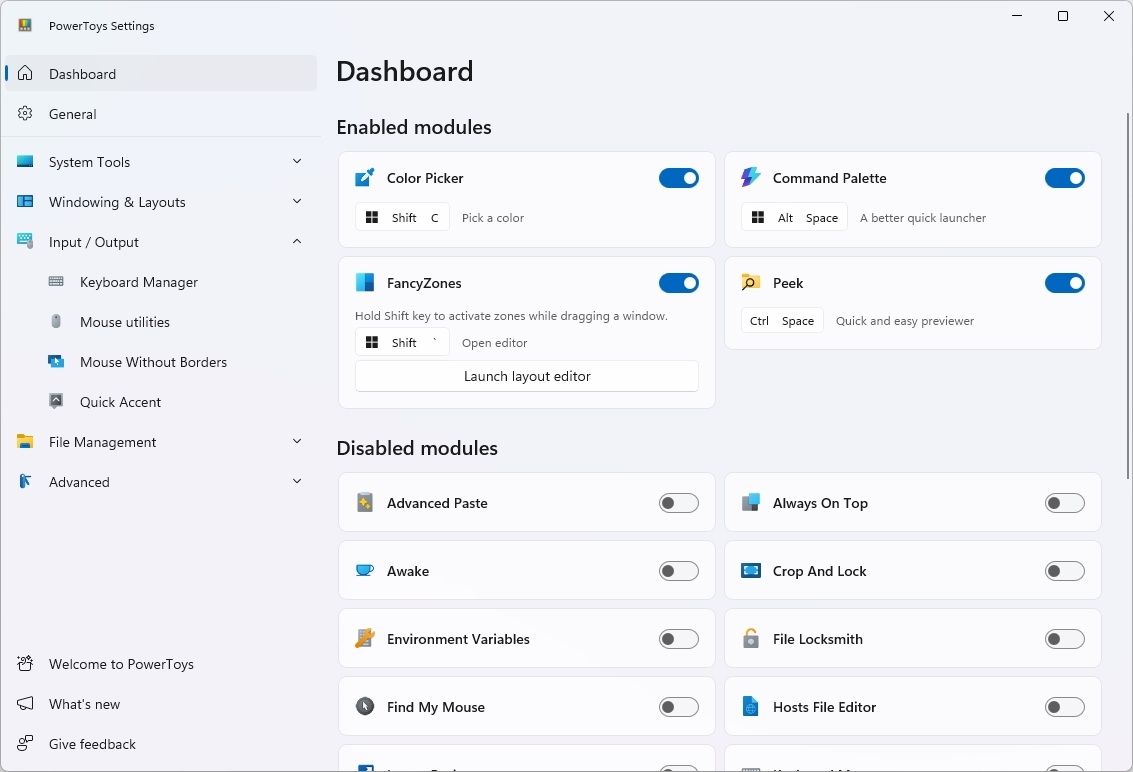
1. PowerToys
Without fail, PowerToys is a standout app that deserves a shout-out on Windows 11, given its widespread popularity.
This application boasts a rich heritage dating back to Windows 95. It experienced a resurgence with the introduction of Windows XP, and was subsequently reintroduced for Windows 10 (and 11) in 2019.
As a researcher, I find myself frequently utilizing PowerToys – a toolkit developed by Microsoft. This collection of user-friendly, open-source applications empowers me to augment and optimize my operating system’s capabilities to better suit my specific needs as a power user.
The app includes a growing list of utilities. Some of the most popular and useful ones include:
- FancyZones: A window manager that allows you to create custom layouts and quickly snap apps into those layouts for better multitasking.
- Color Picker: A utility to pick colors from anywhere on your screen and copy their HEX or RGB codes to your clipboard.
- Command Palette: A quick launcher similar to macOS’s Spotlight search, allowing you to quickly search for and launch apps, files, and more. It’s important to note that Microsoft plans to replace the PowerToys Run with Command Palette.
- Text Extractor: Allows you to copy text from any image or portion of your screen.
- Mouse utilities: A collection of features that enhance mouse and cursor functionality, such as “Find My Mouse” (to quickly locate your cursor) and “Mouse Highlighter” (to show mouse clicks).
- Workspaces: A desktop manager that allows you to launch sets of applications to custom positions and configurations with a single click.
How to get PowerToys
You can download and install Microsoft PowerToys using one of the following methods:
- Microsoft Store: Open the Microsoft Store app, search for PowerToys, and click the Install (or Get) button.
- WinGet (Windows Package Manager): Open Command Prompt or PowerShell and run: install –id Microsoft.PowerToys
- GitHub: Visit the official PowerToys GitHub page and download the appropriate installer for your system.
2. Windows Terminal Preview
From my perspective, I’ve come across this sleek, swift, and incredibly adaptable application known as the Windows Terminal. This tool, skillfully crafted by Microsoft, serves as the principal platform for running Command Prompt, PowerShell, and Linux on Windows 10, 11, and beyond, offering a seamless command line experience.
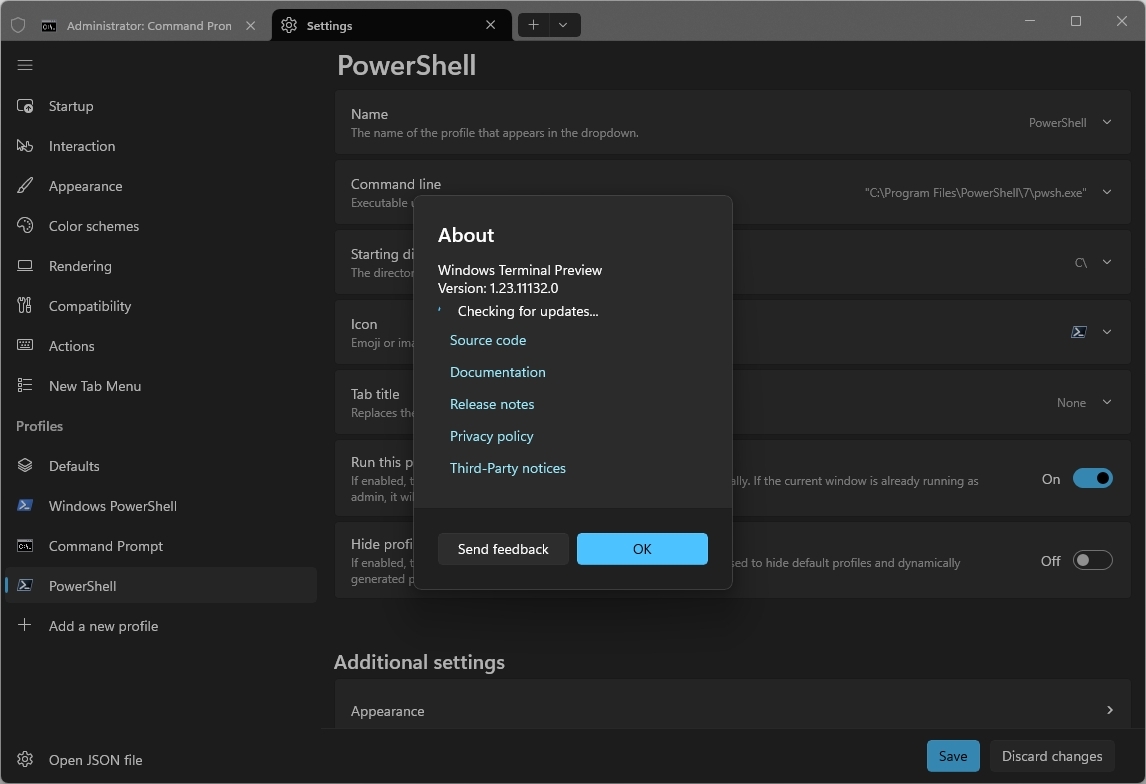
While Windows 11 includes the Windows Terminal, it’s important to note that the standard version often lags behind when it comes to new features and enhancements, as compared to other versions.
On fresh setup occasions, I typically configure the beta or test version of the Terminal, allowing me to enjoy new features, bug repairs, and enhancements prior to their official release in the general, public edition of the console.
How to get Terminal Preview
You can download and install Windows Terminal Preview using one of the following methods:
- Microsoft Store: Open the Microsoft Store app, search for Windows Terminal Preview, and click the Install (or Get) button.
- WinGet: Open Command Prompt or PowerShell and run: winget install –id Microsoft.WindowsTerminal.Preview
- GitHub: Visit the official WinGet GitHub page and download the appropriate installer for your system.
3. NanaZip
On Windows 11, File Explorer provides file compression and decompression capabilities, encompassing Zip, TAR, and RAR file types. However, it’s important to note that this feature does have certain restrictions. For instance, you cannot employ the built-in tool for splitting container compression or handling encryption directly.
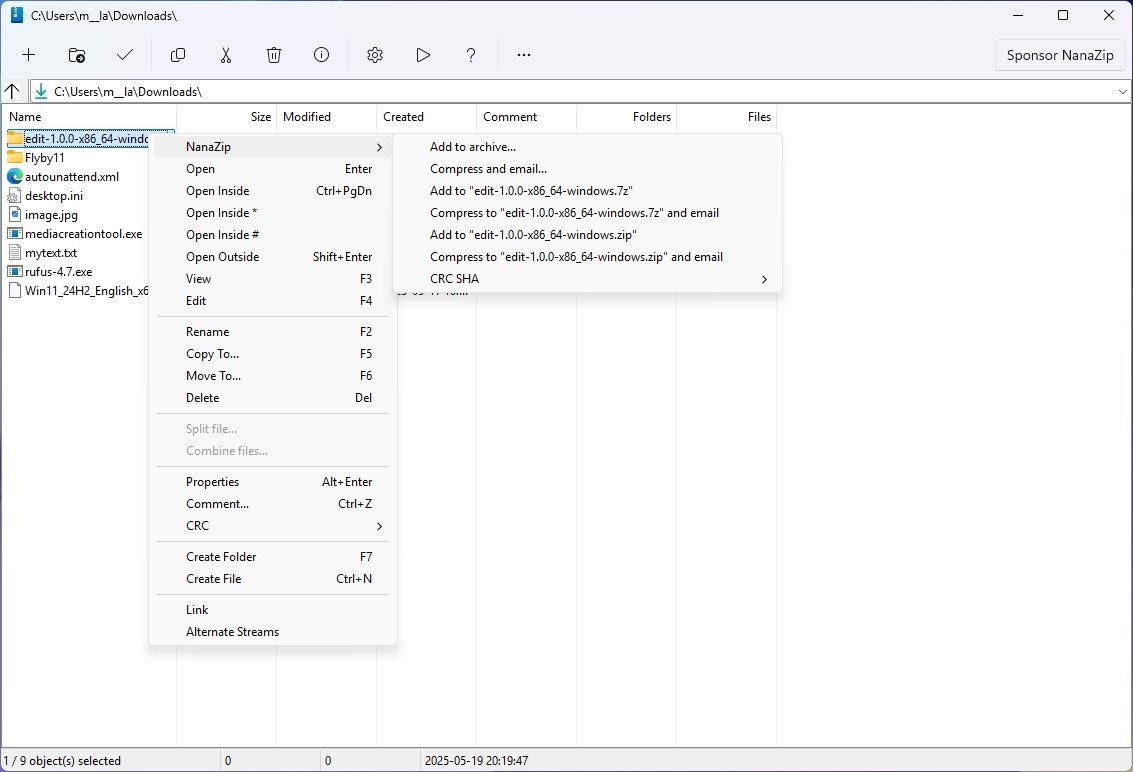
If you’re looking to surpass these and other obstacles, you might consider utilizing external tools such as Nanazip. While I’ve typically relied on 7zip, NanaZip is an open-source adaptation of 7zip that boasts a contemporary interface and compatibility with the latest context menu features found in Windows 11.
How to get NanaZip
You can download and install NanaZip using one of the following methods:
- Microsoft Store: Open the Microsoft Store app, search for NanaZip, and click the Install (or Get) button.
- WinGet: Open Command Prompt or PowerShell and run: winget install –id 9N8G7TSCL18R
- GitHub: Visit the official NanaZip GitHub page and download the appropriate installer for your system.
4. EarTrumpet
One simple rephrasing for the given text could be: EarTrumpet is a well-liked, free software application that manages volume. It’s built to improve upon and take over the standard volume mixer, giving you a more straightforward and precise control of your audio settings.
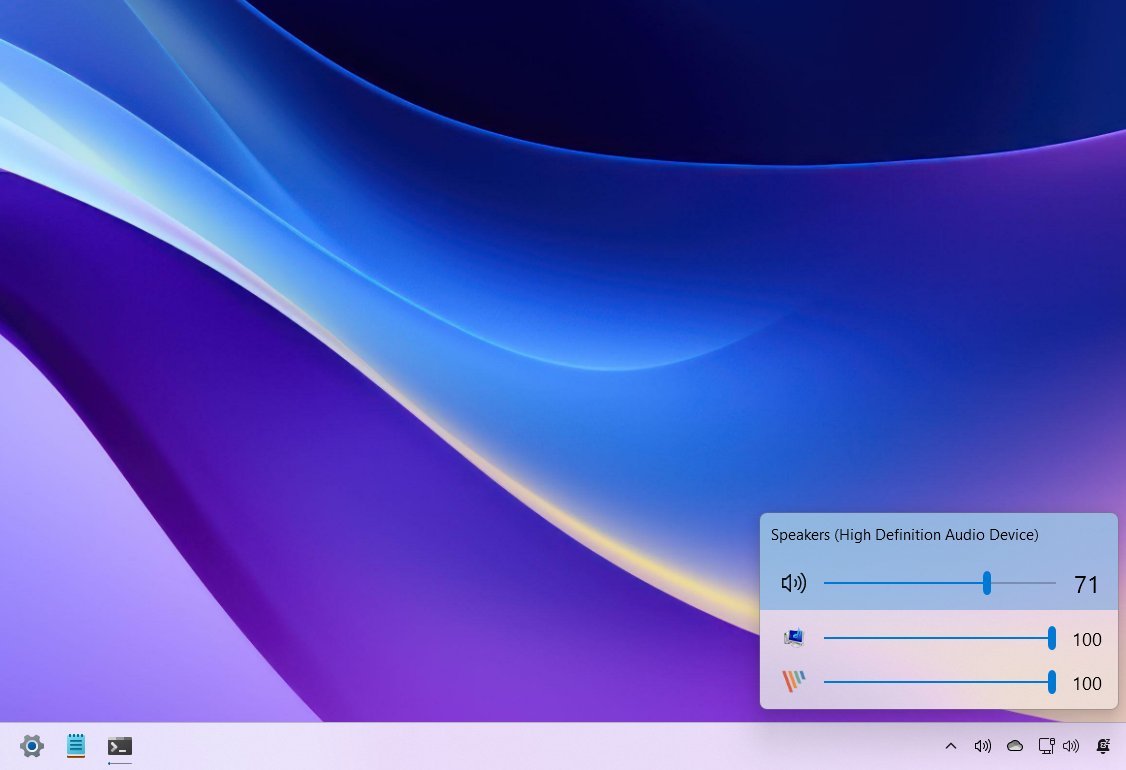
To put it simply, this nifty gadget streamlines the process of adjusting volume levels, either for your entire system or specific applications, right from the EarTrumpet icon on your Taskbar. On Windows 11, you can achieve the same results, but the settings are tucked away within the “Sound output” settings, making them a bit more challenging to find.
How to get EarTrumpet
You can download and install EarTrumpet using one of the following methods:
- Microsoft Store: Open the Microsoft Store app, search for EarTrumpet, and click the Install (or Get) button.
- WinGet: Open Command Prompt or PowerShell and run: winget install –id 9NBLGGH516XP
- GitHub: Visit the official EarTrumpet GitHub page and download the appropriate installer for your system.
5. QuickLook
As an analyst, I’d like to highlight that QuickLook is a compact utility that enables me to inspect images, text files, and various other formats swiftly, without the need to open them with their respective applications. To do so, I simply select the file and employ the keyboard shortcut “Ctrl + Spacebar”.
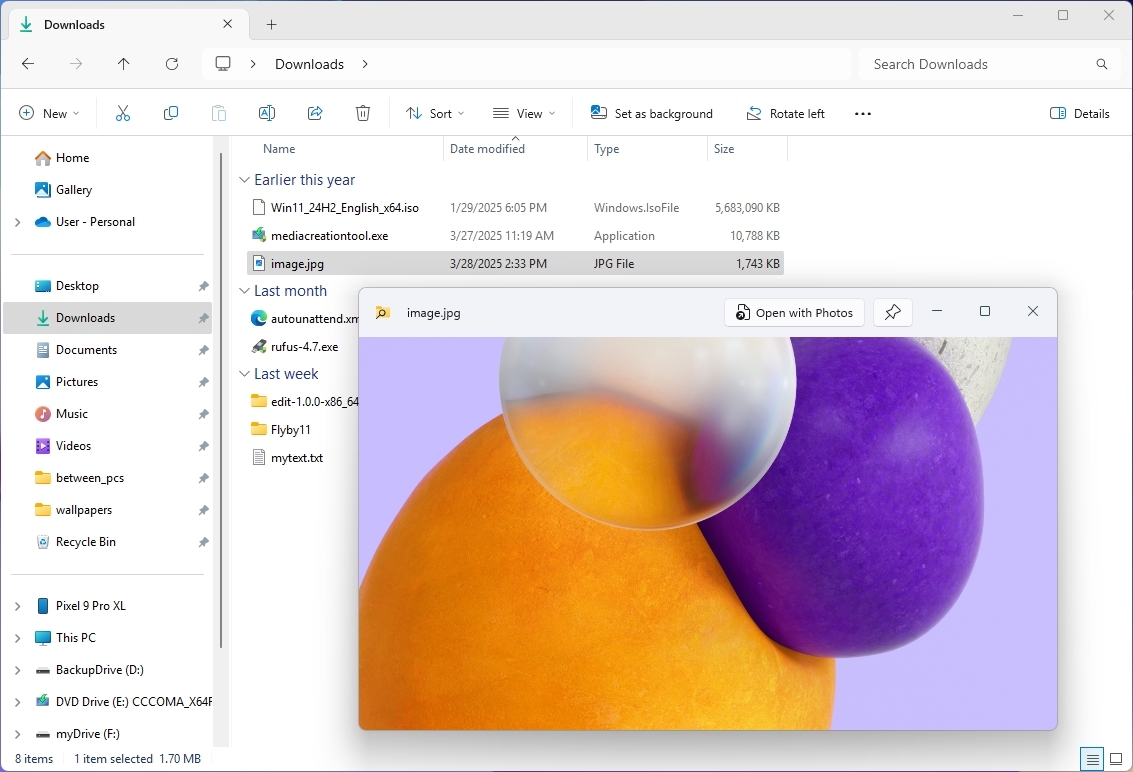
Rather than having to manually open files in File Explorer or launch compatible apps for a peek, QuickLook offers quicker and larger previews with a convenient keyboard shortcut.
How to get QuickLook
You can download and install QuickLook using one of the following methods:
- Microsoft Store: Open the Microsoft Store app, search for QuickLook, and click the Install (or Get) button.
- WinGet: Open Command Prompt or PowerShell and run: winget install –id 9NV4BS3L1H4S
- GitHub: Visit the official QuickLook GitHub page and download the appropriate installer for your system.
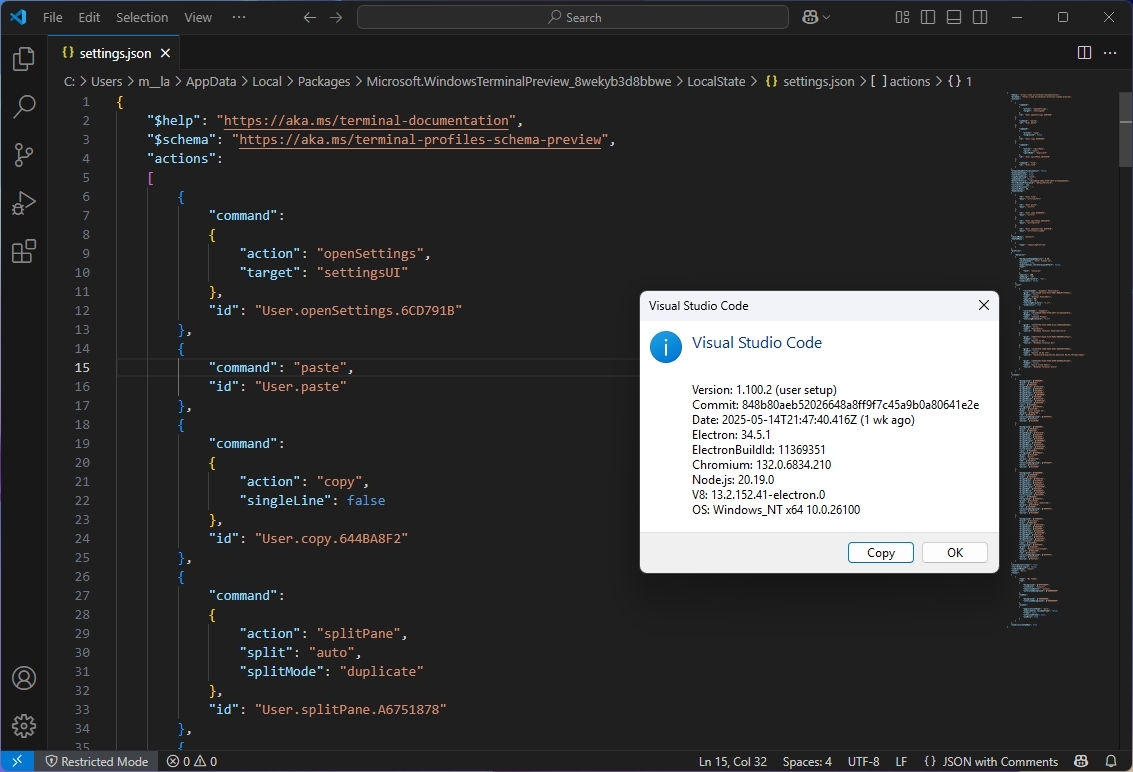
6. Visual Studio Code
Visual Studio Code, or VS Code, is a free, open-source, and widely used coding tool developed by Microsoft. Unlike the comprehensive Visual Studio, it doesn’t offer all the features of an Integrated Development Environment (IDE). Instead, it provides essential IDE functions, making it adaptable for various code development tasks, whether you’re an experienced programmer or someone new to coding who needs to tweak some code or script. The user-friendly design of VS Code makes it accessible to everyone.
Some of the key features found in Visual Studio Code include:
- IntelliSense: This provides smart code completions, function definitions, and imported modules.
- Debugging: The app has a debugger, which allows you to set breakpoints, step through code, inspect variables, and execute commands in the debug console.
- Terminal integration: You can open multiple terminal instances (such as Command Prompt and PowerShell) directly within VS Code.
- Git integration: You can manage your Git repositories, stage changes, commit, pull, push, view diffs, and resolve merge conflicts within the editor’s interface. It also has version control.
Also, VS Code is a code editor that runs on Windows, macOS, and Linux.
A significant feature of this application is its extensive and bustling marketplace for extensions, enabling users to incorporate nearly any coding language, connect with various tools like Docker, Kubernetes, cloud services (such as Azure, AWS, Google Cloud), databases, and even tailor themes according to personal preferences.
How to get VS Code
You can download and install VS Code using one of the following methods:
- Microsoft Store: Open the Microsoft Store app, search for VS Code, and click the Install (or Get) button.
- WinGet: Open Command Prompt or PowerShell and run: winget install –id Microsoft.VisualStudioCode
- Microsoft: Visit the official VS Code page and download the appropriate installer for your system.
7. Obsidian
I also recently started using Obsidian and consider it a suitable replacement for Notepad.
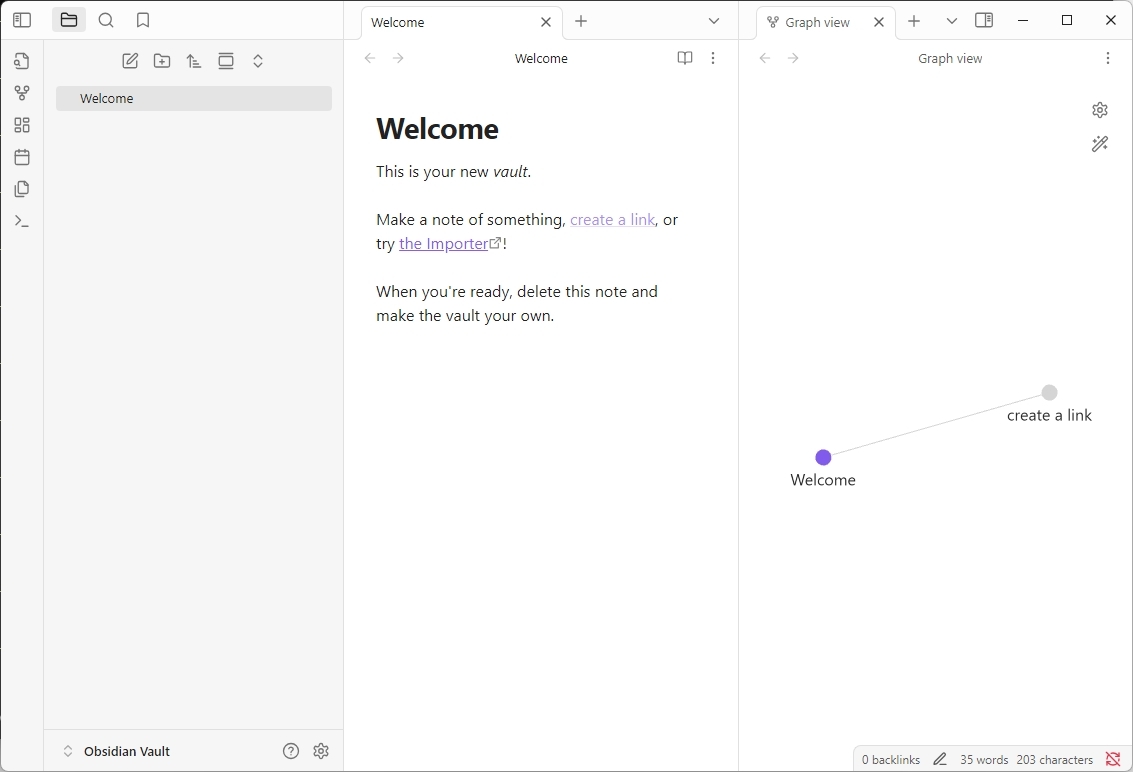
On various operating systems like Windows 11, macOS, Linux, Android, and iOS, there’s an exceptional application called Obsidian that stands out for its note-taking capabilities.
This application can be simply defined as a “personal information organization” tool. It excels not just at fundamental note-taking, but truly shines by facilitating the connection of your thoughts via links, thereby mirroring the way our brains interlink information in a web of knowledge.
As a cross-platform application, it offers an advantage over other note-taking tools, such as Notepad, by storing your text files directly on the device you’re using, rather than online.
The application offers capabilities for syncing and sharing your data among devices and publishing content on the web. To utilize these features, there’s a recurring subscription charge. As an alternative method for synchronization, consider moving the “Vault” folder onto your chosen cloud storage platform.
Some of the key features of Obsidian include:
- Offline access: Since your notes are local, you can work on them anywhere, anytime, without an internet connection.
- Linking: You can easily link one note to another by simply enclosing the note title in double square brackets.
- Graph view: The app visualizes the connections between your notes in an interactive graphic. This map of your knowledge base helps you discover hidden relationships between your notes.
- Extensions: It has a vast and active community plugin marketplace where users develop and share plugins that add many functionalities.
- Templates: Create reusable templates for different types of notes to streamline your workflow.
How to get Obsidian
You can download and install Obsidian using one of the following methods:
- WinGet: Open Command Prompt or PowerShell and run: winget install –id Obsidian.Obsidian
- Obsidian: Visit the official Obsidian page and download the appropriate installer for your system.
8. Everything
While Windows 11 does offer a search feature, it isn’t always precise and may occasionally take too much time to display a particular outcome. In such instances, the tool called “Everything” can be particularly useful.
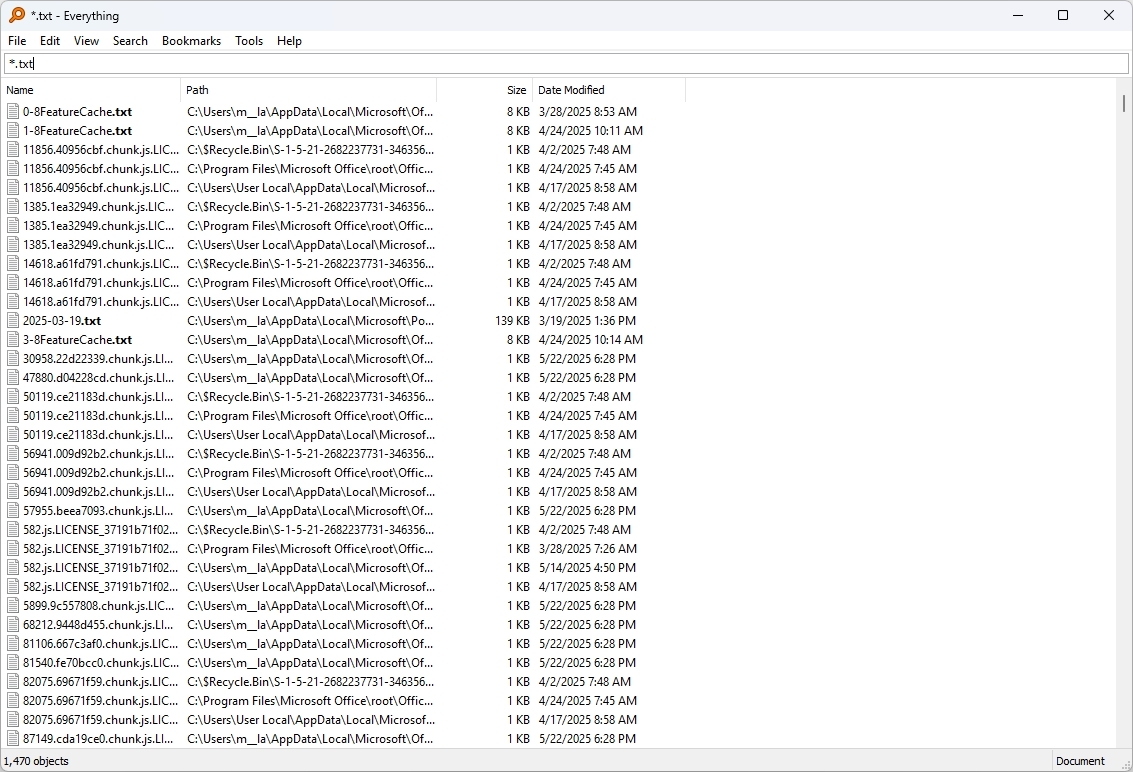
This tool, provided freely by Voidtools, swiftly displays search results for files and folders saved on your computer. It achieves this efficiency by indexing just the names of files and folders, a process that takes merely a few minutes to complete.
From another perspective, while Everything offers a file-searching feature, it tends to reduce the speed at which searches can be performed.
This tool has a traditional yet simplistic layout, deviating slightly from the Windows 11 aesthetic. However, it boasts essential functions such as:
1. Function 1: (describe function 1)
2. Function 2: (describe function 2)
3. Function 3: (describe function 3)
This way of presentation allows for a clear and concise explanation of the tool’s key features, while also maintaining an engaging style of writing.
- Instant search results: The tool provides search results in real-time as you type, often displaying matches within milliseconds, even on drives with tons of files.
- Efficient indexing: It achieves this speed by only indexing file and folder names (and basic metadata like size and date).
- Network indexing: This tool can also index content stored in the network by adding mapped network drives manually on the options page.
- Lightweight: Everything uses very little memory and storage space. It’s designed to be lean and not bog down your system.
- No installation: You can install the tool, but you can also use the portable version that you can run directly from any storage, making it a handy tool for troubleshooting or searching files on other computers without installing anything.
, folder:, size:, dm: for date modified, dc: for date created), to help you tailor your searches more effectively.
How to get Everything
You can download and install Everything using one of the following methods:
- WinGet: Open Command Prompt or PowerShell and run: winget install –id voidtools.Everything
- Everything: Visit the official Everything page and download the appropriate installer for your system.
9. Files App
As a devoted user, I can’t help but sing praises for “Files,” often known as the “Files App.” This remarkable third-party file manager designed for Windows 11 is my go-to choice when seeking a more contemporary and feature-rich alternative to the standard File Explorer. It’s packed with capabilities that you won’t find in the default app, making it an essential tool for streamlining my digital life!
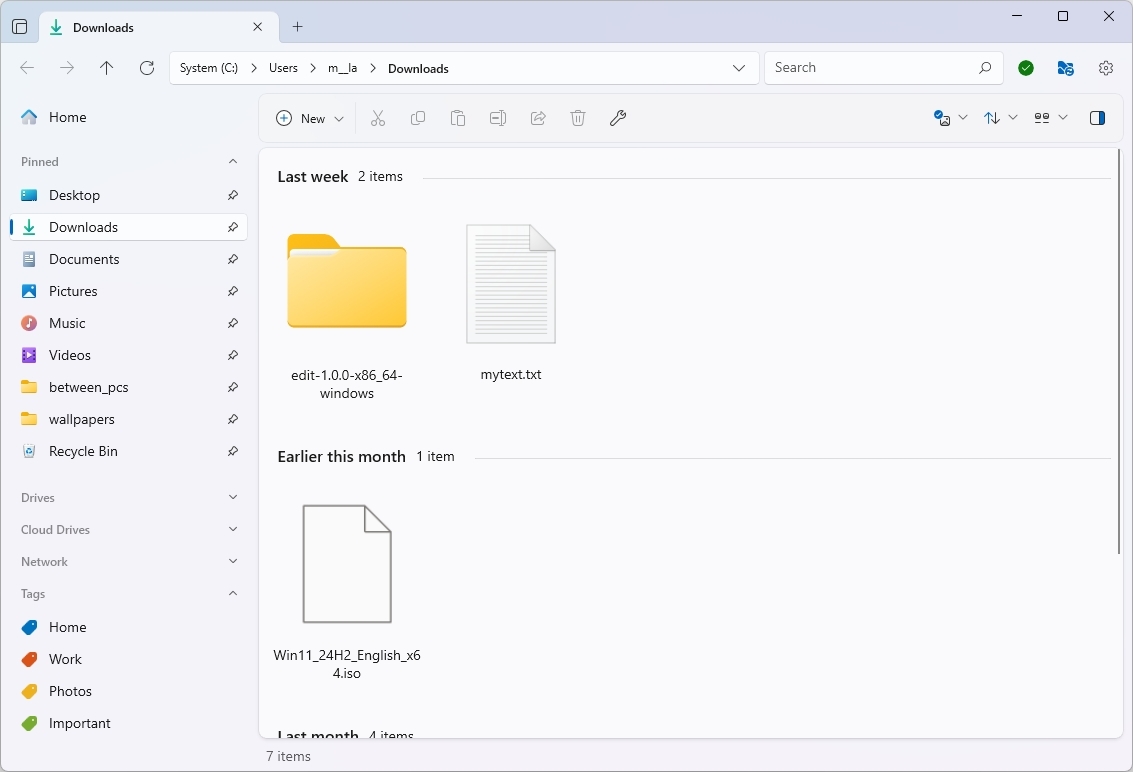
Some of the key features of Files include:
- Independent customization: The Files App features a fully customizable interface with the ability to change the color mode and scheme, similar to a web browser.
- Dual pane support: You can view and manage two folders side by side with this feature without opening multiple instances.
- Tags support: Similar to macOS Finder, you can assign custom tags (with colors) to files and folders, allowing for better organization and quick filtering based on your defined categories.
- Cloud integration: While File Explorer integrates with OneDrive, the File App provides built-in support for multiple cloud drives, including OneDrive, Google Drive, and iCloud, allowing you to manage all your cloud files from one place.
Despite File Explorer’s continuous advancement over time, boasting capabilities like tab support, handling various archive formats (like ZIP, RAR, TAR, and 7z) within the app, Git integration (preview), AI-powered search, and more, it lags behind in terms of overall feature count when compared to the Files App.
How to get Files App
You can download and install the Files App using one of the following methods:
- Microsoft Store: Open the Microsoft Store app, search for Files App, and click the Install (or Get) button.
- WinGet: Open Command Prompt or PowerShell and run: winget install –id FilesCommunity.Files
- Files: Visit the official Files page and download the appropriate installer for your system.
10. Auto Dark Mode
As someone who frequently toggles between dark and light mode settings based on the time of day, I highly recommend you consider installing the Auto Dark Mode application. This way, it’ll automatically adjust your display according to the current lighting conditions, providing an optimal viewing experience throughout the day.
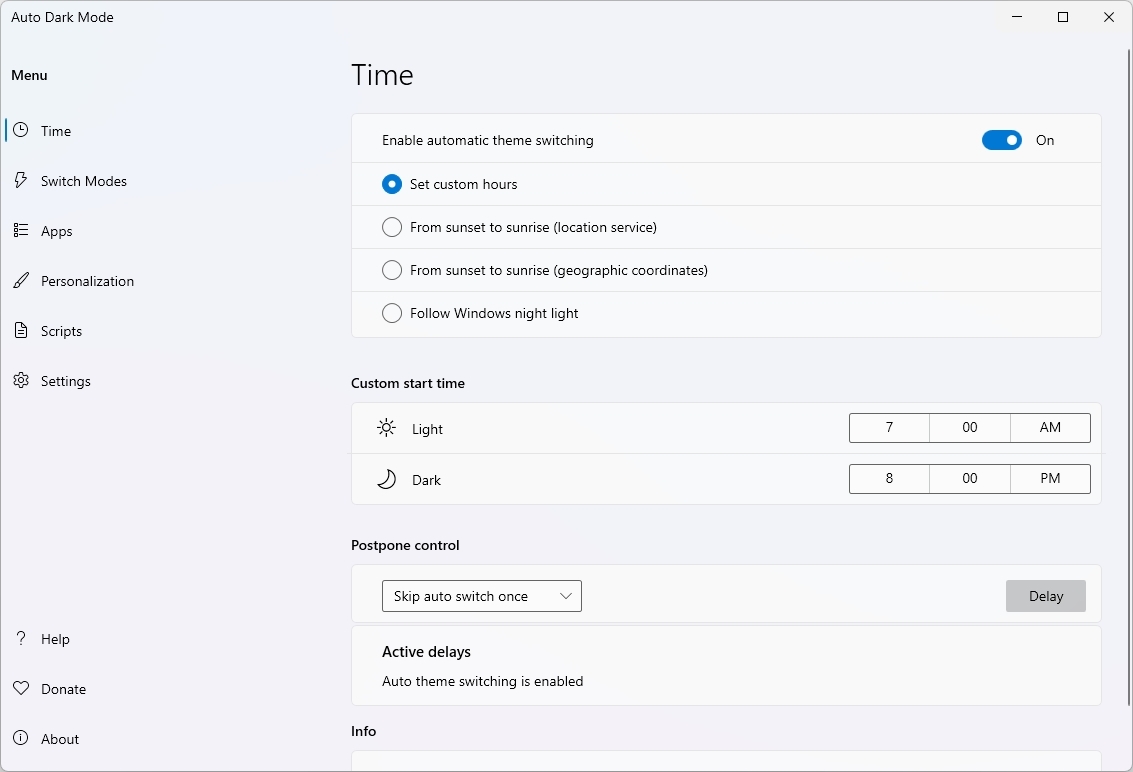
The Free Auto Dark Mode feature lets you control when your color scheme shifts. You have the option to set a personalized time for the change, or opt for it to transition from day to night mode as the sun sets and back to day mode as the sun rises. Alternatively, it can adjust automatically based on when your operating system activates its Night Light feature.
You can even change the desktop background with the color mode.
How to get Auto Dark Mode
You can download and install the Auto Dark Mode using one of the following methods:
- Microsoft Store: Open the Microsoft Store app, search for Auto Dark Mode, and click the Install (or Get) button.
- WinGet: Open Command Prompt or PowerShell and run: winget install –id Armin2208.WindowsAutoNightMode
- Auto Dark Mode: Visit the official Auto Dark Mode page and download the appropriate installer for your system.
11. WinDirStat
Managing the storage on your Windows 11 computer can be facilitated through Storage settings, but keep in mind that it doesn’t specify precisely which files are consuming the most space. In such cases, using the Windows Directory Statistics (WinDirStat) application becomes particularly useful as it provides a more detailed breakdown of the disk usage.
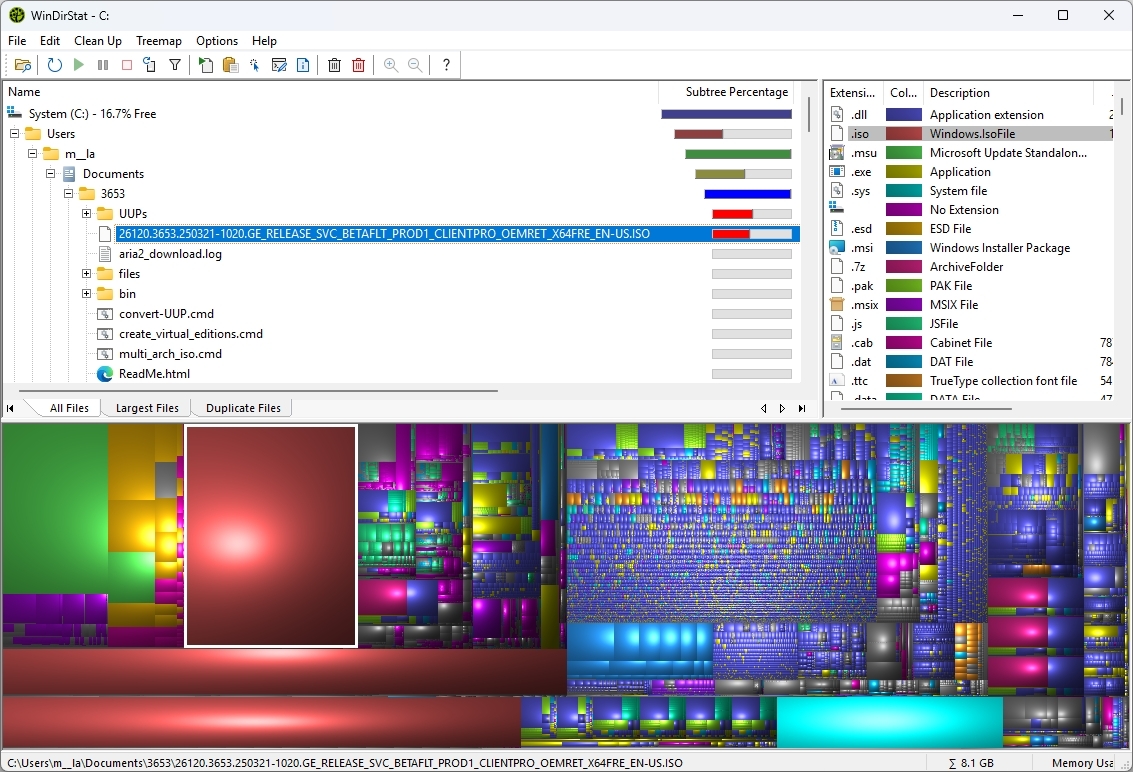
The WinDirStart software, which is available for free, helps you identify how much storage each file and folder occupies on your computer. It does this by thoroughly scanning the entire drive and generating a user-friendly visual report, making it simpler to locate files that can be deleted to create more space.
Some of the key aspects of the WinDriStat app include:
- Visual drive map: Perhaps the most noticeable part of this tool is its intuitive visual representation of disk usage, making it much easier to identify junk files than simply browsing through folders in File Explorer.
- Directory list: Alongside the treemap, WinDirStat offers a traditional tree-view list of your folders, similar to File Explorer, but sorted by size.
- Extension list: This pane shows you a breakdown of disk space usage by file extension (for example, .exe, .zip, .jpg). This is useful for understanding which types of files are taking up the most space overall.
- Cleanup actions: Once you’ve identified files or folders you want to remove, this tool allows you to directly delete them (to the Recycle Bin or permanently) from within WinDirStat.
- Network drive support: The tool can also scan and analyze network drives and UNC paths.
How to get WinDirStat
You can download and install the WinDirStat using one of the following methods:
- WinGet: Open Command Prompt or PowerShell and run: winget install –id WinDirStat.WinDirStat
- WinDirStat: Visit the official WinDirStat page and download the appropriate installer for your system.
12. VLC
Instead of stopping at item number 11, I felt compelled to add the VLC Media Player, which is commonly known as just VLC, to the list.
VLC, a versatile and widely-used media player application, is crafted by the VideoLAN project and offers its services free of charge. This software, which has been in circulation for quite some time, remains highly sought-after due to its exceptional ability to play an extensive range of multimedia files. Therefore, it’s considered an essential addition to any Windows setup.
Some of the key features of the VLC app include:
- Almost all video formats: MP4, MKV, AVI, MOV, WMV, FLV, WebM, MPEG-1/2, H.264, H.265 (HEVC), DivX, Xvid, etc.
- Almost all audio formats: MP3, FLAC, AAC, Ogg, WAV, WMA, etc.
- Physical discs: DVDs, Audio CDs, and even Blu-ray discs (without DRM).
- Streaming protocols: It can play network streams from YouTube, local network shares, webcams, and other devices.
- Screen recording: VLC can even record your desktop screen and video from webcams.
This app is incredibly adaptable, capable of playing videos even while they’re still being downloaded or if there are minor technical hiccups along the way.
How to get VLC
You can download and install the VLC using one of the following methods:
- Microsoft Store: Open the Microsoft Store app, search for VLC, and click the Install (or Get) button.
- WinGet: Open Command Prompt or PowerShell and run: winget install –id VideoLAN.VLC
- VideoLAN: Visit the official VLC page and download the appropriate installer for your system.
Install all essential apps
You can always install all these apps in bulk with these instructions:
- Open Start.
- Search for Command Prompt, right-click the top result, and choose the Run as administrator option.
- Type the following winget command to install all the apps and press Enter: winget install –id Microsoft.PowerToys -e –accept-package-agreements –accept-source-agreements & winget install –id Microsoft.WindowsTerminal.Preview -e –accept-package-agreements –accept-source-agreements & winget install –id 9N8G7TSCL18R -e –accept-package-agreements –accept-source-agreements & winget install –id 9NBLGGH516XP -e –accept-package-agreements –accept-source-agreements & winget install –id 9NV4BS3L1H4S -e –accept-package-agreements –accept-source-agreements & winget install –id Microsoft.VisualStudioCode -e –accept-package-agreements –accept-source-agreements & winget install –id Obsidian.Obsidian -e –accept-package-agreements –accept-source-agreements & winget install –id voidtools.Everything -e –accept-package-agreements –accept-source-agreements & winget install –id FilesCommunity.Files -e –accept-package-agreements –accept-source-agreements & winget install –id Armin2208.WindowsAutoNightMode -e –accept-package-agreements –accept-source-agreements & winget install –id WinDirStat.WinDirStat -e –accept-package-agreements –accept-source-agreements & winget install –id VideoLAN.VLC -e –accept-package-agreements –accept-source-agreements
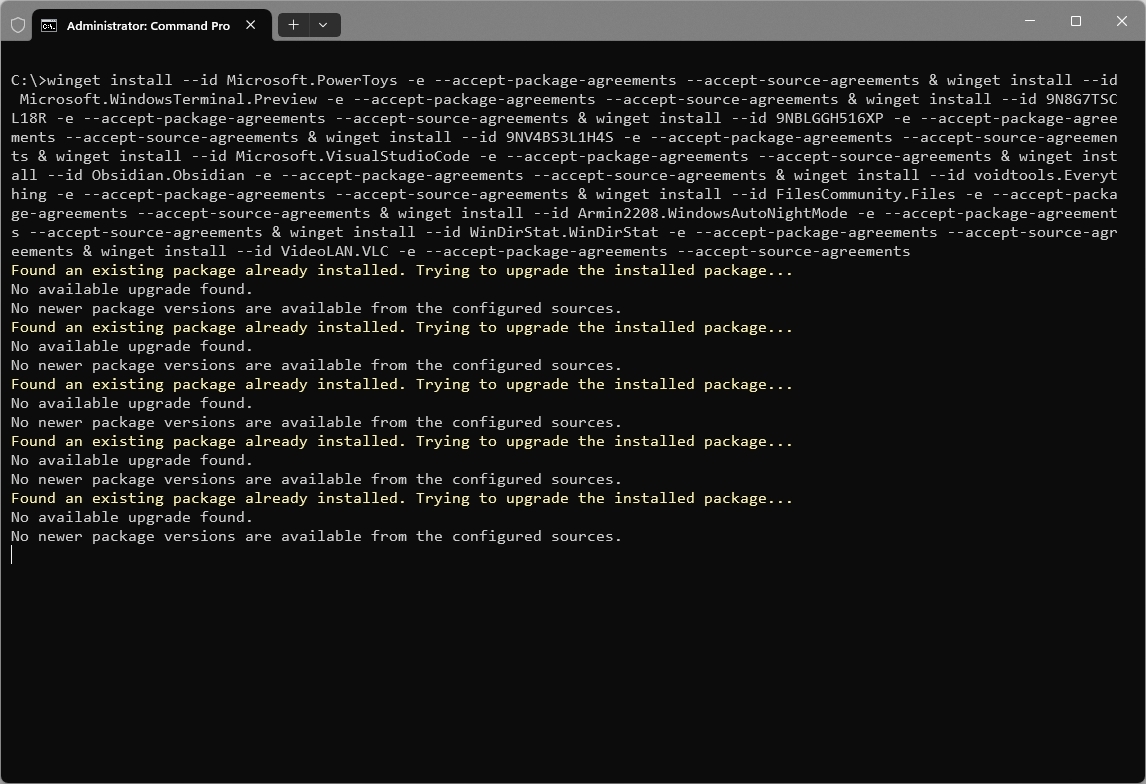
Once you complete the steps, these ten apps will install on your computer automatically.
These applications aren’t merely well-liked; they’re useful and can effectively compensate for the functional voids left by the built-in tools in Windows 11.
What are the apps you find essential on every Windows 11 installation? Let me know in the comments.
More resources
Read More
- PI PREDICTION. PI cryptocurrency
- WCT PREDICTION. WCT cryptocurrency
- Gold Rate Forecast
- Guide: 18 PS5, PS4 Games You Should Buy in PS Store’s Extended Play Sale
- LPT PREDICTION. LPT cryptocurrency
- Elden Ring Nightreign Recluse guide and abilities explained
- Solo Leveling Arise Tawata Kanae Guide
- Despite Bitcoin’s $64K surprise, some major concerns persist
- Chrishell Stause’s Dig at Ex-Husband Justin Hartley Sparks Backlash
- Playmates’ Power Rangers Toyline Teaser Reveals First Lineup of Figures
2025-05-30 14:12