Upon setting up Windows 11, numerous users often jump straight into using the system without first reviewing crucial default settings. Although the system functions right away, neglecting certain initial adjustments might result in performance problems, privacy complications, and potential difficulties when trying to restore your device in case of future issues.
Neglected areas often encompass:
1. Activating System Restore
2. Grasping the importance of BitLocker recovery keys
3. Tweaking fundamental power and privacy settings
4. Verifying correct installation of device drivers
5. Arranging for routine backup procedures
While they may appear as minor adjustments, in truth, these steps play a crucial role in safeguarding your data, ensuring system stability, and ensuring your computer functions as you anticipate.
In this step-by-step tutorial, I’ll provide you with various settings that are frequently overlooked yet essential for the initial configuration of Windows 11.
Essential configurations many users miss after installing Windows 11
After installing Windows 11, it’s advisable to regularly verify these settings for a hassle-free usage and to prevent any possible problems.
1. System Restore
The System Restore tool enables you to go back in time and reset your computer’s system files, applications, Registry, and system configurations to an earlier state by utilizing restore points.
This tool is set up to assist you in resolving issues that may have arisen due to new software installations, driver updates, or alterations in the system settings. It’s designed to do this while ensuring your data remains unaffected.
Generally, this particular feature isn’t activated automatically for most users. They might not be aware of its existence unless a situation arises where they require its use and discover it hasn’t been enabled.
To enable System Restore on your computer, use these steps:
- Open Start.
- Search for Create a restore point and click the top result to open the System Properties page.
- Select the main “System” drive under the “Protection Settings” section.
- Click the Configure button.

- Select the “Turn on system protection” option.
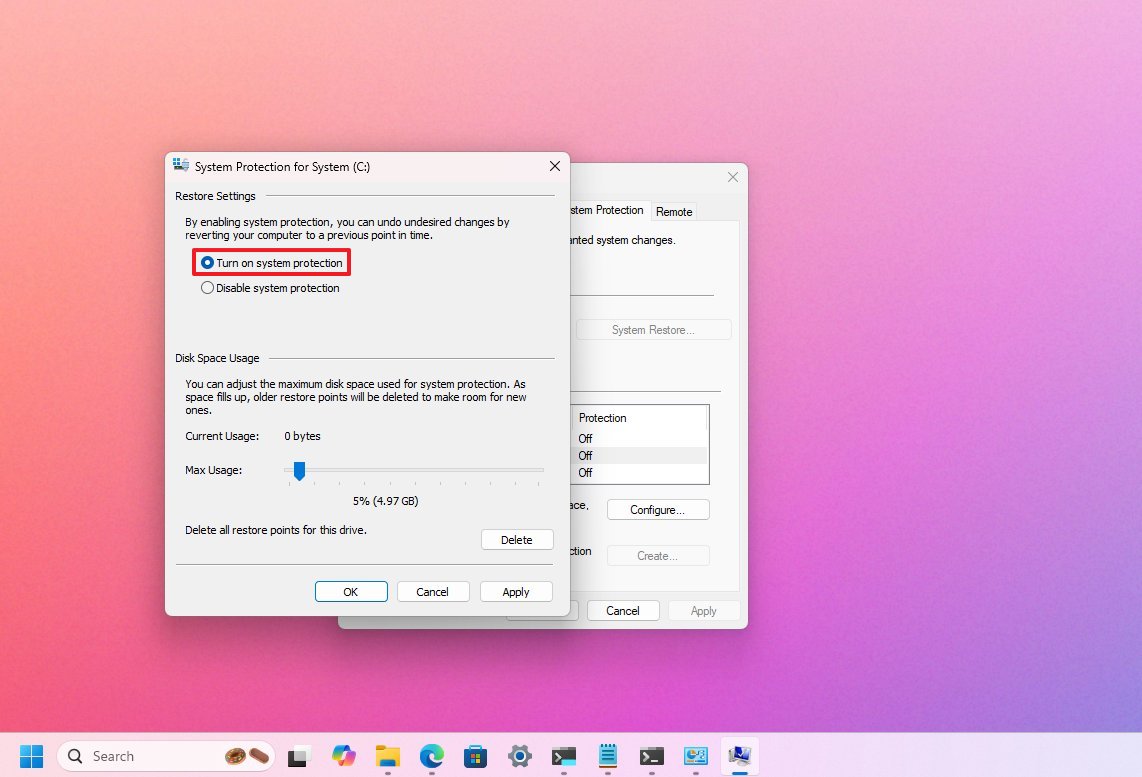
- (Optional) Use the “Max Usage” slider and select how much space the system should reserve to store restore points.
- Click the Apply button.
- Click the OK button.
After finishing the given procedures, the tool will autonomously generate a system restore point while installing updates or implementing particular modifications.
It’s important to note this is not a backup solution. It’s only a tool to undo settings changes.
Additionally, I’ve created an extensive tutorial covering all the steps required to set up System Restore on Windows 11, allowing you to delve deeper into understanding this valuable tool.
2. BitLocker recovery key
From version 24H2 onwards, Windows 11 will enable BitLocker by default for all new installations.
Even though drive encryption is crucial for safeguarding your information, some users encounter difficulties at startup when problems arise, often unaware that a recovery key is essential to access their device. The main challenge, however, lies in the fact that they are frequently uncertain about how or where to recover this vital key.
Luckily, when you set up your operating system using a Microsoft account, Windows 11 will save your recovery key for you in your online account by default. It’s crucial to learn how to get this recovery key sooner rather than later, as you don’t want to find yourself in need of it without having access to it.
To find your BitLocker recovery key, use these steps:
- Open your Microsoft account.
- Sign in with your account credentials.
- Confirm your computer’s recovery key from the list using the “Device Name” information.

After finishing the process, make sure to save the “Device Name,” “Key ID,” and “Recovery Key” details in a secure spot. If your computer encounters issues during the initial startup, you can match the “Key ID” displayed on the boot screen with the one you saved from your account to unlock the device.
3. Power settings
Many users tend to overlook modifying their power settings following the installation of Windows 11, which may result in reduced system performance and unforeseen actions such as screen shutdown or entering sleep mode soon after you leave your workstation.
If you want to configure your device to behave the way you want it, use these steps:
- Open Settings.
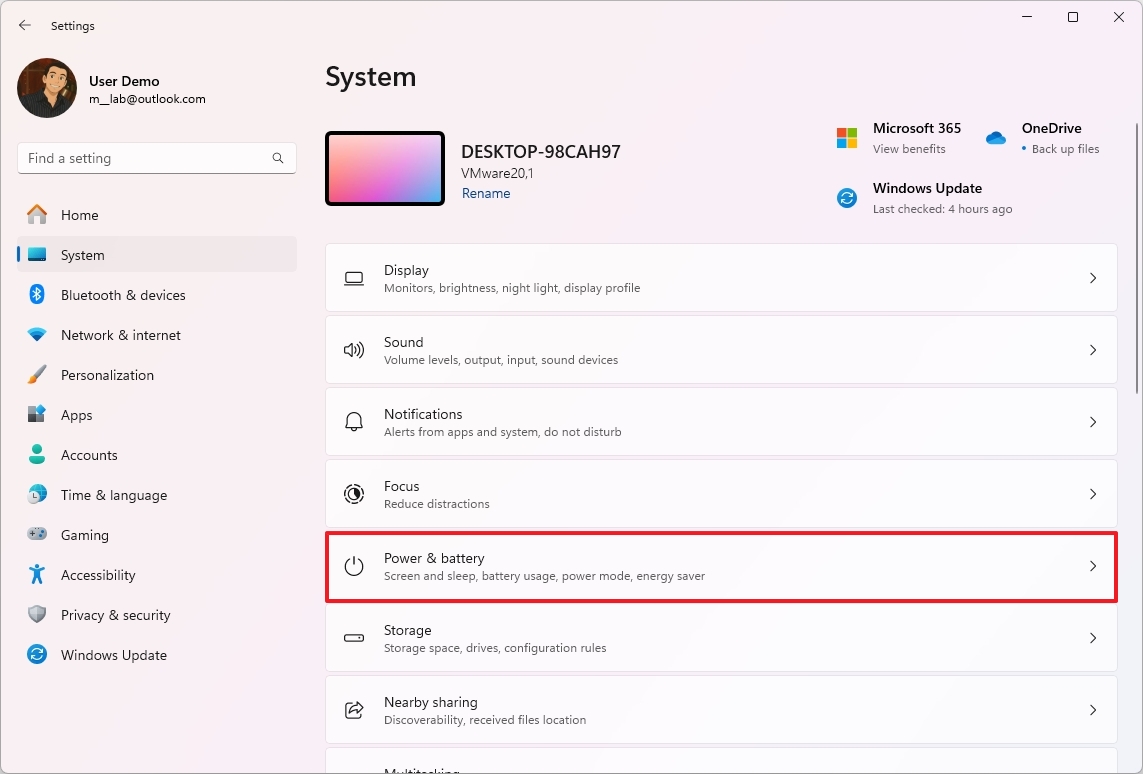
- Click on System.
- Click the Power & battery (or Power) page on the right side.
- Click the Power Mode setting.
- Select the “Best Performance” option for the best result for “Plugged in” and “On battery”.
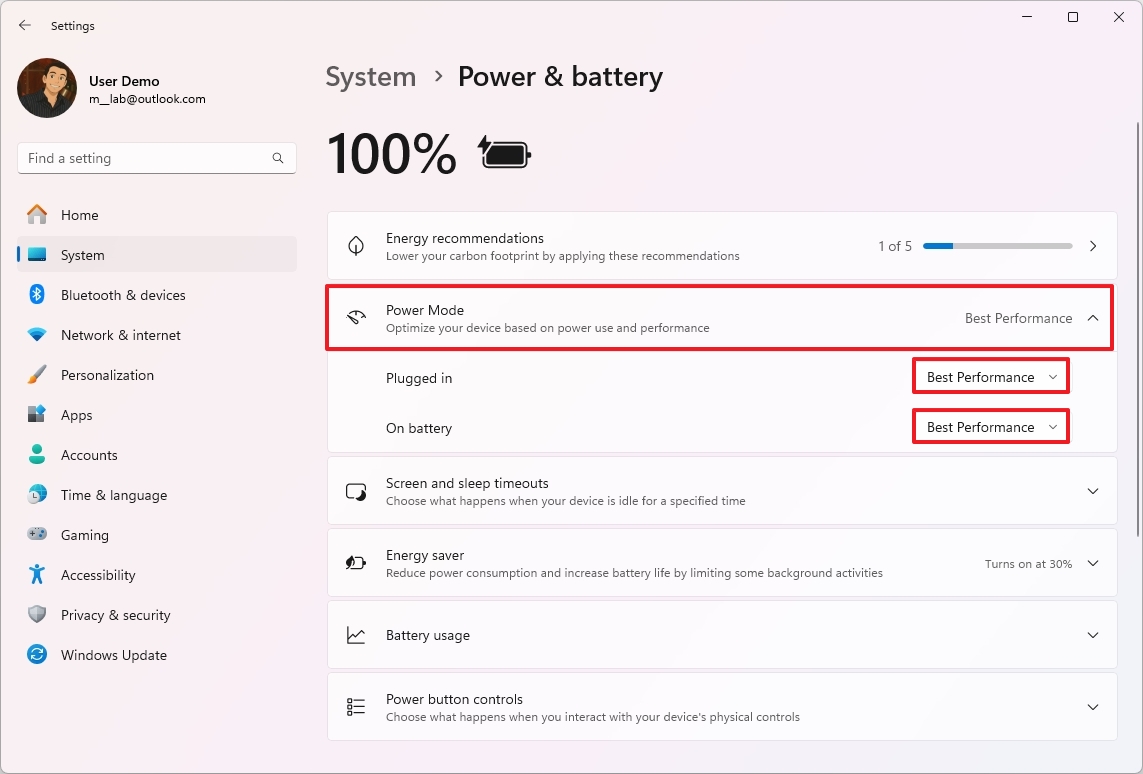
- Quick note: This setting is subjective since you may need to choose the “Best Power Efficiency” option to conserve battery on your laptop.
- Click the “Screen and sleep timeouts” setting.
- Configure the timers for the “Plugged in” and “On battery” settings when your screen turns off automatically and the device enters sleep mode.
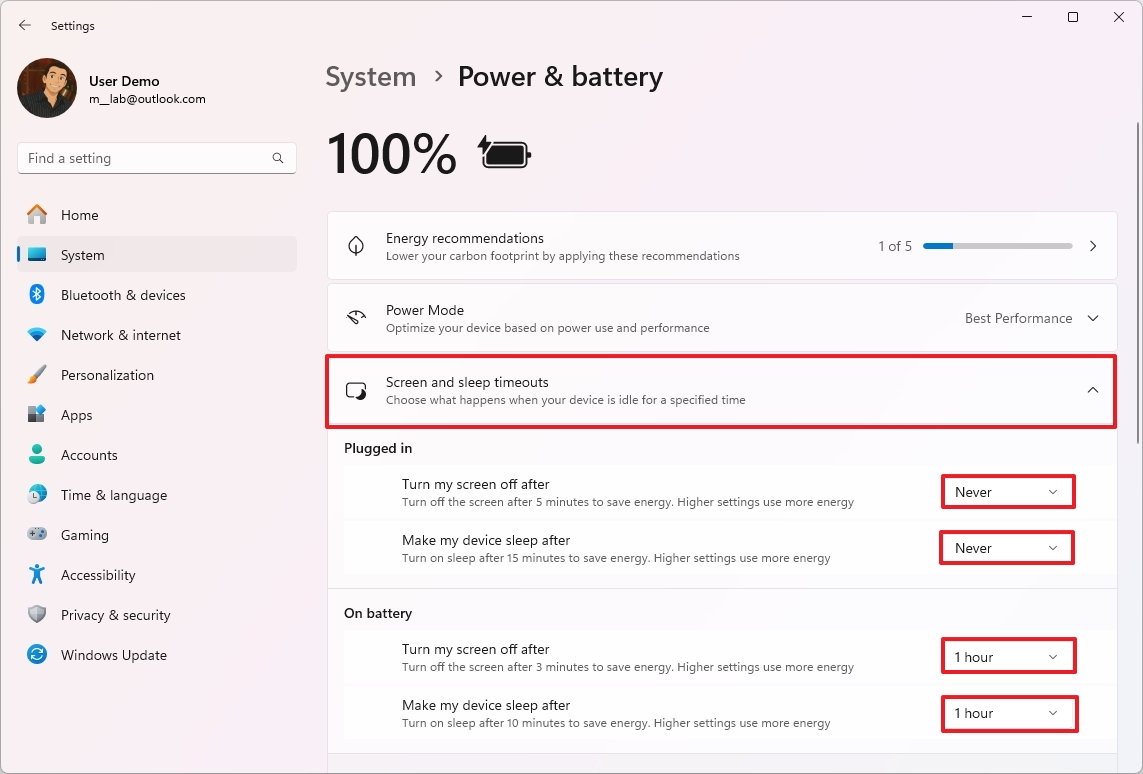
After you complete the steps, the new power configurations will apply to the computer.
4. Privacy settings
By standard settings, Windows 11 gathers a considerable amount of diagnostic and operational data. Furthermore, it assigns a unique identifier for targeted advertisements throughout your user experience and monitors the geographical location of your device using cloud services, among other activities.
Whenever you perform a fresh setup on a device or install it from scratch, I strongly advise modifying at least one system setting to enhance your privacy.
To change the privacy settings on Windows 11, use these steps:
- Open Settings.
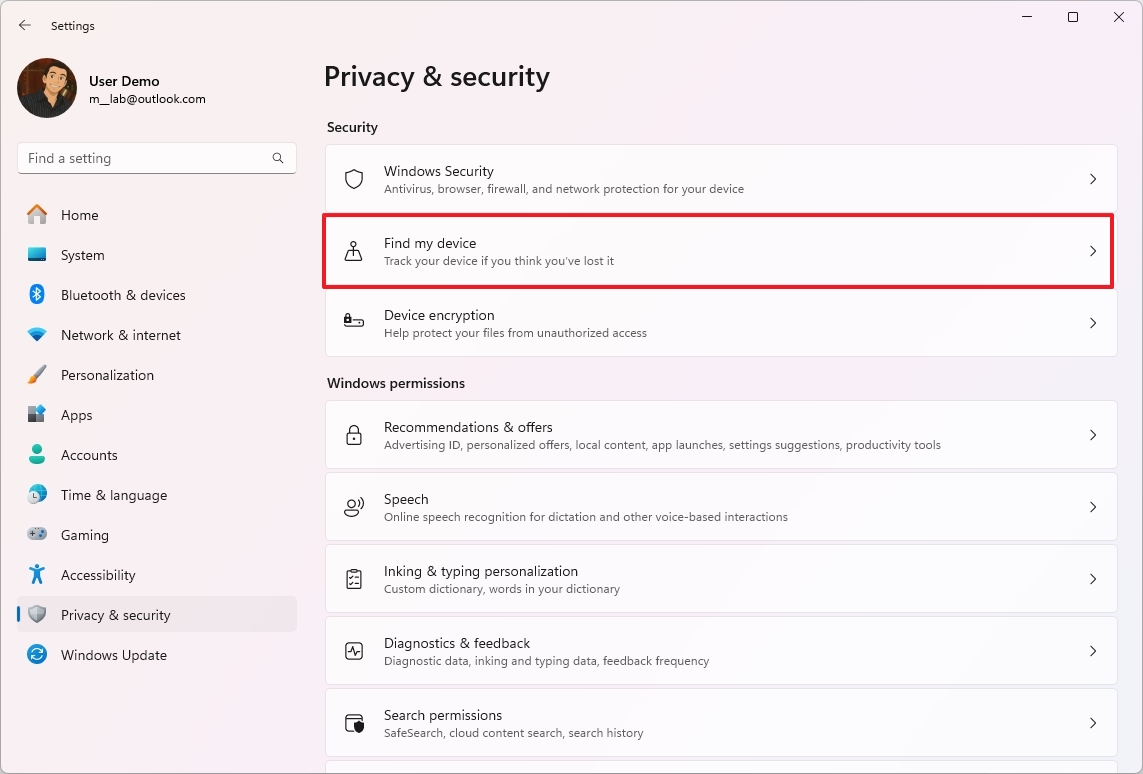
- Click on Privacy & security.
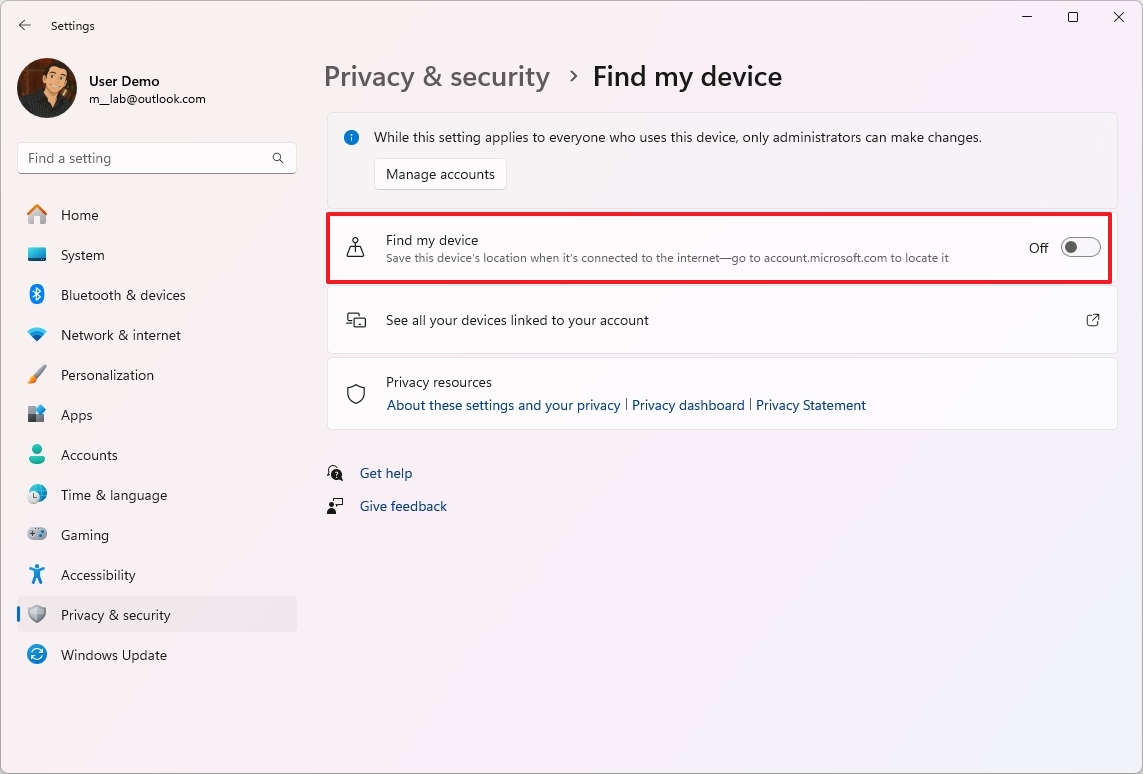
- Click the “Find my device” page on the right side.
- Turn off the “Find my device” toggle switch.
- Click on Privacy & security in the breadcrumb.
- Click the “Recommendations & offers” page on the right side.
- Turn off the “Personalized offers” toggle switch.
- Turn off the “Advertising ID” toggle switch.
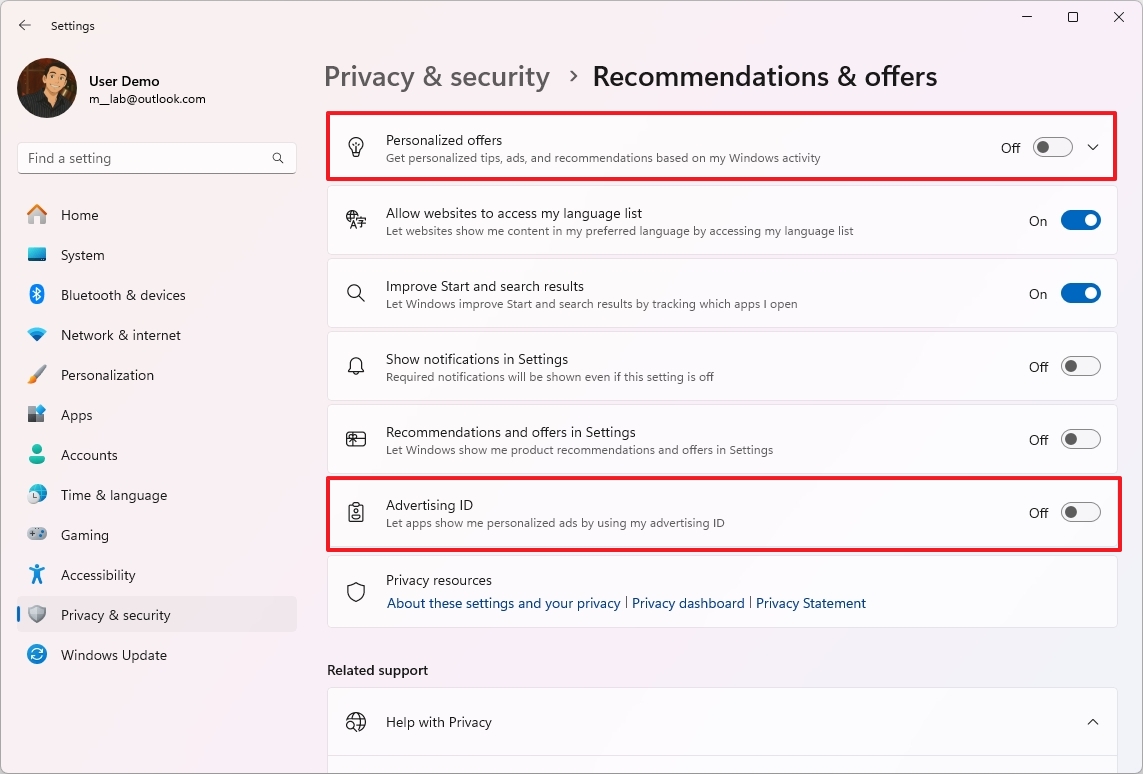
- Quick tip: On this page, you can choose the recommendations and offers settings according to your preferences.
- Click on Privacy & security in the breadcrumb again.
- Click the “Diagnostics & feedback” page on the right side.
- Turn off the “Send optional diagnostic data” toggle switch under the “Diagnostic data” setting.
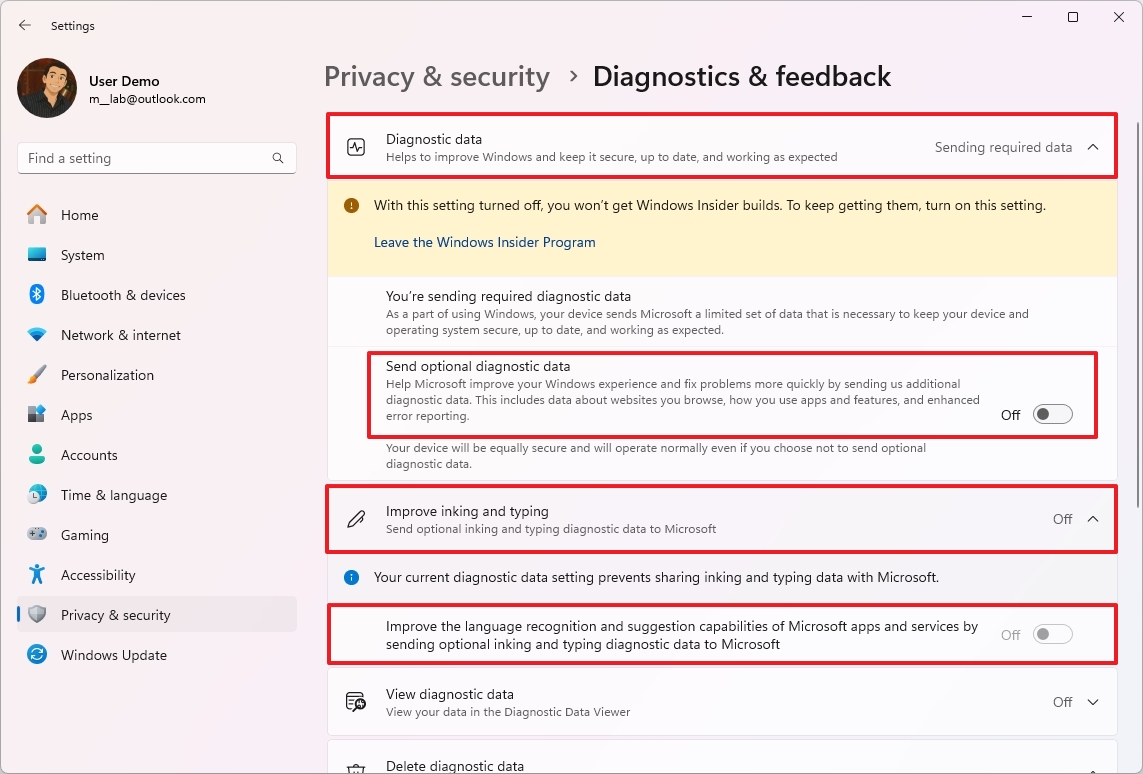
- Quick note: Microsoft requires users to send some diagnostic data to help maintain their computers.
- Turn off the “Improve inking and typing” toggle switch.
- Click the “Delete diagnostic data” setting.
- Click the Delete button.
After finishing the given procedures, you can significantly reduce the data your computer shares with Microsoft. Yet, please bear in mind that regardless of the settings adjusted, the device will continue to transmit some degree of information to the company.
5. Device drivers
Occasionally, following a fresh system setup, when your computer is online, your keyboard, mouse, webcam, and speakers are functional, some users tend to overlook the need to update their device’s drivers if they are absent.
As a tech-savvy individual, I’ve often found myself in situations where my computer seems to be running smoothly, but beneath the surface, my operating system might not be installing the right drivers for crucial components such as my motherboard chipsets and USB controllers. This can lead to unexpected issues down the line.
Once you’ve finished setting up, make sure to verify and ensure that your device drivers have been properly installed.
To check the device drivers installed on your computer, use these steps:
- Open Start.
- Search for Device Manager and select the top result to open the app.
- Confirm that none of the components are labeled as unknown, or they don’t have a yellow exclamation or red mark.

A “Unknown Device” essentially signifies that the computer’s operating system is unable to recognize a specific hardware device attached to it.
As an onlooker, I frequently notice that a bright, sunny exclamation point – more often than not, yellow – serves as a primary signal indicating a potential concern for drivers. This symbol, acting like a beacon, signifies that the system has detected an issue with the device itself.
To summarize, you’ll often find that a red “X” symbol indicates the device is inactive. This could be because it was intentionally turned off through the Device Manager or because of an imposed system policy. An inactive device simply won’t operate.
To download and install device drivers on Windows 11, use these steps:
- Open Settings.
- Click on Windows Update.
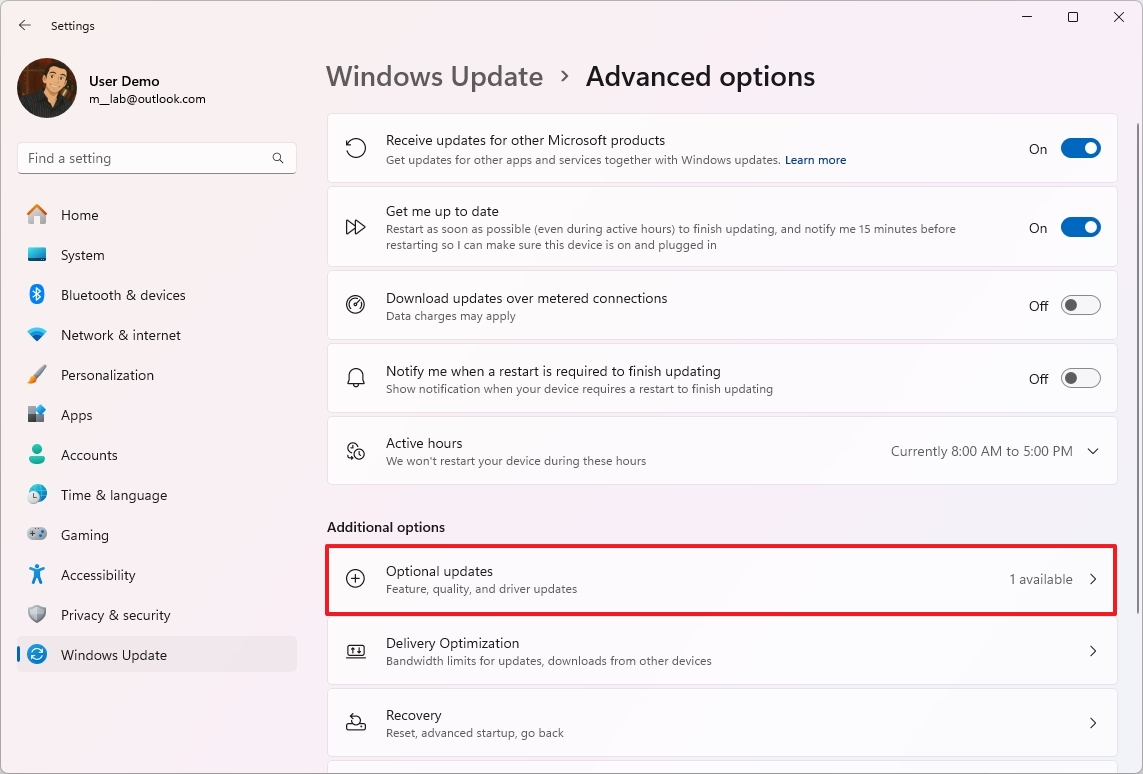
- Click the Advanced options page on the right side.
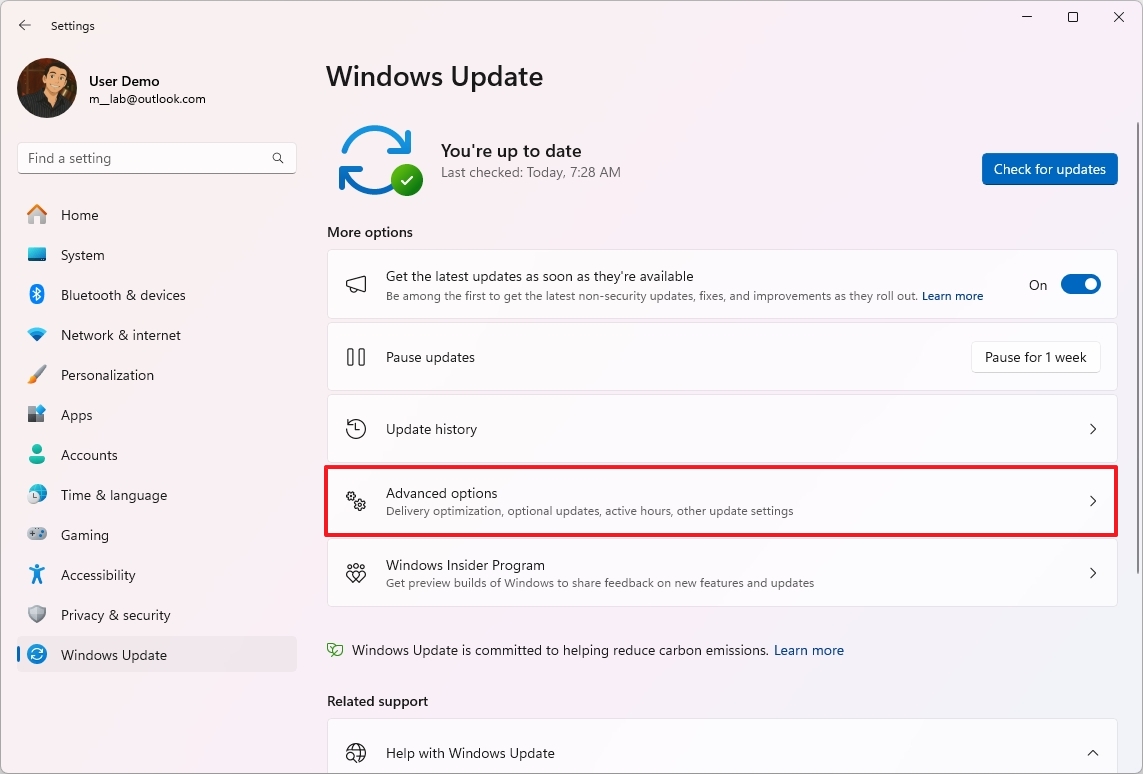
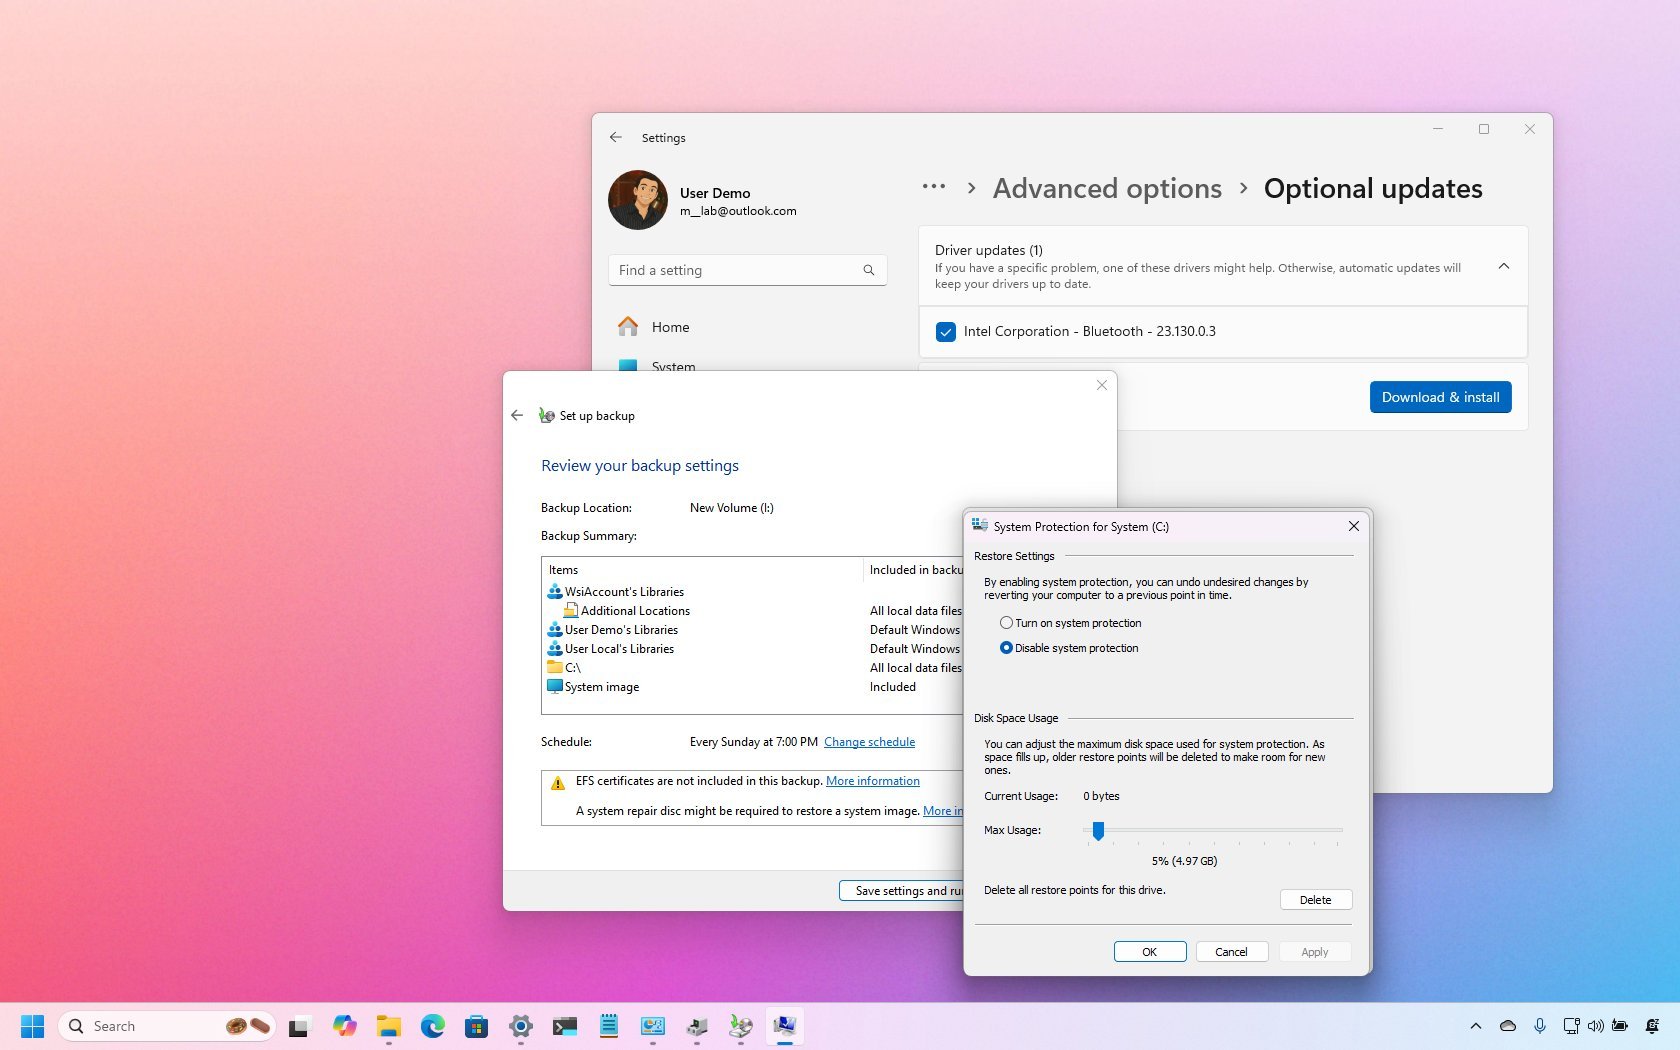
- Click the Optional updates setting.
- Click the Driver Updates setting
- Select the drivers you want to update.
- Click the “Download & install” button.
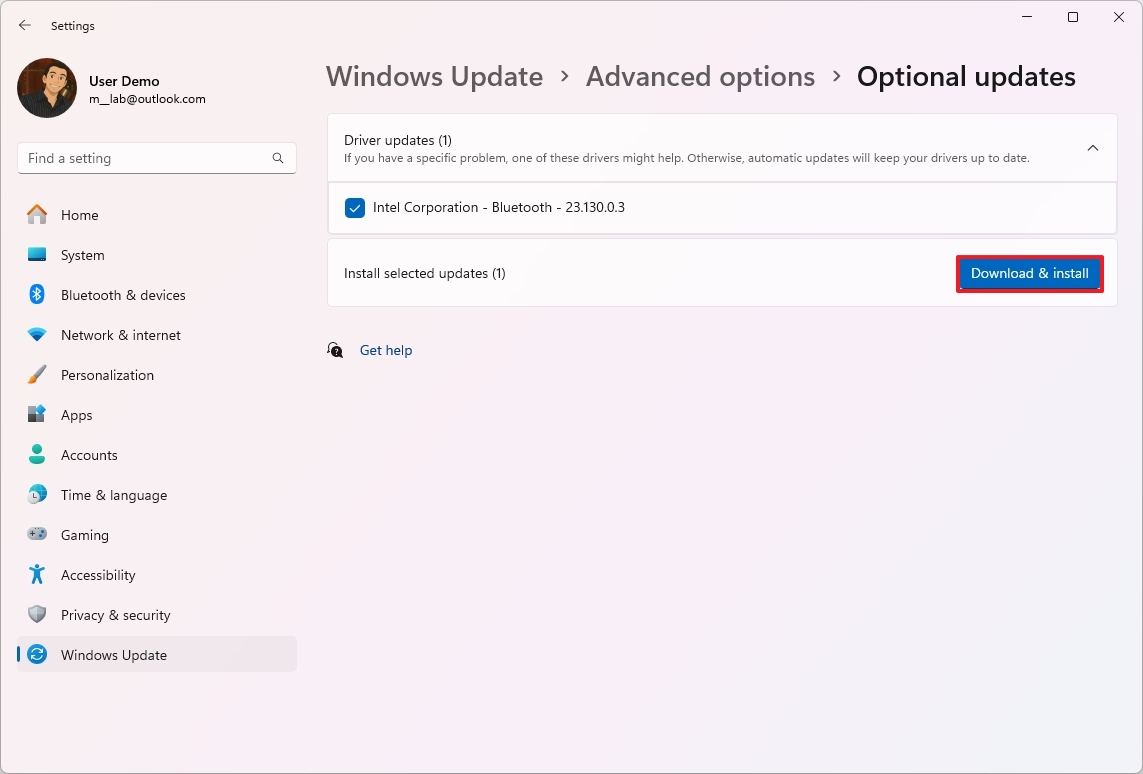
After you complete the steps, the drivers will download and install on your computer.
On Windows 11, if the system can’t locate the necessary device drivers automatically, you’ll need to manually install them yourself.
6. System backup
Immediately after you finish setting up Windows 11, it’s highly recommended that you arrange for a system backup. This is crucial as it allows you to recover your entire computer or specific files if any mishaps occur, such as accidental deletions.
Generally speaking, a system image backup is often discussed, but it’s essential to understand that this method is usually considered short-term, as it primarily safeguards your system configuration and files from the time of the previous backup.
In cases like updating the operating system, swapping out the hard drive, or performing major system overhauls, the tool is designed to protect your system.
To ensure your system and data remain secure, many users overlook the traditional “Automatic Backup and Recovery” tool which routinely saves copies of your data without much manual intervention.
As a keen observer, I’d recommend setting up a daily automatic backup for your computer and essential files. To do this, simply attach an external storage device that has sufficient capacity, then follow the steps below:
1. Plug in your external drive to your computer.
2. Navigate to ‘My Computer’ or ‘This PC’.
3. Locate your external drive under ‘Devices and drives’.
4. Right-click on the empty space within the external drive, select ‘Properties’.
5. Go to the ‘Sharing’ tab and check the box that says ‘Backup automatically’.
6. Click ‘Set up backup’ and follow the prompts to configure your backup settings, such as what files to include and when to run the backup.
7. Save your preferences and start the backup process.
By following these steps, you can ensure peace of mind knowing that your important data is safely backed up daily.
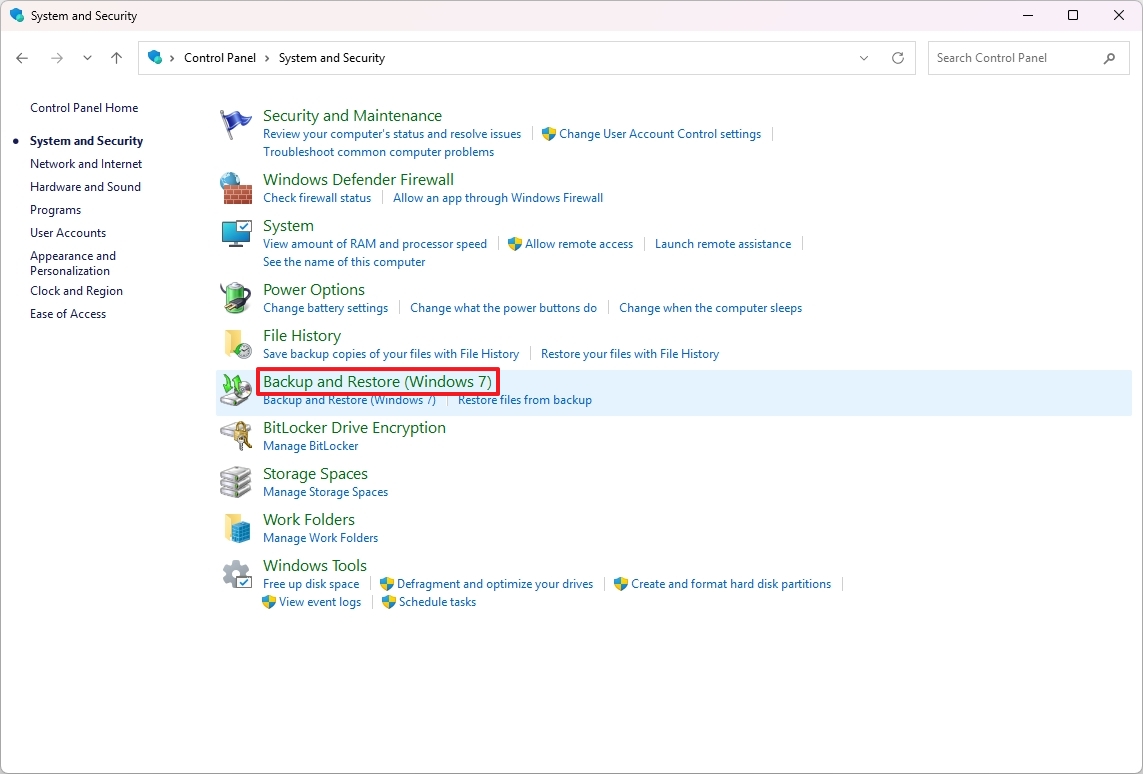
- Open Start.
- Search for Control Panel.
- Click on System and Security.
- Click on Backup and Restore (Windows 7).
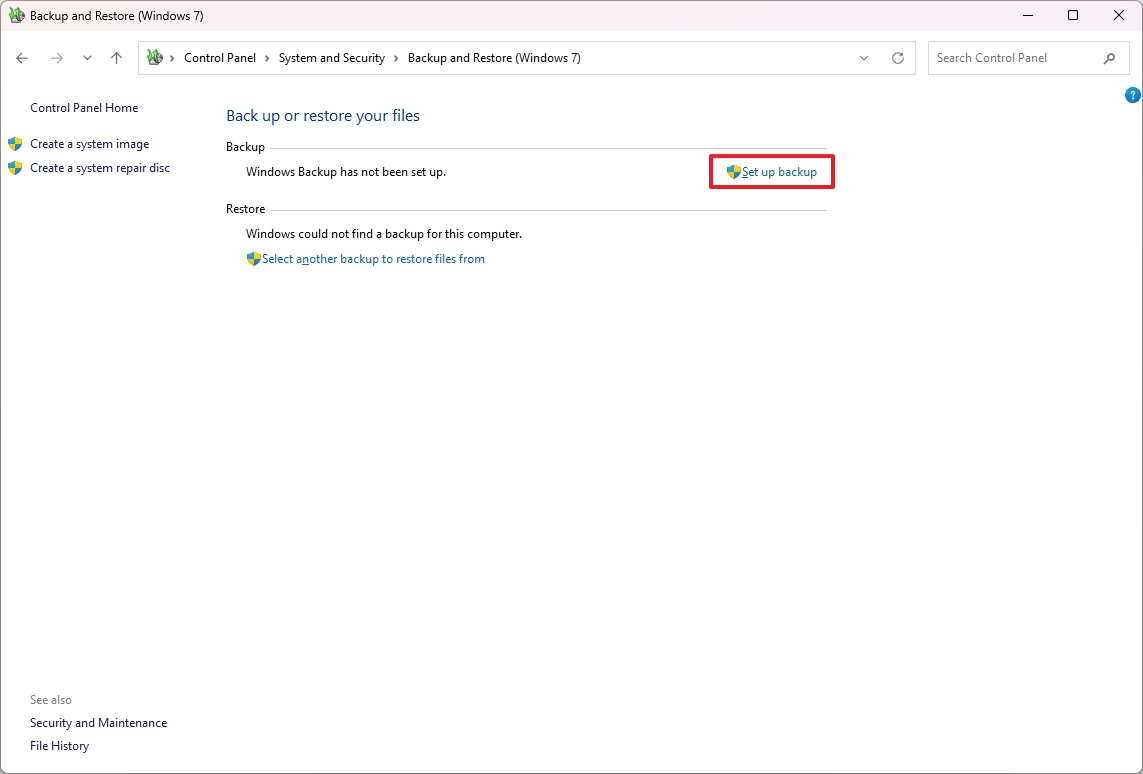
- Click the “Set up backup” option.
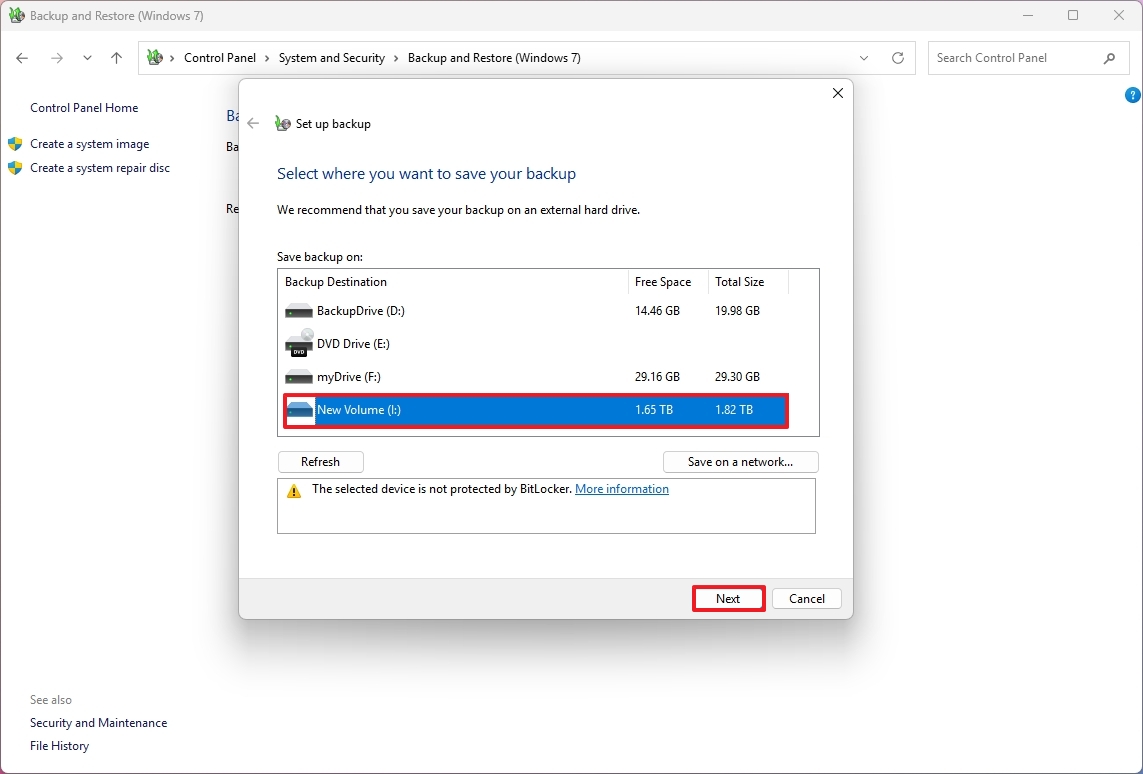
- Select the external storage to save the backup.
- Click the Next button.
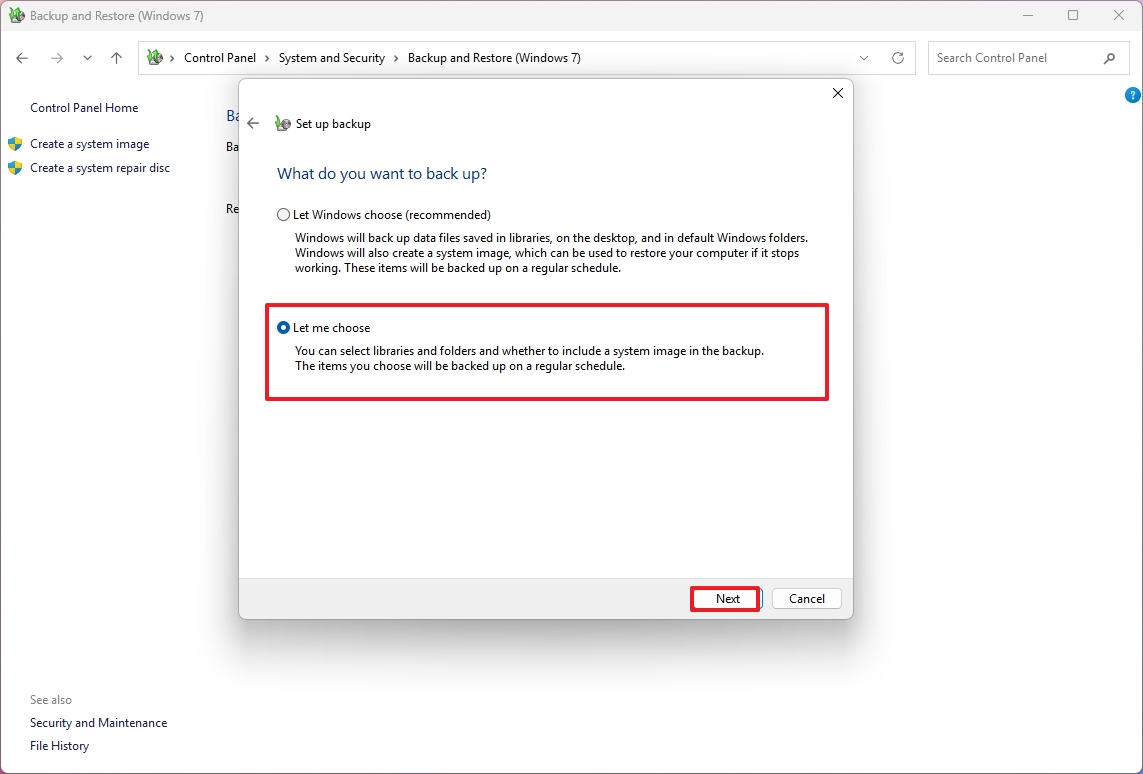
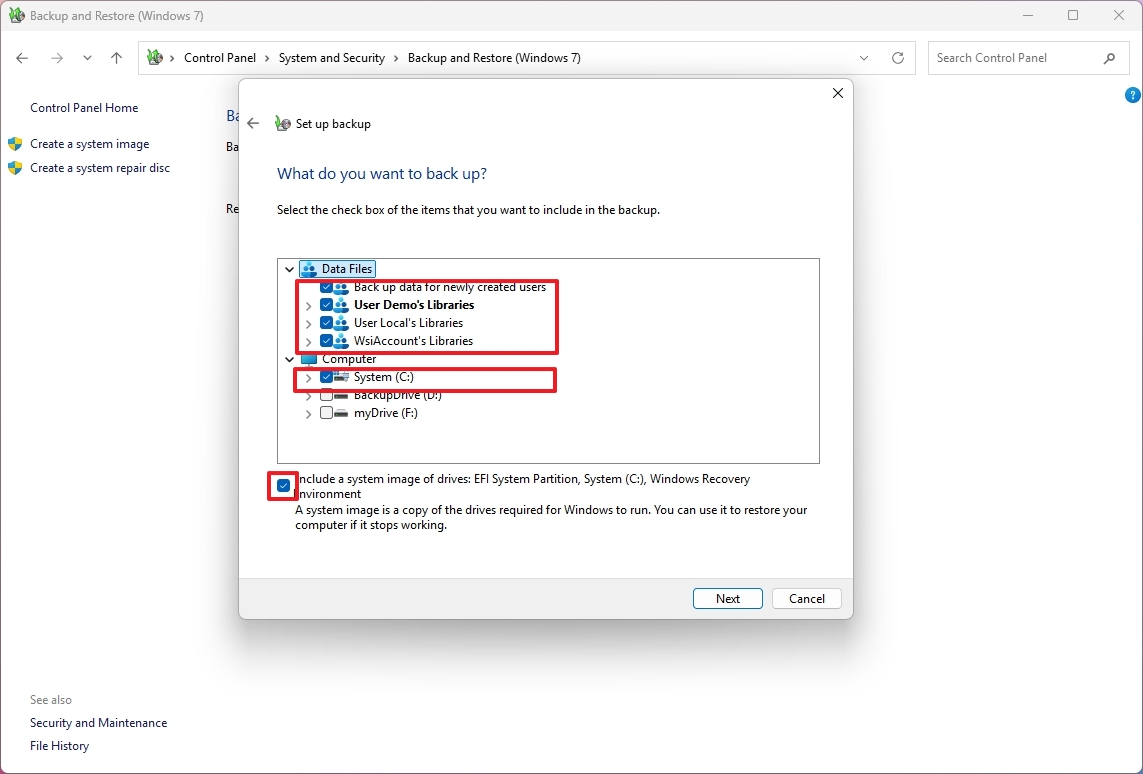
- Choose the “Let me choose” option.
- Click the Next button.
- Select the content you want to include in the backup from “Data Files” and “Computer.”
- Check the option to include the system image of the drives.
- Click the Next button.
- Click the “Save settings and run backup” button.
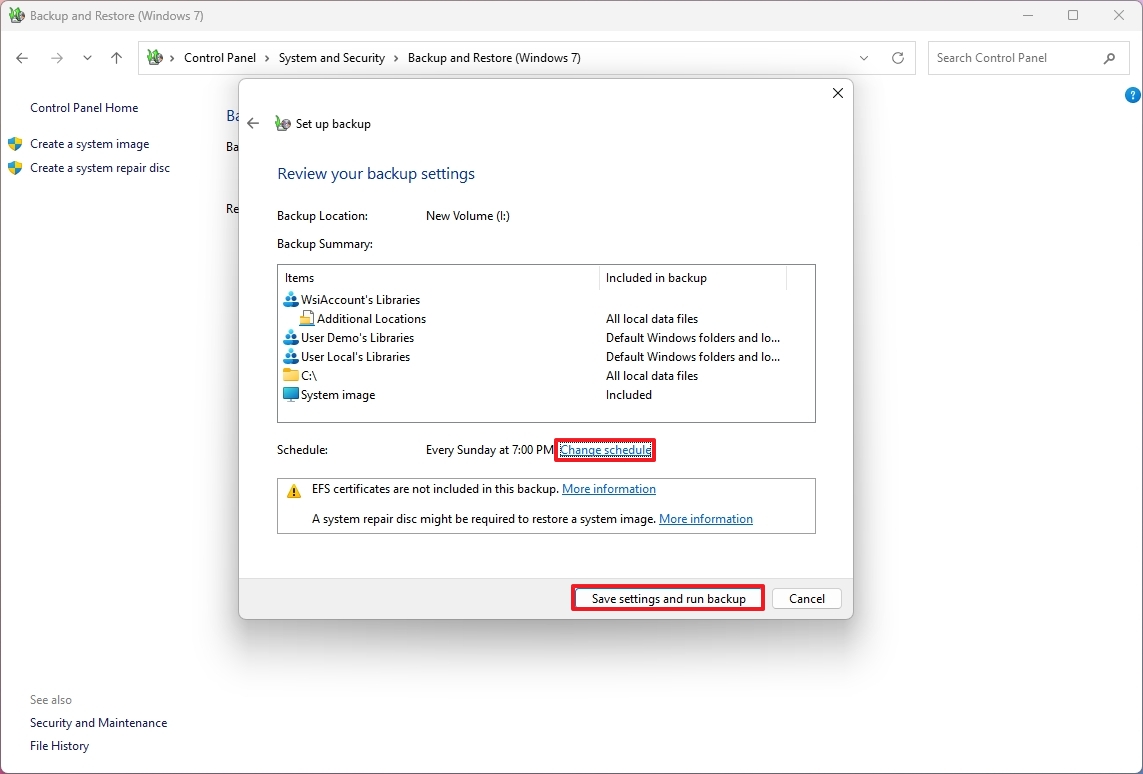
Should you opt for the standard configuration, the system will carry out weekly backups every Sunday at 7 PM; however, you have the flexibility to set up a custom schedule by choosing the “schedule” option, which enables daily incremental backups at a time of your preference.
Do you know any other configuration you notice people usually forget? Let me know in the comments.
More resources
Read More
- Gold Rate Forecast
- SteelSeries reveals new Arctis Nova 3 Wireless headset series for Xbox, PlayStation, Nintendo Switch, and PC
- Masters Toronto 2025: Everything You Need to Know
- Eddie Murphy Reveals the Role That Defines His Hollywood Career
- We Loved Both of These Classic Sci-Fi Films (But They’re Pretty Much the Same Movie)
- Discover the New Psion Subclasses in D&D’s Latest Unearthed Arcana!
- Forza Horizon 5 Update Available Now, Includes Several PS5-Specific Fixes
- ‘The budget card to beat right now’ — Radeon RX 9060 XT reviews are in, and it looks like a win for AMD
- Rick and Morty Season 8: Release Date SHOCK!
- Mission: Impossible 8 Reveals Shocking Truth But Leaves Fans with Unanswered Questions!
2025-06-09 14:40