Window 11 provides a wide array of accessibility options aimed at enhancing usability for everyone, irrespective of their capabilities. Interestingly, while these features are particularly beneficial for those with unique requirements, they can also significantly enhance the general user experience for all.
Adjusting the mouse settings lets you alter the pointer’s design, and there’s also an option to add a visibility aid to help locate the pointer more easily on your screen. Furthermore, you can personalize the text cursor’s look to enhance user-friendliness.
Additionally, you’ll encounter functionalities like Real-time Captioning, which displays captions on the screen for any audio or video material. Furthermore, Voice Command lets you manage your computer solely by voice. Moreover, Voice Transcription can aid in drafting a document via speech as well.
Here’s a simple, conversational rephrase for your text: “In this step-by-step guide, I’ll walk you through seven useful accessibility tools that Windows 11 users should take advantage of.”
By making the language more casual and engaging, we hope to make the text feel less formal while still maintaining clarity and ease of understanding.
Best accessibility for anyone using Windows 11
These are certain accessibility tools that can enhance the overall browsing experience across Windows 11.
1. Customise mouse appearance
Microsoft classifies mouse settings as accessibility tools, yet these customizations are not just for those with specific needs; they allow individuals to give their cursor a touch of individuality and fun.
To change the mouse pointer appearance, use these steps:
- Open Settings.
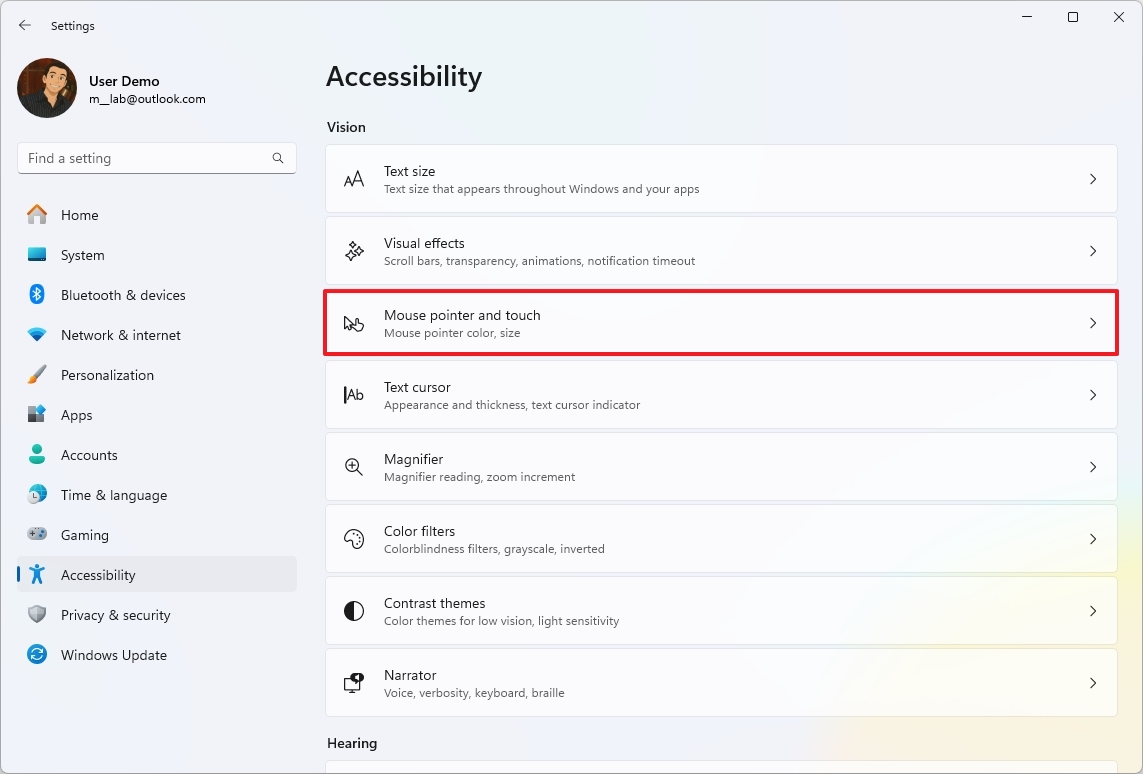
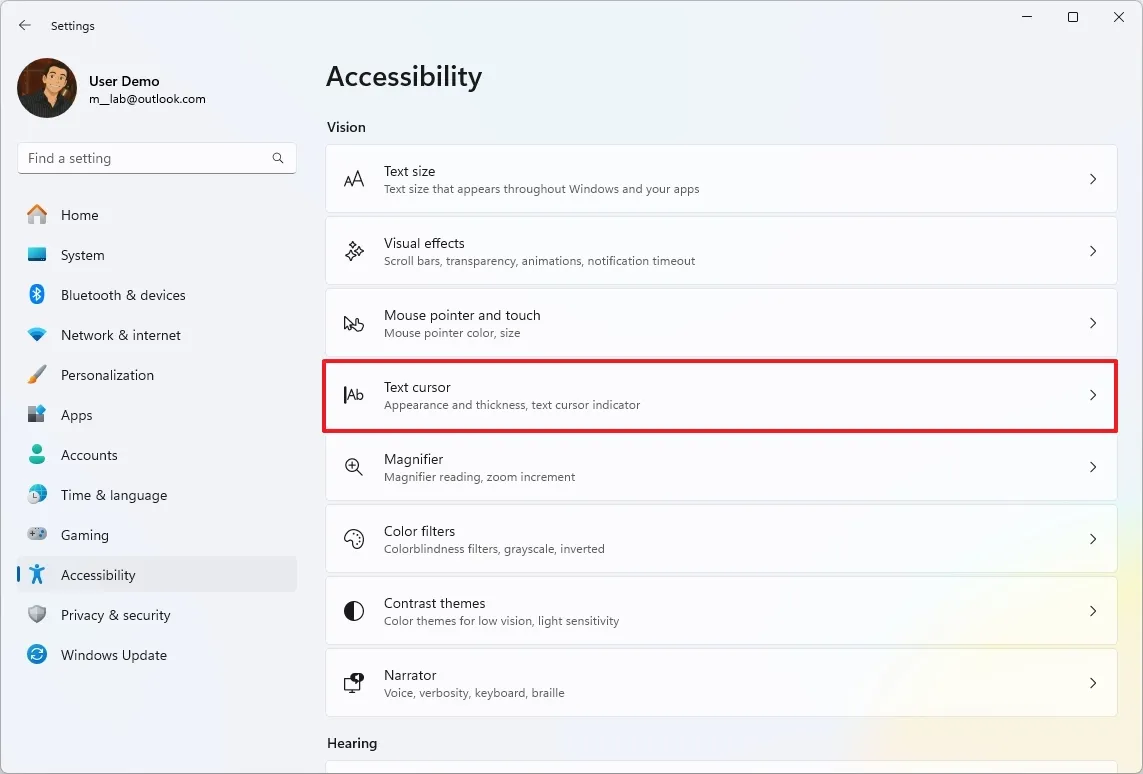
- Click on Accessibility.
- Click the “Mouse pointer and touch” setting.
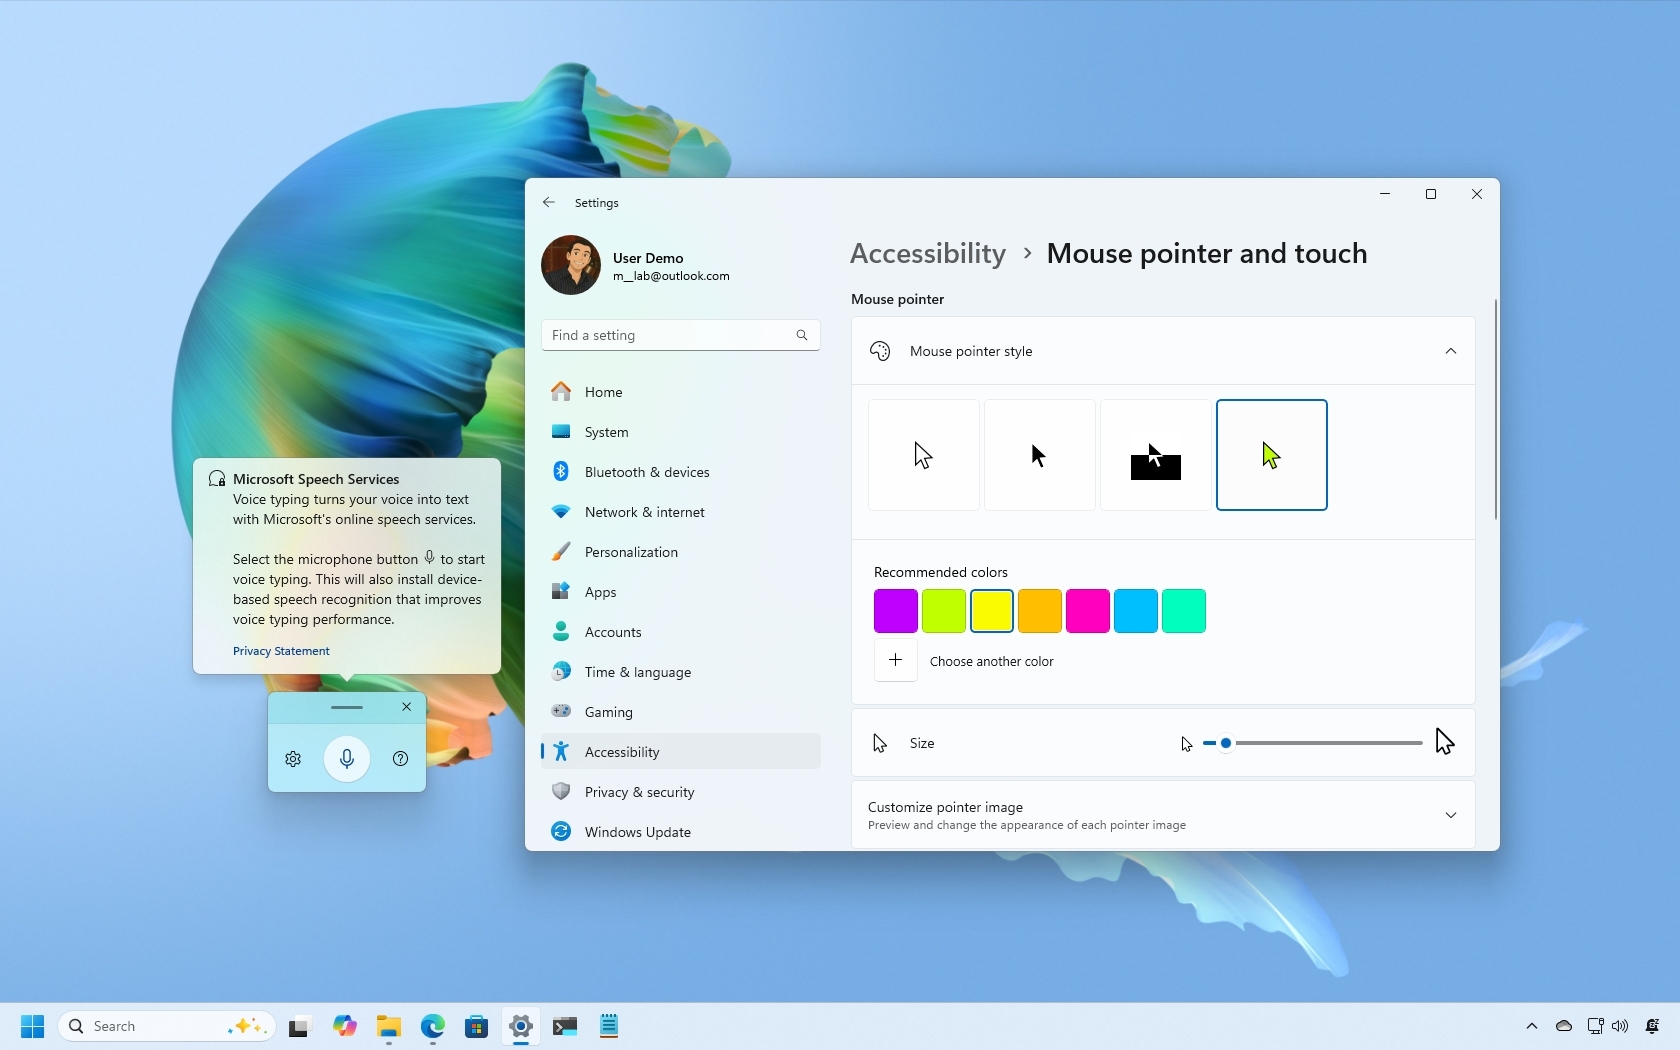
- Select the Custom option under the “Mouse pointer style” section.
- Choose the new color scheme for the pointer.
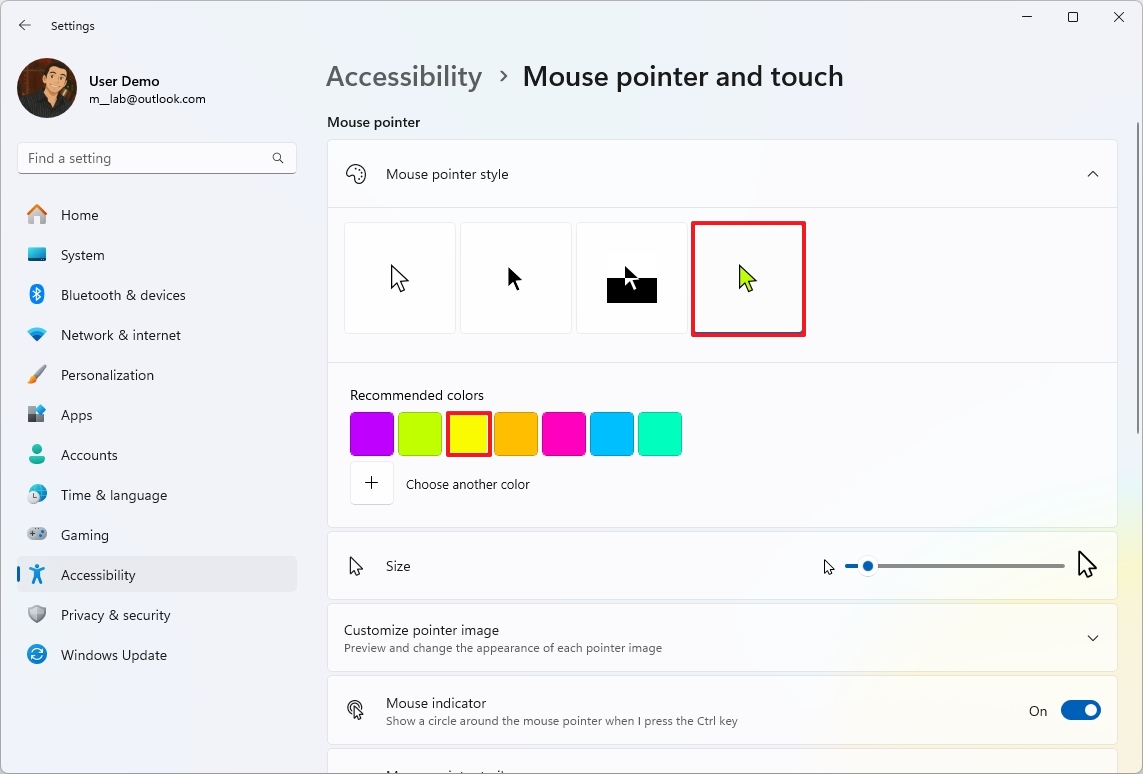
- Quick tip: You can also create a custom color with the “Choose another color” option.
If you’d like to make your experience even more personal, consider adjusting the “Customize Mouse Pointer Image” setting to assign unique icons to different states of your mouse pointer. (Please note that this feature might not be accessible to all users when you read this tutorial.)
In addition, you can make the mouse pointer bigger or smaller using the “Size” slider.
Another feature I frequently activate is the “Cursor Highlight,” which enables you to spot the mouse cursor more easily by pressing the “Ctrl” key, causing a circle to appear around the pointer.
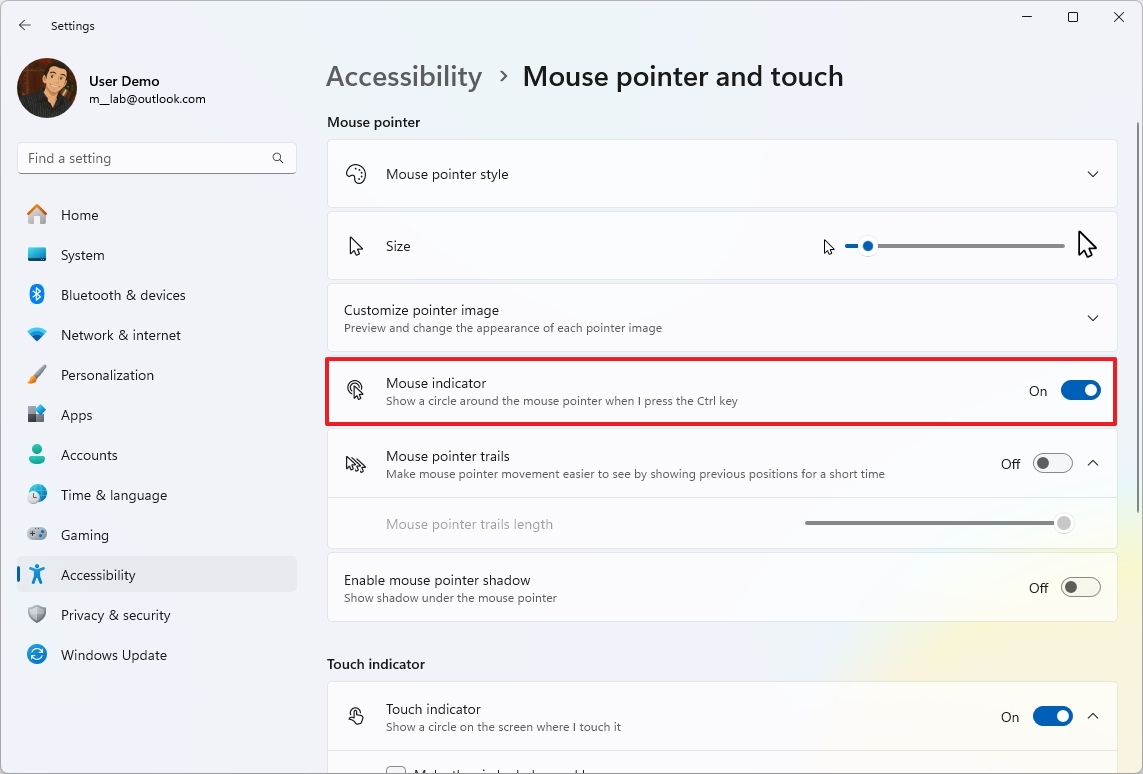
On this page as well, additional historical mouse functions such as mouse pointer trails and shadows are being moved over too.
2. Change text cursor appearance
Despite the text cursor being a simple flashing guide on your screen for entering or editing text, you might not know this, but you can personalize its appearance by changing both its color and thickness.
To change the text cursor appearance, use these steps:
- Open Settings.
- Click on Accessibility.
- Click the “Text cursor” setting.
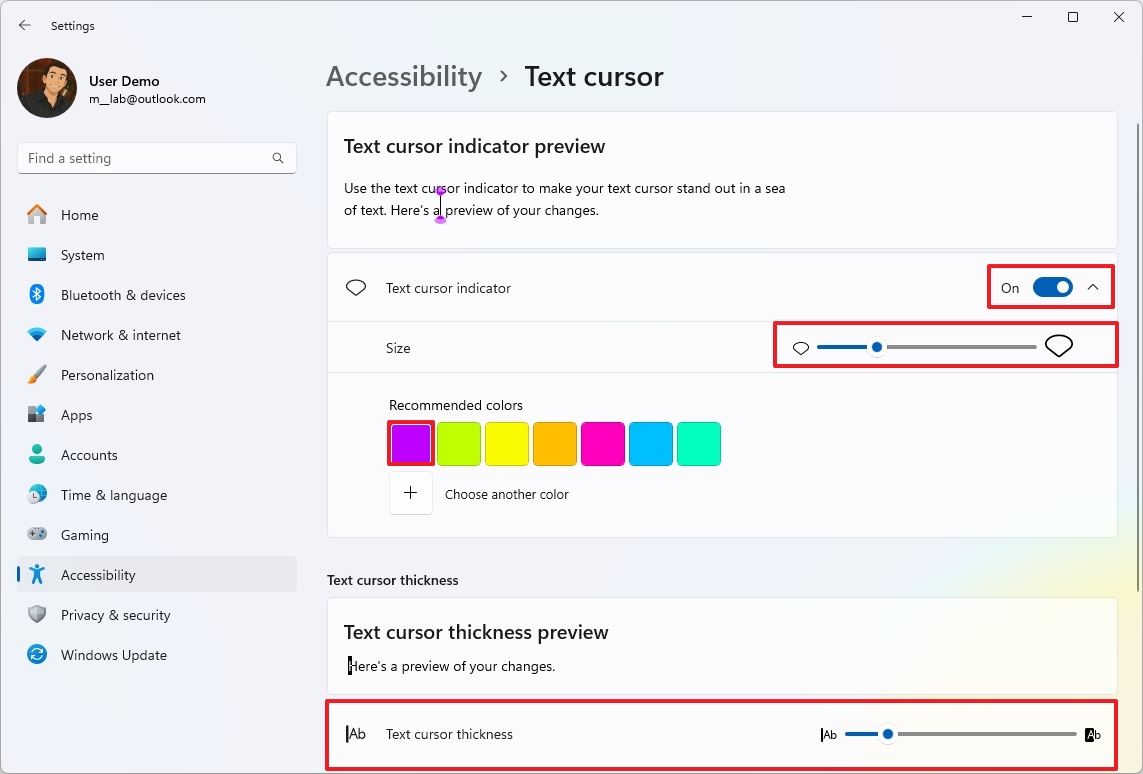
- Turn on the “Text cursor indicator” toggle switch.
- Select the size of the indicator.
- Choose the new color scheme for the text indicator.
- Quick tip: You can also create a custom color with the “Choose another color” option.
- Choose how thin or thick the text cursor is using the “Text cursor thickness” slider.
Once you complete the steps, the changes will apply to the text cursor.
3. Show live captions from any media
Live Captions is a useful tool that transcribes spoken audio into readable text on your display as it happens. Essentially, this feature allows you to read the dialogue from videos, online meetings, podcasts, or games, as text appears before your eyes.
To enable Live Captions on Windows 11, use these steps:
- Open Settings.
- Click on Accessibility.
- Click the “Captions” setting.
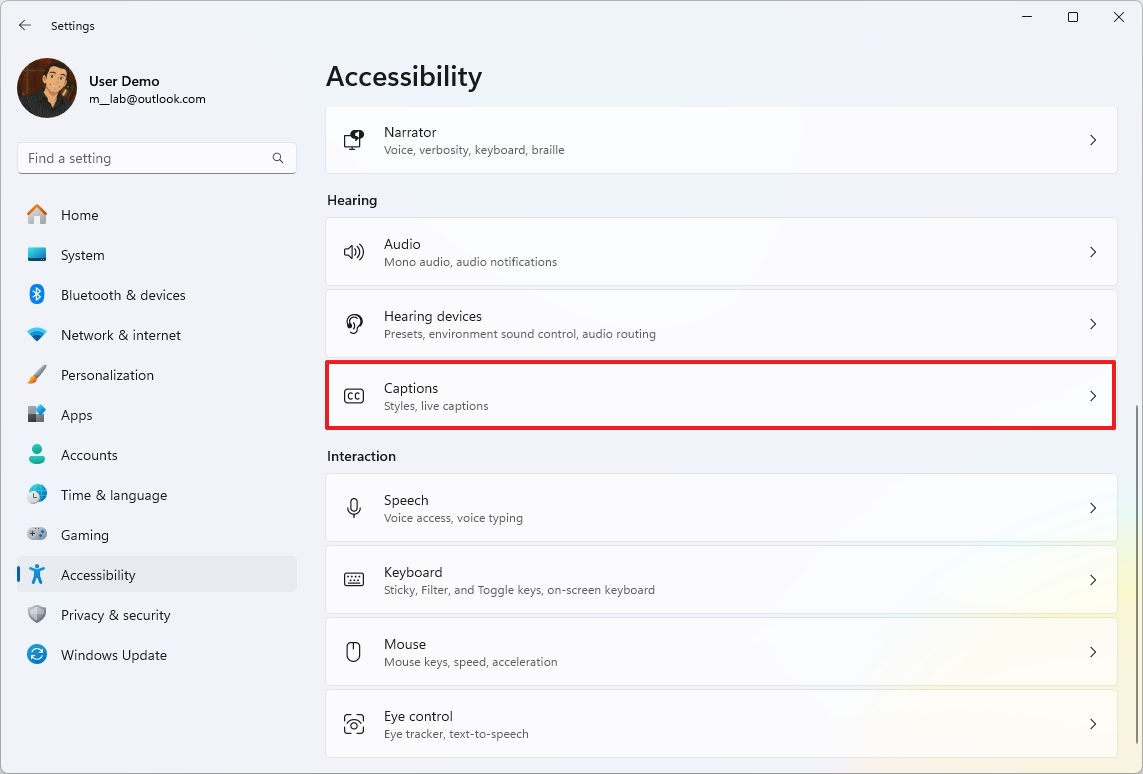
- Turn on the “Live Captions” toggle switch.

- Click the “Yes, continue” button (if applicable).
- Click the Continue button (if applicable).
Once you’ve finished the process, you can manage the feature using the keyboard shortcut “Windows key + Ctrl + L“. To illustrate, activating this feature allows your system to automatically create captions from any audio content using its built-in components.

As a tech enthusiast, I’d express it like this: I can work seamlessly with almost any kind of audio content out there – be it streaming from platforms like YouTube, saved locally on my device, discussions in virtual meetings, tunes from music apps, conversations in podcasts, or even sound effects in games.
4. Control your PC with voice commands
On Windows 11, it’s possible to manage your entire computer using only your voice, without needing a keyboard or mouse. This feature is integrated within the operating system itself and operates independently even when not connected to the internet, following an initial download of the relevant language files.
For those with restricted mobility or temporary injuries, this accessibility tool proves incredibly beneficial. However, it’s not just for them; anyone looking to enjoy a hands-free experience can also make use of it.
- Open Settings.
- Click on Accessibility.
- Click the “Speech” setting.
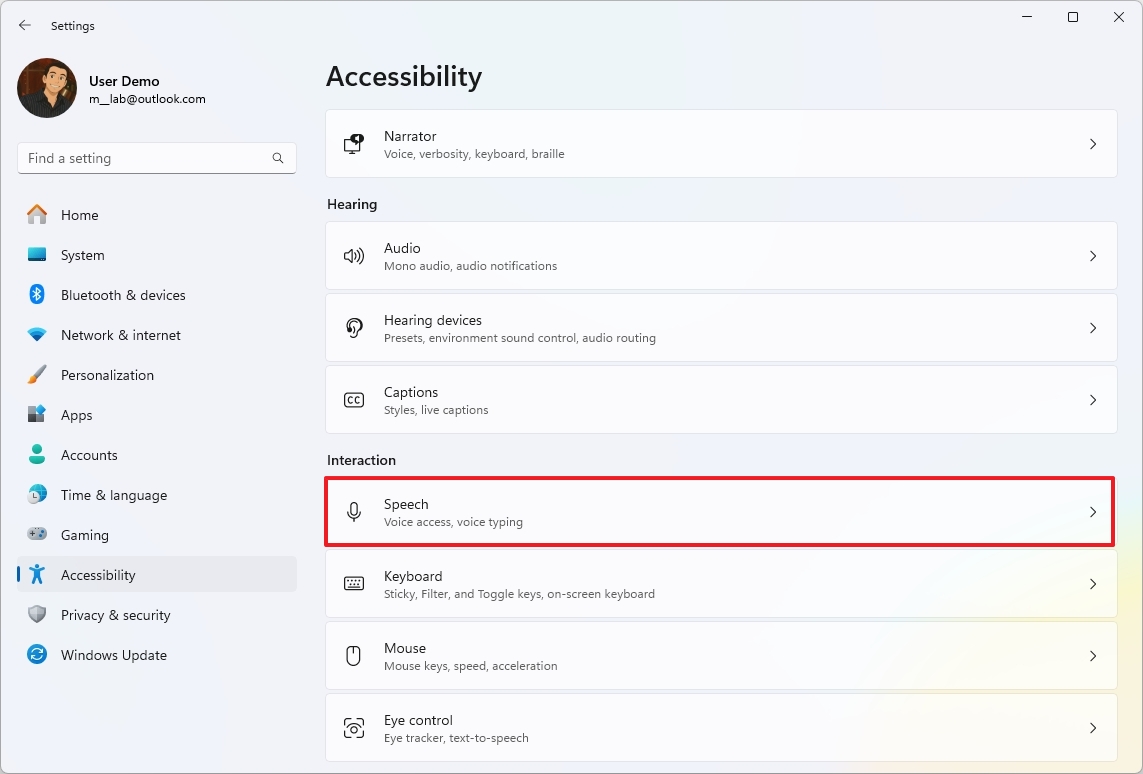
- Turn on the “Voice Access” toggle switch.
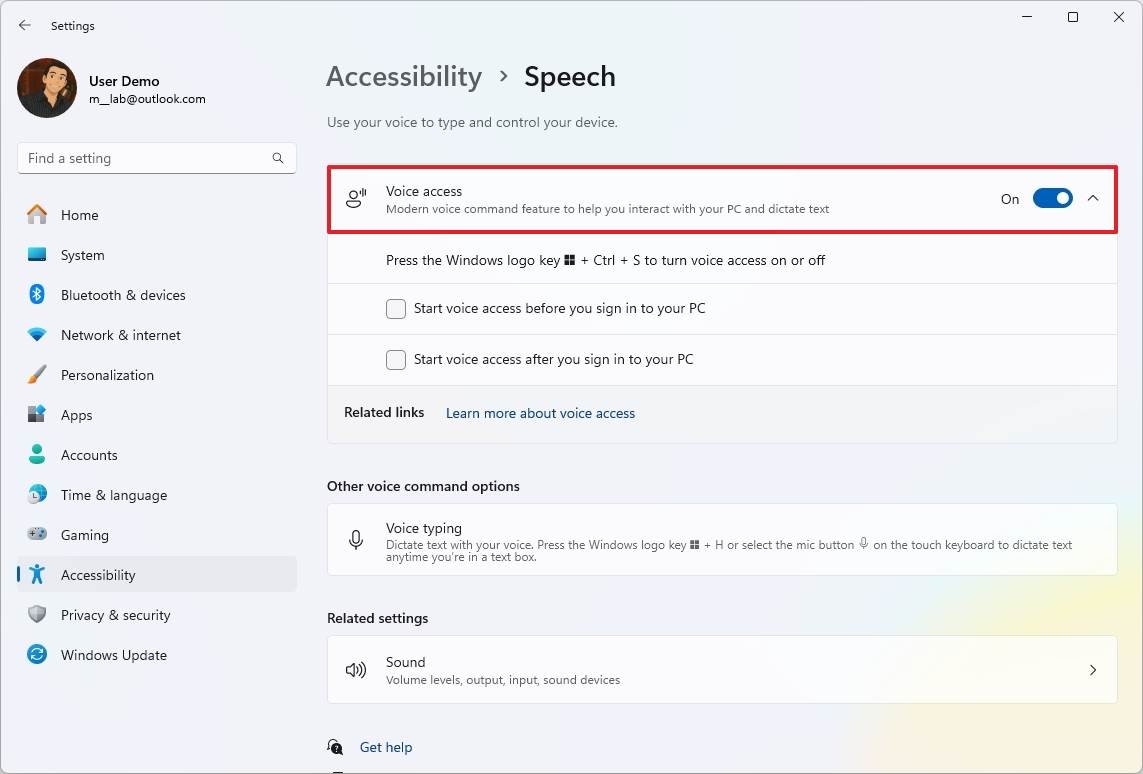
- Click the “I agree” button (if applicable).
- Set up your device’s microphone using the Voice Access Guide app.
1. Option A: Feel free to press the “Done” button if you’re ready to begin using the feature, or click the “Start guide” button to get a quick tutorial on Voice Access.
2. Option B: You may either tap the “Done” button and commence using the feature right away, or choose the “Start guide” button for an introduction to Voice Access before you start.
3. Option C: Clicking the “Done” button will let you dive straight into using the feature, while selecting the “Start guide” button offers a brief walkthrough of Voice Access before you begin.
4. Option D: If you’re eager to get started with the feature, click the “Done” button; if you’d like to learn more about it first, click the “Start guide” button for some basic instructions on Voice Access.
Say ‘Activate Voice Access’ to enable the microphone and communicate with the feature.
Here’s a more conversational rephrasing: “You have the ability to start, change between applications, open and close windows on your screen, organize your workspace, as well as carry out system functions such as turning off or rebooting your computer.
1. “Open the File Explorer” (instead of “Open File Explorer”)
2. “Navigate to Microsoft Edge” (instead of “Switch to Microsoft Edge”)
3. “Close this window” (instead of “Close window”)
4. “Take me to the desktop” (instead of “Go to desktop”)
5. “Power off the PC” (instead of “Shut down PC”)
These phrases are more natural and easy to understand, making them suitable for voice-controlled systems or when interacting with a user in a conversational manner.
Besides moving between different sections, you’re able to explore multiple components on your display such as menus, icons (representing buttons), hyperlinks, and file organizers.
Examples of Commands:
“Tap Begin,” “Move downwards,” “Display counts” (to show counts on clickable elements), “Tap the fifth one” (to choose the fifth option), and “Display a grid” (to improve cursor position accuracy).
Additionally, you have the ability to manipulate the cursor using spoken commands, enabling accurate clicks, double-clicks, right-clicks, and even drag-and-drop movements.
Examples of Commands:
1. “Press with your finger” (for single-click)
2. “Press and hold, then release” (for right-click)
3. “Quickly press twice” (for double-click)
4. “Move the cursor to a precise location” (for Mouse grid)
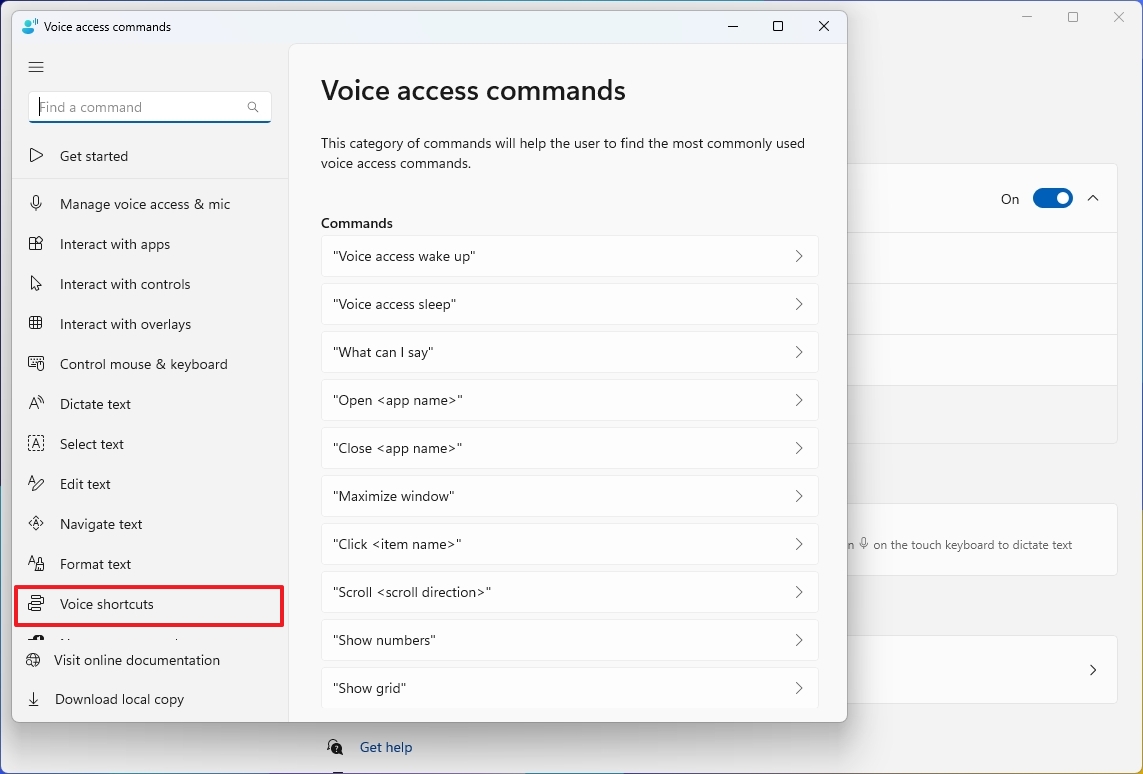
In the Voice Access tool, you’re welcome to utilize the “Help” option whenever you need assistance or a refresher on the available commands. Moreover, personalize your experience by setting up custom shortcuts for individual or multiple actions using the “Voice Shortcuts” feature.
5. Convert voice into text with dictation
Speech-to-text functionality enables you to transform your verbal expressions into written text within various text boxes on your computer, effortlessly.
Essentially, this tool allows you to speak your emails, texts, documents, searches, and more, instead of typing on a keyboard. This not only quickens the writing process but also offers an innovative solution to conventional typing methods.
To get started with Voice Typing, use these steps:
- Invoke the “Windows key + H” keyboard shortcut.
- Click the Microphone button to start dictation.
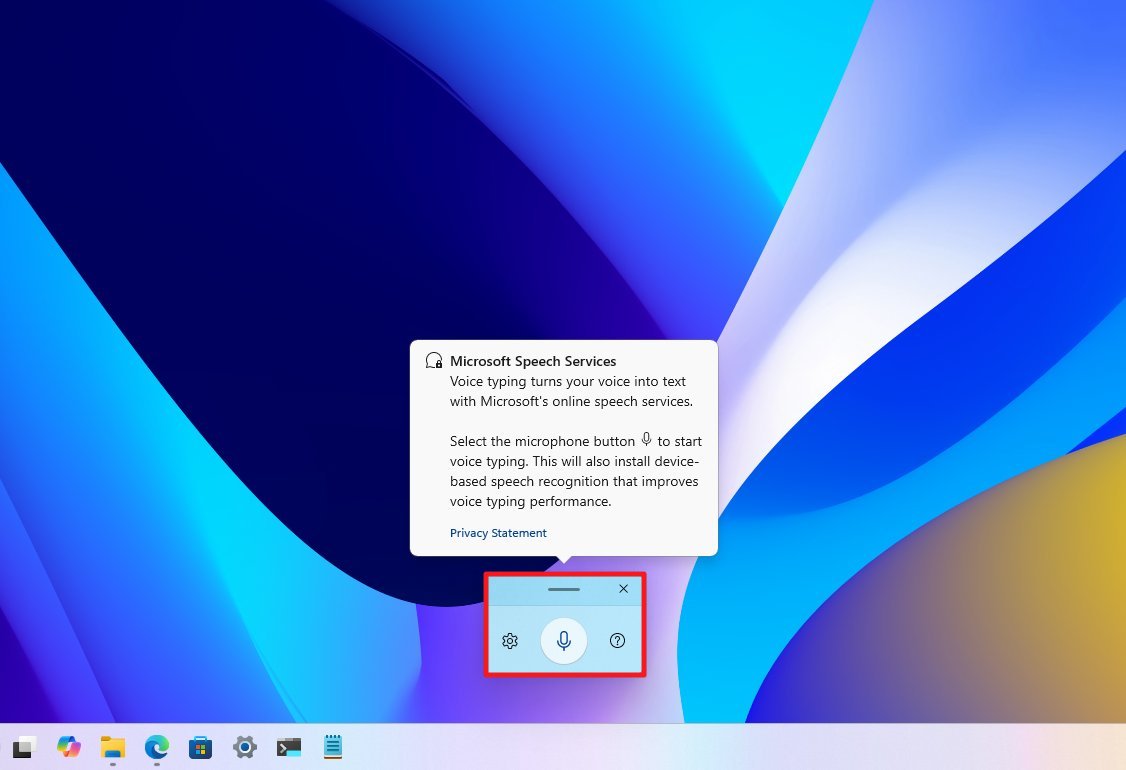
After you complete the steps, you can create text from voice on any application with a text field.
If you prefer, you could adjust your Voice Typing settings so that the function automatically activates whenever it recognizes you’re within a text box.
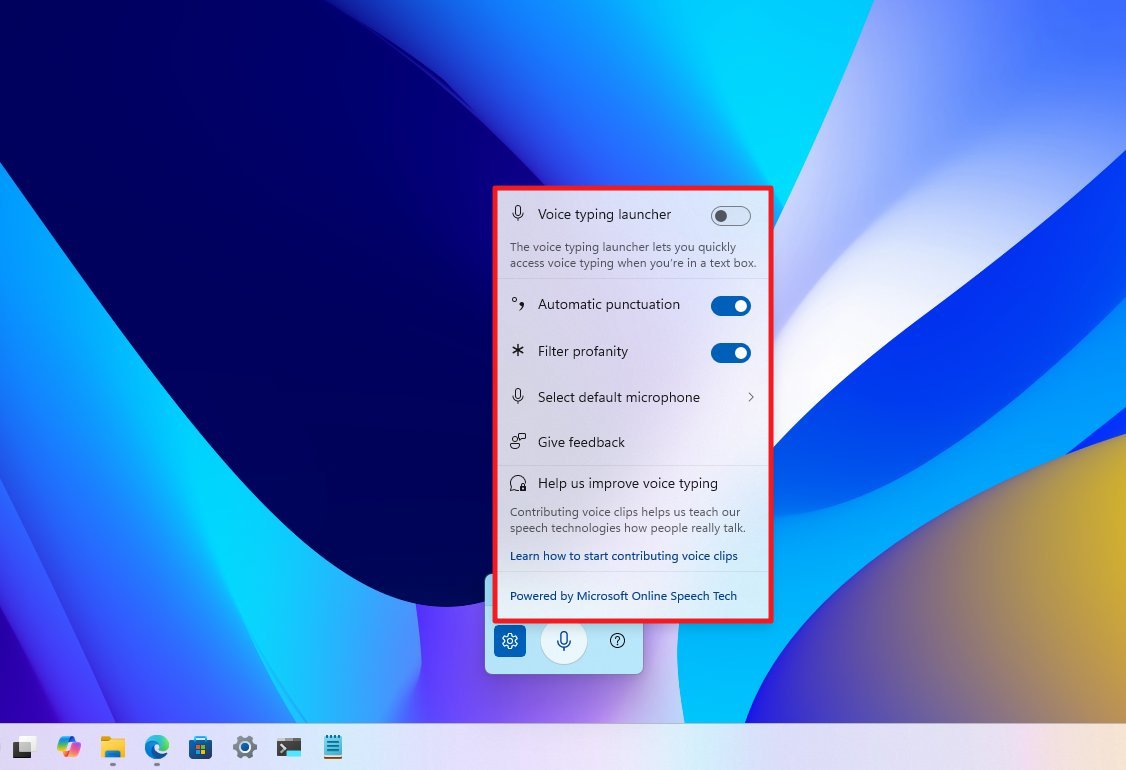
You can also turn on automatic punctuation and change the microphone source as needed.
6. Show scrollbar on all apps
Windows 11 has streamlined its design, with slimmer scrollbars that are typically concealed unless you move your cursor over the relevant section or start scrolling. This change aims to offer a sleeker, less crowded user interface, particularly for touchscreen devices.
On the other hand, some users may find the automatic hiding of scrollbars in Windows 11 disruptive or counterproductive. Consequently, Windows 11 offers a setting to keep scrollbars permanently visible.
To always show the scrollbar, use these steps:
- Open Settings.
- Click on Accessibility.
- Click the “Visual effects” setting.
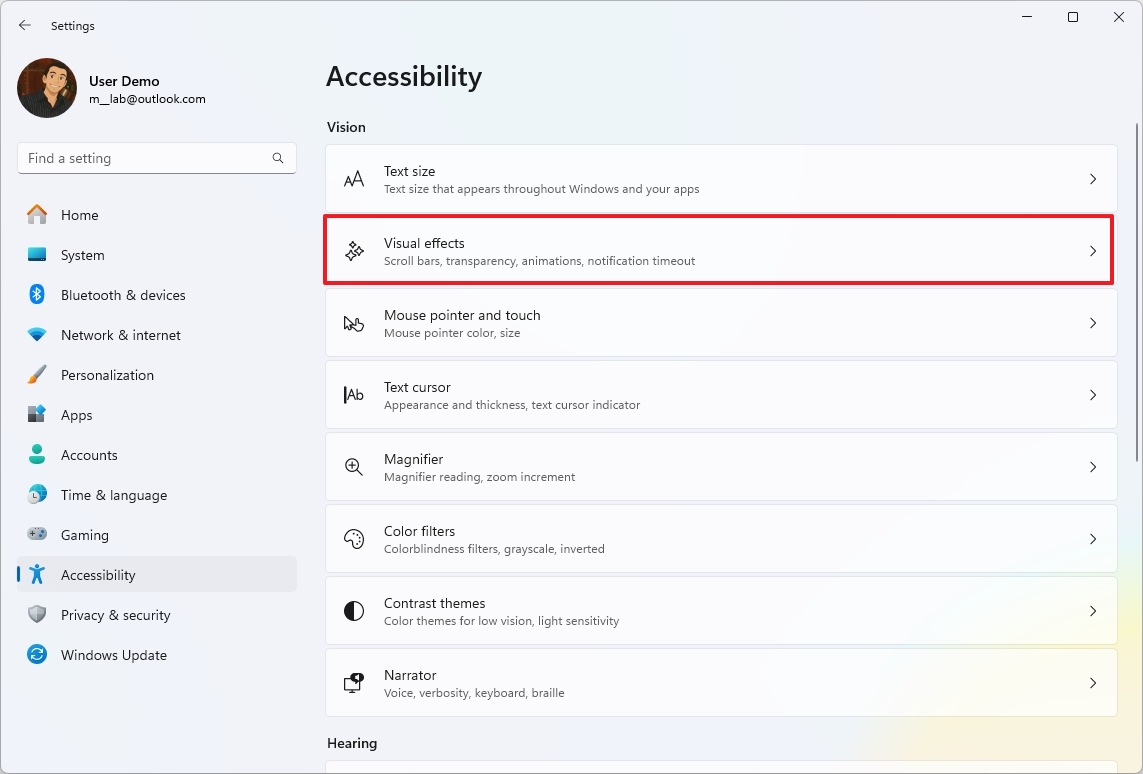
- Turn on the “Always show scrollbars” toggle switch.
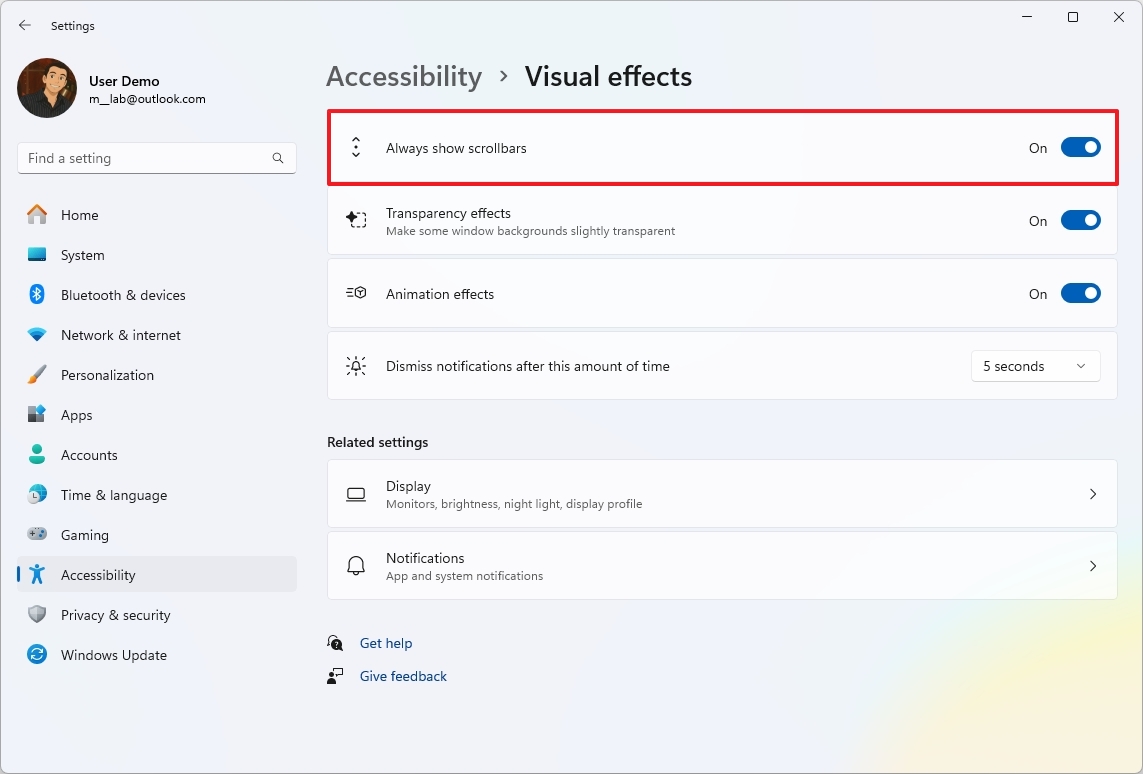
After finishing the required steps, applications such as File Explorer and Settings app will consistently display a scrollbar for easier navigation throughout the entire operating system.
7. Control keyboard sensitivity when typing
The Filter Keys function adjusts the responsiveness of your keyboard, offering choices to disregard or delay multiple key presses in quick succession.
This device is intended to aid people facing mobility difficulties, yet it can also enhance your typing efficiency if you tend to press keys unintentionally multiple times or struggle with maintaining key presses for the right length.
To change the filter keys settings on Windows 11, use these steps:
- Open Settings.
- Click on Accessibility.
- Click the “Keyboard” setting.
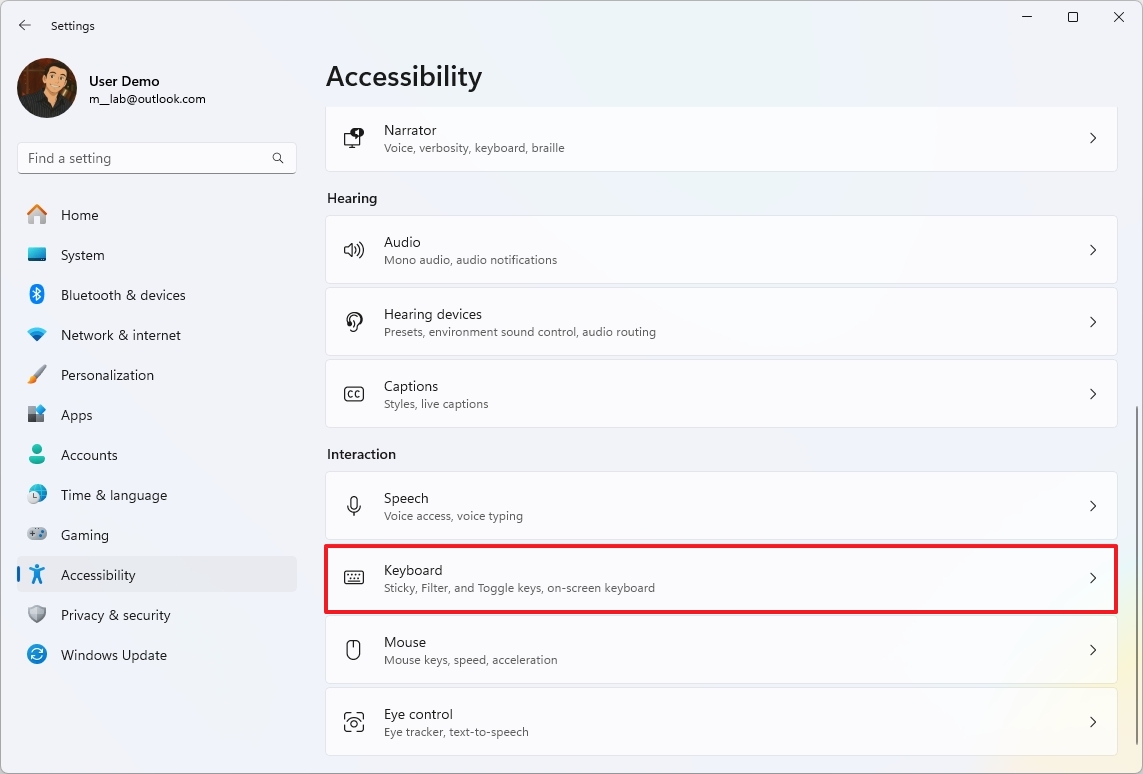
- Click on the “Filter keys” setting.
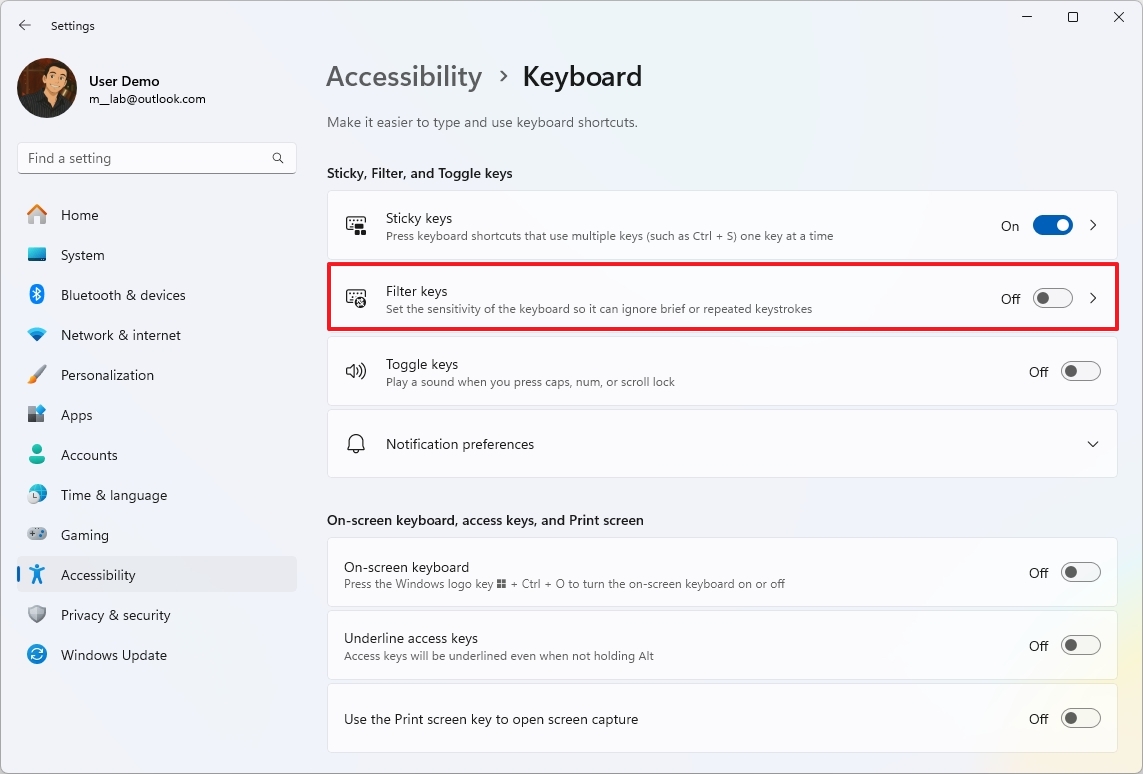
- Turn on the “Filter keys” toggle switch.
- Turn on the “Ignore quick keystrokes (slow keys)” toggle switch.
- Choose the time in seconds in the “Wait before accepting a keystroke” setting.
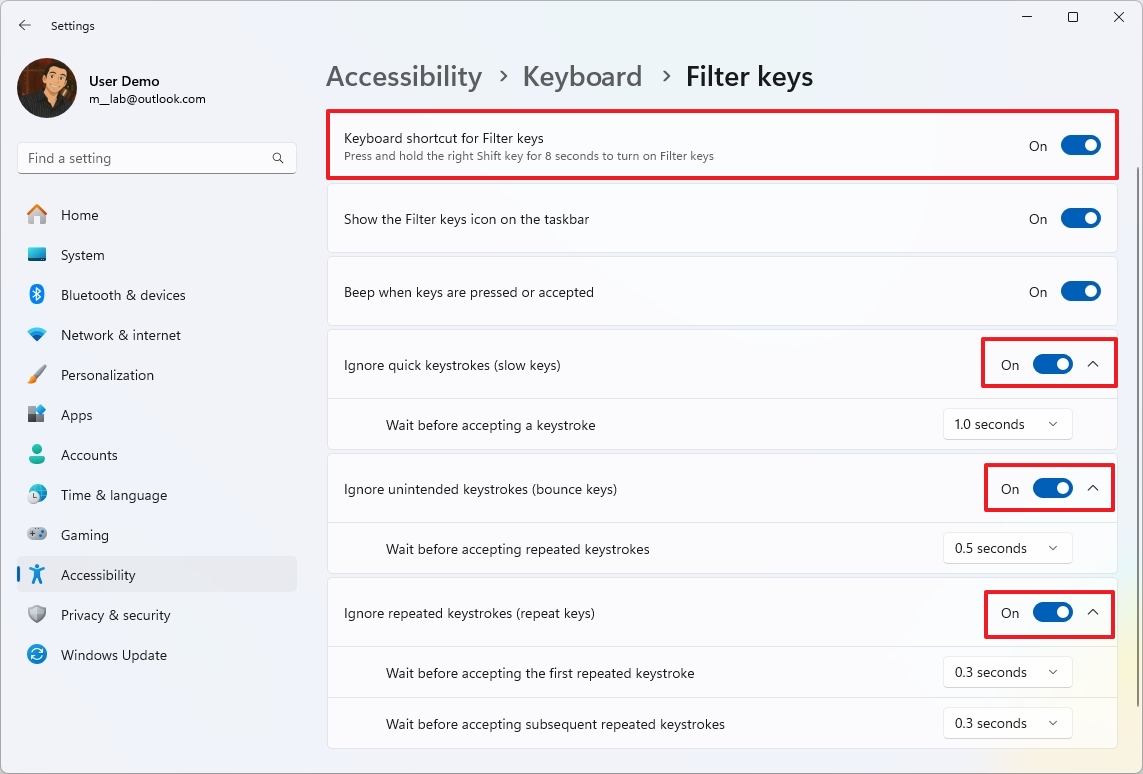
- Turn on the “Ignore unintended keystrokes (bounce keys)” toggle switch.
- Choose the time in seconds in the “Wait before accepting repeated keystrokes” setting.
- Turn on the “Ignore repeated keystrokes (repeated keys)” toggle switch.
- Choose the time in seconds in the “Wait before accepting the first repeated keystroke” setting.
- Choose the time in seconds in the “Wait before accepting subsequent repeated keystroke” setting.
To achieve the optimal setup, it’s crucial to tweak and experiment with the settings to find what works best for your specific requirements.
Have you often found yourself utilizing the accessibility features within Windows 11 to improve your overall user experience? Share your thoughts below.
More resources
Read More
- Gold Rate Forecast
- PI PREDICTION. PI cryptocurrency
- Rick and Morty Season 8: Release Date SHOCK!
- Discover the New Psion Subclasses in D&D’s Latest Unearthed Arcana!
- Linkin Park Albums in Order: Full Tracklists and Secrets Revealed
- Masters Toronto 2025: Everything You Need to Know
- We Loved Both of These Classic Sci-Fi Films (But They’re Pretty Much the Same Movie)
- Mission: Impossible 8 Reveals Shocking Truth But Leaves Fans with Unanswered Questions!
- SteelSeries reveals new Arctis Nova 3 Wireless headset series for Xbox, PlayStation, Nintendo Switch, and PC
- Discover Ryan Gosling & Emma Stone’s Hidden Movie Trilogy You Never Knew About!
2025-06-05 14:10