
On Windows 11, if you’re using OneDrive, you may already be acquainted with its primary functions like syncing files across devices and backing up crucial data in the cloud. Yet, there are several hidden features within this cloud storage service that can enhance productivity, boost privacy, declutter, and simplify file management.
OneDrive provides a greater level of personalization than many people might think, offering features like adjusting folder colors, recovering old file versions, silencing annoying notifications, and even using AI to label photos – all to give you more control over your digital space.
In this step-by-step tutorial, I’ll showcase some underappreciated functions that you ought to master when utilizing OneDrive on Windows 11.
7 features you probably didn’t know about OneDrive
These are some of the features you may not know that can improve your experience in OneDrive.
1. Organize OneDrive with custom folder colors
While giving a color to a folder might seem like a trivial design aspect, it actually offers advantages in terms of organization, efficiency, and visual understanding, particularly for folders containing numerous documents.
To set a color for the folder, use these steps:
- Open File Explorer.
- Click on the OneDrive folder from the left pane.
- Right-click the folder you want to colorize.
- Select the OneDrive menu and choose the Folder color option.
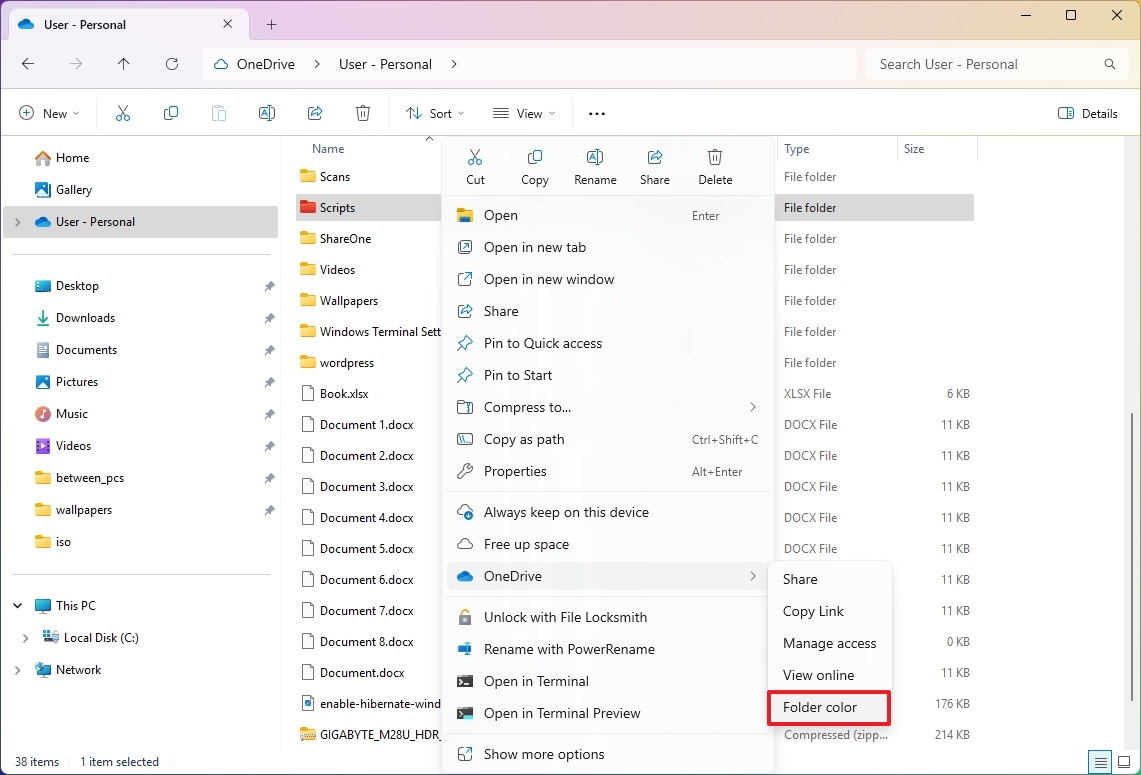
- Select the color for the folder.
- Click the Apply button.

Once you complete the steps, the folder icon will be updated with the color you specified.
It seems that the feature to customize folder colors is accessible via the web interface, but I was unable to locate it within my individual account. It appears others are experiencing the same issue.
2. Silence “On this Day” reminders
The “On This Day” function is set up to display pictures and videos you might have captured on the same date in past years for you to reminisce.
While this feature might spark a sense of nostalgia by displaying old digital content from the same date as previous years, it can become annoying due to the persistent daily reminders to view this content. Additionally, even if you’re already utilizing the Photos app with OneDrive integration, these notifications will always direct you to the web-based version of the cloud storage service when opened.
Should you find these notifications becoming bothersome, simply disable this feature by following these straightforward steps instead:
just follow these easy steps.
- Click the OneDrive icon in the System Tray.
- Click the Settings button.
- Click the Settings option one more time.

- Click on Notifications.
- Turn off the “Notify me when ‘On this day’ memories are available” toggle switch.
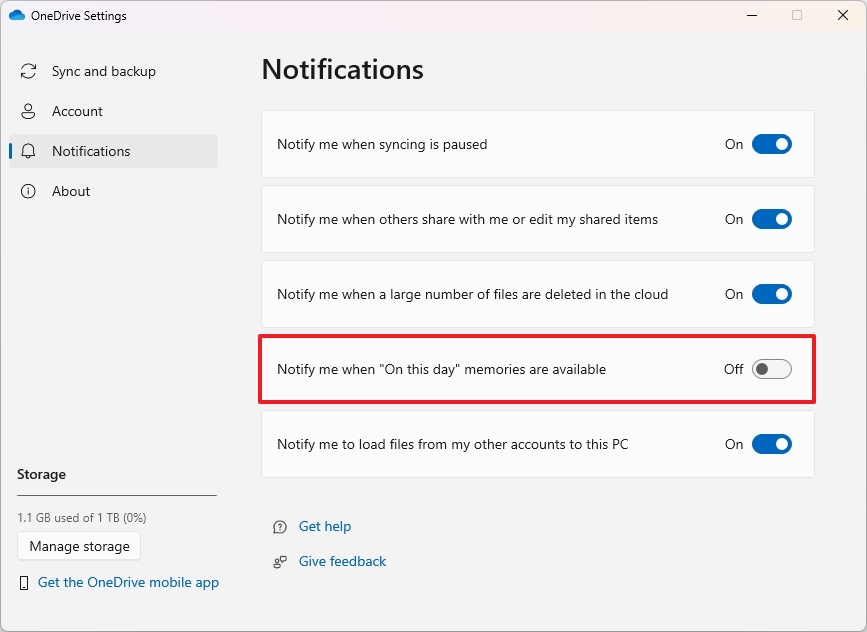
Once you’ve finished the process, you won’t receive any more notifications about this specific OneDrive feature.
You can also change this setting from the web, more specifically from the Notifications page.
3. Disable AI-powered photo tagging
With AI technology, OneDrive automatically sorts and labels your photos by their content, such as people or objects, making it simpler for you to locate specific images. But worry not! If you prefer keeping your images private from AI analysis, you have the option to turn off these features.
To disable photo tagging in OneDrive, use these steps:
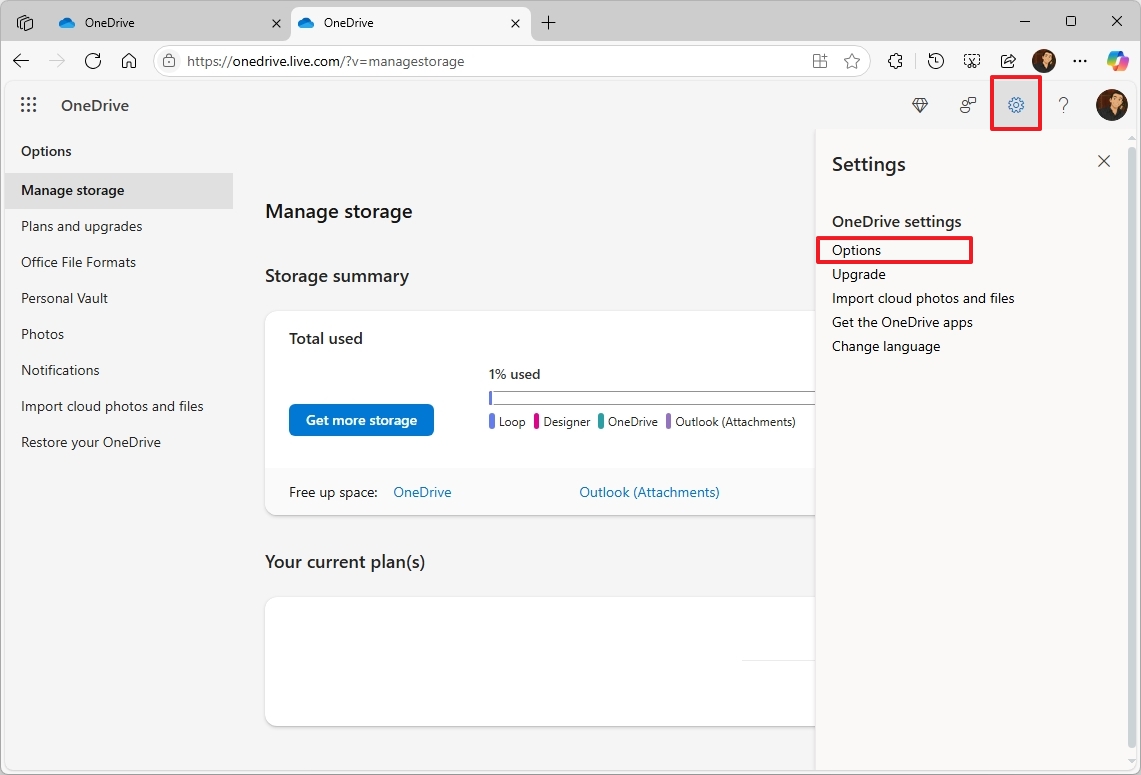
- Open OneDrive (web).
- Click the Settings button on the top-right.
- Click on Options.
- Click on Photos from the left pane.
- Turn off the “Use tags to find and organize photos” toggle switch to prevent AI from adding related tags to your pictures.
- Turn off the “Use AI to find and organize photos” toggle switch to prevent AI from scanning your images for faces.
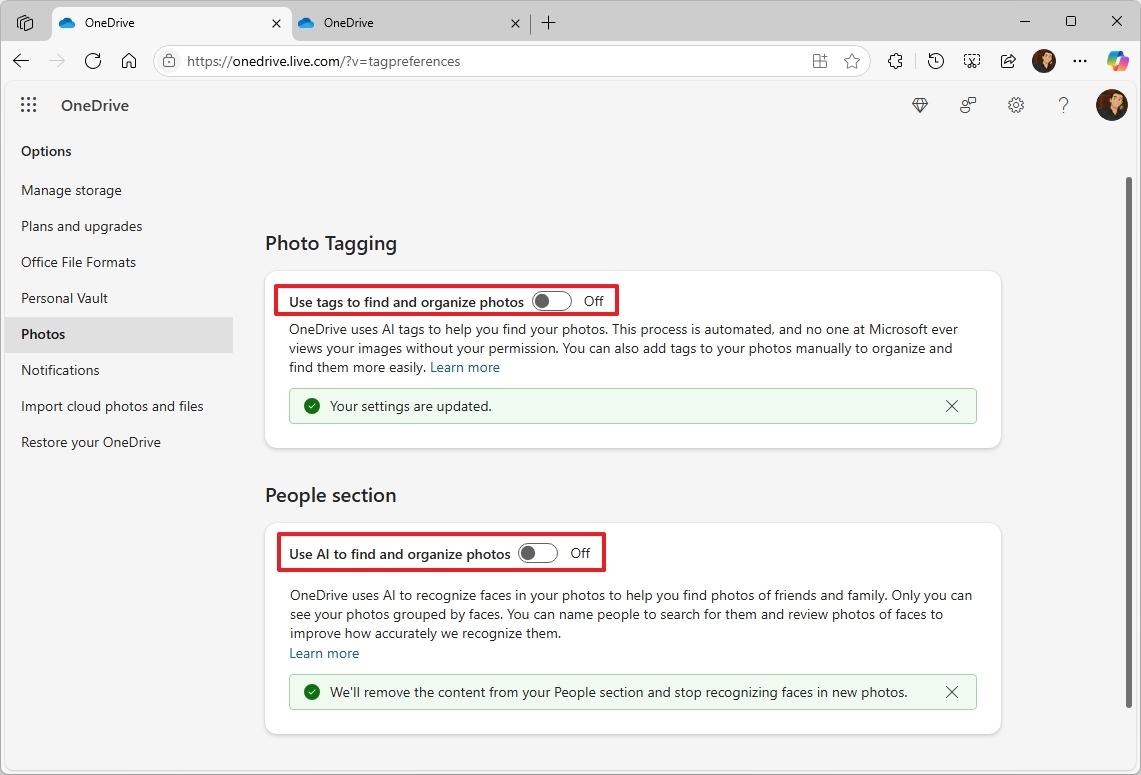
Once you complete the steps, OneDrive will stop using AI to tag images and faces on your pictures.
Turning off this particular feature might impact your ability to find specific items or people within the cloud-based content when conducting searches.
4. Import files from Google Drive or Dropbox
Should you opt for OneDrive as your sole online storage solution, it can help transfer your files from Google Drive and Dropbox (though not directly from iCloud).
To import your files from other cloud storage providers, use these steps:
- Open OneDrive (web).
- Click the Settings button on the top-right.
- Click on Options.
- Click on Import cloud photos and files from the left pane.
- (Option 1) Click the “Connect to Google Drive” option.
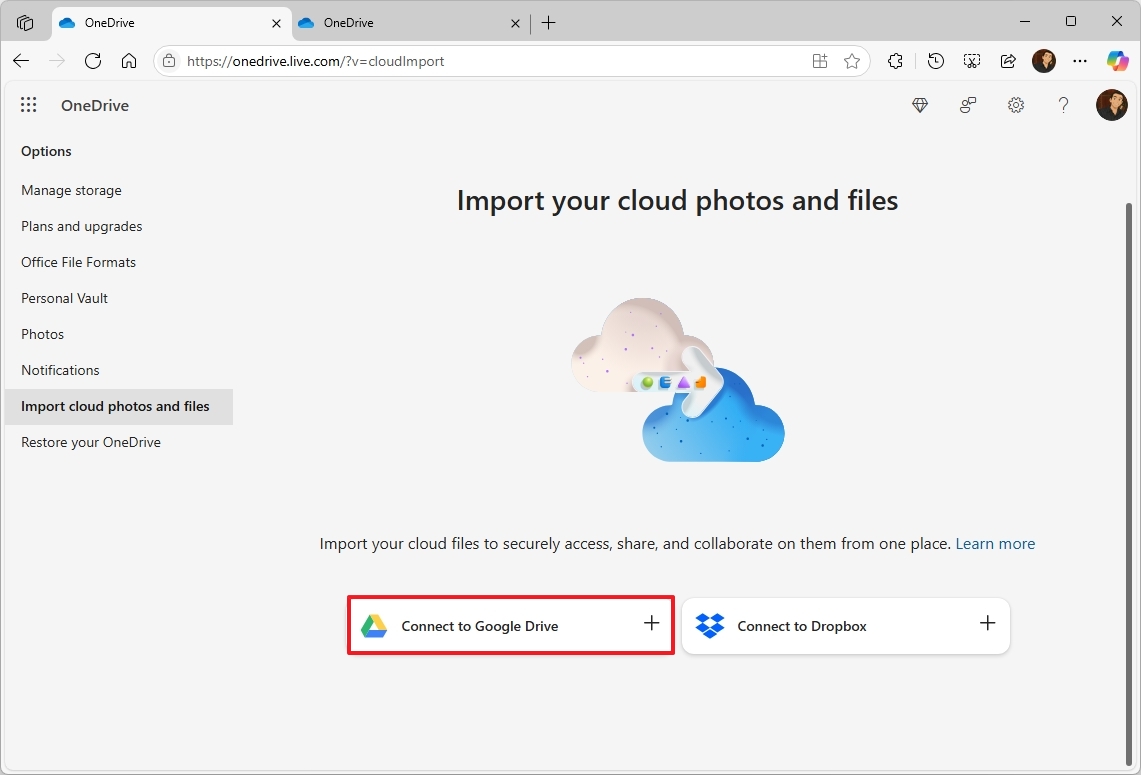
- (Option 2) Click the “Connect to Dropbox” option.
- Continue with the on-screen directions to complete the transfer.
As a tech-savvy individual, here’s what you’ll need to do: Sign into your account with your preferred cloud service, then grant Microsoft 365 the necessary permissions to transfer your files from their platform to OneDrive.
Furthermore, this process will merely create a duplicate of your files. The originals will continue to reside safely within your other storage service.
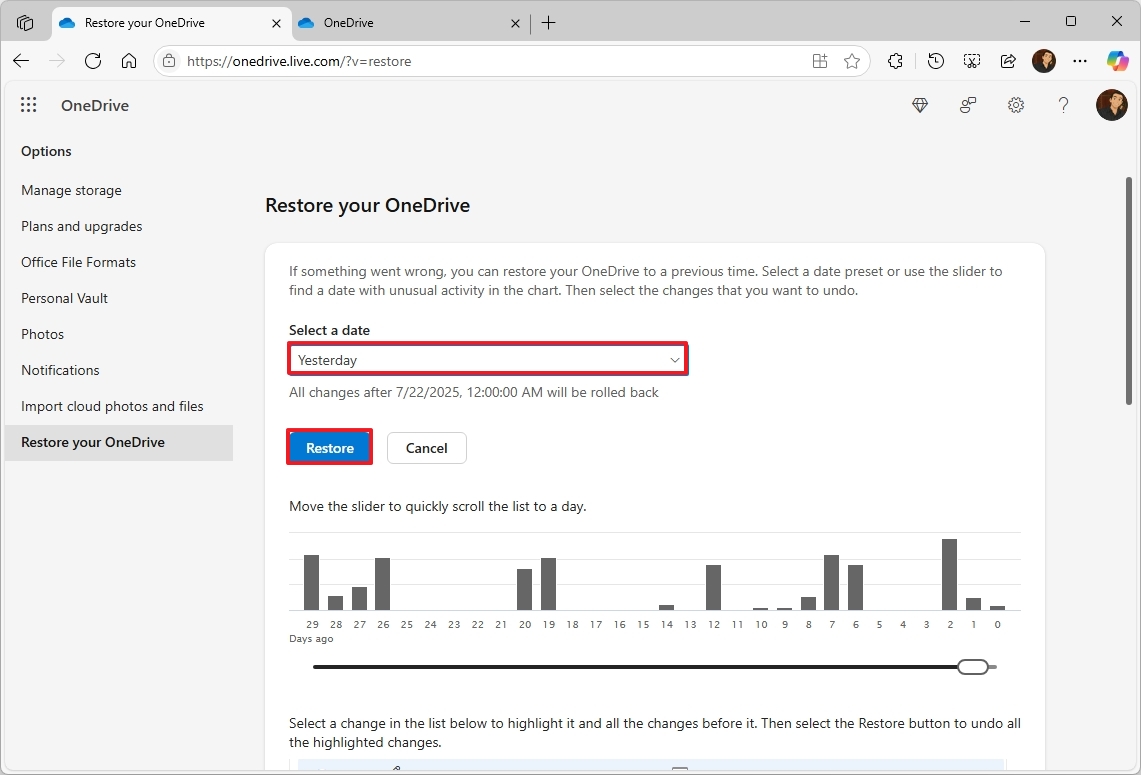
5. Use OneDrive’s account restore tool
As a researcher, I’ve discovered an additional method for data recovery beyond just retrieving deleted files from the OneDrive Recycle Bin. Microsoft provides a restore tool that enables me to revert all changes back to a specific earlier point in time, ensuring I don’t lose any valuable data.
This choice is often useful when there’s an issue with OneDrive, and you need to revert your storage back to a prior moment.
To restore OneDrive to a previous state, use these steps:
- Open OneDrive (web).
- Click the Settings button on the top-right.
- Click on Options.
- Click on Restore your OneDrive from the left pane.
- Select the date (such as yesterday, one week ago, three weeks ago, or custom) from the available settings.
- Click the Restore button.
- Continue with the on-screen directions to complete the restoration (if applicable).
Once you complete the steps, the changes will be restored on your OneDrive account.
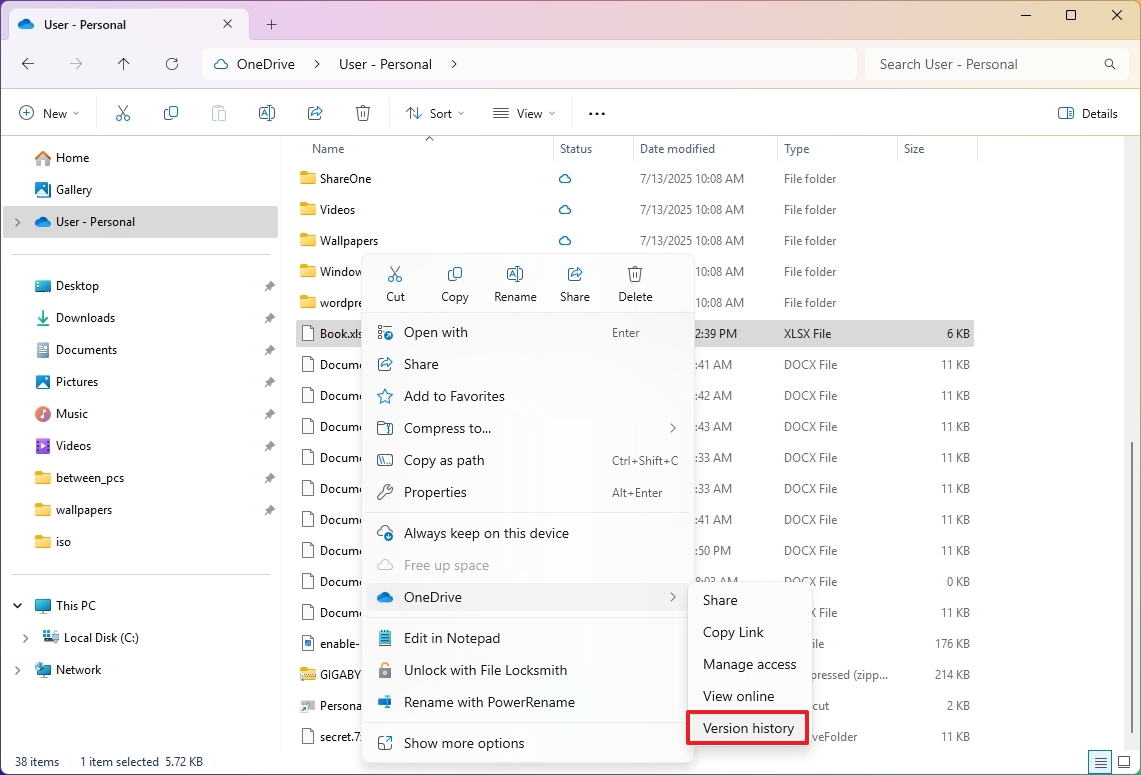
6. Revert via file version history
OneDrive keeps multiple previous versions of your files, allowing you to revert to an older state.
To access the file history and restore a previous version, use these steps:
- Open File Explorer.
- Click on the OneDrive folder from the left pane.
- Right-click the file you want to restore a previous version.
- Select the OneDrive menu and choose the Version history option.
- (Optional) Click the View online option to review the file before restoring.
- Click the menu (three dots) button and choose the Restore option for the revision to recover.
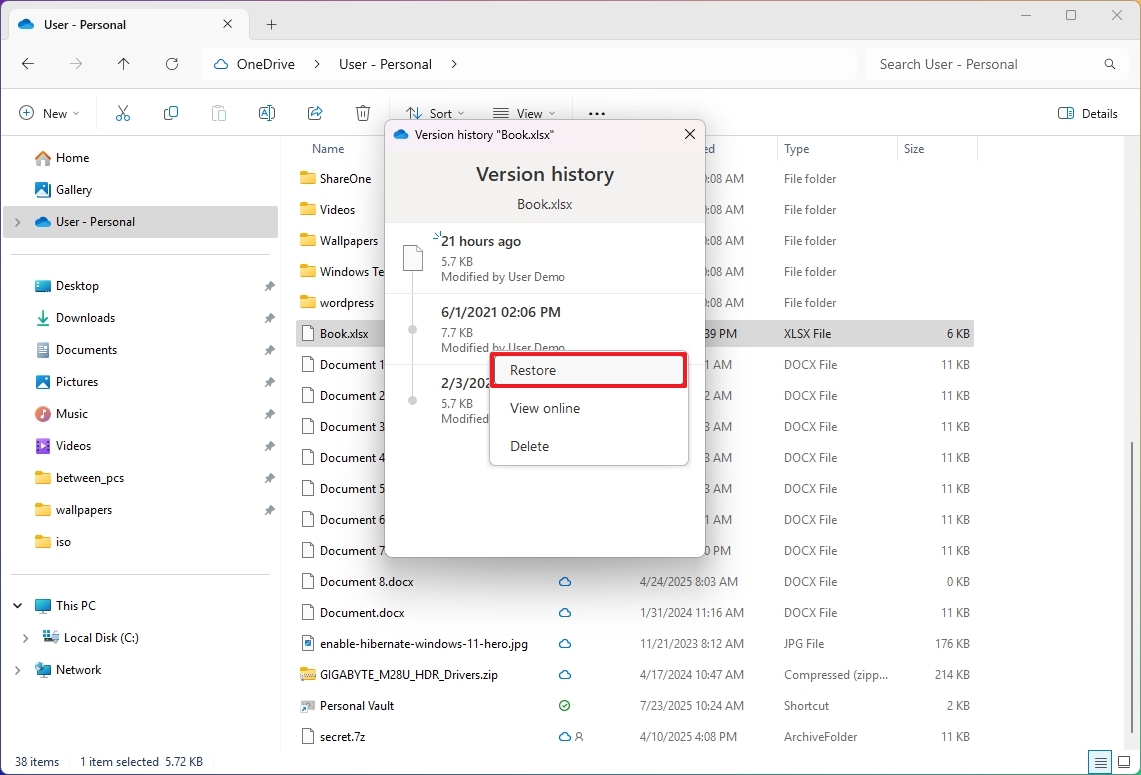
Once you finish the procedures, the chosen file will overwrite the current one, but don’t worry as you can save the old version following those same steps.
To ensure smooth comparison between your files without any unexpected changes, it would be wise to create a backup or duplicate of them prior to attempting to revert to an earlier version.
7. Secure sensitive files in Personal Vault
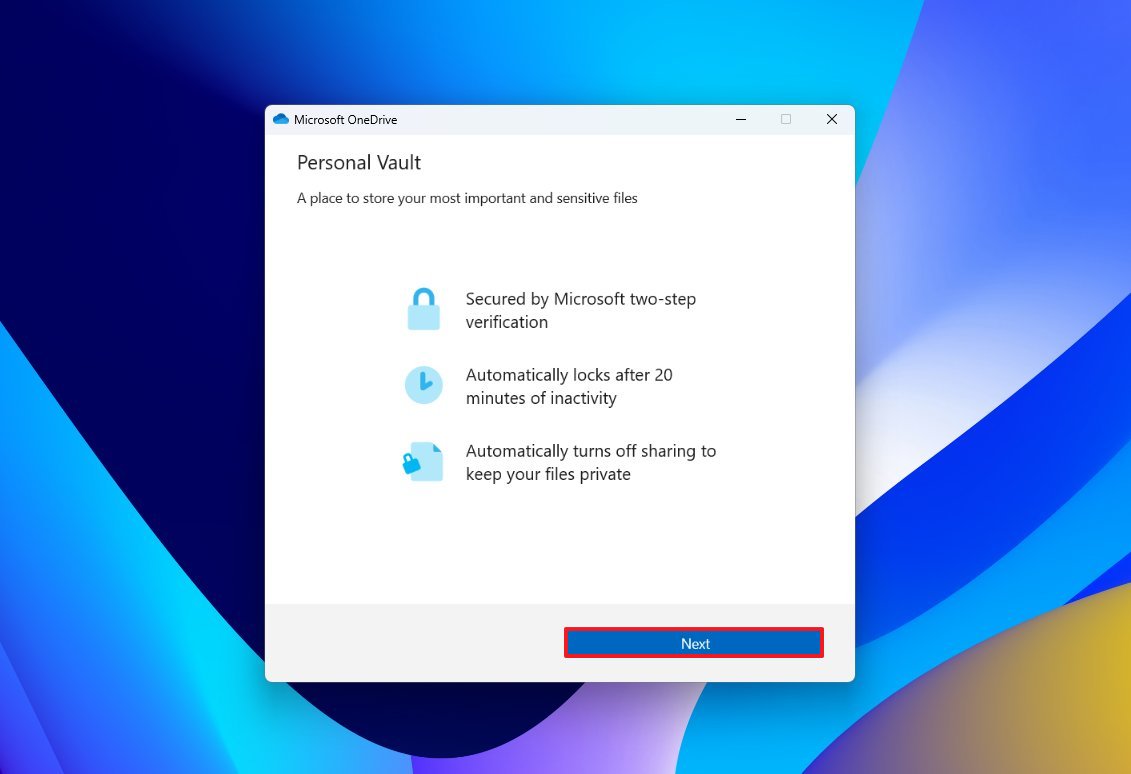
Your OneDrive Personal Vault serves as a secure zone within your account for storing confidential files like documents, personal records, photos, etc. This space is designed with extra protection, ensuring sensitive data is encrypted during upload and reinforced by more advanced security measures such as two-step verification, in addition to the regular sign-in procedure.
If you often save crucial data on cloud storage, it would be more suitable for you to utilize the Vault function rather than just placing files within the primary folder.
You can use the Personal Vault at no cost, but it allows storage of just five files. To access unlimited file uploads, consider getting a Microsoft 365 subscription instead.
To get started with the OneDrive Personal Vault, use these steps:
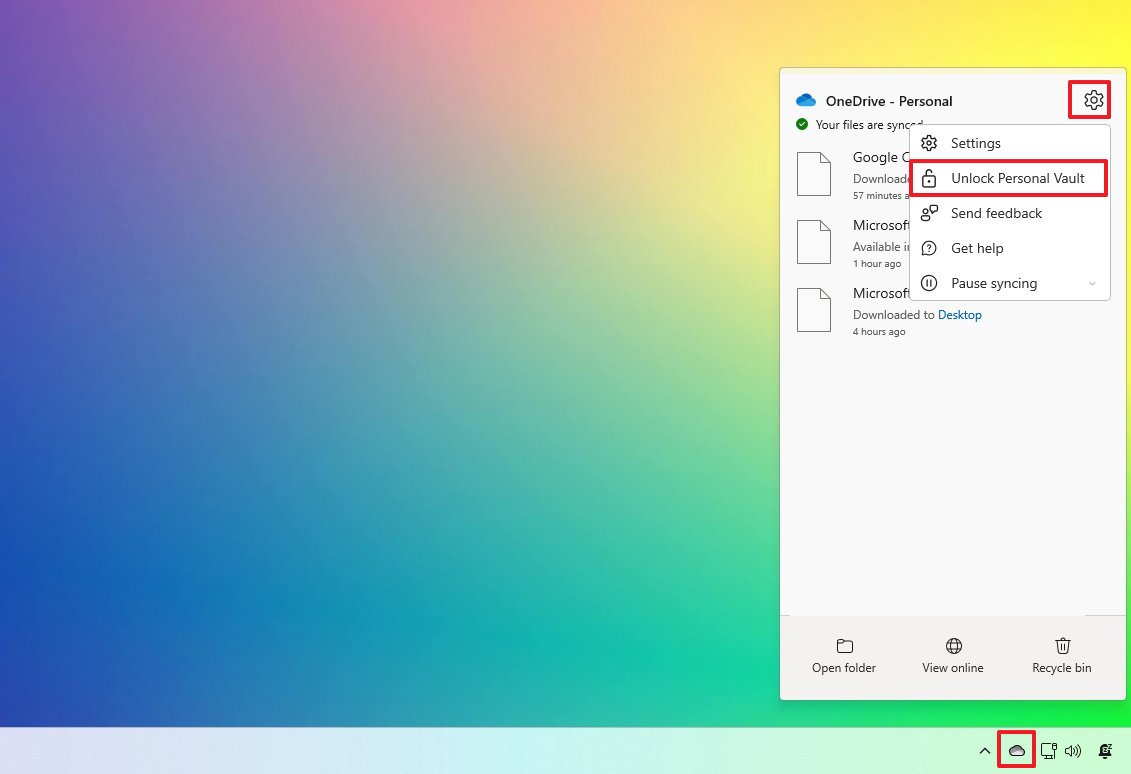
- Click the OneDrive icon in the System Tray.
- Click the Settings button.
- Click the Unlock Personal Vault option.
- Click the Next button.
- Click the Allow button.

- Sign in with your Microsoft account.
- Continue with the on-screen directions (if applicable).
After finishing these tasks, you’ll be ready to transfer files in the secure section of OneDrive.
When the safe is opened, it will automatically secure itself after 20 minutes of no action, but you can adjust this duration from the “OneDrive Settings” > “Accounts” page. The “Lock Personal Vault after” setting enables you to extend the unlocked period for up to four hours.
More resources
Read More
- What Song Is In The New Supergirl Trailer (& What It Means For The DC Movie)
- Why is Tech Jacket gender-swapped in Invincible season 4 and who voices her?
- Highly Anticipated Strategy RPG Finally Sets Release Date (And It’s Soon)
- TV legend Carol Kirkwood reveals the reasons why she decided to retire after 28 years with BBC
- Unforgotten legend Nicola Walker stars in first look at all-new “outrageously witty” comedy drama series
- Grab These Resident Evil PSN Avatars for Free This Month
- Gold’s March Madness: Plumbing, Panic, and Polish Central Banks
- Whales, Channels, and the Inevitable Dance of Folly
- The War Film Harrison Ford Completely Disowned Finally Returns to Streaming – “A Terrible Experience”
- Steam Giving Away Two PC Games for Free for Next 72 Hours
2025-07-24 14:40