In following these steps to connect your Windows 10 or 11 PC to the shared folder in your NAS (Network Attached Storage), you’re embarking on a journey that will transform the way you manage and share files within your home network.
In the realm of Windows 11, you have the ability to transform your computer, or any computer for that matter, into a Network Attached Storage (NAS), allowing you to share files and folders across the network with other users.
As a tech enthusiast, I’d put it this way: A Network Attached Storage (NAS) is a specialized device tailored for data storage and sharing across a network. Typically, you can transform an old computer or server into a file server by installing free NAS software like TrueNAS, or opt for a dedicated NAS from brands like Synology. Yet, it’s worth noting that you can also customize most Windows computers to function as Network-Attached Storage using its built-in file-sharing features.
In this tutorial, I’ll walk you through the process of transforming your Windows 11 PC into a Network Attached Storage (NAS) device. While it’s technically possible to use any computer for this task, I advise against setting up a laptop for such a project.
How to turn your PC into NAS on Windows 11
To transform your desktop computer into a Network-Attached Storage (NAS) device, follow these steps:
Connect a secondary drive
Although you can always share files from the main drive, I always recommend setting up secondary storage to store and share files.
If you’re thinking about transforming your gadget into something more Network Attached Storage (NAS) -oriented, it would be optimal to install an internal hard drive for the task.
To make sure that external USB drives are accessible, it is important to keep them continually connected and online, as users will not be able to retrieve data from them if they are disconnected.
In addition to Windows 11, the Storage Space function is available. This feature lets you merge multiple drives to create a storage solution with backup capabilities. Although it can be utilized in a file server setup, I advise against using it for critical data due to potential performance concerns that might arise. Generally speaking, Storage Spaces are more suitable for tasks like archiving, such as saving a backup of your files.
Configure a static IP address
To ensure smooth operation of your computer as a Network Attached Storage (NAS), it’s advisable to assign a fixed IP address to the device instead of relying on automatic settings from the Dynamic Host Configuration Protocol (DHCP) server, typically your router. This is because these automatic settings can change at any time. If they do, other devices in your network might struggle to access the files on your Windows 11 computer acting as a file server.
While it’s not compulsory, we recommend using an Ethernet connection for the best performance, as it typically provides faster speeds and greater reliability compared to wireless (Wi-Fi) connections.
To configure a static IP address on Windows 11, use these steps:
- Open Settings.
- Click on Network & internet.
- Click the Ethernet page on the right side.
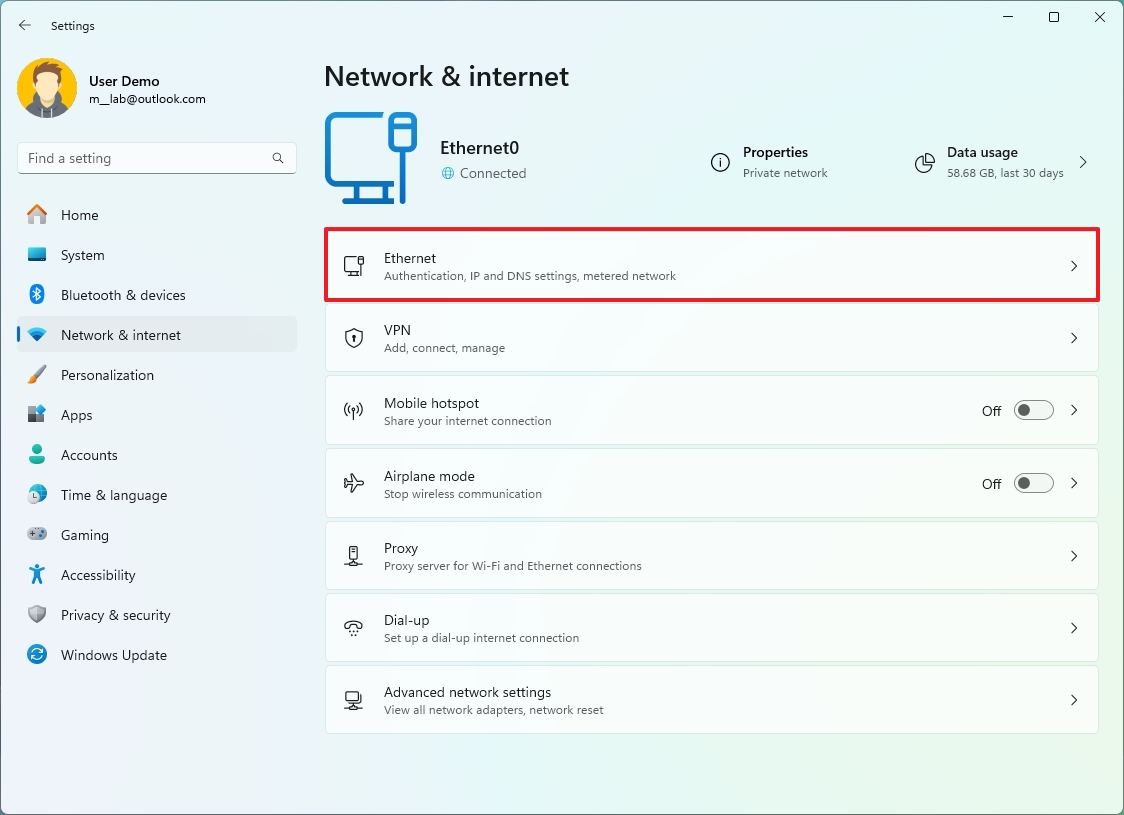
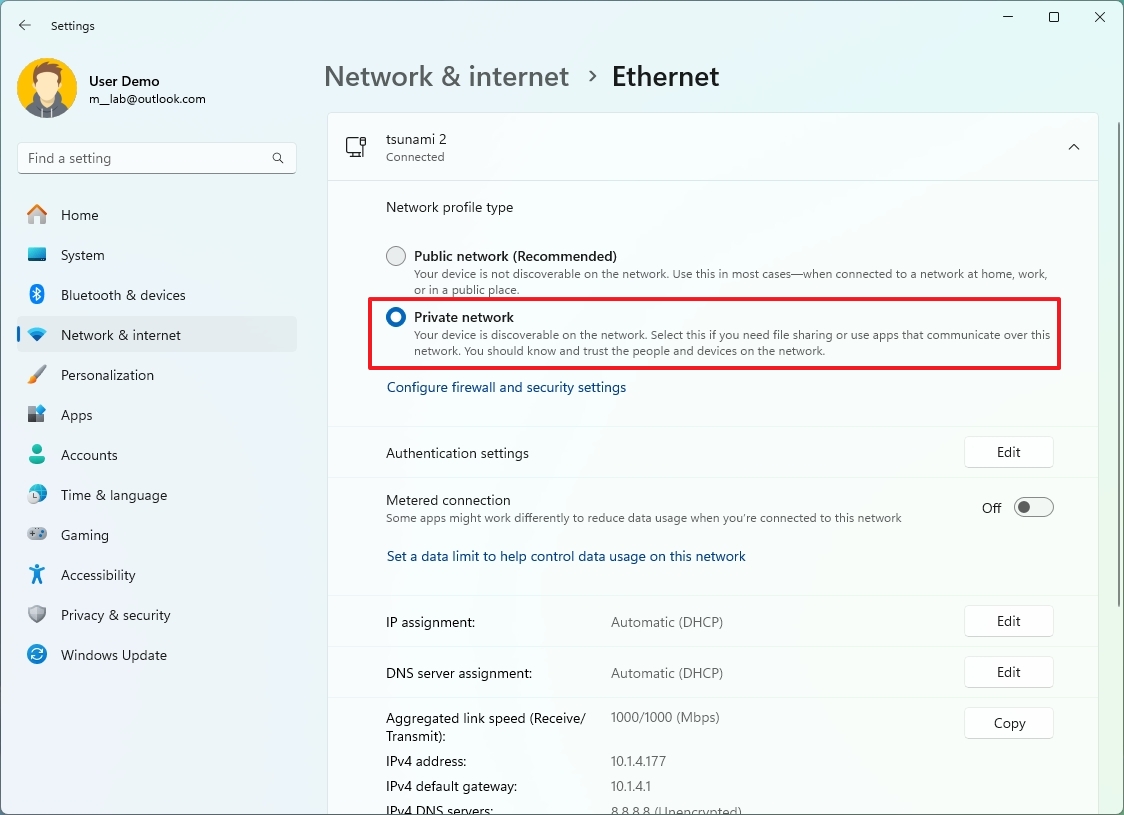
- Choose the Private network option to make the NAS discoverable in the network.
- Click the Edit button in the “IP assignment” setting.
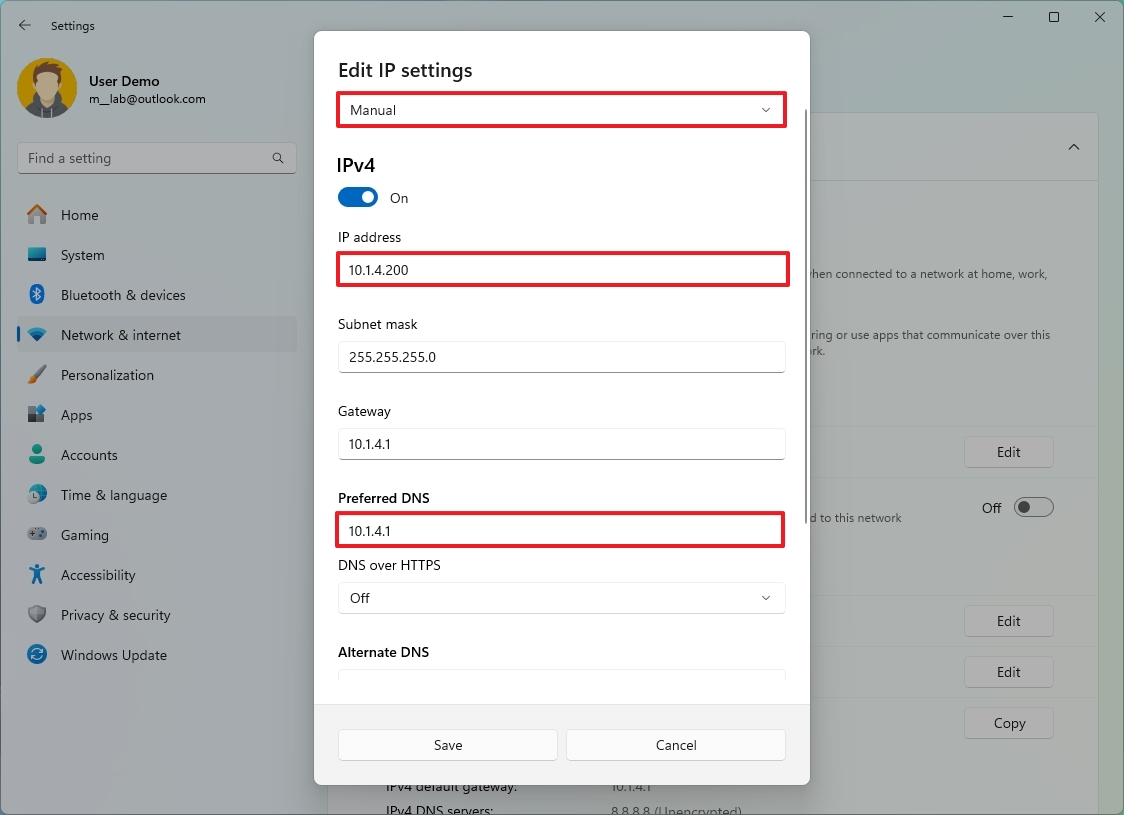
- Choose the Manually option.
- Click the OK button.
- Turn on the IPv4 toggle switch.
- Confirm the new static IP address for the device. For example, 10.1.4.200.
- Quick note: You have to choose an address that is outside of the DHCP scope. Otherwise, the DHCP may assign the address to another device, causing networking conflicts. You can confirm or change the address assignment range on your router or the device acting as the DHCP server.
- Confirm the Subnet mask for the network. For example, 255.255.255.0.
- Confirm the Gateway address, which is typically the address of the router. For example, 10.1.4.1.
- Confirm the Preferred DNS address, which is also usually the address of the router. For example, 10.1.4.1.
- Quick note: If you set the router’s address, you don’t have to worry about adding an alternate DNS address.
- Click the Save button.
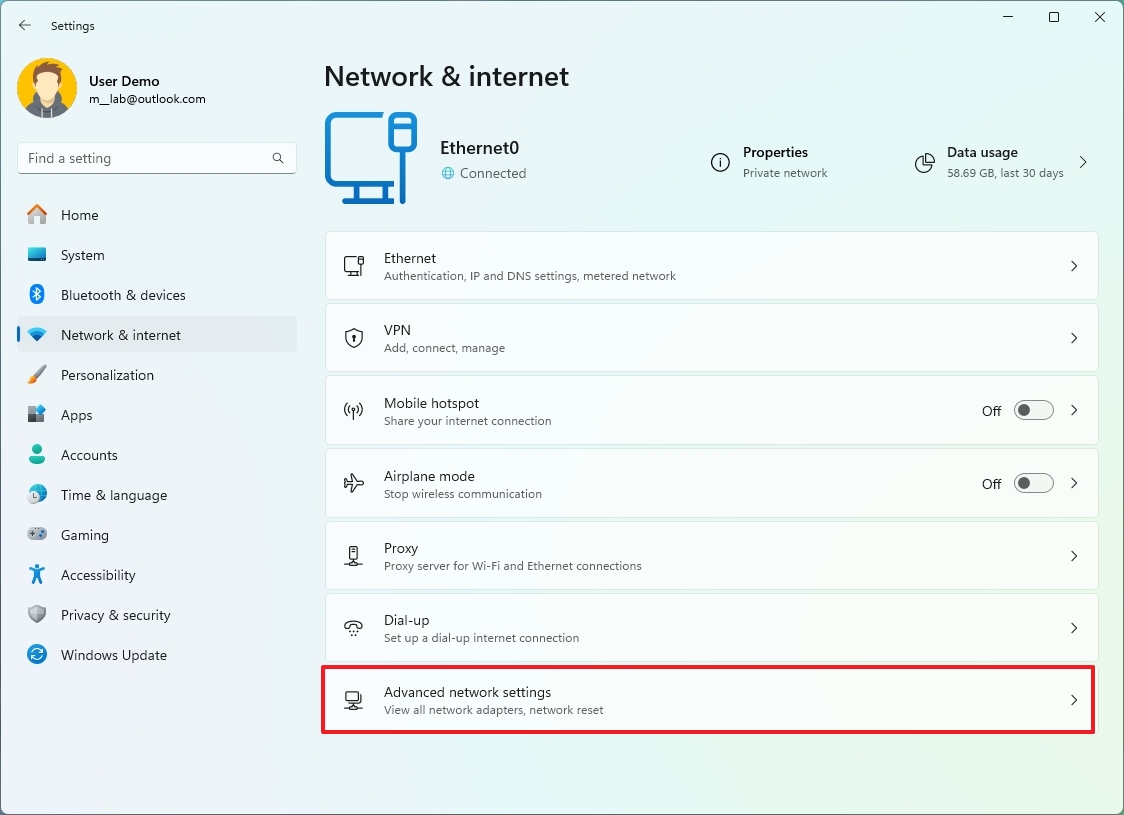
- Click the back button to open the “Network & internet” page again.
- Click on Advanced network settings.
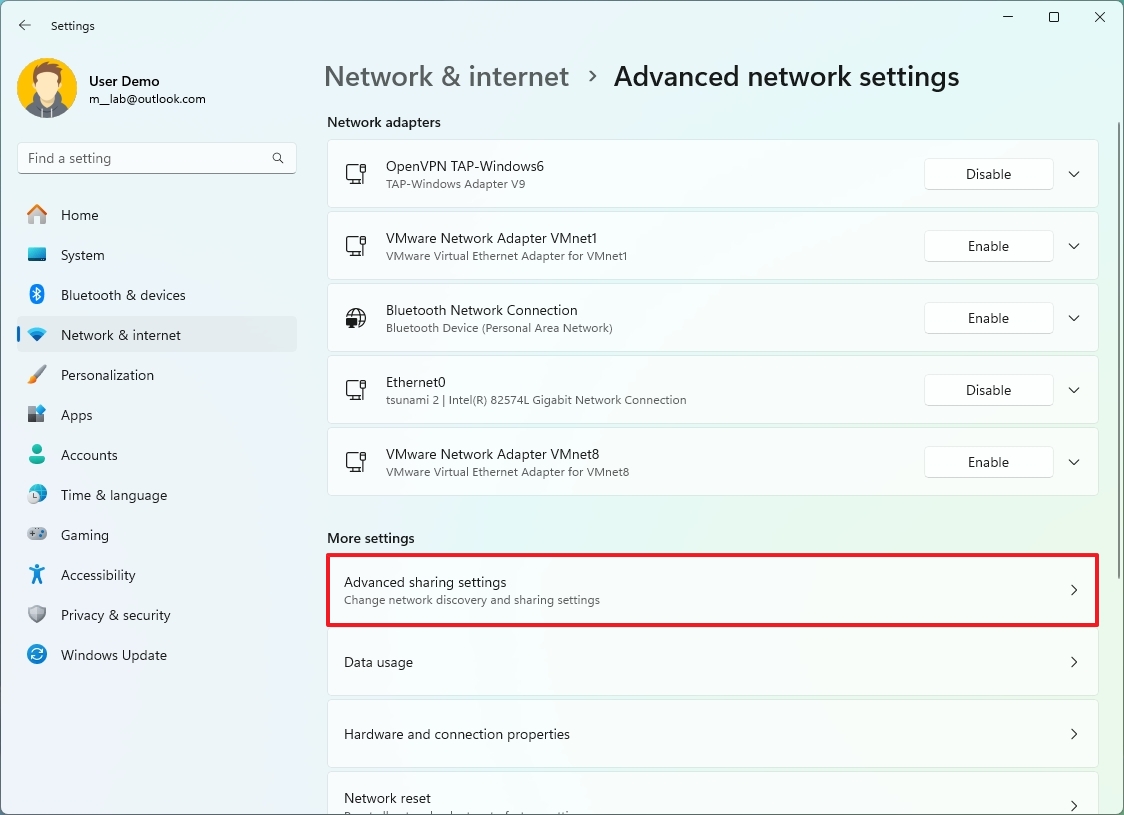
- Click “Advanced sharing settings” under the “More Settings” section.
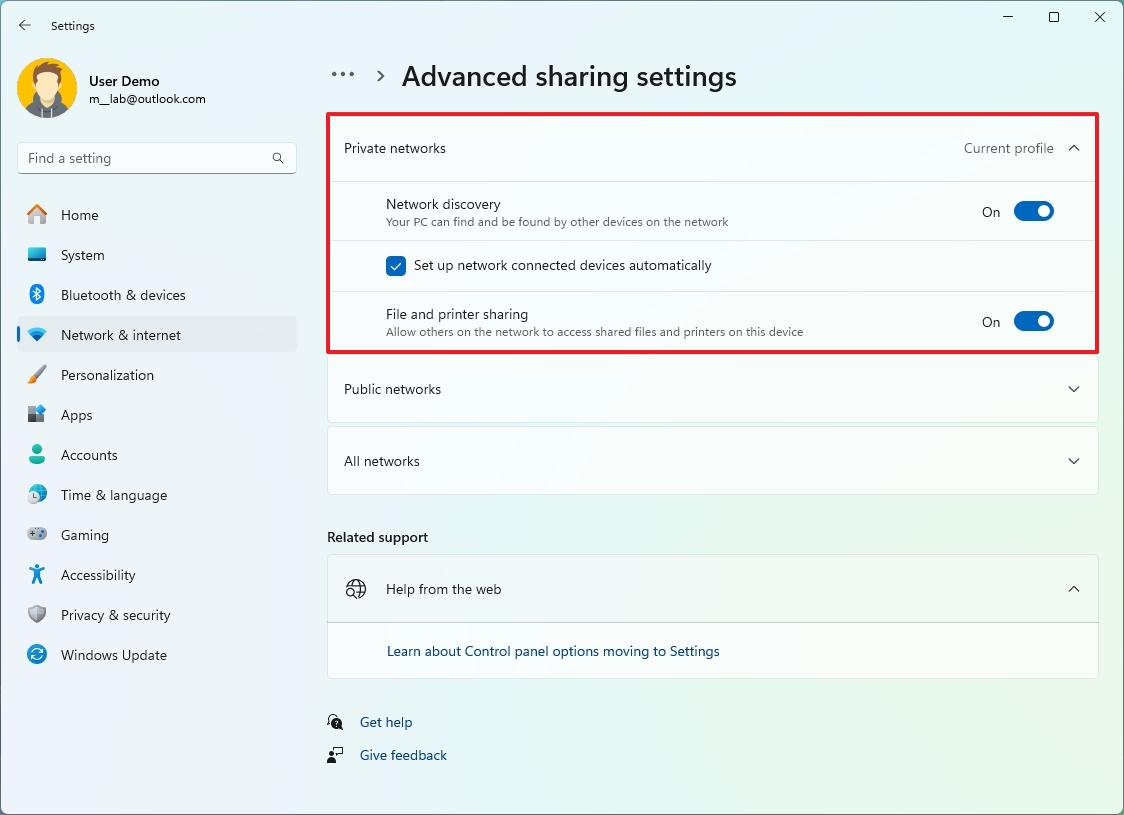
- Turn on the Network discovery toggle switch (if applicable).
- Check the set up connected devices automatically option (if applicable).
- Turn on the “File and printer sharing” toggle switch (if applicable).
After finishing the necessary steps, you’ll be able to access the computer consistently using its fixed IP address setup.
Configure power settings
To keep a shared folder constantly accessible, it’s important to prevent your computer from automatically going into standby or shutting down after periods of inactivity. This can be achieved by adjusting your power settings.
To change the power settings to prevent the computer from going to sleep mode, use these steps:
- Open Settings.
- Click on System.
- Click the Power (or Power & battery) page on the right.
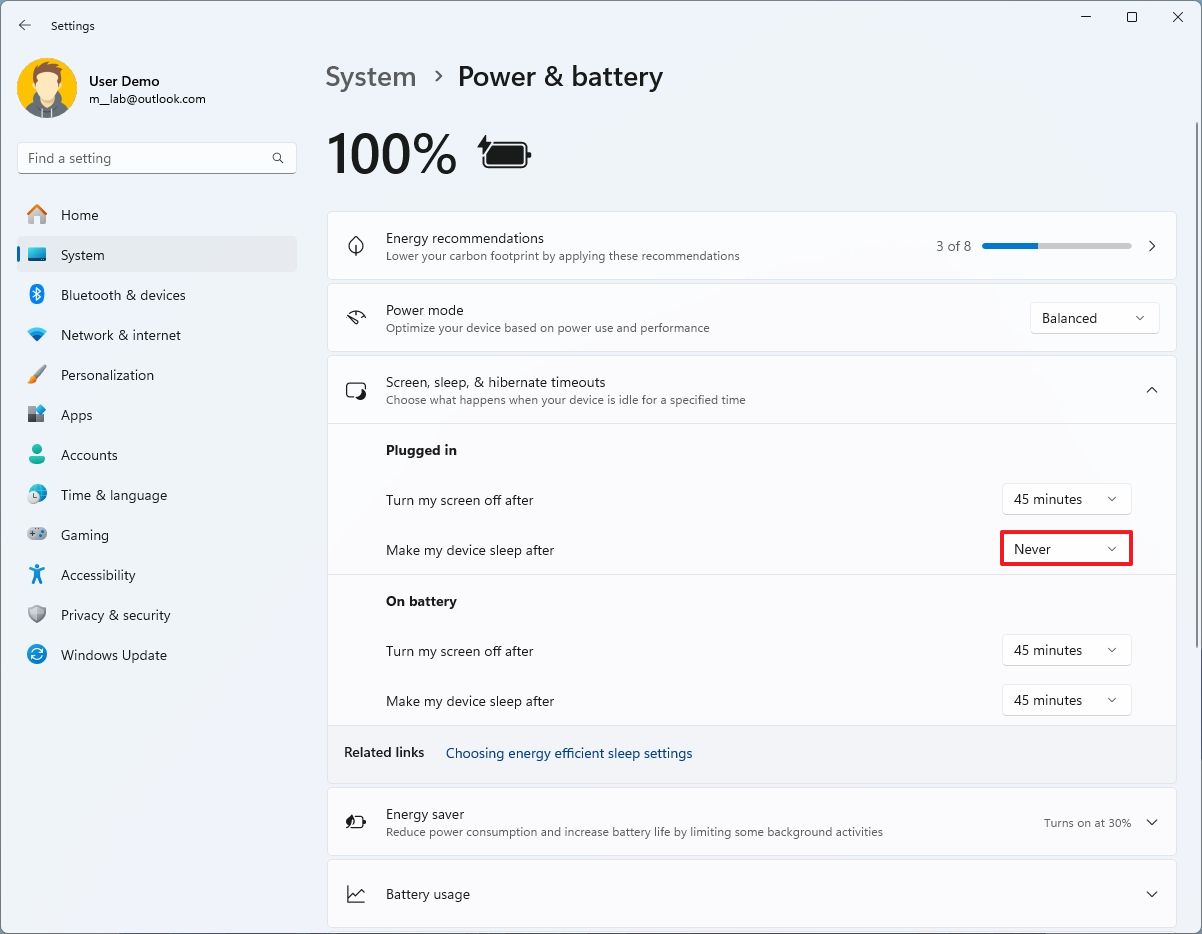
- Click the “Screen and sleep” setting.
- Select the Never option for the “When plugged in, put my device to sleep after” setting (if applicable).
Once you finish the given procedures, the computer will remain active continuously, guaranteeing users a seamless and unbroken access to their files.
Set up a shared folder
To allow other users on your network to exchange files, you have two options:
Create a user account to access the NAS
To create a network user account on Windows 11, use these steps:
- Open Settings.
- Click on Accounts.
- Click the Other Users setting.
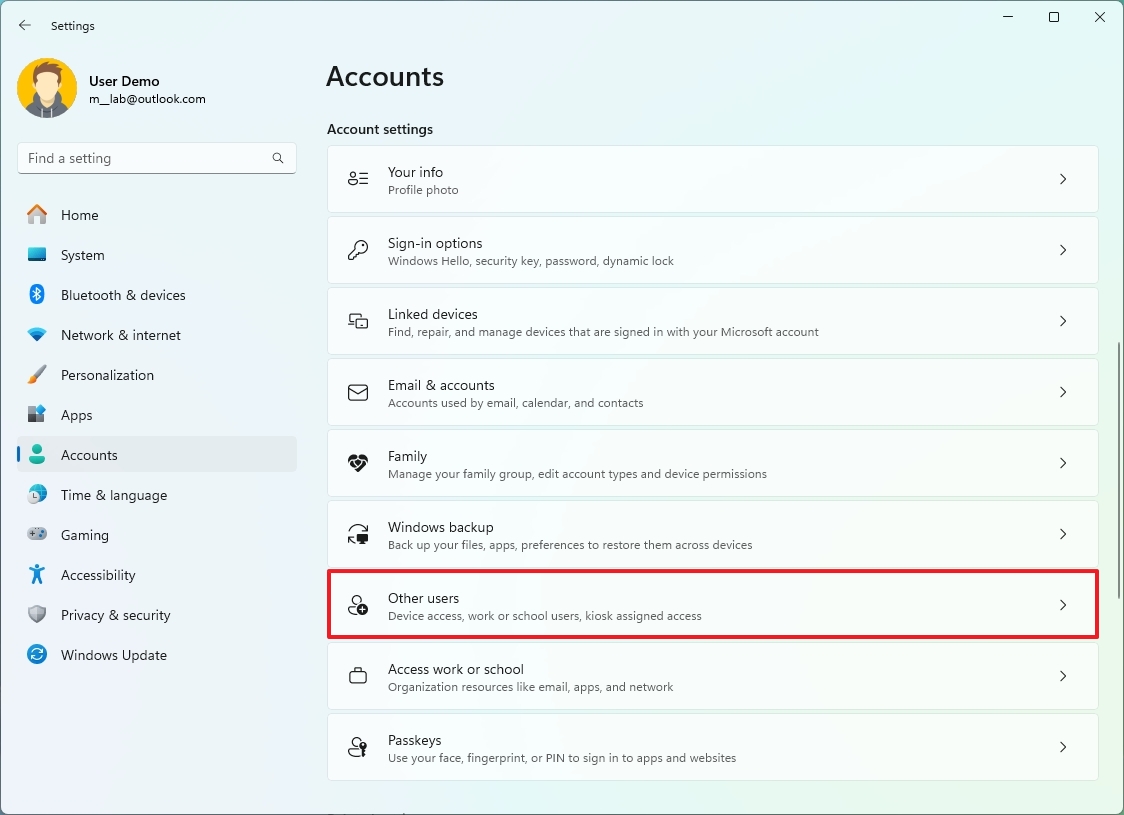
- Click the Add account button.
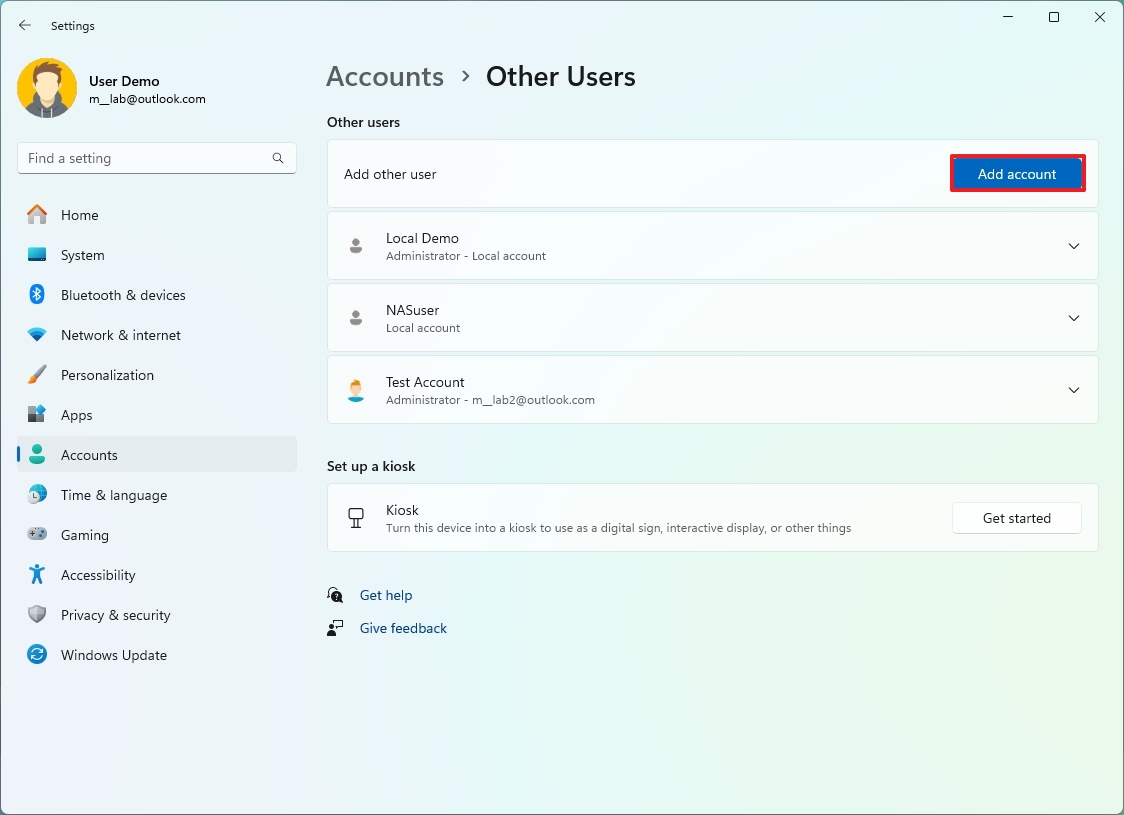
- Click the “I don’t have this person’s sign-in information” option.
- Click the “Add a user without a Microsoft account” option.
- Confirm the name of the account to access the shared folder. For example, NASuser.
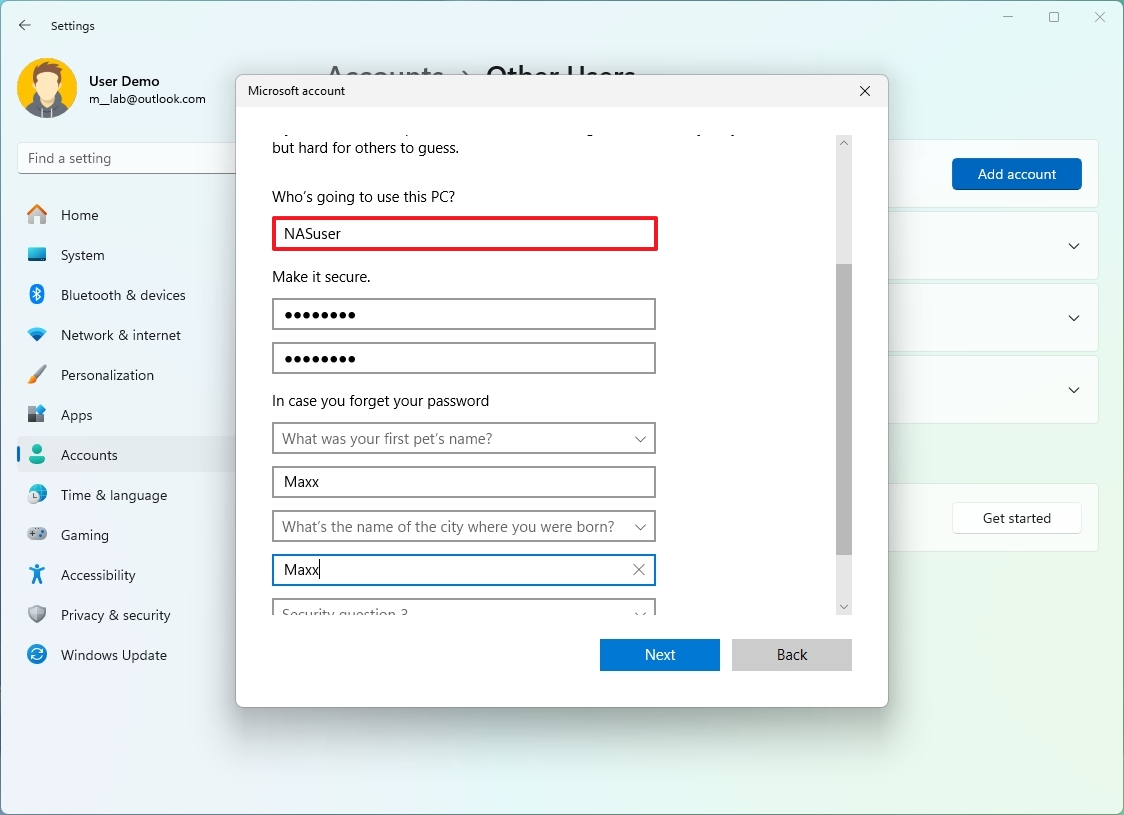
- Confirm a password for the account.
- Complete the security questions for the account recovery.
- Click the Next button.
After finishing the given procedures, you’ll be able to set up and customize a folder on the Network Attached Storage (NAS) system, which is accessible for network users.
In this tutorial, I’m setting up a primary account, however, feel free to follow the same process for establishing further accounts as well.
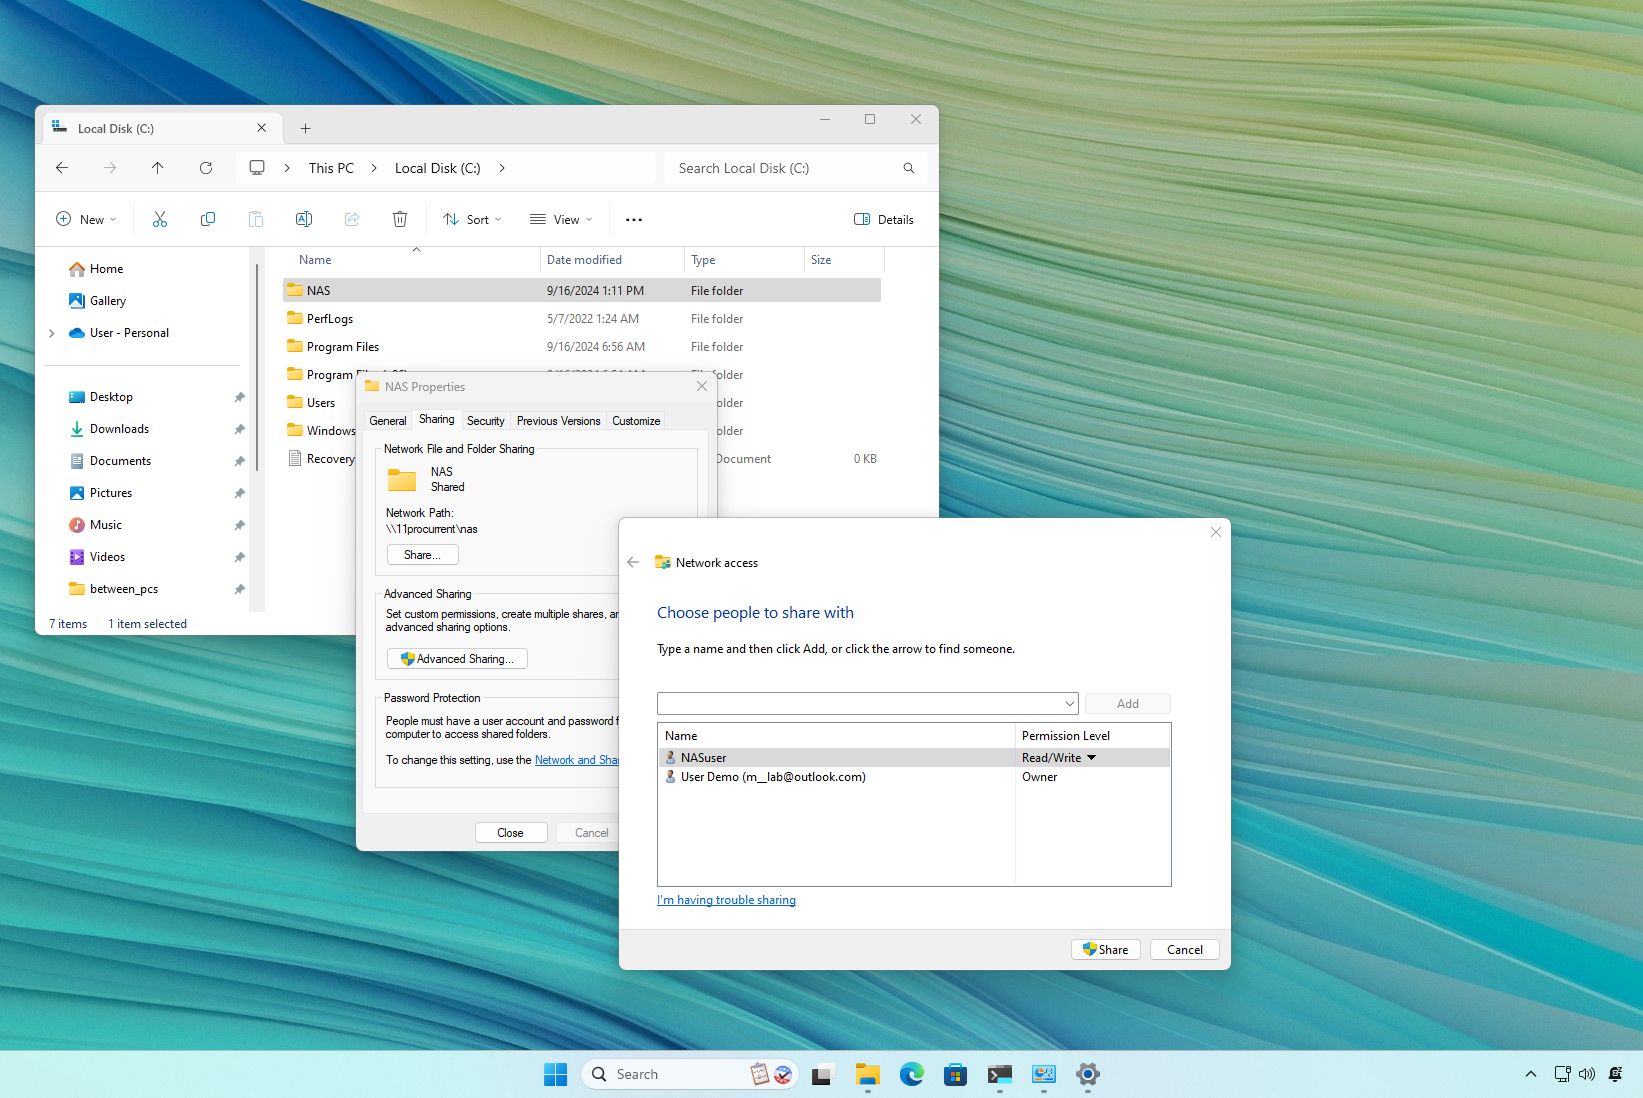
Create a shared folder for the NAS
To create and configure a folder with network access, use these steps:
- Open File Explorer.
- Click on This PC from the left navigation pane.
- Open the “C” drive or the drive you want to create the shared folder.
- Quick note: I recommend creating the shared folder in the root of the “C” or another drive’s root for the experience and security. You don’t want to share folders from within your profile folders (Desktop, Documents, etc.).
- Use the “Ctrl + Shift + N” keyboard shortcut to create a new folder.
- Quick tip: You can also create new folder from the “New” menu and choose the “Folder” option.
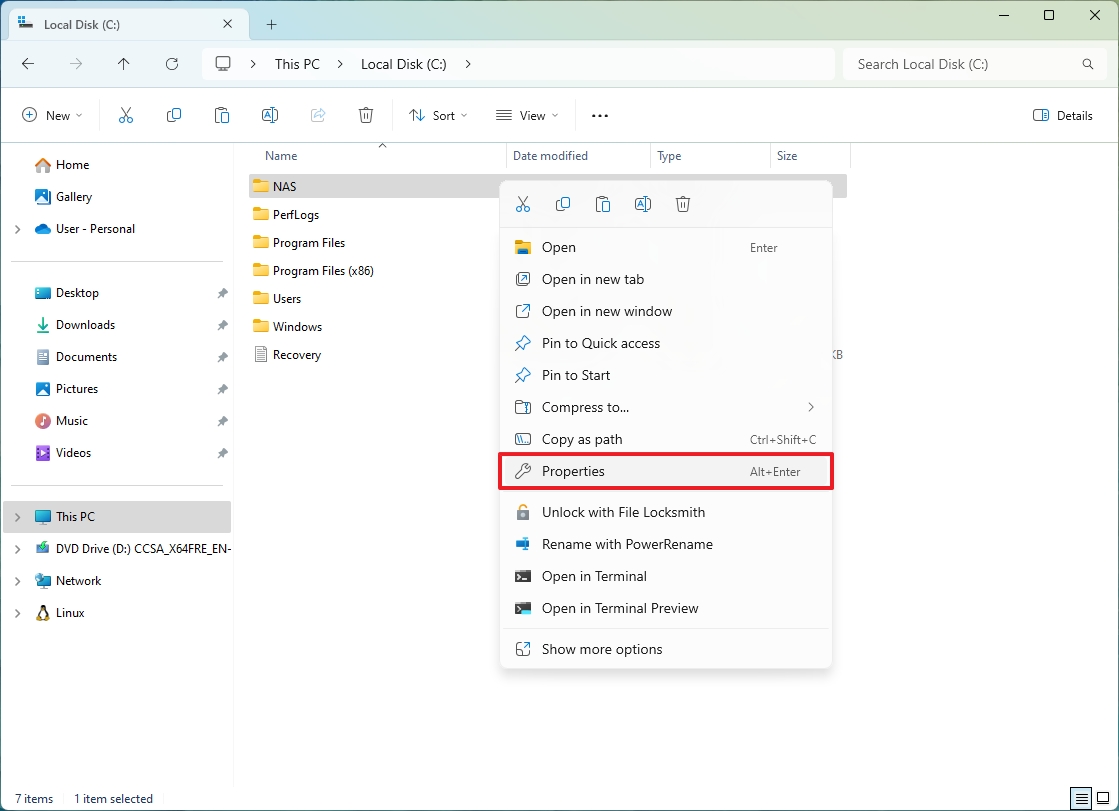
- Confirm a descriptive name for the folder, for example, “NAS,” and press Enter.
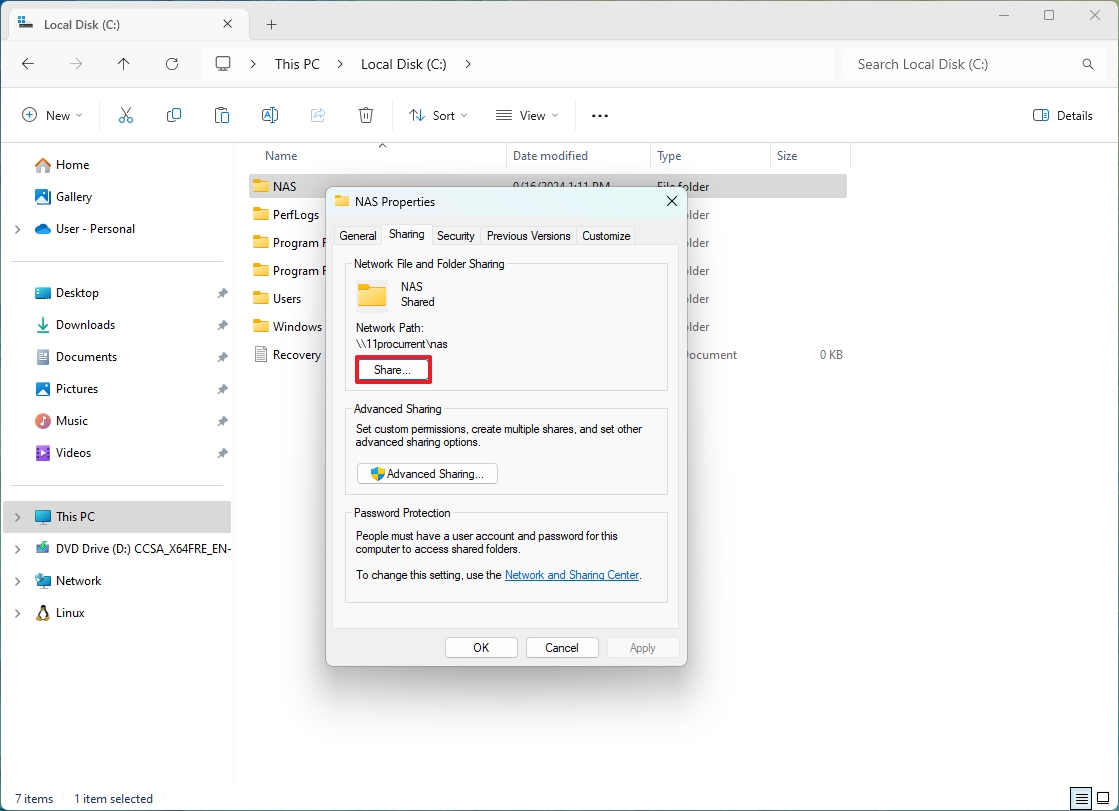
- Right-click the newly created folder and select the Properties option.
- Click the Sharing tab.
- Click the Share button.
- Select the NASuser account from the drop-down menu.
- Click the Add button.
- Open the permission level menu and choose the “Read/Write” option.
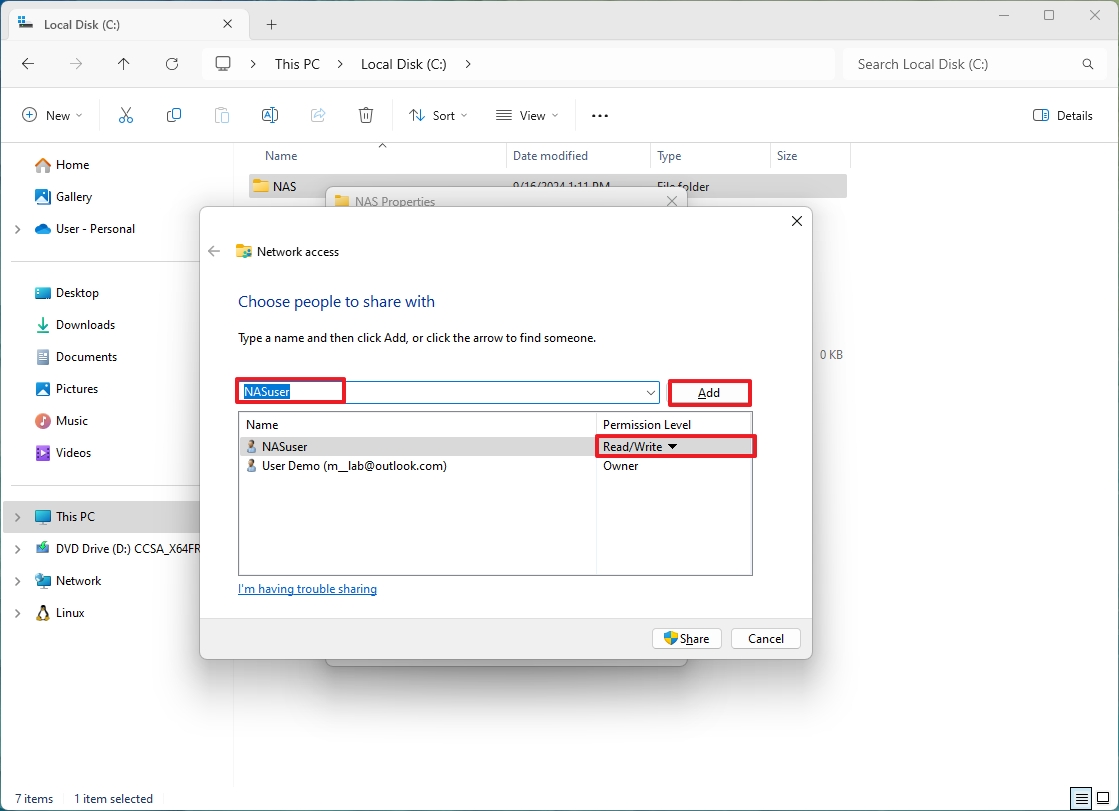
- Click the Share button.
- Click the No option (if applicable).
- Click the Done button.
- Click the Close button.
After finishing the given steps, the folder will become accessible for anyone who has the account and the right password that was set up.
As a tech-loving individual, I strongly recommend organizing the folders you intend to share. For instance, label your primary folder as “‘My Network Storage (NAS)’“, and within it, you can establish subfolders such as “‘Media’, ‘Documents’, ‘Downloads’, and ‘Backups’.” This structure will make your shared files more manageable and easier to navigate.
Connect PCs to the NAS
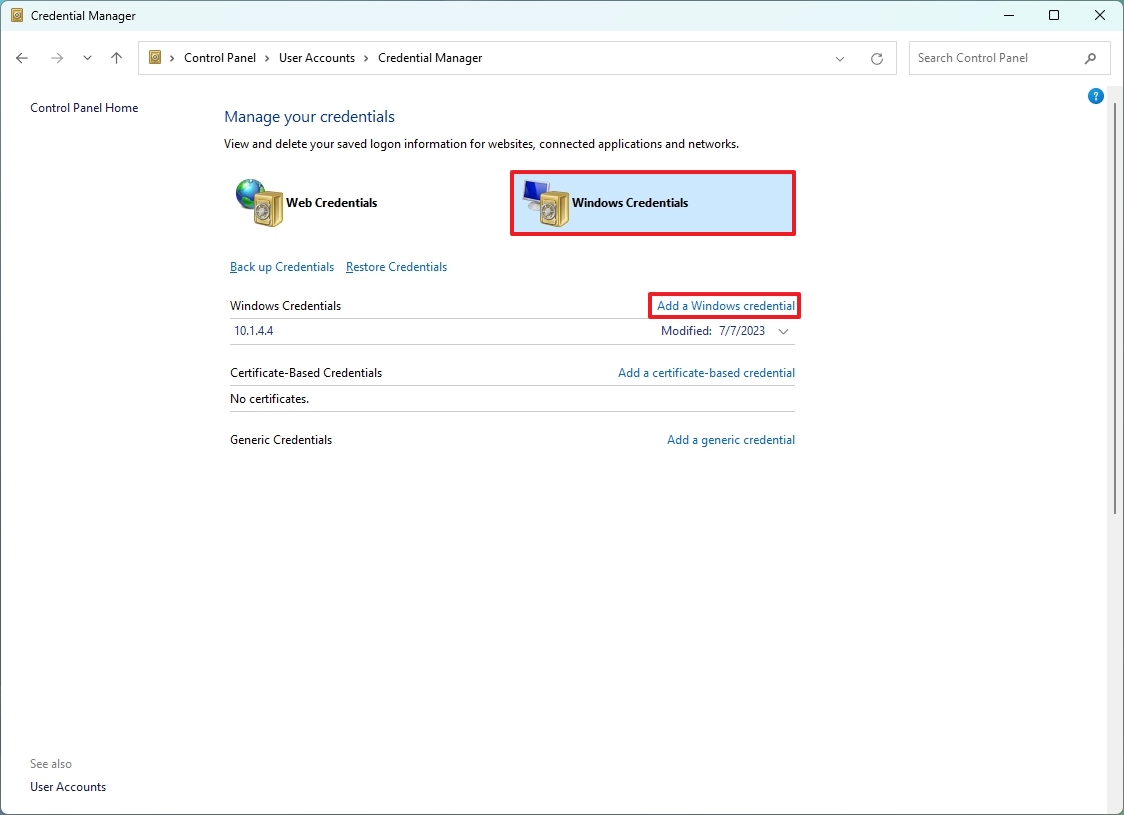
To connect a Windows 10 or 11 computer to the shared folder in the NAS, use these steps:
- Open Start.
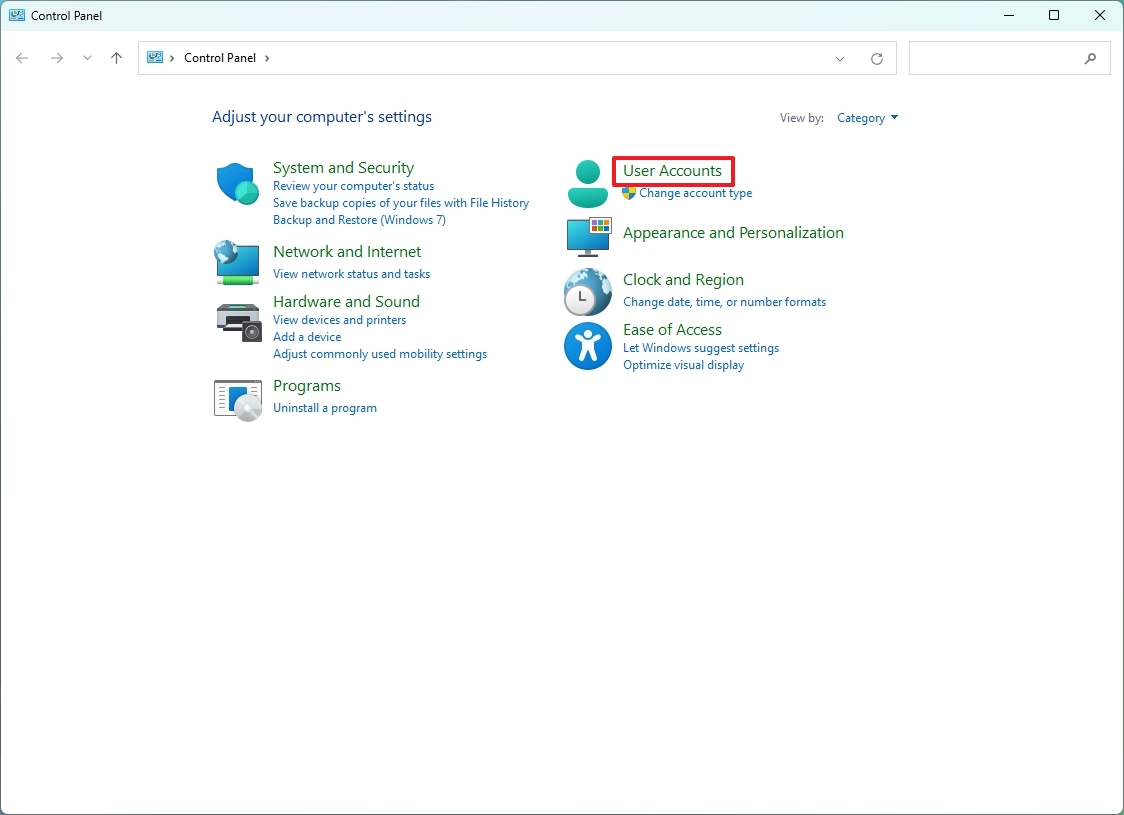
- Search for Control Panel and click the top result to open the app.
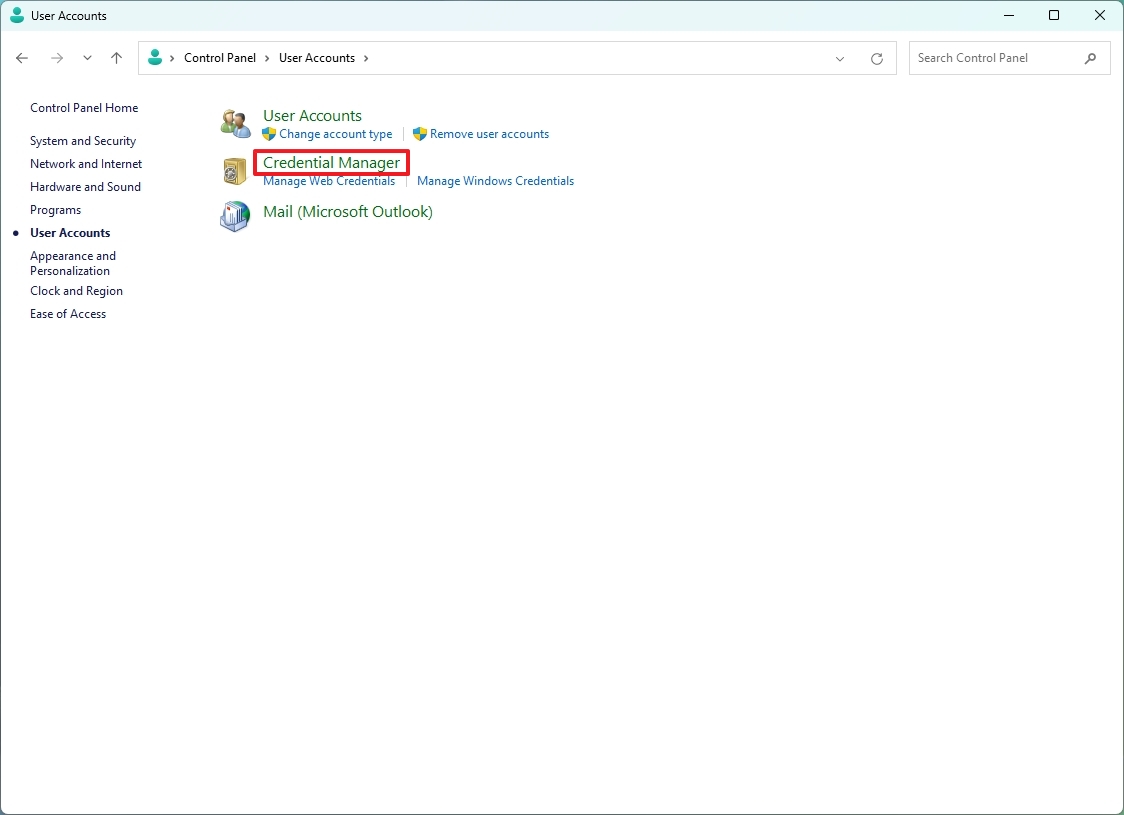
- Click on User Accounts.
- Click on Credential Manager.
- Click on Windows Credentials.
- Click the “Add a Windows credential” option.
- Confirm the IP address of the NAS running Windows 11.
- Confirm the name of the account with access to a shared folder.
- Confirm the password for the account.
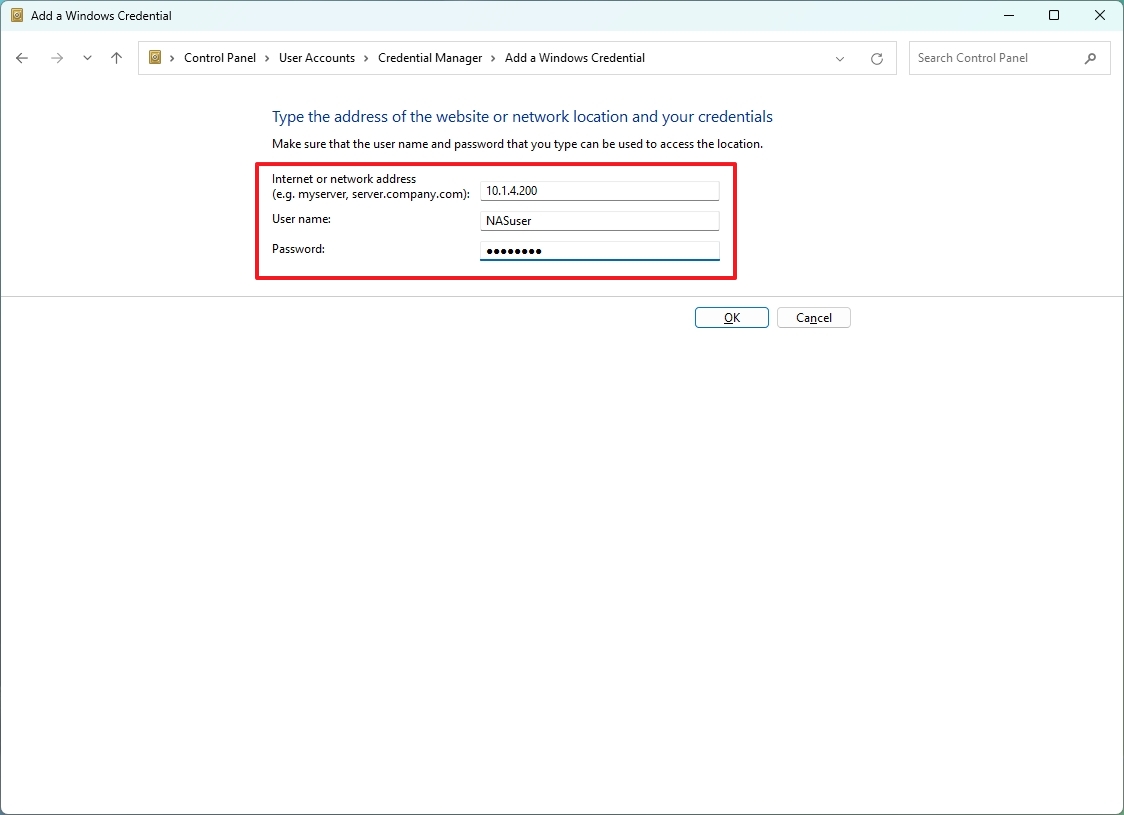
- Click the OK button.
- (Optional) Click the “Add a Windows credential” option.
- Confirm the name of the computer running the Windows 11 NAS.
- Confirm the name of the account with access to a shared folder.
- Confirm the password for the account.
- Click the OK button.
- Open File Explorer.
- Click on Network from the left pane.
- Right-click the NAS device and select the Open option.
- Right-click the NAS shared folder and choose the Open option.
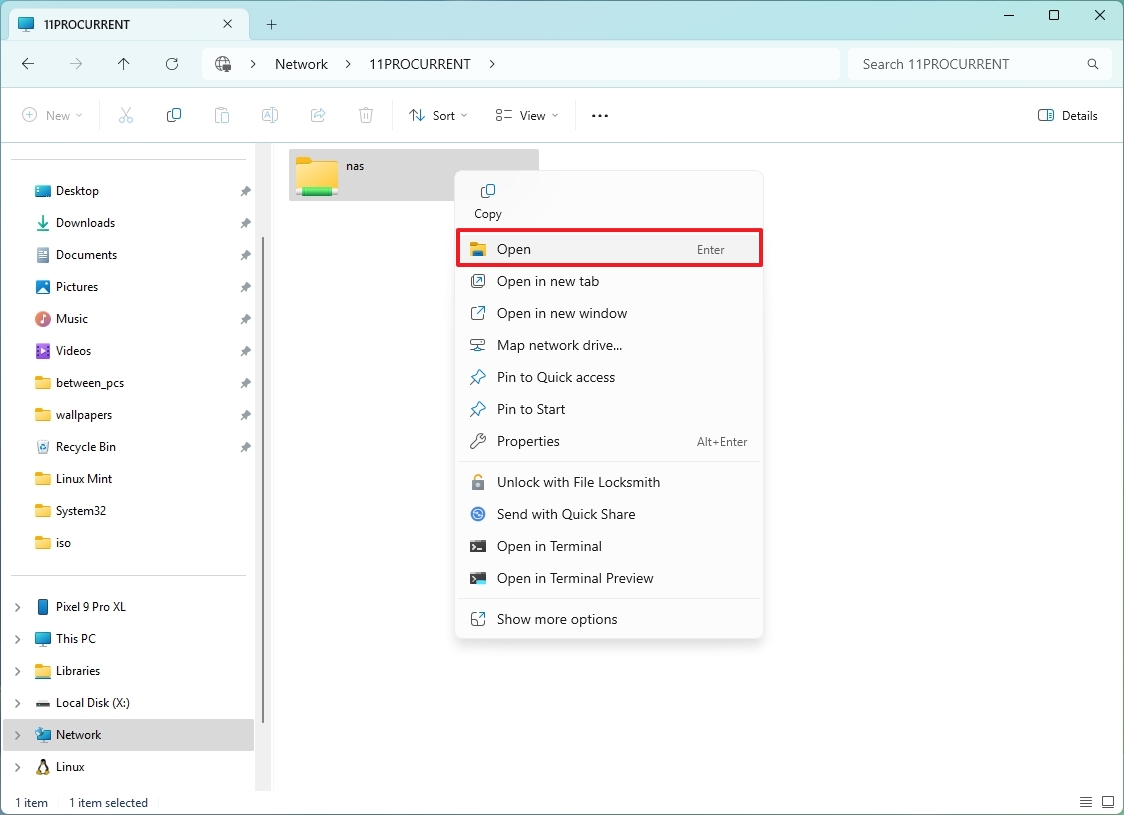
- Quick tip: You can always choose the “Pin to Quick access” option for faster access to files from the left navigation pane.
Once all the procedures are finished, users will have the ability to browse, generate, and erase files and directories directly on their Windows 11 machine functioning as a Network Attached Storage (NAS) device.
In this tutorial, I’ve included your credentials for access twice – once for using an IP address and another for using the computer name. Should you prefer to utilize the IP address, feel free to bypass entering the account details again using the computer name.
Instead of using a separate NAS device, you can still enable file-sharing functionalities on your current computer if you don’t have extra hardware available. This way, you can continue to use the computer as usual while sharing files within your home network among a few users.
More resources
Read More
- Gold Rate Forecast
- PI PREDICTION. PI cryptocurrency
- Rick and Morty Season 8: Release Date SHOCK!
- Discover Ryan Gosling & Emma Stone’s Hidden Movie Trilogy You Never Knew About!
- We Loved Both of These Classic Sci-Fi Films (But They’re Pretty Much the Same Movie)
- Mission: Impossible 8 Reveals Shocking Truth But Leaves Fans with Unanswered Questions!
- SteelSeries reveals new Arctis Nova 3 Wireless headset series for Xbox, PlayStation, Nintendo Switch, and PC
- Discover the New Psion Subclasses in D&D’s Latest Unearthed Arcana!
- Linkin Park Albums in Order: Full Tracklists and Secrets Revealed
- Masters Toronto 2025: Everything You Need to Know
2024-09-18 14:39