On the Windows 11 operating system, PowerShell represents a command-line tool designed by Microsoft for executing commands and scripts. In essence, it serves a purpose similar to Command Prompt, but this tool provides a wider array of tools and flexibility compared to its counterpart. Notably, it’s not limited to use on Windows alone; you can also find it operating on Linux and macOS systems as well.
Regardless of your expertise level with PowerShell, it’s crucial to familiarize yourself with certain fundamental commands, often called “cmdlets.” These are the commands you’ll likely use frequently, particularly when writing PowerShell scripts, due to their wide applicability.
In this step-by-step tutorial, I’ll cover essential PowerShell commands that are worth knowing for beginners. Experienced users might discover some fresh insights or perhaps reacquaint themselves with commands they’ve forgotten over time.
PowerShell essential cmdlets for Windows 11
This list contains essential commands that, in my opinion, every user ought to familiarize themselves with. The list doesn’t follow a specific sequence or pattern.
1. Open your computer’s Start menu.
2. Type “Windows Terminal” in the search bar and click on it to open the application.
3. If needed, open a PowerShell window by clicking on its icon (if it appears).
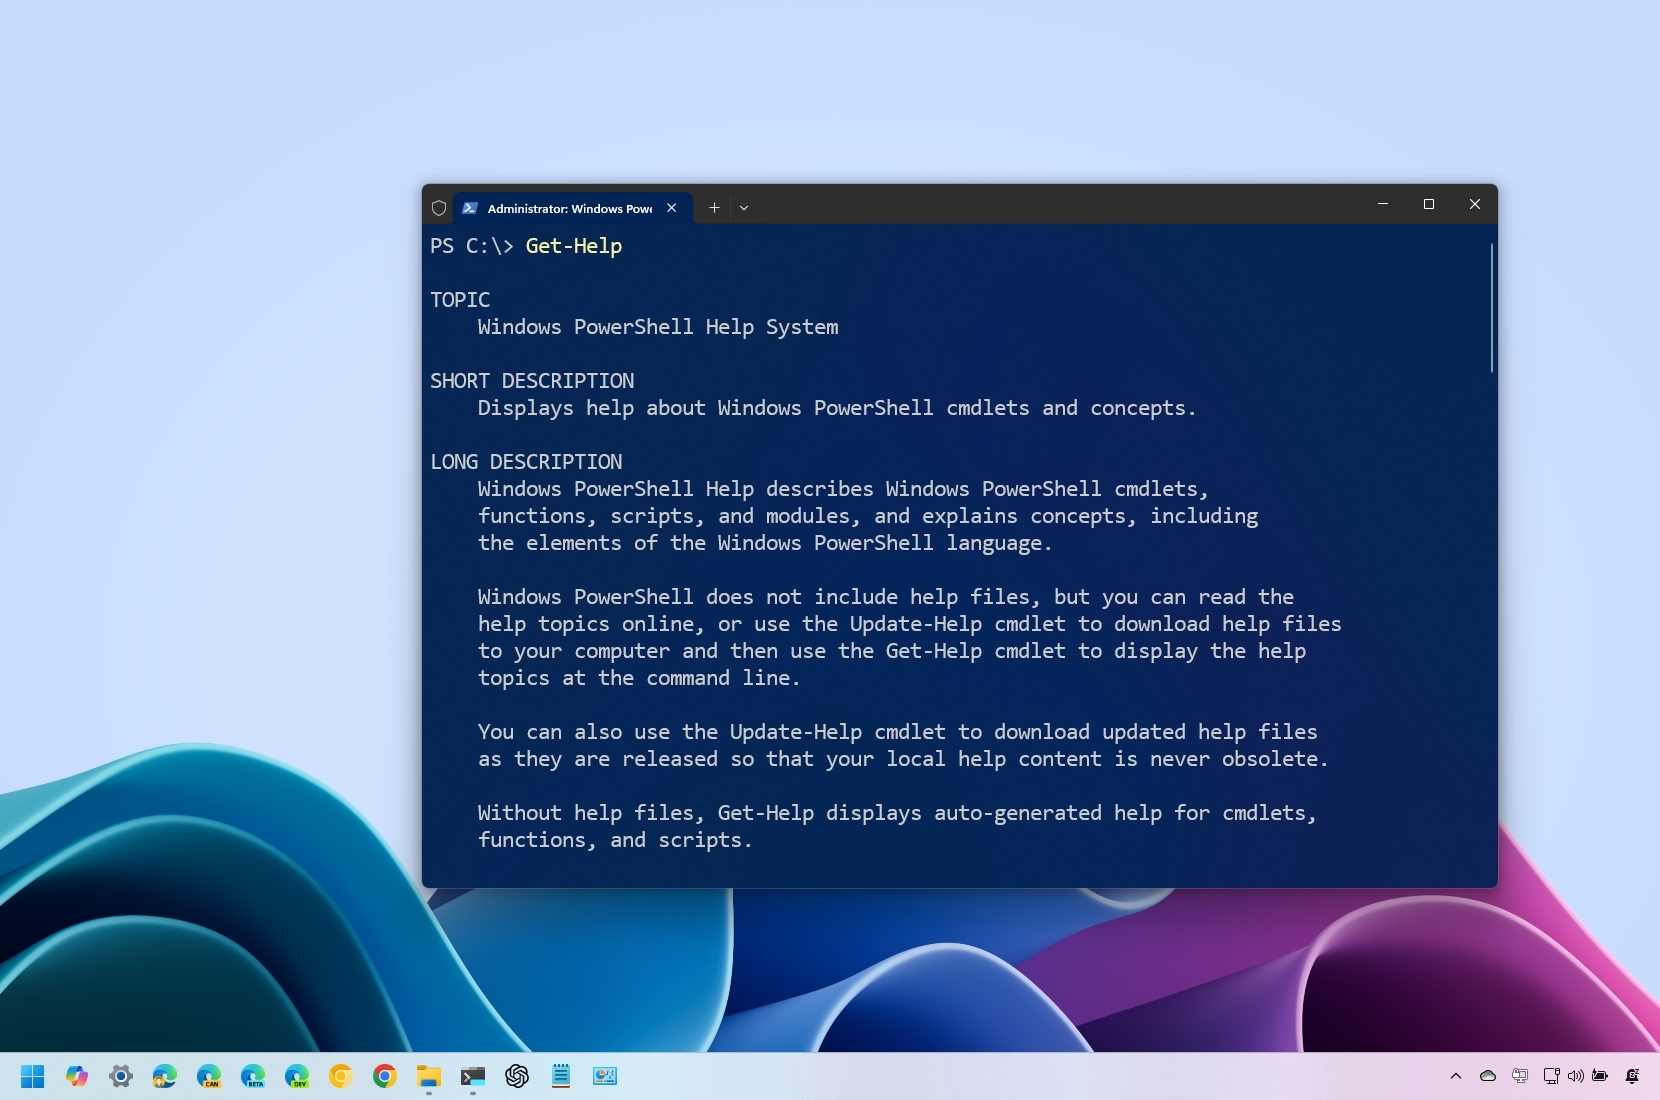
1. Get-help
The “Get-Help” commandlet offers guidance and facts about different features within the PowerShell ecosystem. It specifically fetches details on a particular command, function, or script.
Usage:
- Get-Help CMDLET-NAME
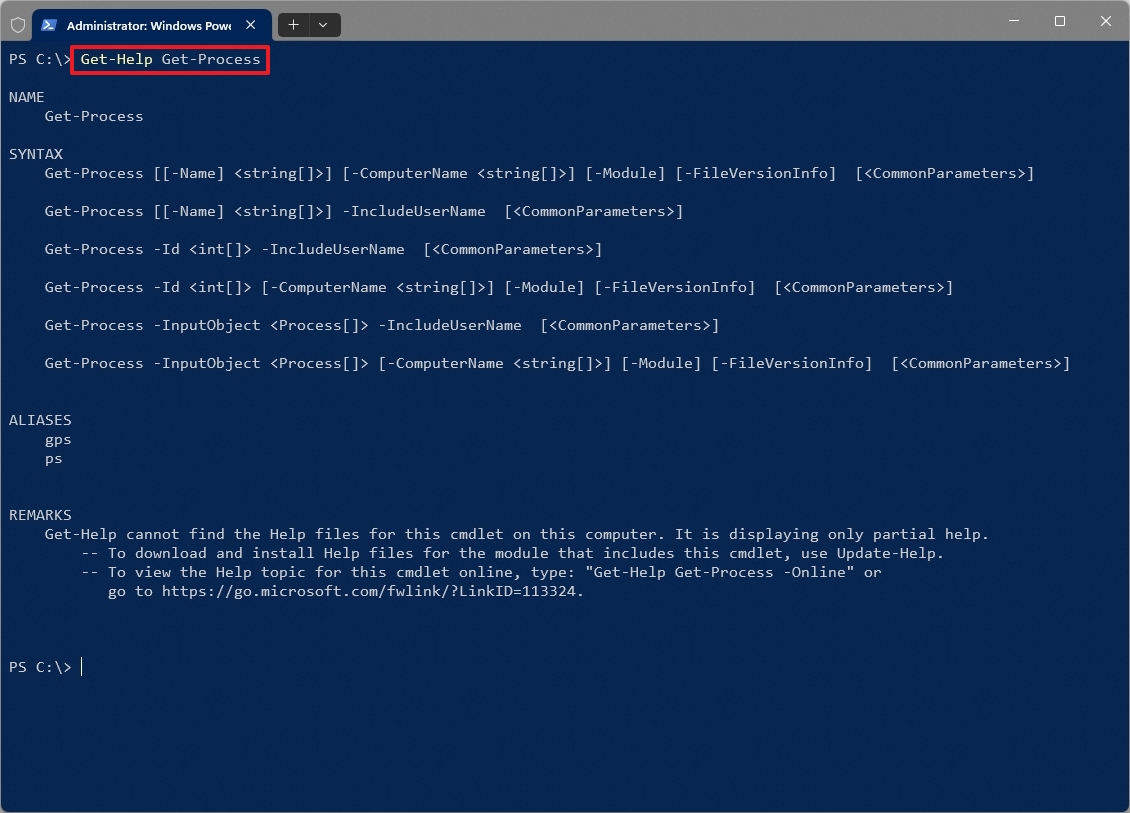
- Example 1: Get-Help Get-Process – Gets basic help for the specified cmdlet, but you can also specify a function or script.
- Example 2: Get-Help Get-Process -Full – Gets more details for the Get-Process cmdlet.
- Example 3: Get-Help Get-Process – Parameter Name – Retrieves details about the “Name” option for the “Get-Process” cmdlet.
- Example 4: Get-Help Get-Process -Online – Opens the Microsoft support pages with information about a specified cmdlet, function, or script.
2. Get-Command
Using the “Get-Command” cmdlet enables you to uncover and investigate the various commands accessible within the PowerShell ecosystem.
Usage:
- Get-Command
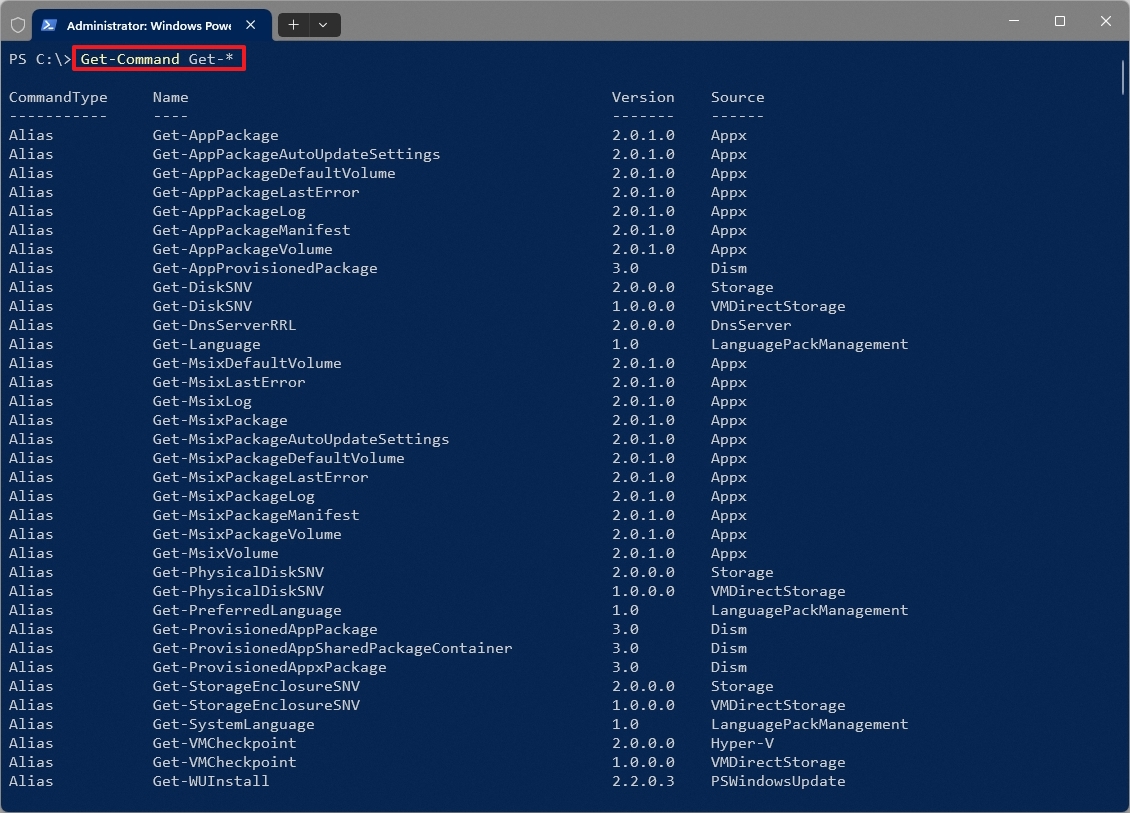
- Example 1: Get-Command Get-* – Lists all commands that start with “Get-“.
- Example 2: Get-Command -CommandType Cmdlet – Lists all cmdlets available. You can change the cmdlet for “Alias” or “Function.”
- Example 3: Get-Command -Name “Copy-Item” -Module Microsoft.PowerShell.Management – Finds the “Copy-Item” cmdlet within the module source “Microsoft.PowerShell.Management.”
Key parameters:
- -Name: Specifies the name of the command you’re looking for, and you can even use wildcards like “*”.
- -CommandType: The option filters results based on the command type (for example, cmdlet, function, and alias).
- -Module: Restricts the search to a specific module.
3. Get-ChildItem (dir, ls, gci)
In PowerShell, the “‘Get-ChildItem’” command functions similarly to the “dir” command, enabling you to view and handle items located in diverse areas like file system folders, the Windows Registry, or certificate repositories.
Usage:
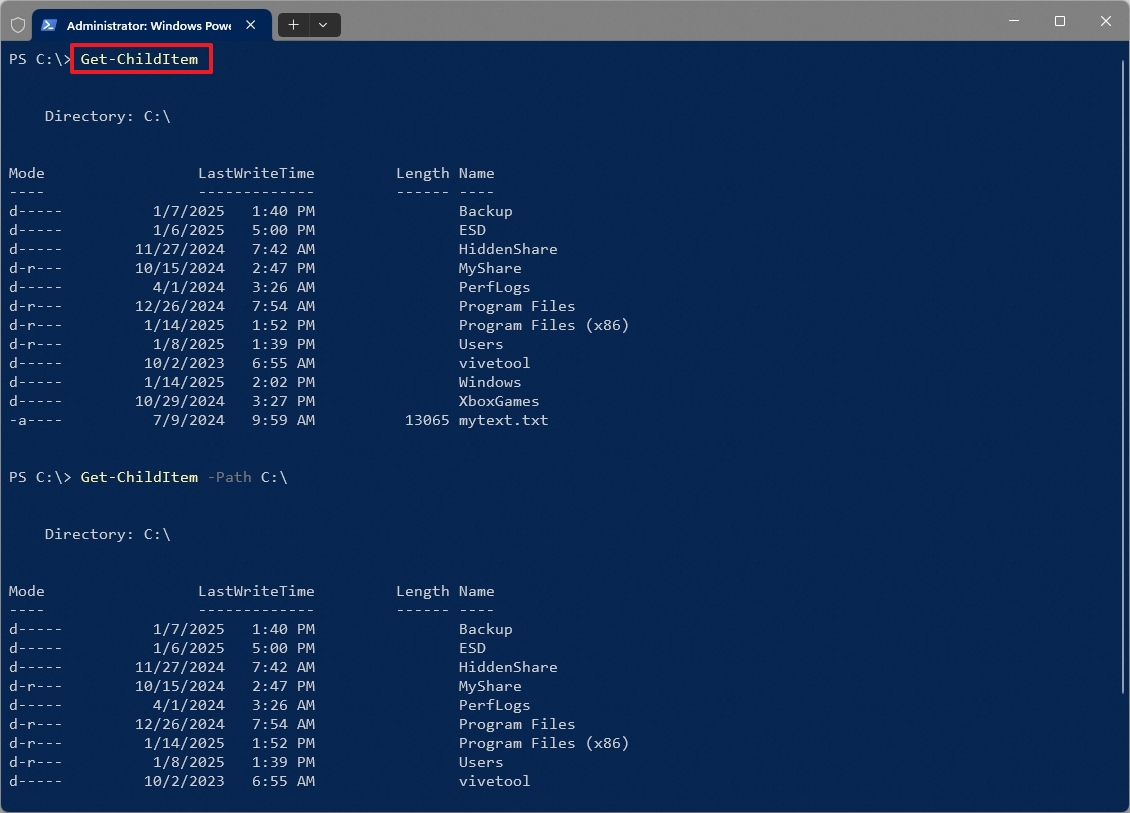
- Get-ChildItem
- Example 1: Get-ChildItem -Path C:\ – Lists all files and directories in the root of the main installation drive.
- Example 2: Get-ChildItem -Path C:\Windows\ -Filter *.exe – Retrieves a list of all executable files inside the “Windows” directory.
- Example 3: Get-ChildItem -Path C:\Users\ -Recurse – Retrieves a list of all the files inside the “Users” directory and subdirectories.
- Example 4: Get-ChildItem -Path C:\ -Include *.txt,*.docx– Retrieves a list of all files with the “.txt” and “.docx” extensions from the specified location.
Key parameters:
- -Path: Specifies the location where items can be retrieved.
- -Filter: This option filters items based on their names (for example, “*.txt” for all files with the “.txt” extension).
- -Include: Specifies patterns to include (for example, “*.txt” and “*.docx”).
- -Exclude: Specifies patterns to exclude (for example, “*.txt”).
- -Recurse: Retrieves items from all subdirectories within the specified location.
- -Depth: Limits the depth of recursion.
- -Force: Includes hidden and system items.
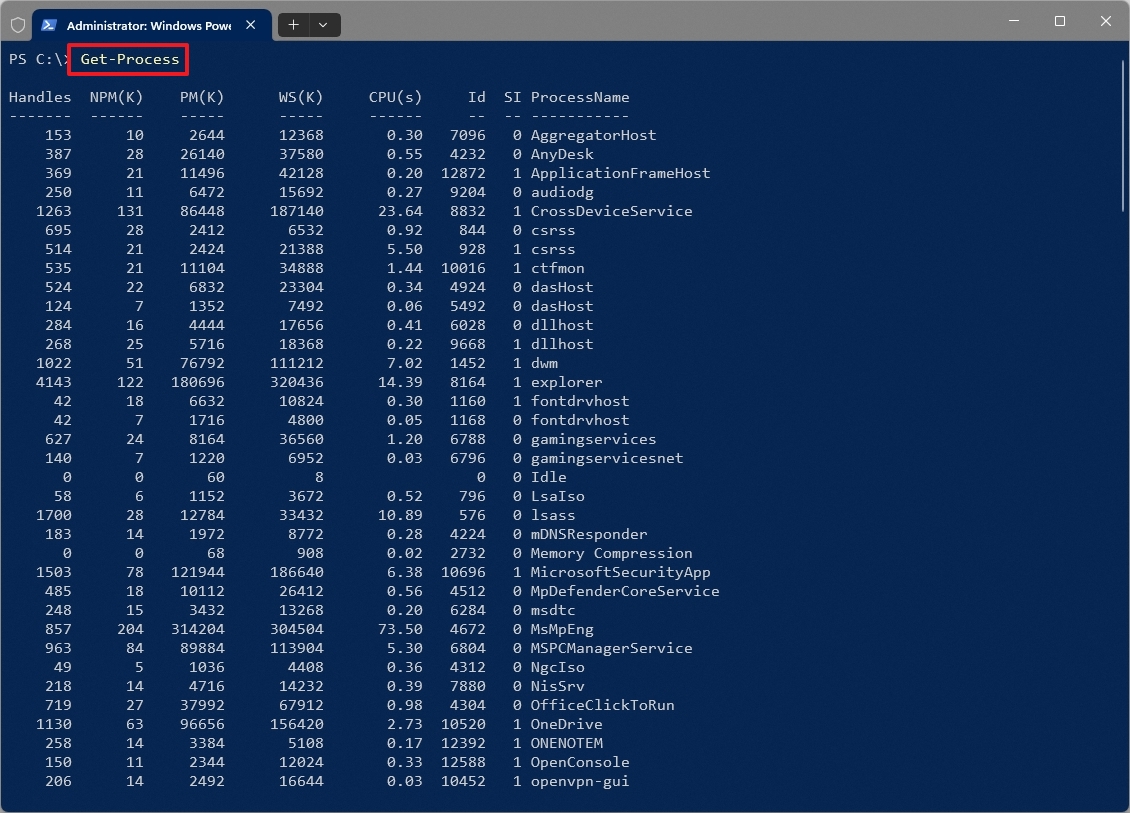
4. Get-Process (gps, ps)
The “Get-Process” command gathers details about the active processes in the computer, much like the Task Manager does. It’s capable of providing information such as the process name, its ID (also known as PID), the number of handles it uses, its memory and CPU consumption, when it started, and the user account that initiated it.
Usage:
- Get-Process
- Example 1: Get-Process -Name notepad – Retrieves the process for the Notepad app.
- Example 2: Get-Process -Id 13616 – Retrieves the process with the “13616” identification number.
Key parameters:
- -Name: Specifies the name of the process to retrieve, and it even supports wildcards like “*.”
- -Id: Specifies the process’s “Process ID” (PID) to retrieve.
Related cmdlets:
- Stop-Process: Terminates running processes by specifying their name or process ID, aiding in managing unresponsive applications. For example, Stop-Process -Name ‘notepad’
- Start-Process: Starts processes by specifying their name or process ID. For example, Start-Process -Name ‘notepad’
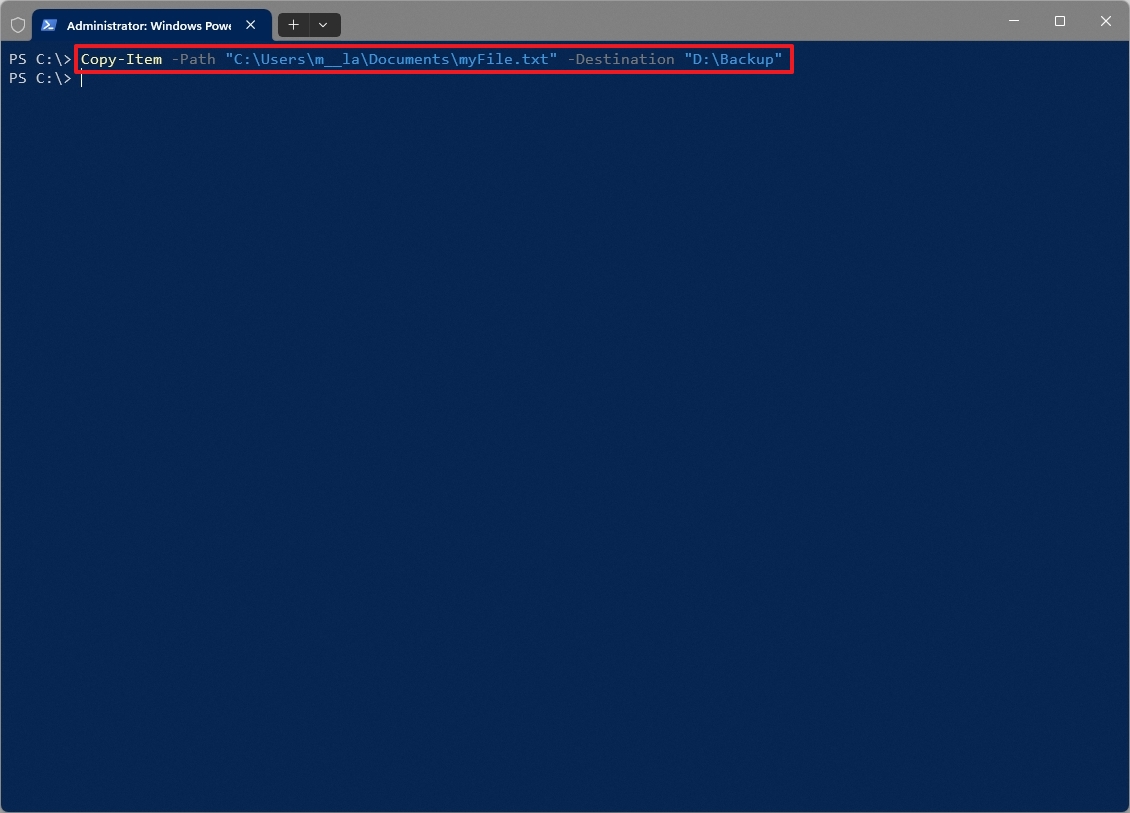
5. Copy-Item (cp, copy, cpi)
Using the “‘Copy-Item’” command, you can easily transfer files and folders from one spot to another while utilizing various customization options.
Usage:
- Copy-Item -Path SOURCE -Destination DESTINATION
- Example 1: Copy-Item -Path “C:\Users\UserDemo\Documents\myFile.txt” -Destination “D:\Backup” – Copies the “myFile.txt” as a single file to the “Backup” folder.
- Example 2: Copy-Item -Path “C:\Users\UserDemo\Documents” -Destination “D:\Backup\Files” -Recurse – Copies the directory and its contents to the “Files” folder.
- Example 3: Copy-Item -Path “C:\Logs” -Destination “D:\Backups\Files” -Recurse -Filter “*.log” – Copies only files with a specific extension to the “Files” directory.
Key parameters:
- -Path: Specifies the source path of the items to be copied.
- -Destination: Specifies the destination path for the copied items.
- -Recurse: Copies all subdirectories within the source directory.
- -Force: Overwrites existing files at the destination (if necessary).
- -Filter: Specifies a filter to include or exclude specific files based on their names (for example, “*.txt”).
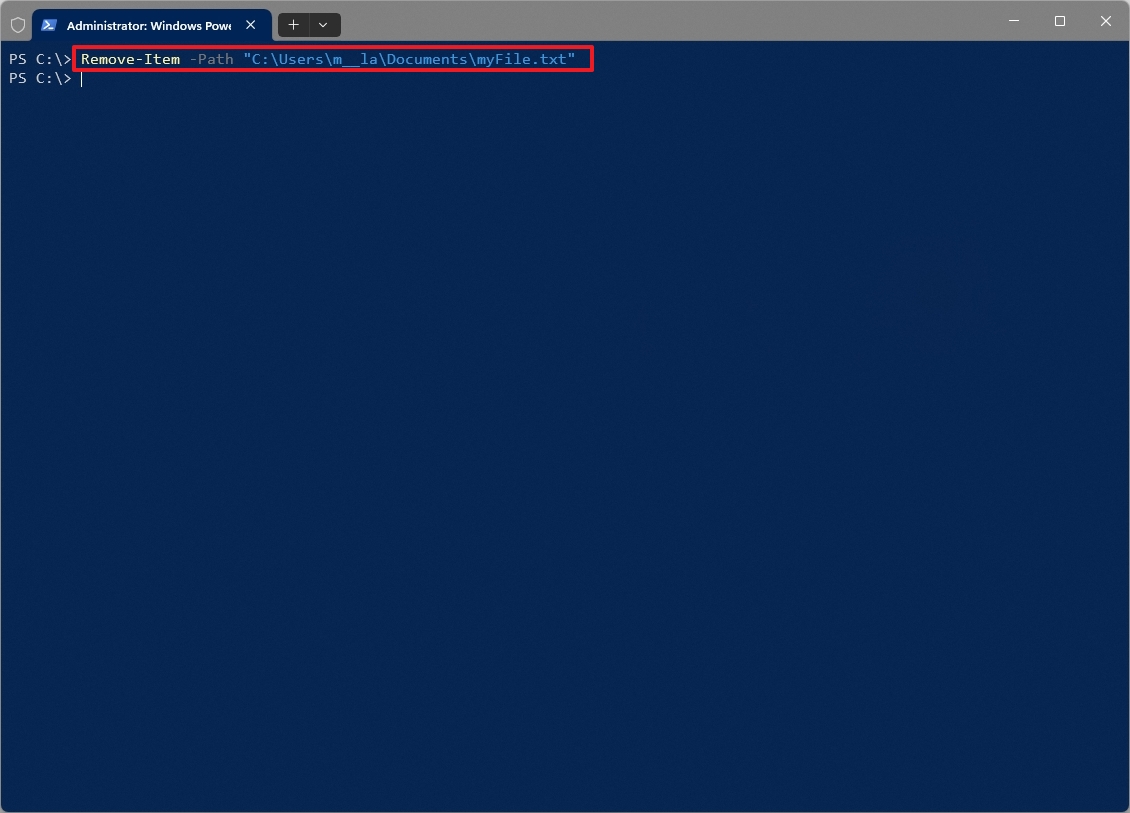
6. Remove-Item (rm, del, erase, ri, rmdir)
In PowerShell, the “Remove-Item” command serves the purpose of deleting various items like files, folders, and others across your system. It even extends to non-file systems such as the Registry, certificate store, and environment variables. Essentially, it’s comparable to the “del” command used in Command Prompt.
Usage:
- Remove-Item -Path SOURCE-FILE
- Example 1: Remove-Item -Path “C:\Users\UserDemo\Documents\myFile.txt” – Deletes only the “myFile.txt” from the “Documents” folder.
- Example 2: Remove-Item -Path “C:\MyFiles” -Recurse – Deletes a directory and all its content.
- Example 3: Remove-Item -Path “C:\Users\UserDemo\Documents” -Recurse -Include “*.docx” – Removes the files with the “.docx” extension from the “Documents” folder.
Key parameters:
- -Path: Specifies the path of the items to be deleted.
- -Recurse: Deletes all subdirectories within the specified directory.
- -Force: Overwrites read-only attributes and deletes hidden or system files.
- -Confirm: Prompts for confirmation before deleting each item.
- -WhatIf: Simulates the deletion operation without deleting any of the items.
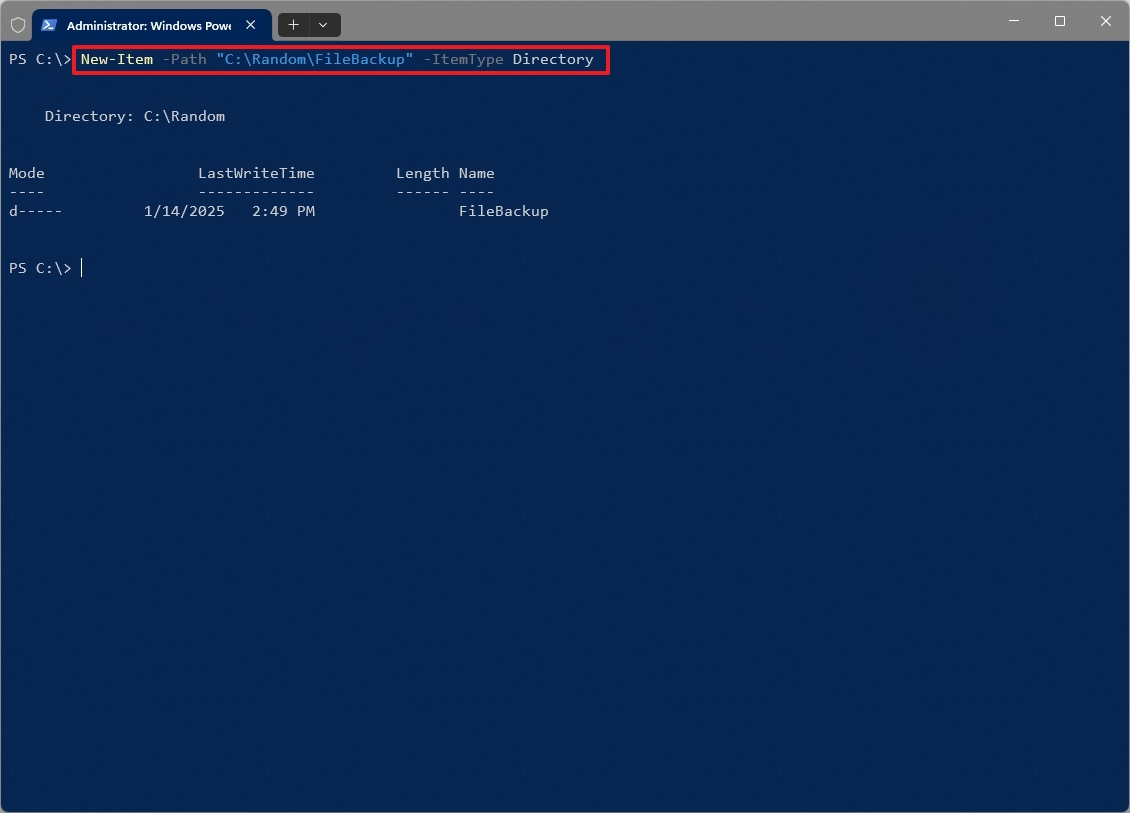
7. New-Item (ni)
Using the “Create New Item” command will assist you in generating new entities within your system, including files, folders, registry keys, and other similar items.
Usage:
- New-Item -Path PATH\FOLDER-NAME -ItemType Directory
- Example 1: New-Item -Path “C:\Random\FileBackup” -ItemType Directory – Creates a new directory (or folder) as indicated in the path of the specified location.
- Example 2: New-Item -Path “C:\Random\myFile.txt” -ItemType File -Value “This text will be printed inside the text file.” – Creates a text file on the specified location and adds the “This text will be printed inside the text file” content into the file.
- Example 3: New-Item -Path “C:\Random\myFile.txt” -ItemType File – Creates an empty text file on the specified location.
- Example 4: New-Item -Path “HKCU:\Software\MyApp” -ItemType RegistryKey – Creates a new Registry entry in the specified location.
Key parameters:
- -Path: Specifies the location where the new item will be created.
- -ItemType: Specifies the type of item to create (for example, “File,” “Directory,” or “RegistryKey”).
- -Name: Specifies the name of the new item that the command will create.
- -Value: Specifies the initial content of the file.
- -Force: Overwrites existing items (if necessary).
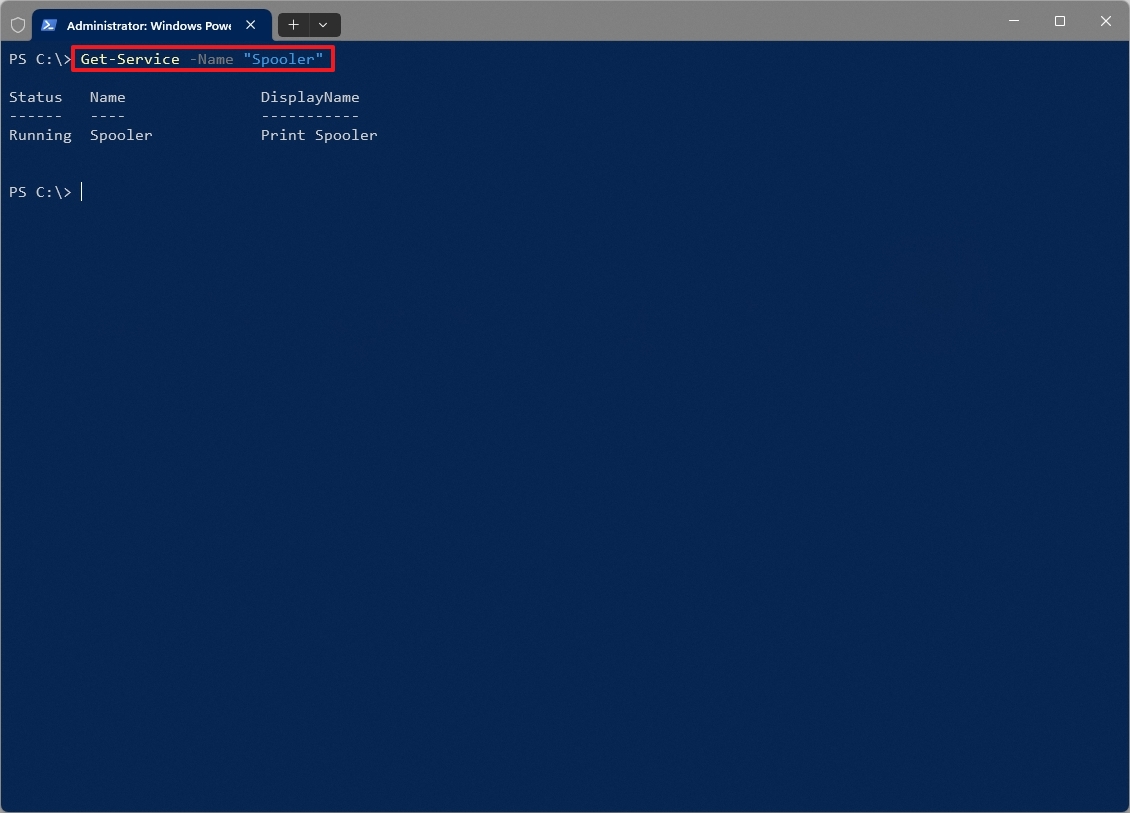
8. Get-Service (gsv)
Using the command “‘Get-Service’“, you can gather information about the services currently active on your system. This data encompasses service and display names, their current status, startup mode, and any dependent services.
Usage:
- Get-Service
- Example 1: Get-Service -Name “Spooler” – Retrieves the “Spooler” service.
- Example 2: Get-Service -DisplayName “Windows Audio” – Retrieves the “Windows Audio” service.
Key parameters:
- -Name: Specifies the name of the service to retrieve (supports wildcards).
- -DisplayName: Specifies the display name of the service.
- -ComputerName: Specifies the remote computer from which to retrieve services.
- -Include: Specifies patterns to include (for example, “Win*”).
- -Exclude: Specifies patterns to exclude (for example, “SQL*”).
Related cmdlets:
- Start-Service: Starts a stopped service, enabling the activation of necessary system services. For example, Start-Service -Name ‘wuauserv’
- Stop-Service: Stops a running service, allowing for the cessation of unnecessary or problematic services. For example, Stop-Service -Name ‘wuauserv’
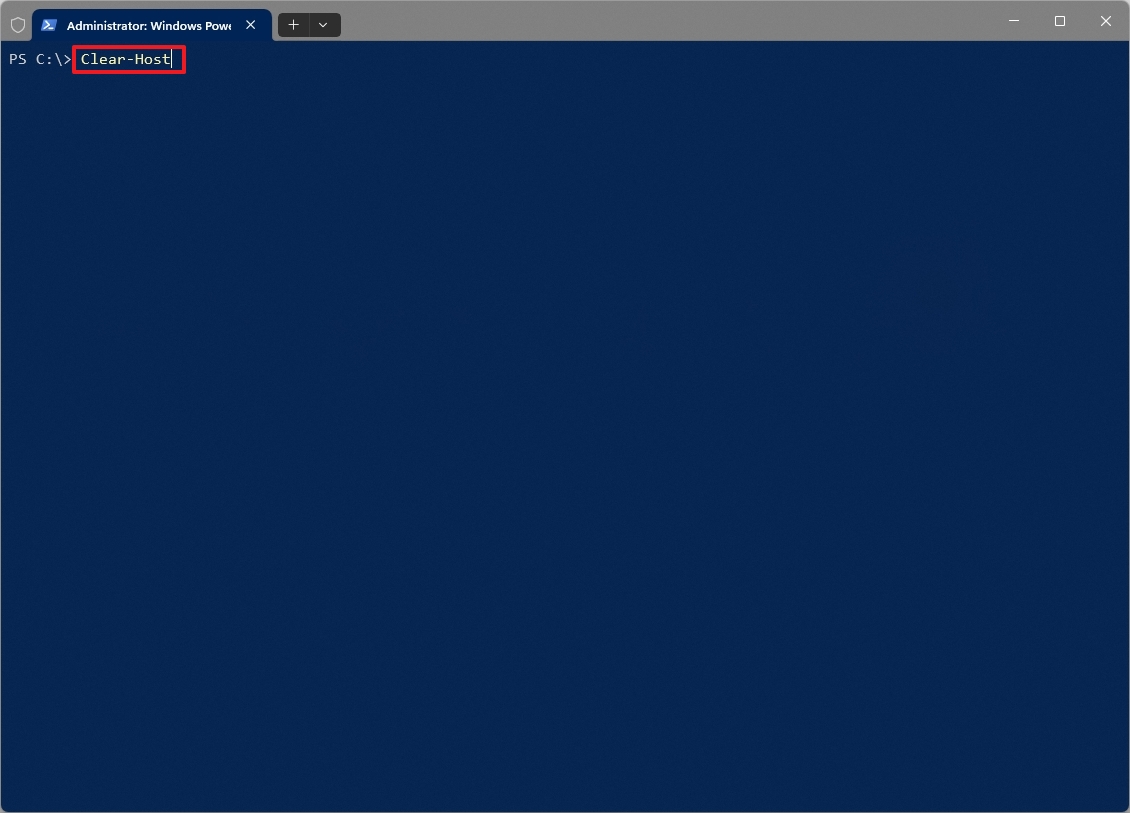
9. Clear-Host (cls, clear)
The “Clear-Host” command function is equivalent to the “cls” command in the Command Prompt, as it empties the content of the current terminal window.
Typically, you’d employ this command to declutter and enhance the readability of your console screen, particularly following the execution of numerous commands or viewing extensive results.
Usage:
- Clear-Host
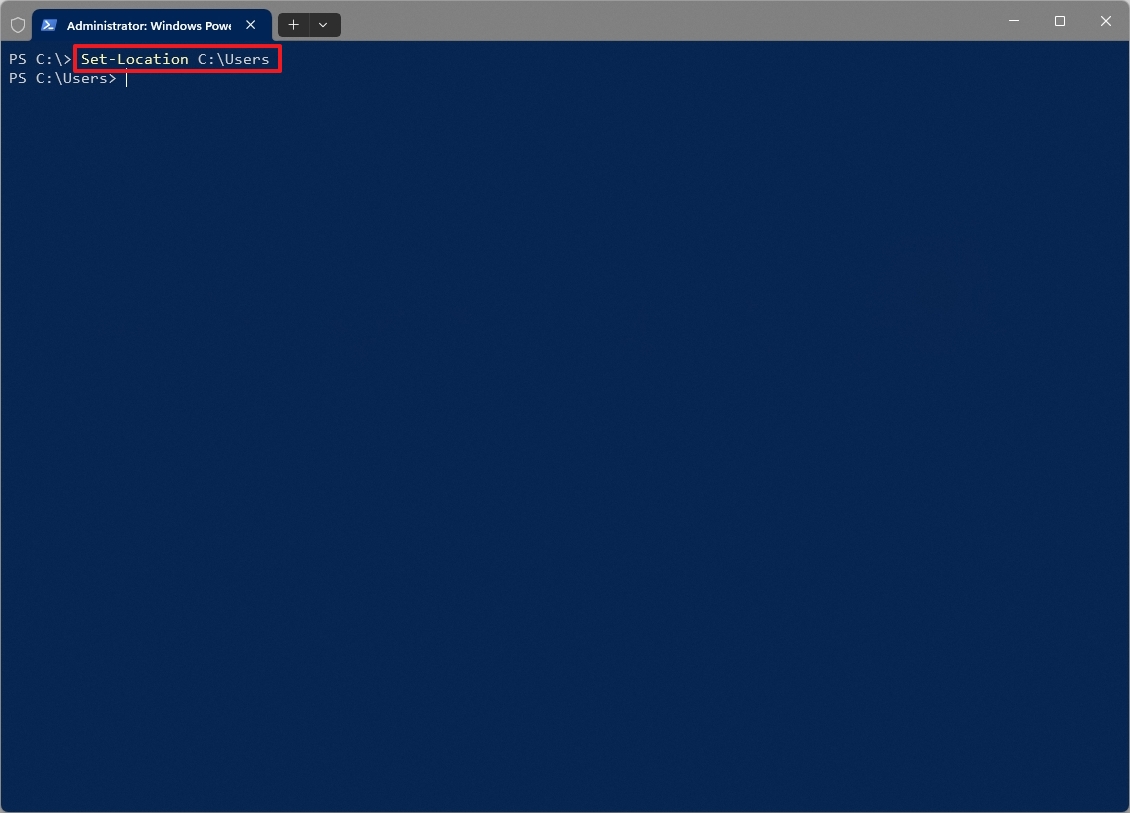
10. Set-Location (cd, chdir)
The “Set-Location” command allows you to navigate to a different folder, functioning much like the “cd” command in the Command Prompt, changing the active directory where you’re currently working.
Usage:
- Set-Location PATH
- Example 1: Set-Location C:\ – Navigates to the root of the “C” drive.
- Example 2: Set-Location .. – Moves one level up in the directory hierarchy (equivalent to “cd ..”).
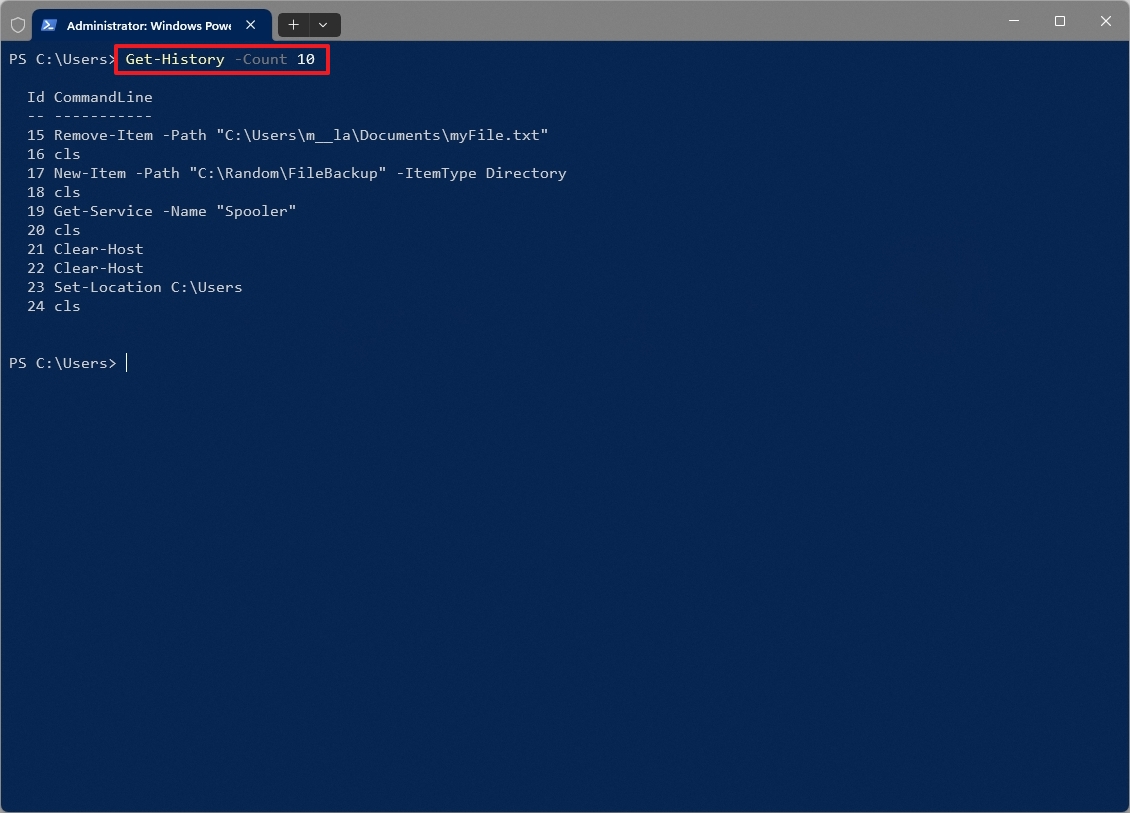
11. Get-History (ghy, h)
Using the “Get-History” command, you can effortlessly pull up a list of all the commands you’ve already typed in the current session. In simpler terms, this cmdlet enables you to quickly run previously entered commands again without needing to rewrite them manually.
Usage:
- Get-History
- Example 1: Get-History -Count 10 – Displays the last 10 commands entered.
- Example 2: Get-History -Id 123 – Displays the command with the ID 123.
As a tech enthusiast, I’d love to share a handy tip about PowerShell command history! You can adjust the number of commands that PowerShell stores using the “‘$MaximumHistoryCount’” option. Initially, from PowerShell 3.0 onwards, it defaults to remembering the last 4096 commands you entered. But if you want to increase this limit, simply type in ‘$MaximumHistoryCount = 32767’ to set it to the maximum possible value. Happy scripting!
12. Get-Content (gc, cat, type)
The “Get-Content” command is capable of reading and displaying the contents of files or various data sources. This command is not only beneficial for viewing a text file within the command line interface, but it can also be used effectively to inspect the contents of a log file.
Usage:
- Get-Content -Path PATH-AND-FILENAME
- Example 1: Get-Content -Path “C:\Folder\myFile.txt” – Reads the content of “myFile.txt” and displays each line on a separate line in the console.
- Example 2: $fileContent = Get-Content -Path “C:\Folder\myFile.txt” – Reads the content of “myFile.txt” and stores it in the variable $fileContent.
- Example 3: Get-Content -Path “C:\Folder\myFile.txt” -Raw – Reads the entire content of “myFile.txt” as a single string.
- Example 4: Get-Content -Path “C:\Folder\myFile.txt” -TotalCount 5 – Reads the first five lines of “myFile.txt.”
- Example 5: Get-Content -Path “C:\Folder\myFile.txt” -Tail 3 – Reads the last three lines of “myFile.txt.”

Key parameters:
- -Path: Specifies the path to the file or other data source.
- -Raw: Reads the entire file content as a single string instead of an array of lines.
- -TotalCount: Only the specified number of lines from the beginning of the file are read.
- -Tail: Only the specified number of lines from the end of the file are read.
13. Test-Connection (ping, tnc)
The “Test-Connection” cmdlet enables you to verify if there’s network access to a distant computer or server, and it functions in much the same way as the “ping” command does.
As I’m watching, this command initiates Internet Control Message Protocol (ICMP) echo requests, often referred to as ‘pings’, towards a specific device on the network. The purpose? To check if that device is accessible within the network and also measure the round-trip time for each ping sent.
Usage:
- Test-Connection -ComputerName DESTINATION-NAME-OR-IP
- Example 1: Test-Connection -ComputerName bing.com – Sends four pings to the destination and displays detailed results.
- Example 2: Test-Connection -ComputerName 10.1.4.158 -Count 3 – Sends three pings to the IP address 10.1.4.158.
- Example 3: Test-Connection -ComputerName bing.com -Quiet – Returns True or False depending on whether the connection to bing.com was successful.

Key Parameters:
- -ComputerName: Specifies the target computer or IP address.
- -Count: Specifies the number of pings to send.
- -Interval: Specifies the time interval between pings.
- -Quiet: Returns only a boolean value (True/False) indicating success or failure.
- -TraceRoute: Displays the hops along the way, including the IP address and response time for each hop.
As an analyst, I’ve found that PowerShell doesn’t have a direct equivalent to the “tracert” command. Yet, we can leverage the “Test-NetConnection” command with the “-TraceRoute” switch for similar functionality. For instance, you can use this: “Test-NetConnection -ComputerName bing.com -TraceRoute”.
14. Get-NetIPConfiguration
The “Get-NetIPConfiguration” cmdlet offers a detailed summary of the network adapter settings on your computer.
Here’s a simple and conversational rephrasing of the original statement: “This tool will provide you with comprehensive details about every network adapter on your device, such as their names, MAC addresses, IP addresses, subnet masks, default gateways, and DNS servers.
Usage:
- Get-NetIPConfiguration
- Example 1: Get-NetIPConfiguration -Name “Ethernet0” – Shows the network configuration of the adapter. In this case, “Ethernet0,” but you can specify the adapter you want.
- Example 2: Get-NetIPConfiguration -InterfaceIndex 1 – Displays the network configuration for the adapter with the specified index. In this case, “1,” but you can specify the adapter you want.
- Example 3: Get-NetIPConfiguration | Select-Object InterfaceName, IPv4Address – Shows only the InterfaceName and IPv4Address properties for all network adapters.

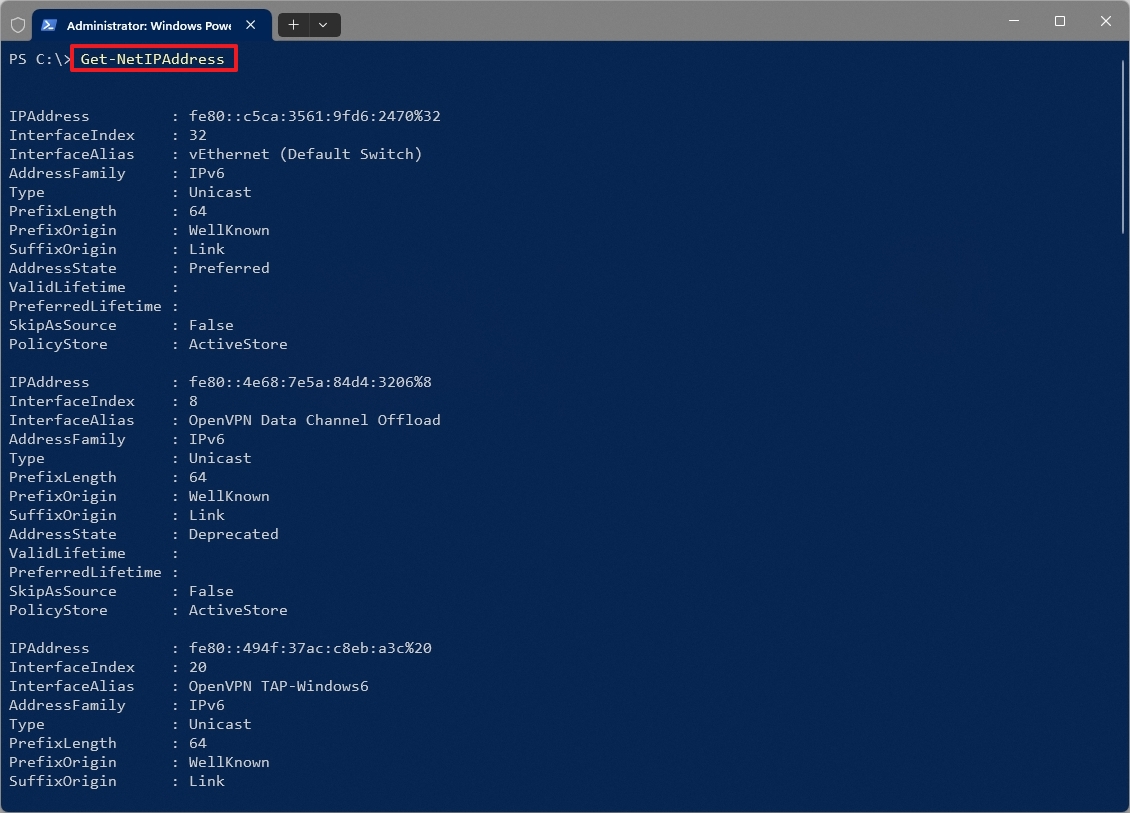
15. Get-NetIPAddress
The “Get-NetIPAddress” commandlet gathers IP address details from the network interfaces on the local system.
This command retrieves details on IPv4 and IPv6 addresses linked to the network connections. It displays information such as the status of the address, the interface number, the length of the prefix, and the duration for which the address is valid.
Usage:
- Get-NetIPAddress
- Example 1: Get-NetIPAddress -AddressFamily IPv4 – Displays the IPv4 addresses.
- Example 2: Get-NetIPAddress -InterfaceIndex 1 – This command displays the IP information for the adapter with an index of “1.” You can change the number to show the information for a specific adapter.
Key Parameters:
- -AddressFamily: Specifies the type of addresses you want to retrieve (e.g., IPv4, IPv6).
- -InterfaceIndex: Filters results based on the network interface’s index.
- -AddressState: Filters results based on the address state (for example, Preferred, Obsoleted).
The “Get-NetIPAddress” command is quite similar to the “Get-NetIPConfiguration”, but it delves deeper into the specific details of IP address configurations. On the other hand, “Get-NetIPConfiguration” offers a broader perspective, providing an all-encompassing view of network adapters and their respective configurations.
More resources
Read More
- Solo Leveling Season 3: What You NEED to Know!
- OM PREDICTION. OM cryptocurrency
- Oblivion Remastered: The Ultimate Race Guide & Tier List
- Rachel Zegler Claps Back at Critics While Ignoring Snow White Controversies!
- How to Get to Frostcrag Spire in Oblivion Remastered
- Fantastic Four: First Steps Cast’s Surprising Best Roles and Streaming Guides!
- Moana 3: Release Date, Plot, and What to Expect
- Captain America: Brave New World’s Shocking Leader Design Change Explained!
- Oshi no Ko Season 3: Release Date, Cast, and What to Expect!
- Doctor Doom’s Unexpected Foe: The Dark Dimension’s Ultimate Challenge Revealed!
2025-01-15 16:12