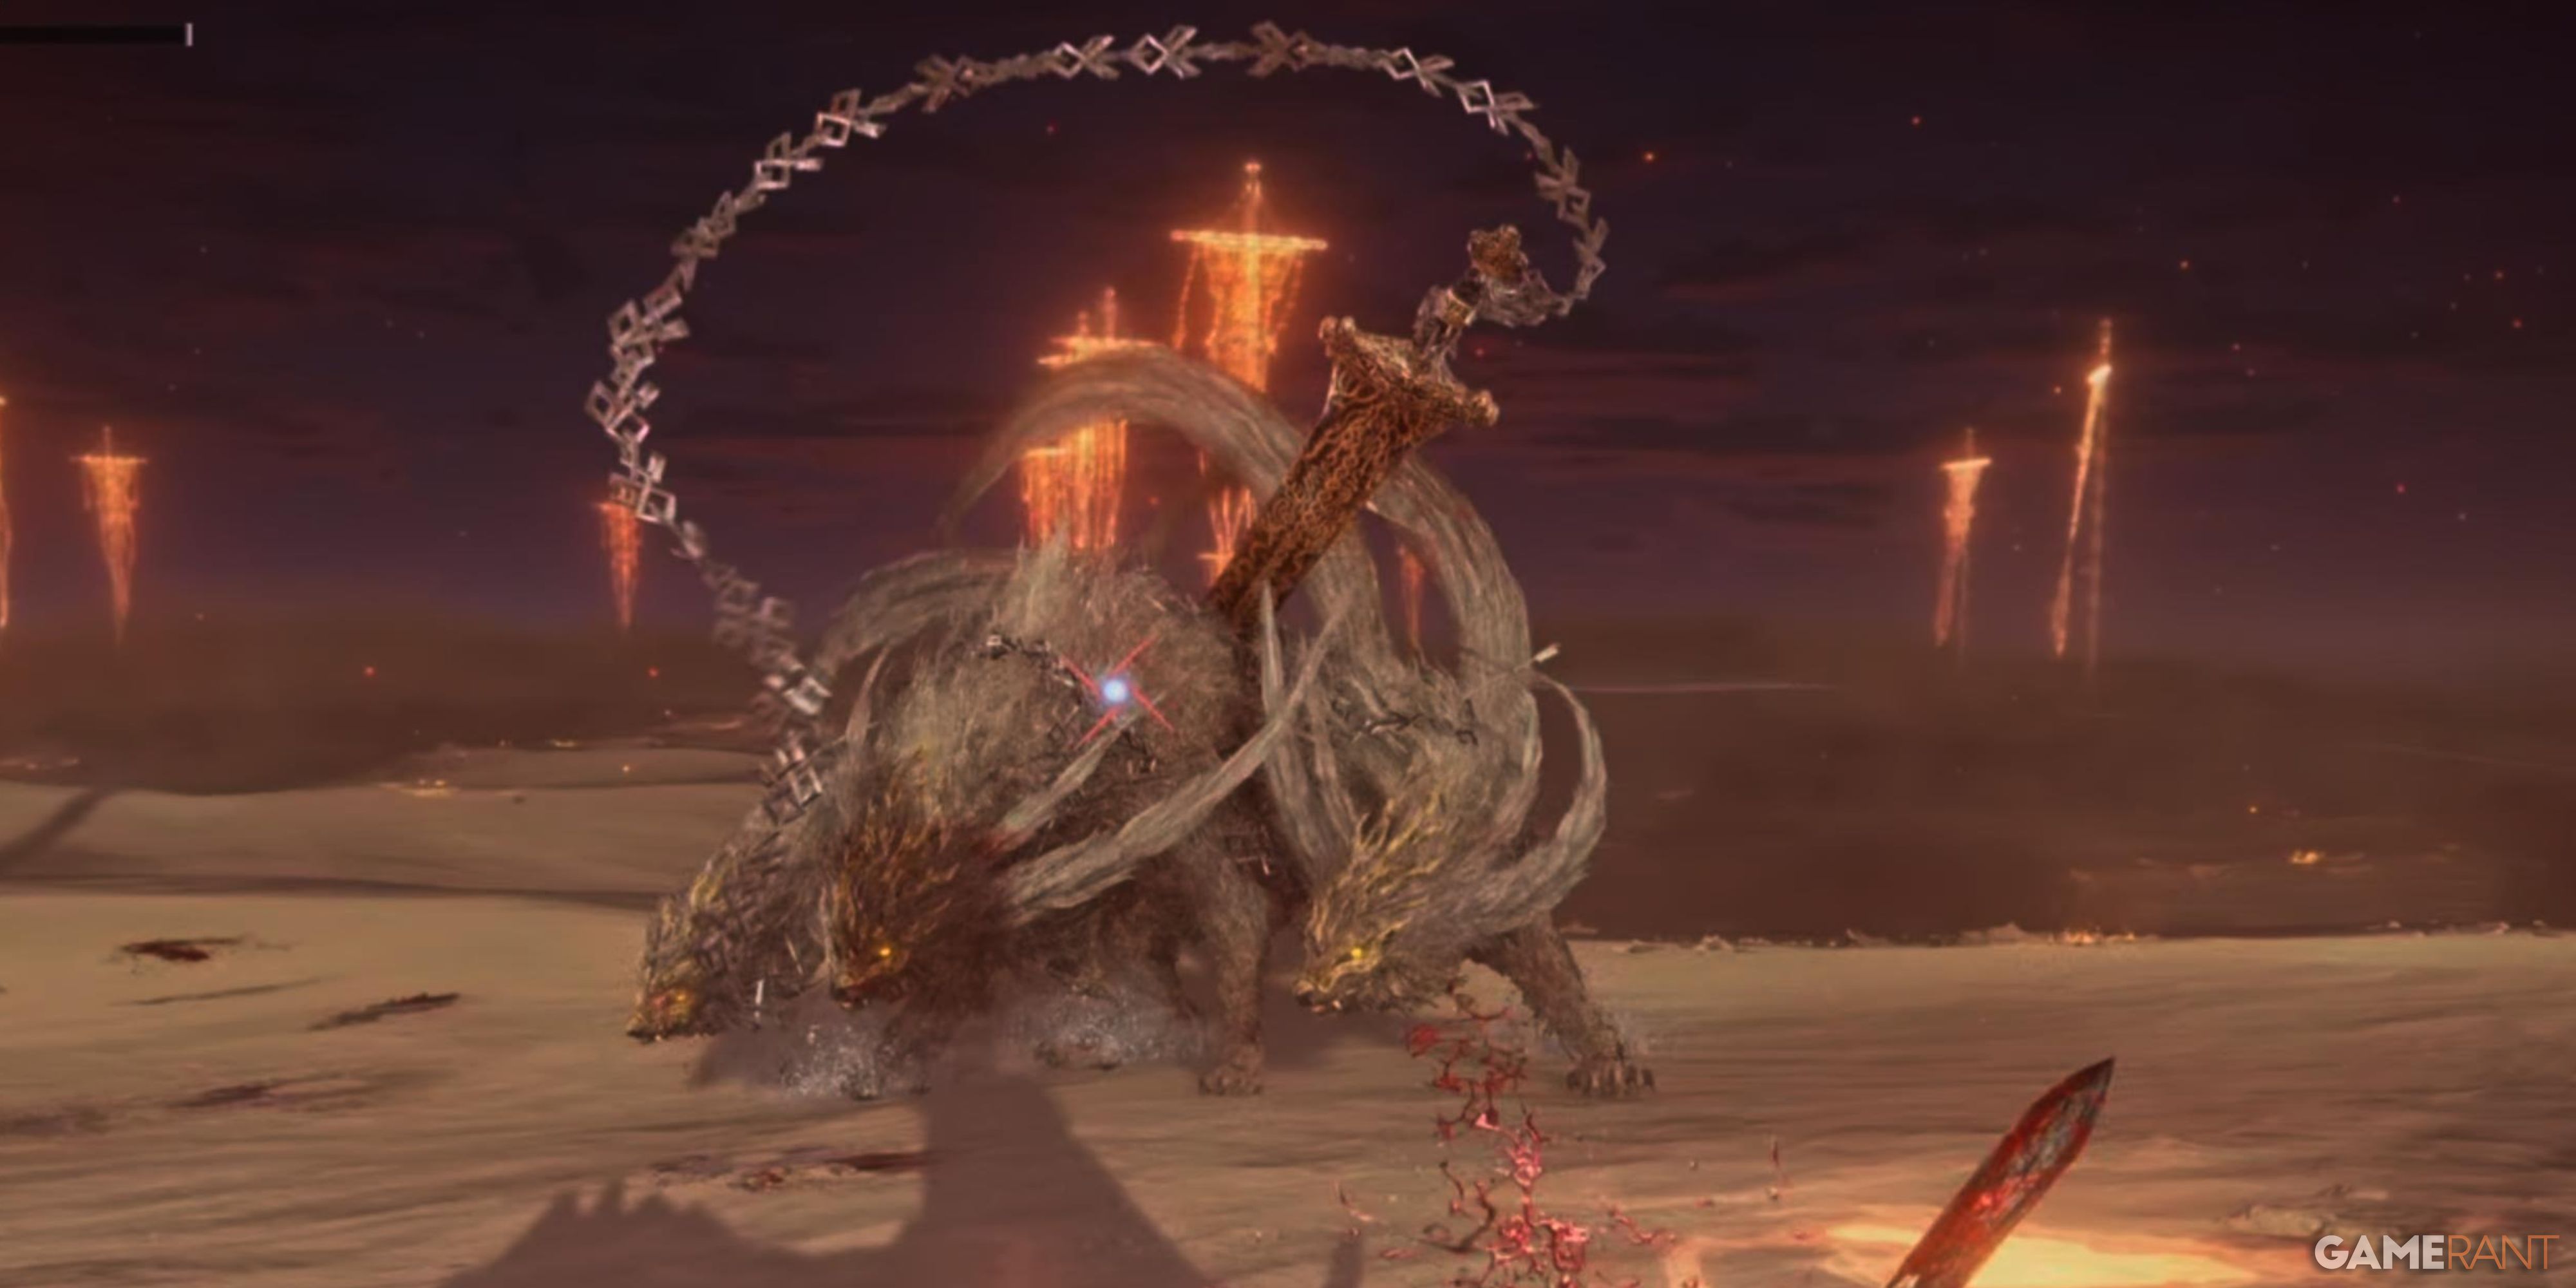
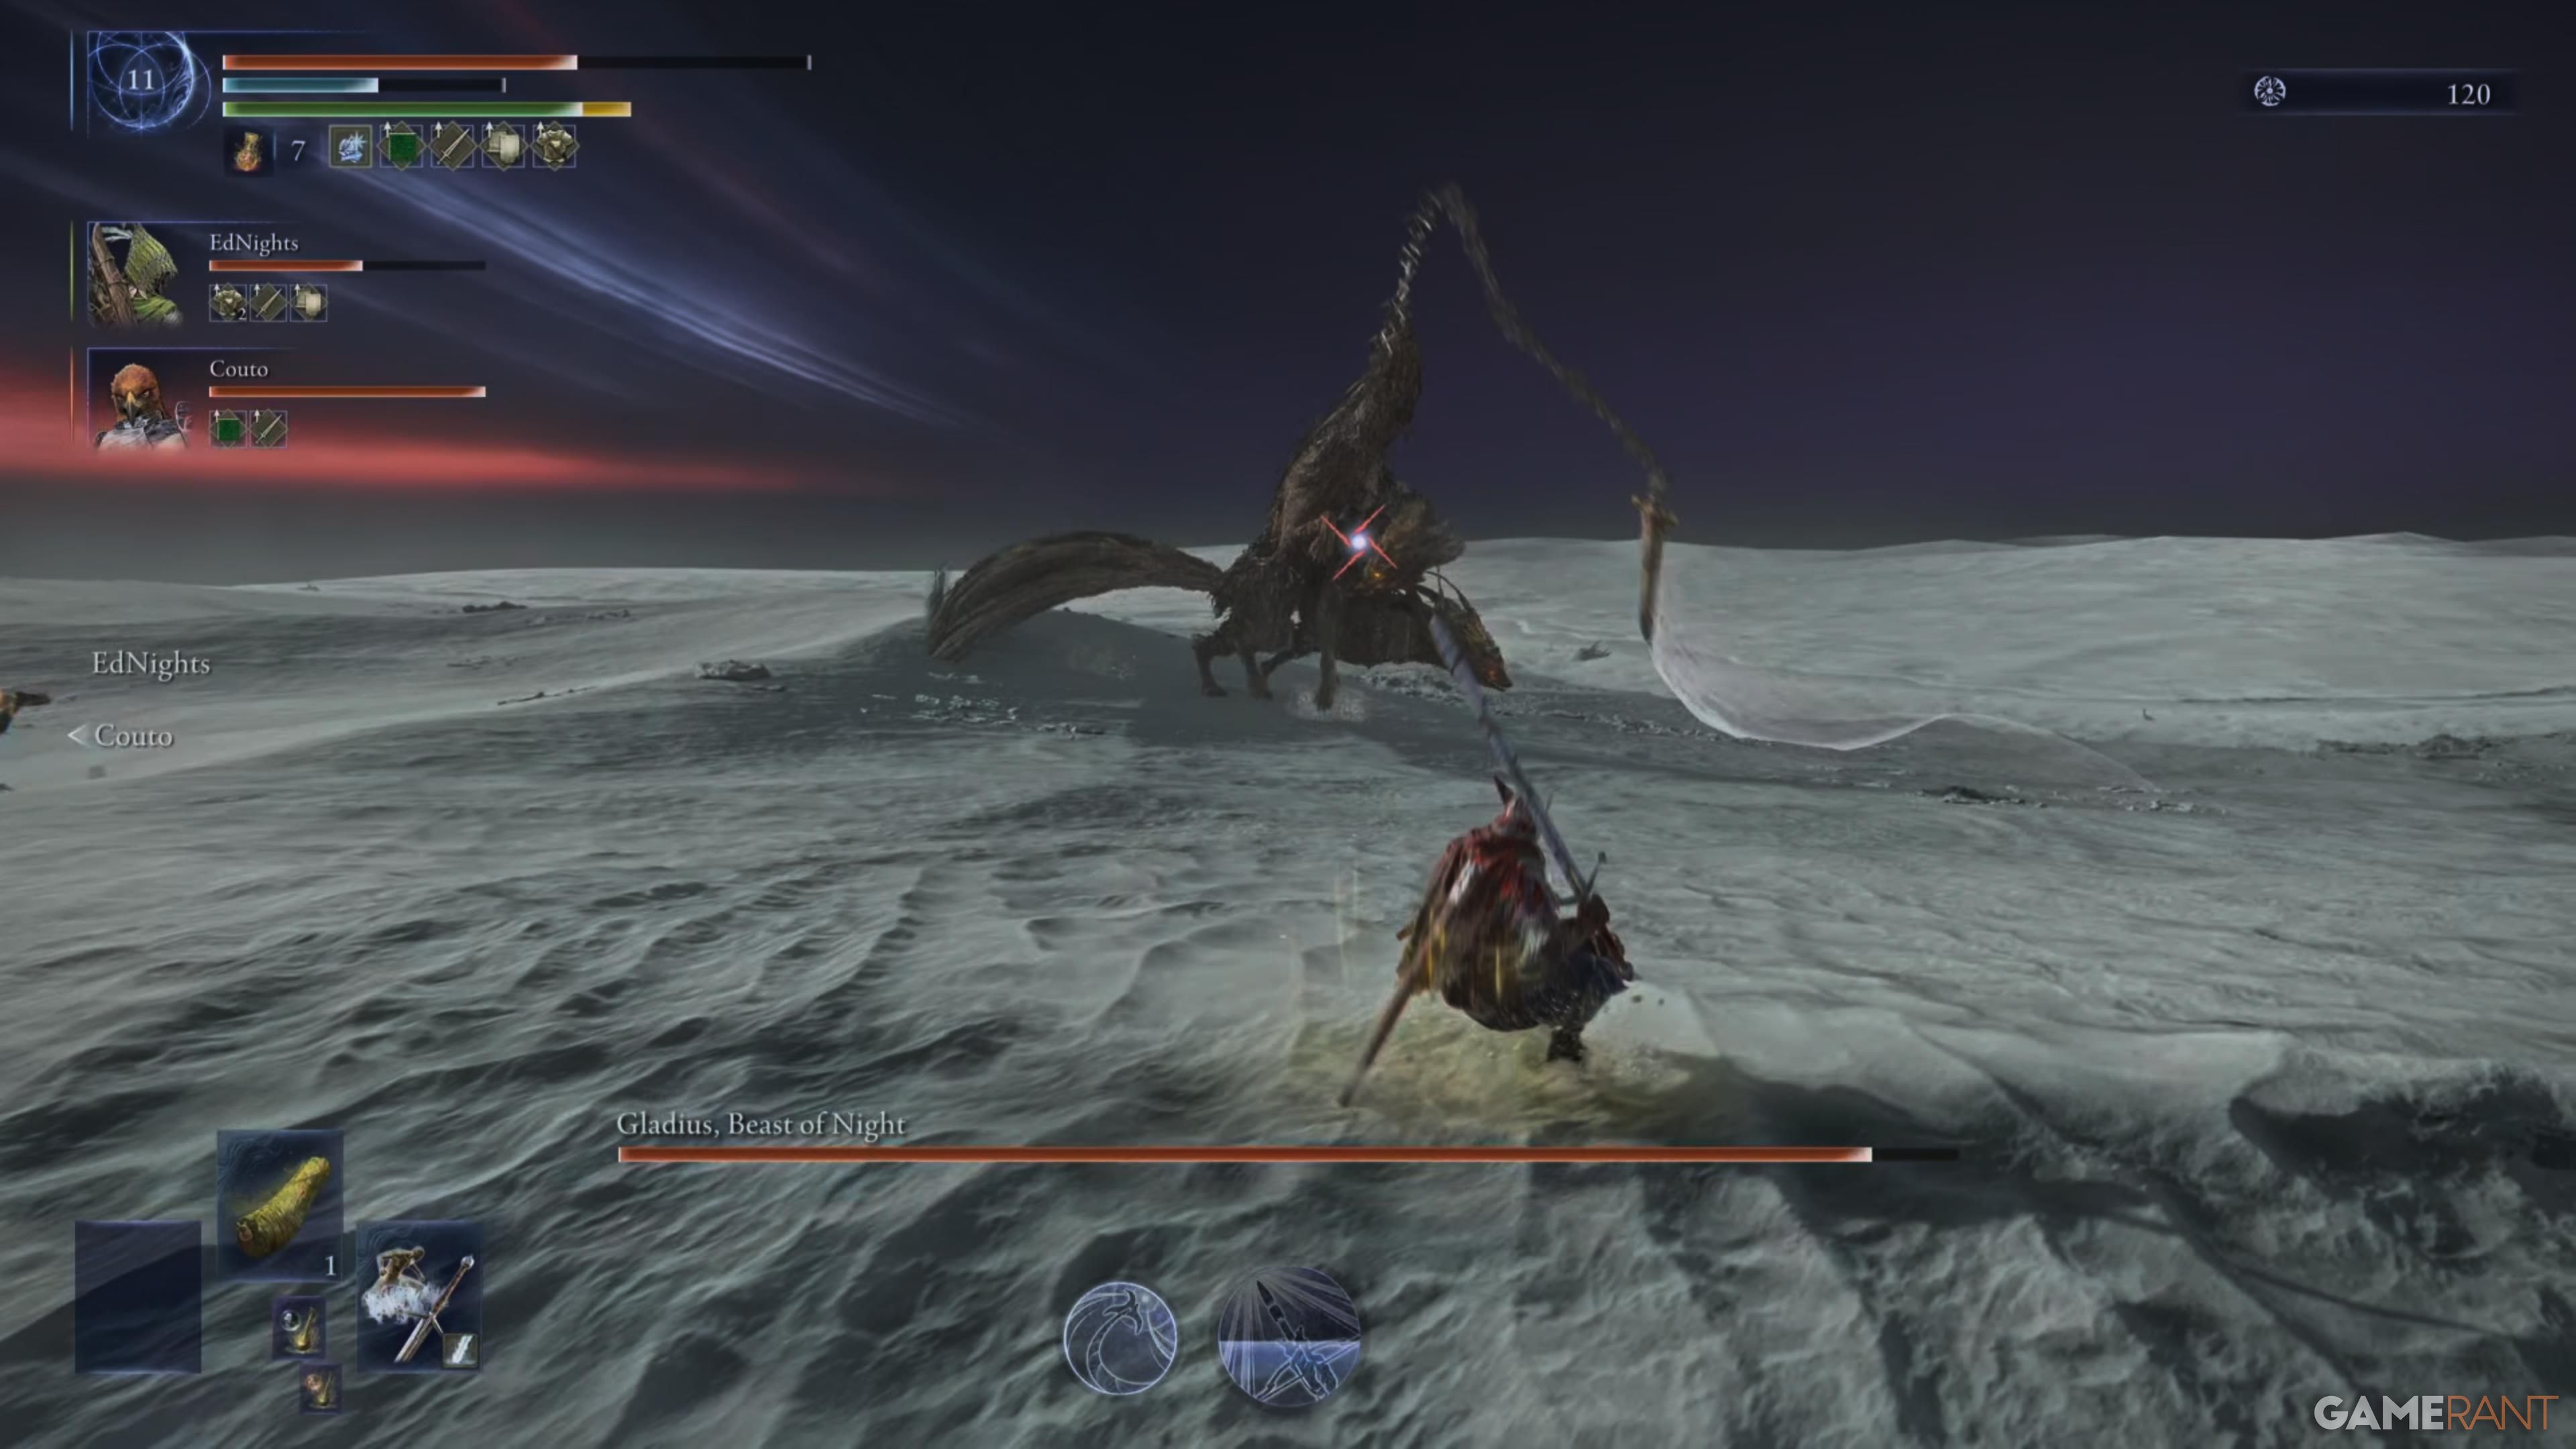
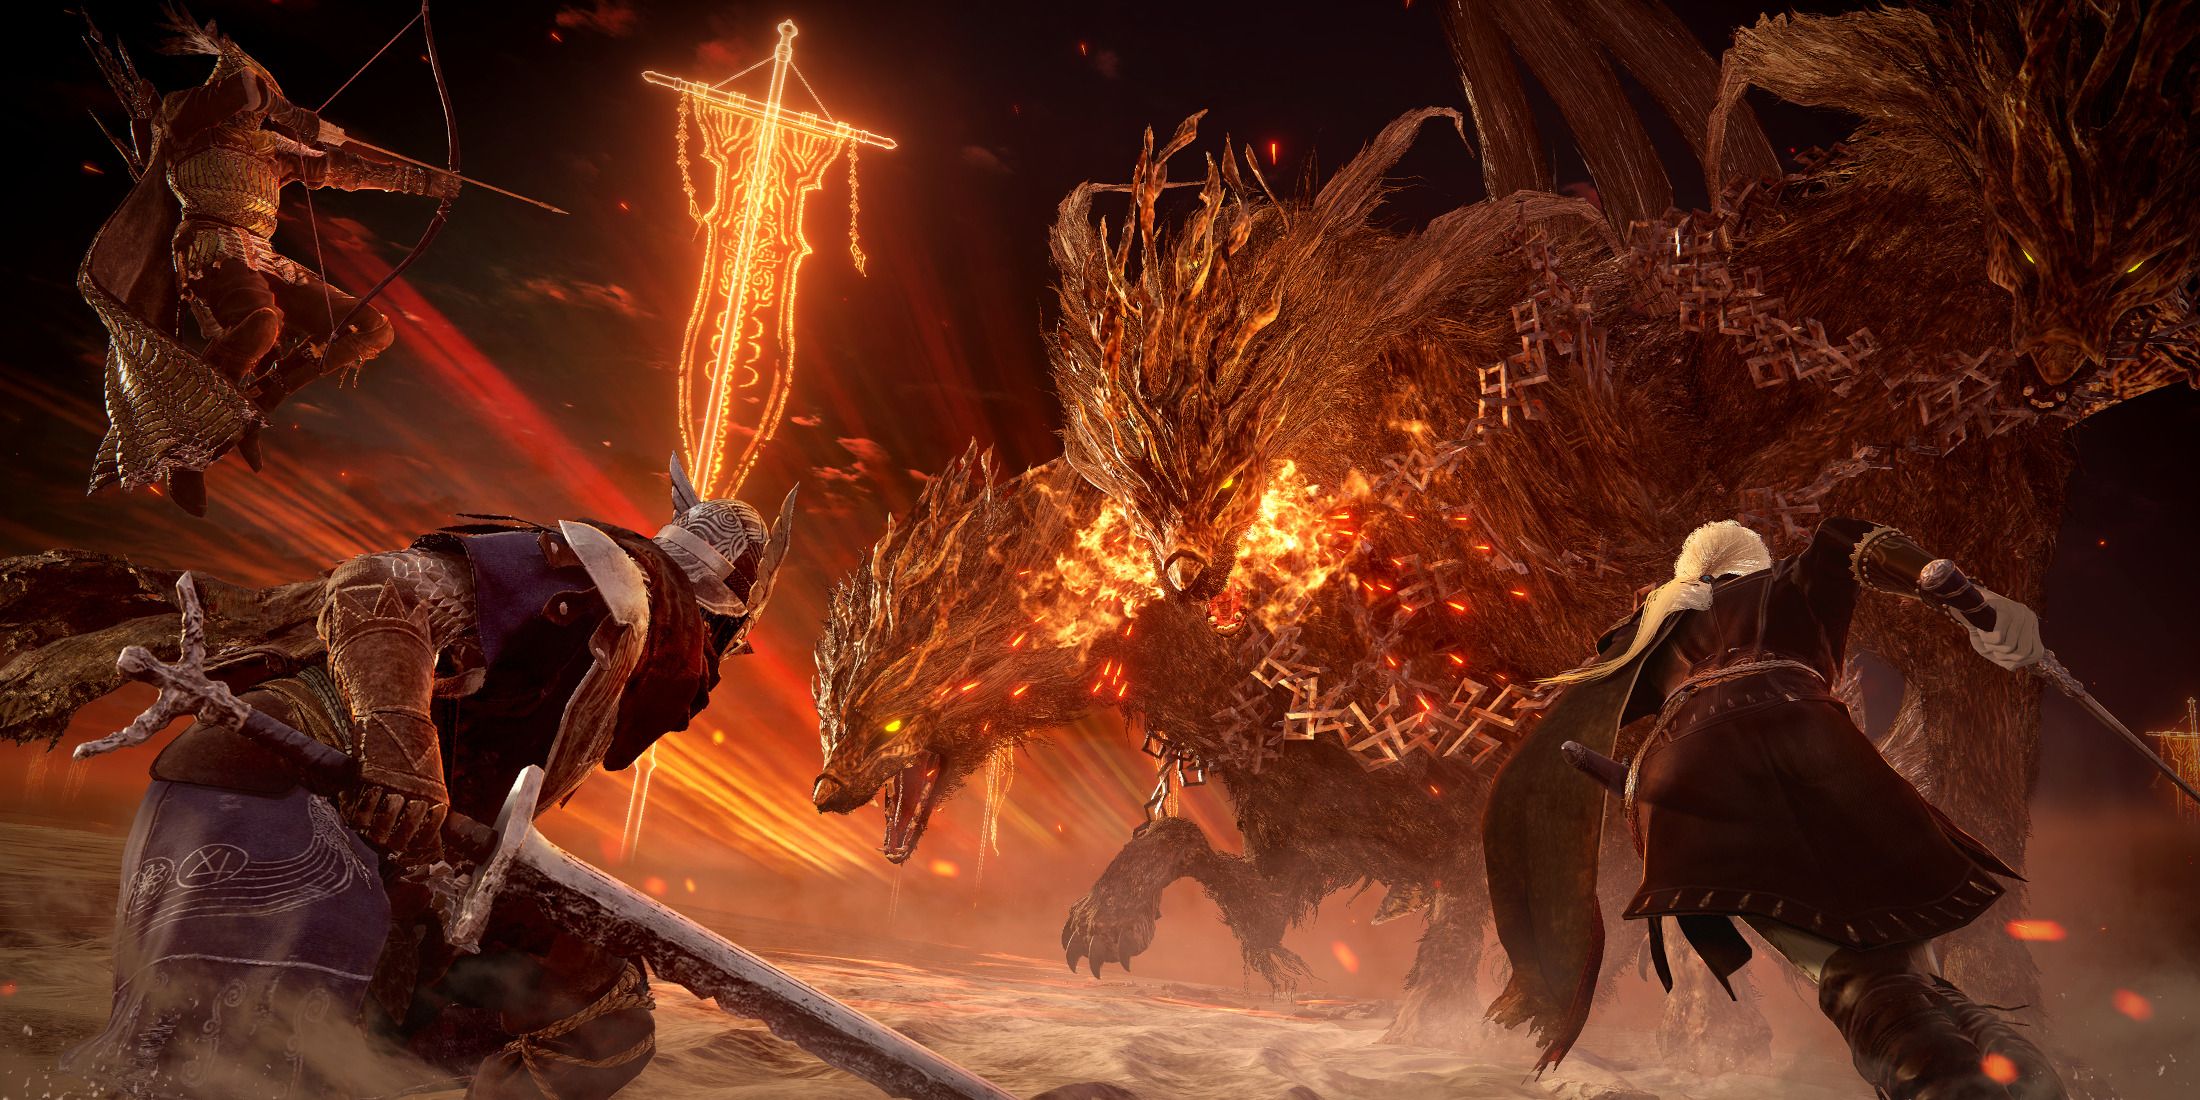
In the Elden Ring Nightreign‘s Tricephalos Expedition, players will initially encounter a creature known as Gladius, the Beast of Night. This multi-legged beast is reminiscent of a wolf and sports an unusual three heads. What sets it apart, other than its multiple heads, is the sword tethered beside one of them.
As the premier Nightlord, Gladius offers players a sneak preview of the game’s upcoming challenges and underscores the importance of a sound strategy for success. This guide will help you locate Gladius, decode its attack patterns, identify its vulnerabilities, and create an effective plan to defeat Gladius swiftly in the game Elden Ring Nightreign.
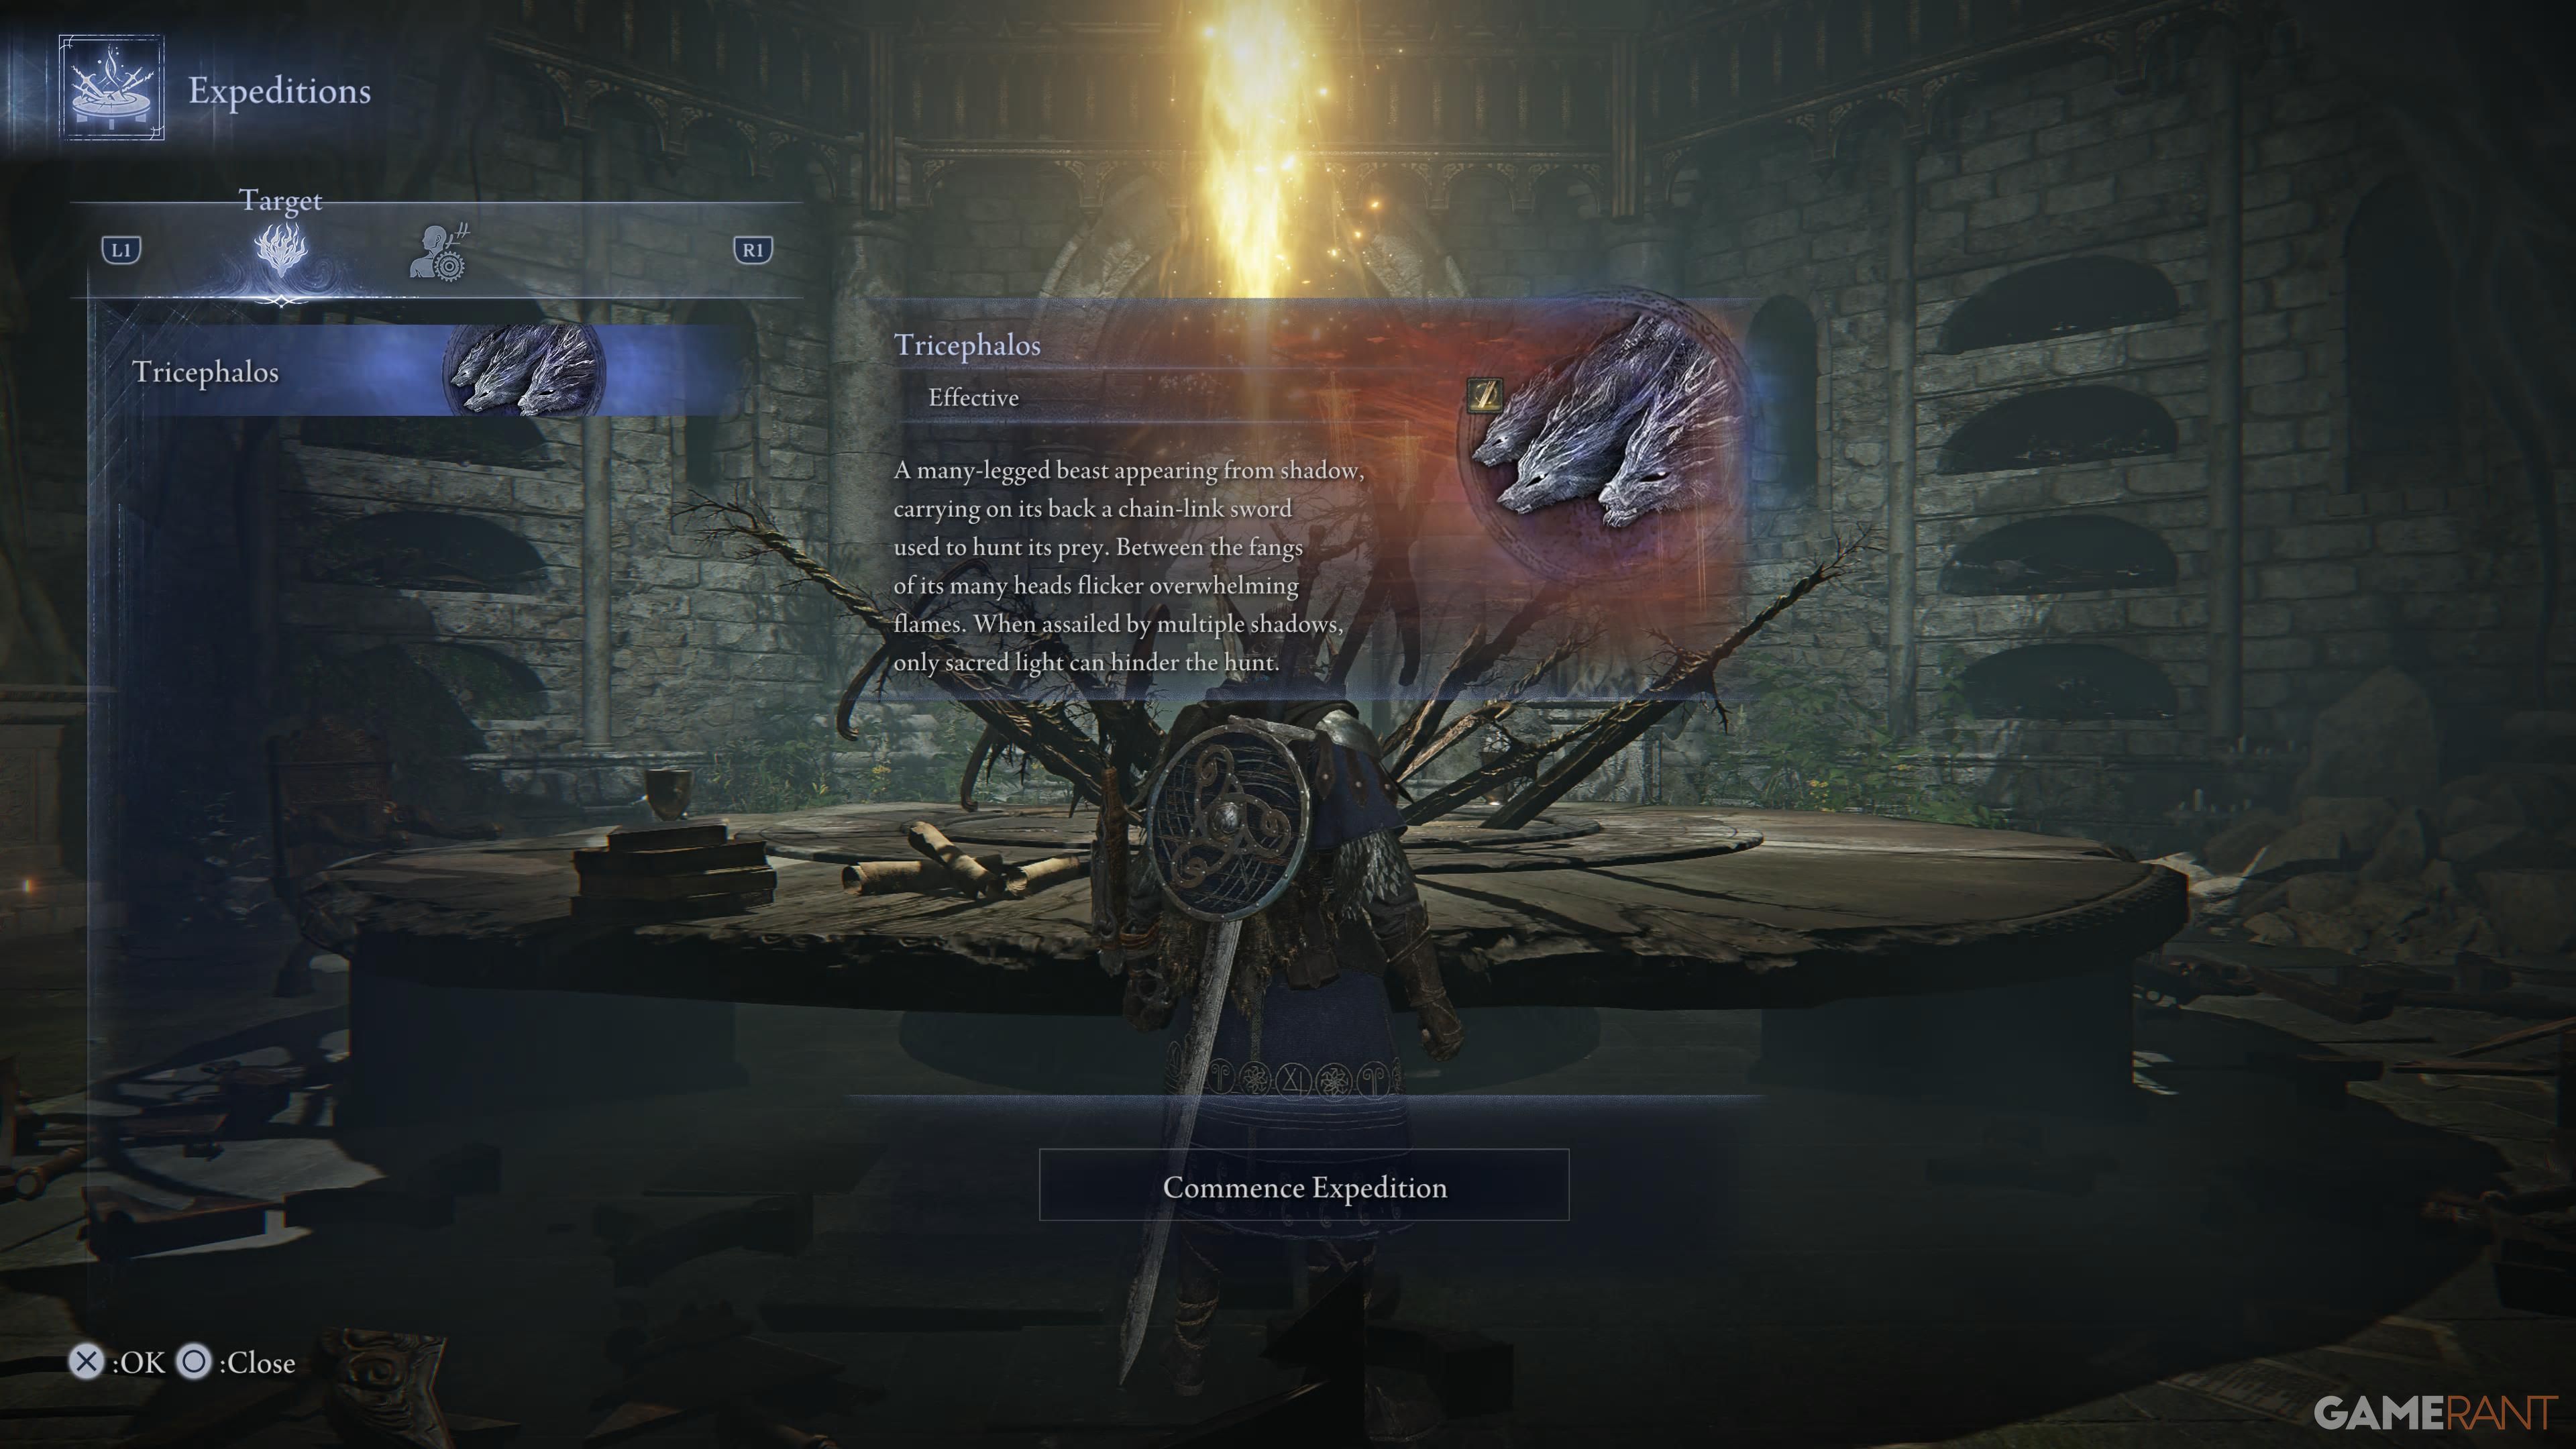
How to Find Tricephalos In Elden Ring Nightreign
As a devoted fan, I can share that once you’ve mastered the tutorial and step into the Roundtable Hold, the initial Expedition at your disposal is none other than Tricephalos. When you decide on this adventure, whether you choose to embark solo or with companions, you’ll find yourself materializing in Limveld. Your main objective during Day 1 is leveling up. As the hours tick by, the Night’s Tide begins its relentless march, and you’ll notice a protective circle appearing on the map. To stay safe from the tide, it’s essential to move towards this circle to avoid taking damage.
As the game progresses, the play area will shrink, eventually leading me to a tough battle against a formidable Night Boss. If I manage to defeat it, the night phase will be over, resetting back to day one. The same pattern repeats for day 2, where another Night Boss awaits at its end. Once these challenges are conquered, I can visit the center of the circle to access the Spirit Shelter. Here, I can enhance my weapons, buy useful items from a merchant, and level up at the Site of Grace. As I advance, there’s a door that leads to the arena for the Nightlord, the current Expedition’s final boss.
Gladius, Beast of Night Overview In Elden Ring Nightreign
| Attack | Image | Attack Description |
|---|---|---|
| Phase 1 | ||
| Bite |
 |
The boss sprints toward a Nightfarer’s location and leaps to bite them using all three of its heads. |
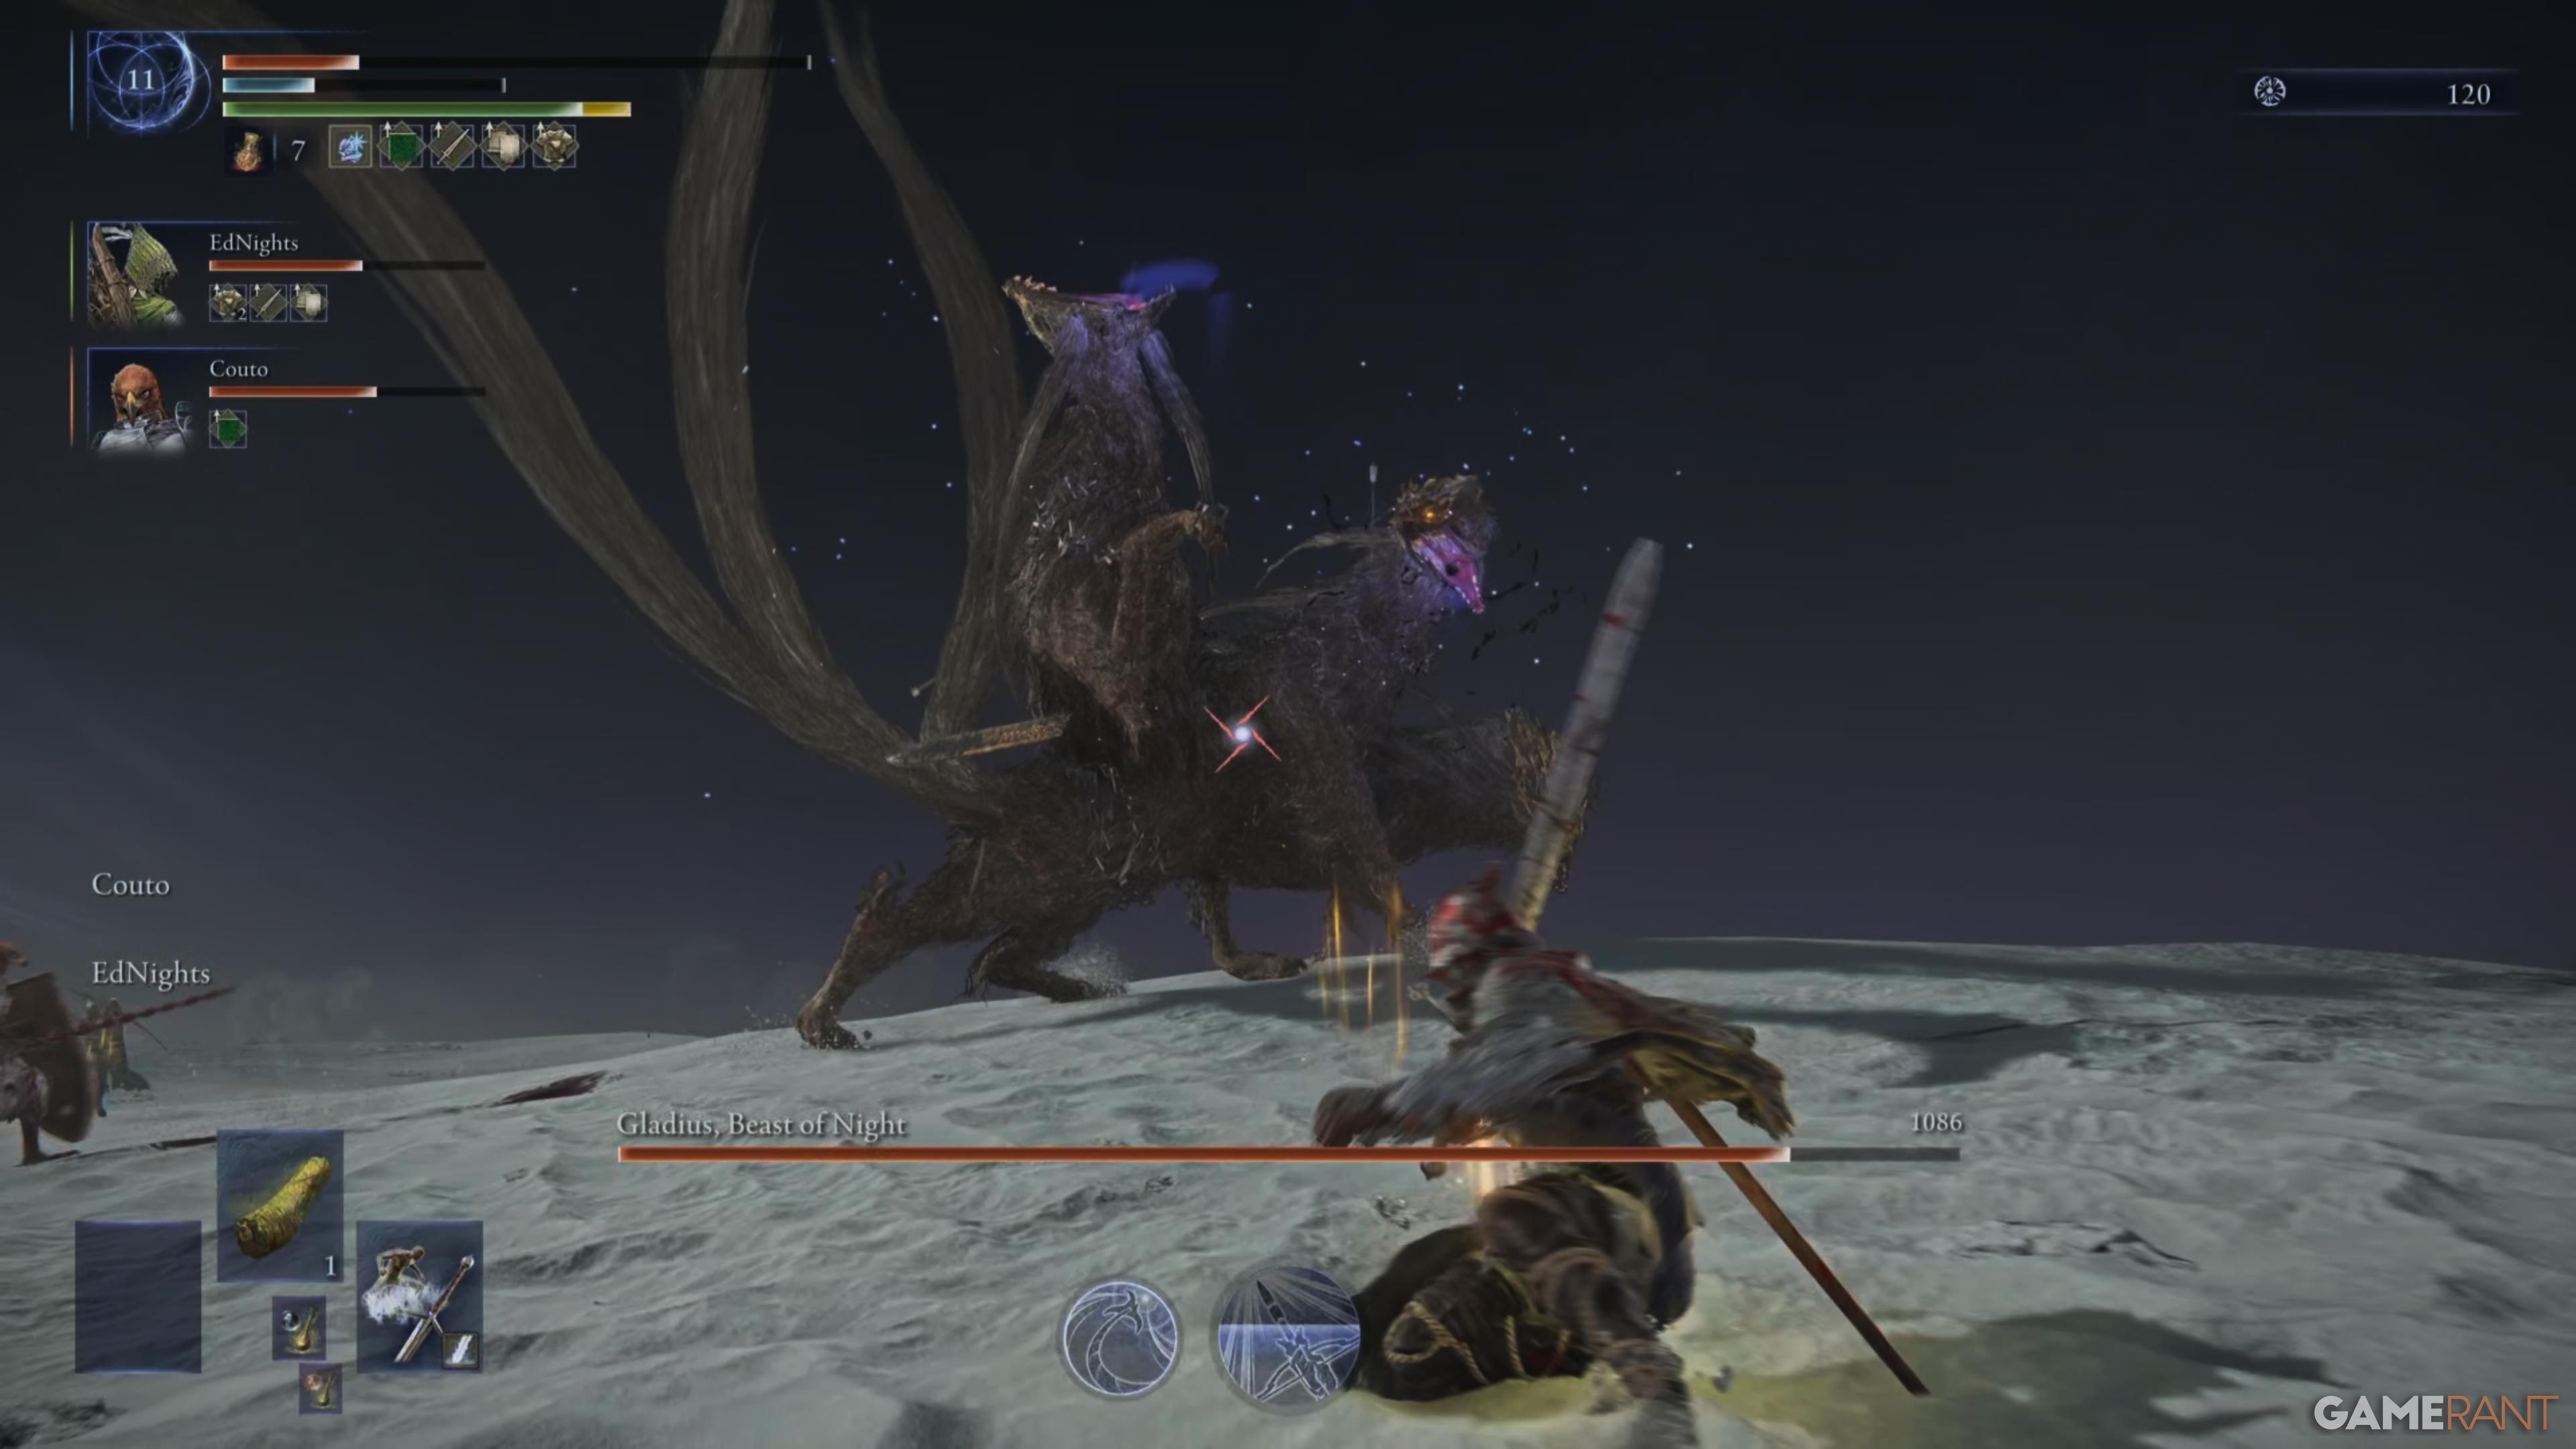
| Chained Sword Sweep |
 |
Gladius takes out the sword sticking from its back and performs a wide horizontal sweep, followed by another sweeping strike. The boss can also slam the chain and sword down at a player’s location. |
| Purple Grab |
 |
The boss rears up as the mouths of all three heads begin to glow one after the other, signaling a powerful grab attack that follows shortly after. |
| Phase 2 | ||
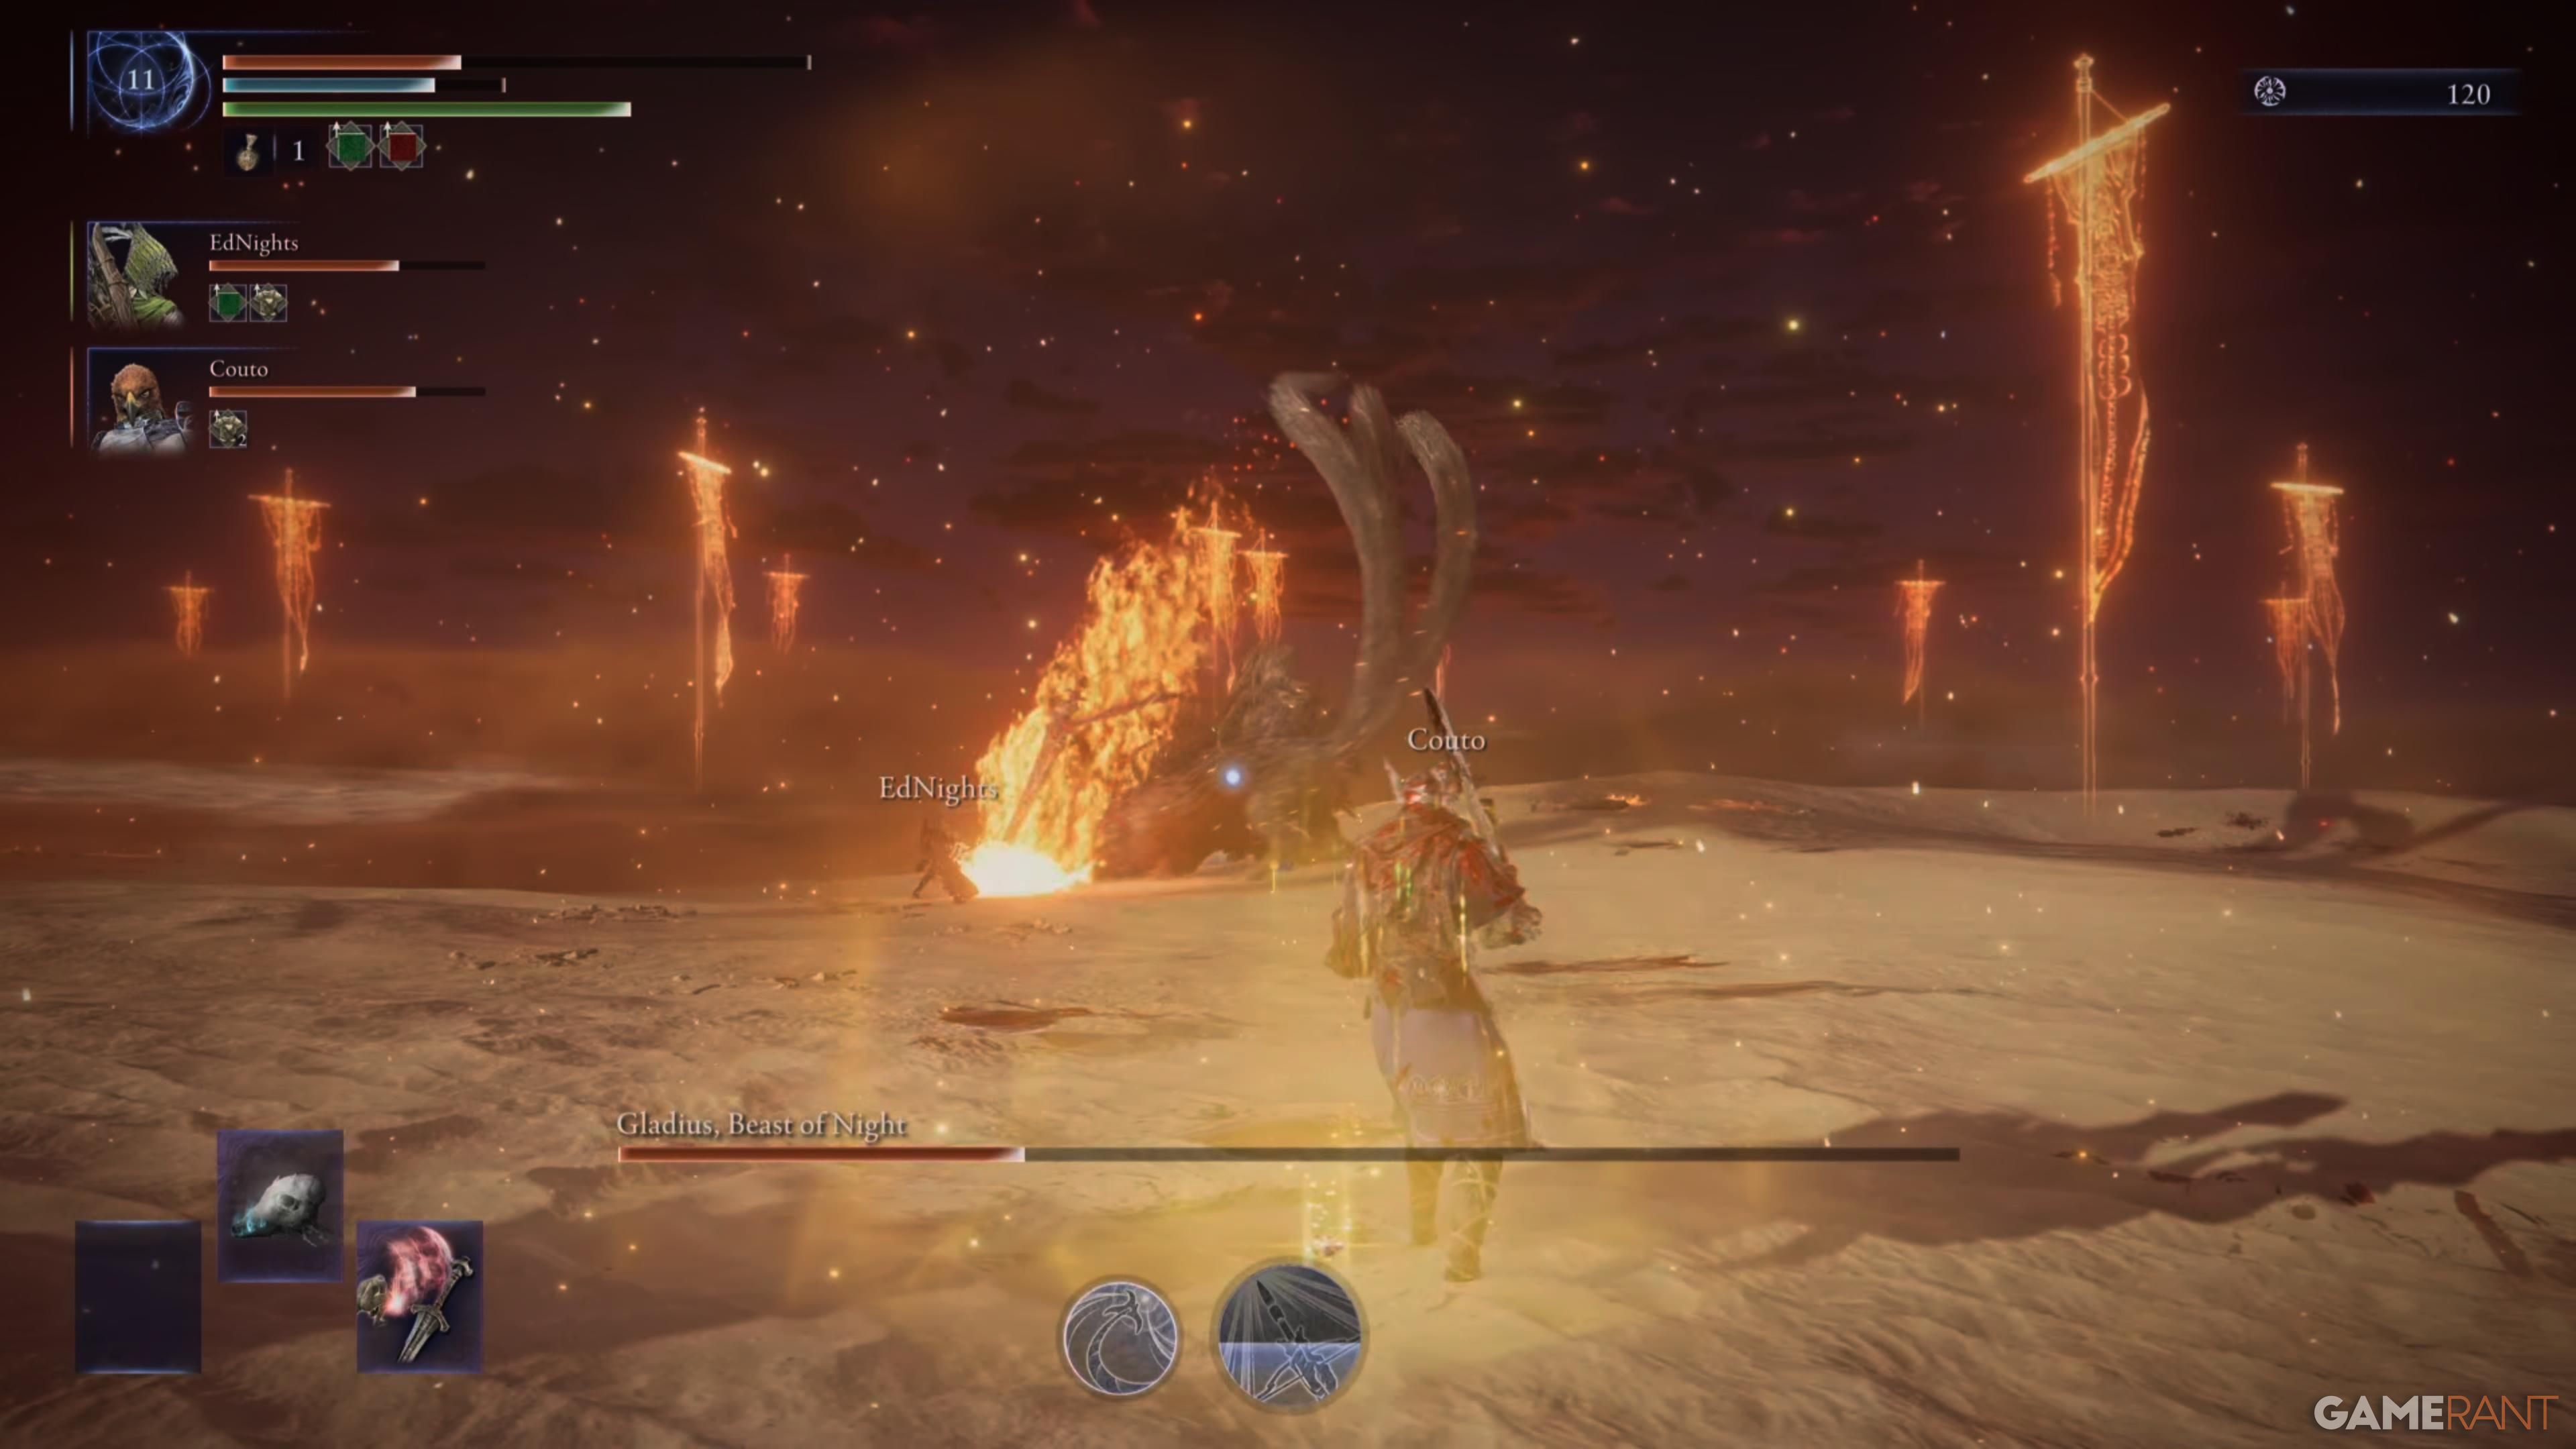
| Split |
 |
Gladius lets out a howl and splits into three fireballs that drift through the slightly altered field behind it. When the fireballs take form, they transform into three wolves that the player must deal with. |
| Explosive Plunge |
 |
The boss performs its usual Chained Sword Sweep and follows the second horizontal sweep by pulling back the chain, raising the weapon now covered in fire, and then slamming it down on the player, causing an AOE explosion. |
| Wave of Fire |
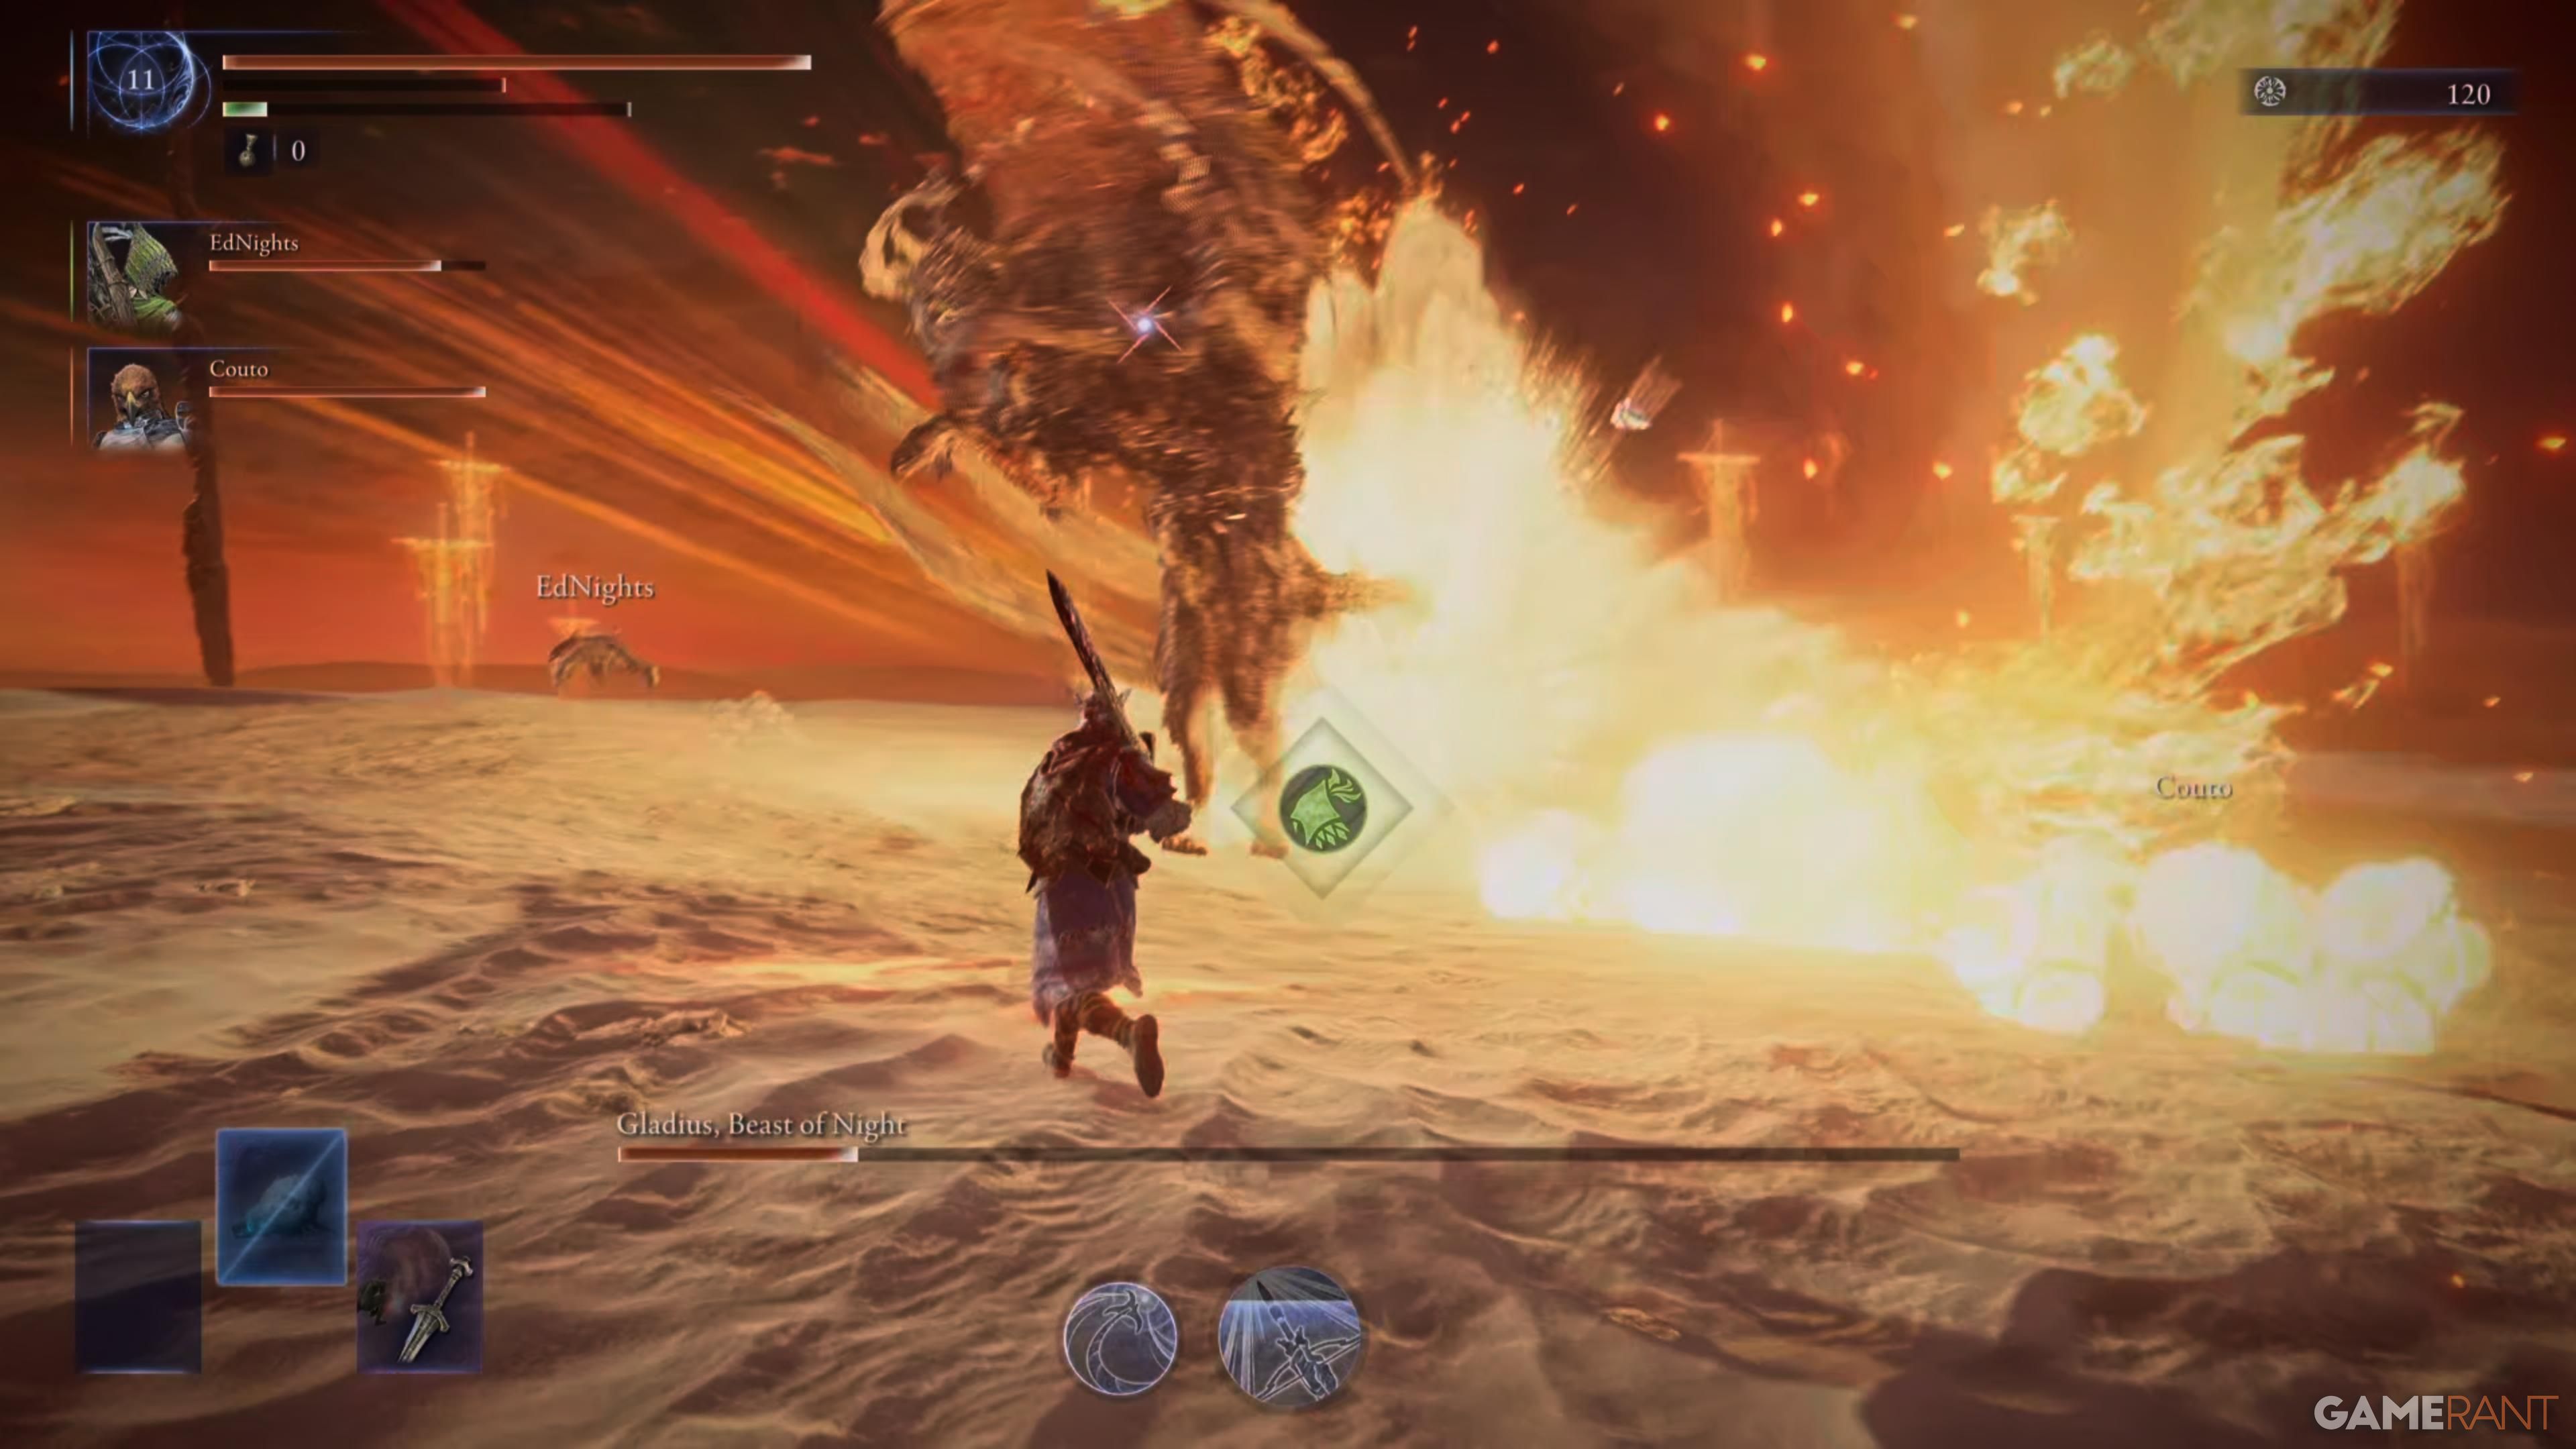 |
Gladius grabs the sword from its back and plants it into the ground, causing fire to accumulate around it. It then pulls the sword out and attacks in a wide vertical arc, creating a wave of fire. |
Strategies For Tricephalos In Elden Ring Nightreign
Boss Weakness: Holy
In your adventure with Gladius, Keeper of the Night, it’s crucial to note that he is vulnerable to Holy-infused weapons. Your goal during the Expedition should be to discover camps where there’s a chance they may drop potent Holy weapons for you to wield. If no Holy locations appear on your map, feel free to use any powerful weapon with beneficial effects and an activated skill instead.
The primary advantage of using a Holy weapon lies in the fact that it causes the boss to stumble more rapidly when Holy damage is inflicted upon him. This increased instability will enable you to swiftly break the boss’s stance, ensuring a critical hit and possibly dealing a significant blow to its health.
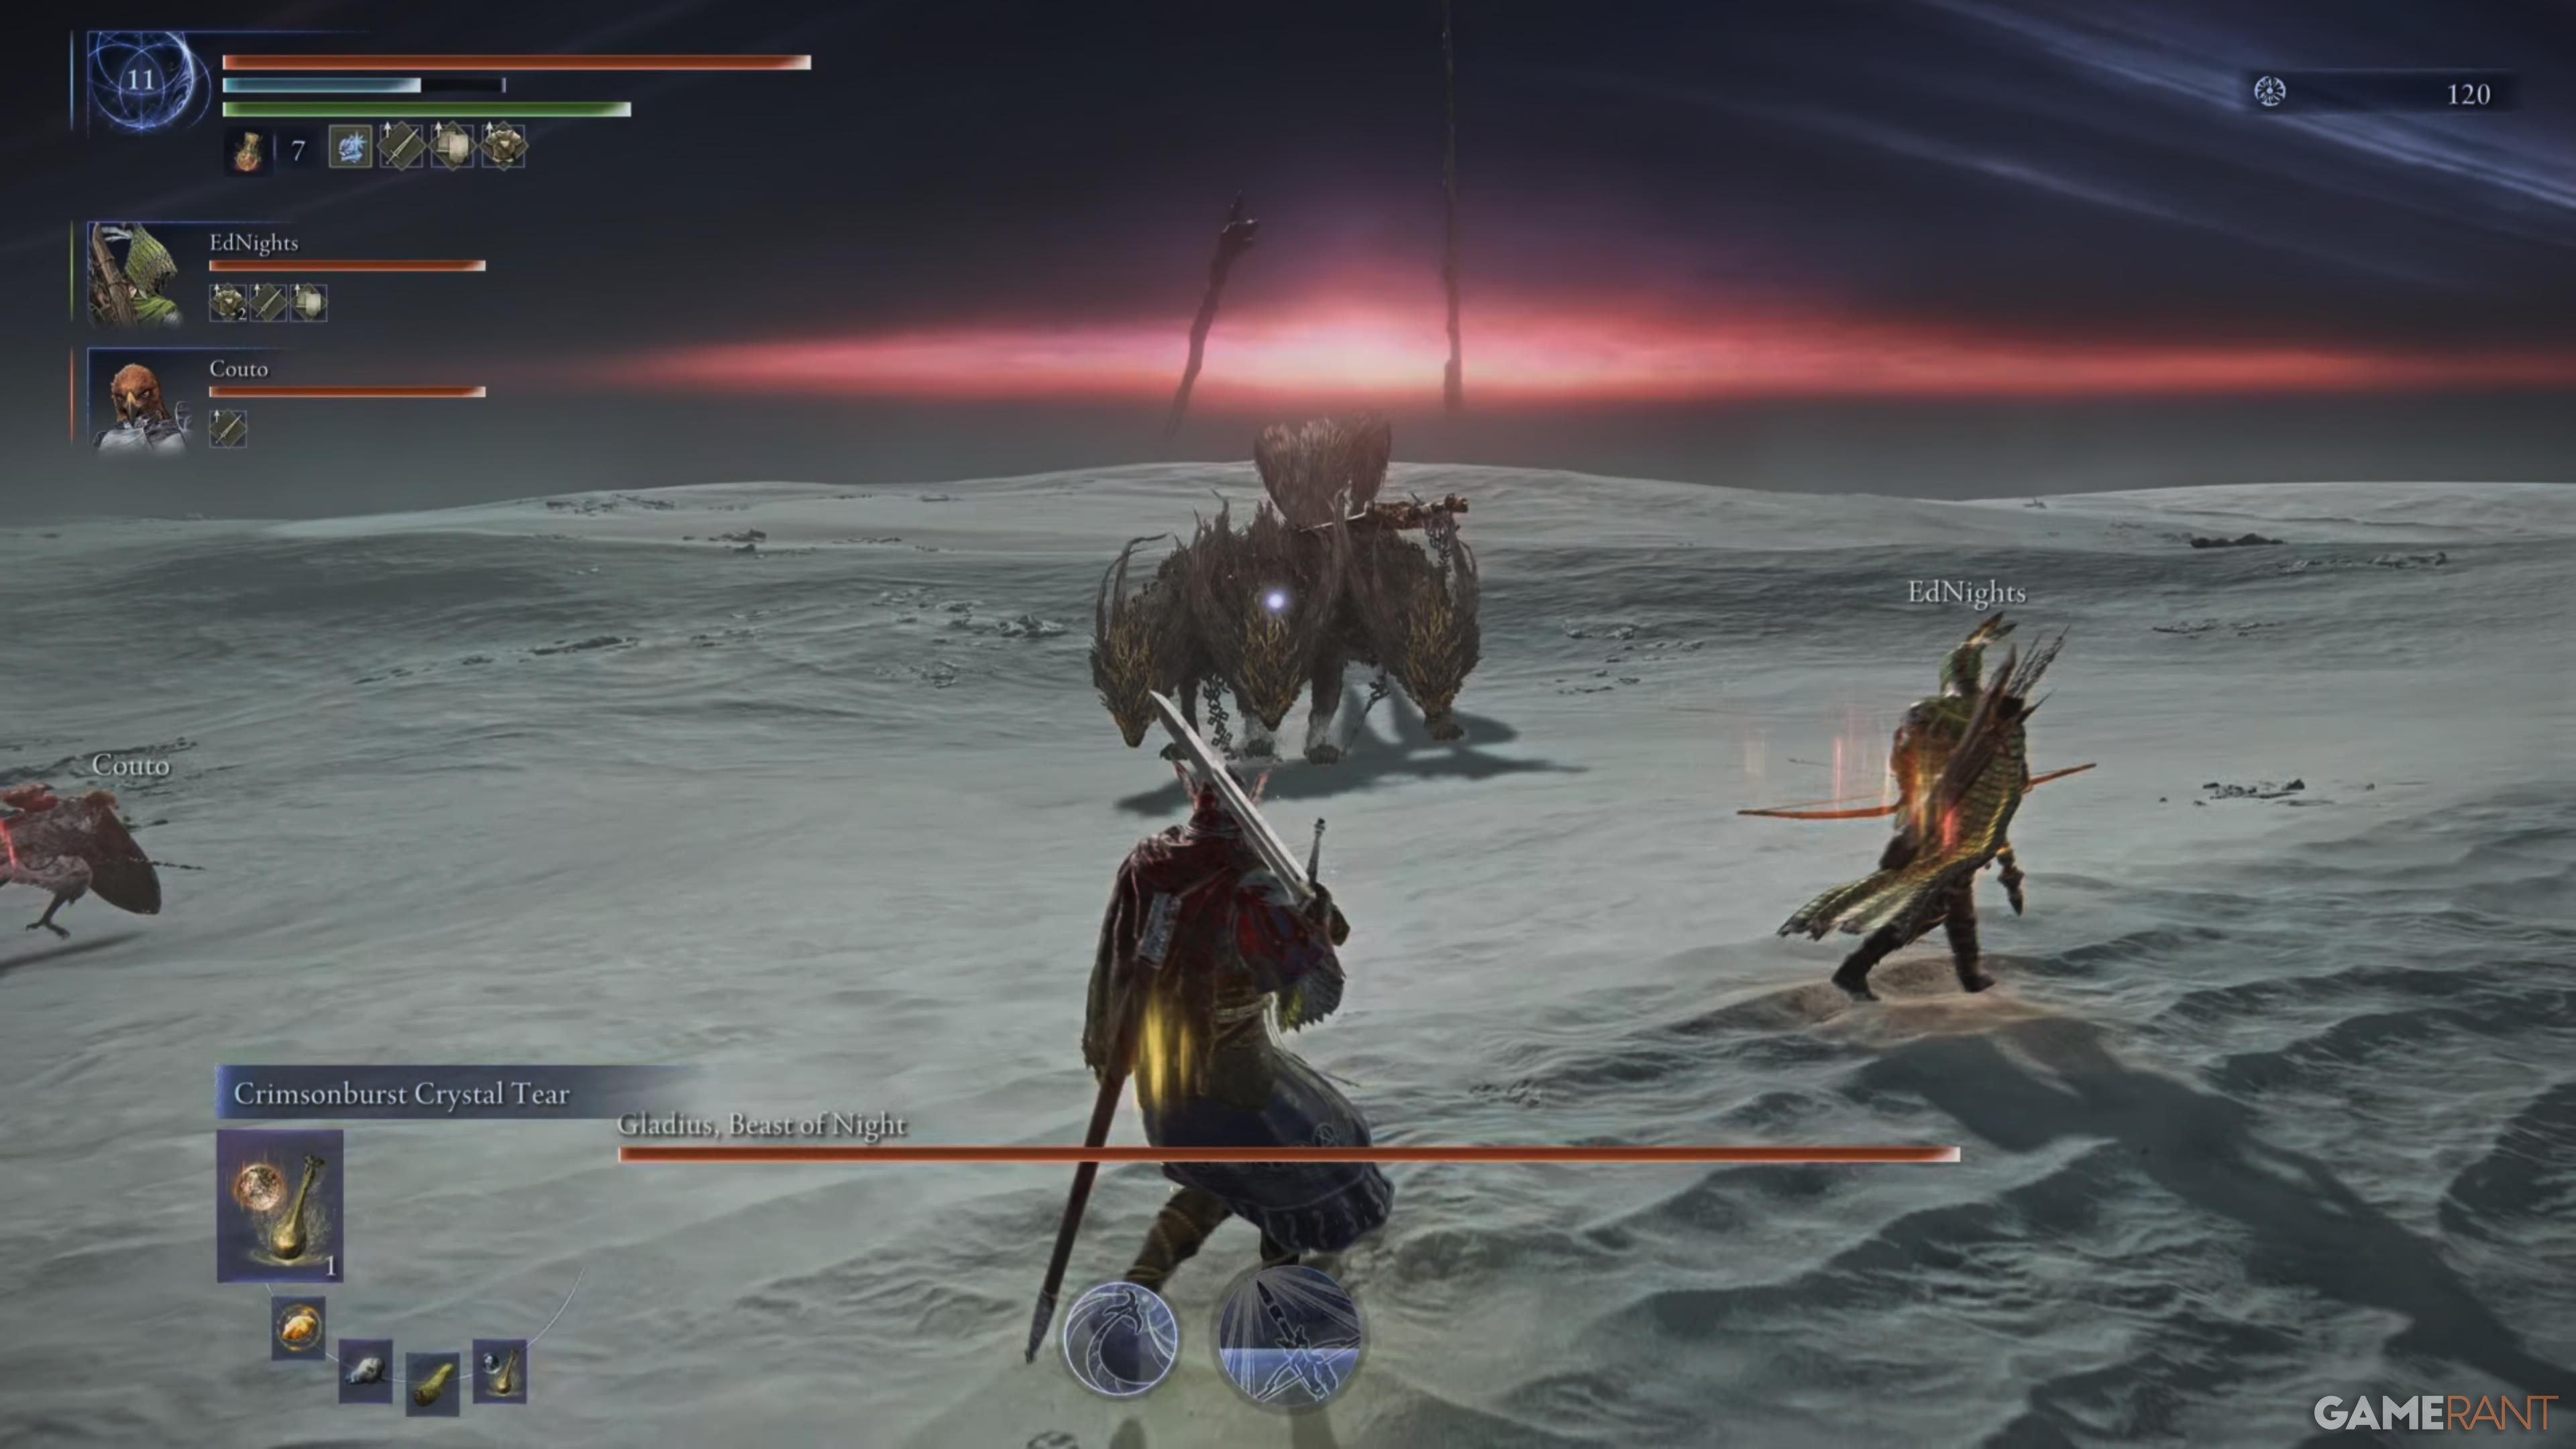
When the battle with the Nightfarer begins, Gladius will zero in on one opponent and lunge at them, attempting to bite. You can effortlessly evade this by moving backward while keeping lock-on, followed by a dodge backwards as the boss initiates its biting animation. It’s worth noting that Gladius seldom uses a grab attack, but when it does, it’s easy to spot because all three heads will emit a purple glow beforehand.
Without a doubt, the Chained Sword Sweep is one of the most lethal moves in its repertoire. It involves wielding the sword and chain to execute a wide, horizontal sweep. This move boasts an impressive reach and can deplete around half of your health gauge with just one strike, considering there are two sweeps during the attack sequence. So, even if the boss seems preoccupied with another player, it’s crucial to evade this move to stay alive. A simple dodge strategy is to time your first dodge, pause for a moment, and then dodge again shortly after.
Avoid immediate second dodges following the first, since this increases your chances of getting struck by the subsequent sweep.
The boss is also known for regularly emitting fiery bursts from each of its three heads, a behavior that can take you by surprise when you’re attempting to resuscitate someone or using an item.
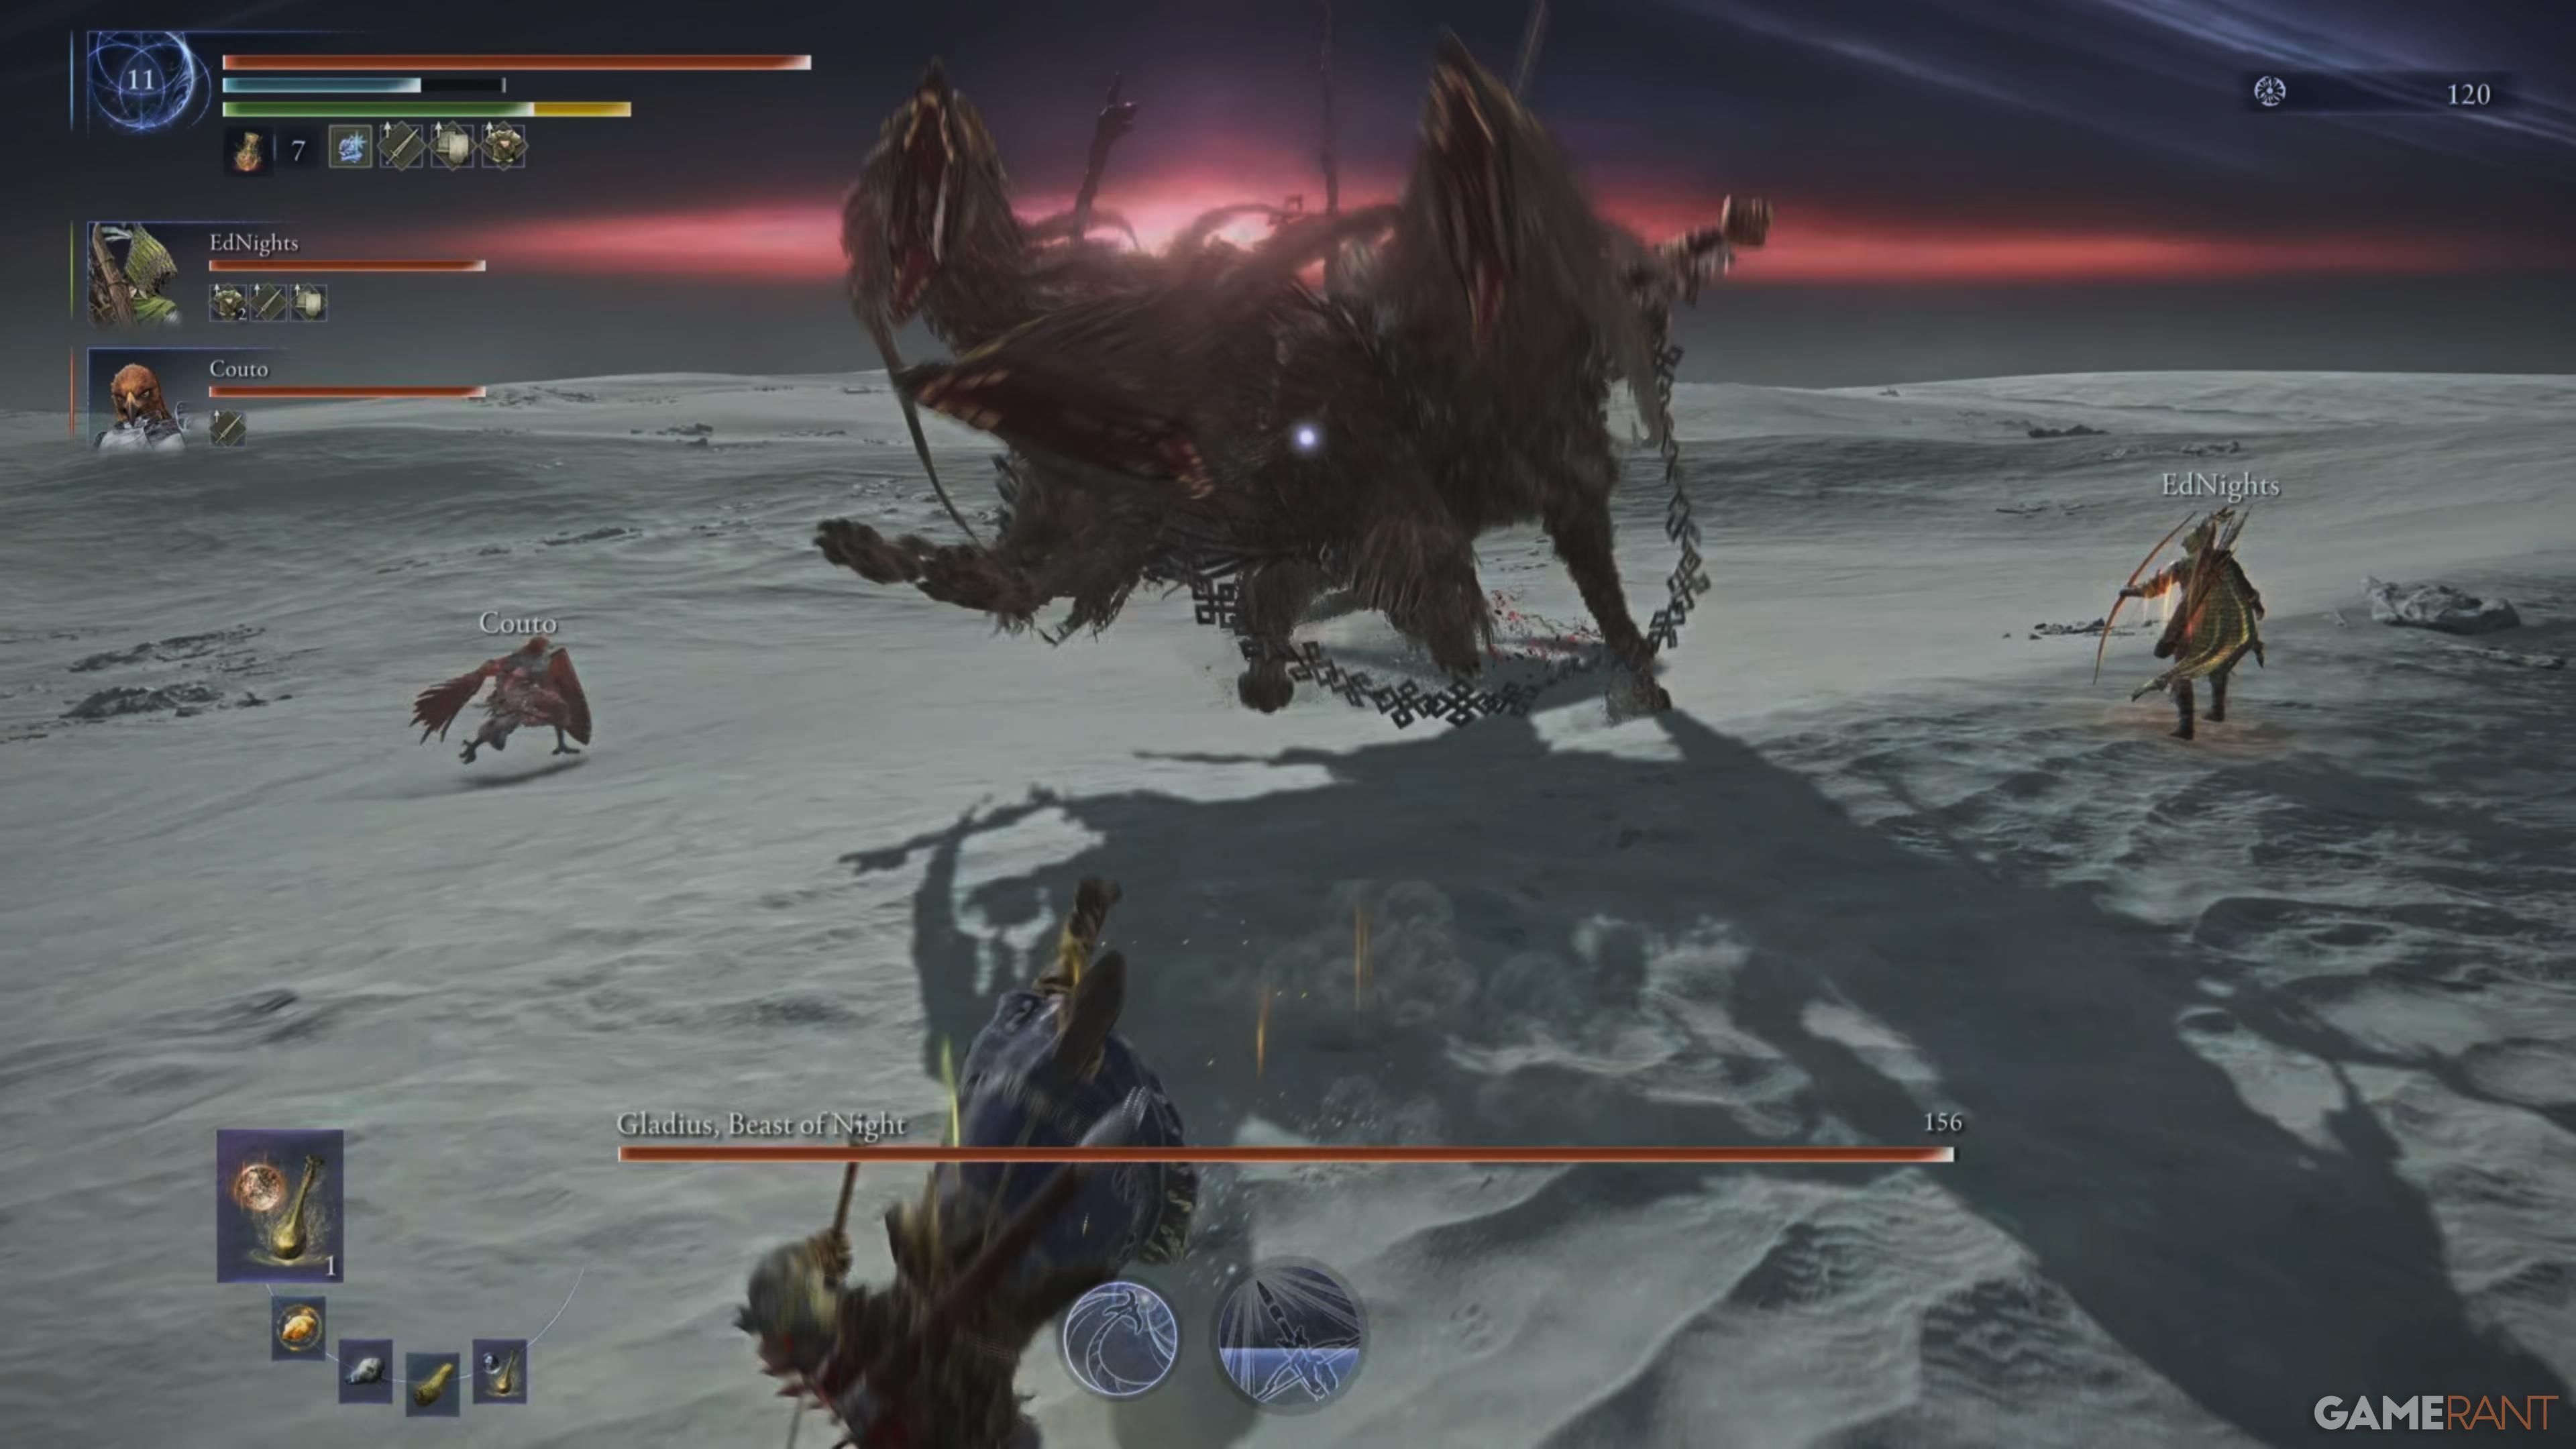
Phase 2
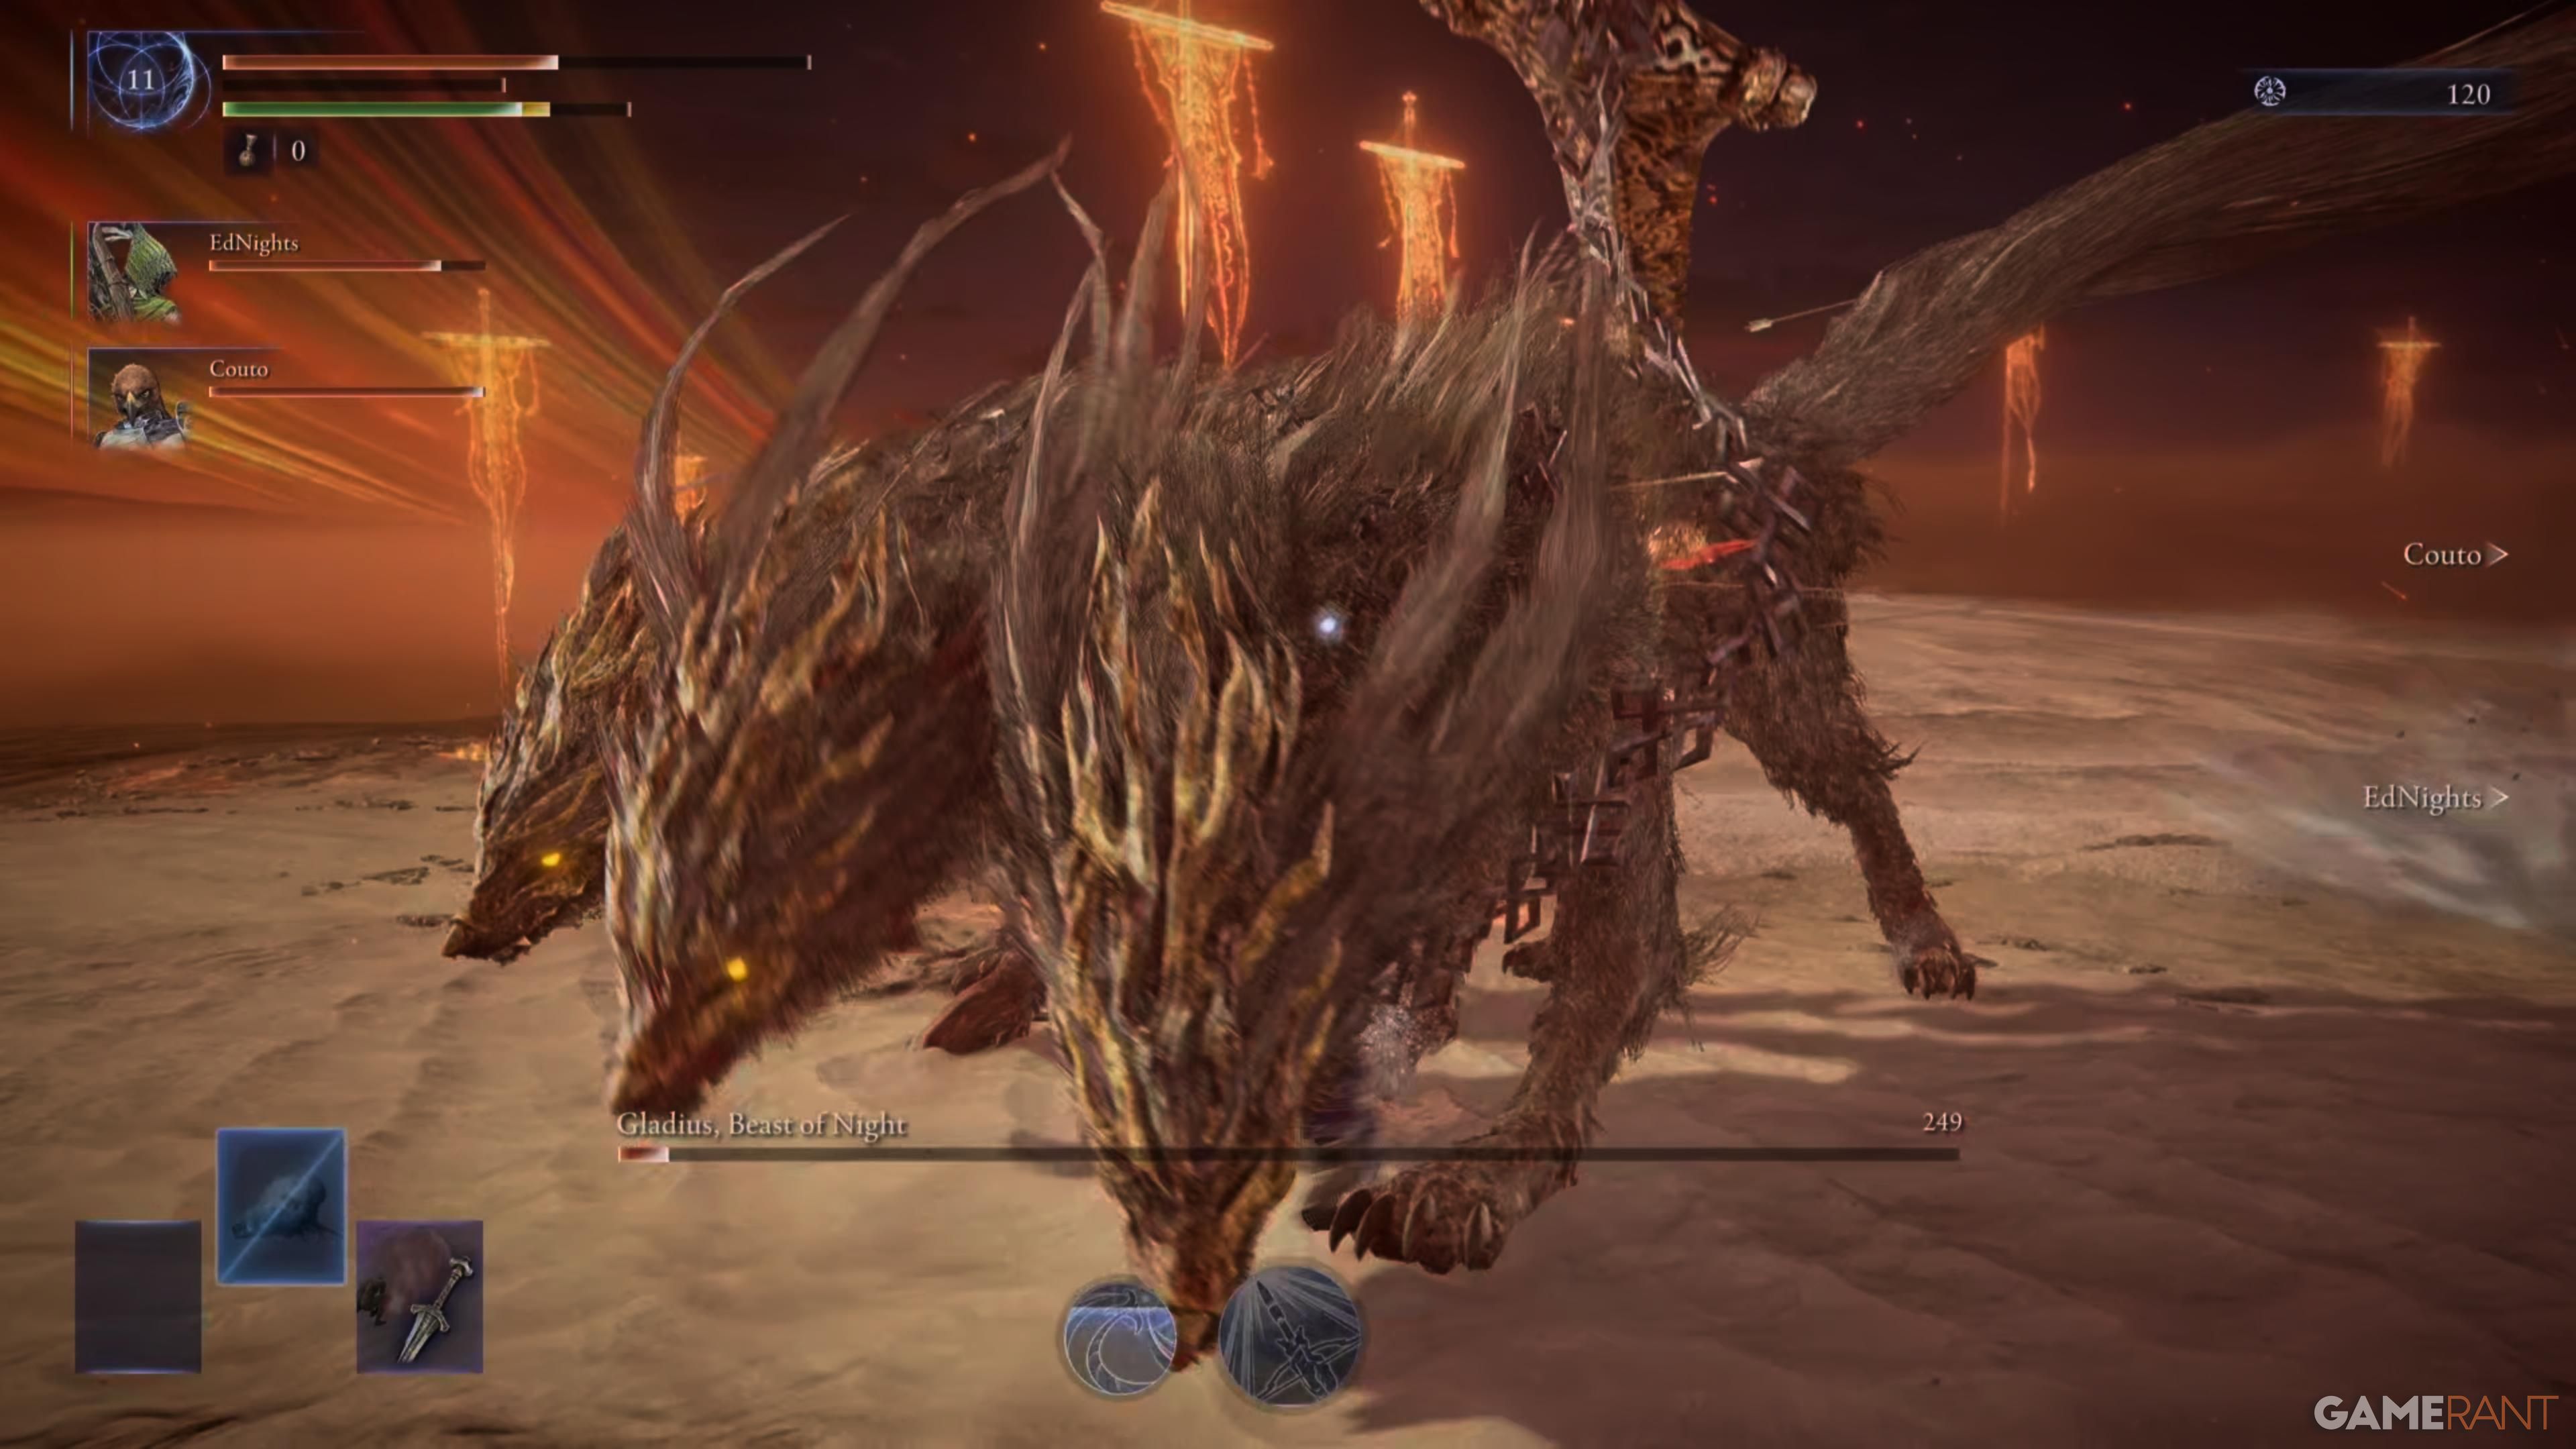
The second stage commences when the boss has lost between 25% and 30% of its health. At this point, it will emit a roar and transform into three distinct wolves. Among these wolves, the one carrying a sword and chain is the most dangerous. As these wolves pursue a particular Nightfarer, they will pause and let out a howl, making their eyes glow brightly. After the howling, you should focus on attacking the aggressive wolves, aiming to stun them with your attacks, which eventually causes the glow in their eyes to fade.
If your team can successfully divide the three wolves and concentrate on one at a time, this part of the battle should be manageable with ease for the next 45 seconds. However, once the second phase commences, Gladius will introduce new fiery attacks. The Explosive Plunge and Wave of Fire are both high-damage moves that need to be evaded at all costs. If you’re keeping a safe distance from the boss during the Wave of Fire, adjust your roll timing to avoid getting scorched by the incoming flames.
During the battle, your boss will divide into three wolf forms at various points, based on how swiftly you inflict damage. A benefit of this transformation is that if you manage to inflict stance damage on any of the three wolves, the effect will persist when the boss recombines again.
Best Team Composition For Gladius In Elden Ring Nightreign
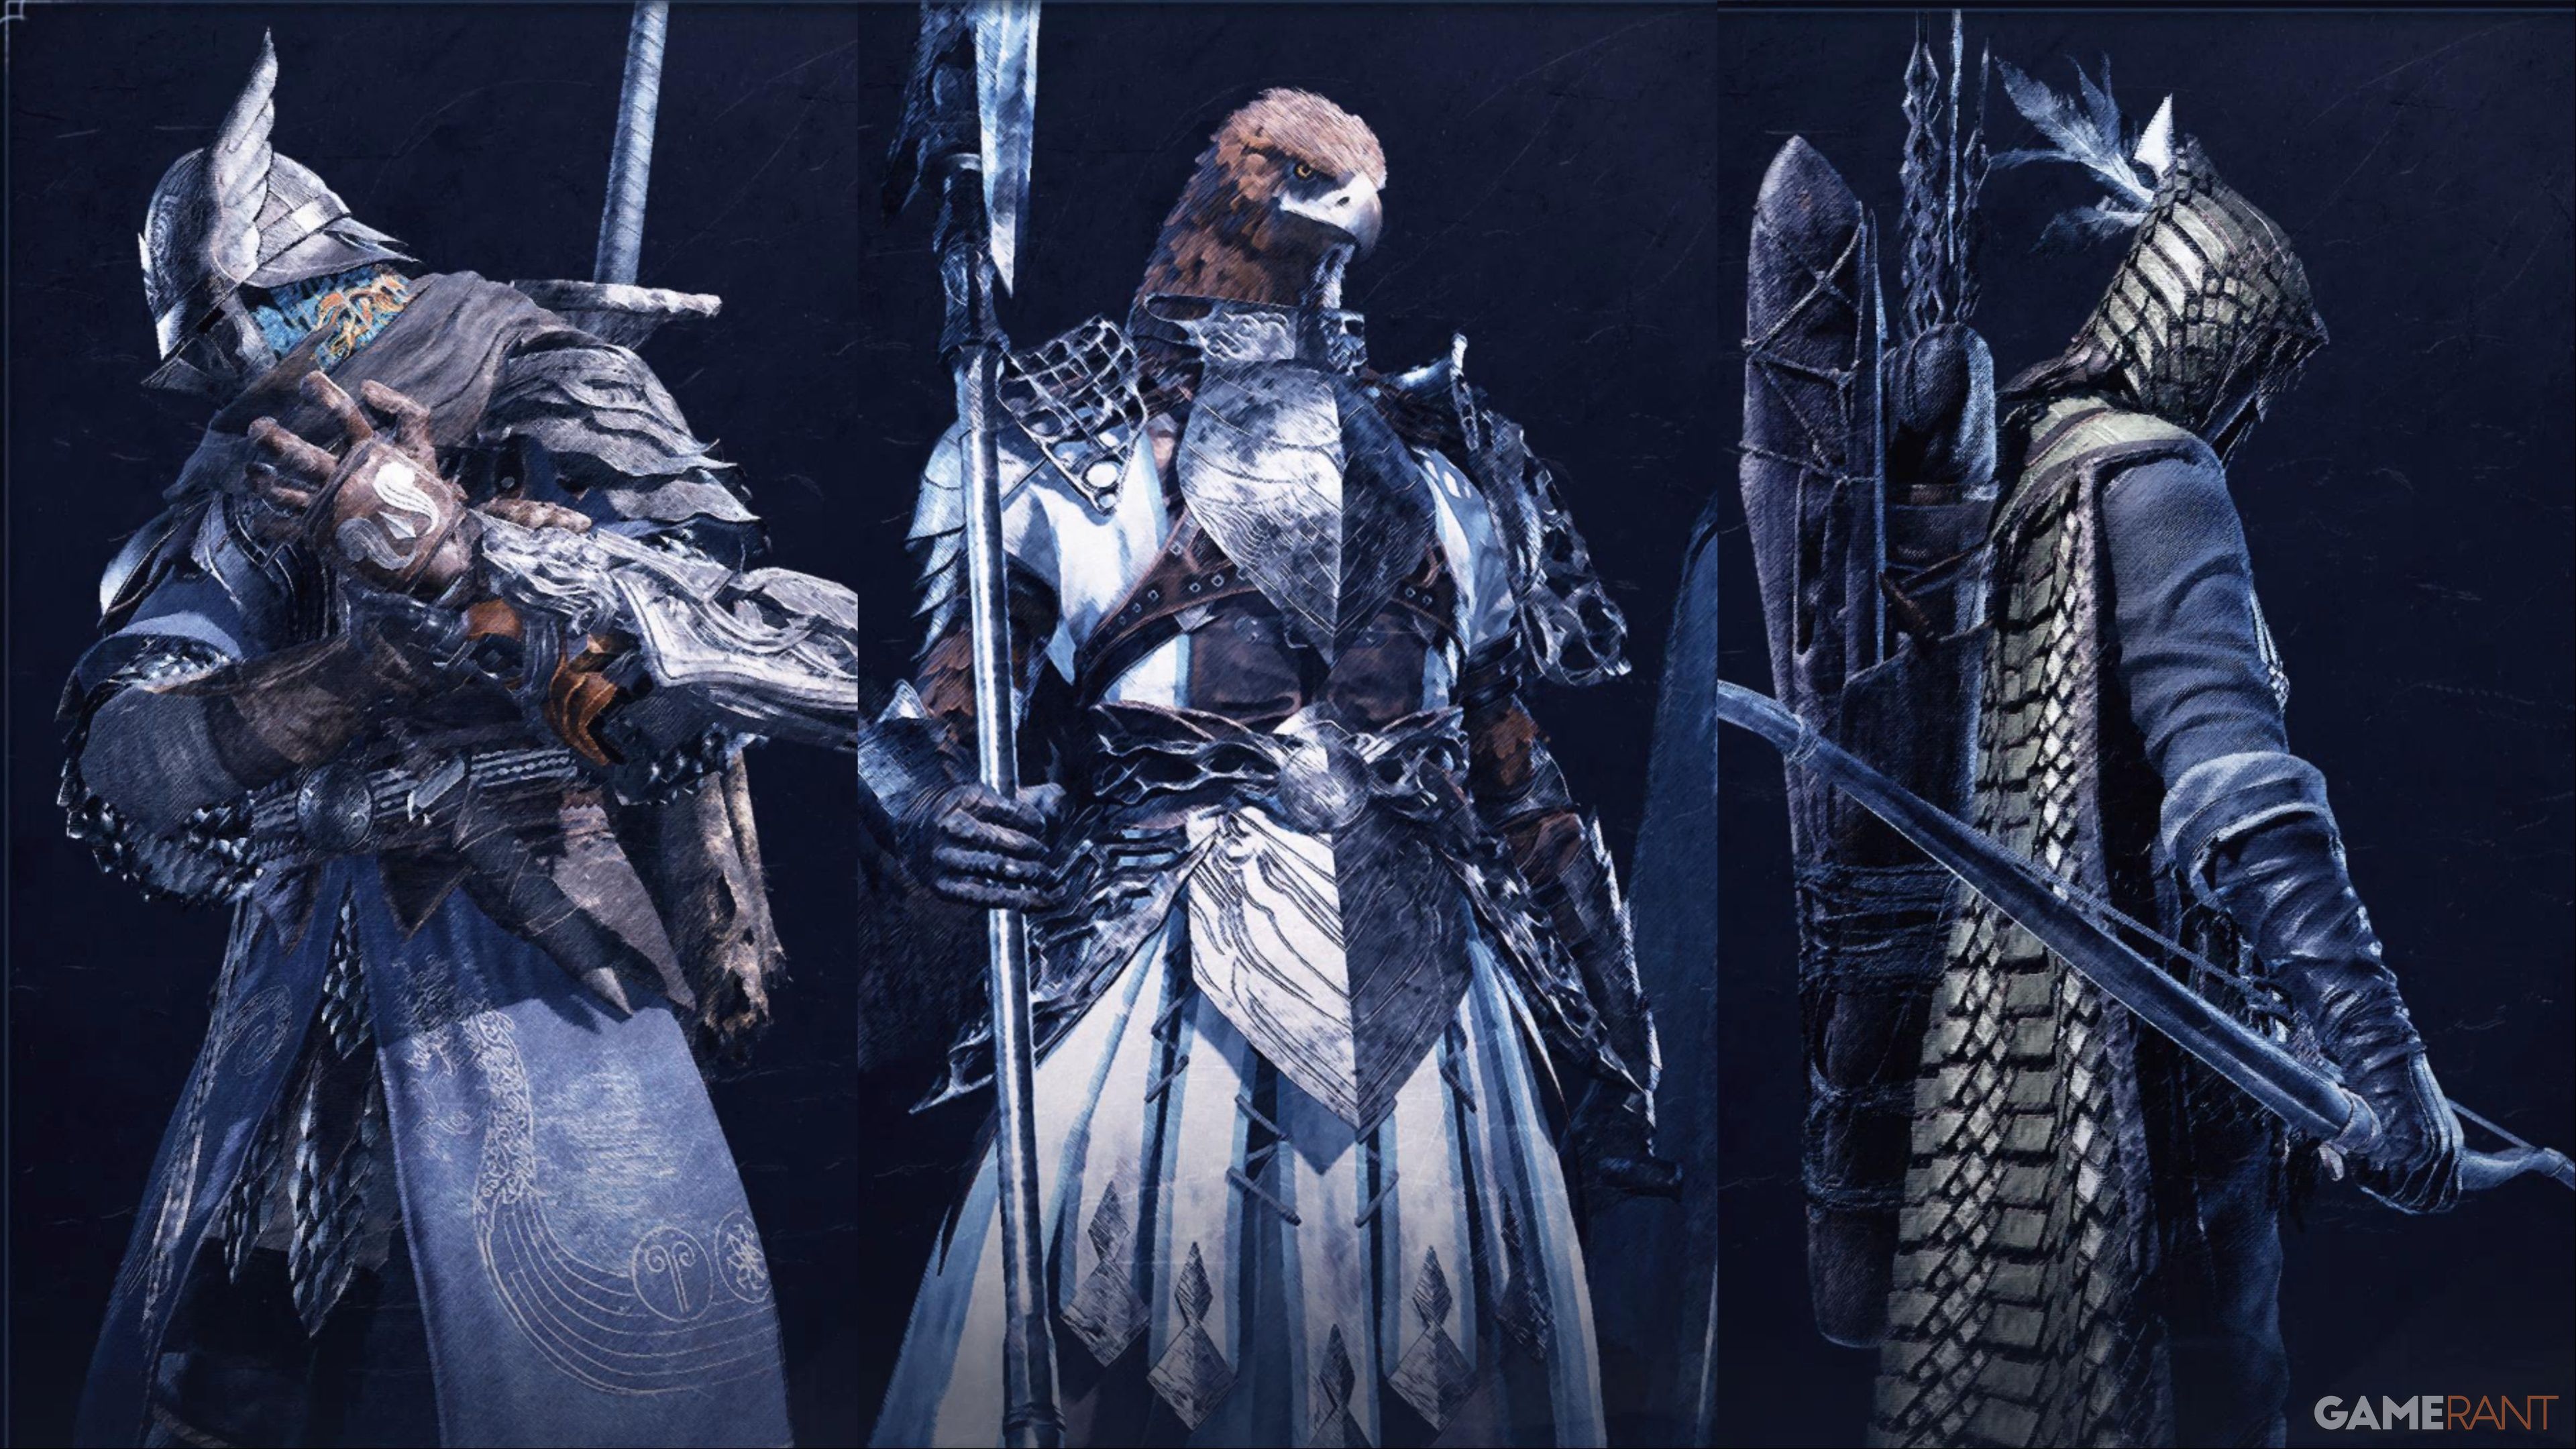
In the game, Gladius is one of the bosses known for its agility. Since it moves about frequently, it’s essential to have a team composition that can quickly close the distance with the boss. Wylder, who possesses the ‘Claw Shot’, is indispensable in this scenario. However, remember to jump at the end of his animation as this will propel you forward, helping you catch up more swiftly.
As a fellow gamer, let me tell you that having Ironeye on our team is a must. His unique ability to mark the boss, causing it to stagger if the mark is destroyed, proves invaluable during battles. With the right Relics, Ironeye can consistently keep the boss marked throughout the entire fight. Not only that, but his bow has an unlimited ammo supply and he can shoot from a considerable distance, making him one of the best choices for reviving teammates.
Lastly, Guardian, with his Ultimate ability to resurrect both players in a wide area and create a protective zone, rounds out our trio. This defensive power is crucial when taking on this particular boss.
Highlighting these three characters doesn’t exclude using the rest of the Nightfarers. However, given their versatility and usefulness, it’s advantageous to assemble a team that excels in various areas for optimal performance.
Rewards For Beating Tricephalos In Elden Ring Nightreign
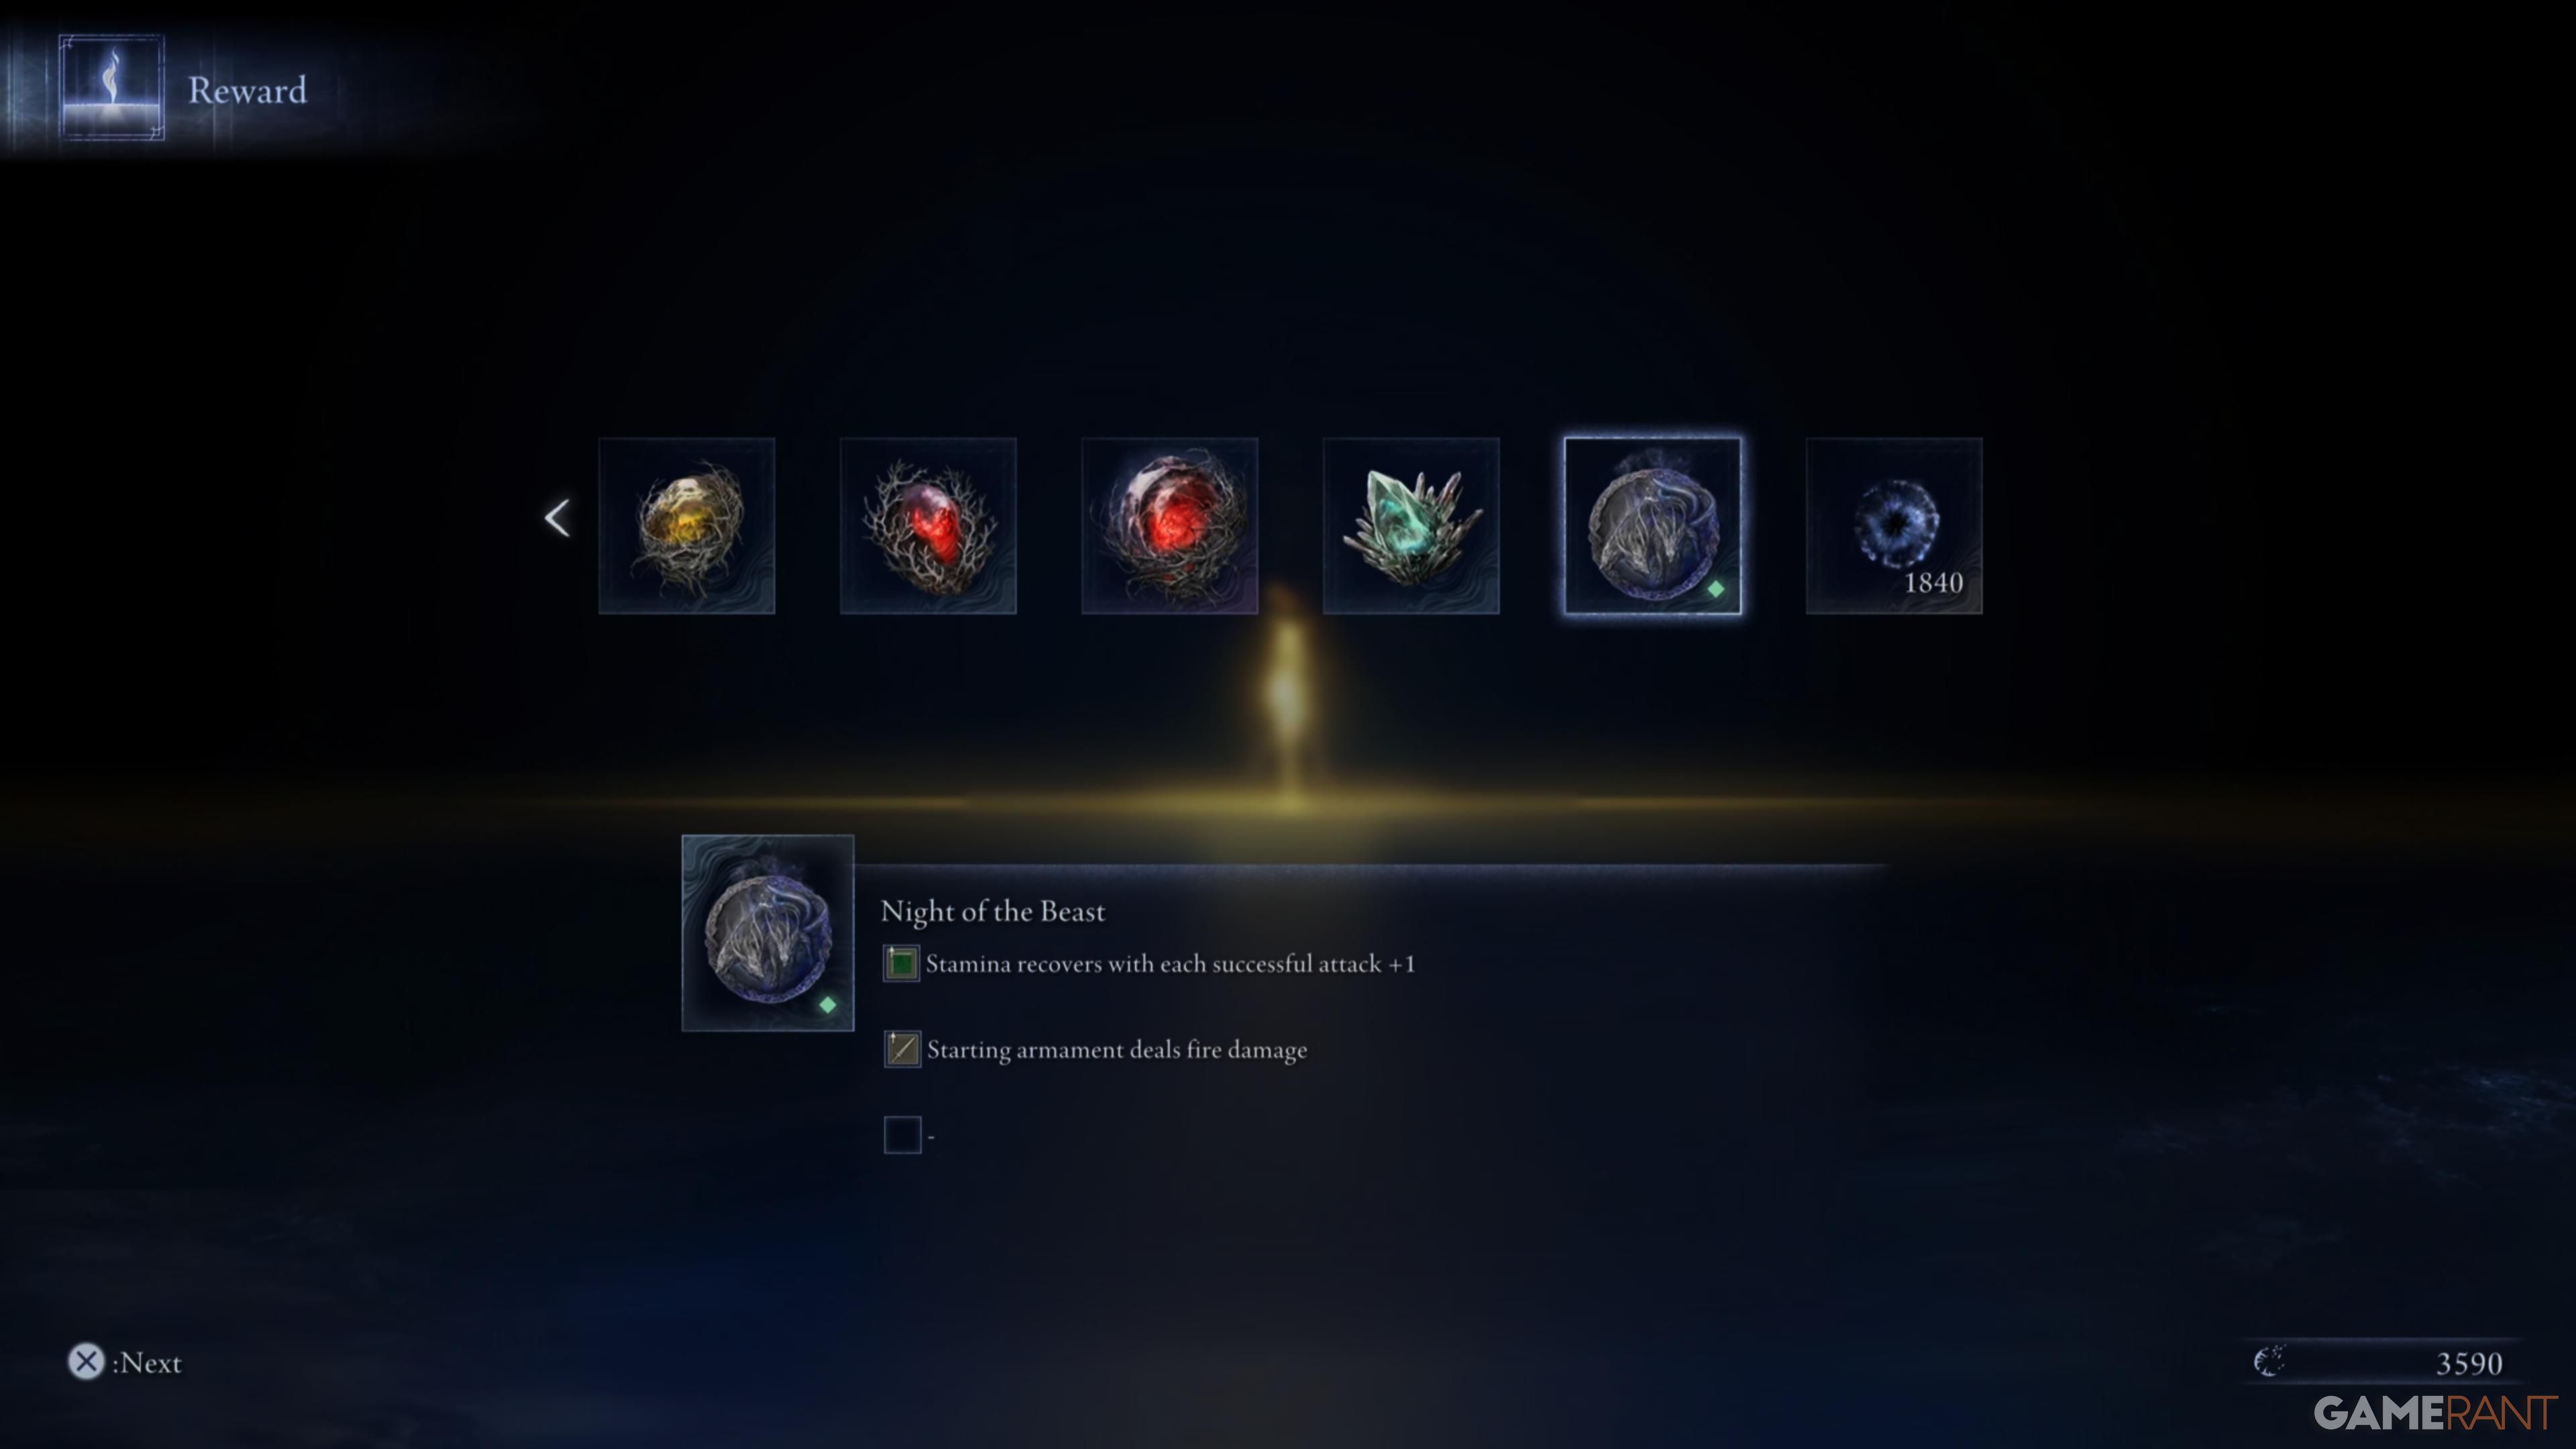

Following the conquest of the Expedition, this triumph shall be your initial victory, rewarding you with the “Night of the Beast” Artifact. This artifact bestows the following advantages upon you:
- Stamina recovers with each successful attack +1
- Starting armament deals fire damage
This relic is beneficial for the Sentient Pest and Fissure in the Fog Expeditions since both bosses are vulnerable to fire. Having a fire weapon at your disposal, you could strive to enhance it and employ it against the Nightlord if acquiring a superior fire weapon proves challenging during your journeys. Additionally, you’ll receive approximately 1840 Murk for defeating Tricephalos, which can be utilized to purchase additional relics from the Small Jar Bazaar or to unlock new gestures.
Upon your return to the Roundtable Hold, you’ll encounter a message popping up, indicating that the Shifting Earths have become active. This dynamic aspect can change parts of the map, providing exciting rewards and tough-as-nails boss battles for players daring enough to venture into these newly transformed areas.
Read More
- Gold Rate Forecast
- PI PREDICTION. PI cryptocurrency
- Rick and Morty Season 8: Release Date SHOCK!
- Discover Ryan Gosling & Emma Stone’s Hidden Movie Trilogy You Never Knew About!
- Mission: Impossible 8 Reveals Shocking Truth But Leaves Fans with Unanswered Questions!
- SteelSeries reveals new Arctis Nova 3 Wireless headset series for Xbox, PlayStation, Nintendo Switch, and PC
- Discover the New Psion Subclasses in D&D’s Latest Unearthed Arcana!
- Linkin Park Albums in Order: Full Tracklists and Secrets Revealed
- Masters Toronto 2025: Everything You Need to Know
- We Loved Both of These Classic Sci-Fi Films (But They’re Pretty Much the Same Movie)
2025-05-31 13:54