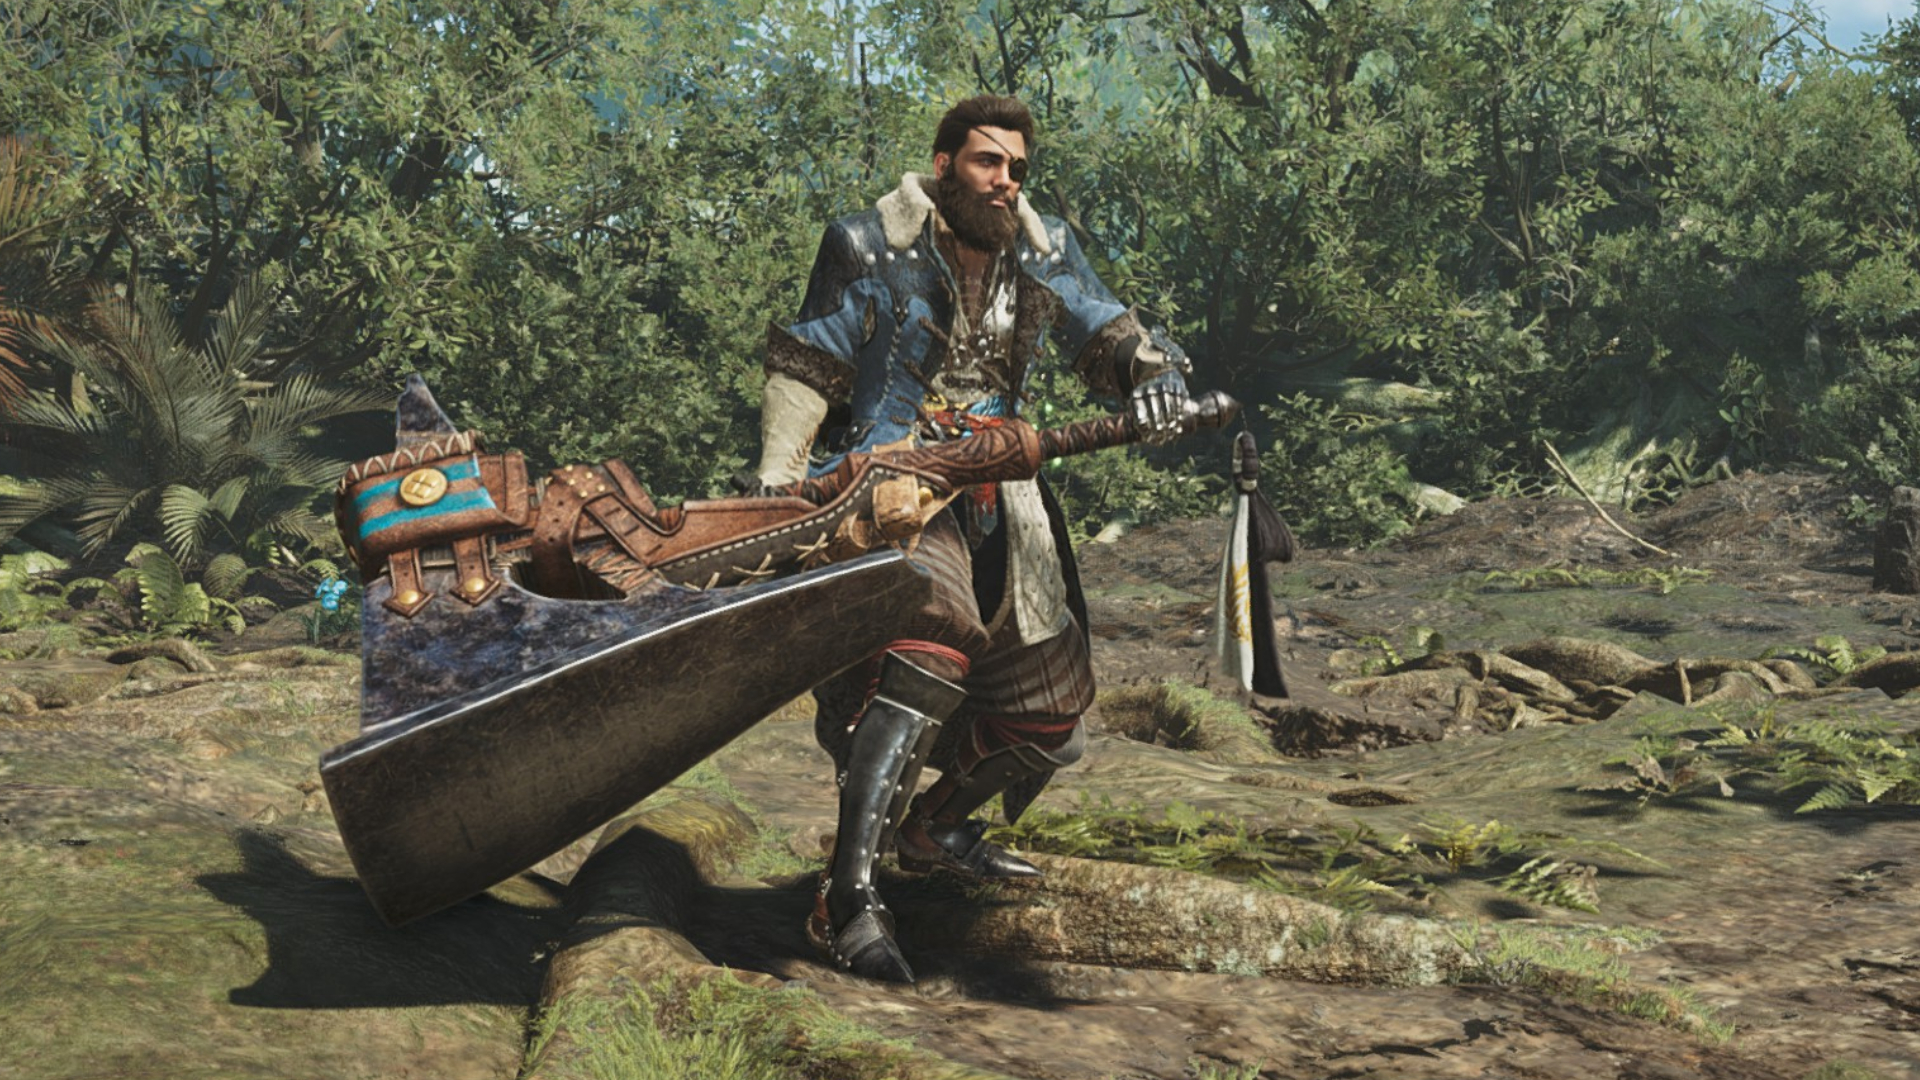
One effective way to construct a Hammer build in Monster Hunter Wilds is by ensuring it fulfills a straightforward condition: It should facilitate frequent strikes to the monster’s head. Contrary to its heavy-duty reputation, the Hammer proves to be surprisingly agile for a charge weapon, making it an adaptable option for both group and solo hunts.
The primary attraction of the Hammer lies in its ability to knock out monsters with its powerful blunt impact, creating an opportunity for you and your fellow hunters to deliver your most potent combo attacks without fear. Having a skilled Hammer user as part of your team is highly valued, as Hammers effectively boost overall damage output at no extra cost.
I’ll explain the essentials of playing Hammer in Wilds, making you the powerful smasher your friends will be glad to have in their hunting team. I’ll also suggest some ideal weapon and armor combinations for you to ensure a pleasant experience as you crush heads throughout the Low Rank storyline.
How to play Hammer in Monster Hunter Wilds
In the world of Monster Hunter, here’s a crucial tip: Always aim for headshots! When you strike a monster with your hammer, you’re actually building up a secret stun gauge. If this stun gauge surpasses a certain level due to repeated head hits, the monster will be knocked out (KO), collapsing onto the ground and becoming vulnerable to further attacks.
As a new hammer user transitioning from other types of weapons, I must admit it can be quite daunting to engage in combat where monsters are at their peak danger level. However, the good news is that the Hammer is an incredibly agile weapon, boasting numerous cancellable attack animations and generous recovery windows. With practice, you’ll find yourself nestled right up against a monster’s face, allowing you to land those coveted knockout blows with ease!
The hammer has simple controls, mainly utilizing a few primary combinations and charged attacks.
- Press Y for your standard attacks. This is a three-hit sequence, finishing with a heavy Upswing attack that, in addition to being a satisfying uppercut when you land it on a monster’s jaw, is also useful for hitting midair flying monsters. After the Upswing, you can transition into the new Mighty Charge. More on that below.
The final Upswing also serves as an Offset Attack, which will knock monsters back if you time the attack to land during the monster’s attack animation.
- Press B for the Big Bang Combo. This is your highest damage default combo, but it’s also the one that leaves you the most vulnerable. It’s a five-hit sequence, ending with a Big Bang Finisher that does heavy damage. To reach it, though, you have to land every previous attack; one missed Big Bang ends the combo early, and puts you into a long recovery animation. When the monster is staggered, stunned, or toppled, this is the combo to reach for.
You can also opt to transition into the new Mighty Charge in place of the Big Bang Finisher, extending the combo slightly for a bit more damage.
- Hold RT for charge attacks. As you hold the charge, you’ll drain stamina as you prepare heavier attacks. There are three successive charge stages, each producing a different attack. At charge level one, you’ll do a Charged Side Blow, a quick attack that easily chains into your Upswing combo. At charge level two, you’ll get a Charged Upswing, a lunging attack that’s great for closing distance to the monster. At the final charge level, you’ll do a Charged Big Bang, a heavy slam attack.
While charging, you can press B to perform a Charged Step, tugging yourself a short distance across the ground with your Slinger to let you dodge without losing your current charge level.
Monster Hunter Wilds Handbook: Essential Tips, Weapon Blueprints, Armor Strategies, and More in One Convenient Location
* Monster Hunter Wilds Hunting Guide: Dive into the Hunt
* Monster Hunter Wilds Arsenal: Customize Your Weapons
* Monster Hunter Wilds Protection: Strengthen Your Defense
* Monster Hunter Wilds Bestiary: Explore All Creatures
* Monster Hunter Wilds Teamwork: Master Co-op Hunting
- Many of your heaviest attacks lead into the new Mighty Charge. This is a second charge attack that serves as an alternate finisher to cap off your bread-and-butter combos. The most straightforward way to access it is by pressing B+Y while holding RT at charge level three, but you can also combo into it by pressing RT+B+Y at the end of your Upswing combo or in place of a Big Bang Finisher.
Releasing the Mighty Charge early will perform a Mighty Charge Upswing, but fully charging it will perform a Mighty Charge Slam—one of your heaviest-damaging attacks. If you’ve got the opening for it, it’s almost always worth transitioning into a Mighty Charge off your Upswing and Big Bang combos.
- Pressing B+Y will start a Spinning Bludgeon during your Upswing combo or after a Mighty Charge. (Yes, if you’ve played Hammer before, this means you won’t accidentally start spinning off a charge attack anymore.) This is a sustained spinning attack that you can cancel out of early by pressing Y. If you don’t cancel it, you’ll go into a lengthy recovery animation, because you’ve made yourself dizzy.
If you hold Y during the spin, though, you’ll prepare an Upswing attack like the one at the end of your usual Y button combo. Like the standard upswing, this is an Offset Attack, and can transition into yet another Mighty Charge.
In action, Hammer gameplay involves initiating a sequence with an initial attack at full charge level for taking advantage of sudden opportunities, or launching with a level 2 lunge to bridge gaps. Subsequently, you’ll employ regular Y button swings, and if necessary, dodge away early or prolong the combo until reaching the Upswing, then transition into a Mighty Charge.
If you manage to knock down or weaken the monster during the fight, follow up by using a Big Bang attack aimed at its head when it’s vulnerable. After that, finish it off with a Mighty Charge for the last blow.
Best Hammer builds in Low Rank
Generally speaking, the builds for Hammer tend to focus on enhancing abilities that aid in stamina conservation. This is crucial because you lose stamina when charging, so it’s important to maintain a sufficient supply. Adequate stamina not only allows you to execute powerful charge attacks, but also helps you dodge efficiently to avoid damage.
In Low Rank, we’re aiming to acquire the Marathon Runner armor ability which lessens the continuous stamina consumption during activities such as running and, for those wielding a Hammer, charging attacks. Over time, we’ll secure the Stamina Surge skill to speed up our stamina regeneration. Additionally, we’ll incorporate skills like Evade Extender that enhance overall gameplay convenience.
- First weapon: Chata Clobberer I
Once you begin using the Hope Hammer, you’ll quickly learn how to construct the Chata Clobberer utilizing Chatacabra components. This will provide you with an acceptable enhancement in base damage and a protective buffer when you’re most vulnerable.
- First armor set: Bone Helm, Bone Mail, Chainmail Gloves, Bone Coil, Leather Pants
In the initial phase of armor creation, the bone fragments from your first set will serve you well up until the Low Rank level, as there aren’t many beneficial options for Hammer users at that stage. With these three pieces, you’ll have optimized Marathon Runner, reducing the impact on your stamina during charged attacks. Additionally, the Chainmail Gloves and Leather Pants provide a skill point each in Geologist and Botanist respectively, helping to expedite your early-game resource gathering.
- Second weapon: Jail Hammer I
After defeating Lala Barina for the first time, you’ll acquire the blueprint to create an initial version of the Jail Hammer. While it may have slightly less raw physical power than the Chata Clobberer II, it will provide Paralysis damage instead. This additional feature allows you to immobilize monsters in two ways – by causing paralysis and knocking them unconscious, or inducing wound staggers. Throughout Low Rank, you’ll have multiple opportunities to utilize these effects effectively.
- Second armor set: Bone Helm, Bone Mail, Balahara Vambraces, Bone Coil, Balahara Greaves, Leaping Charm I
Upon my return to the Windward Plains for the chase of the elusive Balahara, I eagerly anticipate upgrading my gear and crafting my initial talisman. Equipped with Balahara Vambraces, Balahara Greaves, and a Leaping Charm I, I’ll achieve maximum Evade Extender, significantly expanding my travel distance with each dodge roll. In all my armor sets, I always aim to include a few points of Evade Extender; it offers an increased sense of comfort and mobility, without disrupting the timing of my evasion frames like the Evade Window skill can.
Monster Hunter Wilds Handbook: Gathering all our wisdom in a single spot
Monster Hunter Wilds Strategies: Dive right into the hunt
Monster Hunter Wilds Arsenal: Various weapon options
Monster Hunter Wilds Top Armor: Secure your defense
Monster Hunter Wilds Creatures: All the fearsome beasts
Monster Hunter Wilds Team Play: Mastering cooperative hunting
- Third weapon: Jail Hammer II
After embarking on your initial journey to the Iceshard Cliffs, you’ll come face-to-face with Nerscylla for the first time. This encounter will yield a Nerscylla Claw essential for upgrading your Jail Hammer. Additionally, enhancing your paralysis buildup and attack power can only benefit your progress.
- Third armor set: Bone Helm, Xu Wu Mail, G. Rathalos Vambraces, Xu Wu Coil, G. Rathalos Greaves, Leaping Charm I
In our Low Rank finalization armor set, we’re making the most alterations. We’re swapping out two Bone pieces for the Xu Wu Mail and Xu Wu Coil, which grant us two points in the Stamina Surge skill. This trade-off means we slightly lose in Marathon Runner, but if needed, you can recover those points using decorations.
Instead of using Balahara parts, we’ll switch to G. Rathalos Vambraces and Greaves. In return, we receive an enhancement in the useful Weakness Exploit skill, which increases our chances for critical hits when striking a monster’s weak spots. Since monsters’ faces are often their weak points, this is a beneficial increase to our damage output. If the change to Evade Extender I feels challenging, consider using decorations to enhance the skill. If there are no suitable decorations available, prioritize survivability over damage, and feel free to revert back to Balahara parts.
Instead, consider using the Rey Sandmail armor piece from Rey Dau in place of the Xu Wu chestpiece. This switch provides a boost to your Constitution ability – a skill that reduces the constant drain on your stamina during actions like dodging. I tend to favor Constitution over other stamina skills due to its significant impact on evading, but ultimately, choose what feels most suitable for you and your gaming style.
In the days ahead, we’ll expand upon this advanced guide for top-tier and endgame constructions, so keep an eye out for updates!
Read More
- Gold Rate Forecast
- SteelSeries reveals new Arctis Nova 3 Wireless headset series for Xbox, PlayStation, Nintendo Switch, and PC
- Masters Toronto 2025: Everything You Need to Know
- Eddie Murphy Reveals the Role That Defines His Hollywood Career
- We Loved Both of These Classic Sci-Fi Films (But They’re Pretty Much the Same Movie)
- Discover the New Psion Subclasses in D&D’s Latest Unearthed Arcana!
- Forza Horizon 5 Update Available Now, Includes Several PS5-Specific Fixes
- ‘The budget card to beat right now’ — Radeon RX 9060 XT reviews are in, and it looks like a win for AMD
- Rick and Morty Season 8: Release Date SHOCK!
- Mission: Impossible 8 Reveals Shocking Truth But Leaves Fans with Unanswered Questions!
2025-02-27 14:53