Here’s a guide on how to set up proofing settings for Microsoft Word (or other Office applications like Excel and PowerPoint) using the new Outlook app for Windows 11:
As an analyst, I’d rephrase it as: While Windows 11 offers built-in grammar and spelling aids for most applications to help with typos and corrections, certain apps like Notepad, Outlook, and Microsoft 365 require manual setup to access these tools
If your computer is running the most recent version of Windows 11, it has the ability to underline misspelled words and automatically correct typos. Additionally, it can provide text suggestions without requiring third-party tools. The Notepad app also offers typing features, but you need to enable them manually
Applications such as Microsoft Edge, Outlook for Windows 11, and Microsoft 365 come equipped with grammar help tools, however, since these tools have varying functionalities, you need to activate them by adjusting the settings within each respective application
In this step-by-step guide, I will walk you through the process of setting up the grammar features accessible on Windows 11 and some of the most widely used Microsoft applications. This tutorial will show you how to set up the language options for Windows 11 and some popular apps from Microsoft
How to enable grammar tools on Windows 11
For Windows 11, several grammar options can be set up so they work across all applications. However, for certain programs, these features must still be adjusted manually
Enable spell checker and autocorrect
“How do I set up Grammarly, Word Suggestions, and other grammar tools on my Windows 11 system?”
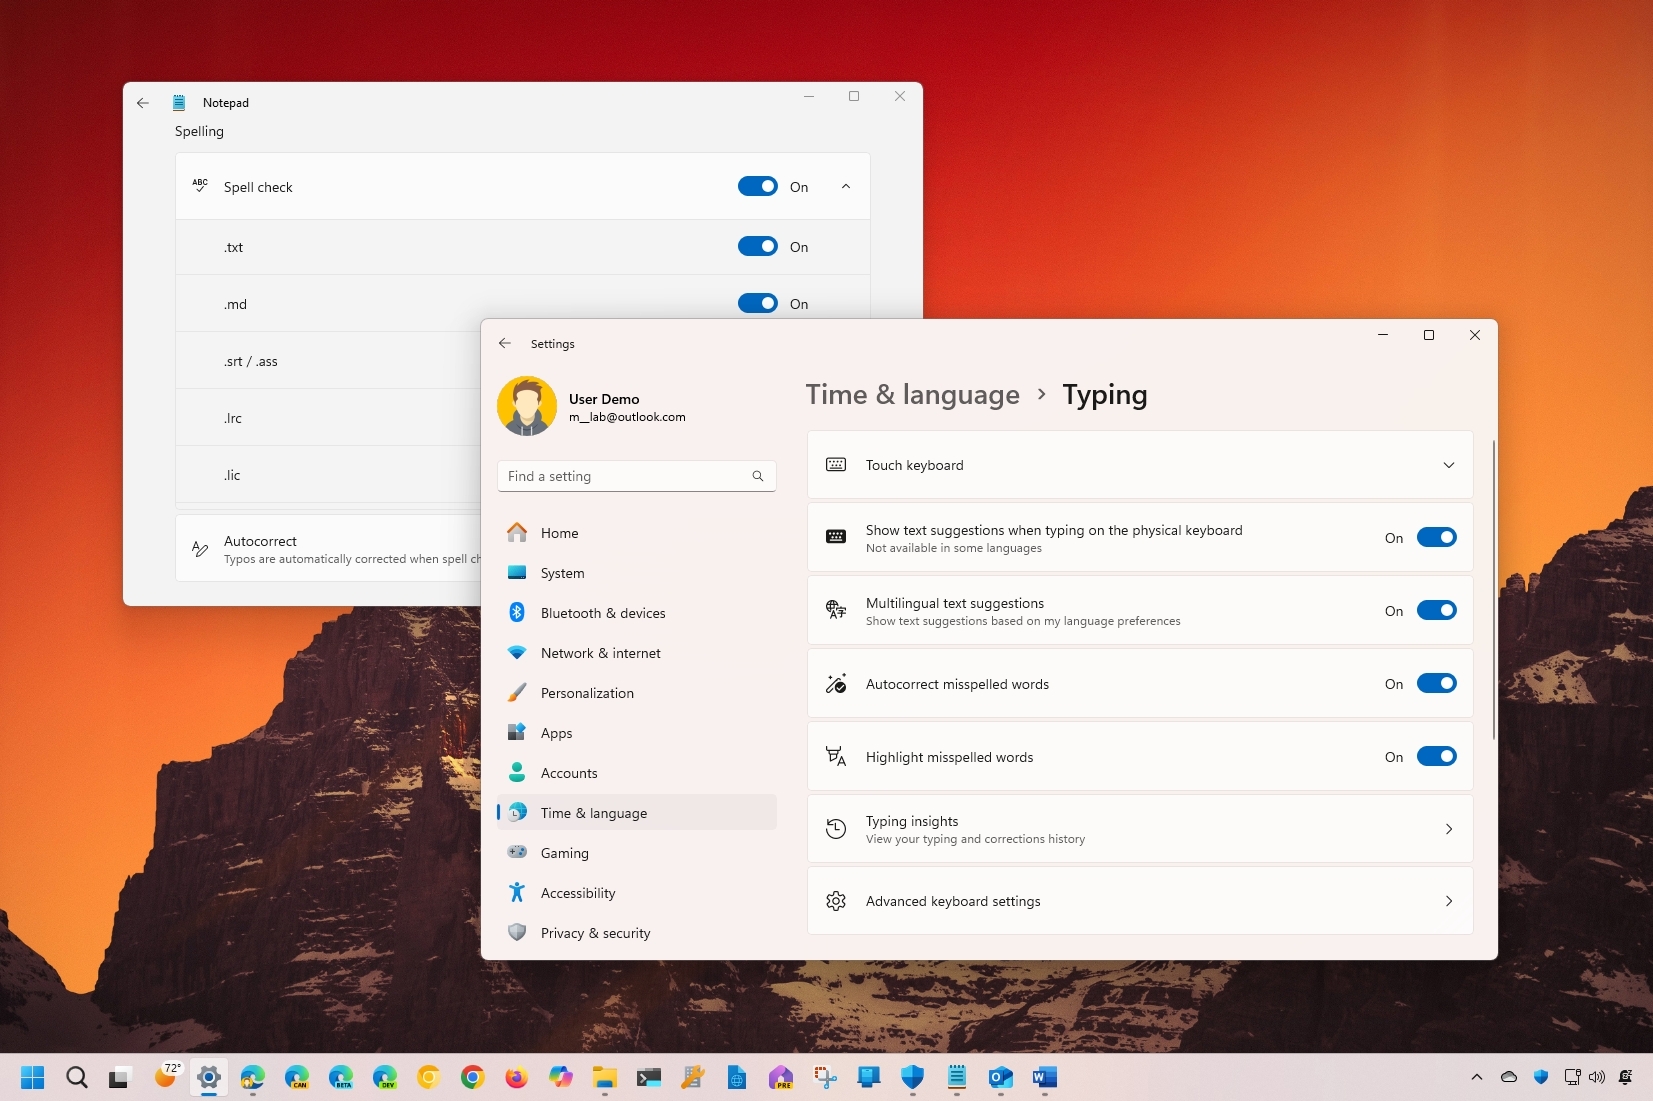
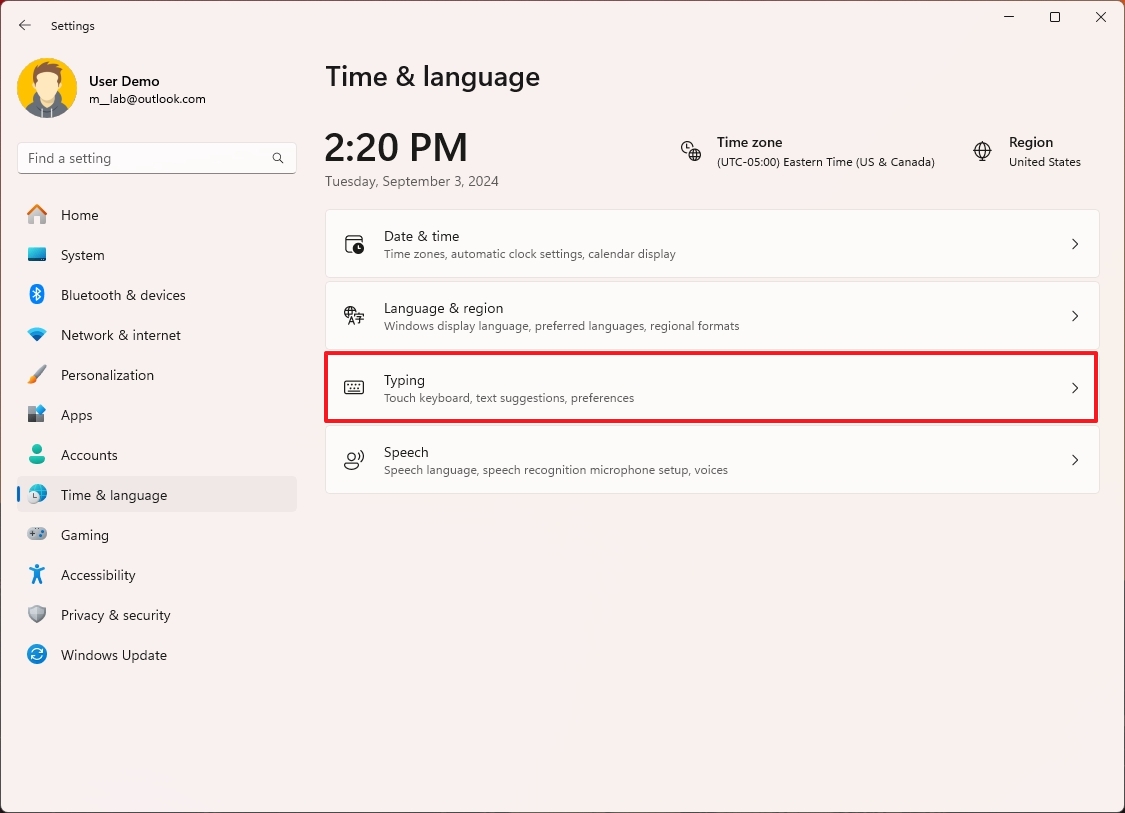
- Open Settings.
- Click on Time & language.
- Click the Typing page on the right side.
- Turn on the “Autocorrect misspelled words” toggle switch to allow the system to correct typos automatically.
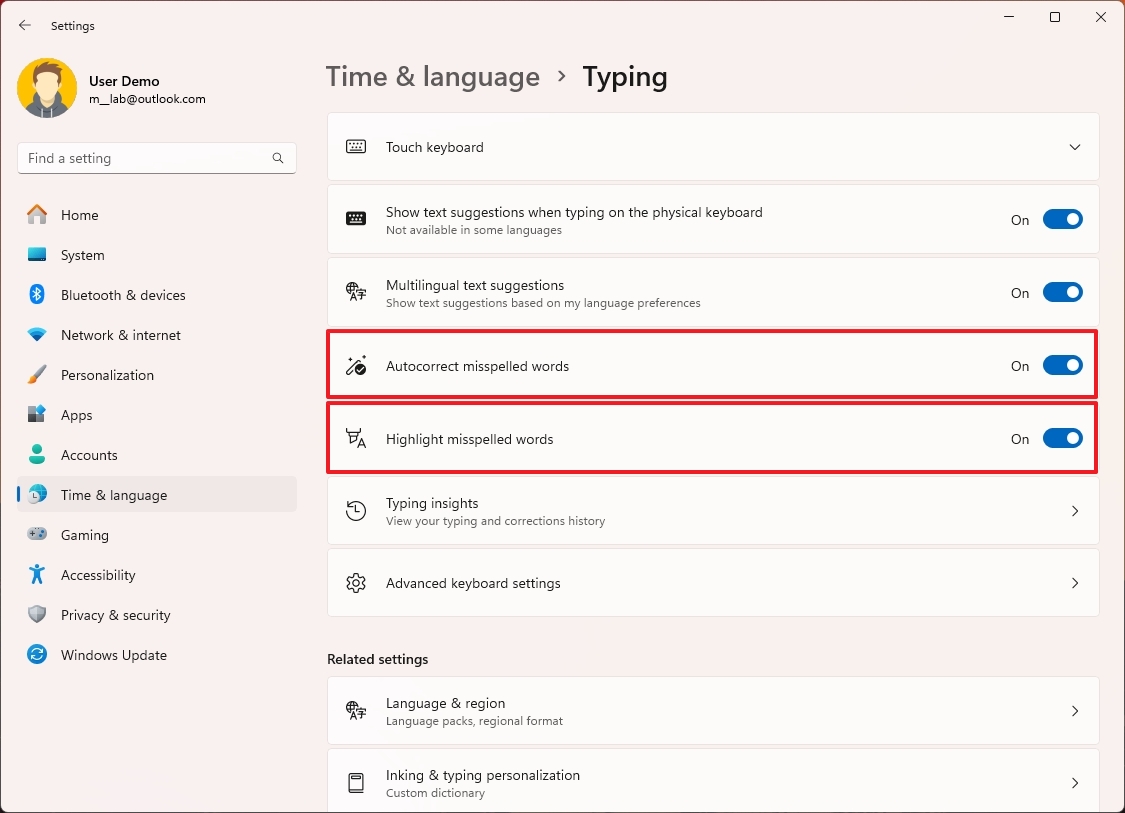
- Quick note: This feature won’t correct significant mistakes.
- Turn on the “Highlight misspelled words” toggle switch to enable the spellchecker feature.
- (Optional) Turn on the “Show text suggestions when typing on the physical keyboard” toggle switch to generate a list of predictions.
- (Optional) Turn on the “Multilingual text suggestions” toggle switch if you use multiple languages and want the system to suggest text as you type.
After finishing the process, the system automatically underlines misspelled words and corrects typing errors within any software
Review your typing stats
To check your typing statistics on Windows 11, use these steps:
- Open Settings.
- Click on Time & language.
- Click the Typing page on the right side.
- Click the “Typing insights” setting.
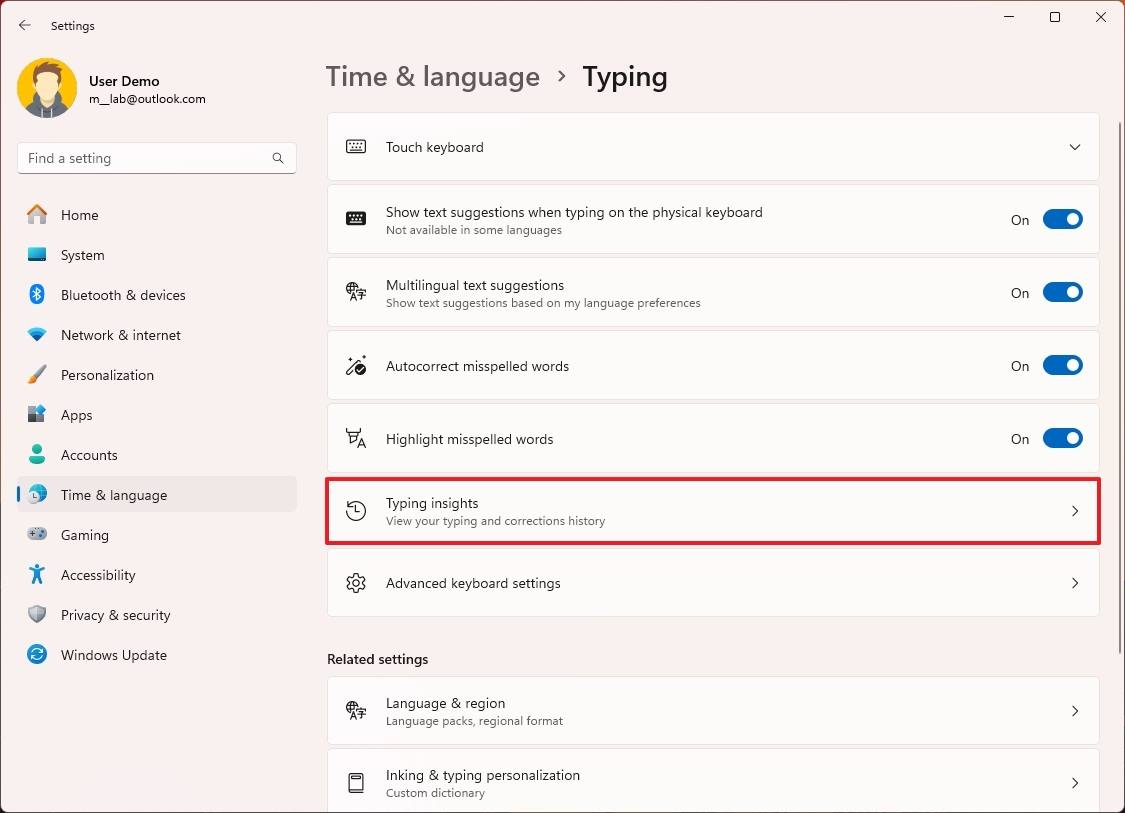
- Confirm your stats using the system grammar tools.
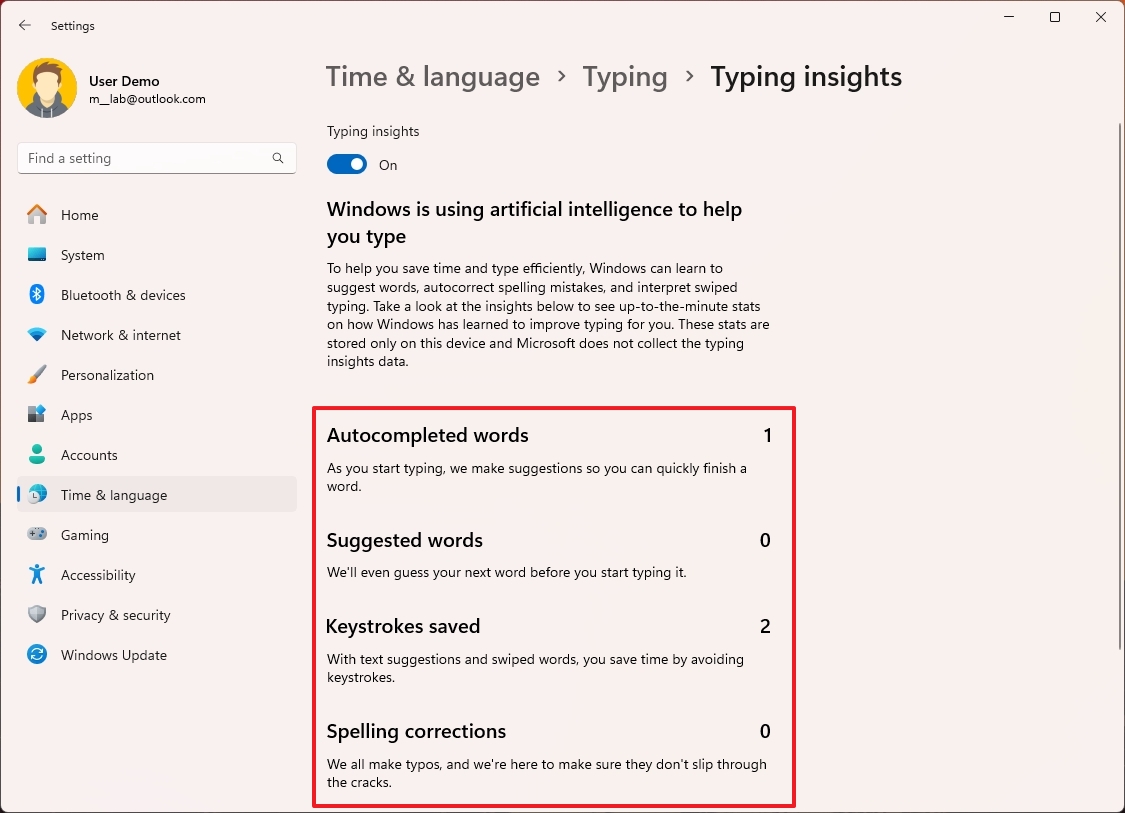
- (Optional) Turn off “Typing insights” toggle switch to disable the feature.
Once you’ve finished the tasks, you can examine the proposed spellings, auto-completed words, and keystrokes you saved with these functionalities
Manage custom dictionary
As an analyst, when I find that my text is being flagged as incorrect despite having the right spelling, it might be because I inadvertently added extra words to my custom dictionary. Unfortunately, I can’t modify this personal dictionary directly, but I can clear it to ensure future spellings are checked properly
To clear the custom dictionary on Windows 11, use these steps:
- Open Settings.
- Click on Privacy & security.
- Click the Inking & typing personalization page.
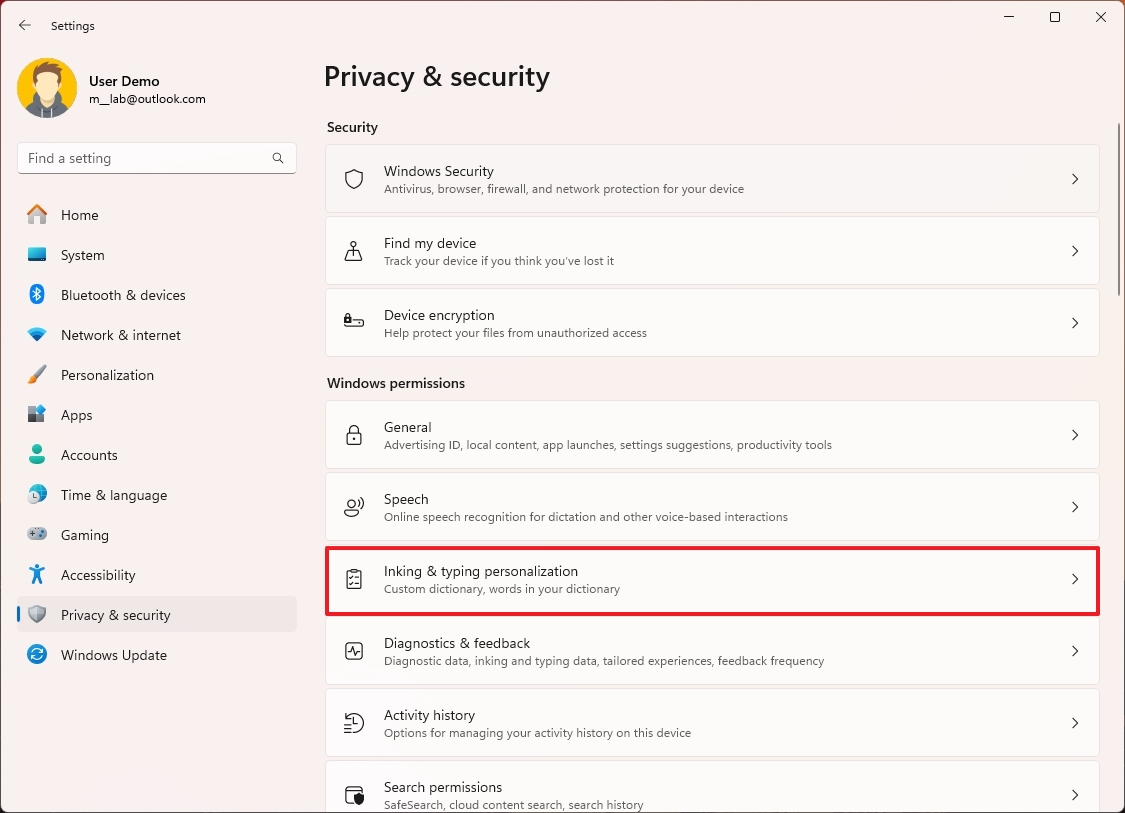
- Click the Custom dictionary setting.
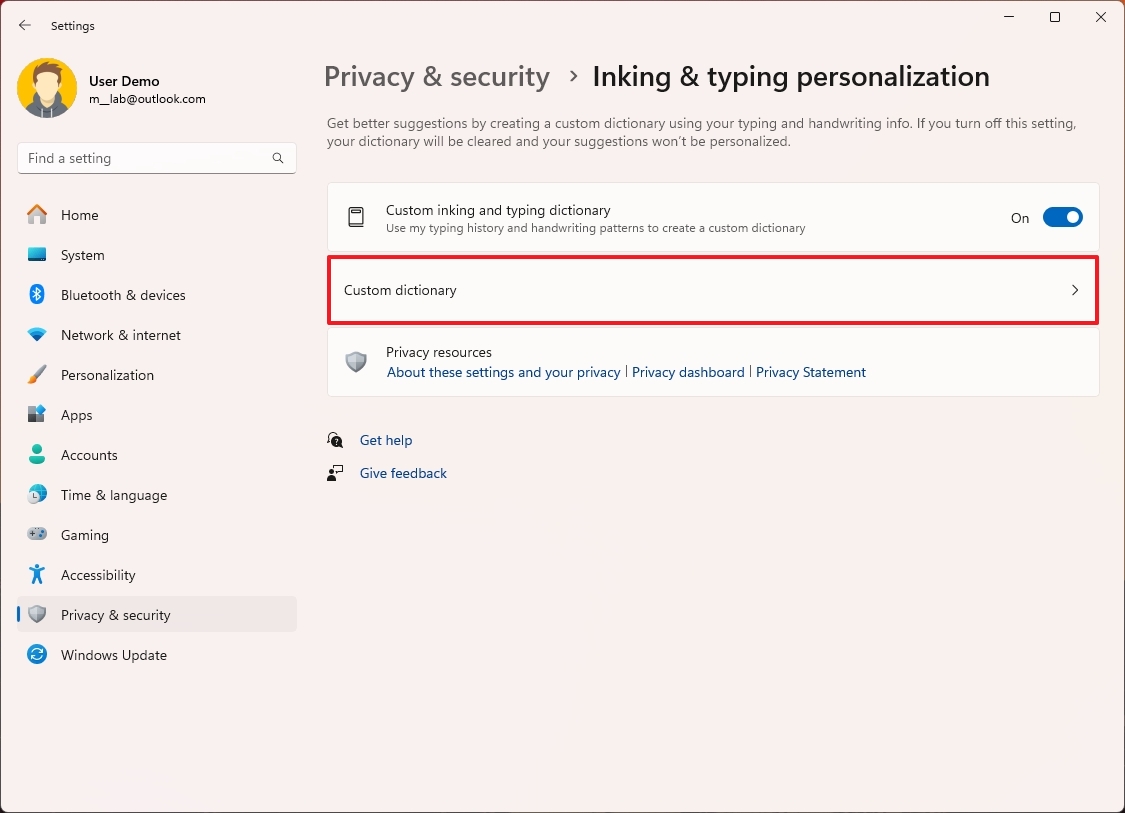
- (Optional) Turn off the “Custom inking and typing dictionary” toggle switch to disable the feature.
- (Option 1) Review the list of words added to the dictionary using the spelling features.
- (Option 2) Click the “Clear your custom dictionary” button to clear all the words for this account.
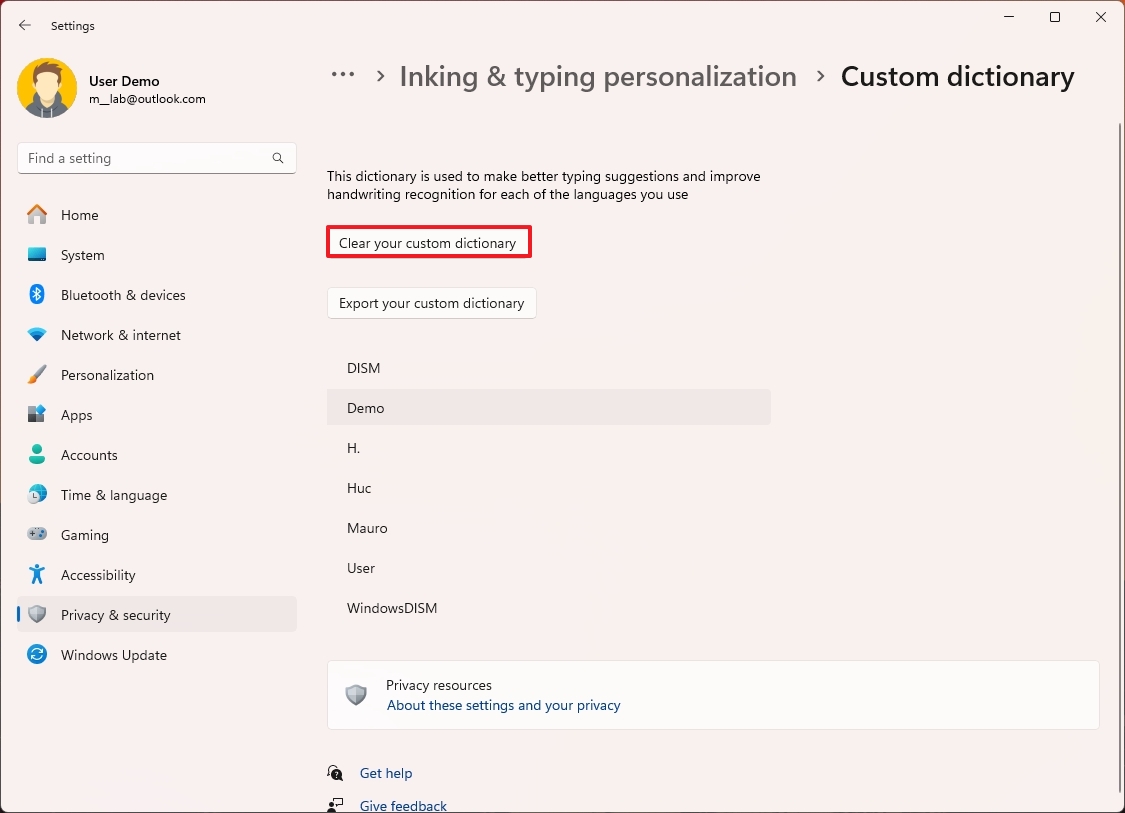
- Quick note: The feature doesn’t include an option to delete words individually.
Once you complete the steps, you can review and clear the custom dictionary as necessary.
How to enable grammar tools on specific system apps on Windows 11
To facilitate the use of spelling features like capitalization, hyphenation, and plurals in applications such as Notepad, Microsoft Edge, or the new Outlook app, you need to adjust settings manually. Here’s a simplified breakdown:
Notepad
To enable the spelling features in Notepad, use these steps:
- Open Notepad.
- Click the Settings (gear) button on the top-right.
- Turn on the Spell check toggle switch.
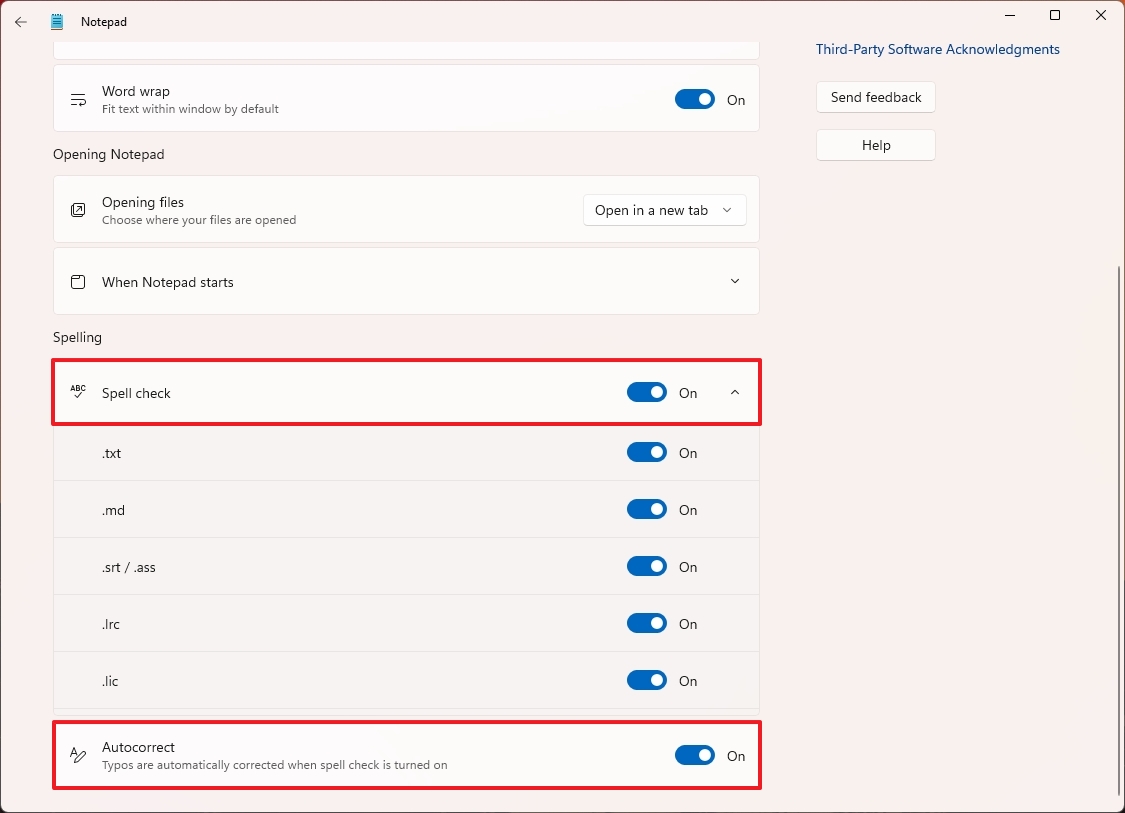
- (Optional) Click the Spell check setting.
- Turn on or off the file type you may want to include or exclude from this feature.
- Turn on the Autocorrect toggle switch.
After finishing the process, the application will gain access to the built-in spell check for Windows 11, allowing it to underline any incorrectly spelled words or typos
Microsoft Edge
To enable the spelling features in Microsoft Edge, use these steps:
- Open Microsoft Edge.
- Click the Settings and More (three dots) button at the top right.
- Select the Settings option.
- Click on Language from the left pane.
- Turn on the “Enable grammar and spellcheck assistance” toggle switch.
- Choose the Microsoft Editor option to use the company’s Grammarly-like service to enhance grammar, spelling, and style suggestions.

- Quick tip: If you only want the basic spelling features, choose the Basic option.
- (Optional) Turn on the “Use text prediction” toggle switch to allow the browser to show word suggestions as you type, like on Windows 11.
- (Optional) Turn on the “Collaborate with Copilot as you write on the web” toggle switch to access the Copilot assistant to write content on the web.
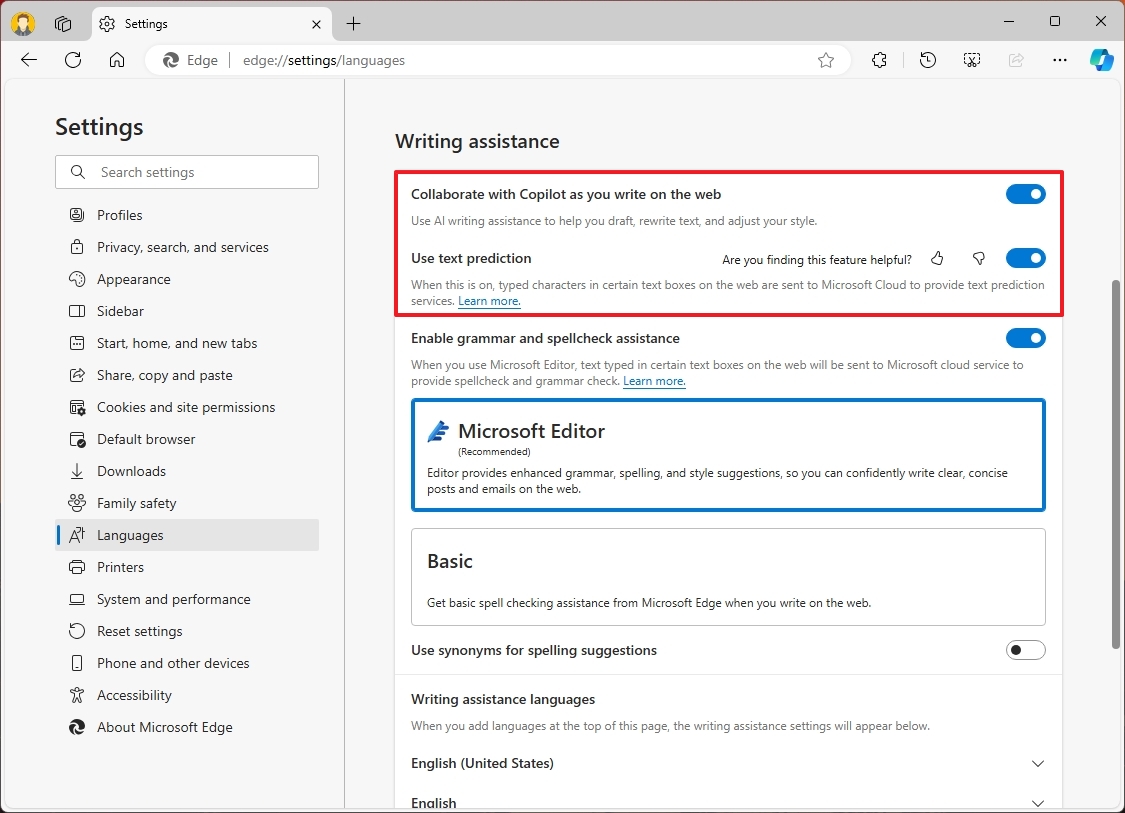
- Quick note: If you turn off this feature, the browser will not provide assistance with rewriting content when selecting text on the web.
- (Optional) Click the Customize dictionary setting.
- Remove or add new words to the list (as necessary).
After you complete the steps, the browser will apply the new spelling settings on your computer.
Outlook
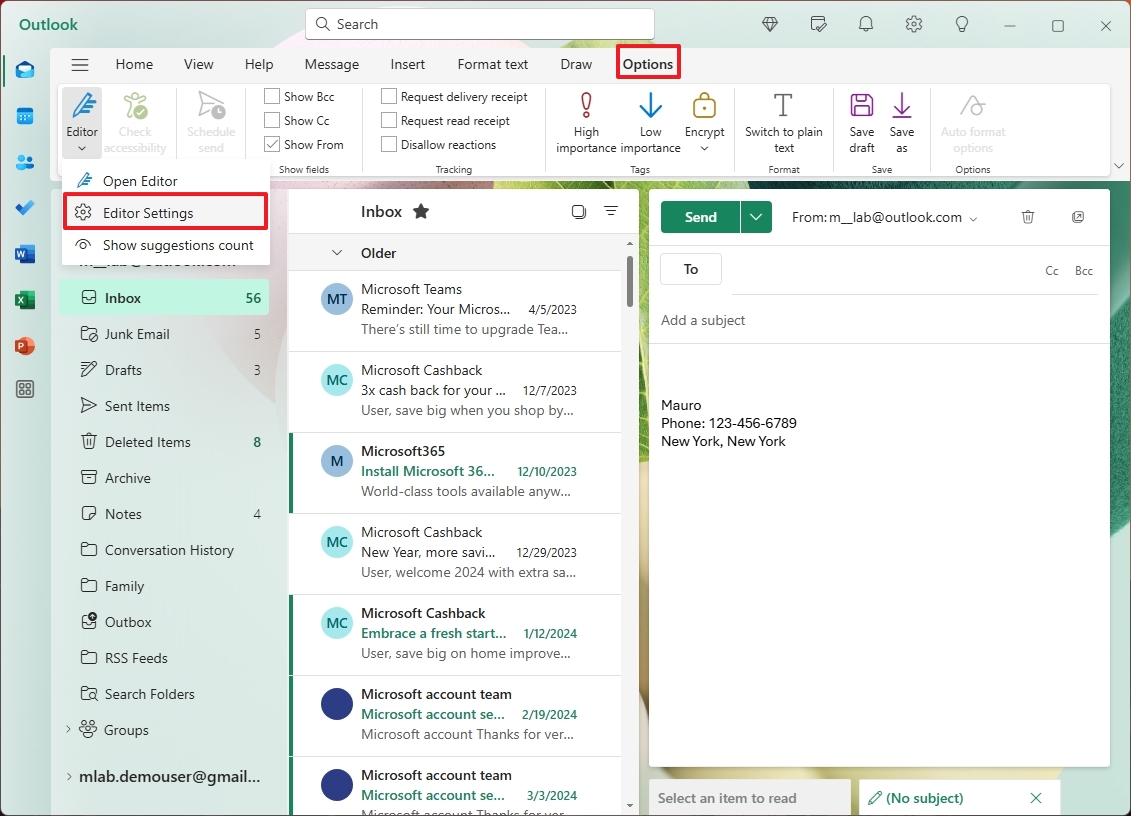
To configure the spelling features in Outlook, use these steps:
- Open the Outlook for Windows 11 app.
- Click the New button from the Home tab to start a new email.
- Click the Options tab.
- Click the Editor button.
- Click on Editor Settings.
- Turn on the “Text predictions” toggle switch.
- Turn on the “Enable auto correct” toggle switch.
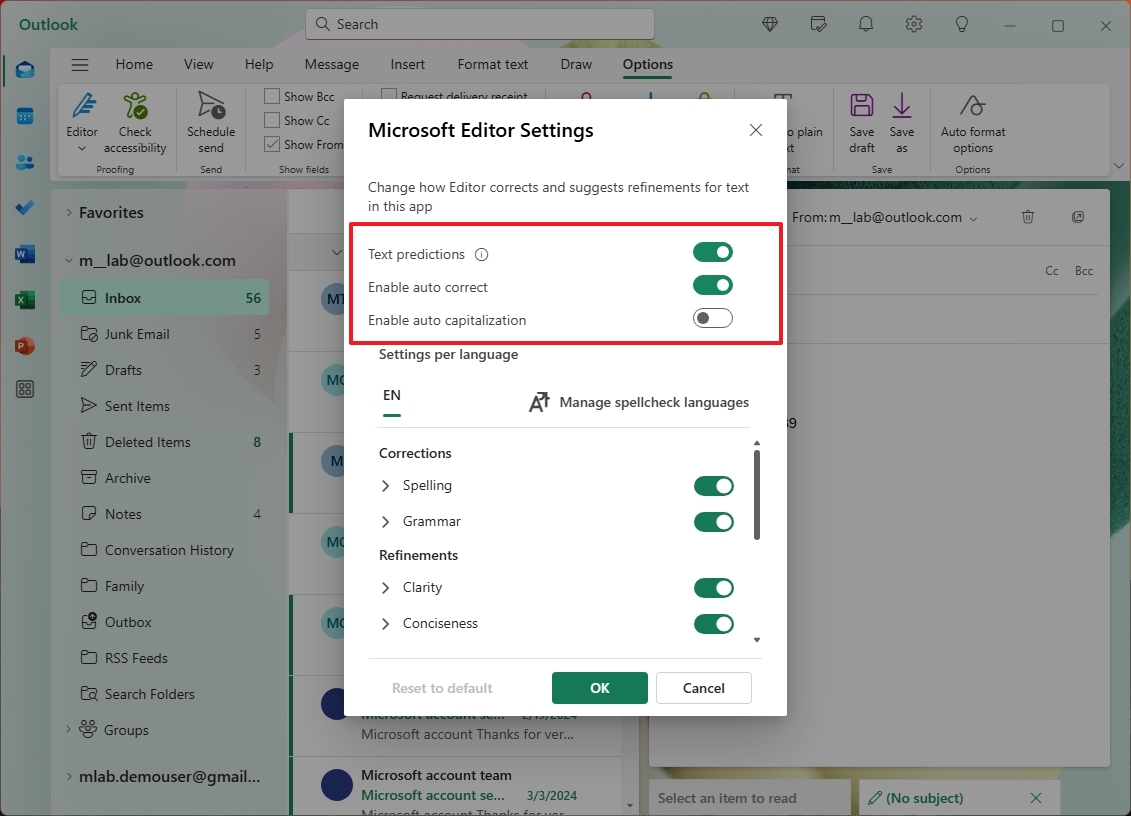
- (Option) Turn on the “Enable auto capitalization” toggle switch.
- Configure the “Corrections” features that include the Spelling and Grammar settings.
- Configure the Refinements features to customize clarity, formality, tone, vocabulary, and other grammar refinements.
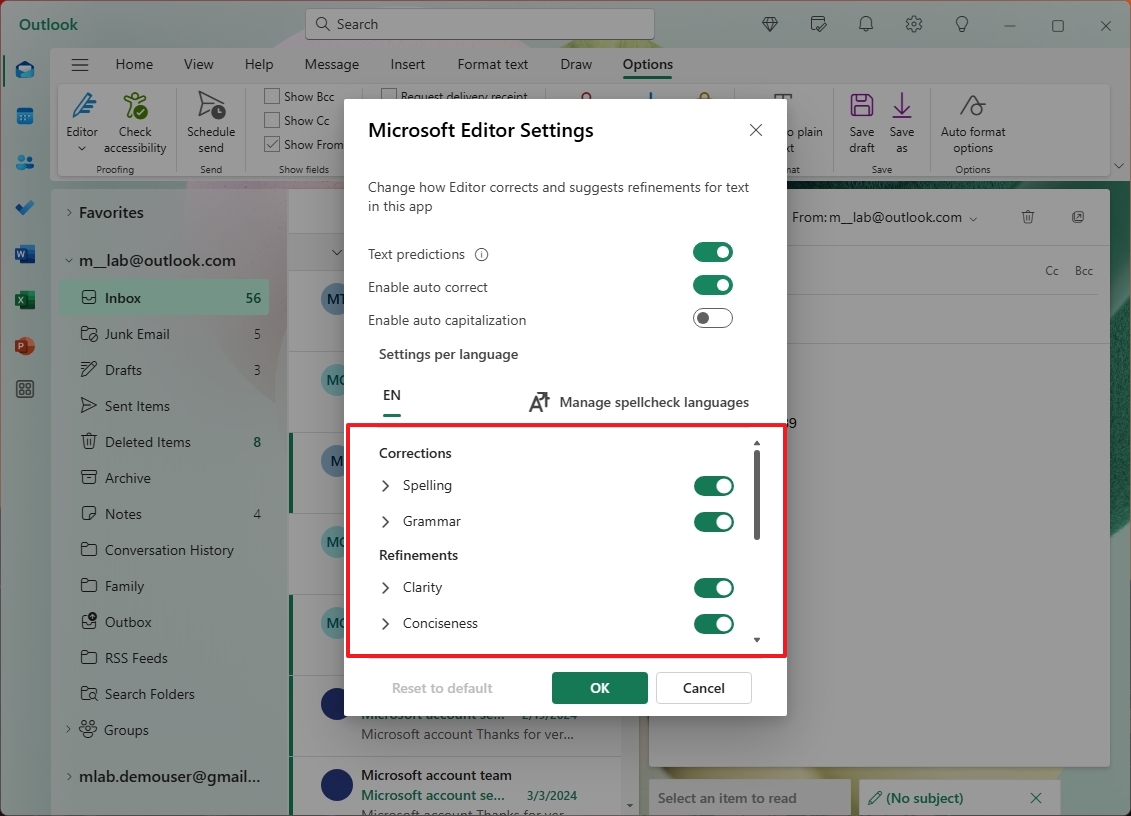
- Click the OK button.
After finishing the necessary steps, the email software will offer grammar suggestions tailored to your settings
Microsoft 365 apps
Launch the Microsoft Office application (Word, Excel, or OneNote) on your Windows 11 system
- Open a Microsoft 365 app (such as Word).
- Click on File and click on Options.
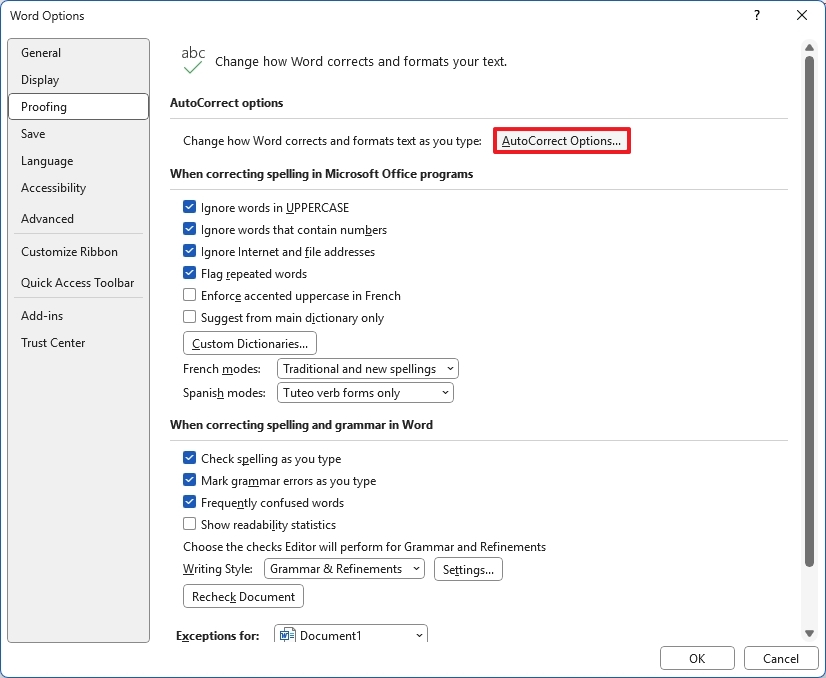
- Click on Proofing on the left side.
- Check the “Check spelling as you type” option.
- Check the “Mark grammar as you type” option.
- Choose the “Grammar & Refinements” option from the “Writing Style” setting.
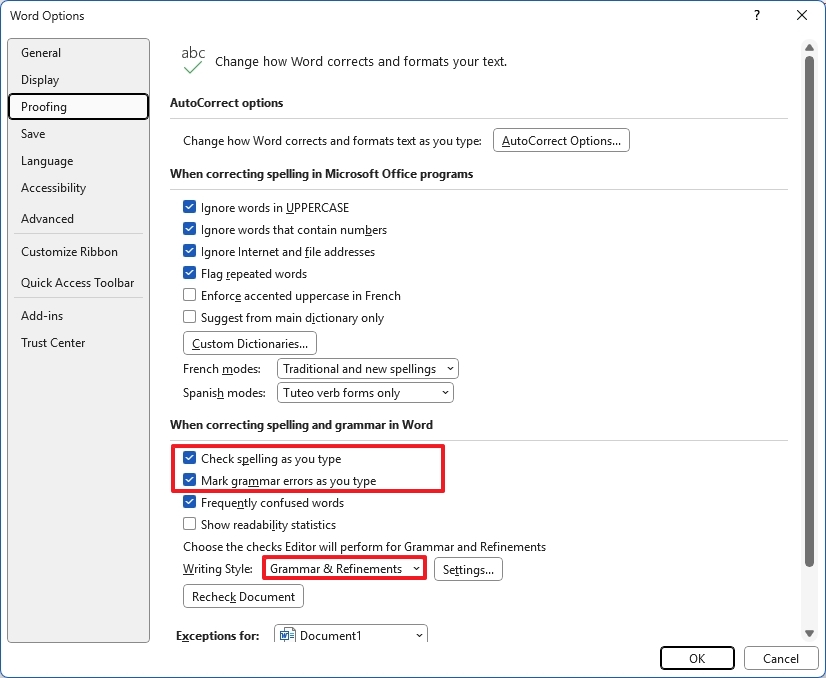
- Quick tip: You can also choose to use only the “Grammar” settings.
- Click the Settings button.
- Configure the features for Grammar, Concisensess, Formality, Inclusiveness, Punctuation Conventions, Resume, Sensitive Geopolitical References, and Vocabulary.
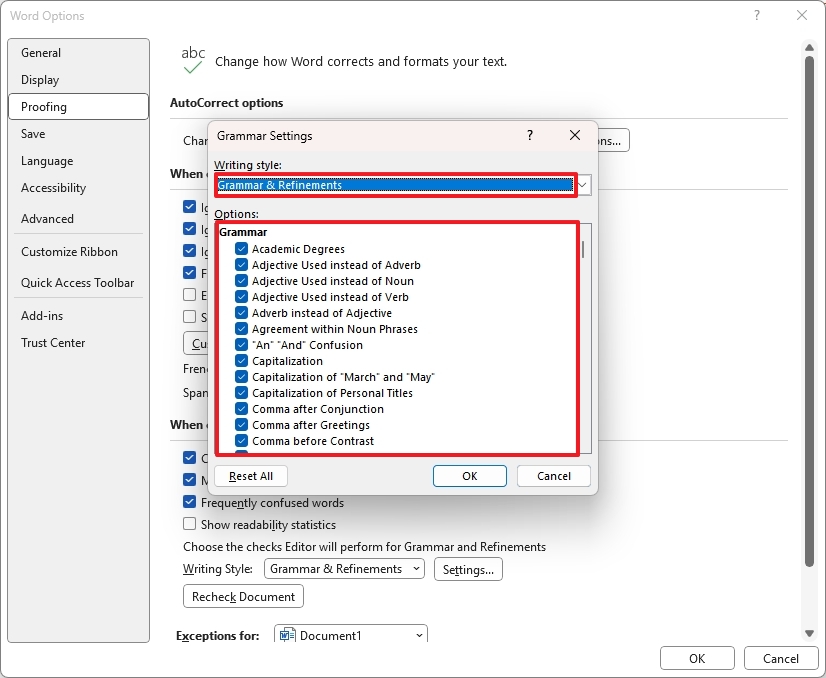
- Click the OK button.
- (Optional) Click the Custom Dictionaries button.
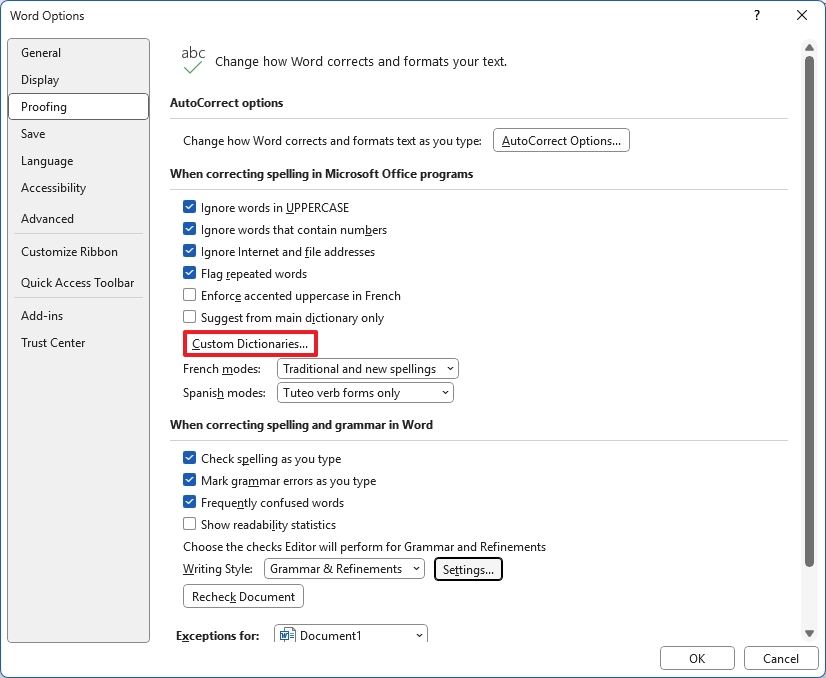
- Select the “RoamingCustom.dic” option.
- Click the “Edit Word List” button.
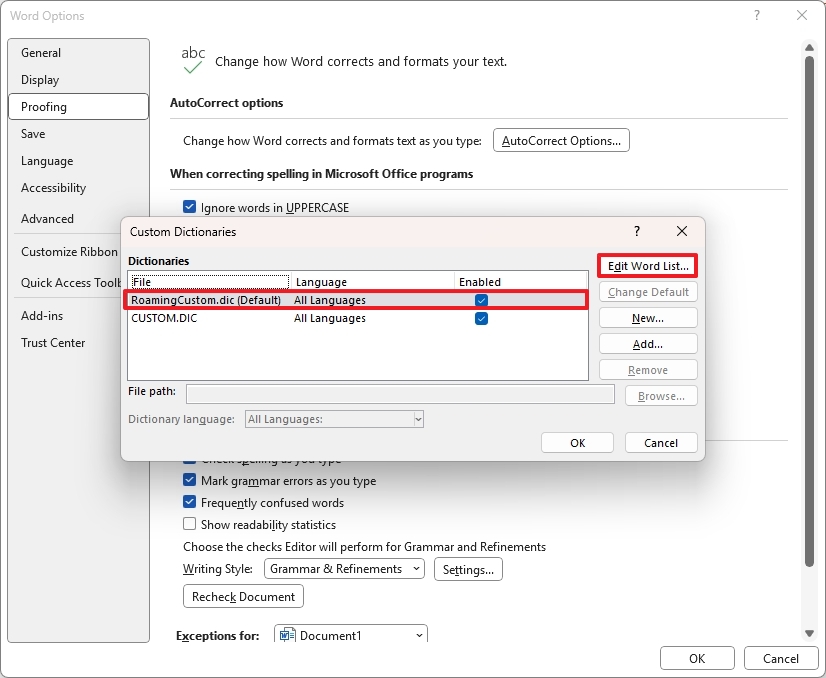
- Add or remove words to the dictionary.
- Click the OK button.
- (Optional) Click the “AutoCorrect Options” button.
- Click on the AutoCorrect tab.
- Check the options to want to correct automatically while typing in a document.
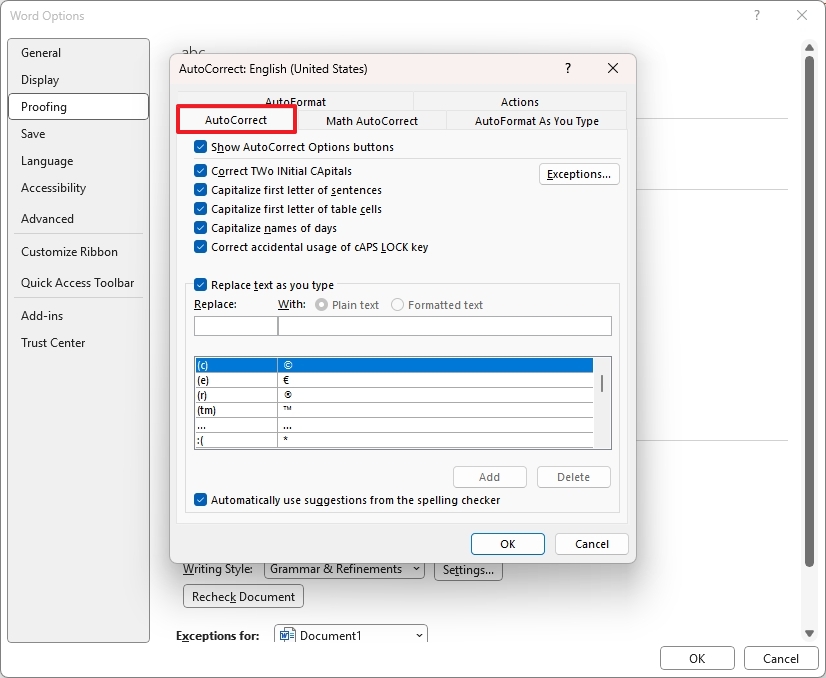
- Quick tip: From this section, you can also configure the autocorrect settings for math, format, and actions.
- Click the OK button.
- Click the Ok button again.
After you complete the steps, the proofing settings will apply to your Microsoft 365 app.
Even though you can adjust proofing settings across Word, Excel, and PowerPoint, it’s worth noting that each program offers unique options. For a more detailed setup, make sure to modify the proofing settings individually in each application (keep in mind that some personalized customizations will apply to all applications)
You can utilize the Microsoft Editor feature on Word online, which is similar to the settings available in the new Outlook application for Windows 11, when you have a Microsoft 365 subscription
More resources
Read More
- WCT PREDICTION. WCT cryptocurrency
- LPT PREDICTION. LPT cryptocurrency
- The Bachelor’s Ben Higgins and Jessica Clarke Welcome Baby Girl with Heartfelt Instagram Post
- Chrishell Stause’s Dig at Ex-Husband Justin Hartley Sparks Backlash
- Guide: 18 PS5, PS4 Games You Should Buy in PS Store’s Extended Play Sale
- Gold Rate Forecast
- PI PREDICTION. PI cryptocurrency
- SOL PREDICTION. SOL cryptocurrency
- Superman Rumor Teases “Major Casting Surprise” (Is It Tom Cruise or Chris Pratt?)
- FANTASY LIFE i: The Girl Who Steals Time digital pre-orders now available for PS5, PS4, Xbox Series, and PC
2024-09-05 13:23