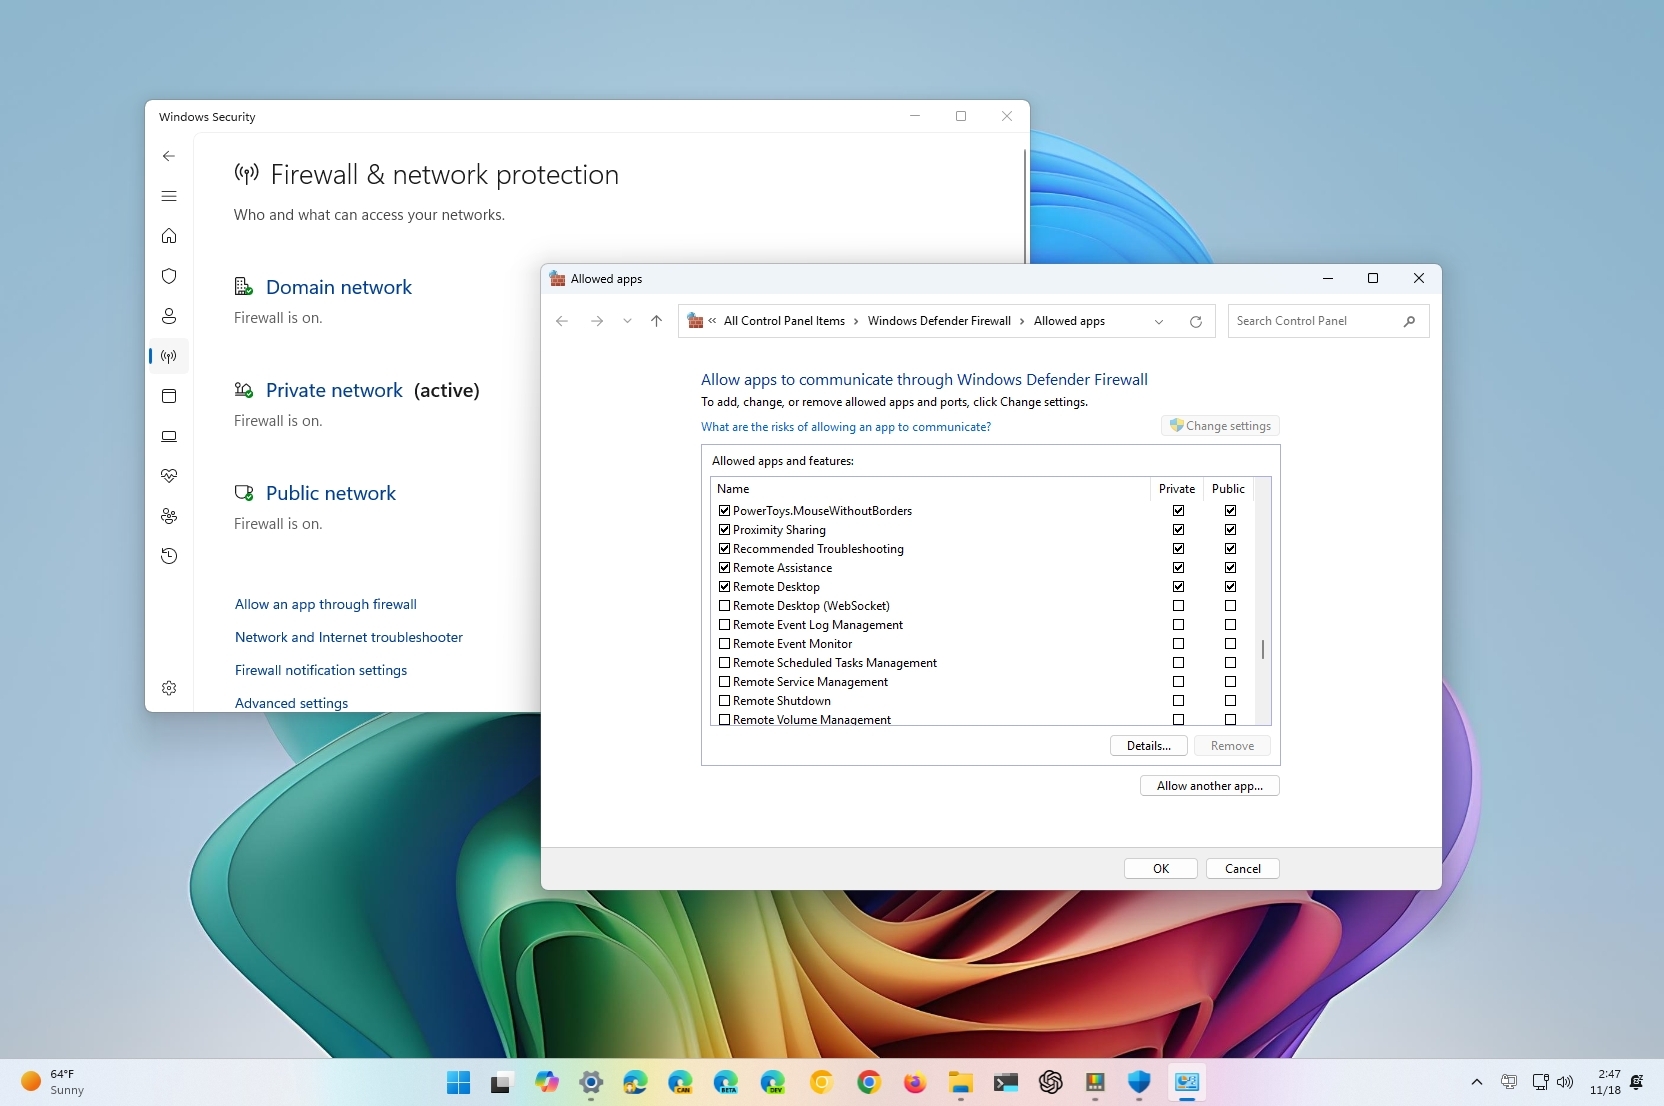
I must say, navigating through the labyrinth of Windows Security settings can be quite the adventure! But fear not, for I have braved those digital depths to bring you a comprehensive guide on customizing your very own Microsoft Defender Firewall.
On Windows 11, you’ll find a protective security element called Microsoft Defender Firewall. This integrated feature serves as a shield for your computer, safeguarding it from unwanted online or network intrusions. Essentially, it functions like a guardpost, scrutinizing both inbound and outbound network data flows and blocking suspect connections that could pose a threat.
Through the Windows Security application, users can access a straightforward interface for managing settings and keeping tabs on activity. For instance, you can tailor the firewall to either permit or deny specific applications from connecting to the network, giving you precise control over your system’s security. Additionally, the firewall offers distinct options for various network types, enabling you to adapt your computer’s security according to the network conditions and requirements.
Here, you’ll find a simple walkthrough explaining how to configure the initial firewall settings on your Windows 11 system.
How to manage the built-in firewall on Windows 11
In Windows 11, Microsoft Defender Firewall is activated automatically at setup, allowing you to toggle it on/off, manage app permissions (allow/block), personalize notification preferences, and in case of error, there’s a feature to revert back to original settings.
Check firewall protection
To check whether the firewall is on or off on your computer, use these steps:
- Open Start.
- Search for Windows Security and click the top result to open the app.
- Click on Firewall & network protection.
- Confirm the feature reads “Firewall is on” for Domain, Private, and Public networks.
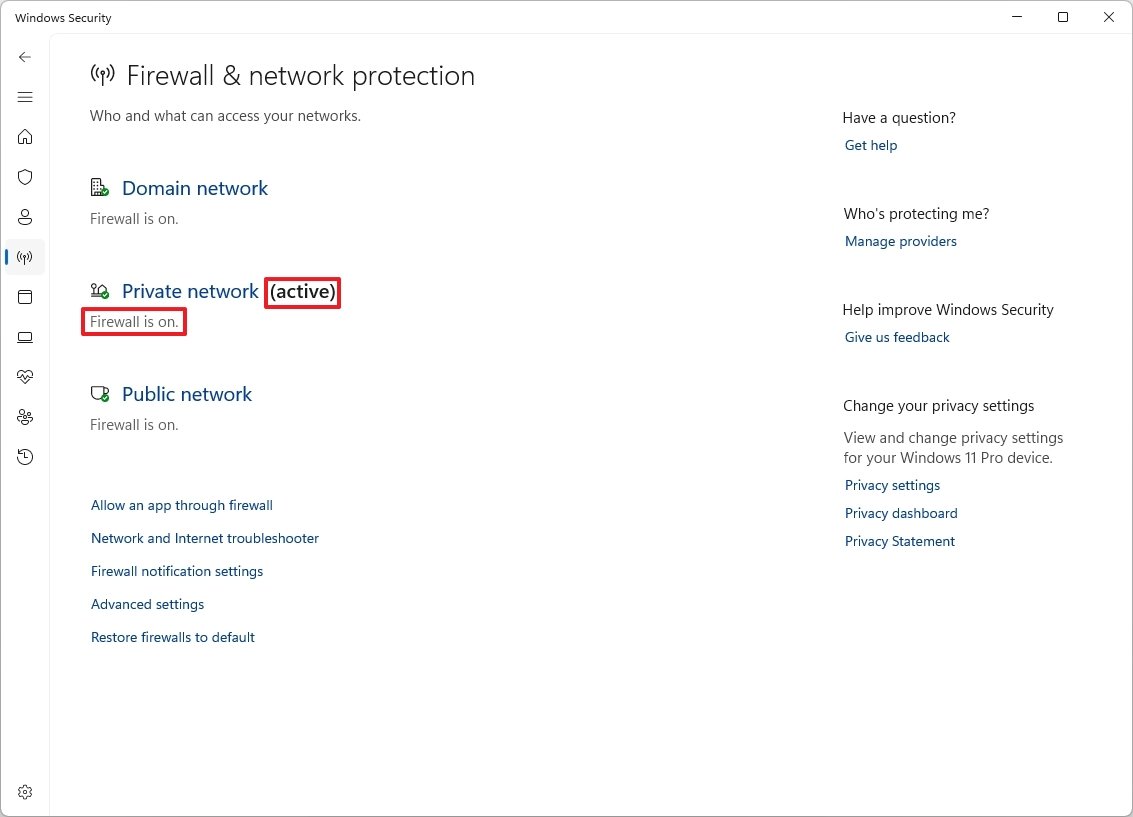
- Quick note: The networks set as “active” indicate the type of network the firewall is protecting.
Additionally, you’ll find controls for customizing firewall settings to permit specific applications and access more intricate options. These adjustments are actually shortcuts that lead you to modify configurations directly from the Control Panel.
Enable or disable firewall
To enable or disable the Defender Firewall on Windows 11, use these steps:
- Open Start.
- Search for Windows Security and click the top result to open the app.
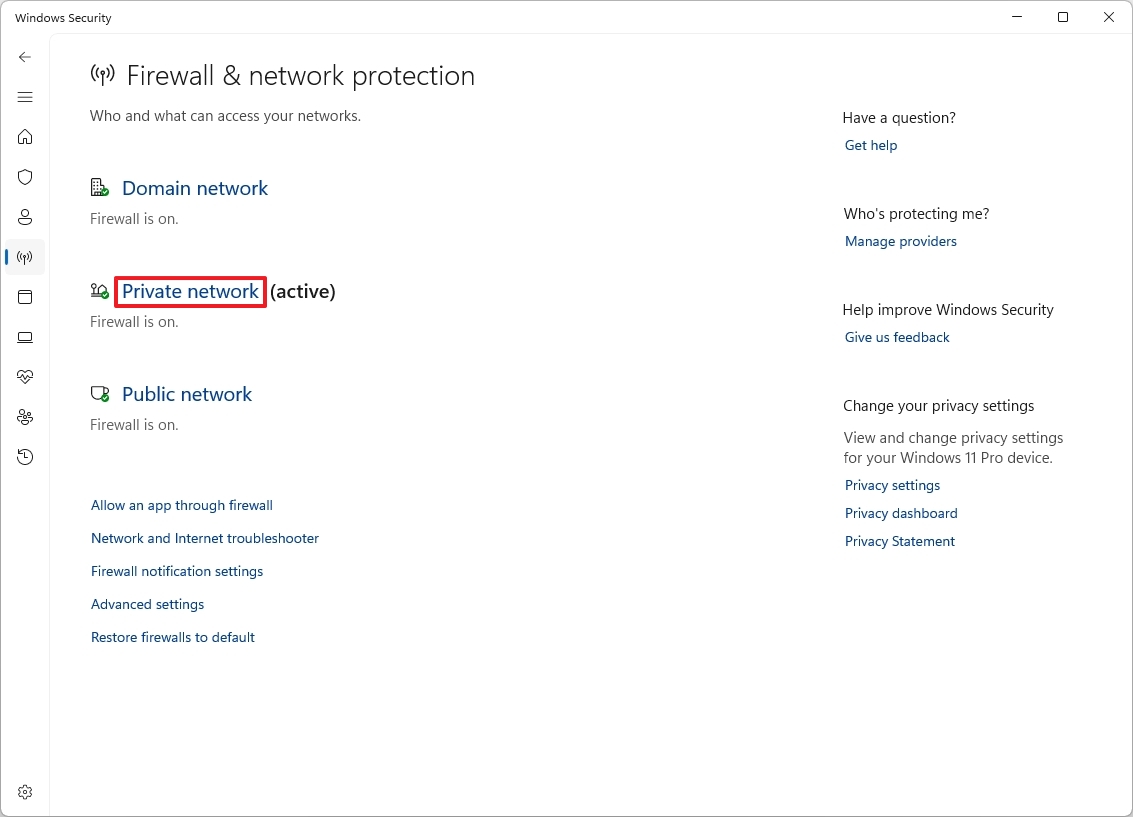
- Click the active firewall. For example, Private network.
- Turn the “Microsoft Defender Firewall” toggle switch on or off to enable or disable the security feature.
- (Optional) Check the “Blocks all incoming connections, including those in the list of allowed apps” option to block incoming connections
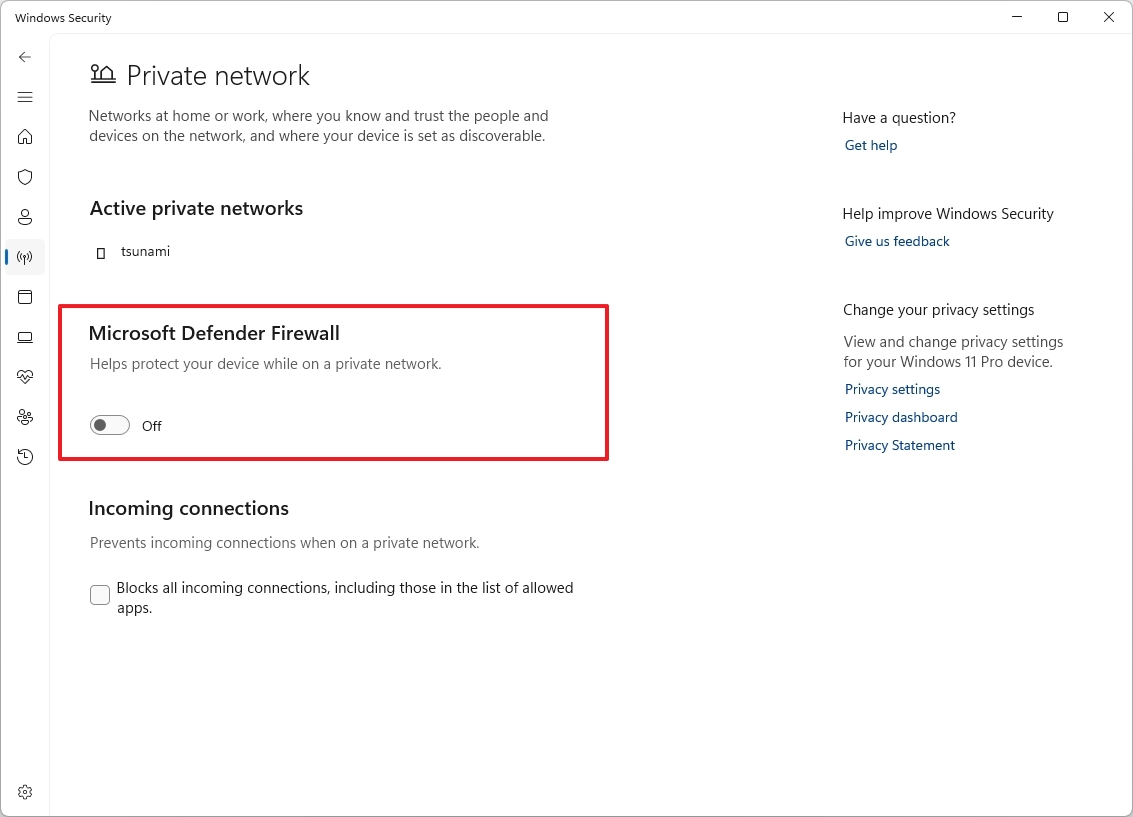
- Quick note: This option has been designed to turn off the firewall for a specific network type temporarily. Usually, you would use this option to troubleshoot connectivity problems.
Once you complete the steps, the firewall will turn on or off according to your configuration.
Allow an app access through firewall
To allow a specific app through the firewall, use these steps:
- Open Start.
- Search for Windows Security and click the top result to open the app.
- Click the “Allow an app through firewall” option.
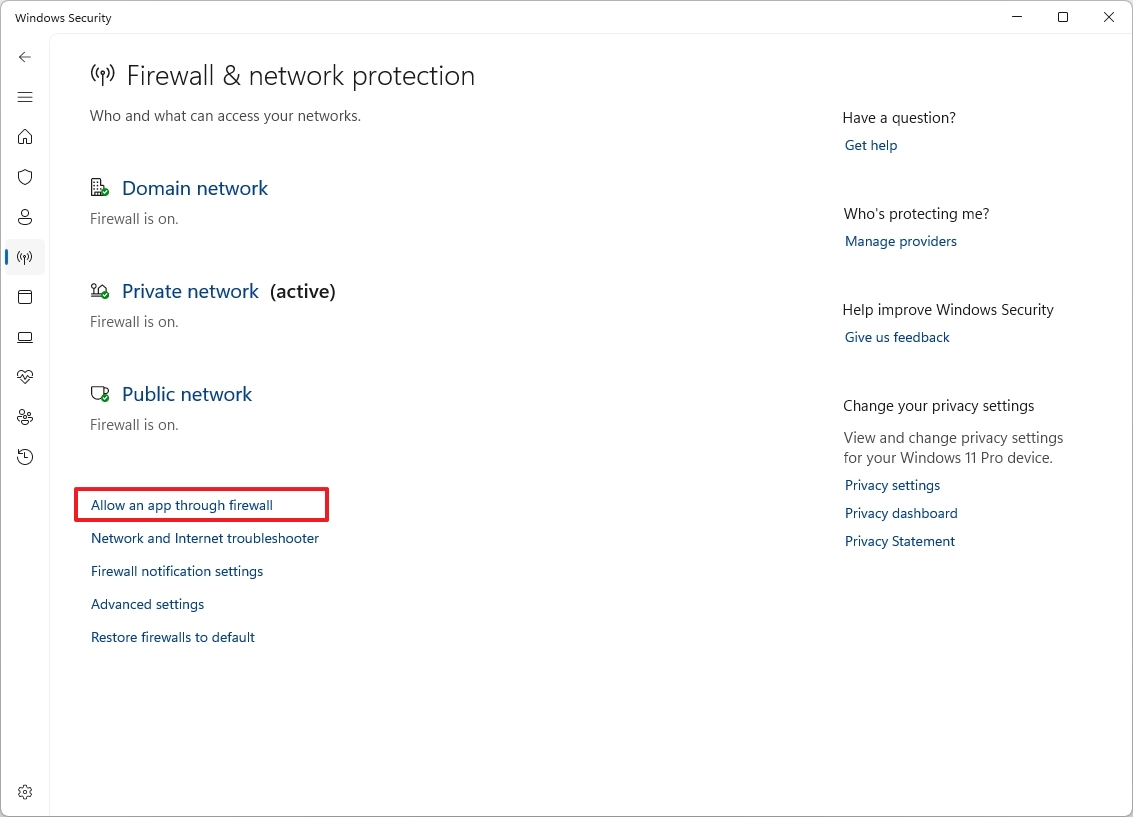
- Click the Change settings button.
- (Option 1) Check the app or feature to allow through the firewall.
- Check the Private option.
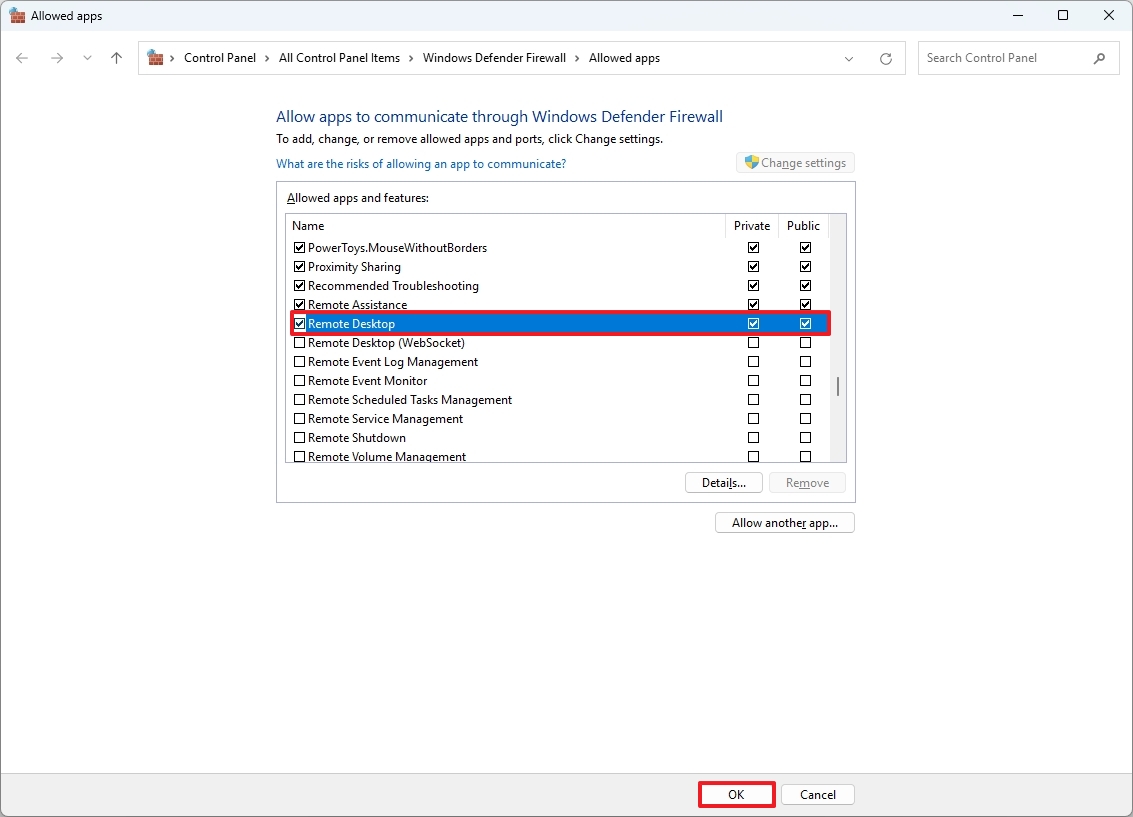
- (Optional) Check the Public option if you will be connecting with the app or feature through a public network.
- (Option 1) Click the “Allow another app” button.
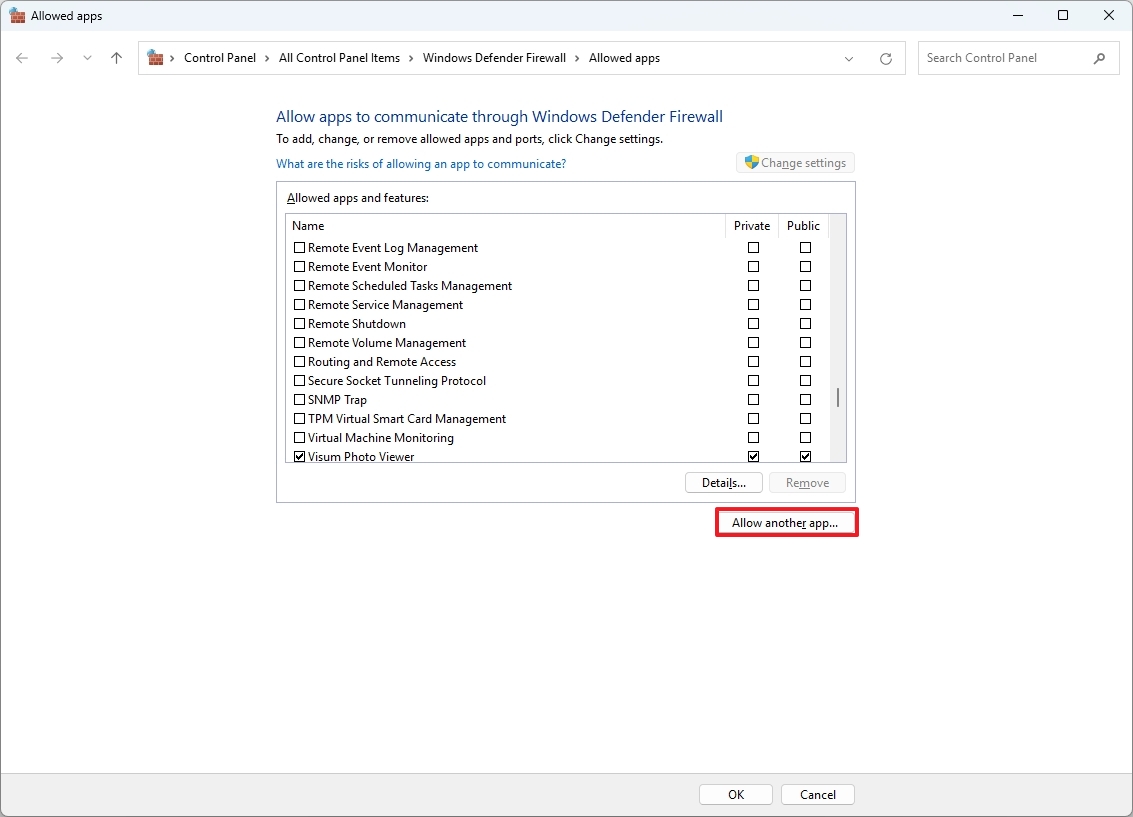
- Click the Browse button.
- Choose the app’s executable to allow through the firewall.
- Click the Open button.
- Click the Add button.
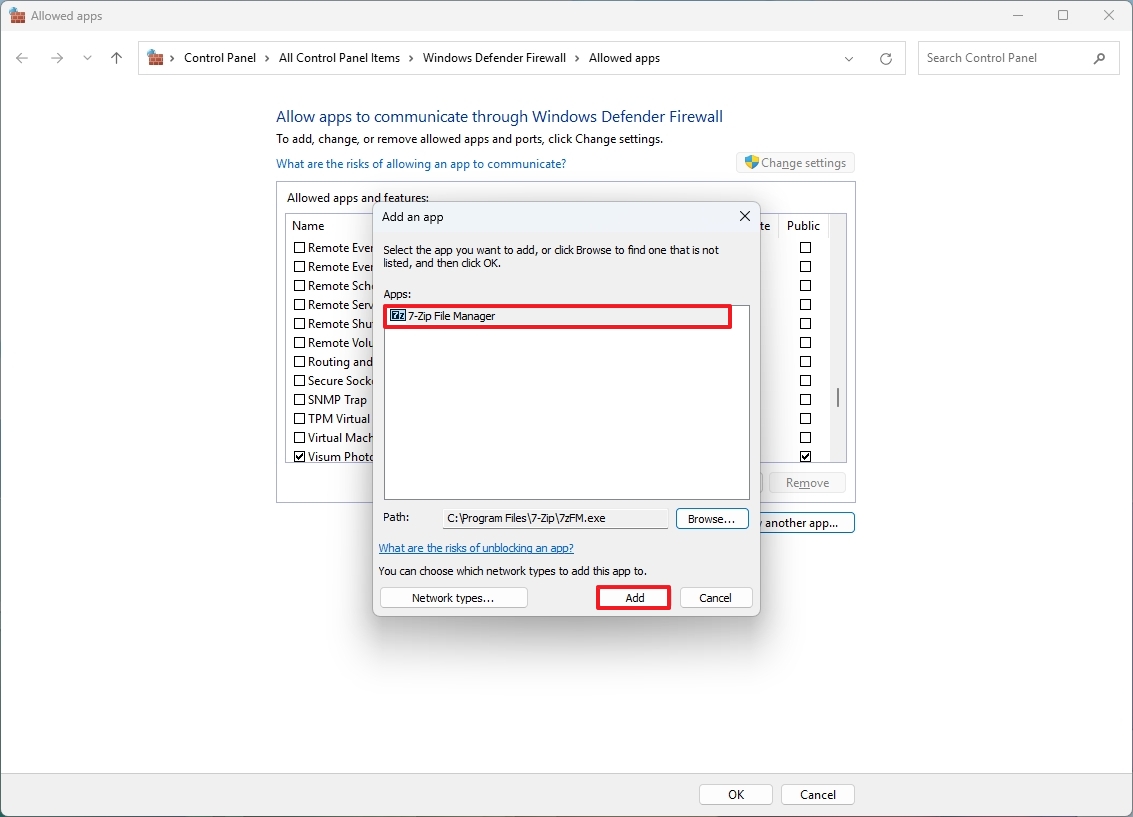
- Check the Private option.
- (Optional) Check the Public option if you will be connecting with the app or feature through a public network.
- Click the OK button.
Once you’ve finished the required steps, the app will gain permission to transmit and receive data both within the local network and over the internet.
Block an app access through firewall
To prevent an app from accessing the network or the internet, use these steps:
- Open Start.
- Search for Windows Security and click the top result to open the app.
- Click the “Allow an app through firewall” option.

- Click the Change settings button.
- Clear the check mark for the app to block, making sure that the Private and Public options are also unchecked.
- Click the OK button.
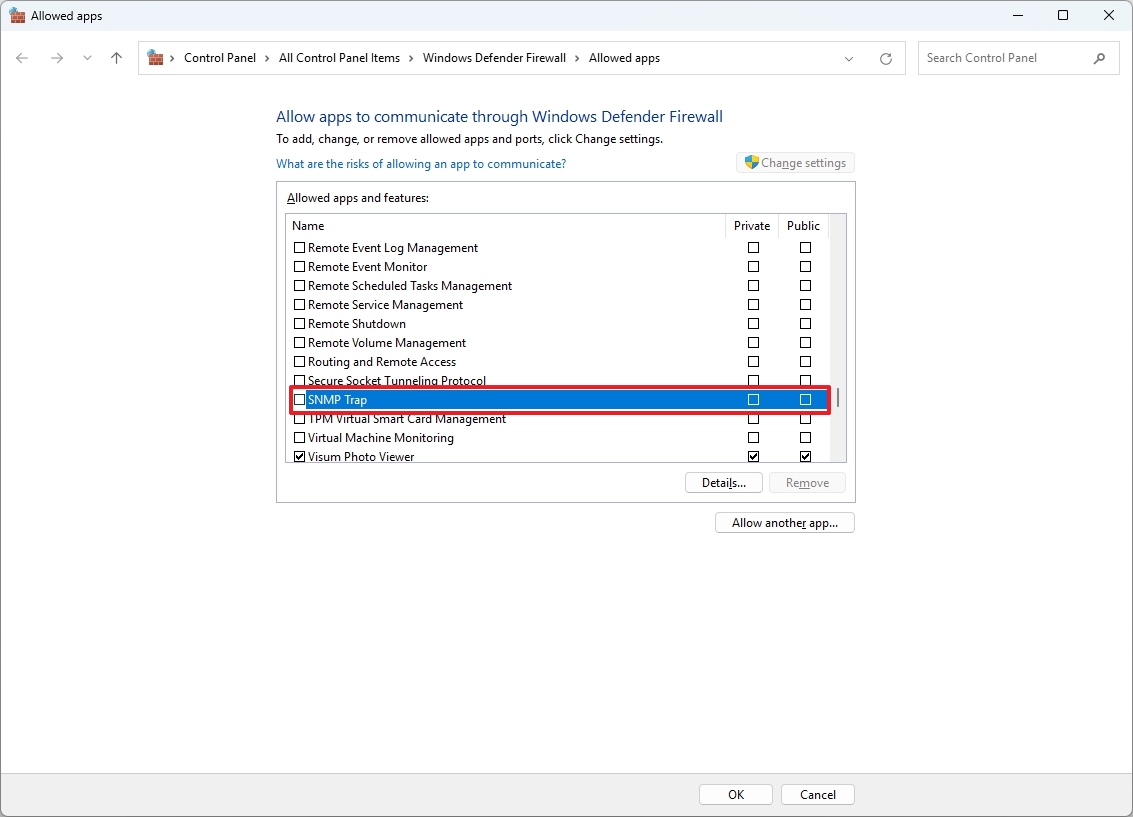
Once you complete the steps, the firewall will block the application through the firewall.
Customize firewall notifications
To customize the notifications for the Windows 11 firewall, use these steps:
- Open Start.
- Search for Windows Security and click the top result to open the app.
- Click the “Firewall notification settings” option.
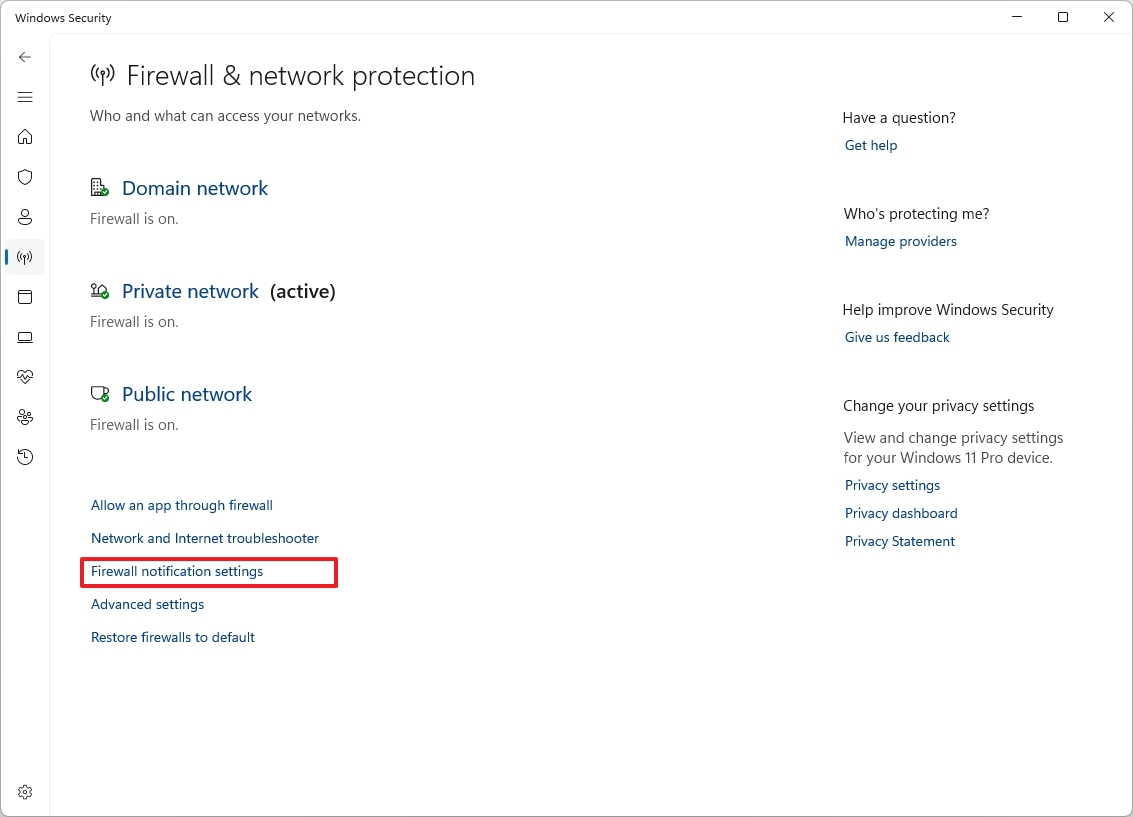
- Click the Manage notifications option for the “Notifications” setting.
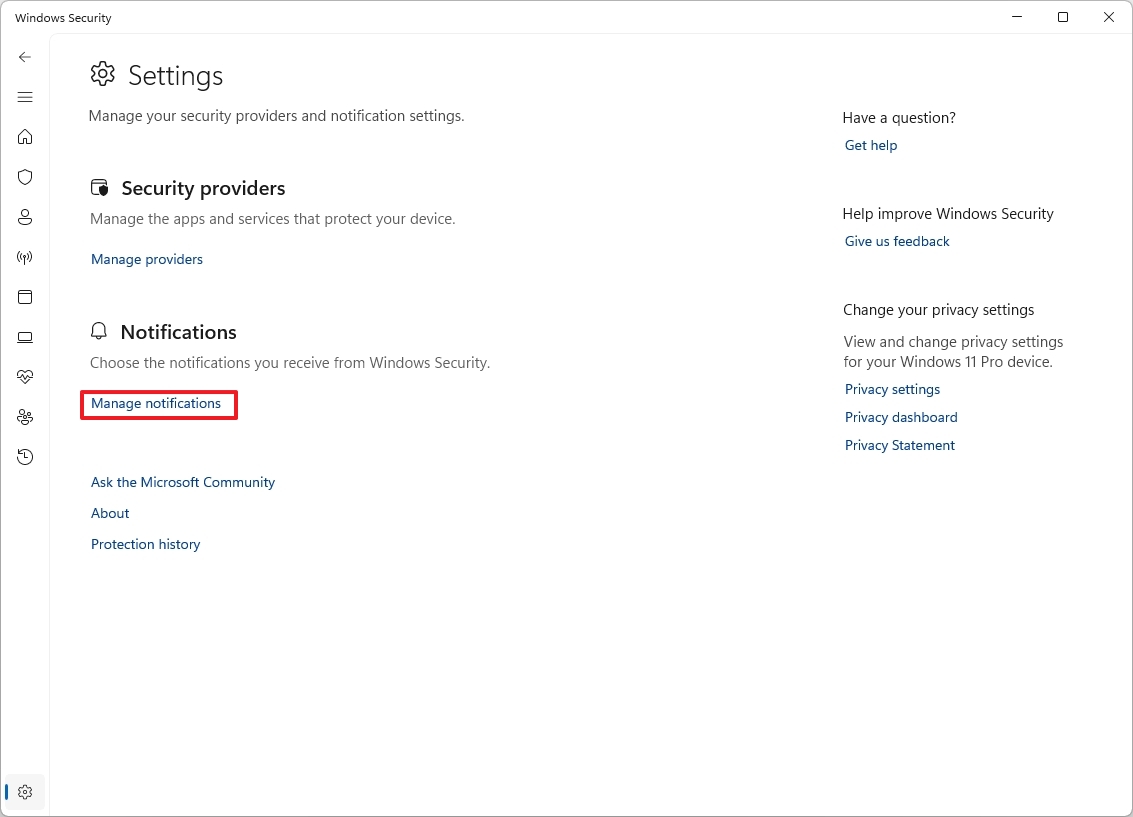
- (Option 1) Turn off the “Notify me when Microsoft Defender Firewall blocks a new app” toggle switch.
- (Option 2) Clear the type of notifications you want to turn off, including Domain, Private, and Public.
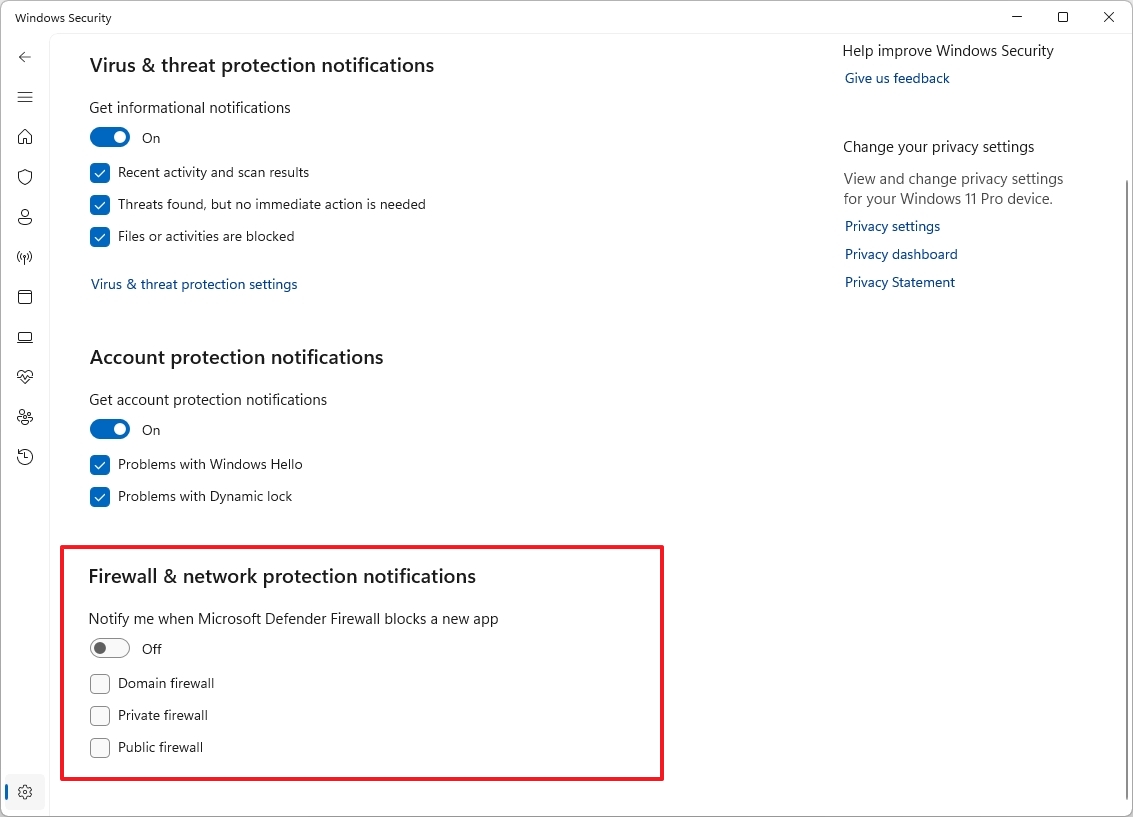
After you complete the steps, you will receive notifications according to your configuration.
Restore firewall default configuration
To restore the Microsoft Defender Antivirus feature default settings, use these steps:
- Open Start.
- Search for Windows Security and click the top result to open the app.
- Click the “Firewall notification settings” option.
- Click the “Restore firewalls to default” option.
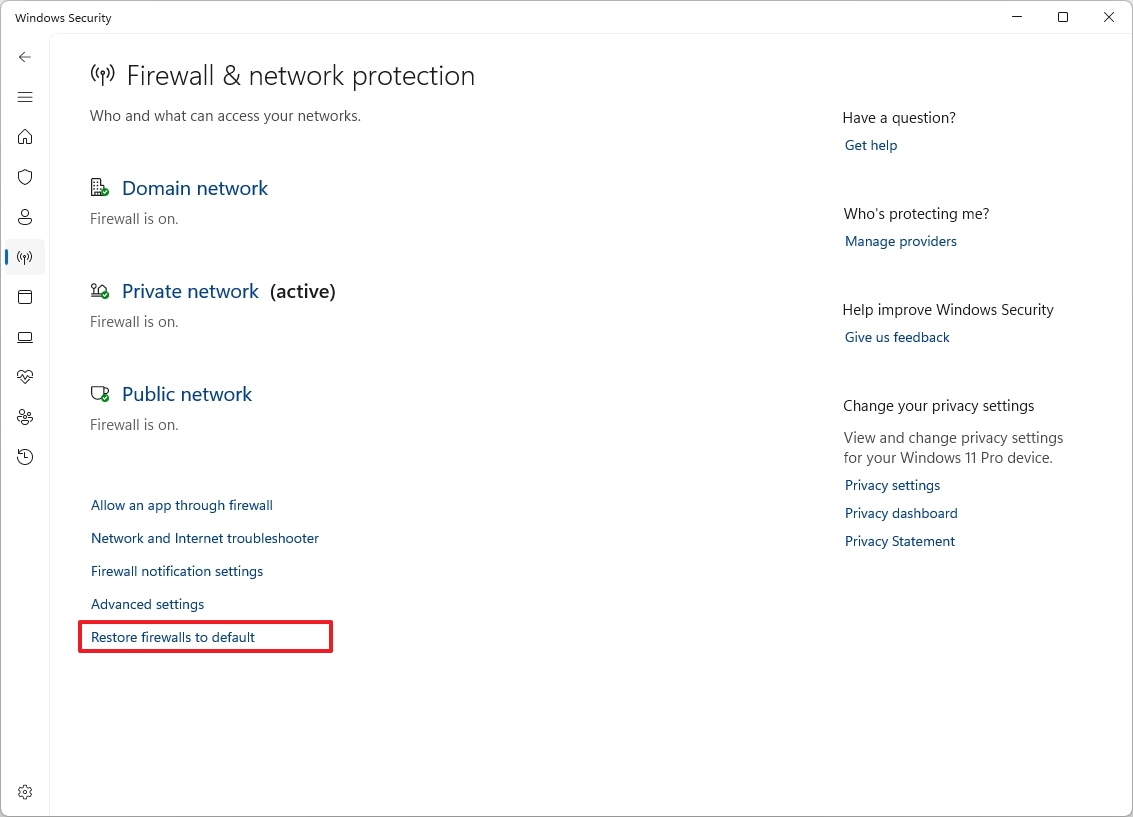
- Click the Restore defaults button.
After finishing the given steps, the security function will restore the settings to their original factory configuration by resetting them on Windows 11.
More resources
Read More
- PI PREDICTION. PI cryptocurrency
- Gold Rate Forecast
- Rick and Morty Season 8: Release Date SHOCK!
- Discover Ryan Gosling & Emma Stone’s Hidden Movie Trilogy You Never Knew About!
- Discover the New Psion Subclasses in D&D’s Latest Unearthed Arcana!
- Linkin Park Albums in Order: Full Tracklists and Secrets Revealed
- Masters Toronto 2025: Everything You Need to Know
- We Loved Both of These Classic Sci-Fi Films (But They’re Pretty Much the Same Movie)
- Mission: Impossible 8 Reveals Shocking Truth But Leaves Fans with Unanswered Questions!
- SteelSeries reveals new Arctis Nova 3 Wireless headset series for Xbox, PlayStation, Nintendo Switch, and PC
2024-11-19 16:09