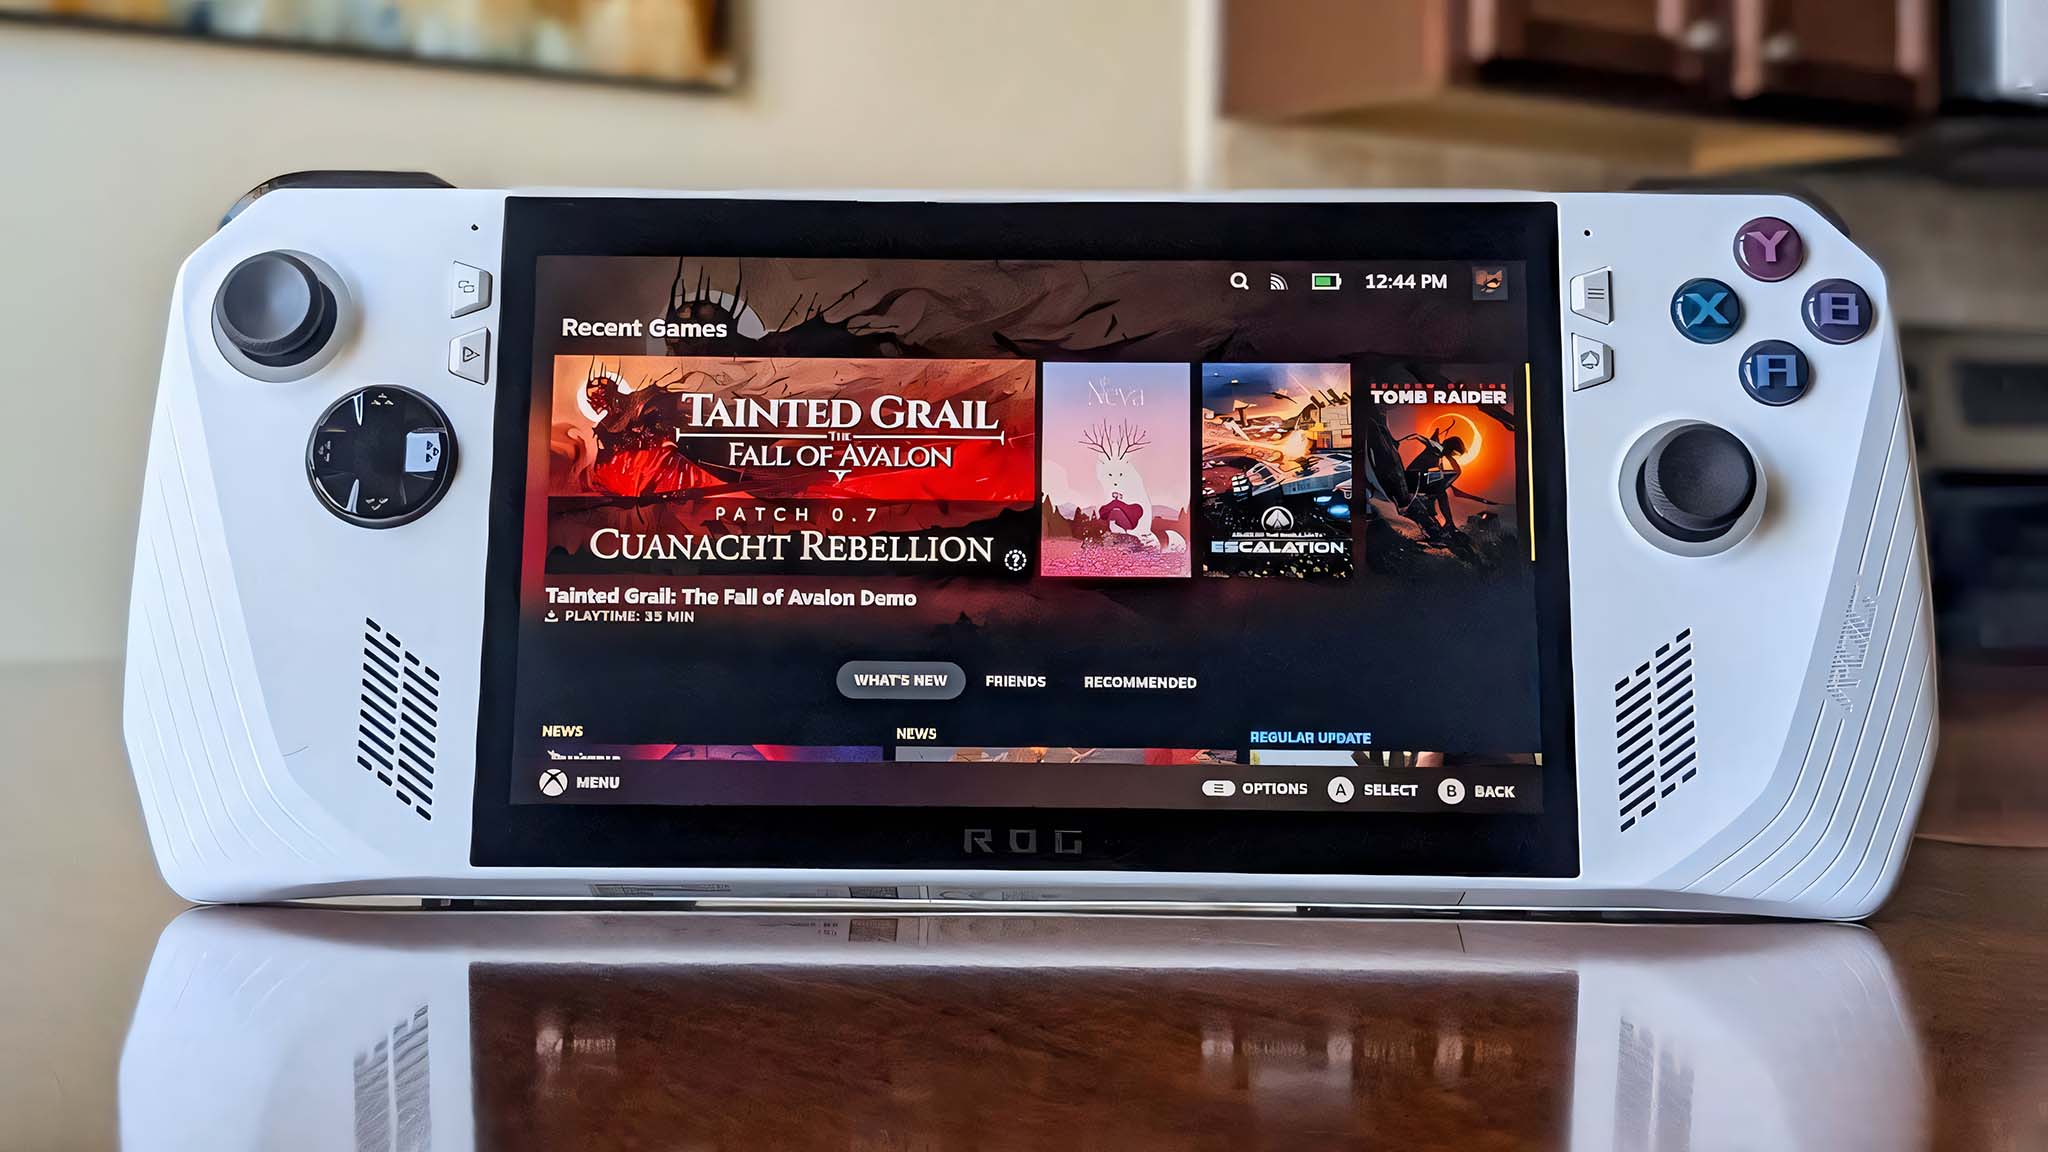
Following several months of excitement, it’s now confirmed that SteamOS can be utilized on gaming handhelds aside from the Steam Deck, like the ASUS ROG Ally and Lenovo Legion Go, which originally ran on Windows.
I set up SteamOS on my ROG Ally, whereas my Editor-in-Chief put SteamOS onto his Legion Go.
This page offers detailed instructions with illustrations to guide you through the process of installing SteamOS on your Windows portable gaming device. To proceed smoothly, ensure you have a flash drive like the SanDisk USB-C stick I utilized for this purpose.
What you’ll need to install SteamOS on a non-Steam Deck handheld
- This is a permanent change: Reimaging your ROG Ally or Legion Go will completely wipe everything on it, and this action cannot be undone. If there are any files you want to save, make sure to move them onto another device before installing SteamOS on your handheld.
- You’ll need a flash drive: The easiest method for putting SteamOS on a Windows handheld is by using a USB-C flash drive. If you only have a USB-A flash drive, you’ll need to use a USB-A to USB-C adapter.
How to install SteamOS on ROG Ally and ROG Ally X
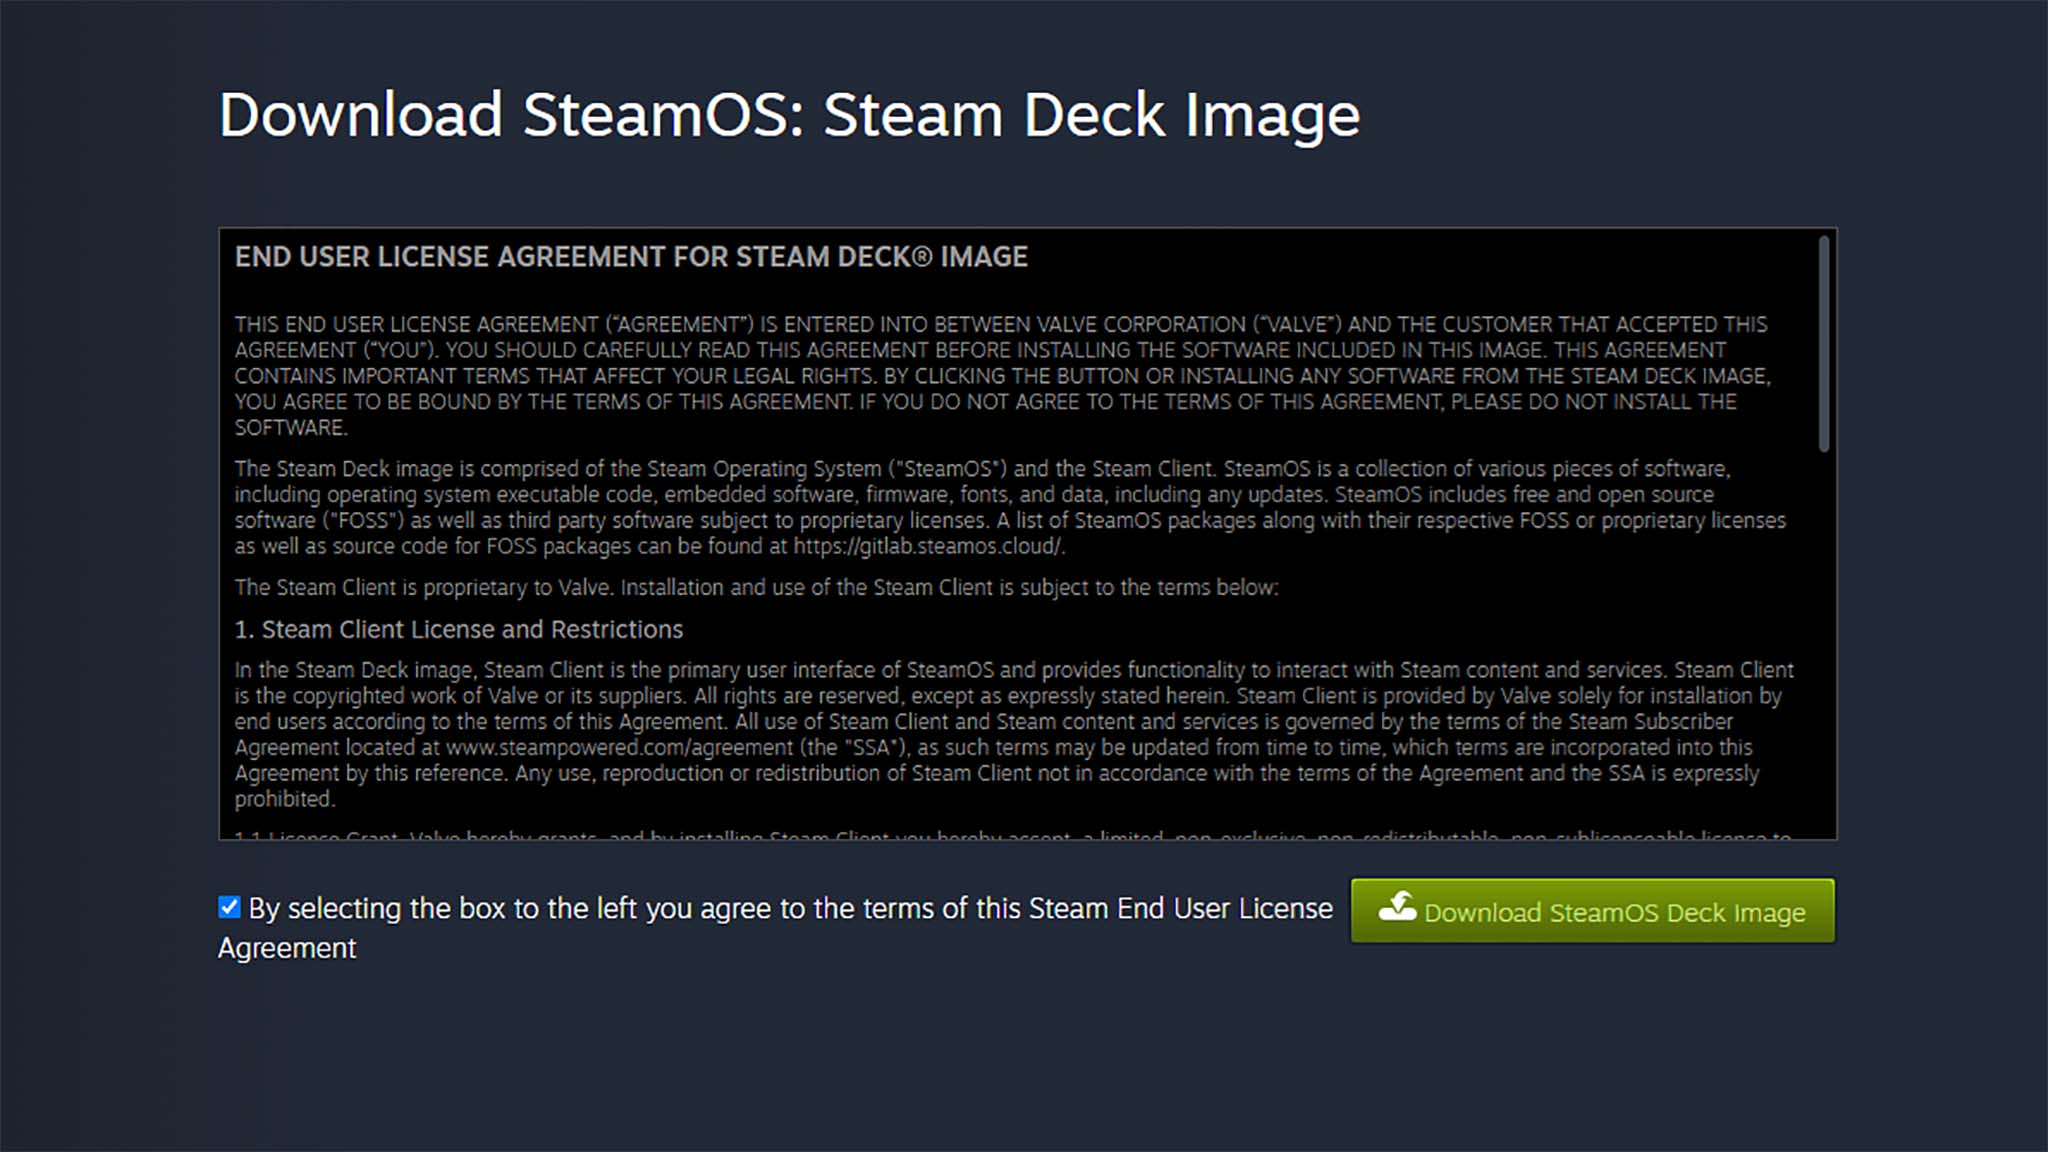
- To start off, plug your USB flash stick into your computer and then download the SteamOS: Steam Deck recovery image from Steam’s website.
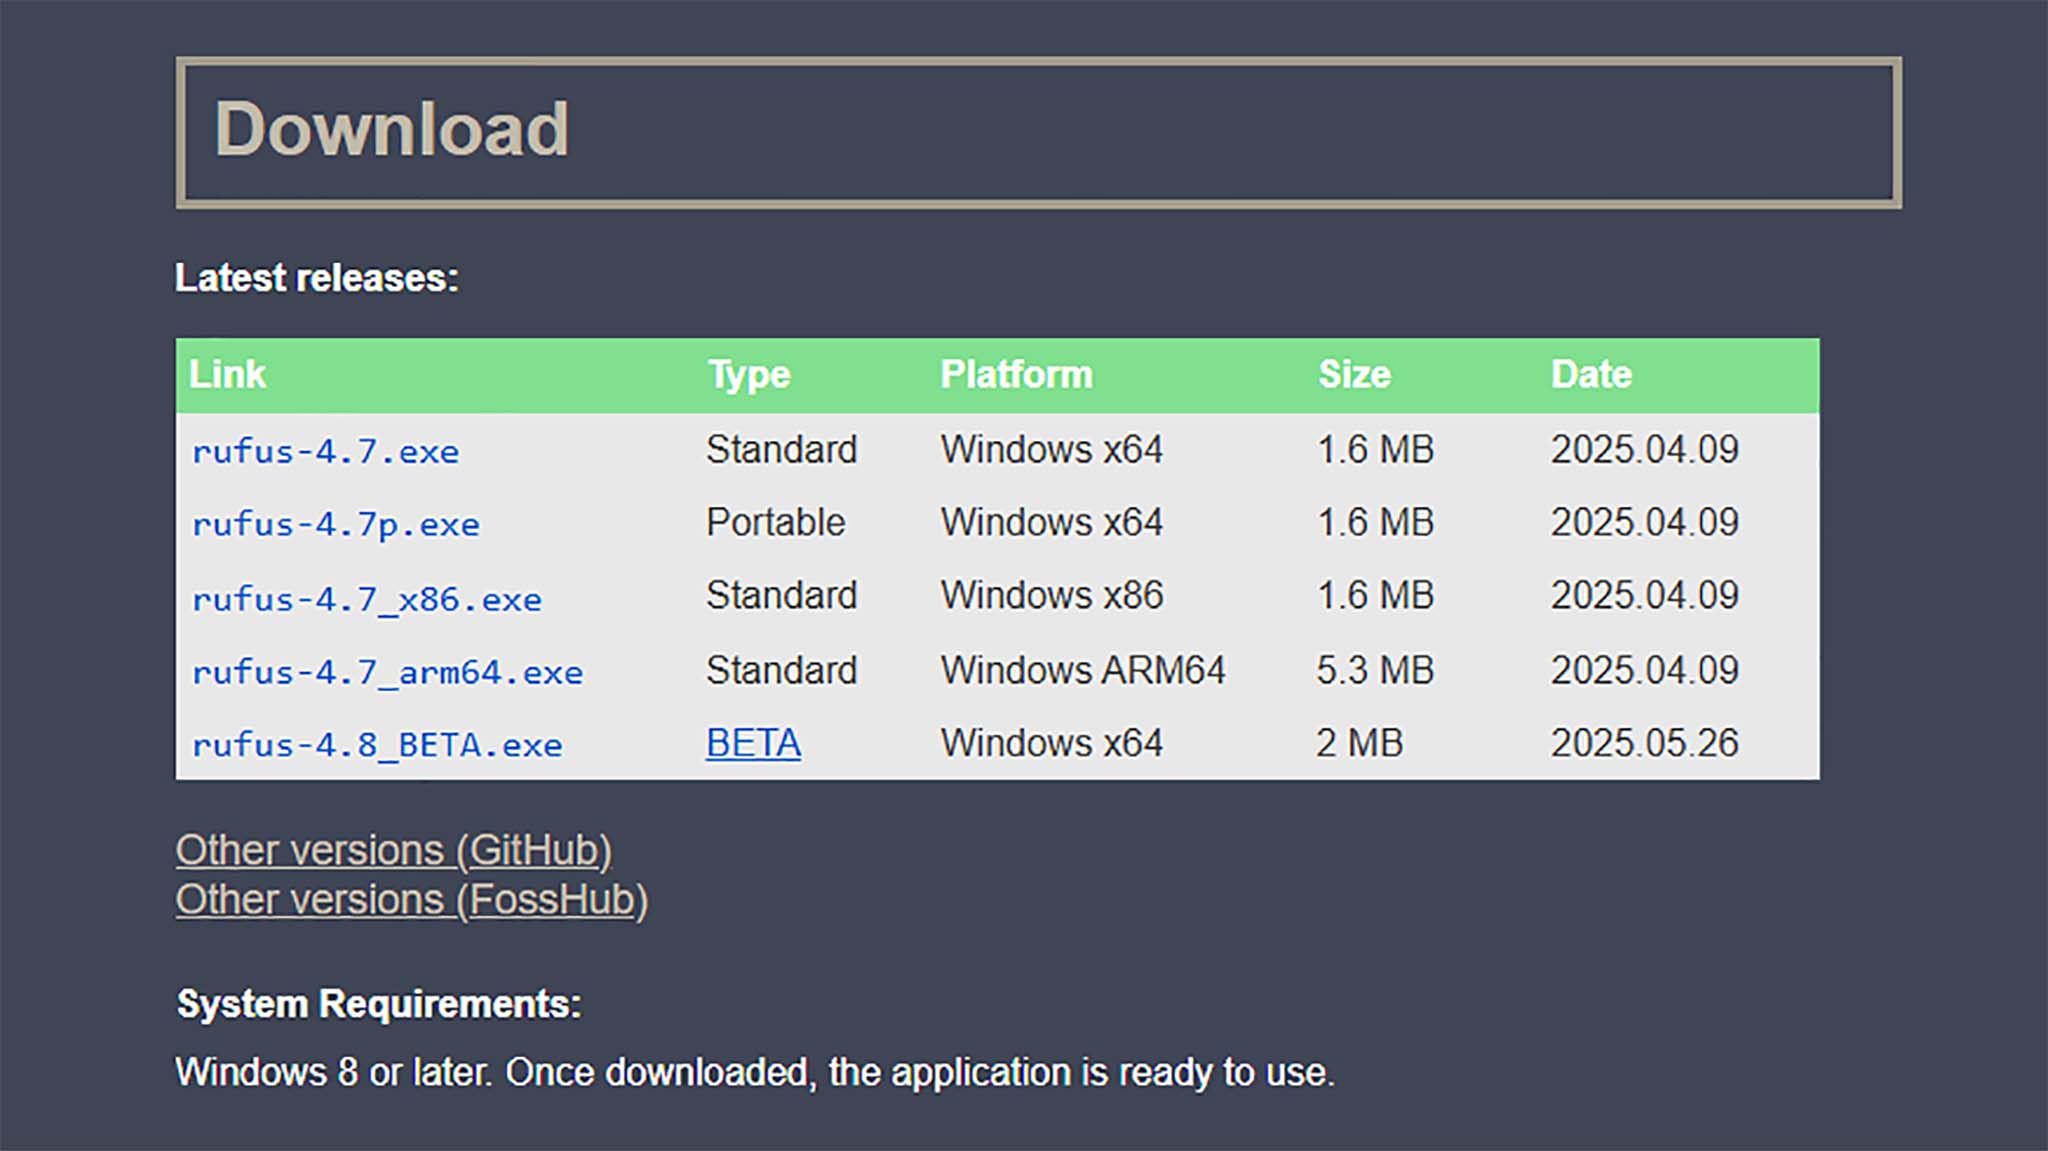
- Now, download the Rufus utility by clicking on the latest executable listed on the Rufus website.
- Open File Explorer and navigate to Downloads. Then right-click on the Steam Deck repair file you downloaded from Steam and select Extract All.
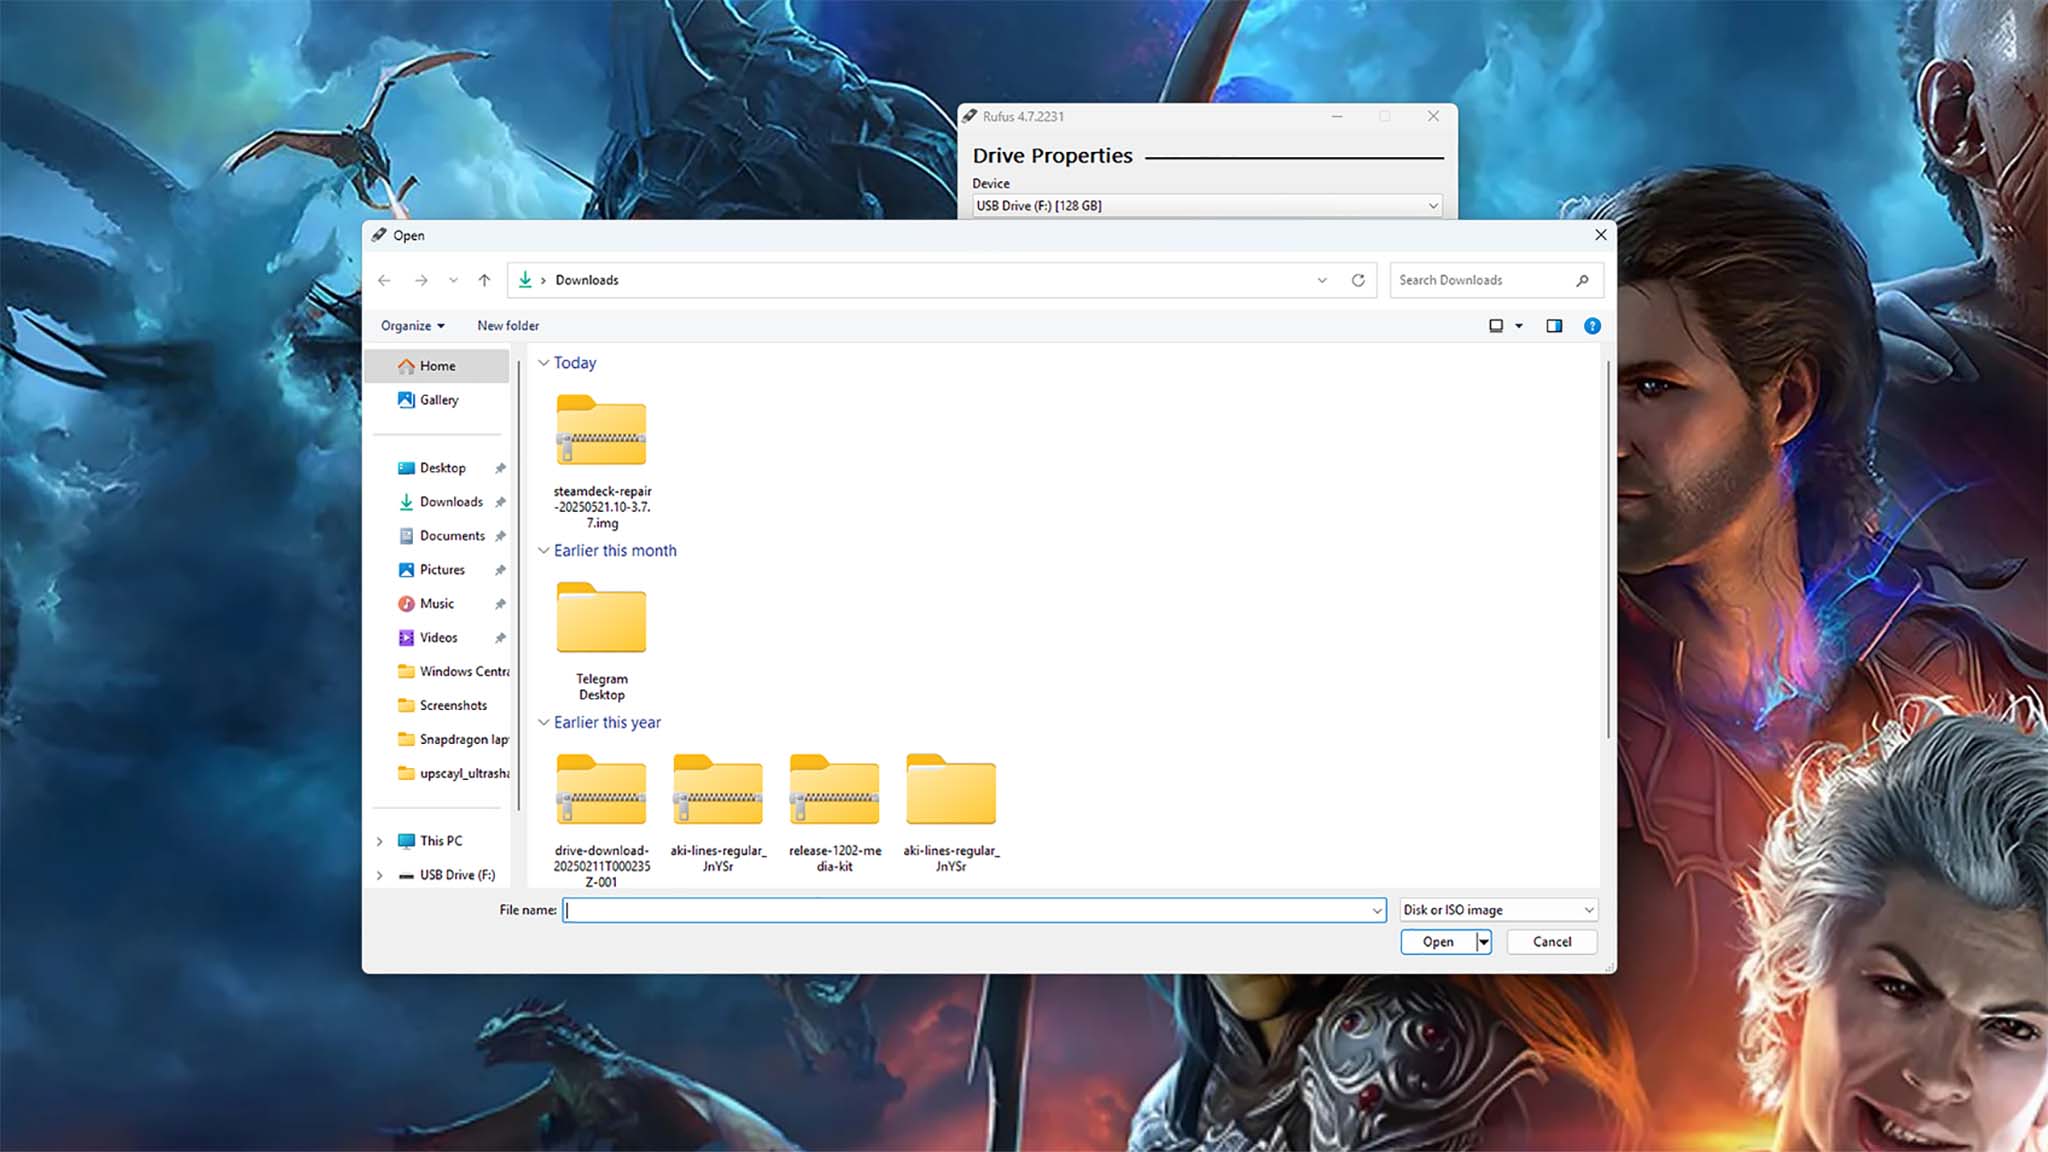
- When the computer is done extracting, open Rufus and click on the Select button. Then choose the uncompressed Steam Deck Repair files in Downloads.
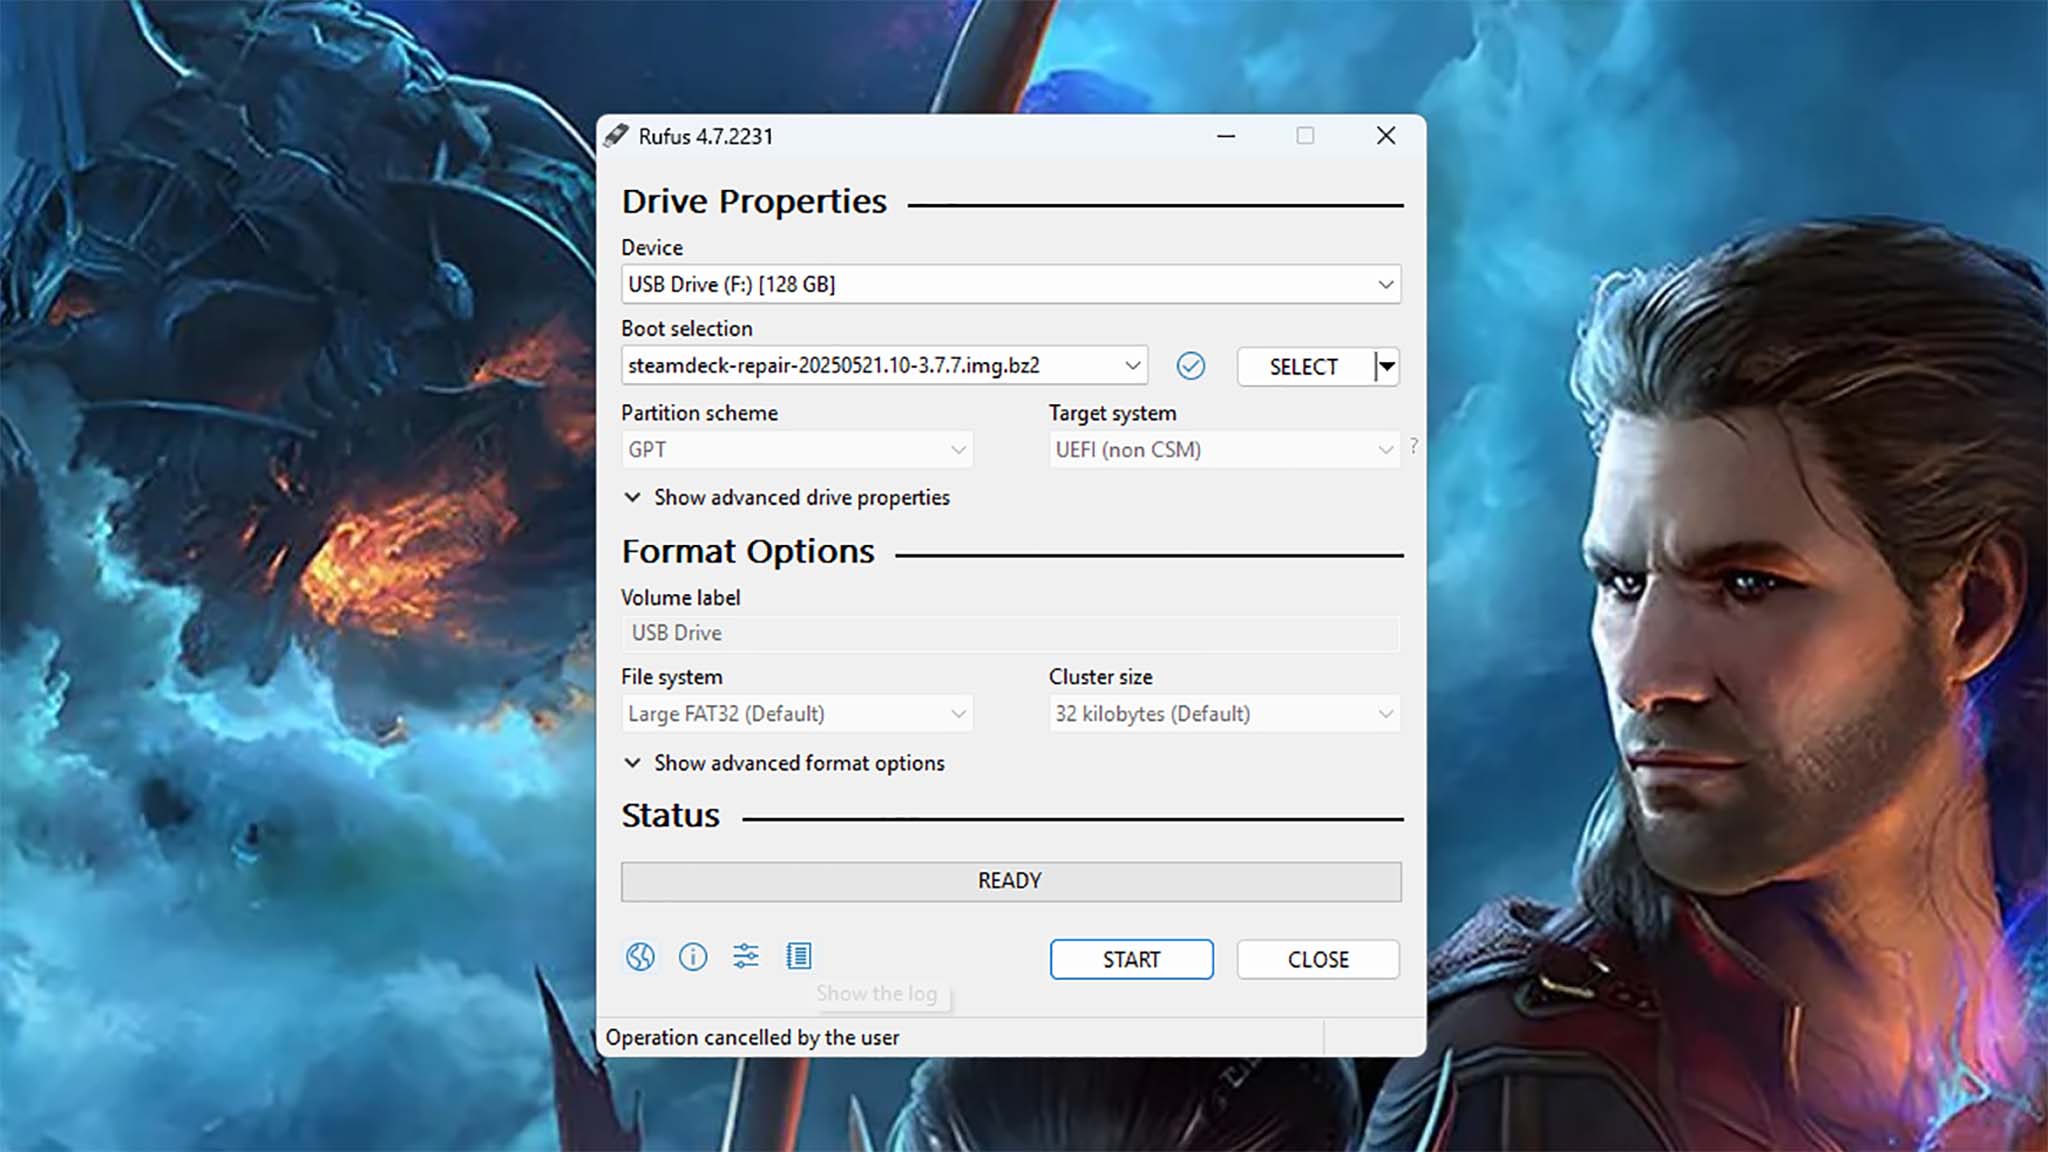
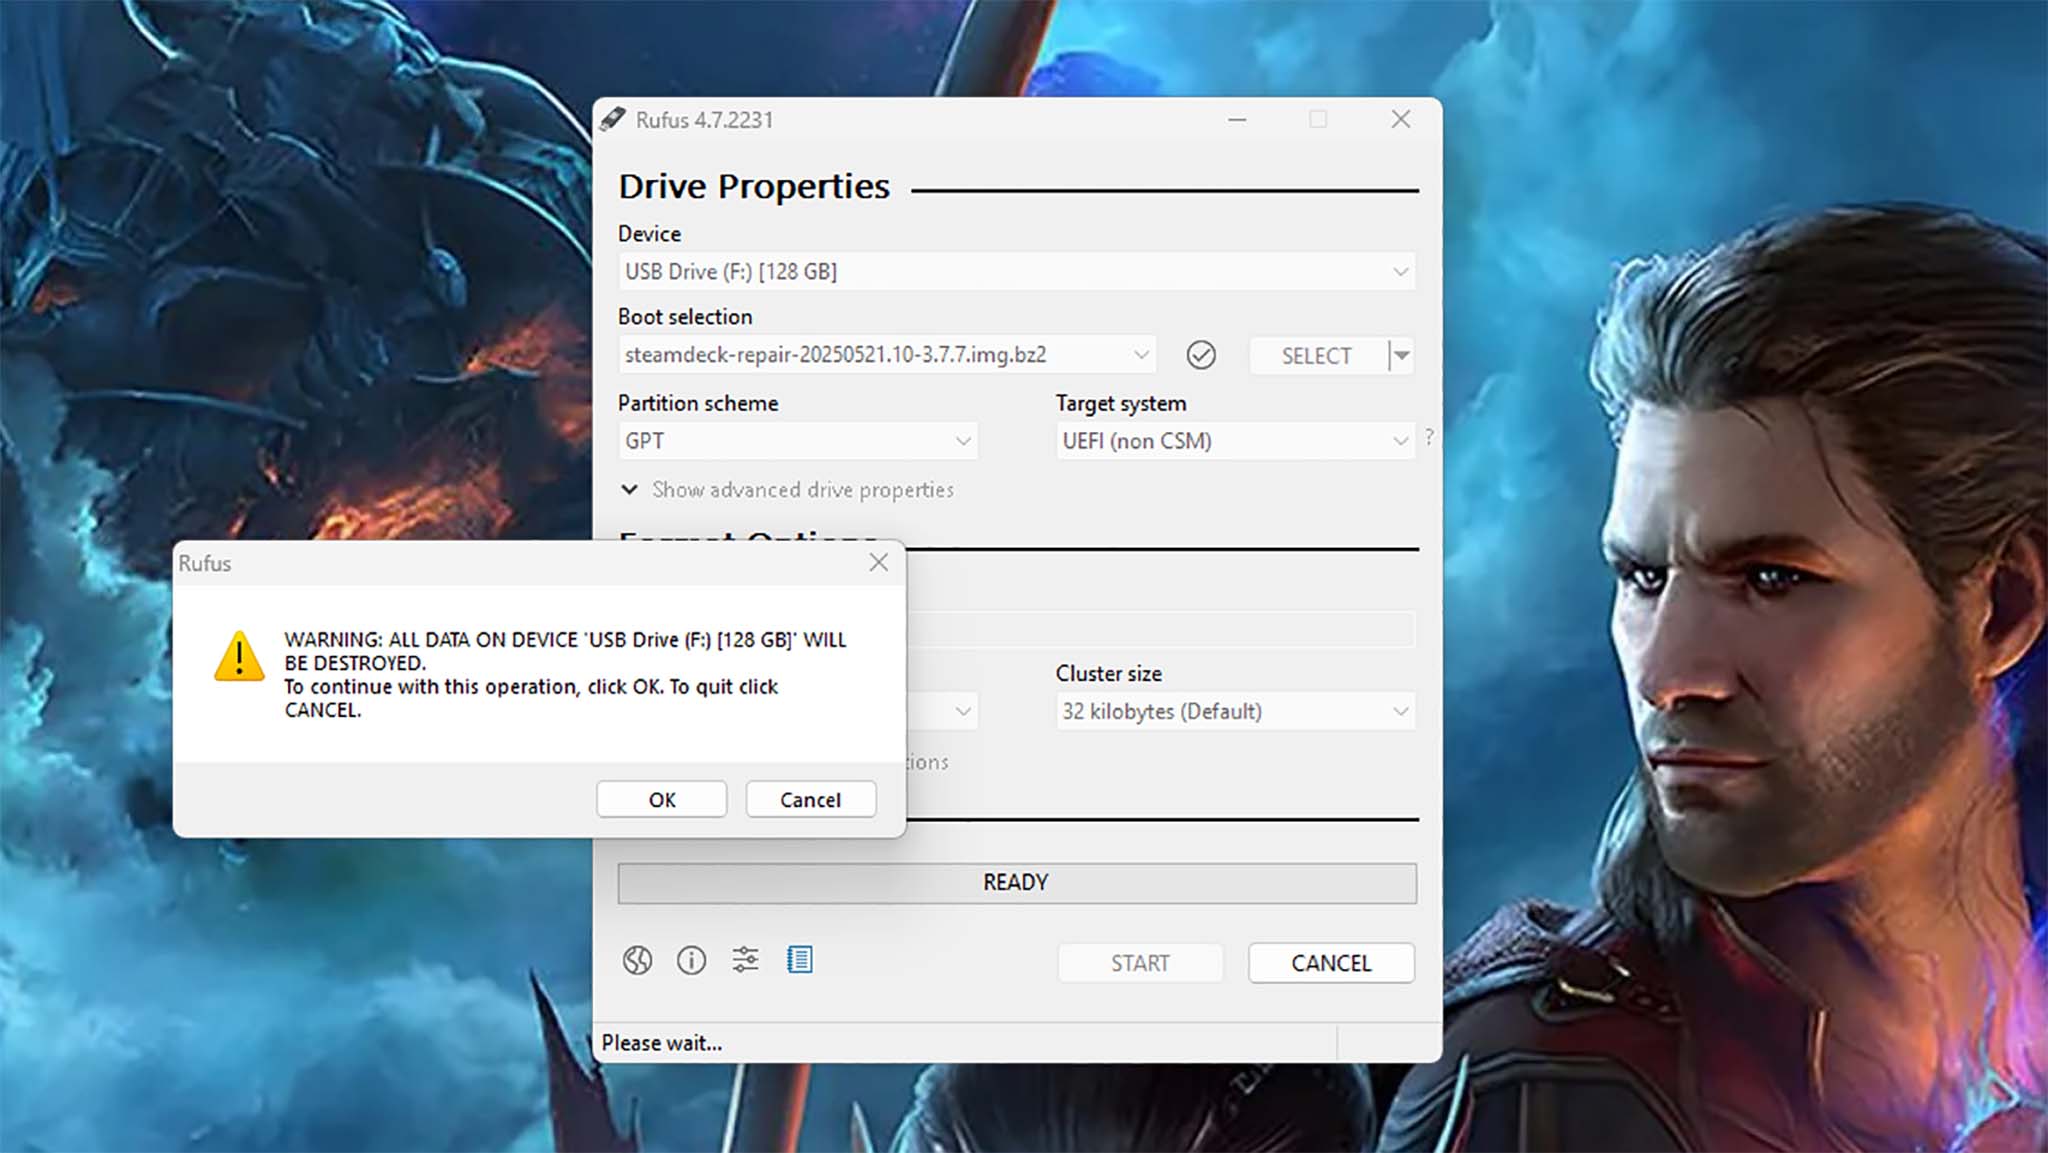
- Now click Start. A pop-up will appear warning that anything on the USB will get destroyed. Select OK if you’re good to continue.
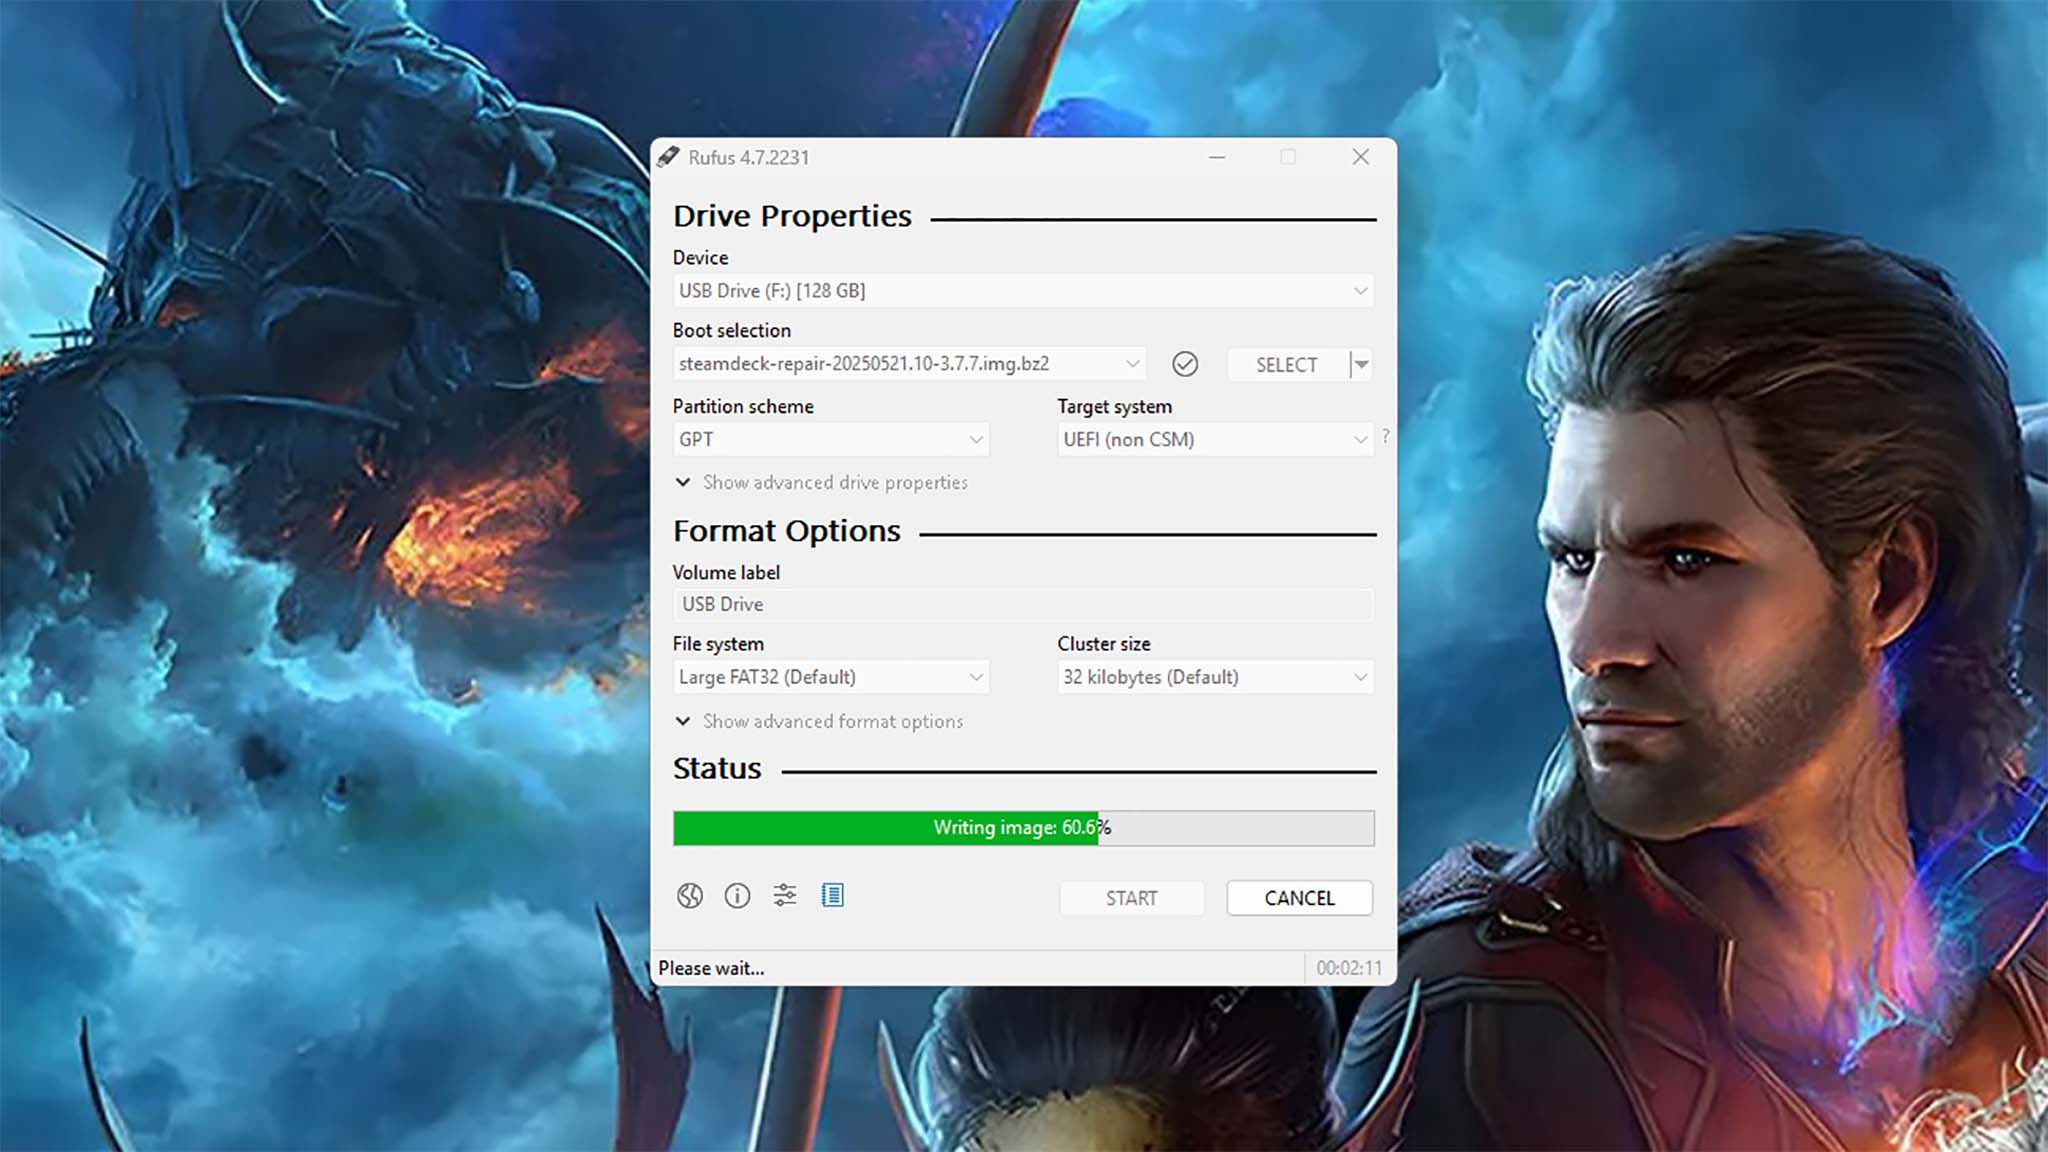
- Wait while Rufus turns your USB flash stick into a bootable SteamOS key. When it’s done, close out of Rufus and remove the flash drive from your computer.
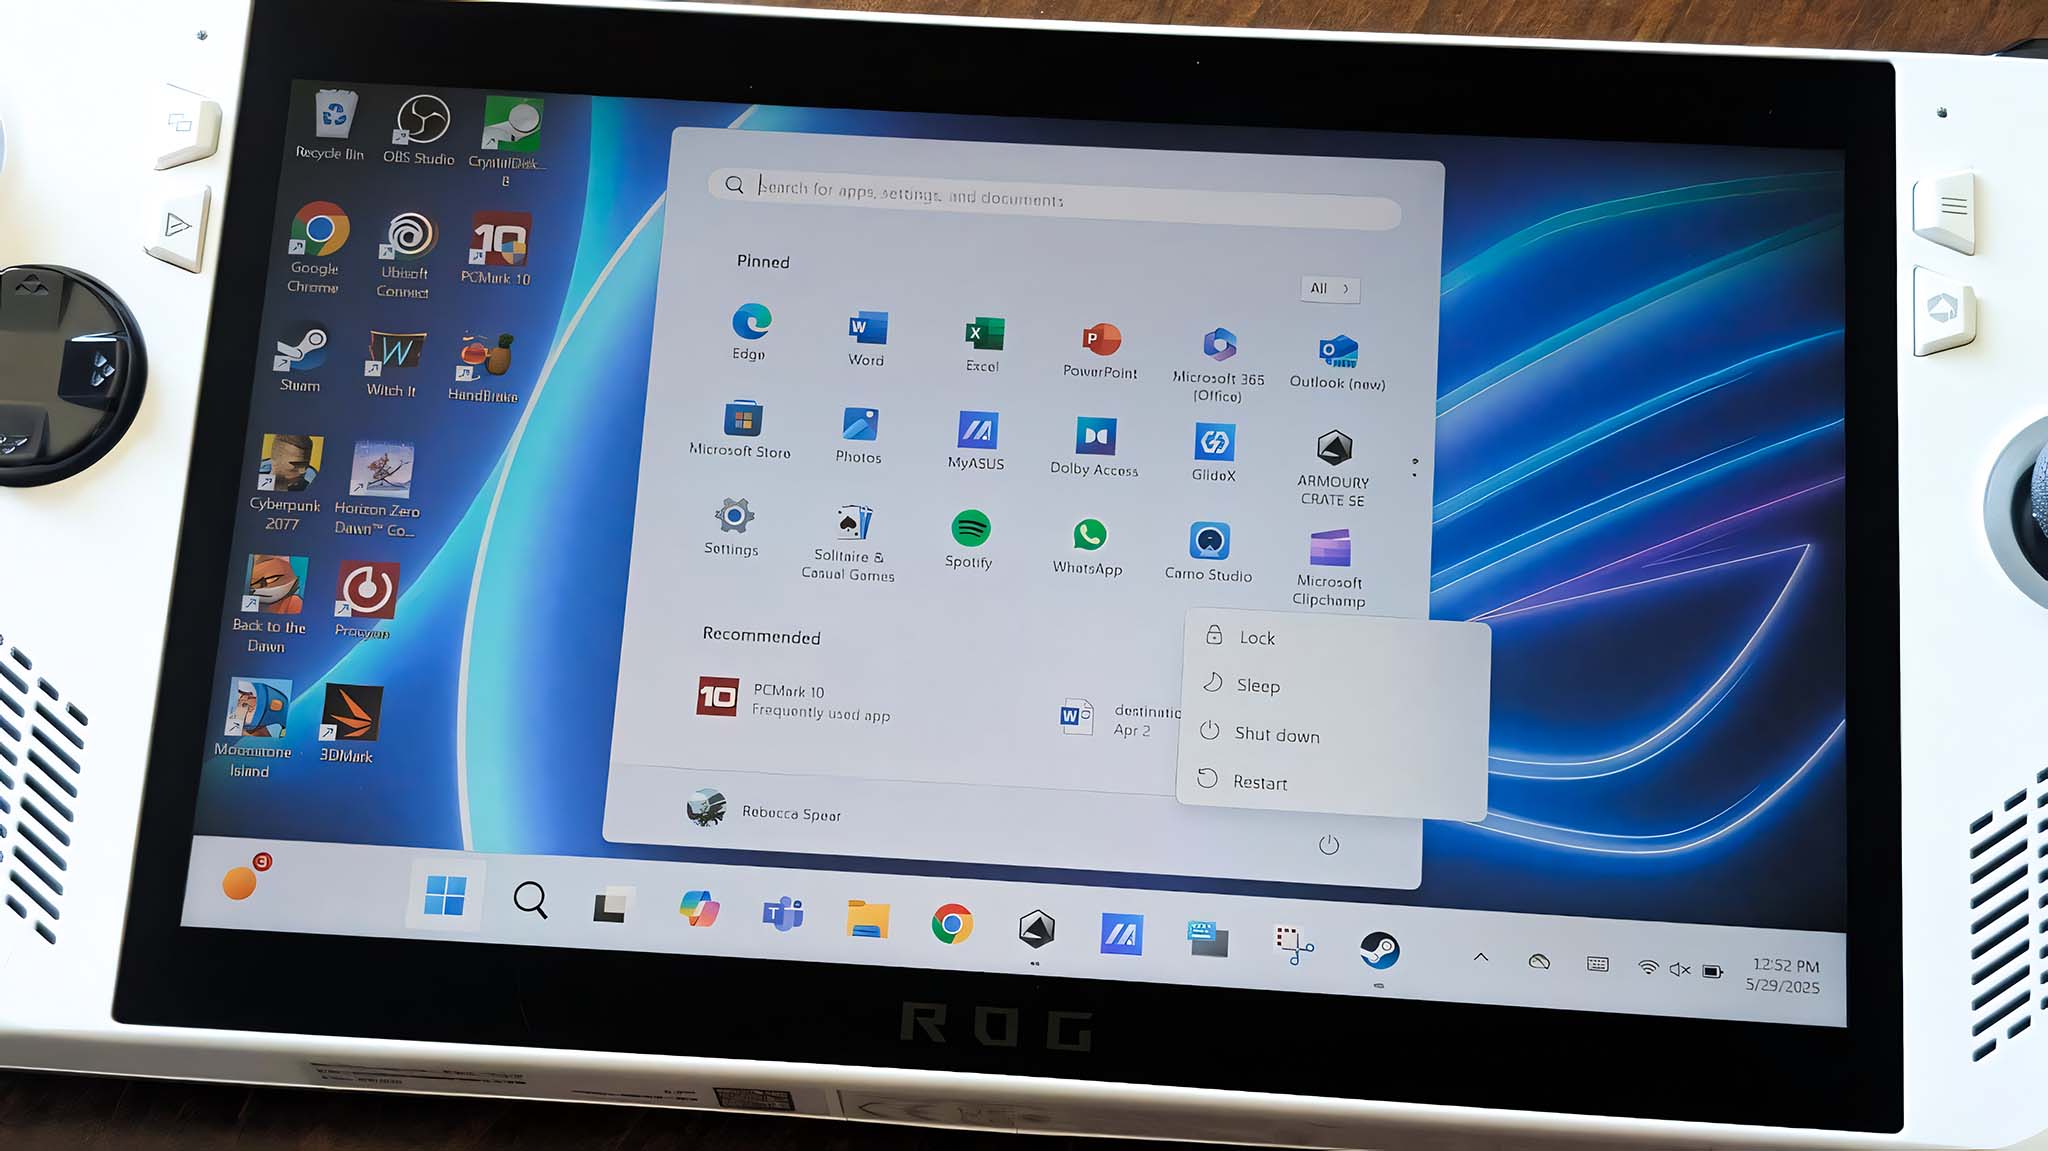
- On your ROG Ally, select the Start button, then the Power icon, and select Restart.
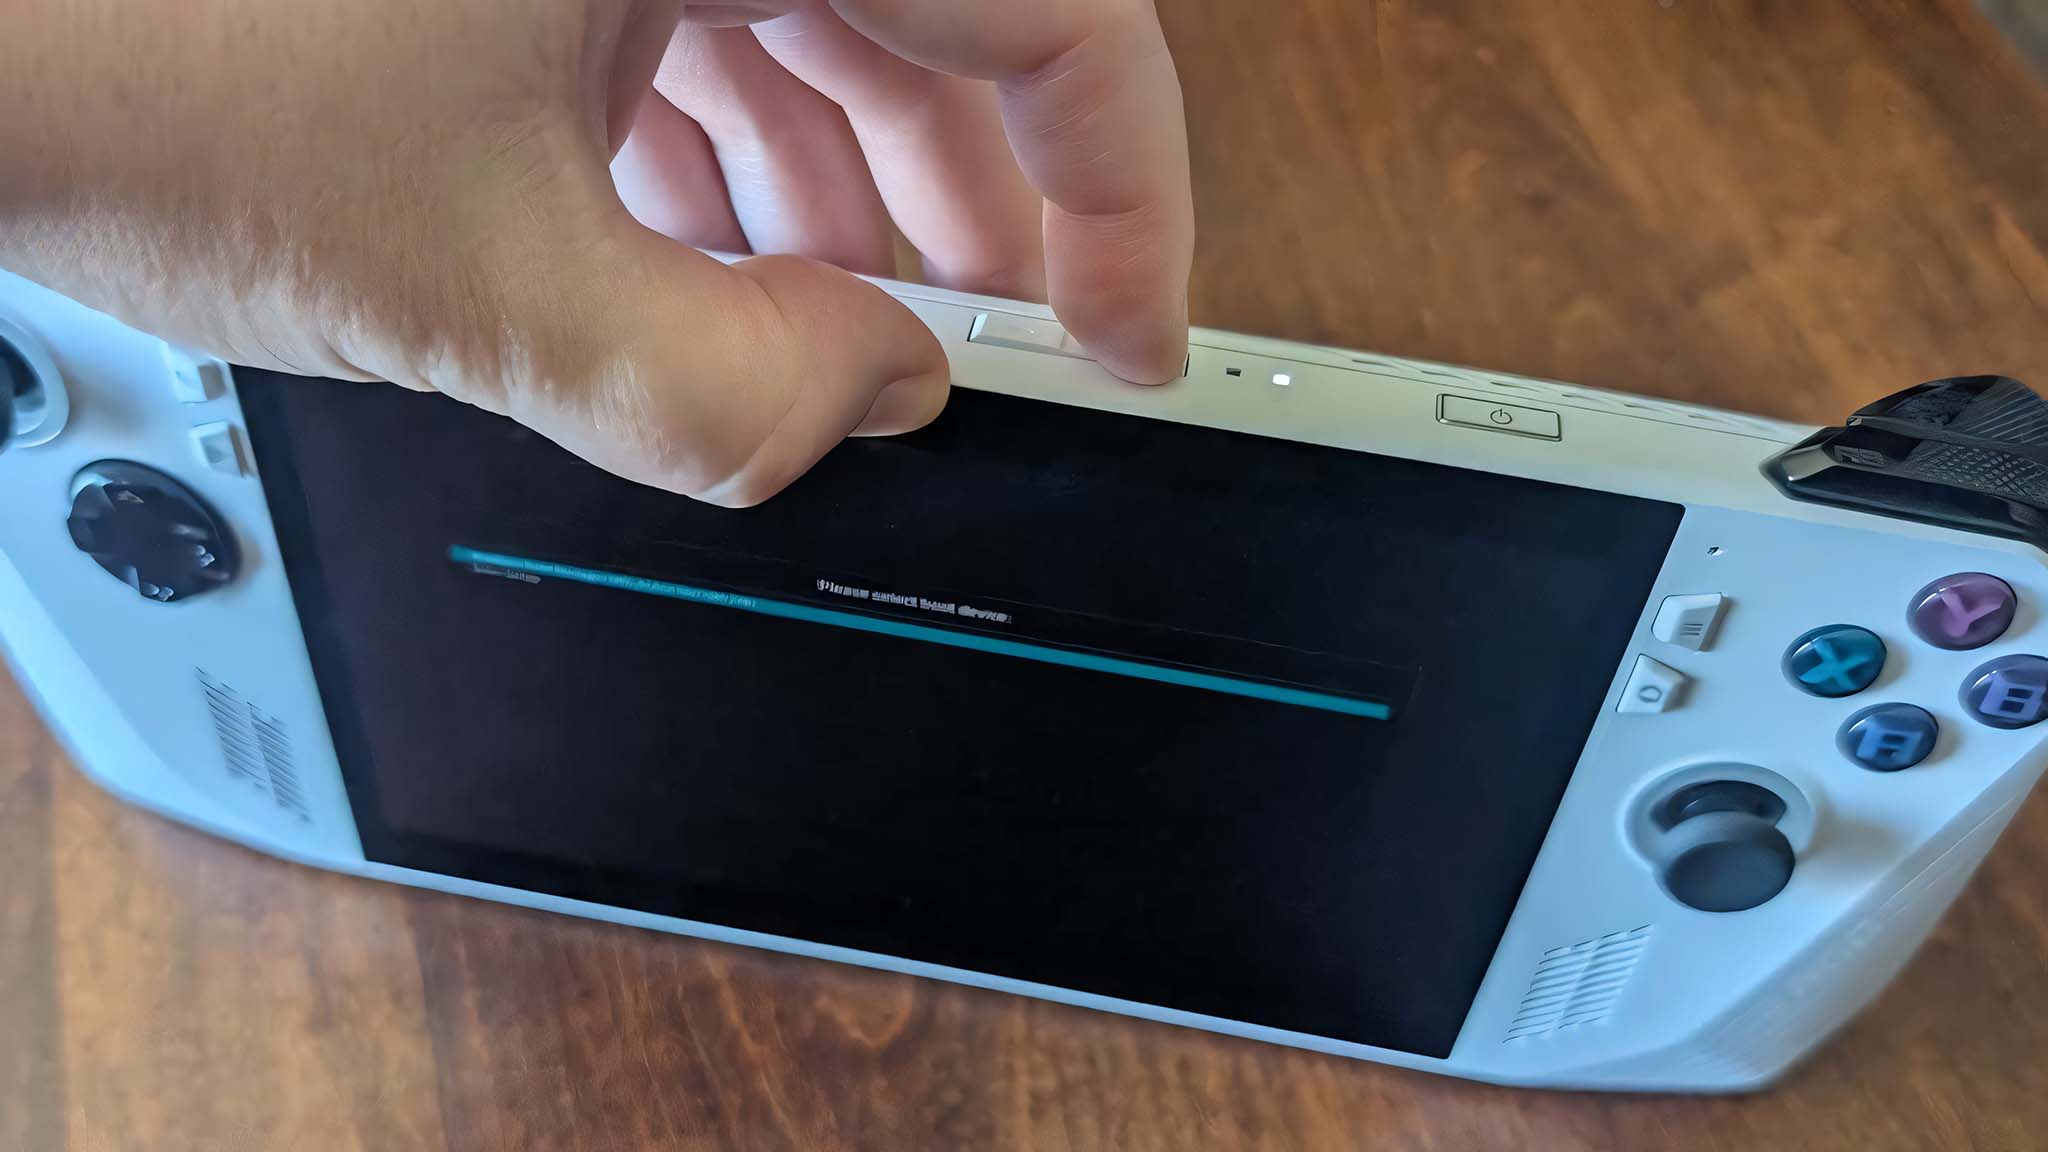
- While the ROG Ally restarts, hold down the Volume up button until the BIOS boots up.
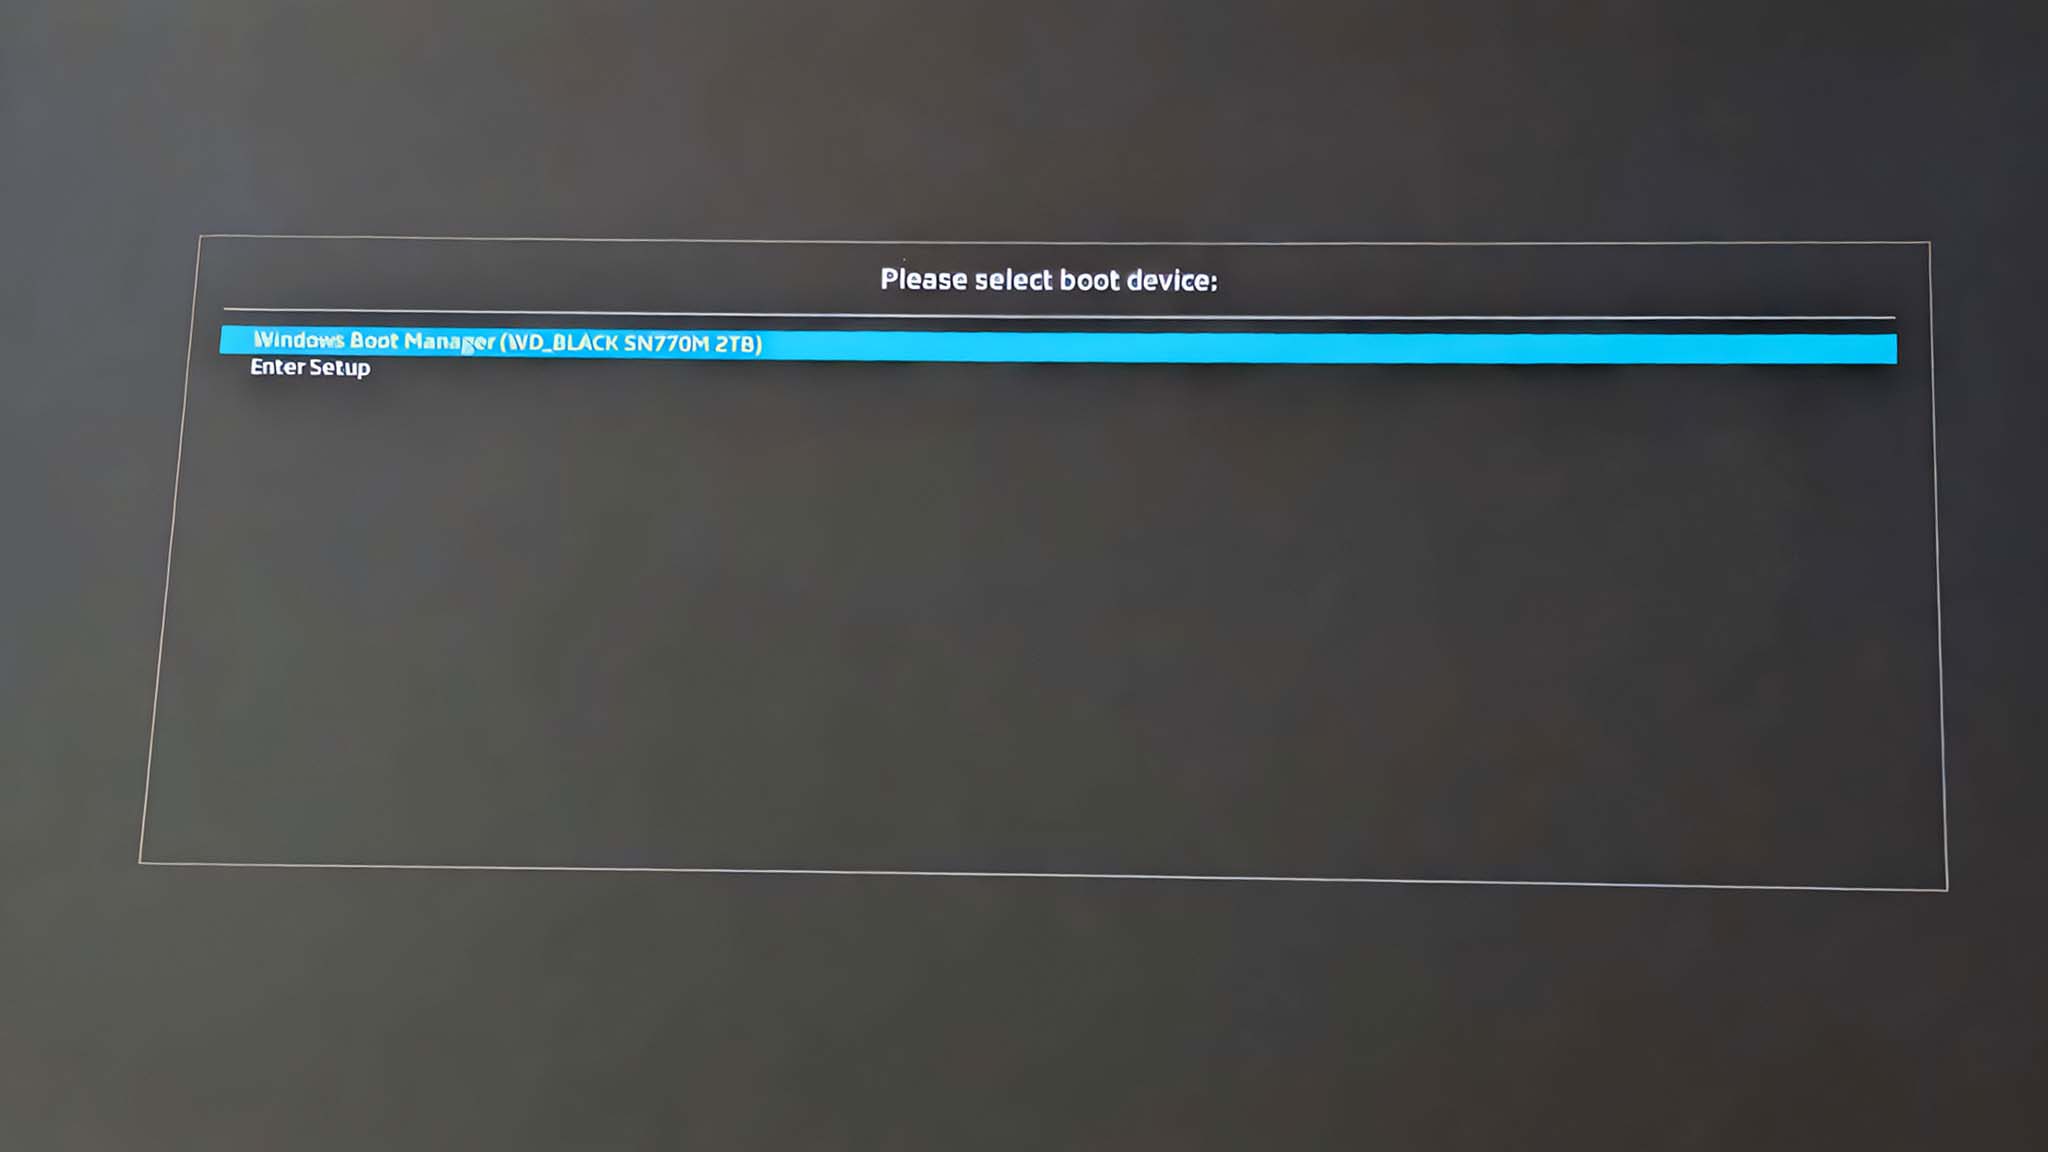
- If you get this screen, select Enter Setup.
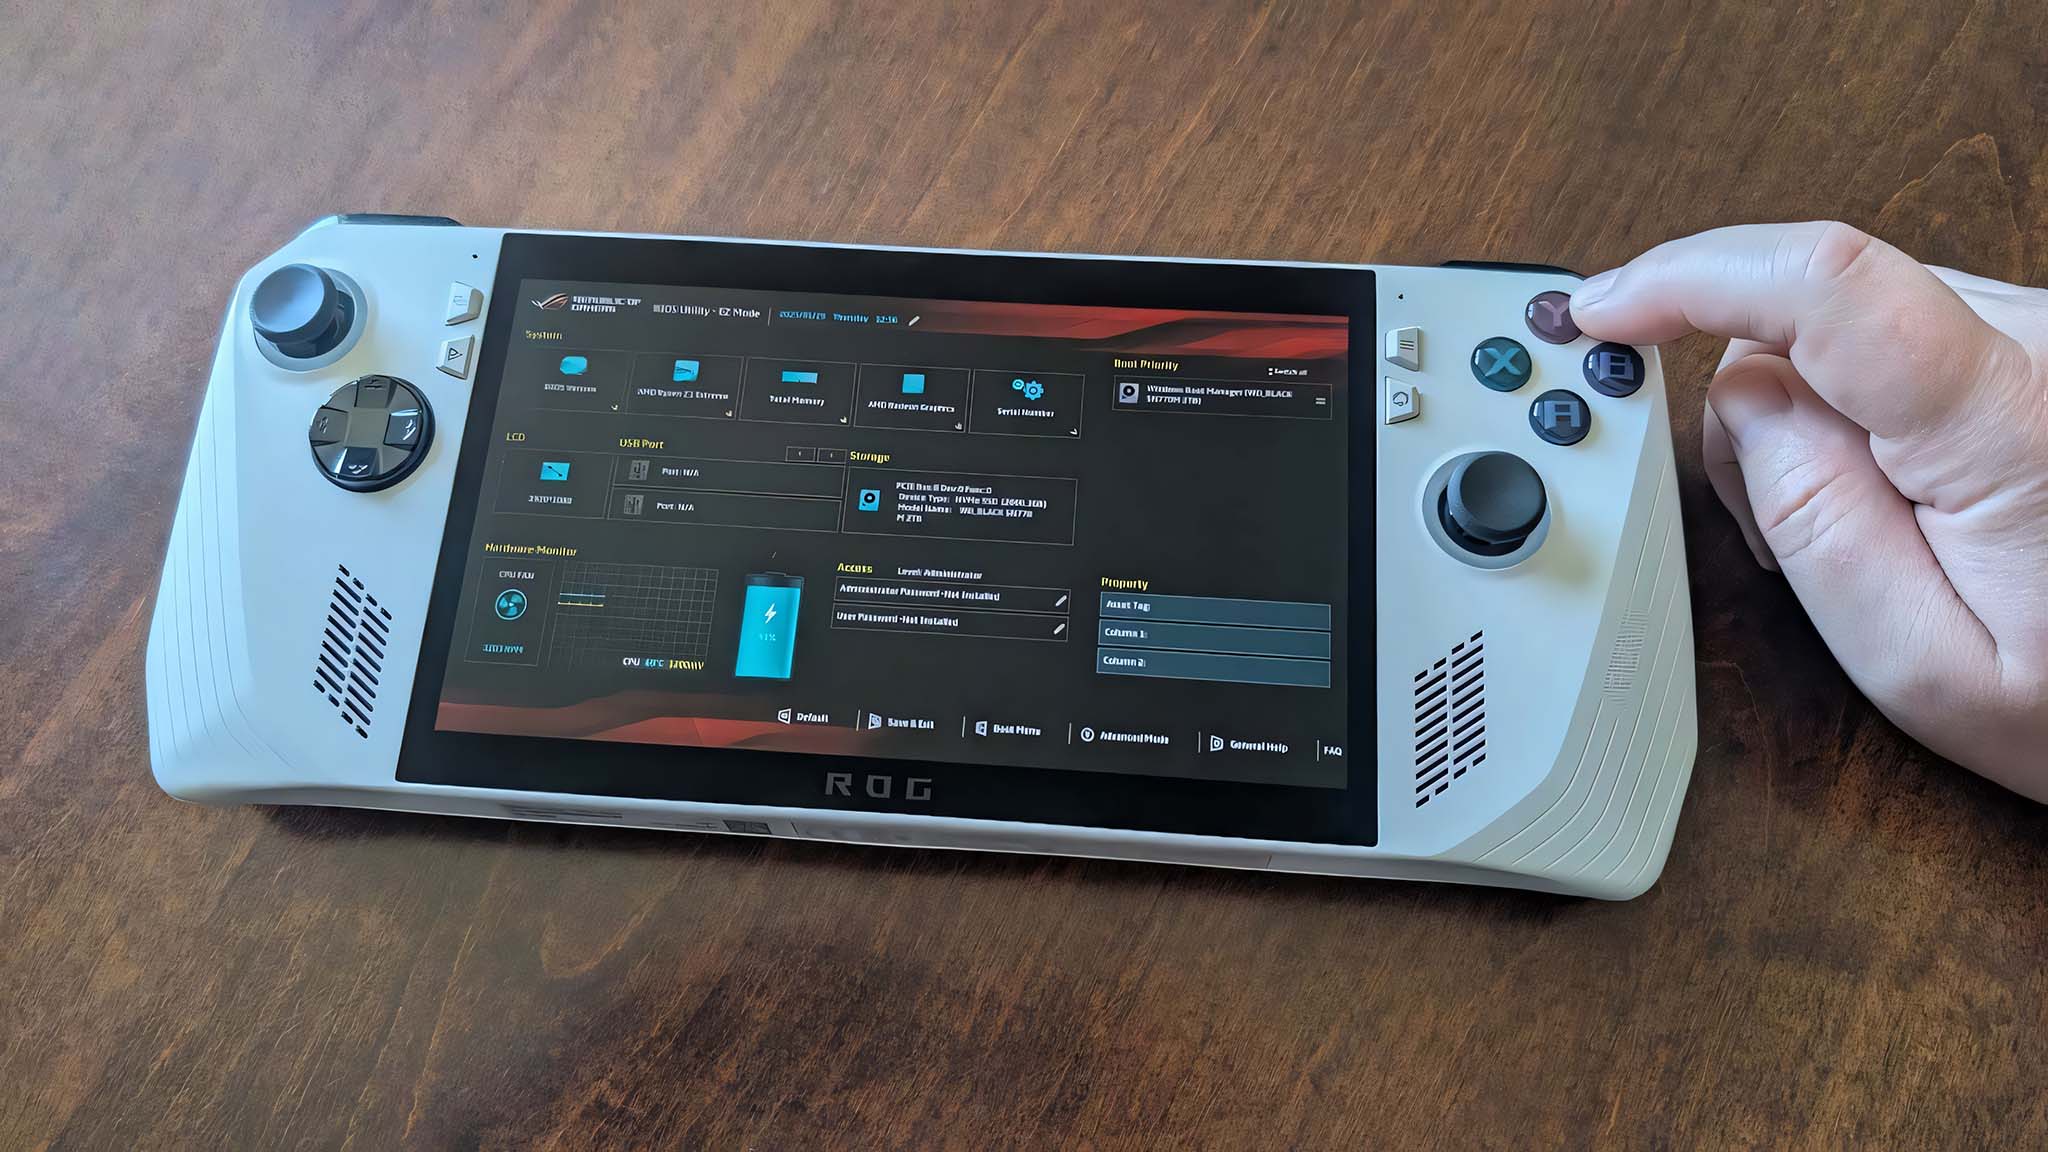
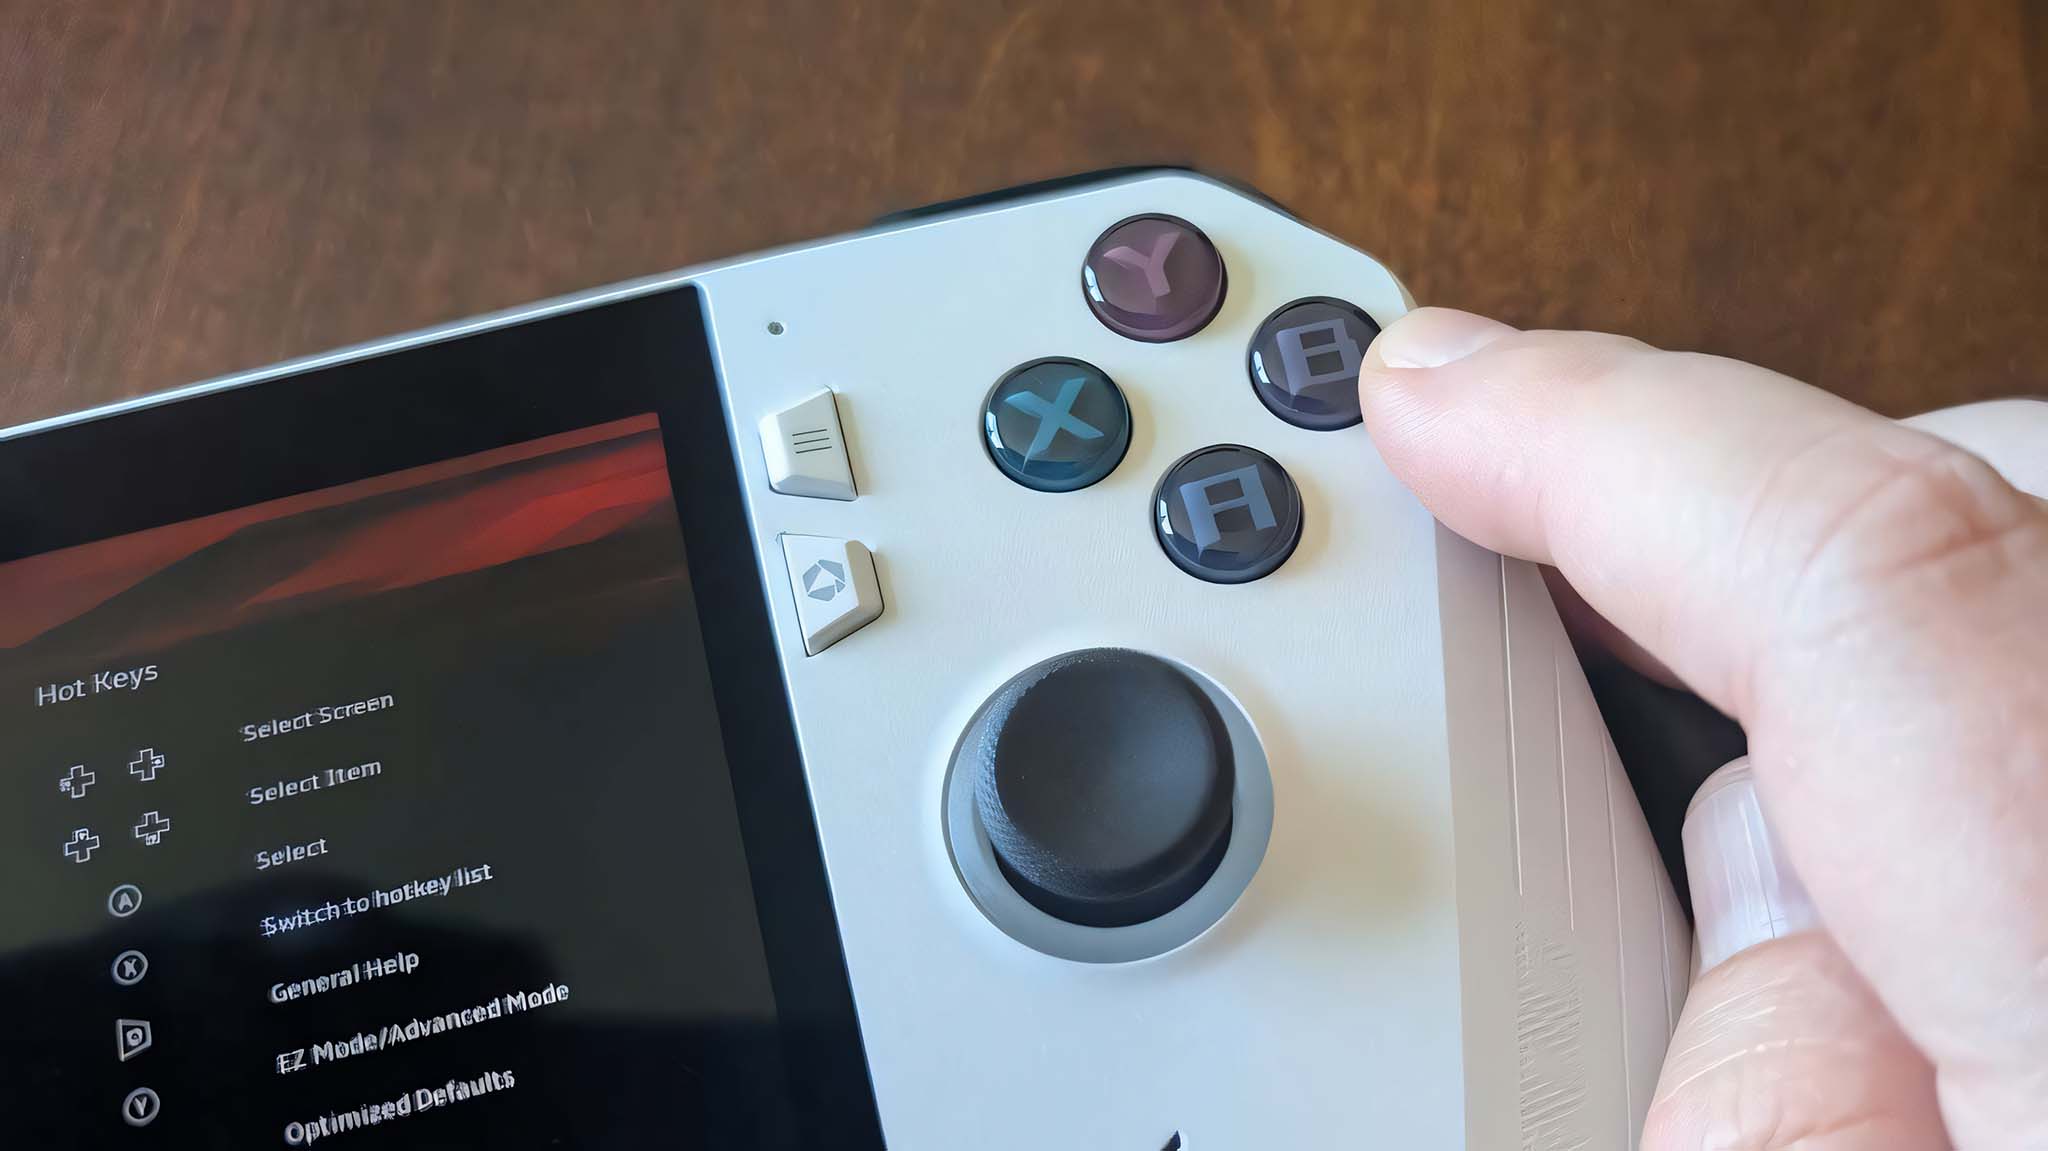
- After you enter the BIOS, press the Y button to go to Advanced Mode.
- Use the right D-Pad button to get to the Security tab and then select Secure Boot.
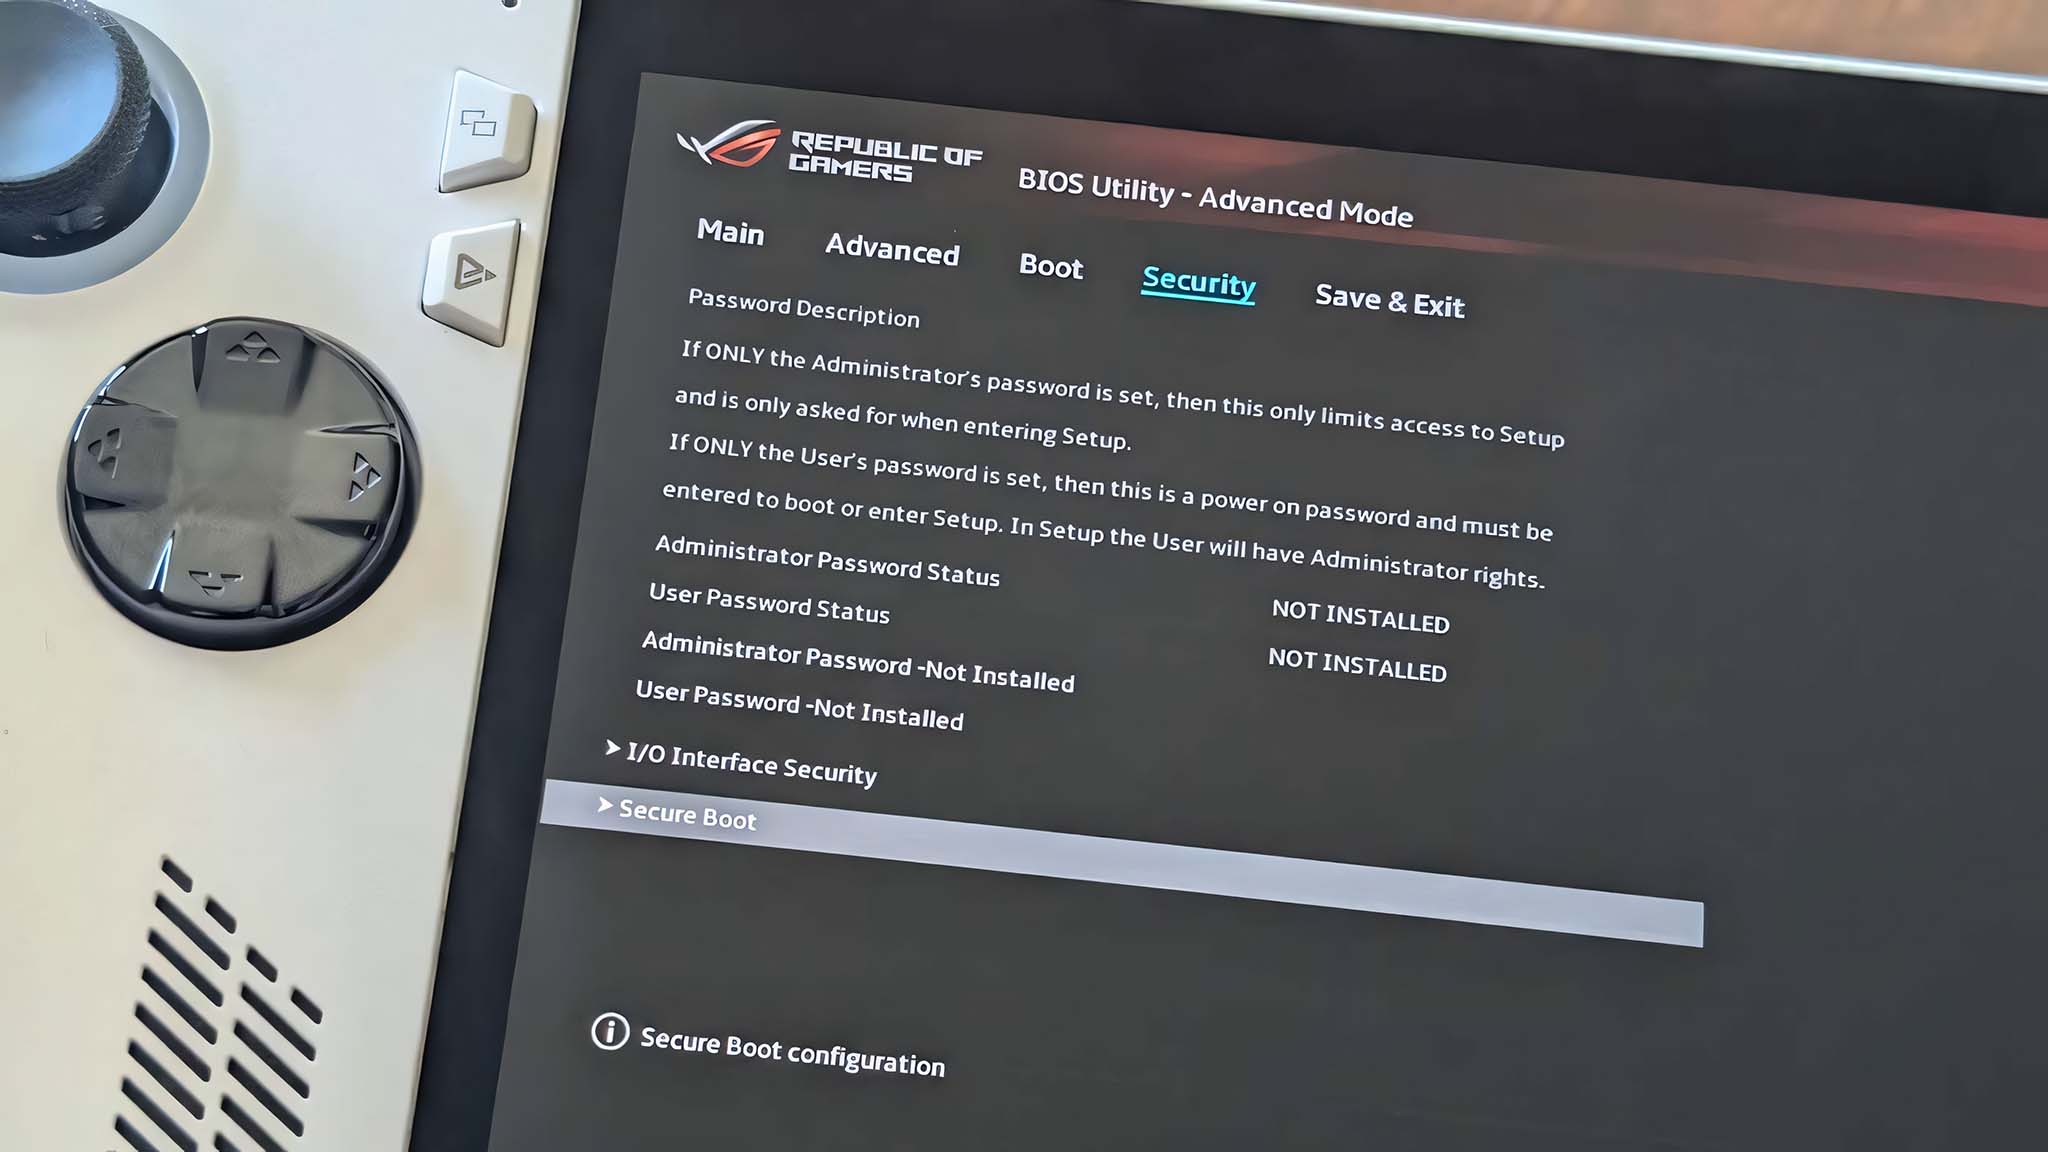
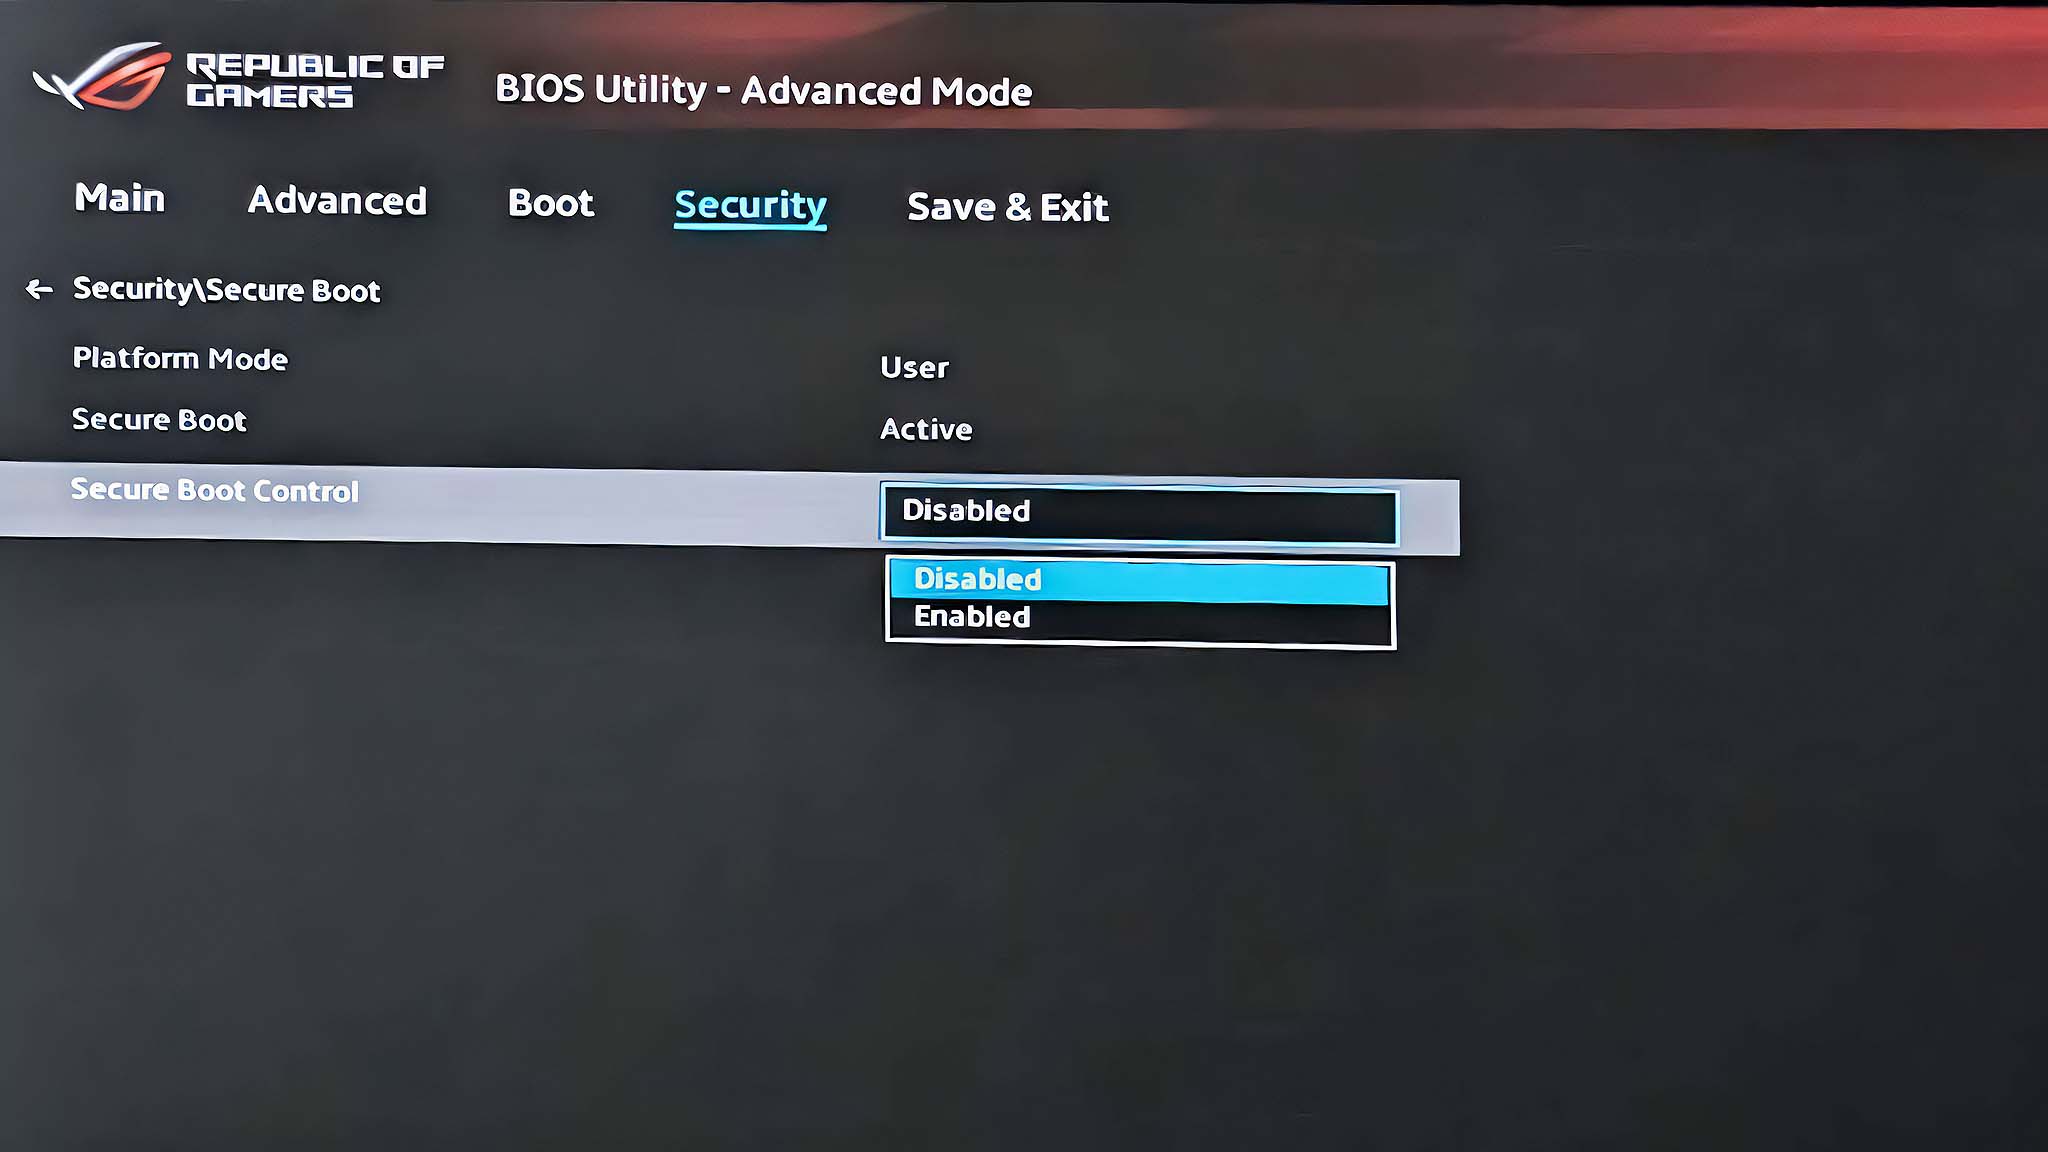
- Click on the dropdown menu box for Secure Boot Control and select Disabled.
- Press the B button to go back to the previous menu.
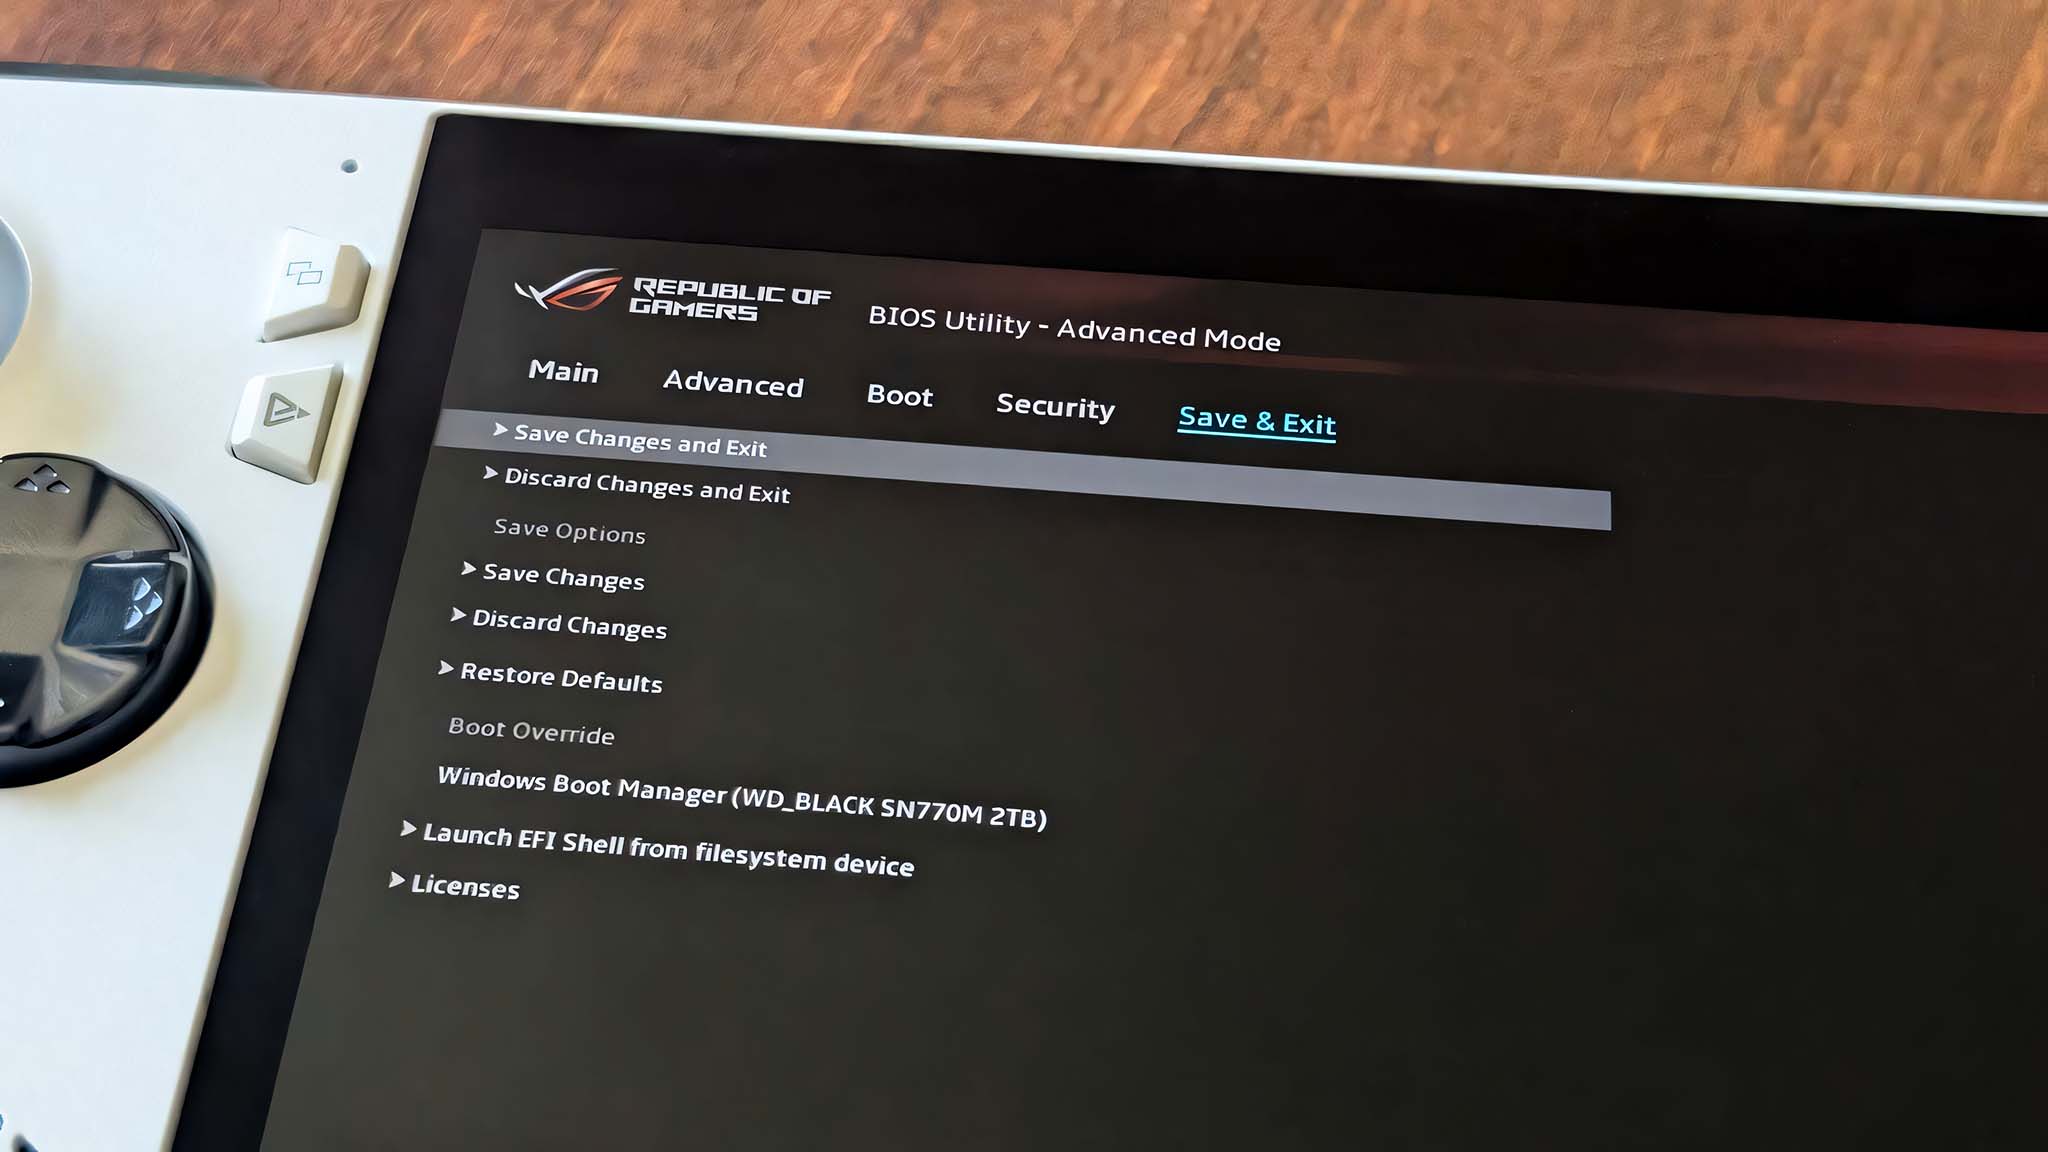
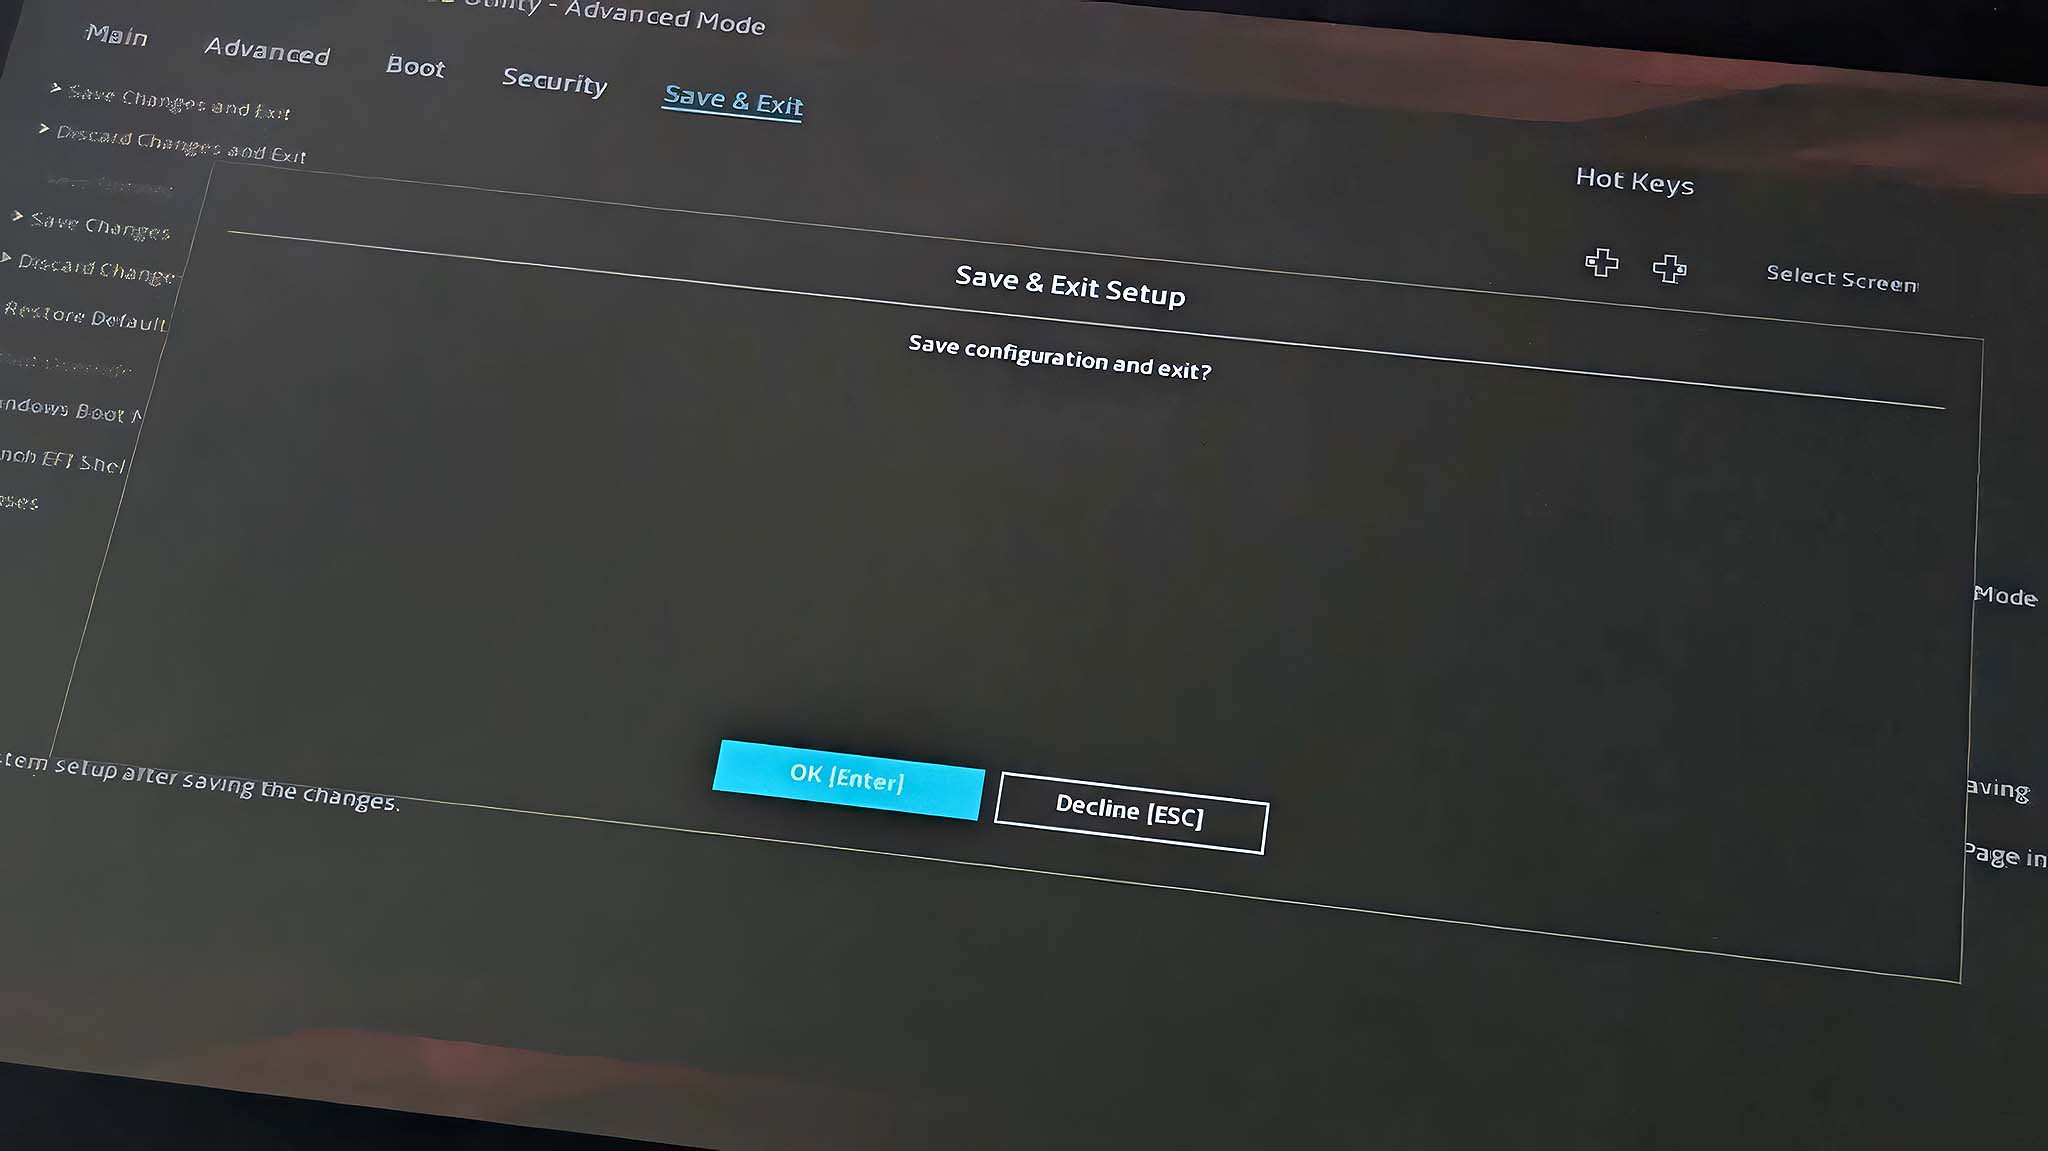
- Use the right D-Pad button to get to the Save & Exit tab then select Save Changes and Exit.
- Now select OK [Enter] to exit the BIOS.
- Next, you’ll need to plugin your prepared USB flash drive key. If your USB stick is a USB-A, you might need to use a USB-A to USB-C adapter.
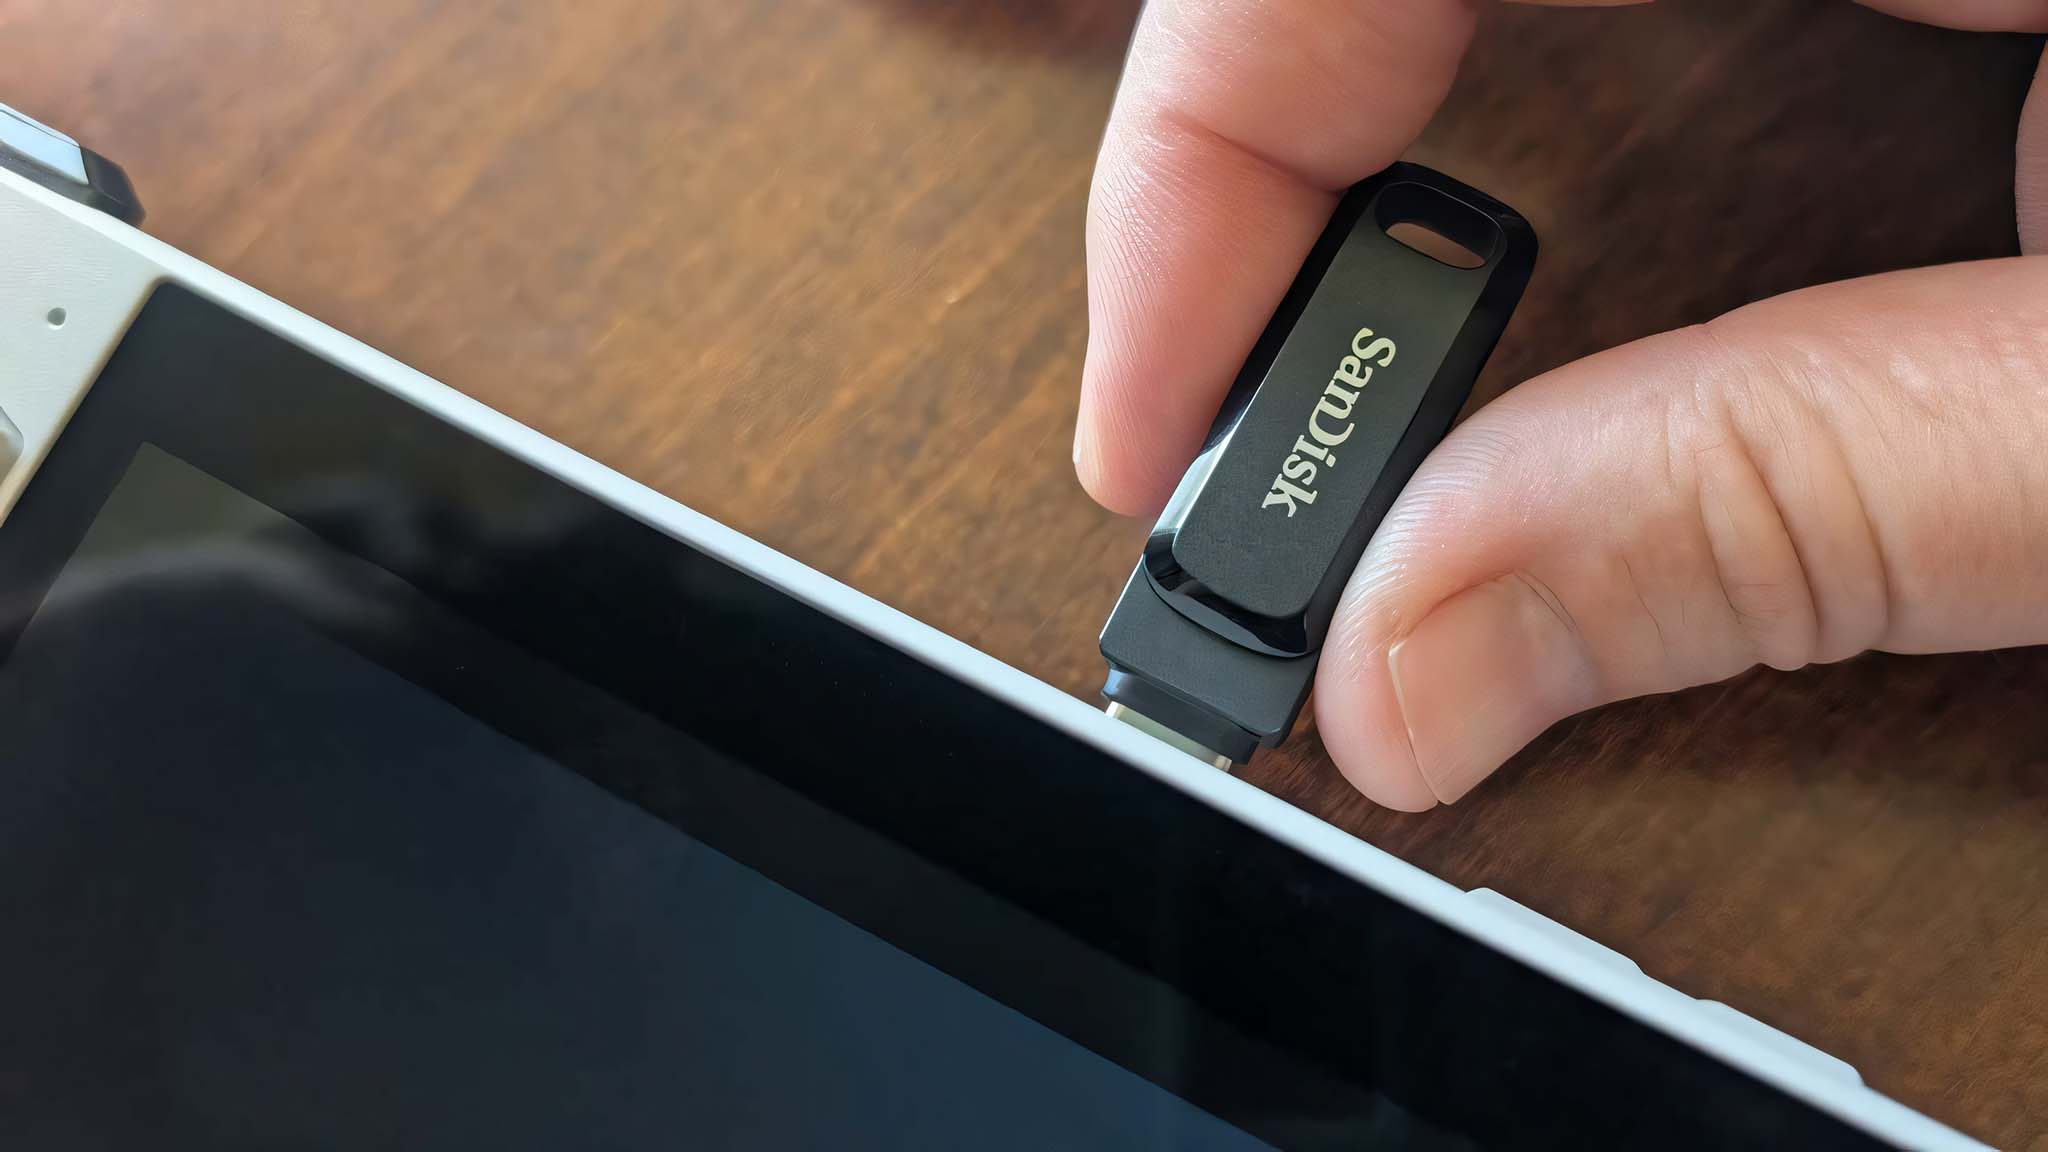
- Then, restart your ROG Ally.

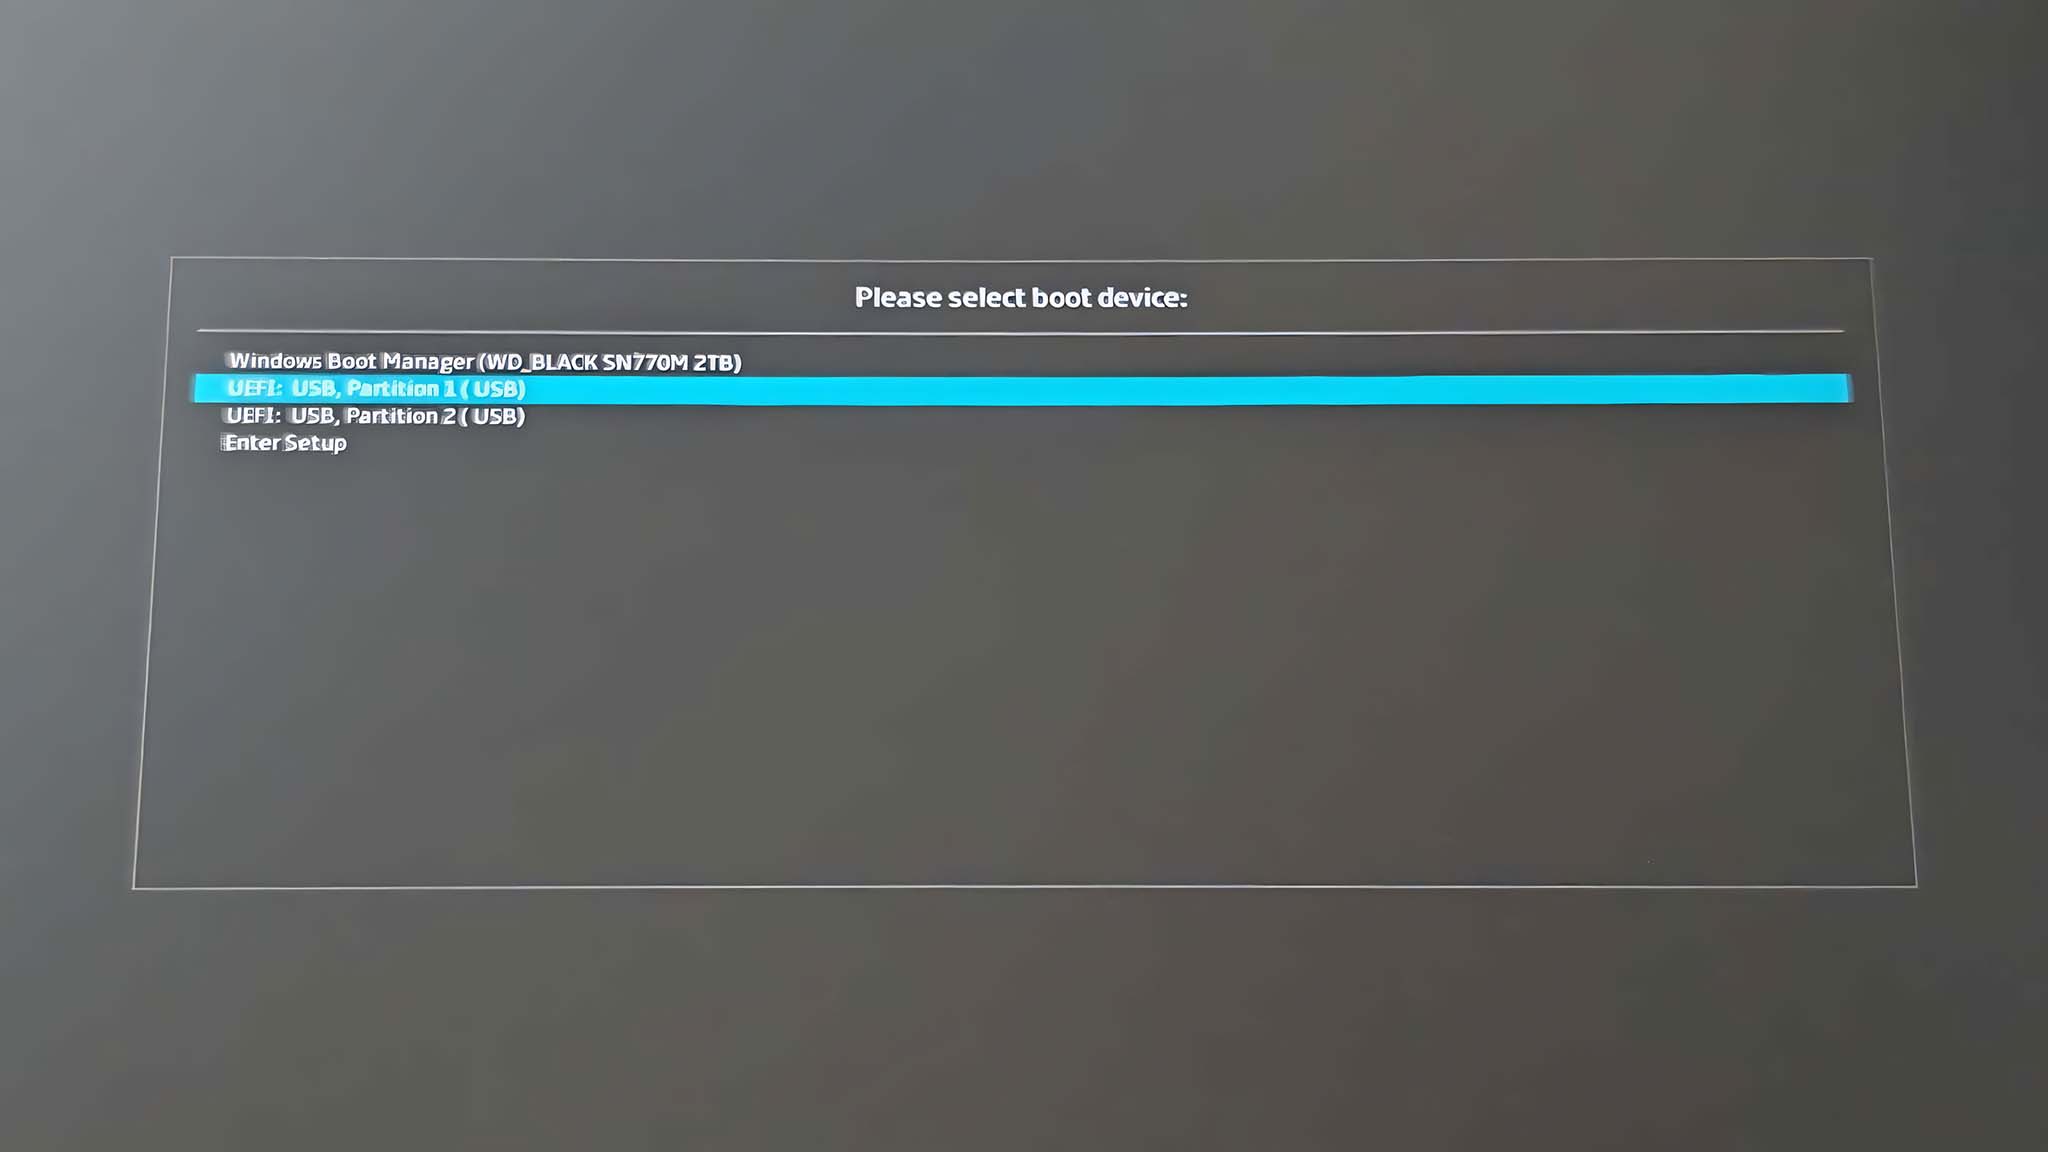
- As soon as the ROG symbol appears on the screen, hold down the Volume up button to boot into the BIOS.

- Tap on UEFI: USB, Partition 1 (USB).
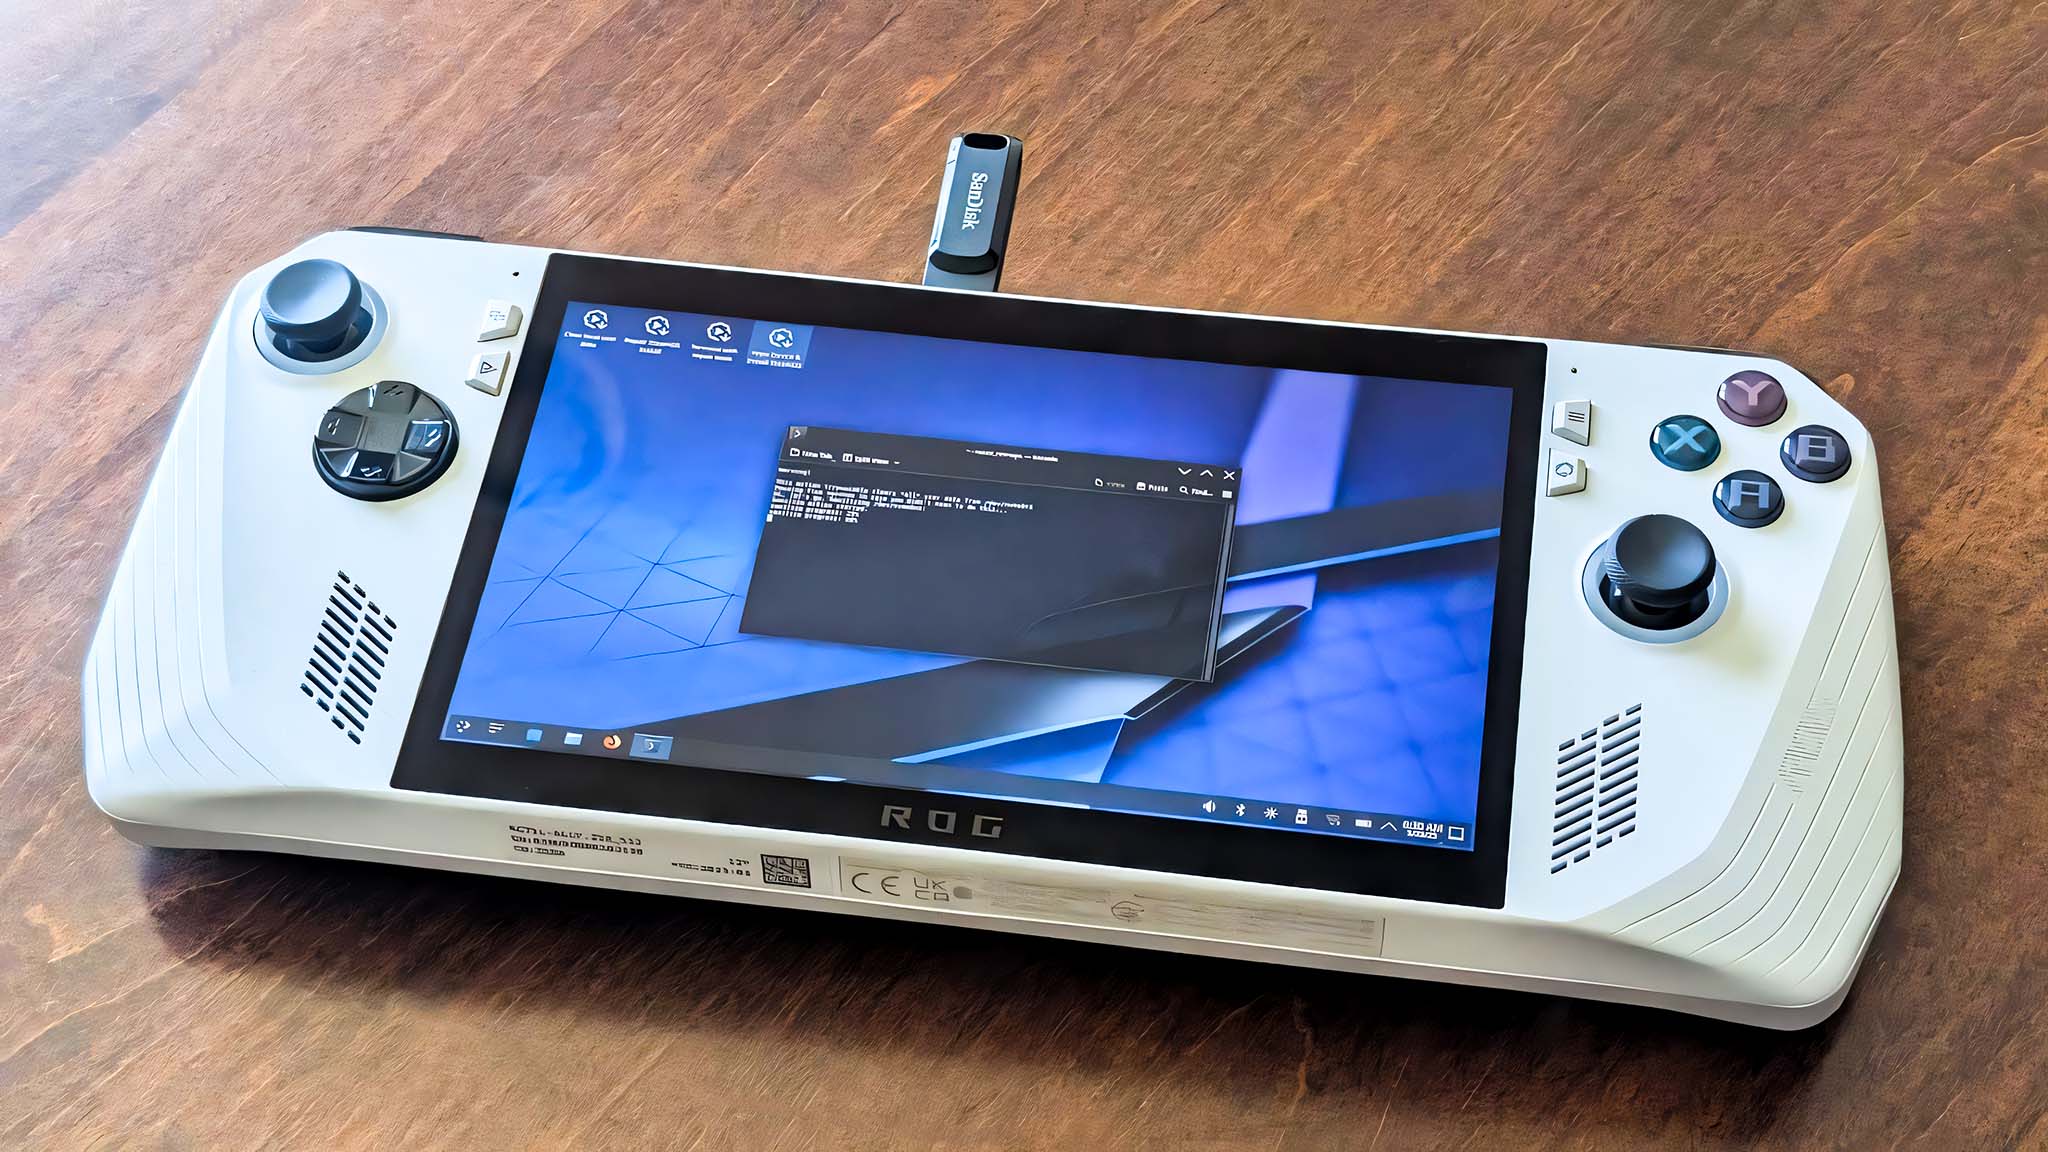
- After a moment, you’ll find yourself in a desktop setup. Double tap on the icon on the top of the screen that reads Wipe Device & Install SteamOS.
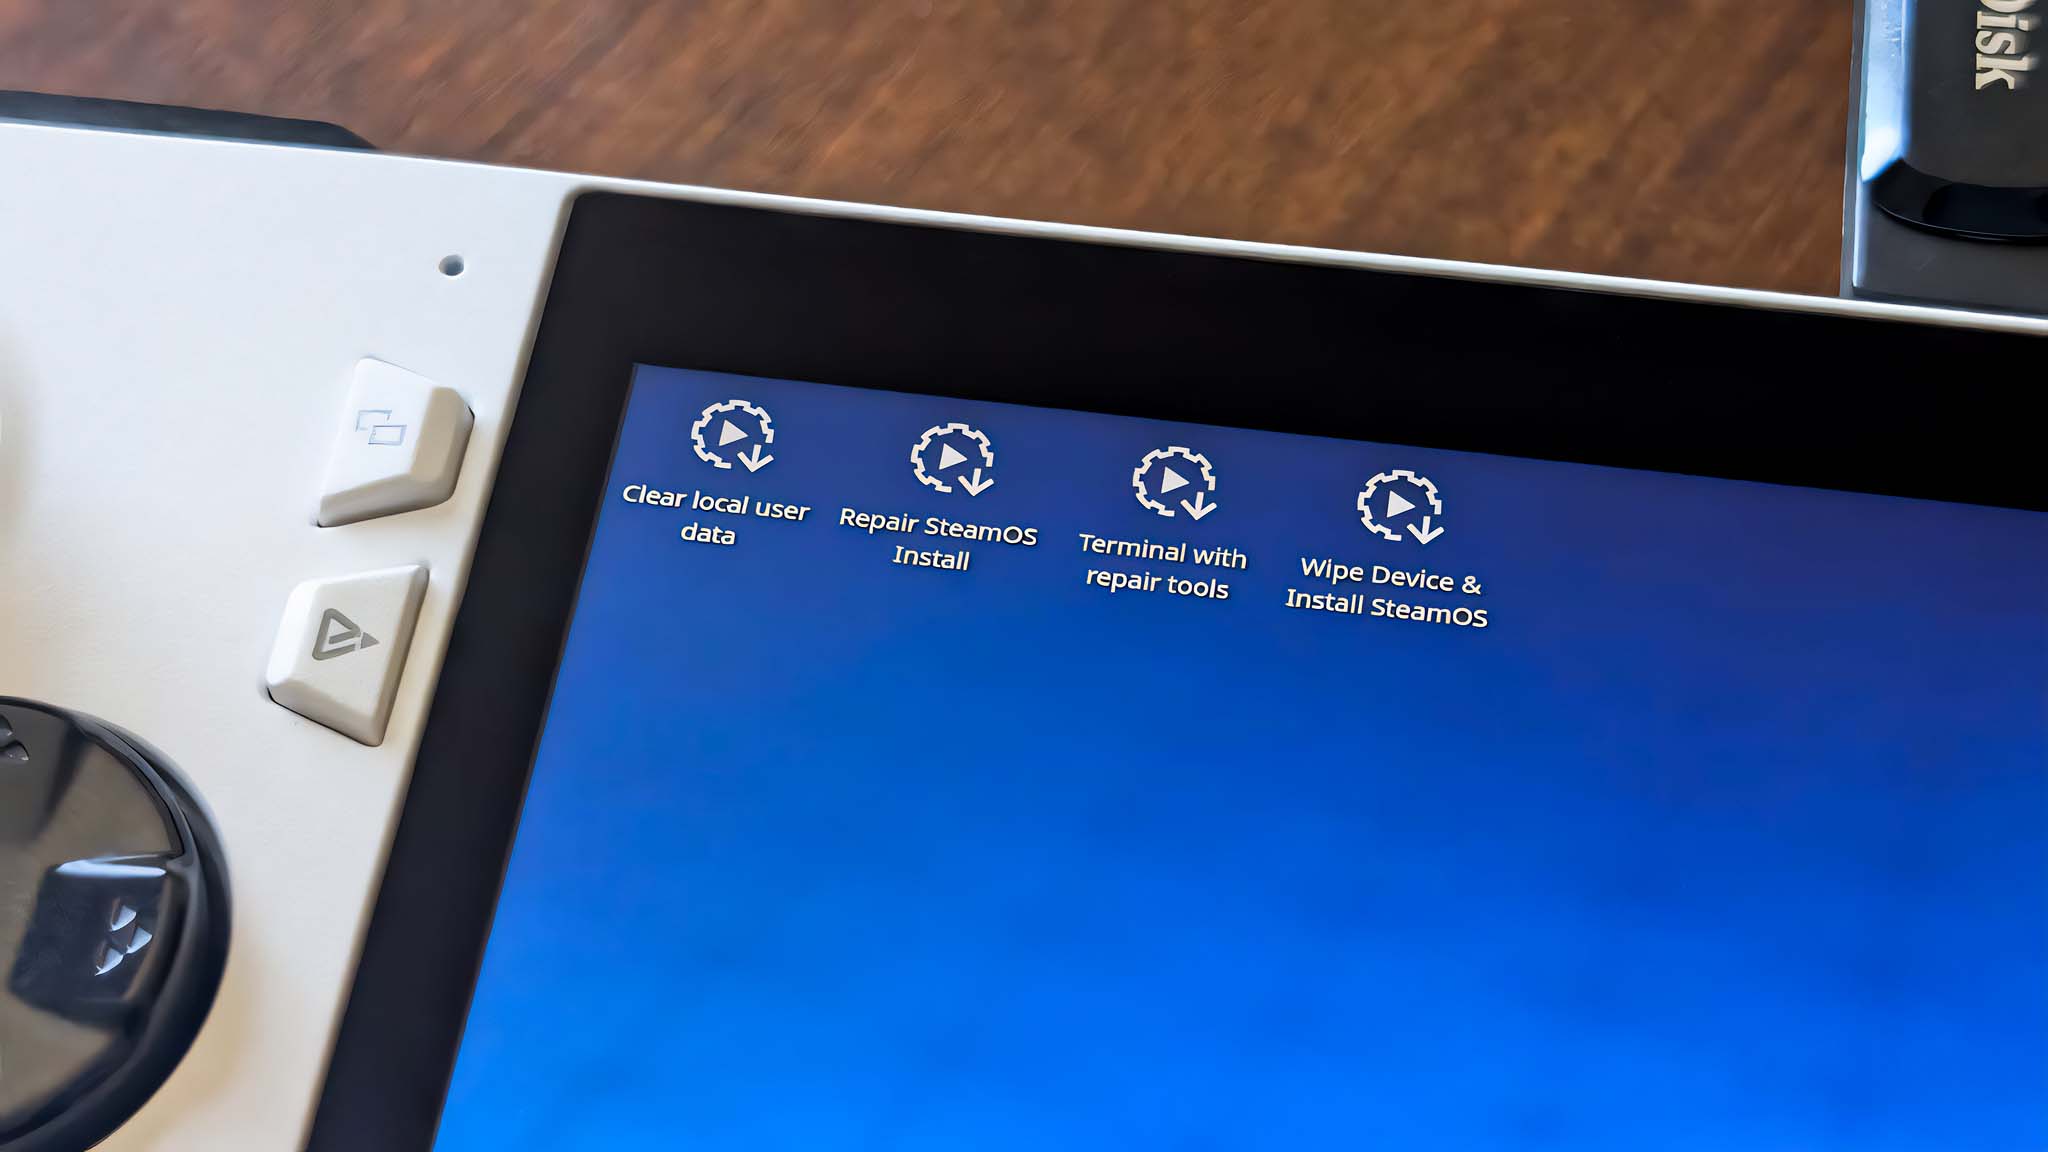
- A warning pops up letting you know that this process will completely remove everything currently on the device and cannot be undone. If you’re okay with this, select Proceed.
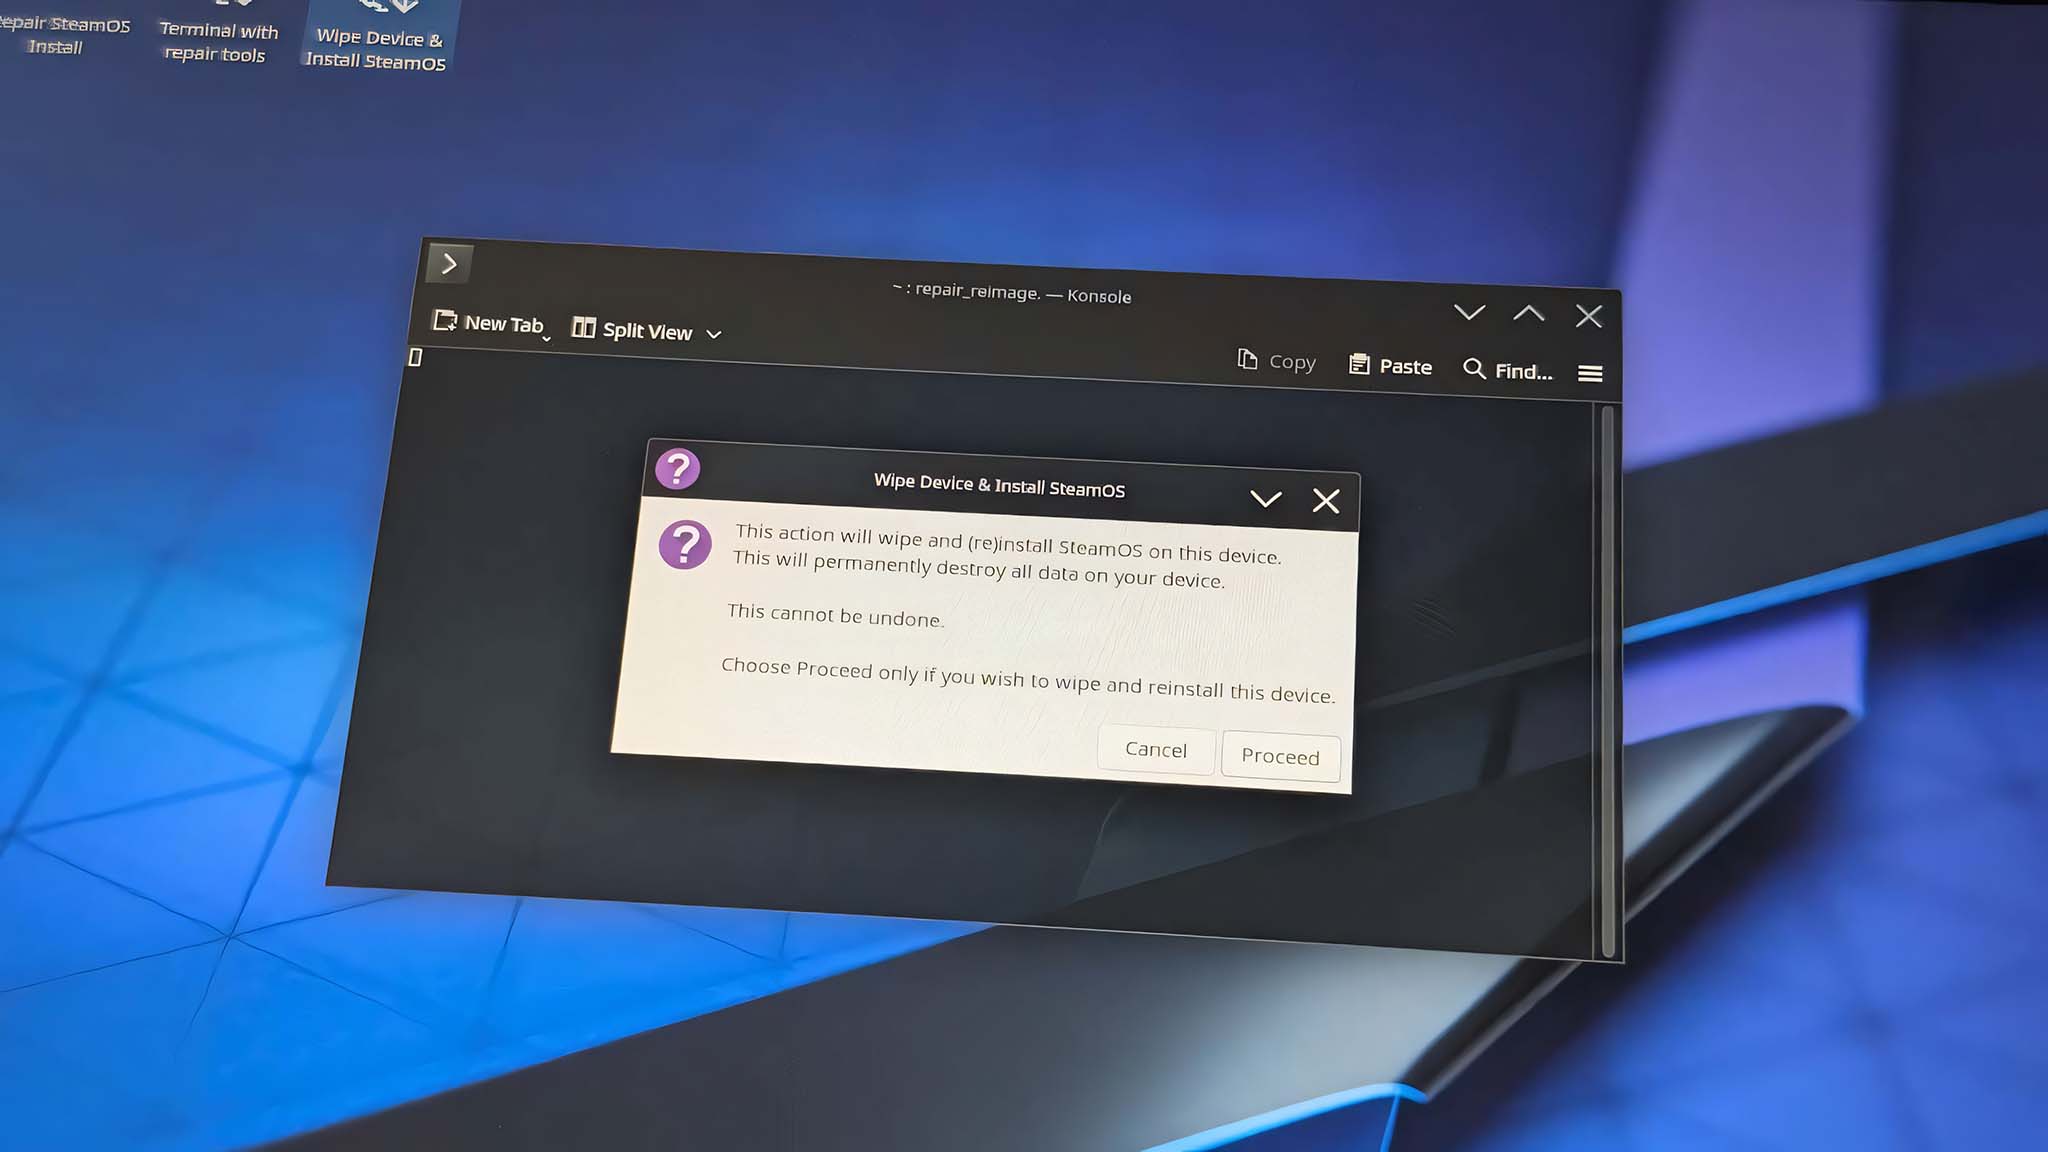
- Leave the ROG Ally alone and let it finish the process.
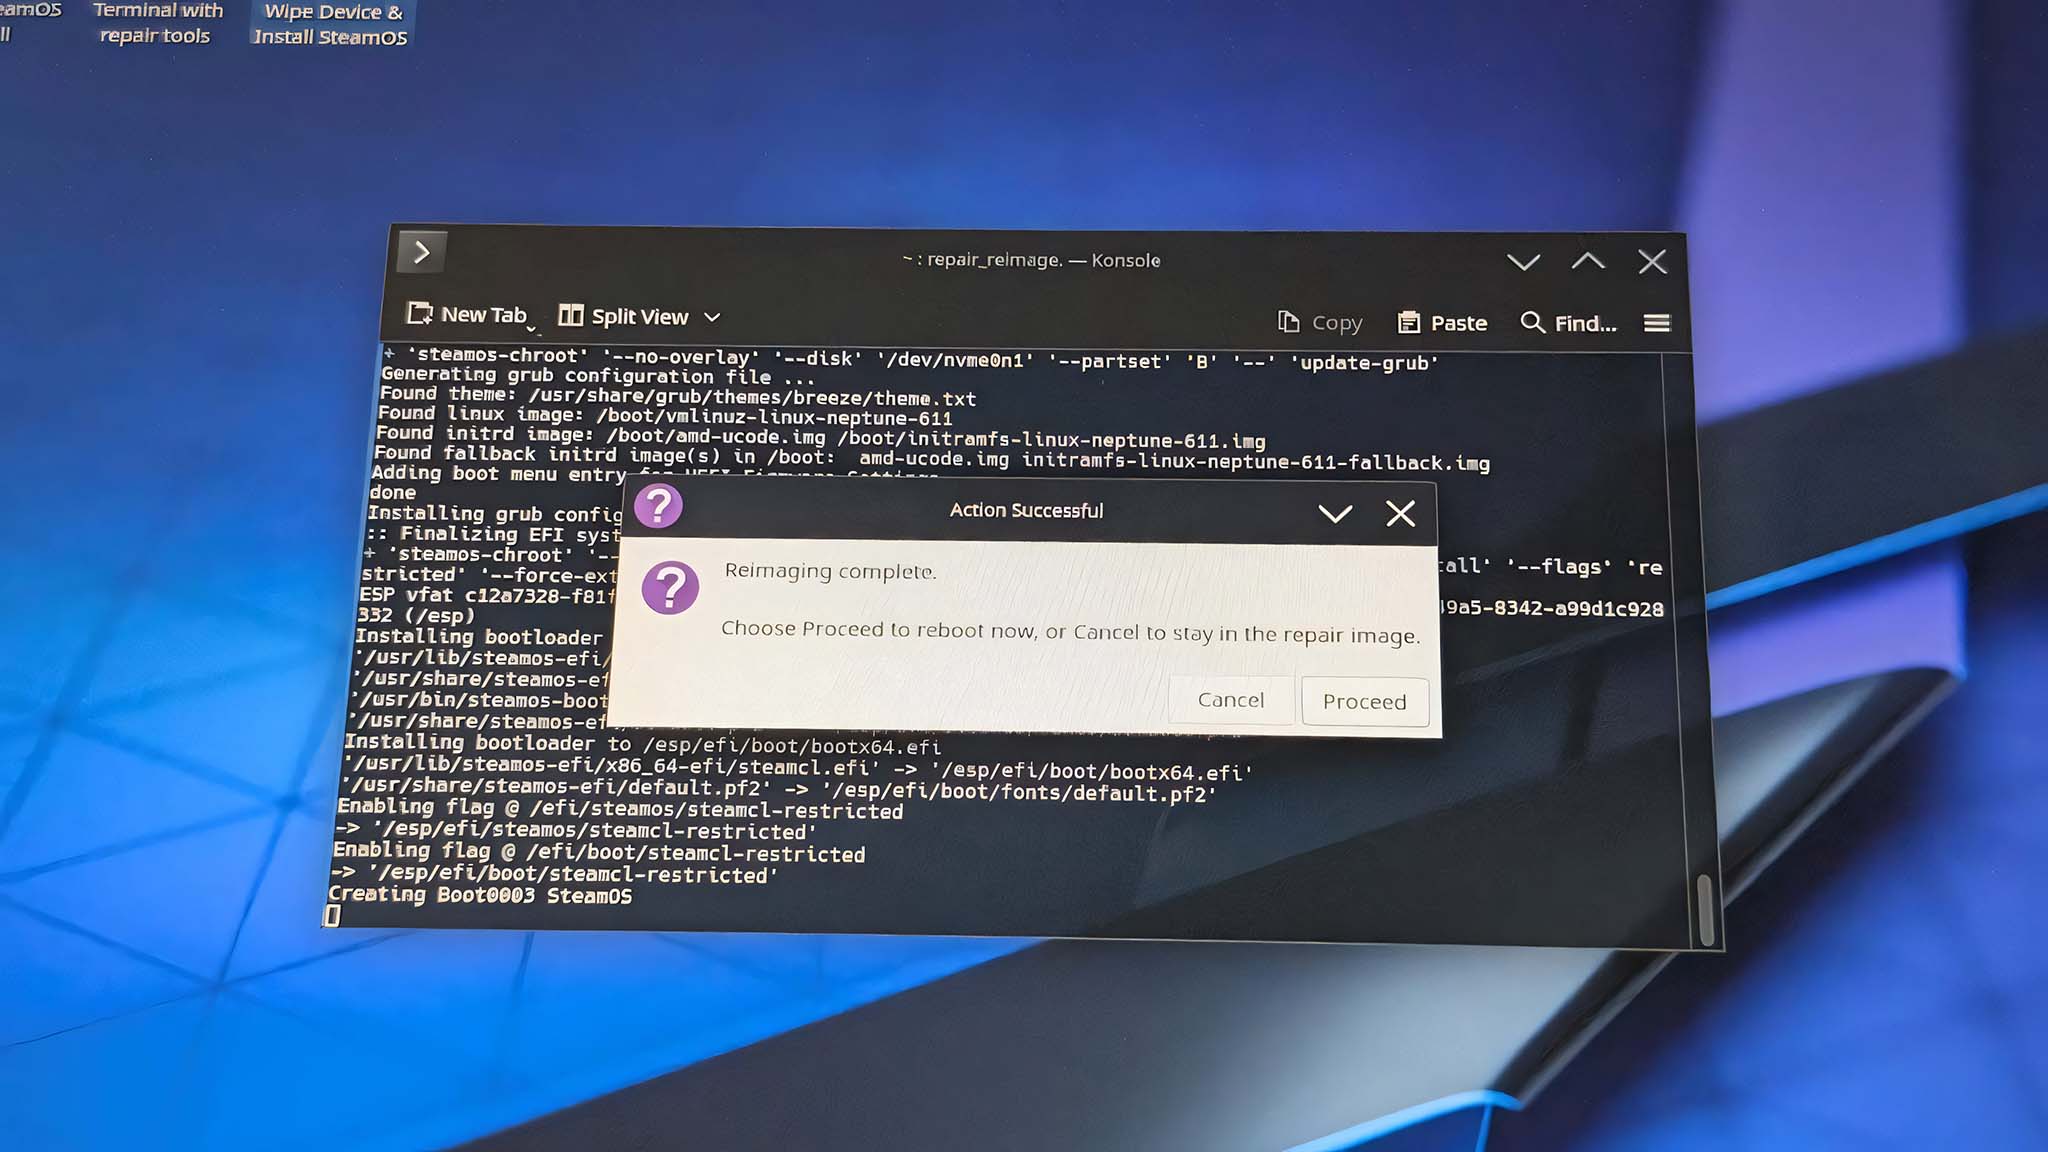
- A pop-up will then let you know the reimaging has completed. Select Proceed to restart the device.
- You can now remove your USB stick from the ROG Ally.

- After it boots up, wait for SteamOS to install on your Ally.
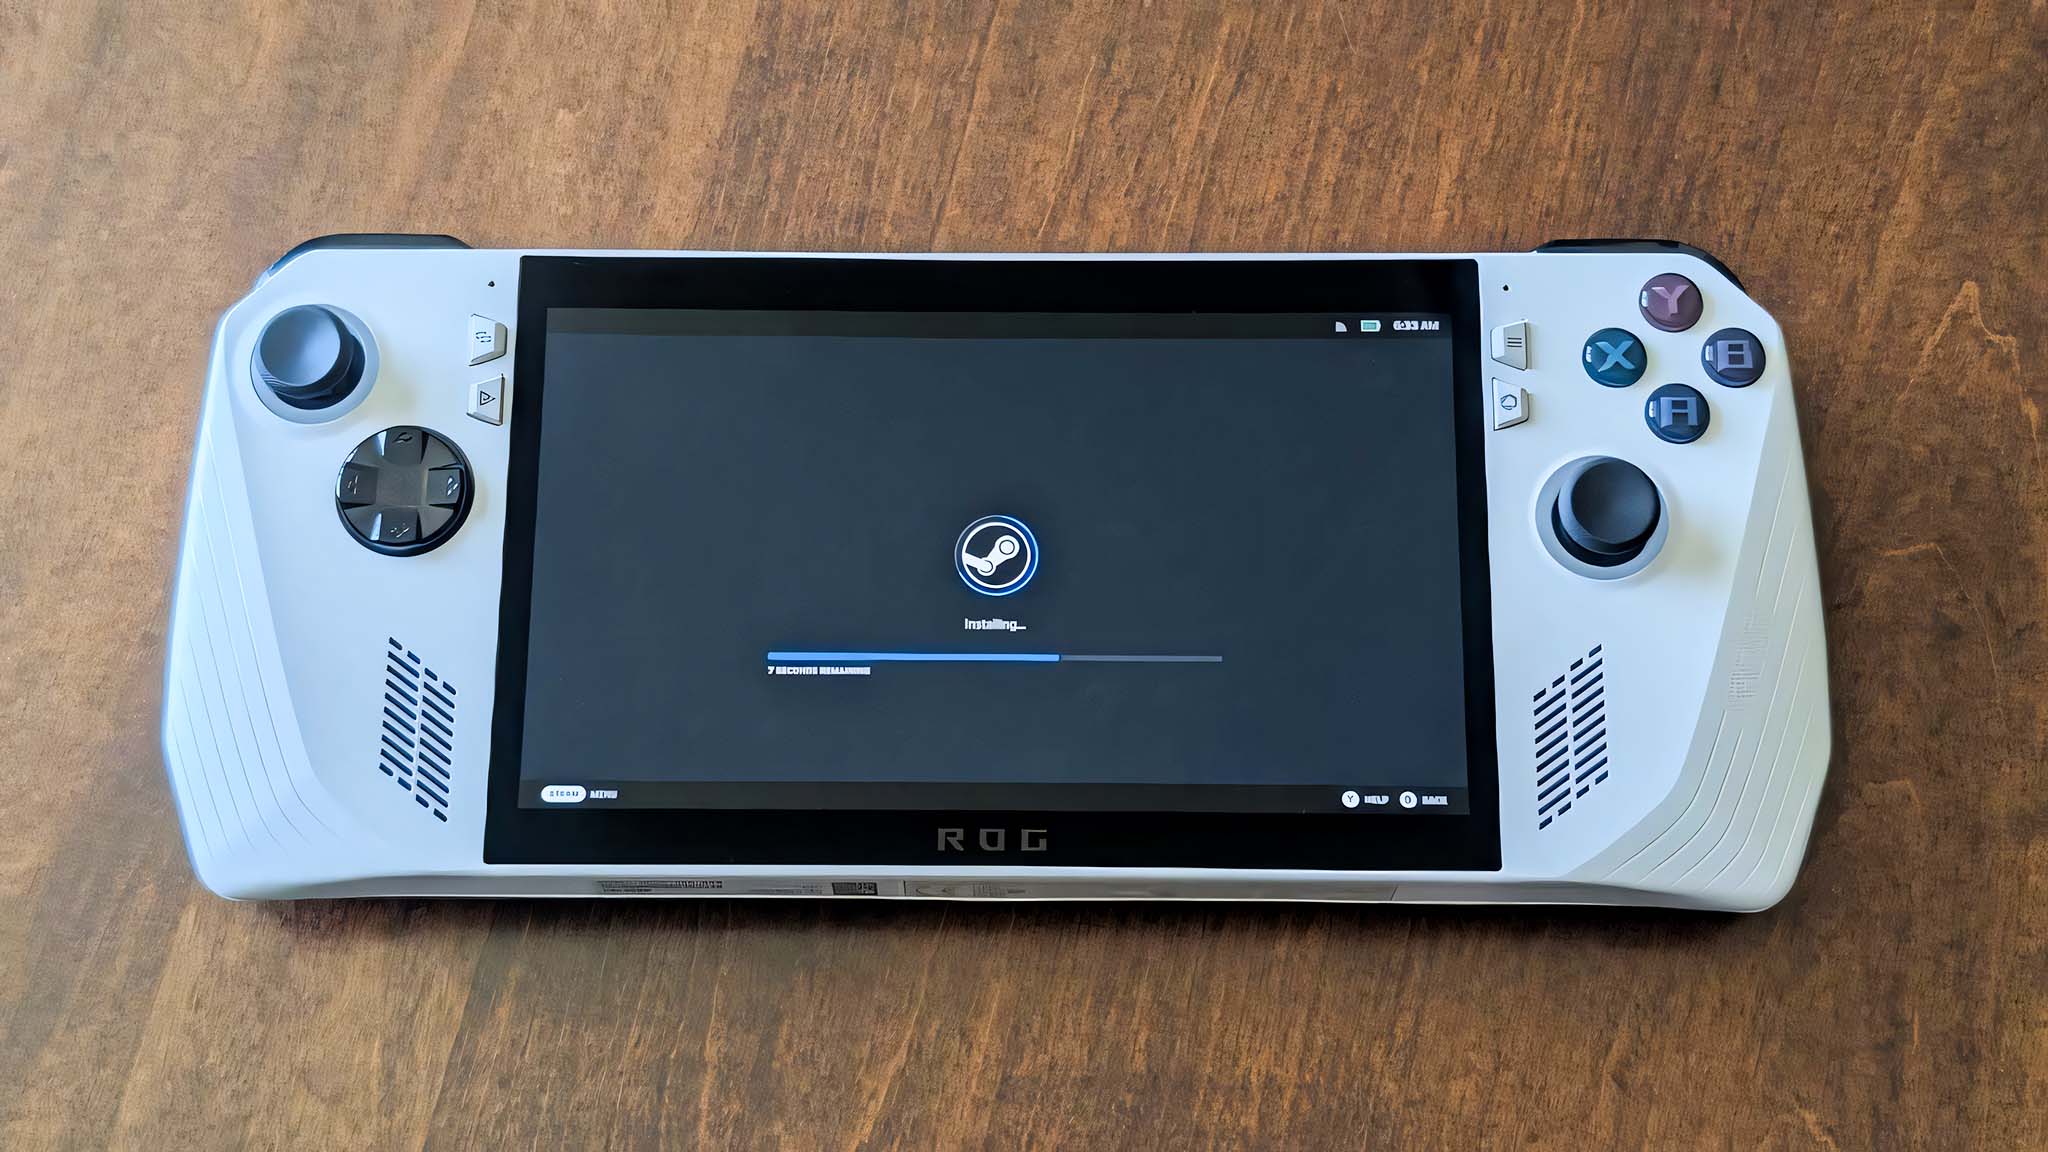
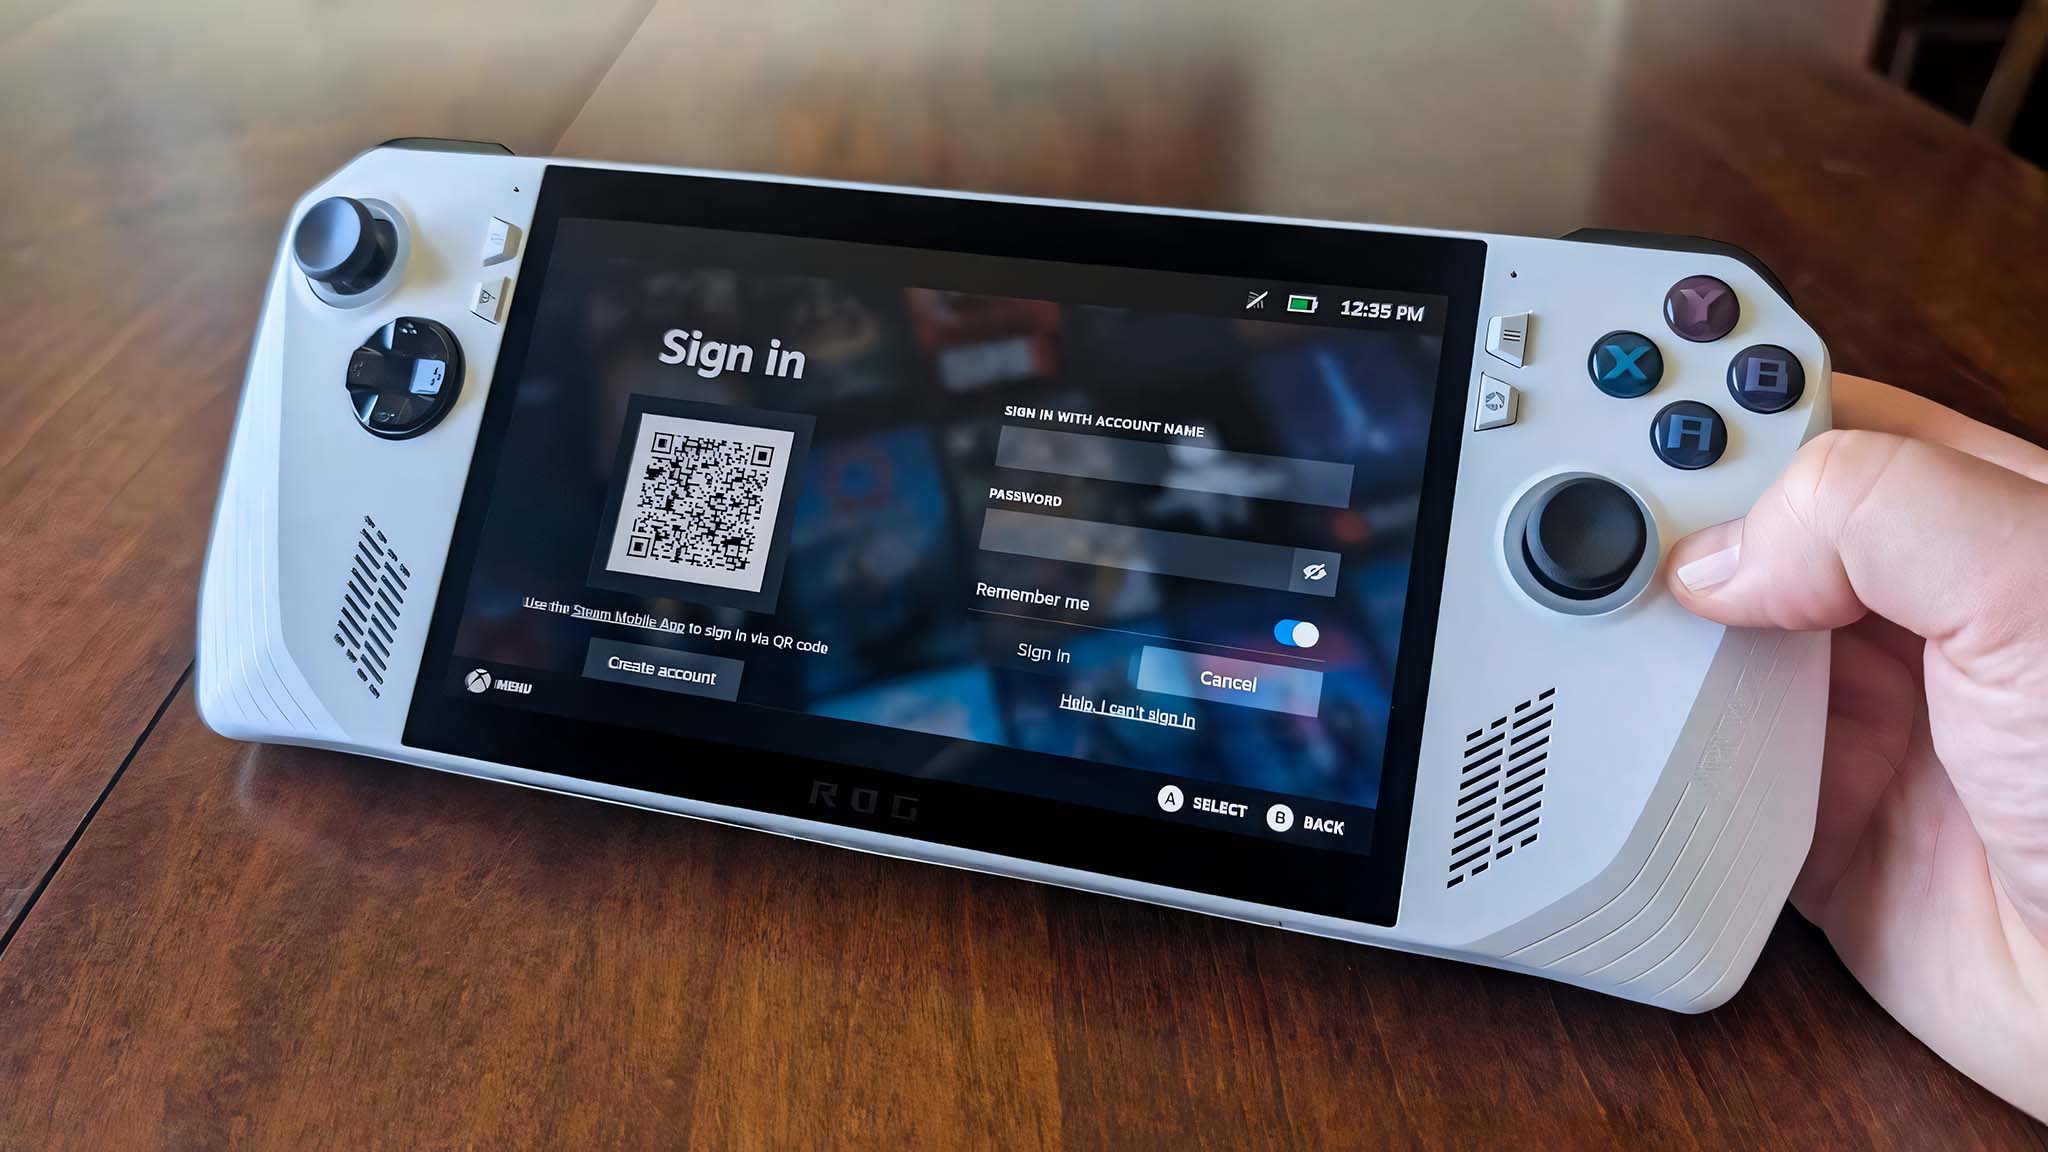
- When the installation finishes, set up SteamOS and log into your Steam account.

- Before doing anything else, tap on the Menu icon in the bottom left of the screen, tap on System, and then check for updates and install system updates.
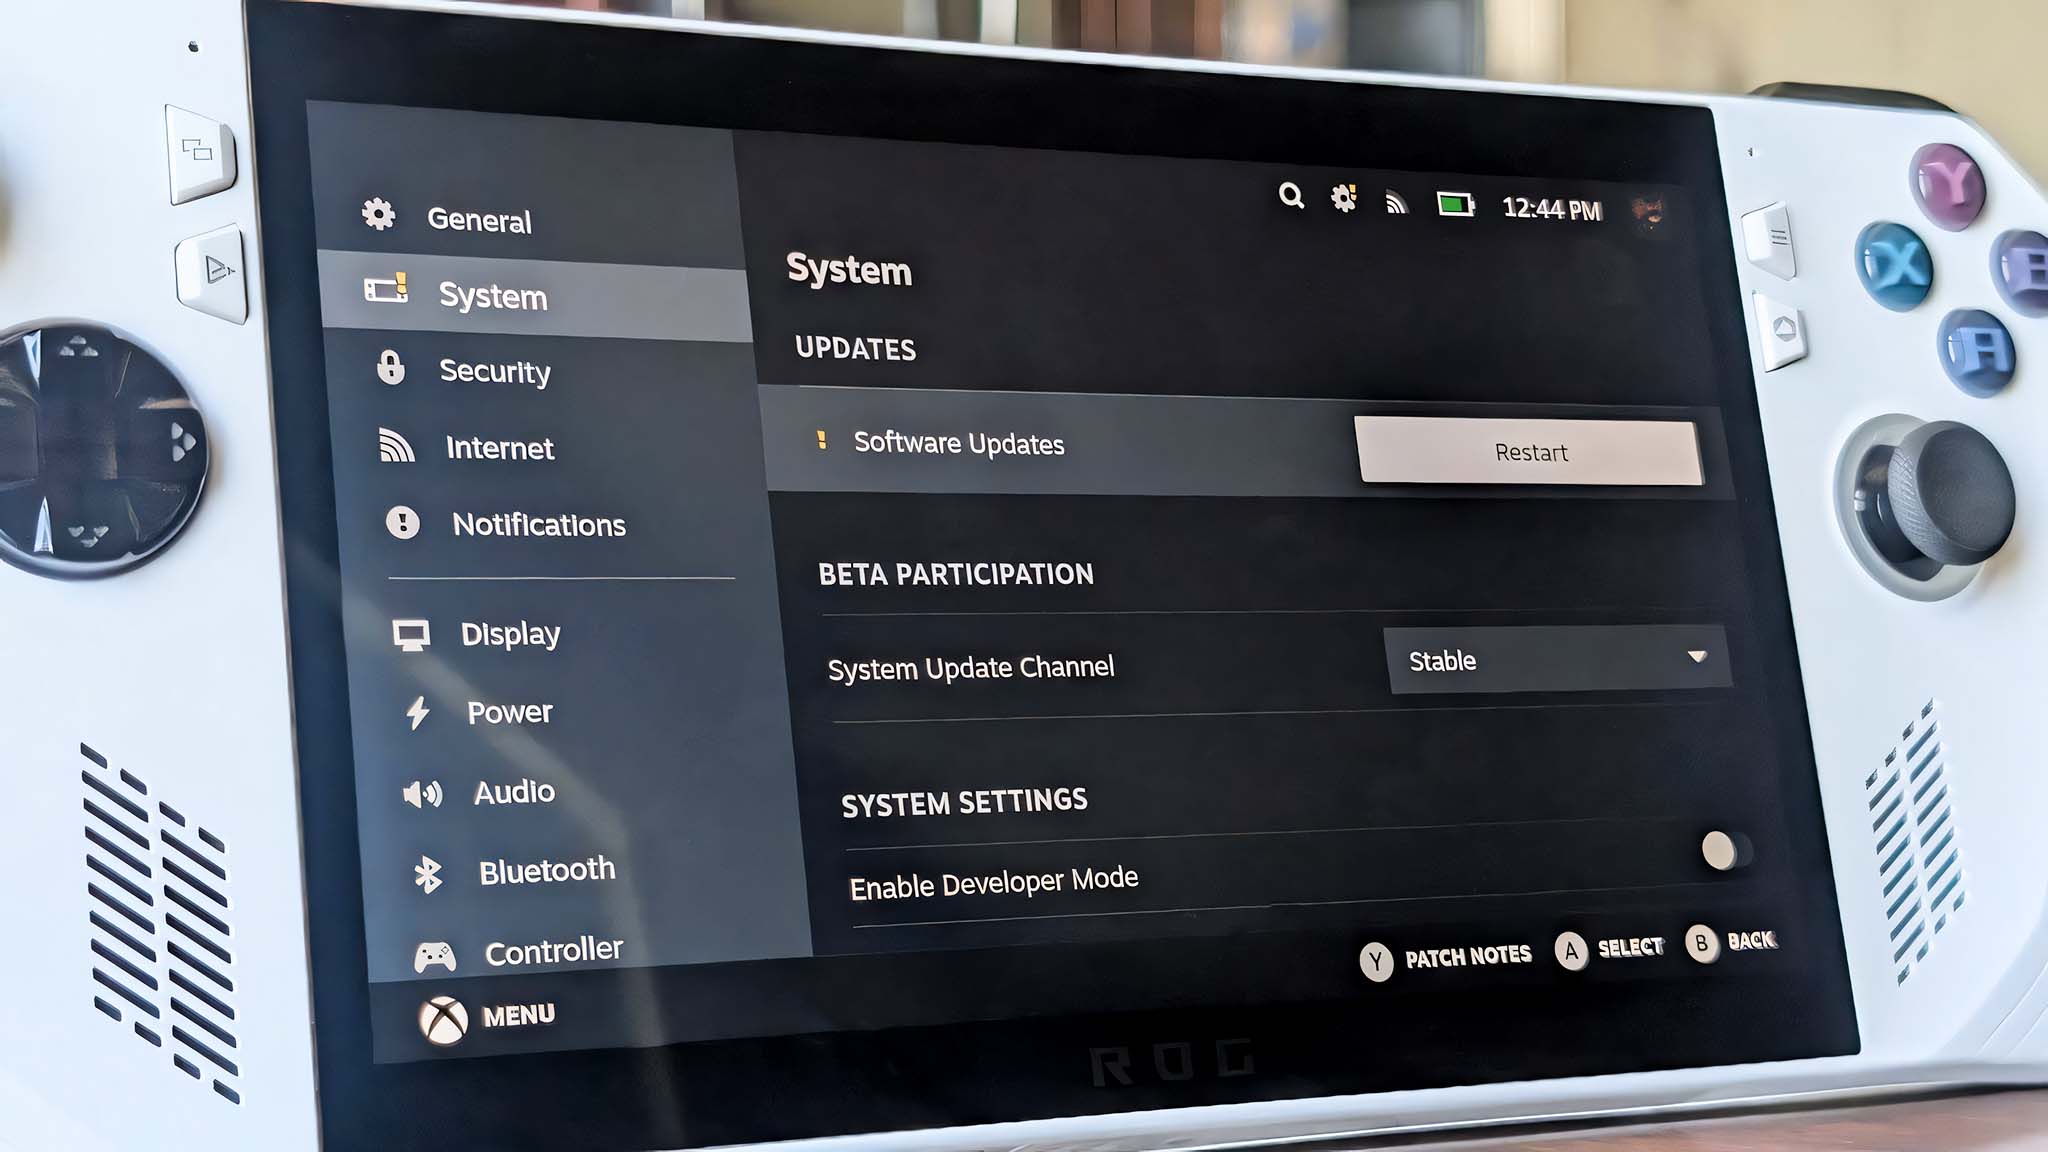
After cleaning your ASUS ROG Ally, setting up SteamOS on it, and ensuring all updates are in place, you’re now ready to enjoy playing games and utilizing your Steam-powered ASUS ROG Ally.
Enjoy your gaming experience with the portable handheld!
How to install SteamOS on Legion Go and Legion Go S (Windows)
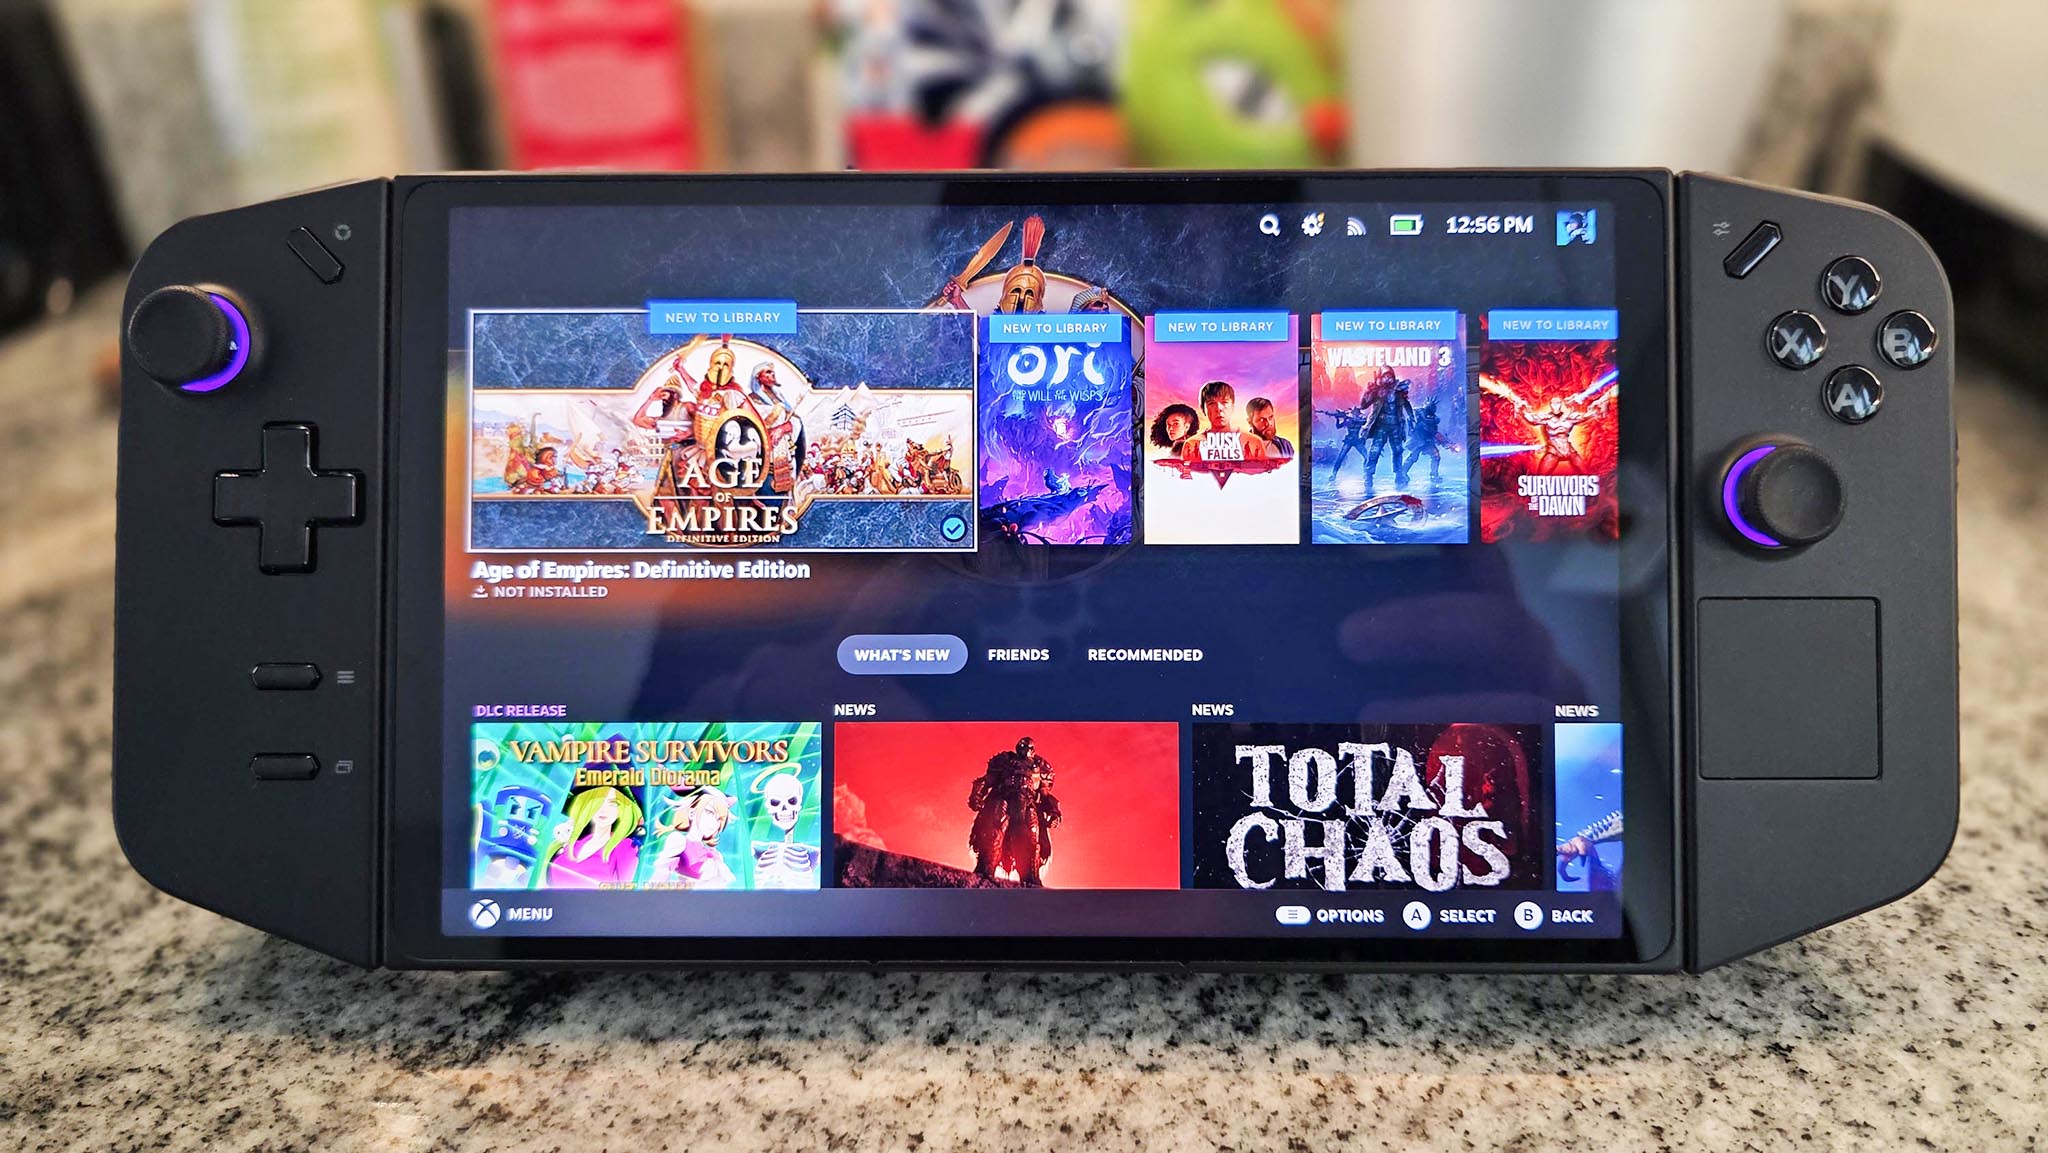
- Plug your USB flash drive into your computer and then download the SteamOS reimage files from the Steam website.
- Navigate to the Downloads menu and then right-click on the SteamOS image files and select Extract All.
- Next, download Rufus utility from the Rufus website.
- Open Rufus and tap on the Select button, then choose the SteamOS reimage files you downloaded earlier.
- Press Start and then OK to start the process. Note that this will destroy anything on the USB, so make sure any important files have been put elsewhere.
- Wait while Rufus turns your USB flash drive into a bootable SteamOS key.
- When Rufus is done, remove the USB flash drive from your computer.
- Next, you’ll need to completely power off your Legion Go handheld.
- After that, hold Up Volume + Power for a few seconds to make the device enter BIOS.
- Using your finger, tap BIOS Setup in the small box. The buttons and joysticks won’t respond.
- Select “Novo Button Menu” as your BIOS setup.
- Select More settings.
- Next, select Security and tap on the Secure boot drop box to change it to Disabled.
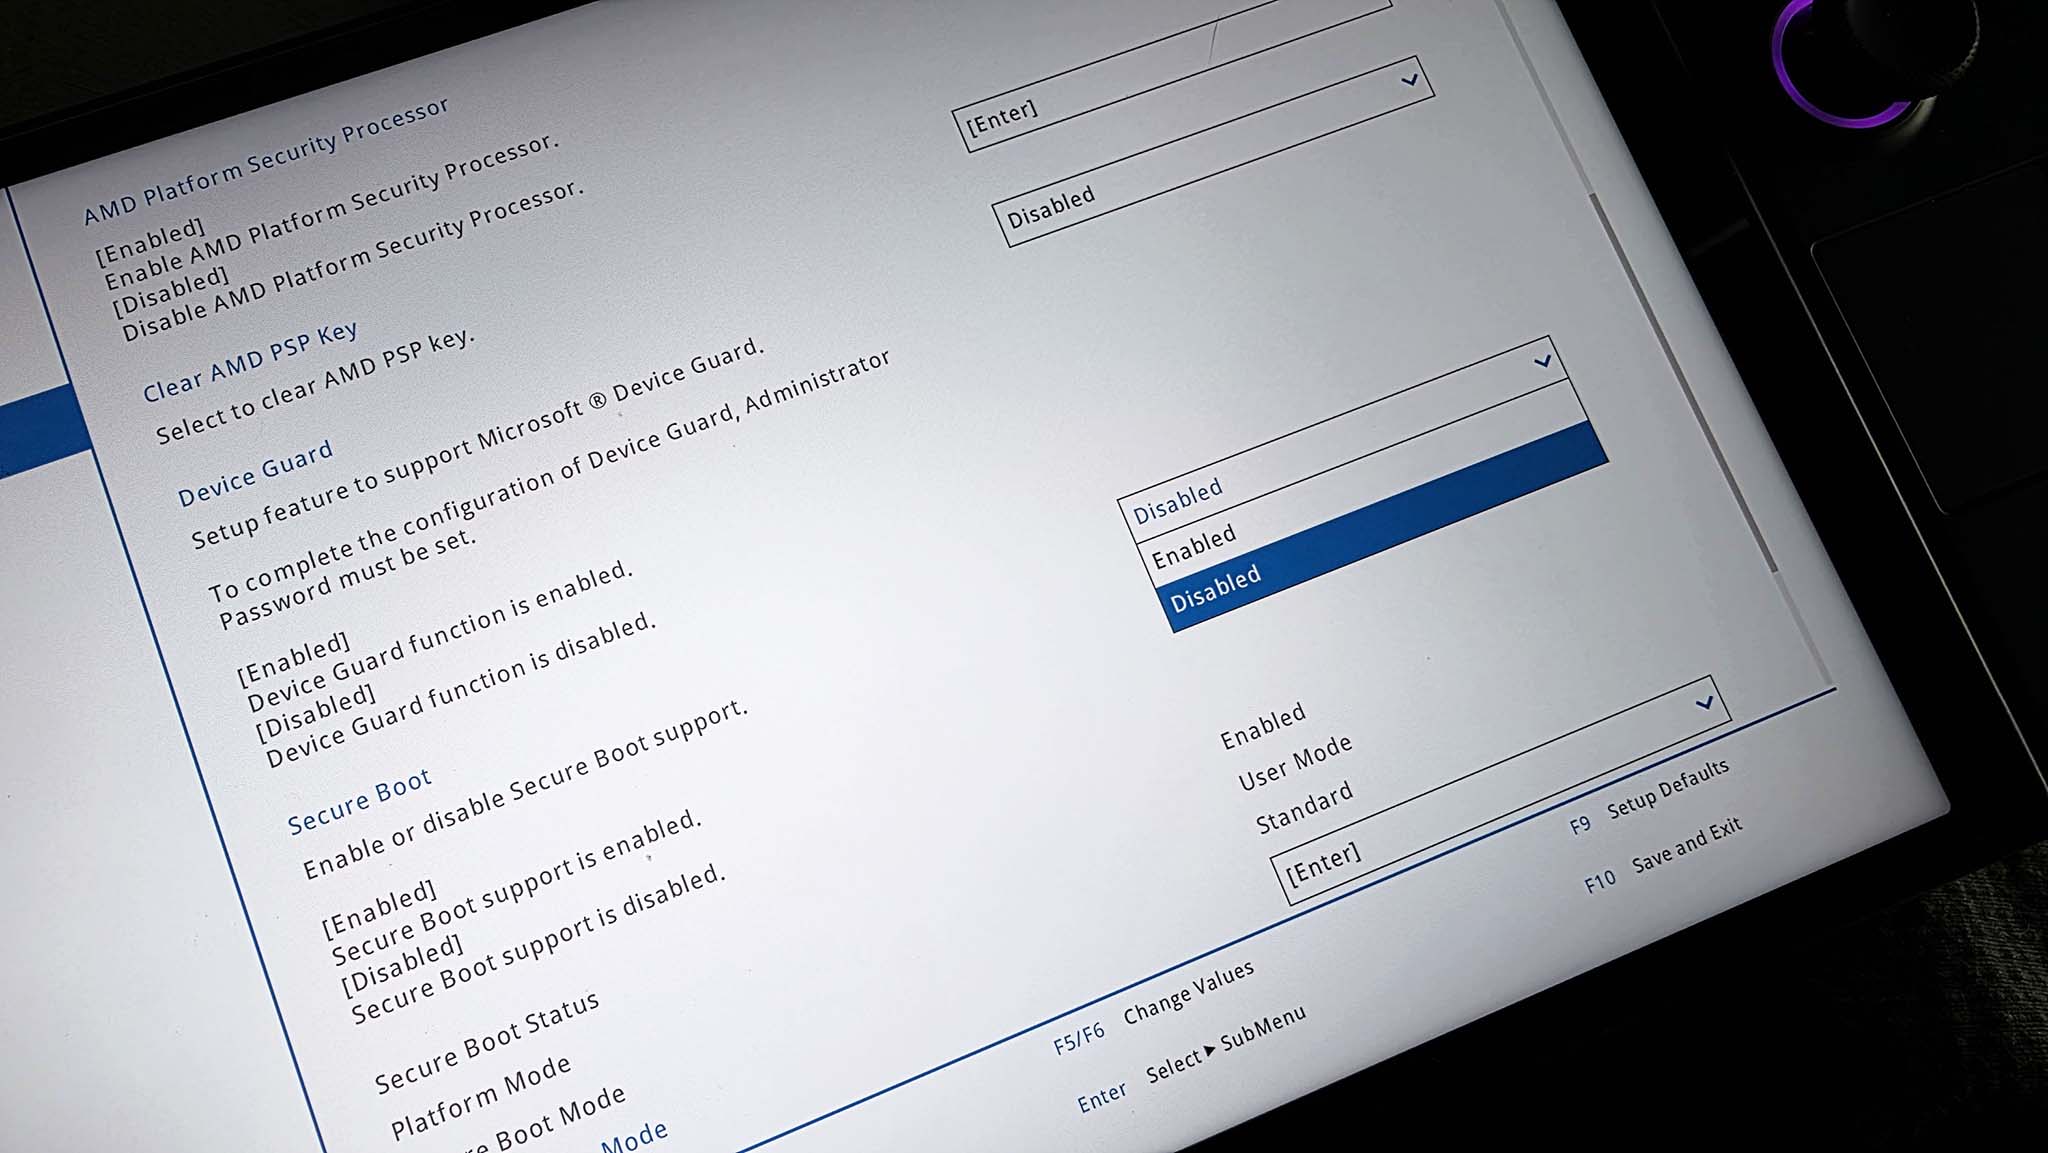
- After that, tap Exit and then tap Exit saving changes.
- Now, plug your USB flash drive into the Legion Go.
- Hold the Power button and Volume up button to enter BIOS, then select the USB stick. This will boot up the SteamOS reimage files.
- Double-tap on Wipe Device & Install SteamOS.
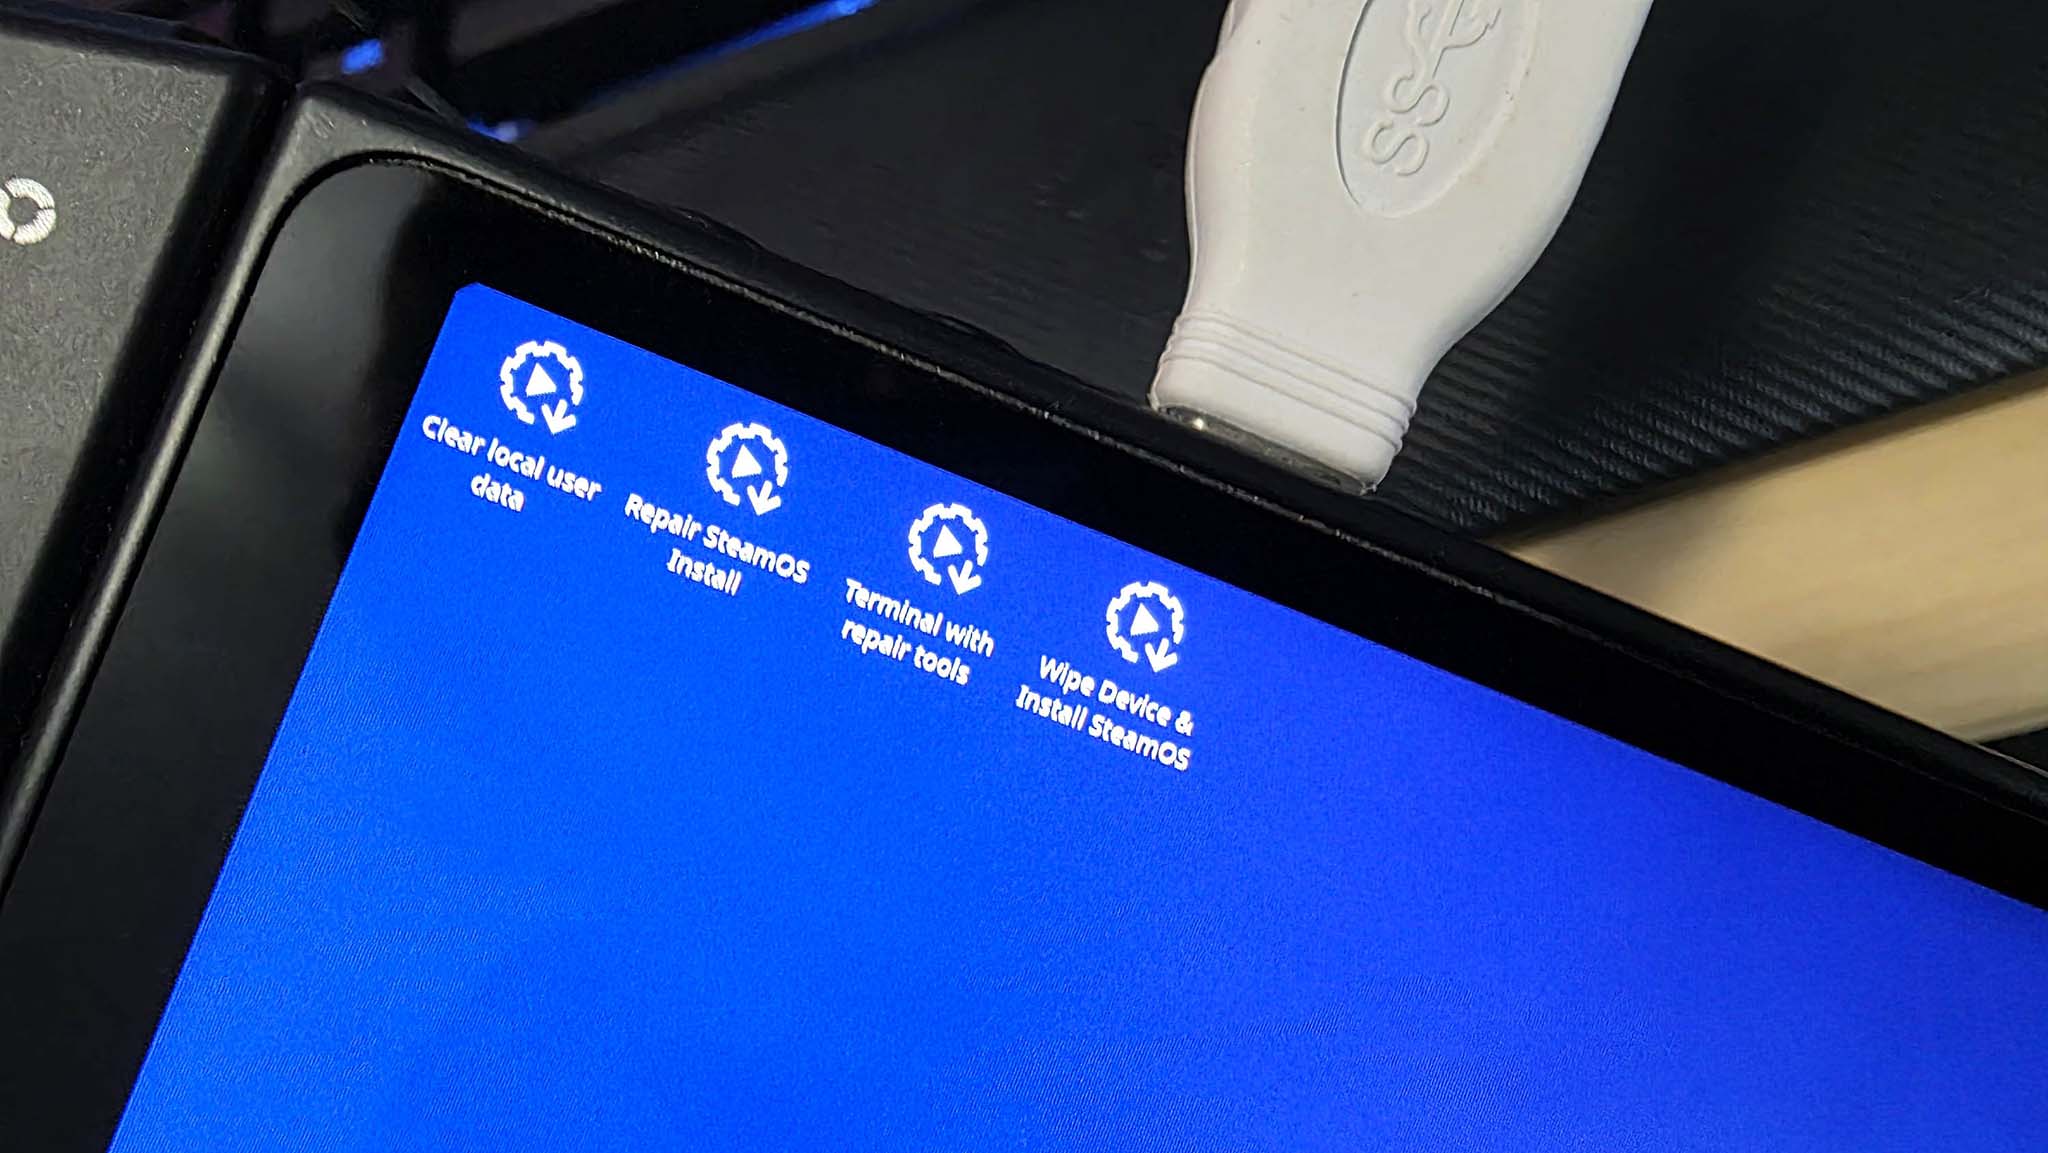
- Select Proceed in the pop-up box and then press Proceed again in the next pop up.
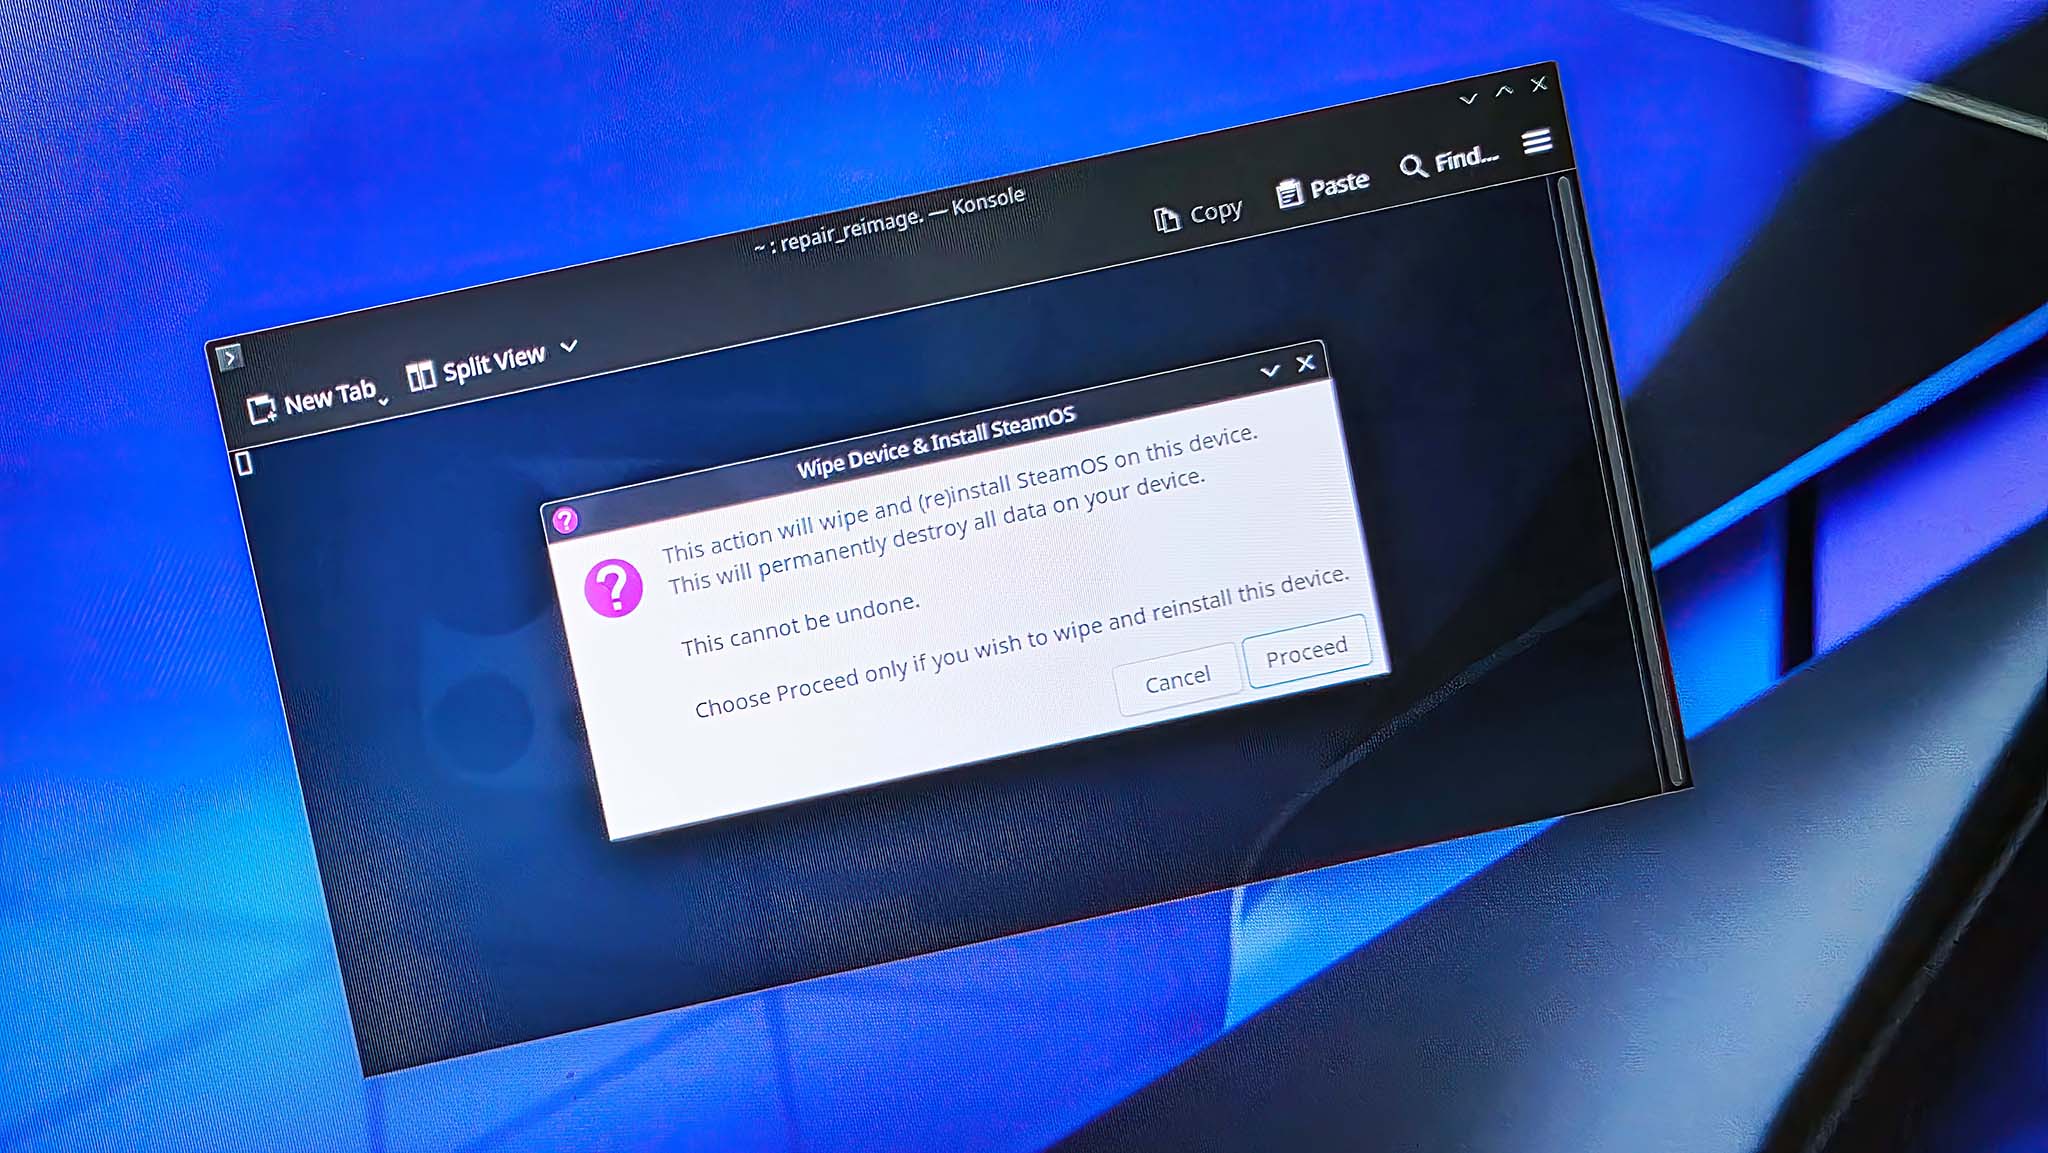
- Wait while SteamOS reimaging happens.
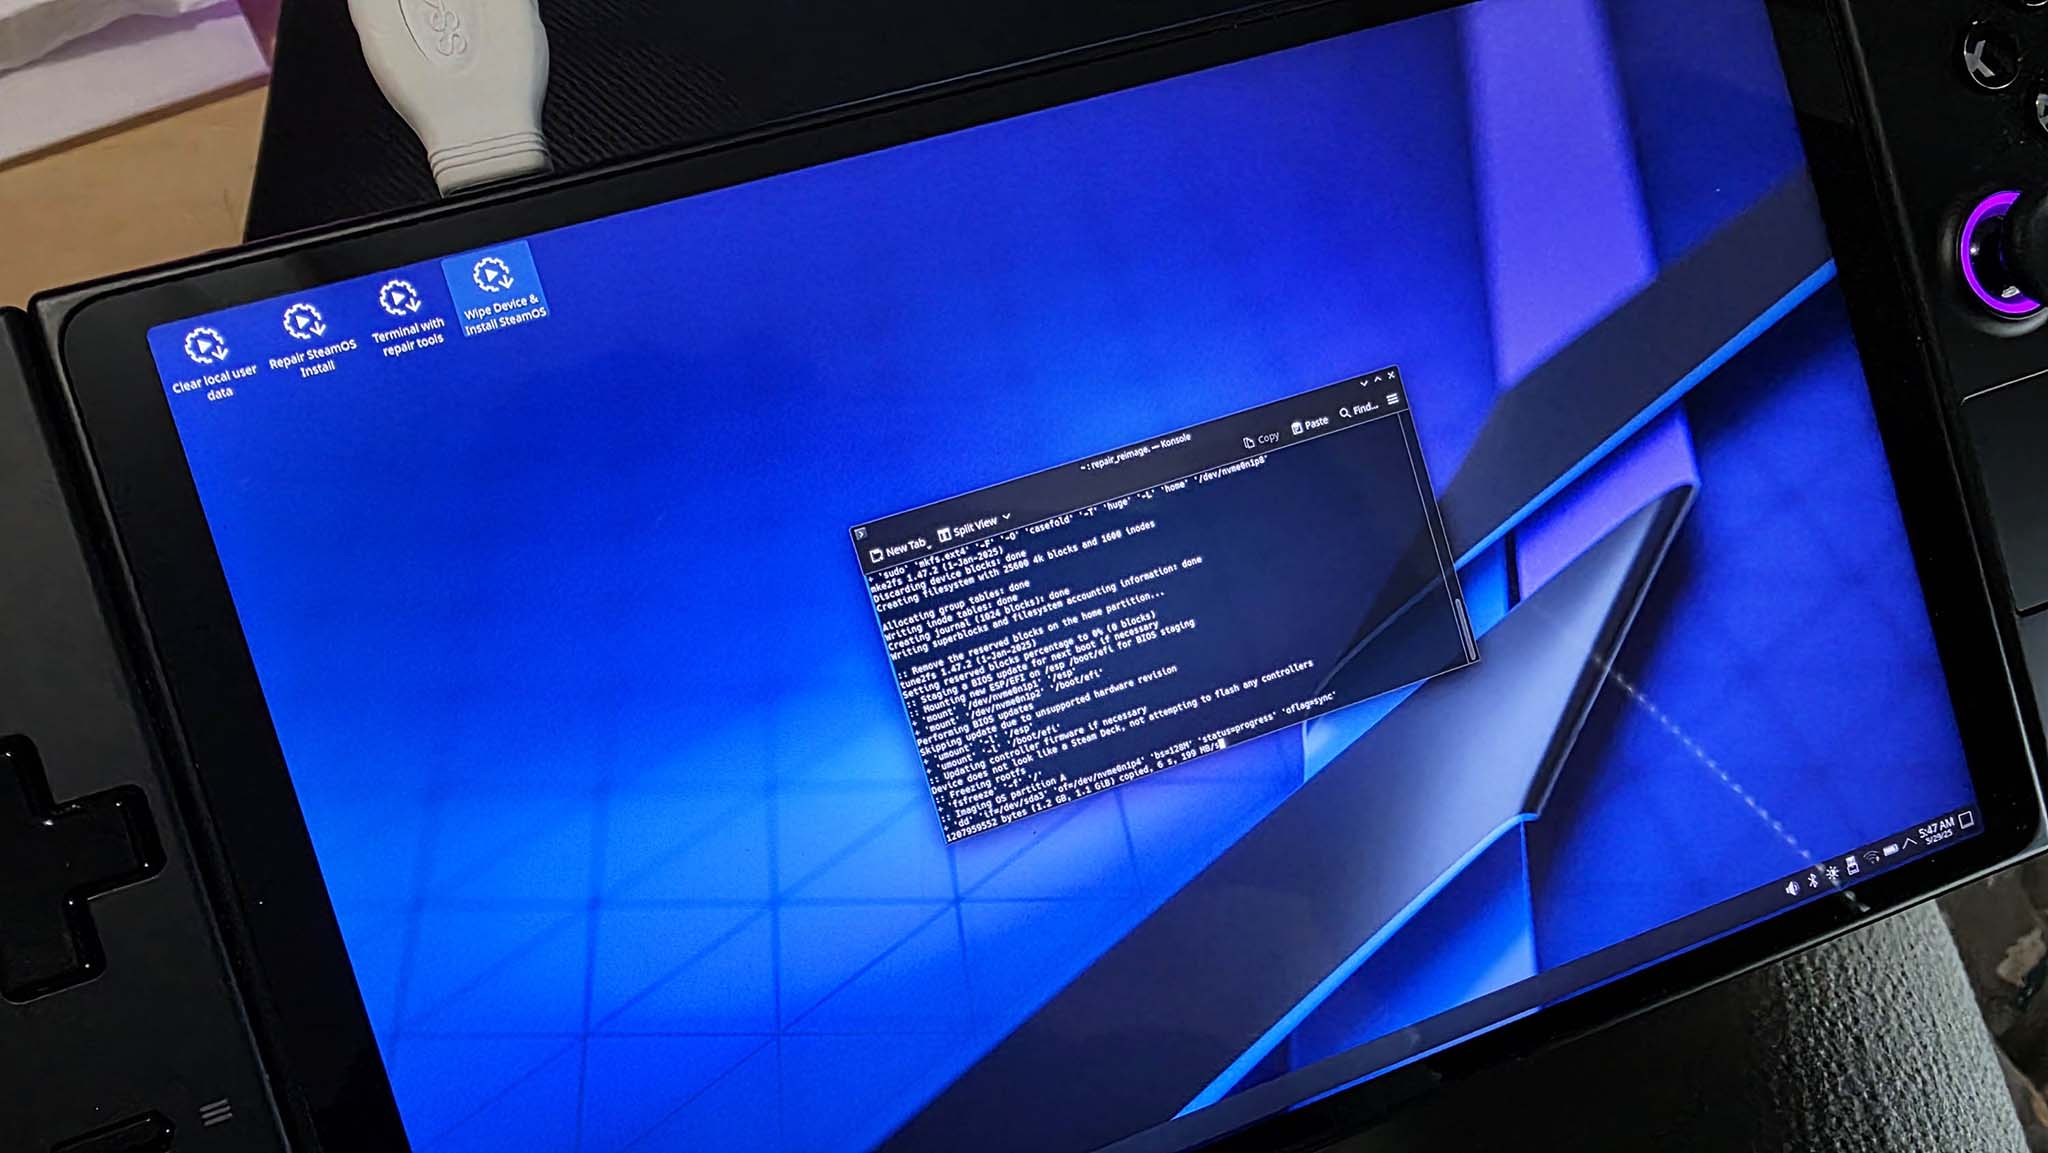
- After a while, the system will start installing SteamOS. Wait until this process is over.
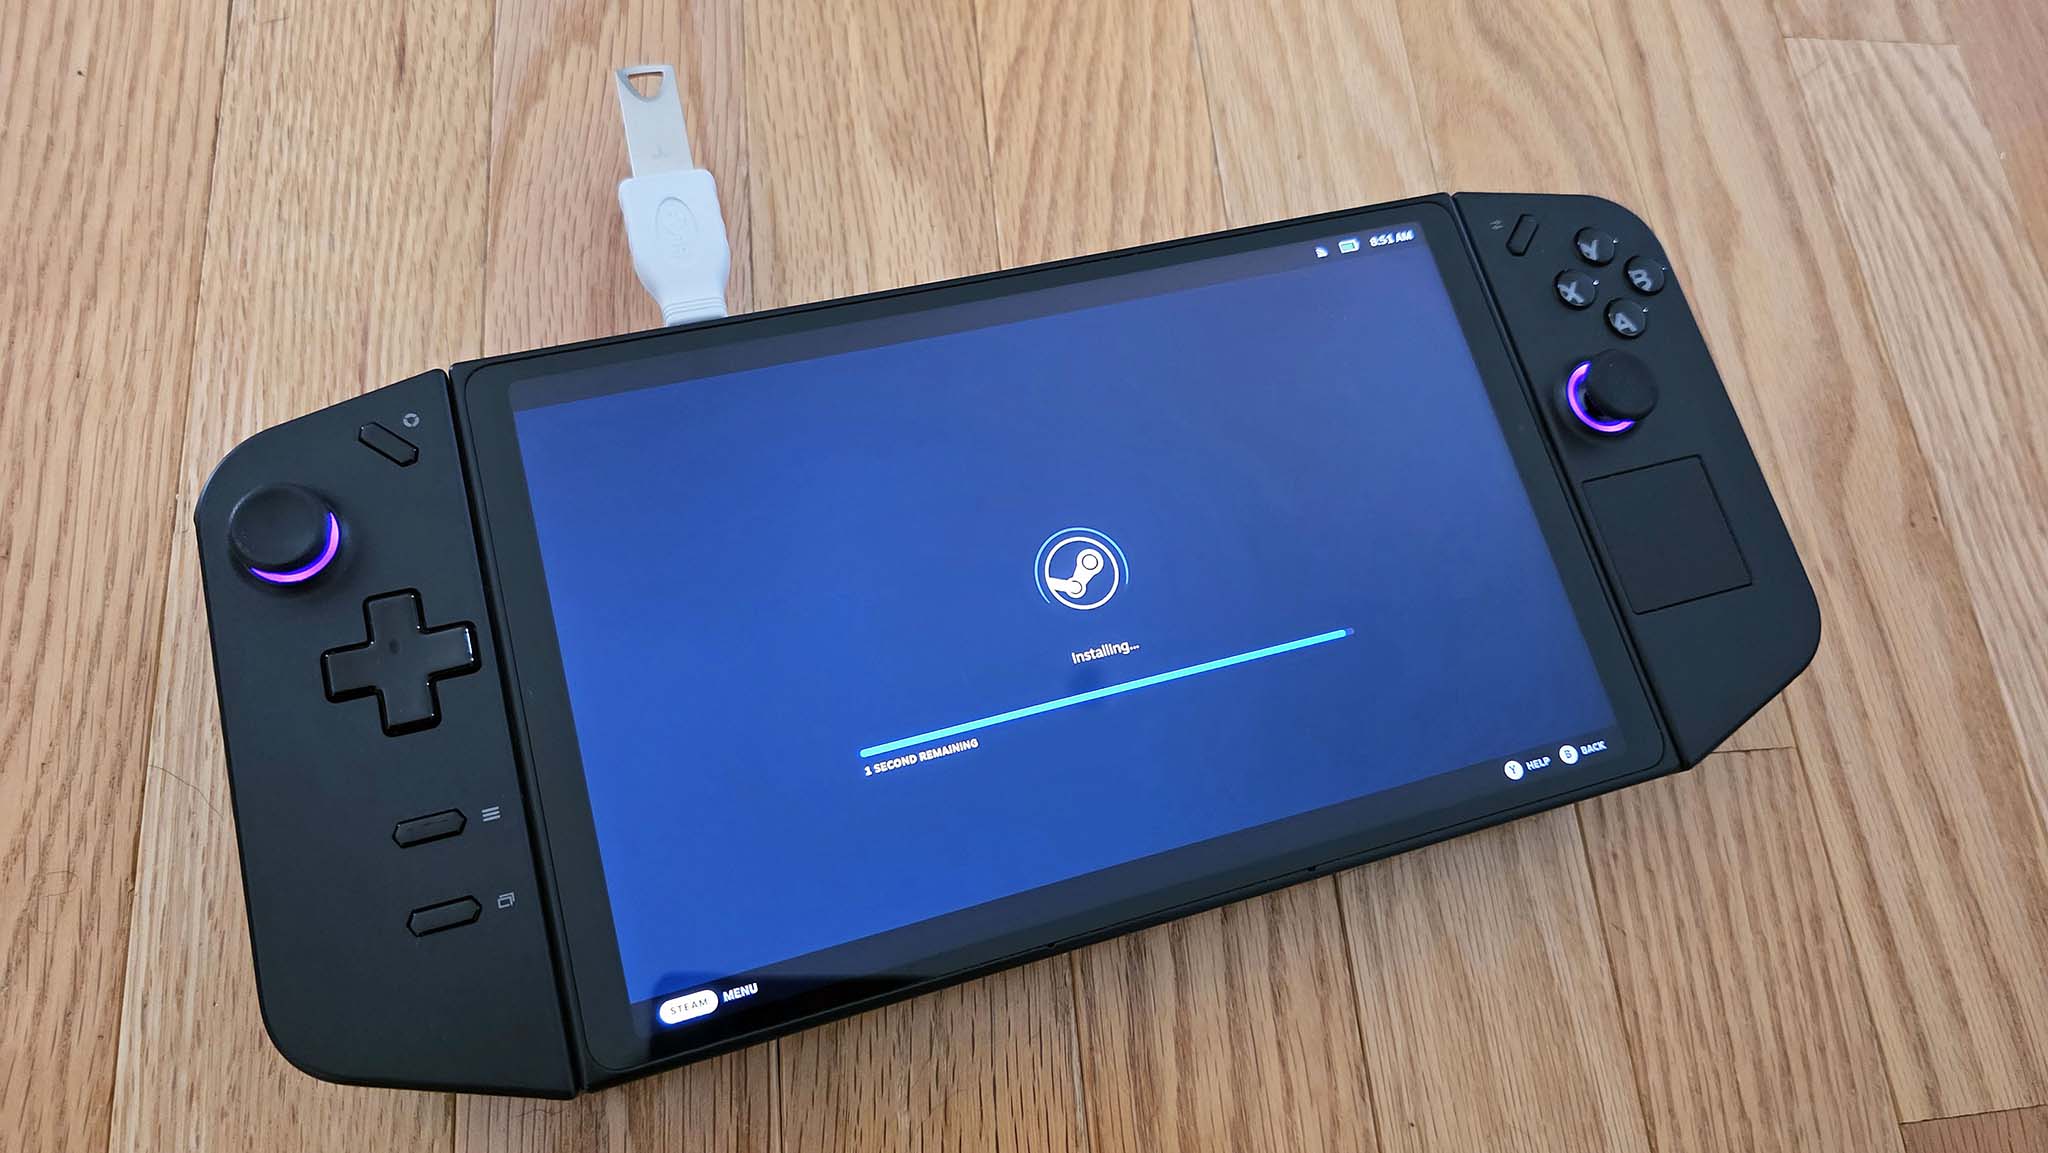
- Next, set up your device and log into your Steam account.
- Before doing anything else, open the menu, go to System, and install software updates.
- You’ll need to allow the device to restart after updates are installed.
- The next thing you’ll want to do is tap on the Menu button on the bottom of the screen, select System, and install system updates.
Once the entire setup is done, you’ll be all set to play SteamOS games on your Legion Go. Essentially, it will seem like a fresh system, so have fun exploring its features!
Breathe new life into your Windows handheld
These devices – ROG Ally, Ally X, and Lenovo Legion Go – outperform the Steam Deck in terms of power, yet their use of Windows as an operating system has been a significant drawback for some users. However, with the official availability to install SteamOS on these gaming handhelds, you can now enjoy the optimal blend of performance and Steam Deck-like functionality.
After a day of using SteamOS on my ROG Ally, I can’t help but express my delight. Compared to my Steam Deck, my games run noticeably faster and smoother. To top it off, the superior resolution screen enhances the overall visual experience as well.
Read More
- PI PREDICTION. PI cryptocurrency
- Gold Rate Forecast
- Rick and Morty Season 8: Release Date SHOCK!
- Discover Ryan Gosling & Emma Stone’s Hidden Movie Trilogy You Never Knew About!
- Discover the New Psion Subclasses in D&D’s Latest Unearthed Arcana!
- Linkin Park Albums in Order: Full Tracklists and Secrets Revealed
- Masters Toronto 2025: Everything You Need to Know
- We Loved Both of These Classic Sci-Fi Films (But They’re Pretty Much the Same Movie)
- Mission: Impossible 8 Reveals Shocking Truth But Leaves Fans with Unanswered Questions!
- SteelSeries reveals new Arctis Nova 3 Wireless headset series for Xbox, PlayStation, Nintendo Switch, and PC
2025-05-31 14:09