As a seasoned tech enthusiast with decades of tinkering under my belt, I can’t help but appreciate the thoughtfulness Microsoft puts into their operating systems – even the smallest details, like creating a backup during an upgrade and providing options to reclaim space afterwards.
During the installation of the Windows 11 2024 Update (version 24H2), your Windows 11 system will automatically save a copy of the current setup configuration as a safety measure. This allows you to easily restore the previous state if any major problems arise during the update process.
Nevertheless, following the installation, a “Windows.old” folder is retained, containing approximately 20GB or more of files. This could be a considerable amount of space for devices with limited storage capacity.
Should your computer run short on space following the installation of the 2024 Update, Windows 11 offers several methods to recover a significant portion of the lost storage via the Settings application and Disk Cleanup tool.
In my current project, I’m outlining the straightforward process I followed to clear out the old setup files once I successfully updated to the most recent edition of my operating system, thereby reclaiming valuable storage space.
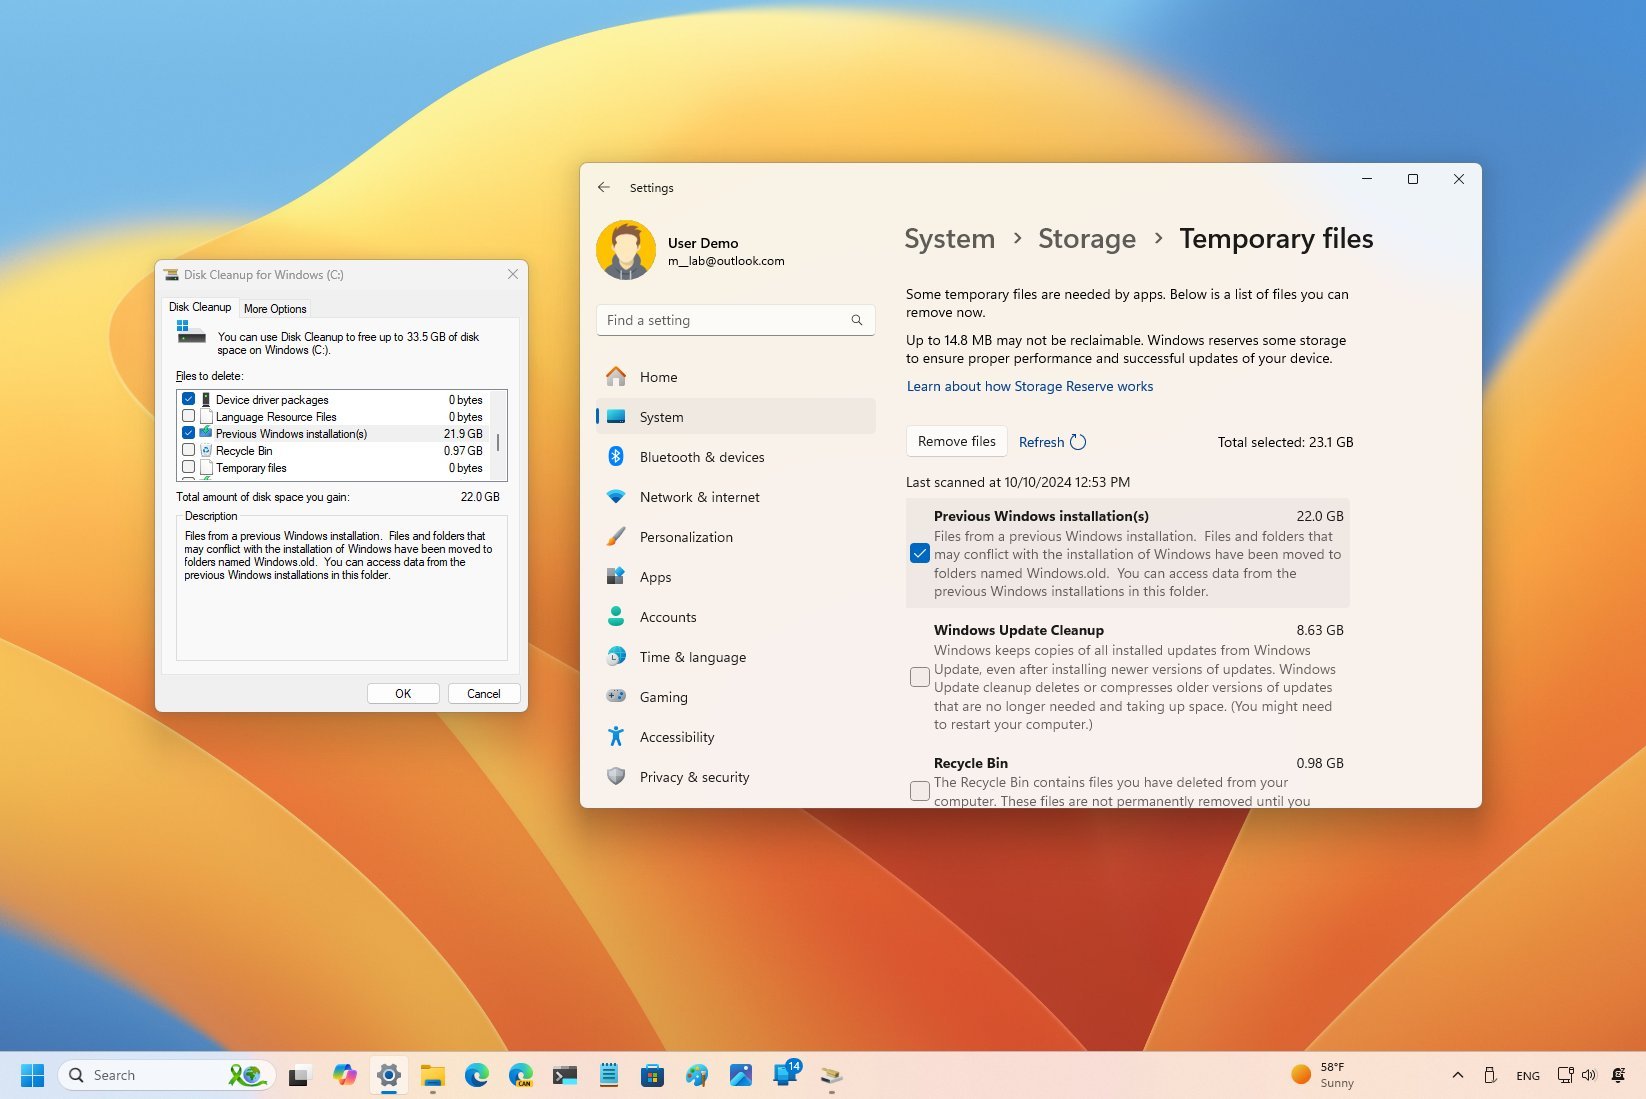
How to free up space after upgrading to Windows 11 2024 Update using Settings
To reclaim space after installing the most recent release of Windows 11, use these steps:
- Open Settings.
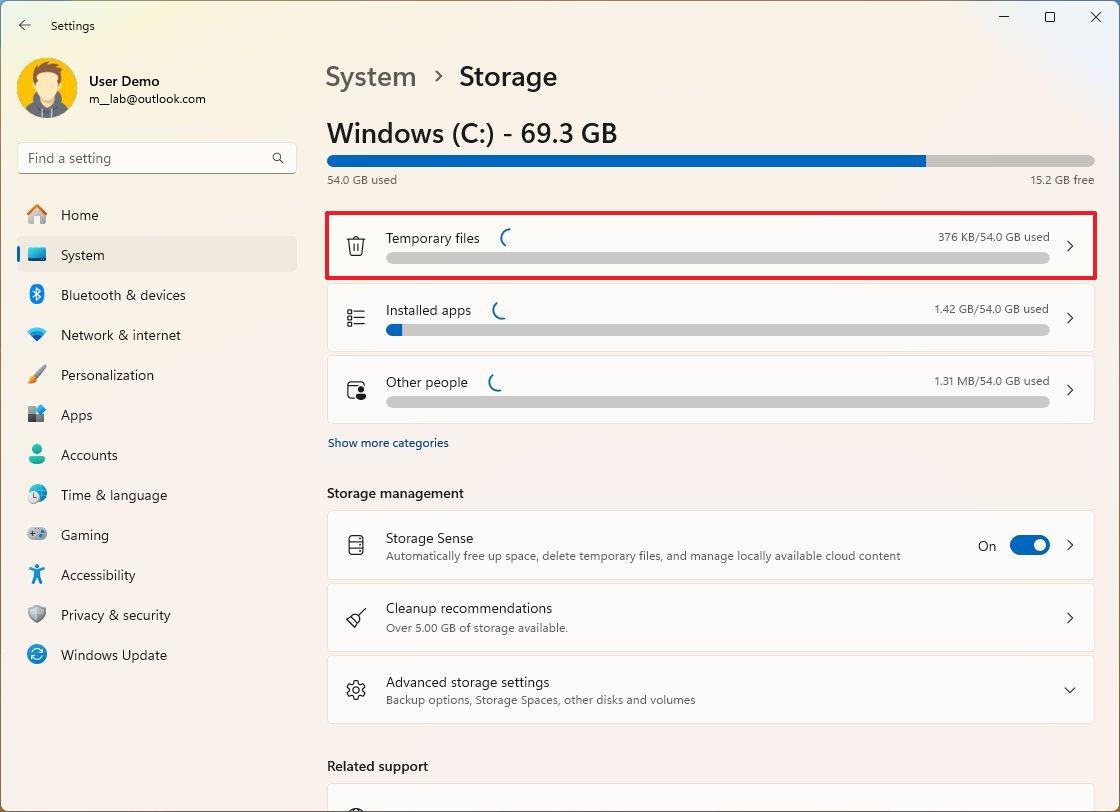
- Click on System.
- Click on Storage.
- Click the Temporary files page on the right-side.
- Clear all the preselected items (if applicable).
- Check the “Previous Windows installation(s)” option.
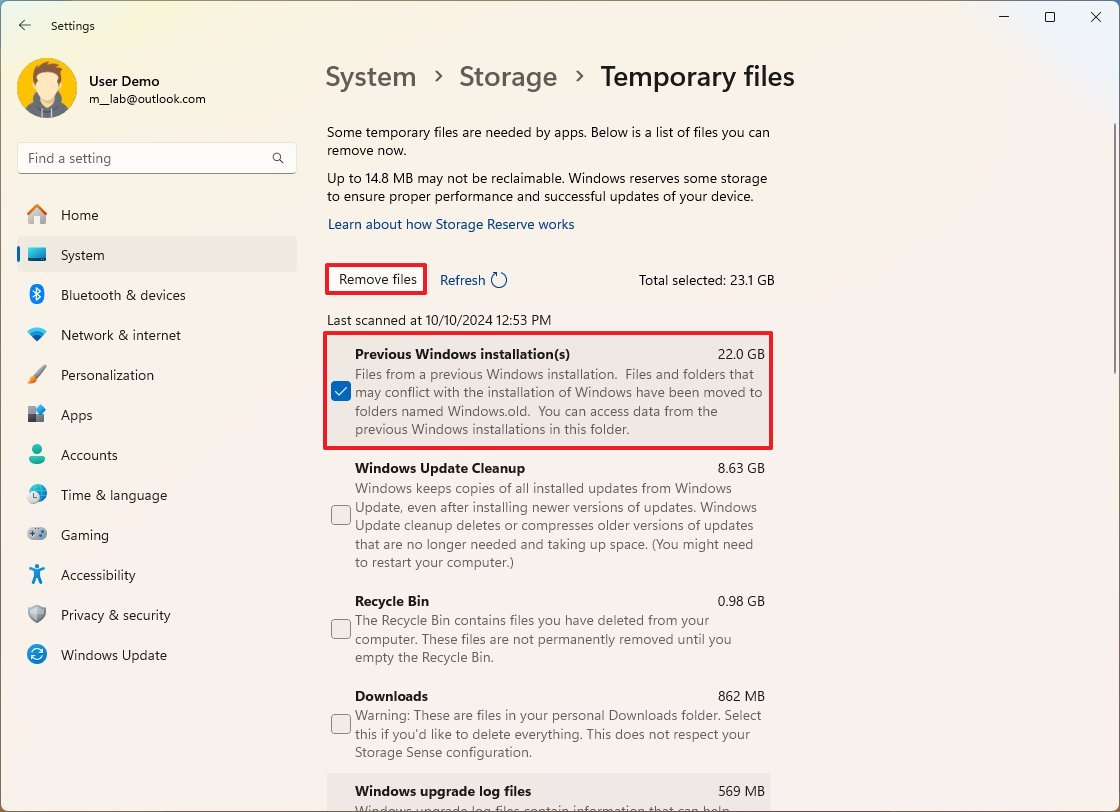
- Click the Remove files button.
Once you complete the steps, you will have some additional space for more important files.
How to free up space after upgrading to Windows 11 2024 Update using Disk Cleanup
To free up space after upgrading to Windows 11 version 24H2, use these steps:
- Open Start.
- Search for Disk Cleanup, and click the top result to open the settings.
- Click the “Clean up system files” button.
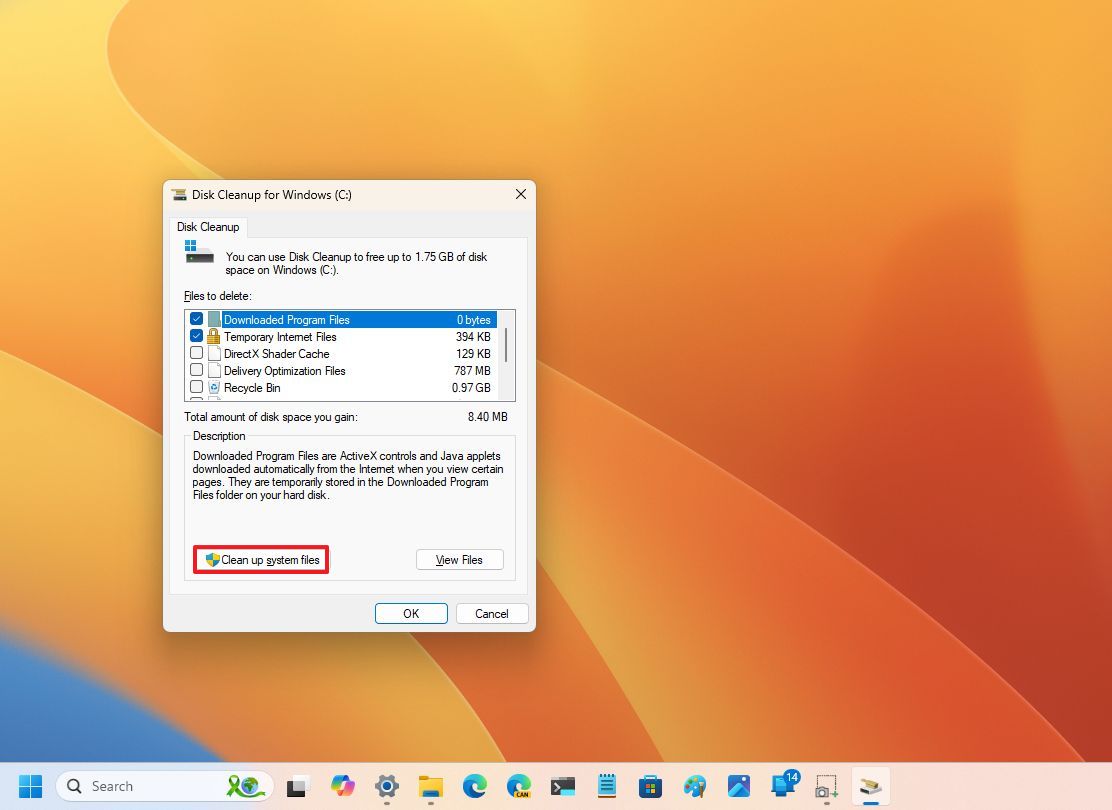
- Check the “Previous Windows installation(s)” option.
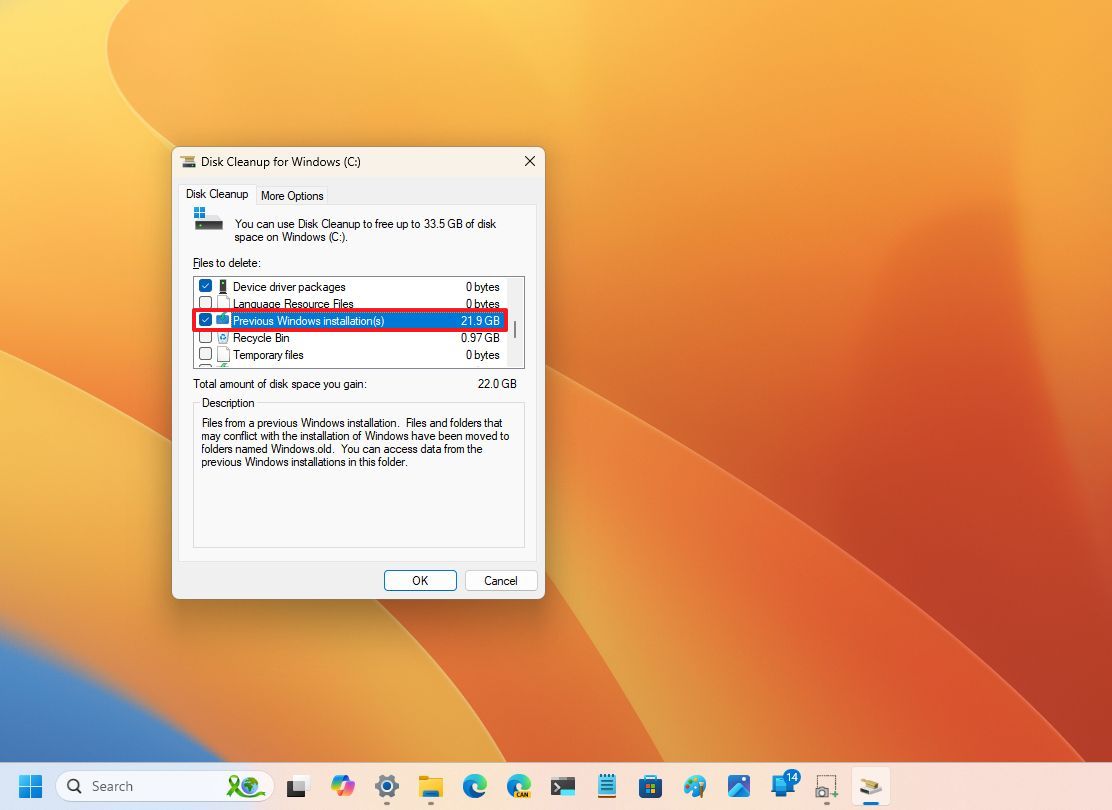
- Clear the Downloads option to avoid deleting downloaded files inside the “Downloads” folder (if applicable).
- Click the OK button.
Once you finish the procedures, it will erase the old installation data, thereby increasing available space on your installation disk.
You have up to ten days following an upgrade to keep your old installation backup files; after this timeframe, the system will automatically delete them on its own.
Once you’ve removed those files, keep in mind that you won’t be able to restore your system to its previous state via the recovery options. But, should you have the installation resources, you can perform a clean install of version 23H2 again.
Keep in mind that several users have encountered trouble when attempting to clean up the Windows Update cache, which holds duplicate copies of already installed updates. It’s worth noting that this process doesn’t pertain to deleting files from a prior installation.
More resources
Read More
- PI PREDICTION. PI cryptocurrency
- How to Get to Frostcrag Spire in Oblivion Remastered
- We Ranked All of Gilmore Girls Couples: From Worst to Best
- How Michael Saylor Plans to Create a Bitcoin Empire Bigger Than Your Wildest Dreams
- Kylie & Timothée’s Red Carpet Debut: You Won’t BELIEVE What Happened After!
- Gaming News: Why Kingdom Come Deliverance II is Winning Hearts – A Reader’s Review
- S.T.A.L.K.E.R. 2 Major Patch 1.2 offer 1700 improvements
- Florence Pugh’s Bold Shoulder Look Is Turning Heads Again—Are Deltoids the New Red Carpet Accessory?
- The Elder Scrolls IV: Oblivion Remastered – How to Complete Canvas the Castle Quest
- WCT PREDICTION. WCT cryptocurrency
2024-10-12 20:39