On Windows 11, File History functions as an old yet essential tool, automatically saving copies of your files at regular intervals during the day to safeguard your data against unintentional changes, removals, or harm.
By setting up File History on your computer, it typically saves files found in user-specific folders like Documents, Music, Pictures, Videos, Desktop, Contacts, Favorites, and OneDrive (provided these files are accessible offline) without any additional action required.
Additionally, File History necessitates a distinct storage area for your backup files, so it’s necessary to attach an external hard drive with sufficient storage capacity to your computer in order to configure this feature.
Here, I will walk you through the process of configuring and restoring files using the File History feature on Windows 11.
How to backup and restore files using File History
Once you connect the external storage, you can proceed with the setup process. Here’s how.
File History setup
To set up File History, connect a USB hard drive and use these steps:
- Open Start.
- Search Control Panel and select the top result to open the app.
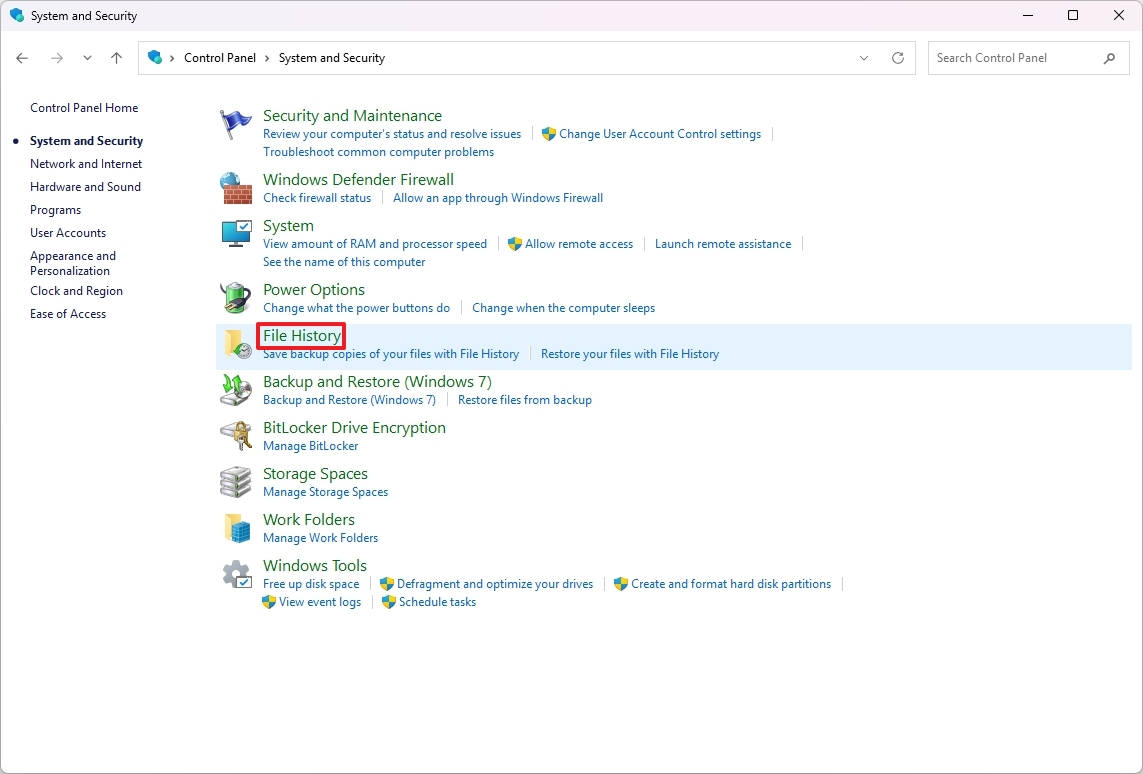
- Click on System and Security.
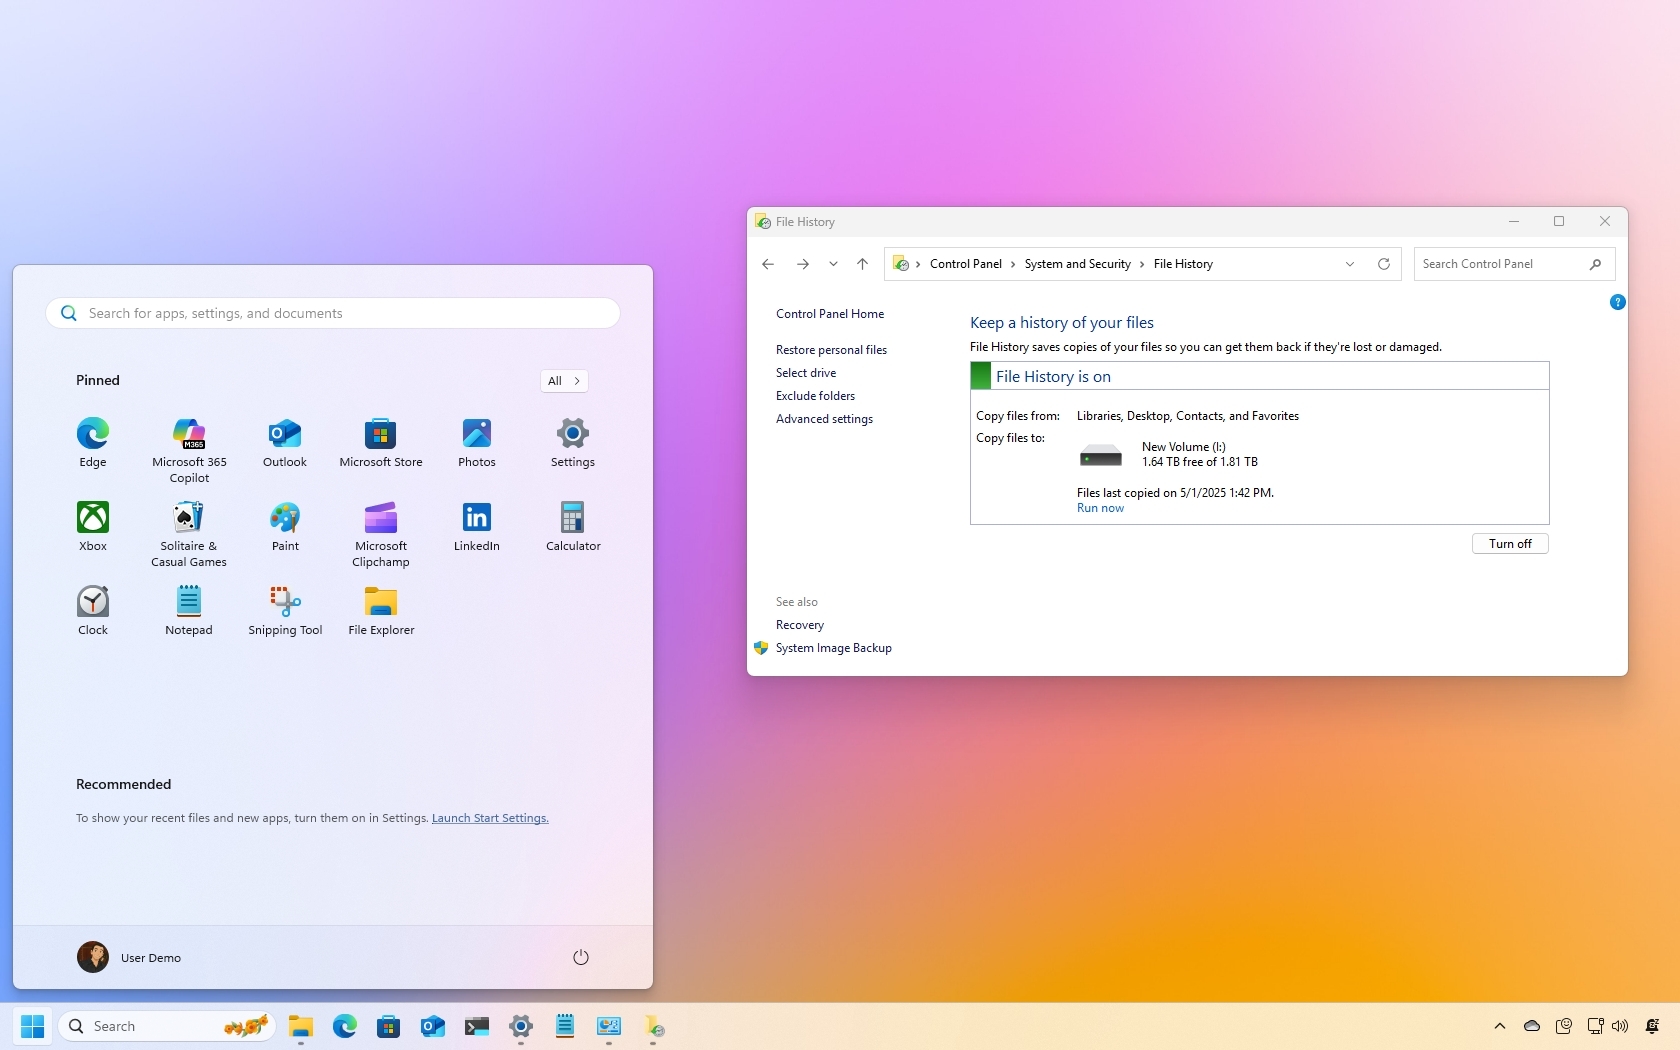
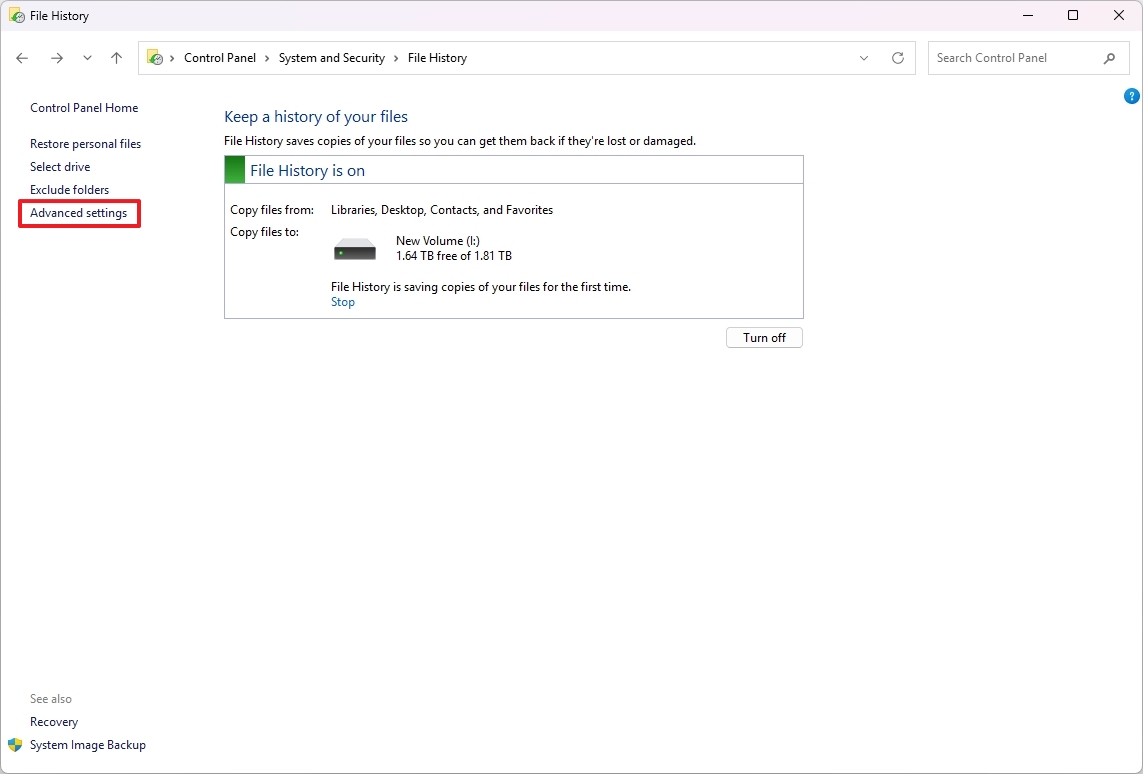
- Click on File History.
- (Option 1) Click the Turn on button to enable the feature with the default drive selection.

- (Option 2) Click the Select drive option from the left pane.
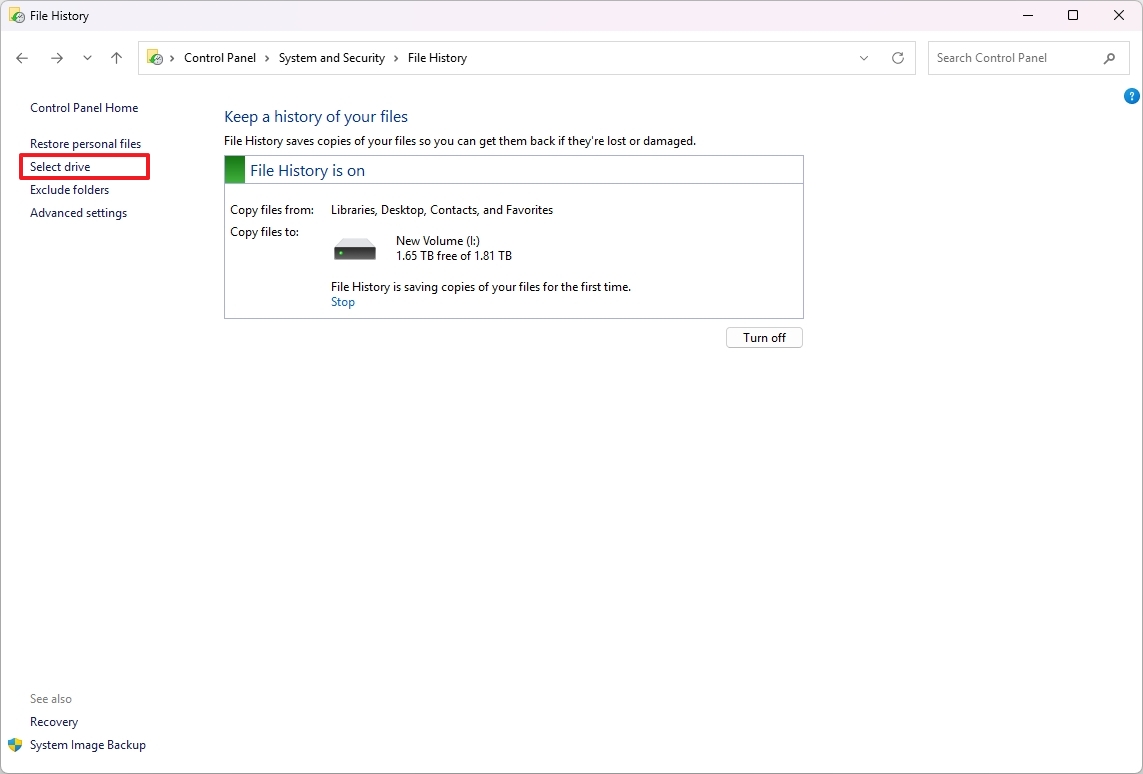
- Choose another drive to store the backups.
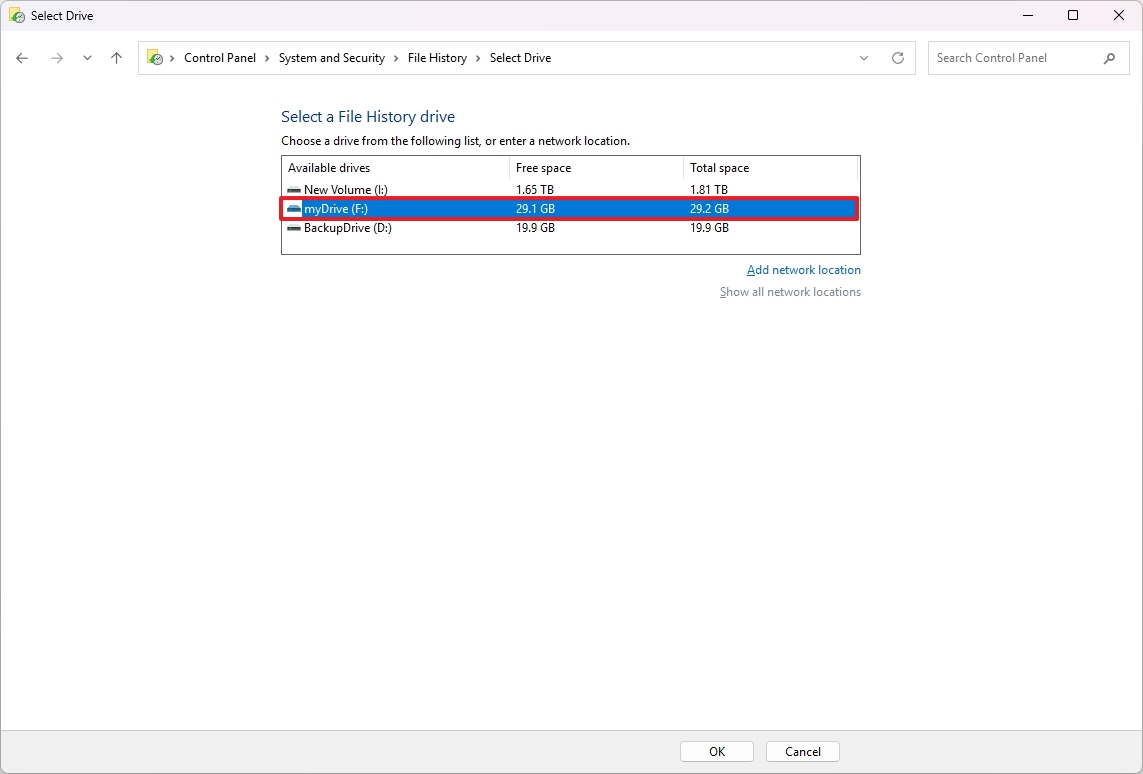
- Click the OK button.
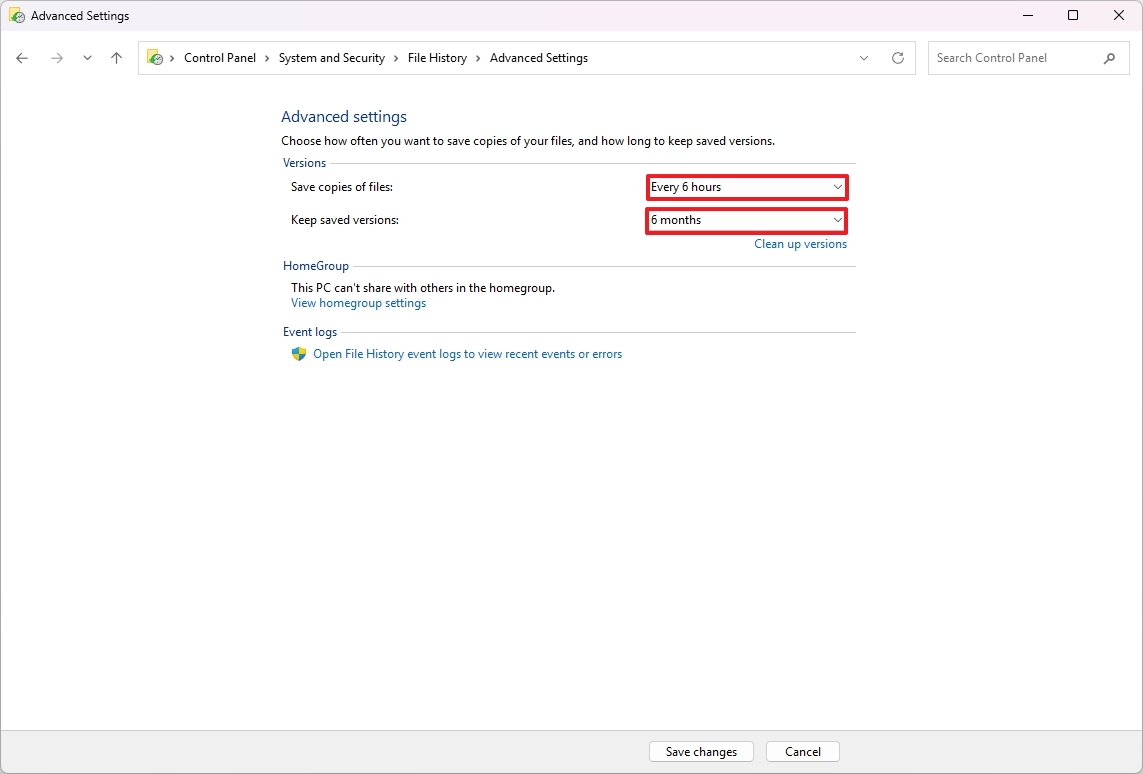
- (Optional) Click the Advanced settings option from the left pane.
- Choose how often File History saves copies of your files.
- Choose how long to keep saved copies of your files.
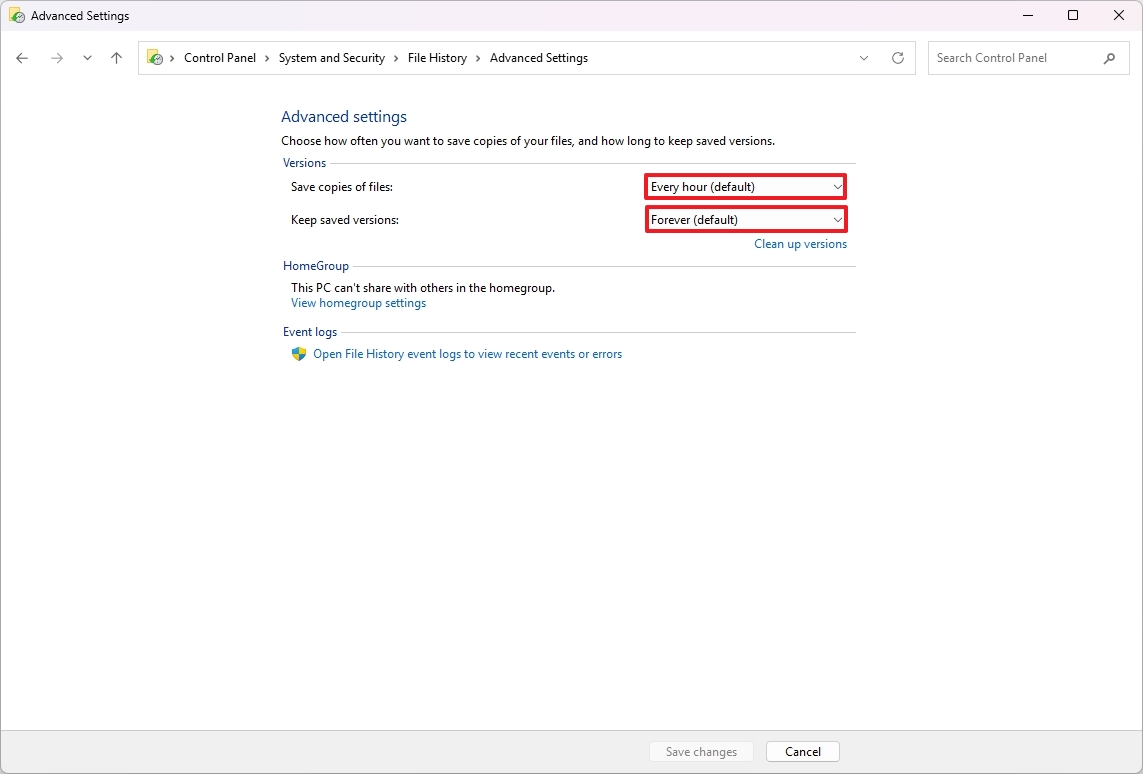
- Click the Save changes button.
- (Optional) Click the Exclude Folders option from the left pane.
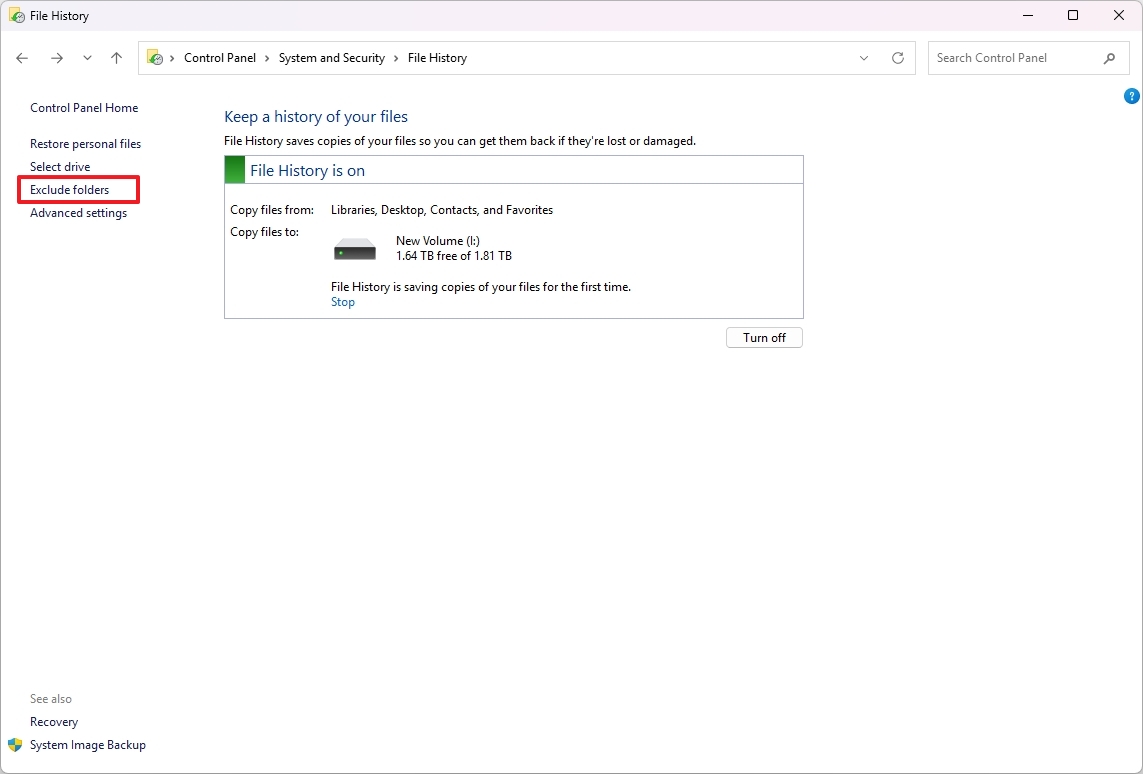
- Click the Add button.
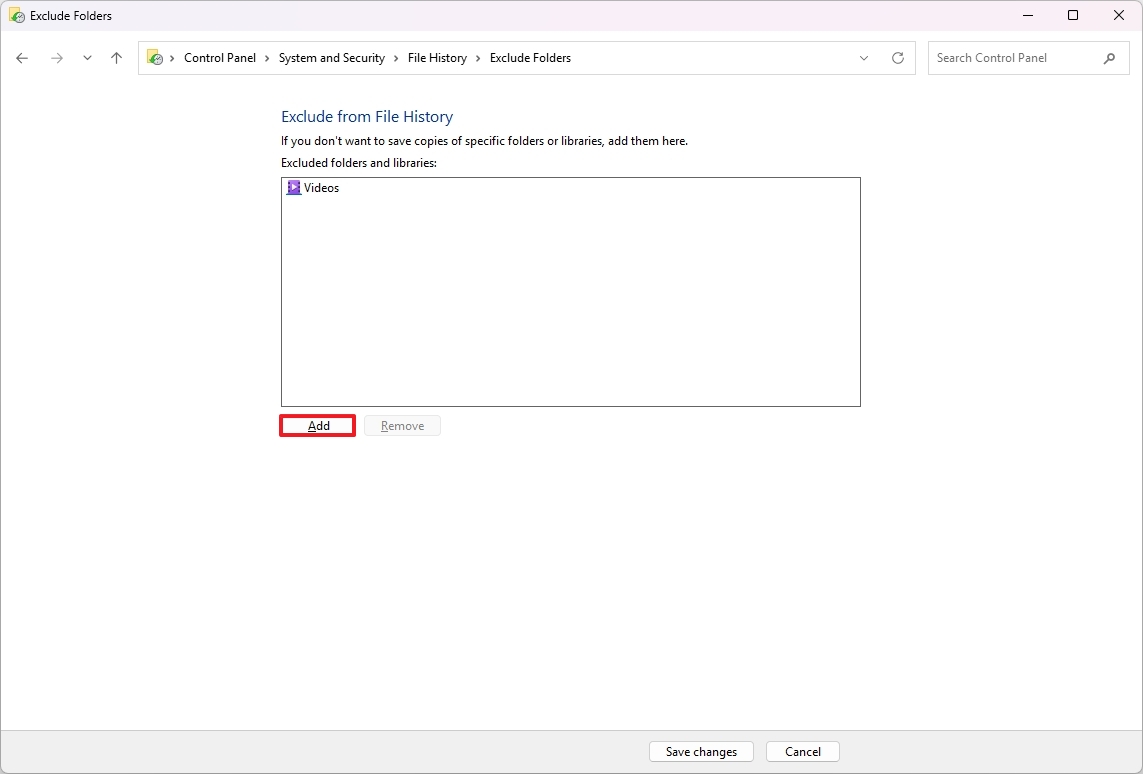
- Choose the folders to exclude from File History.
- Click the Select Folder button.
- Click the Save changes button.
Once you’ve finished the given tasks, the designated feature will automatically save your files according to the time intervals you specified.
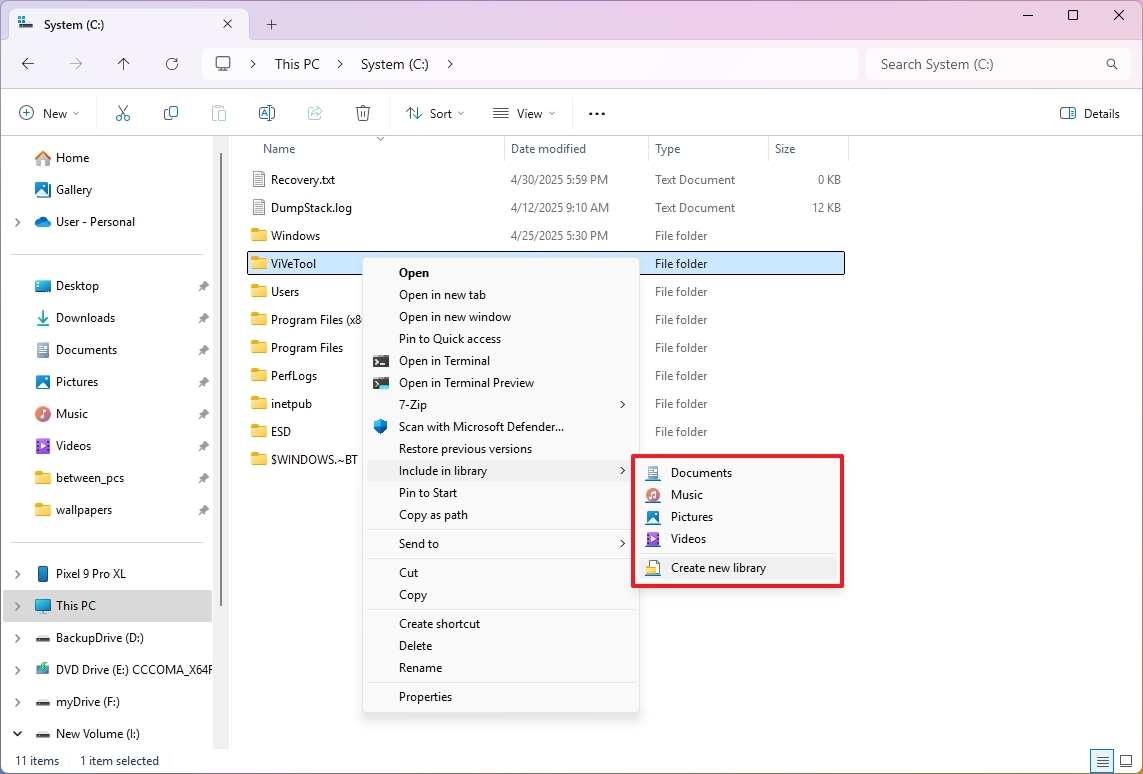
To ensure that File History backs up files stored in various locations, you’ll need to include those folders within the recognized “Libraries.” This can be done by right-clicking on the folder, selecting “Show more options,” followed by “Include in library” and choosing an existing library or creating a new one.
File History restoration
To restore documents, pictures, videos, and other file types using File History, use these steps:
- Open Start.
- Search Control Panel and select the top result to open the app.
- Click on System and Security.
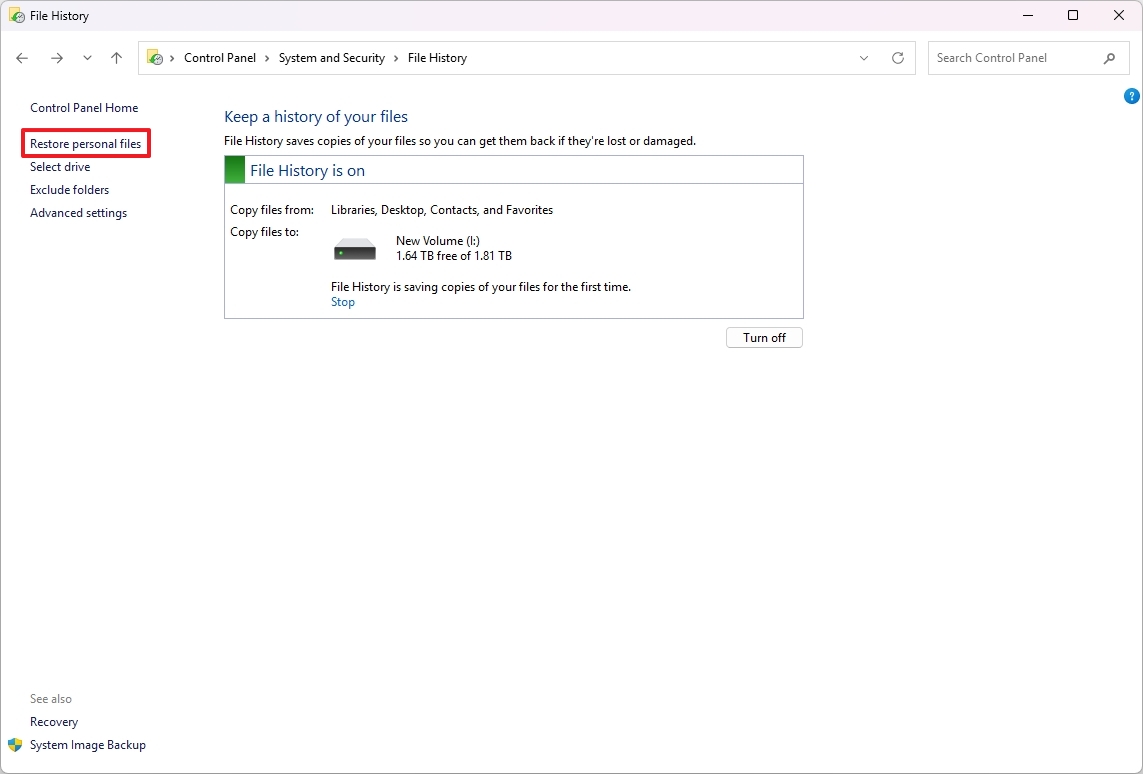
- Click on File History.
- Click the “Restore personal files” option from the left pane.
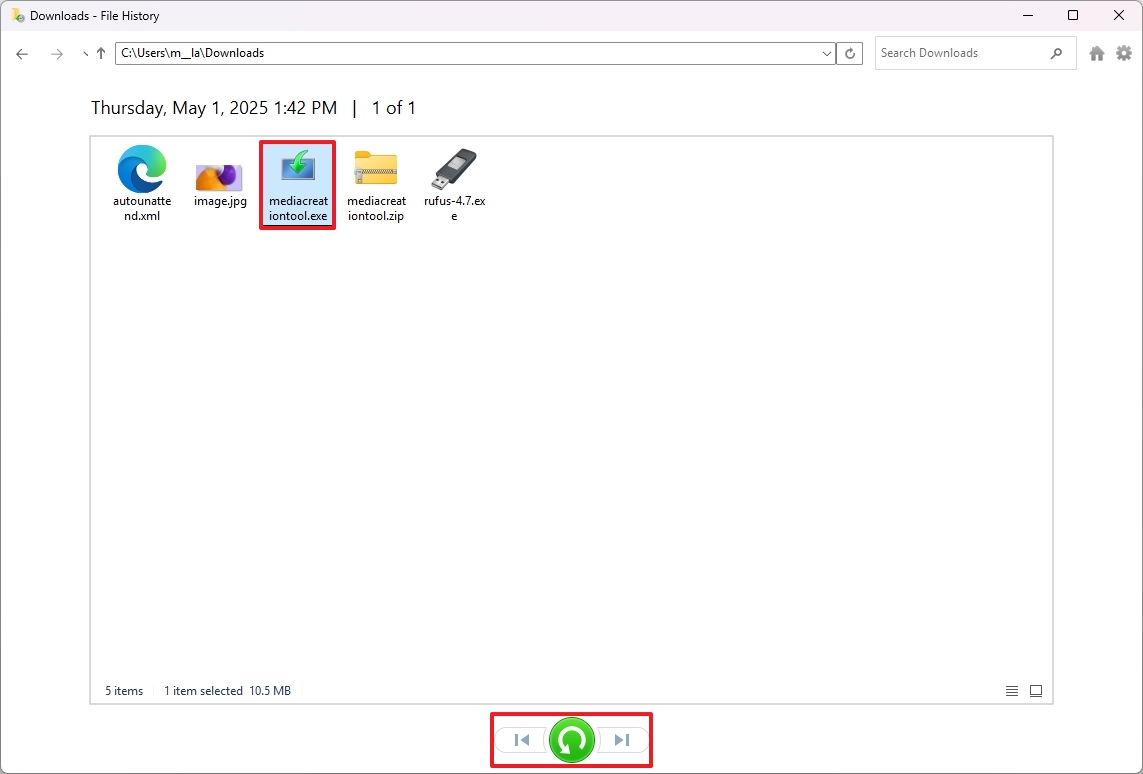
- Click the left and right buttons at the bottom to navigate the File History timeline.
- Choose the files you want to recover.
- Click the Restore button.
After following through with these instructions, you’ll find that either the original location or an alternate one will be graced with the restored file, depending on the method of restoration you’ve chosen.
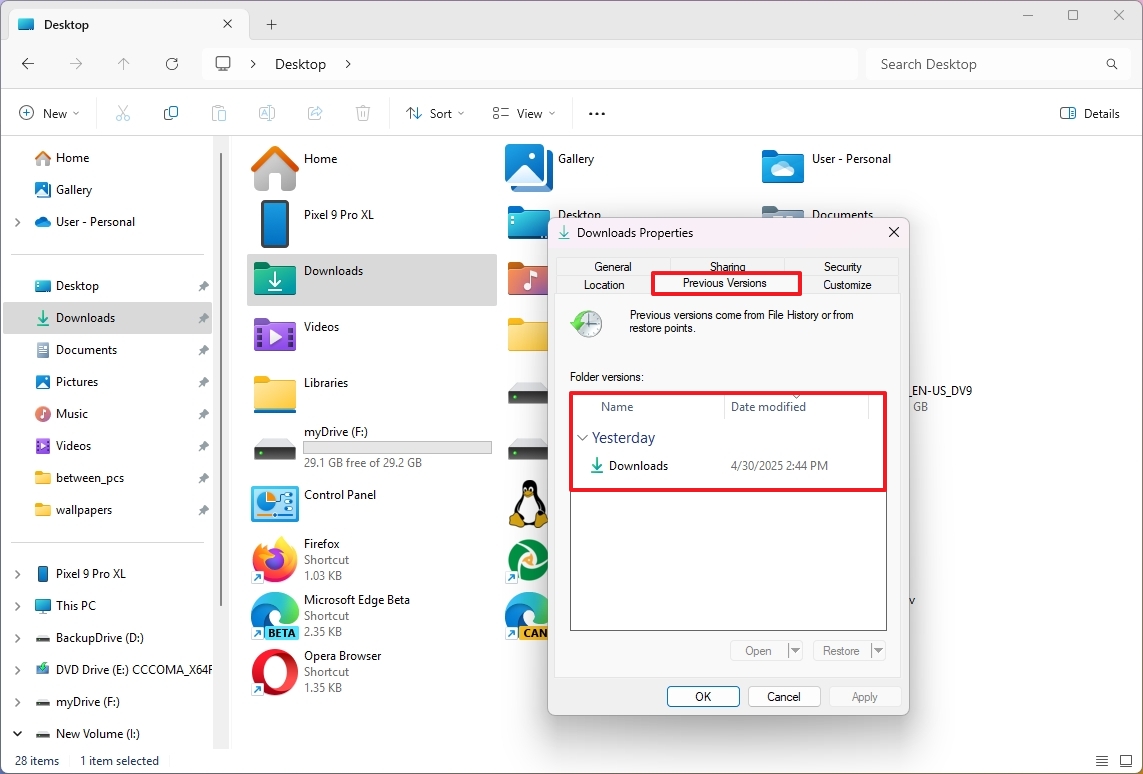
Additionally, you may opt to click the right mouse button on a folder, followed by selecting “Properties”. Once in the properties menu, navigate to the “Previous Versions” tab where you can choose and recover the desired version of the file.
File History storage cleanup
Should you find that your storage space is being used up rapidly due to backups, consider deleting older backup versions. Additionally, adjust the retention settings to a more frequent schedule to reduce the effect on your storage consumption.
To free up space used by File History, use these steps:
- Open Start.
- Search Control Panel and select the top result to open the app.
- Click on System and Security.
- Click on File History.
- Click the Advanced settings option from the left pane.
- Change the backup frequency to fewer times a day, depending on your current configuration.
- Change the backup retention to, for example, six months instead of forever.
- Click the “Clean up versions” option.
- Choose the files to delete according to their age.
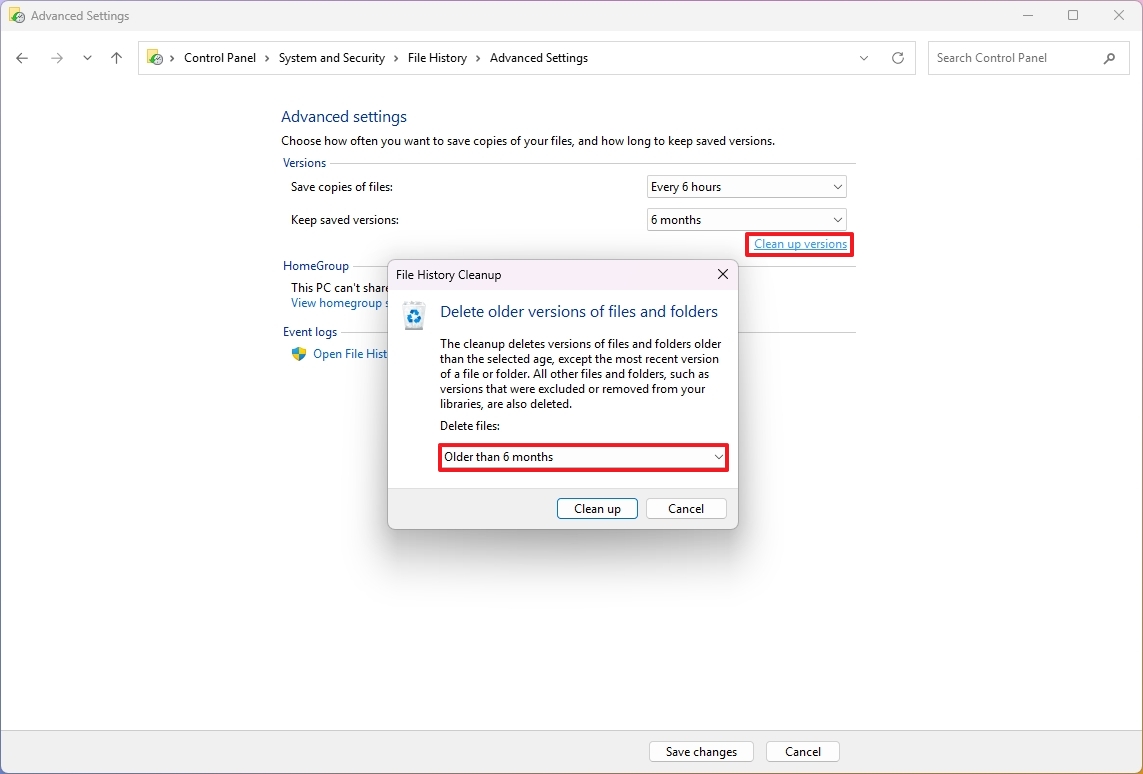
- Quick tip: The action can take a long time, depending on your selection.
- Click the Clean up button.
After you complete the steps, File History will reduce the storage usage in the backup drive.
While File Explorer is useful for safeguarding your data, it’s advisable not to rely on it as your main backup method because it won’t enable you to recover all your files in case of a fresh installation of the operating system on the same or another device.
Currently, Microsoft tends to favor OneDrive for storing data on the cloud, yet File History continues to be a useful tool for backing up your files locally.
In line with your data protection plan, frequently generate a complete system backup to ensure swift recovery in the event of a severe malfunction or loss of data.
More resources
Read More
- Masters Toronto 2025: Everything You Need to Know
- We Loved Both of These Classic Sci-Fi Films (But They’re Pretty Much the Same Movie)
- Valorant Champions 2025: Paris Set to Host Esports’ Premier Event Across Two Iconic Venues
- ‘The budget card to beat right now’ — Radeon RX 9060 XT reviews are in, and it looks like a win for AMD
- Forza Horizon 5 Update Available Now, Includes Several PS5-Specific Fixes
- Gold Rate Forecast
- Street Fighter 6 Game-Key Card on Switch 2 is Considered to be a Digital Copy by Capcom
- The Lowdown on Labubu: What to Know About the Viral Toy
- Karate Kid: Legends Hits Important Global Box Office Milestone, Showing Promise Despite 59% RT Score
- Mario Kart World Sold More Than 780,000 Physical Copies in Japan in First Three Days
2025-05-02 16:39