As a devoted fan, I’m thrilled to share one of the standout aspects in the Commander mode for Ready or Not: the Officer Traits. Each of my AI-controlled squad mates in this setting comes equipped with a unique trait. The array of traits is vast, ranging from those that boost survival chances to ones that facilitate apprehension. Understanding each trait’s function and behavior is key! Here, I’ll walk you through our comprehensive guide on all Officer Traits.
Officer Traits Guide | Ready or Not
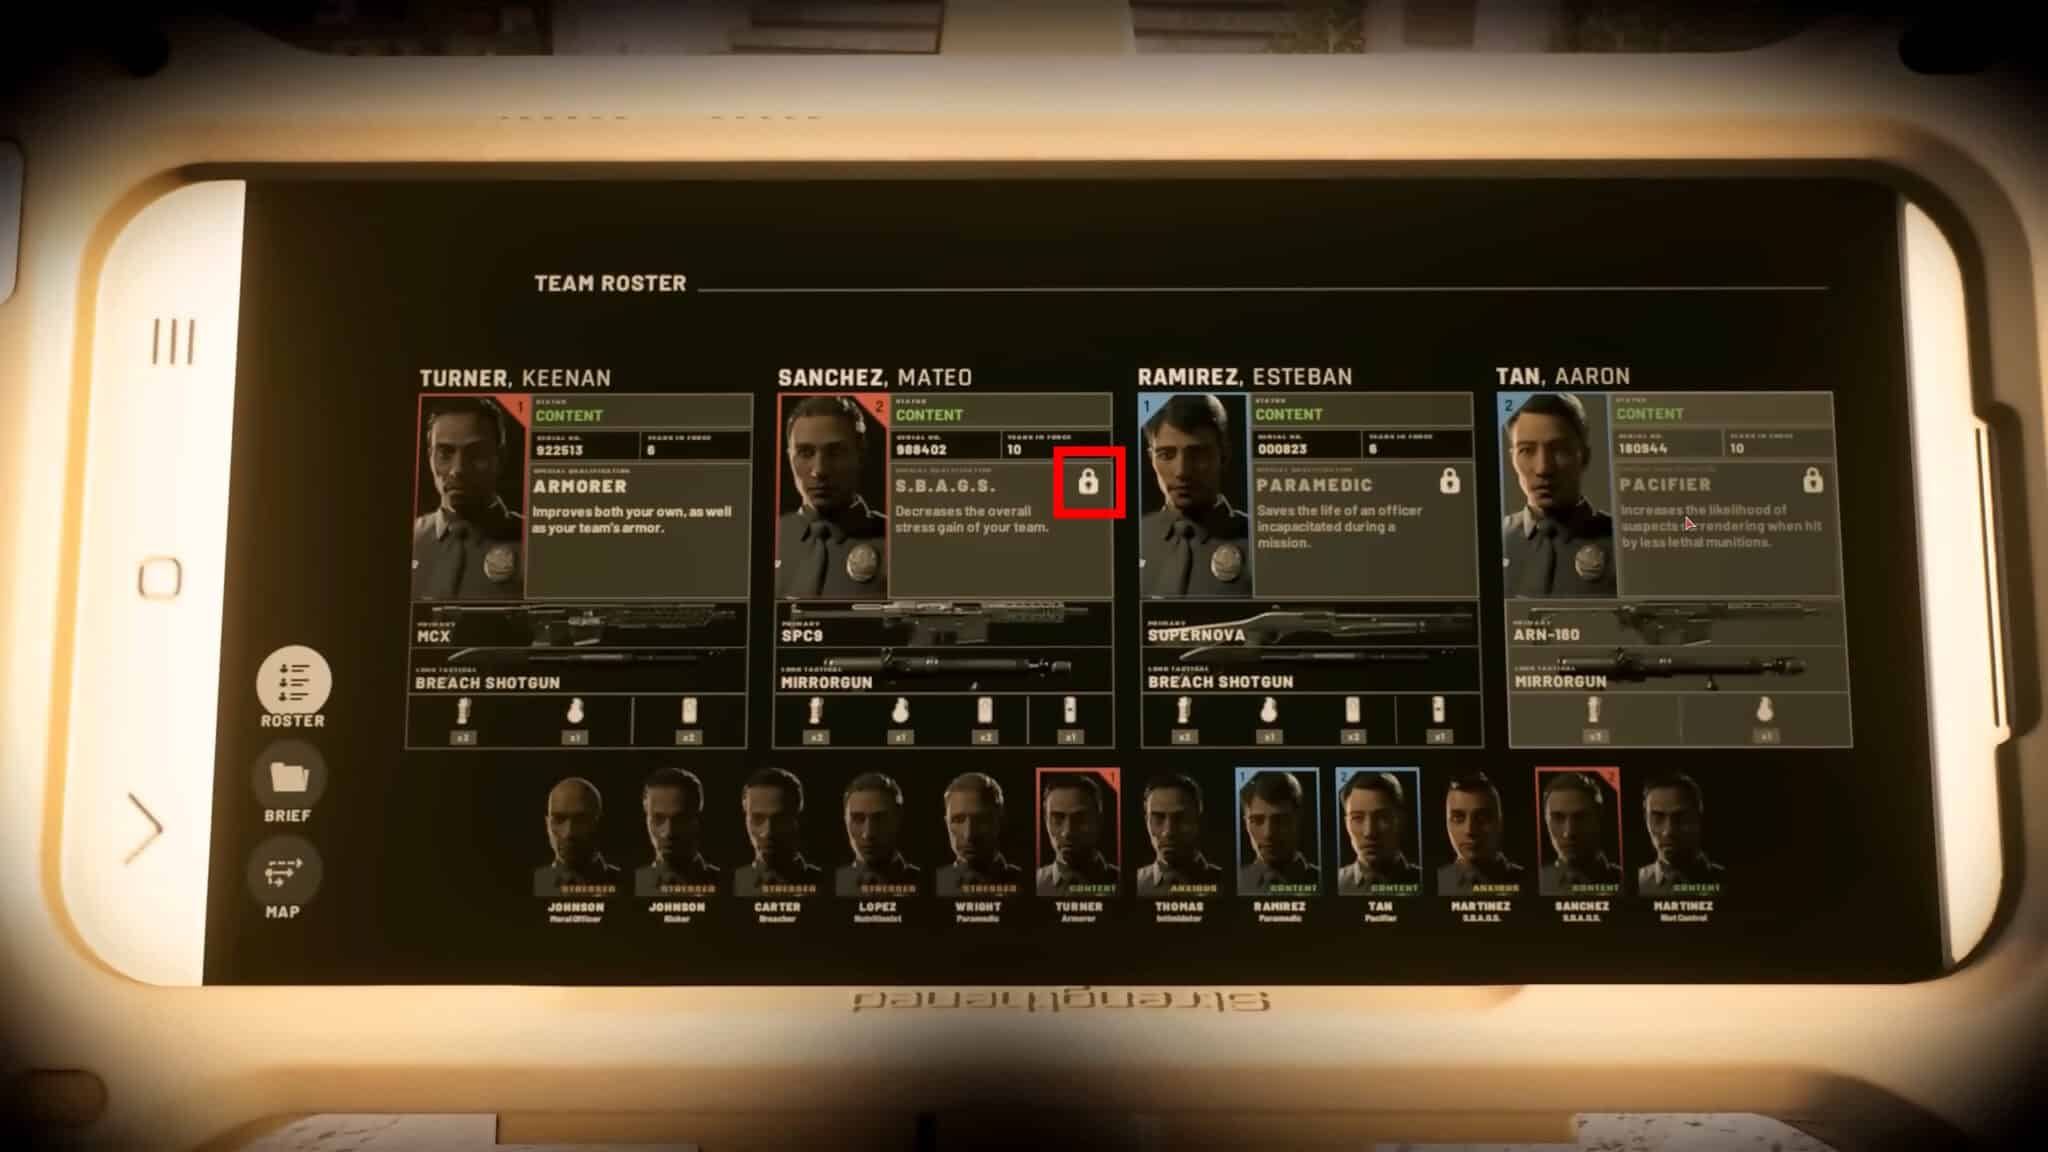
To begin with, let’s discuss the method for revealing the Officer Traits. Initially, during the campaign or upon hiring a new officer, you will observe that their trait is locked, as indicated by the padlock icon depicted previously.
You’ll discover these characteristics becoming available once you’ve finished two missions alongside an officer from your current team. However, only one officer’s traits can be unlocked at a time, so if you have four officers in your team, it will require a total of five missions to fully unveil all their characteristics.
After being activated, these traits will continuously influence your whole team for the duration that the officer carrying them is present in the squad. Thus, when selecting officers in Commander mode, it’s essential to consider their traits, as they can significantly impact the gameplay.
Furthermore, certain attributes can combine to enhance their impact. For instance, if you have two units possessing the Armorer trait, the effect will be more pronounced compared to just one unit. Yet, not all traits behave this way, so it’s essential to bear this possibility in mind when strategizing.
After establishing the fundamentals, let’s delve into the specific impacts of each Officer Trait within the game, so you’ll be well-informed about their functions!
List of All Officer Traits

- Armorer – Increases the durability of you and your squad’s armor by 50%. Also increases damage reduction for armor by +5%. Doesn’t stack.
- Breacher – Increase damage to the Morale of civilians and suspects whenever you use any breaching method, such as Battering Rams or kicking doors. This makes them less likely to act out of line. Stacks up to 4 times: +25%, +50%, +65%, +75%.
- Intimidator – Makes it so that civilians and suspects passively take Morale damage whenever they look at you or squad members. Stacks twice: +50%, +100%.
- Kicker – Allows you and squad members to open doors instantly with a single kick. Doesn’t stack.
- Moral Officer – Reduces Stress for your officers whenever you arrest civilians or suspects. Only works if they are alive, not dead or unconscious. Stacks 4 times: +50%, +100%, +130%, +150%.
- Negotiator – Increases the chance of civilians and suspects surrendering on your and your squad’s first Compliance yell. Stacks 4 times: +25%, +50%, +55%, +60%.
- Nutritionist – Increases the Health of you and your entire squad. Stacks up to 4 times: +25%, +30%, +33%, +35%.
- Pacifier – Gives a chance for suspects and civilians to instantly surrender when hit by less-than-lethal ammo and grenades. Stacks up to 4 times: +25%, +50%, +55%, +60%.
- Paramedic – Has a 50% chance to prevent a squad member from being Killed In Action. Instead, they will be Hospitalized so they can recover and resume work. Can stack up to 4 times, with each stack giving a 50% chance to 1 more officer.
- Riot Control – Extends the duration of Stuns from grenades and less-than-lethal ammo dealt by you and your squad. Stacks up to 4 times: +33%, +66%, +75%, +80%.
- S.B.A.G.S – Reduces Stress for your entire squad. Seems not to activate in the Elephant mission. Stacks up to 4 times: -20%, -35%, -40%, -50% Stress.
- Veteran – Improves accuracy and reaction time for the squad. Stacks up to 4 times: +15%, +30%, +35%, +40%.
Officer Traits Recommendations

After discussing the impacts of each Officer Trait within Ready or Not, let’s round up this guide by offering some suggestions.
You may have observed that when you accumulate multiple instances of a trait, there’s a point where the benefits start to decrease significantly. To maximize efficiency, it’s usually best to limit yourself to stacking no more than two instances of a trait, except for Paramedic. The reduced returns make it generally more advantageous to have a variety of traits rather than piling up multiple instances of the same one beyond the second stack.
Furthermore, it’s strongly advised to include an Armorer and a Nutritionist as part of your team. Their combined contributions significantly enhance the overall resilience of your group, potentially transforming the game dynamic, particularly for those who are just starting out!
With those two items chosen, you have 2 more slots open based on the gameplay approach you prefer. For a non-lethal style, consider choosing either 2 Pacifiers or one Pacifier and one Intimidator/Negotiator. If you’re aiming for a lethal playstyle, we suggest selecting 2 Veterans to enhance your squad’s precision.
Read More
- 4 TV Shows To Watch While You Wait for Wednesday Season 3
- Gold Rate Forecast
- 10 Most Memorable Batman Covers
- All 6 Takopi’s Original Sin Episodes, Ranked
- 40 Inspiring Optimus Prime Quotes
- PlayStation Plus Game Catalog and Classics Catalog lineup for July 2025 announced
- Every Creepy Clown in American Horror Story Ranked
- Best X-Men Movies (September 2025)
- 10 Best Buffy the Vampire Slayer Characters Ranked
- 10 Best Connie Episodes of King of the Hill
2025-07-17 04:36