On Windows 11 (and 10), it’s possible to control the storage usage per user on your computer using a feature called Disk Quotas. In this tutorial, I will walk you through the process of setting it up.
The Disk Quota feature, which has been around for some time, enables you to regulate the amount of storage space an individual user can occupy on a drive. This feature is particularly beneficial in situations where you want to prevent users from overwhelming the hard drive with their files or to guarantee that a particular user has only the necessary space for their tasks.
It’s worth mentioning that the main purpose of this function is to assist network administrators in managing storage across devices set up for multiple users. However, it’s accessible to everyone. Additionally, please be aware that this functionality works exclusively with drives that have been formatted using the NTFS file system.
In this step-by-step tutorial, I’ll walk you through the process of setting up the Disk Quotas function on your device, whether you’re using Windows 11 or the latest version of Windows 10. Here’s how to do it!
How to set up Disk Quotas for all users on Windows 11
To configure Disk Quotas to limit storage usage for all users, use these steps:
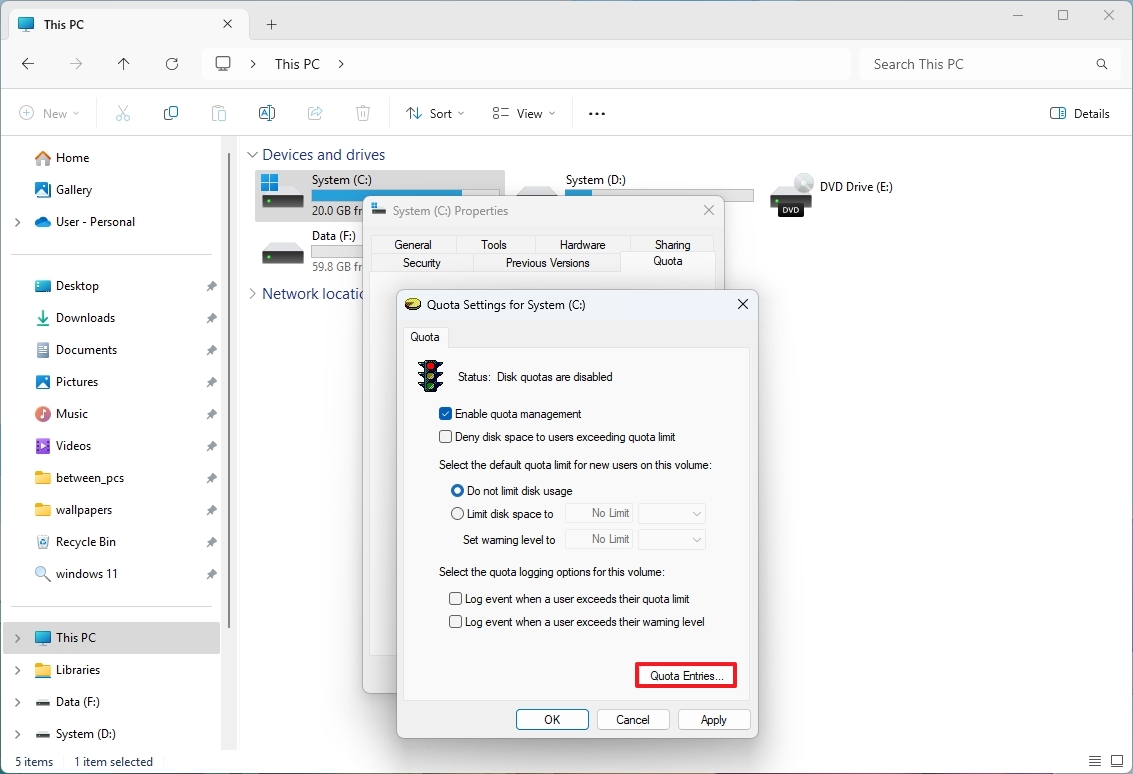
- Open File Explorer.
- Click on This PC from the left side.
- Right-click the main drive and choose the Properties option.
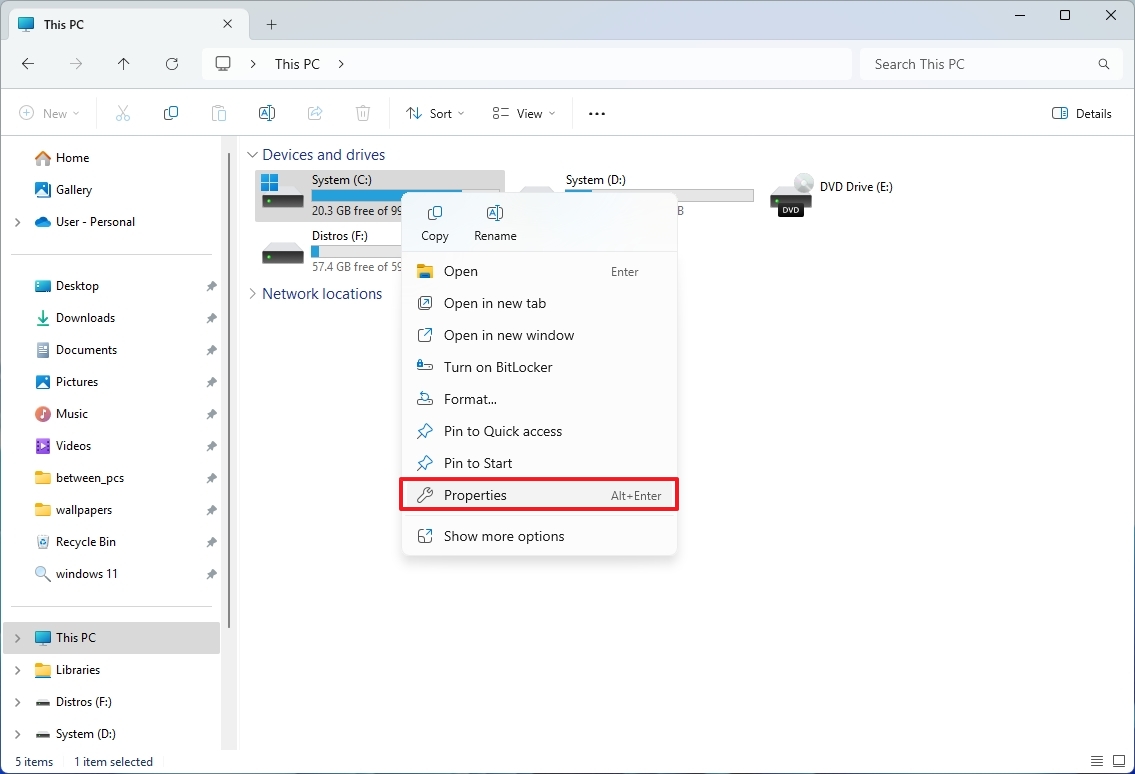
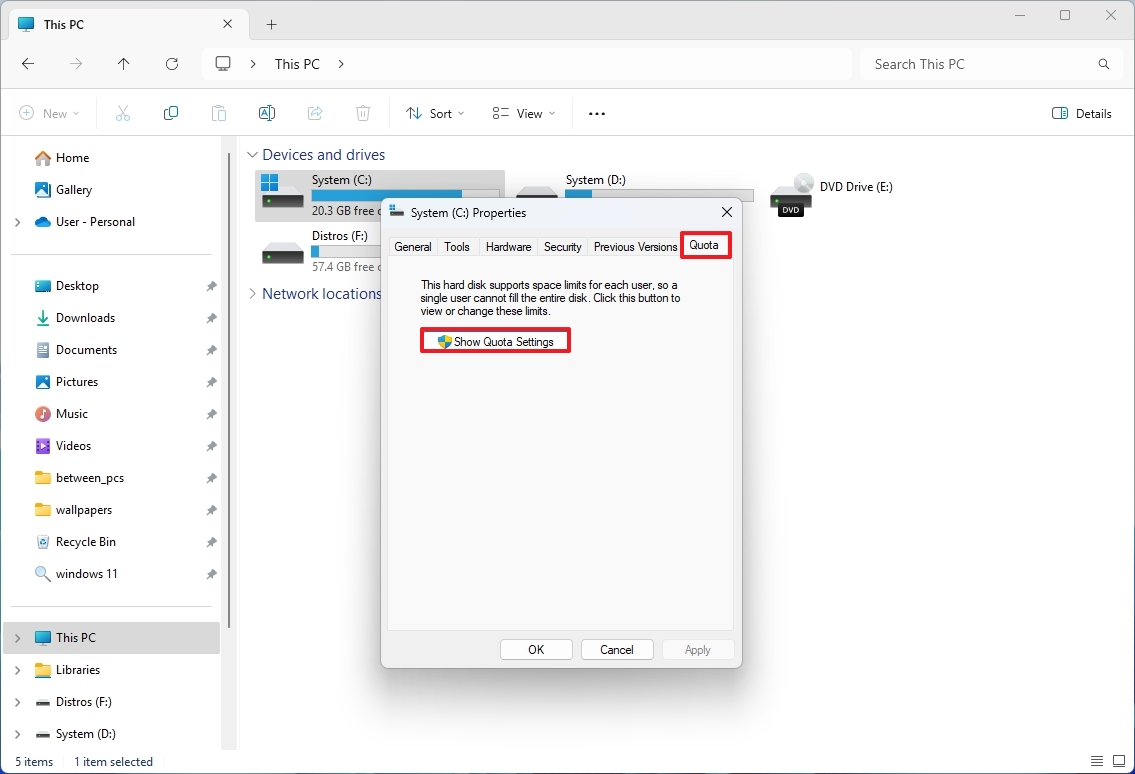
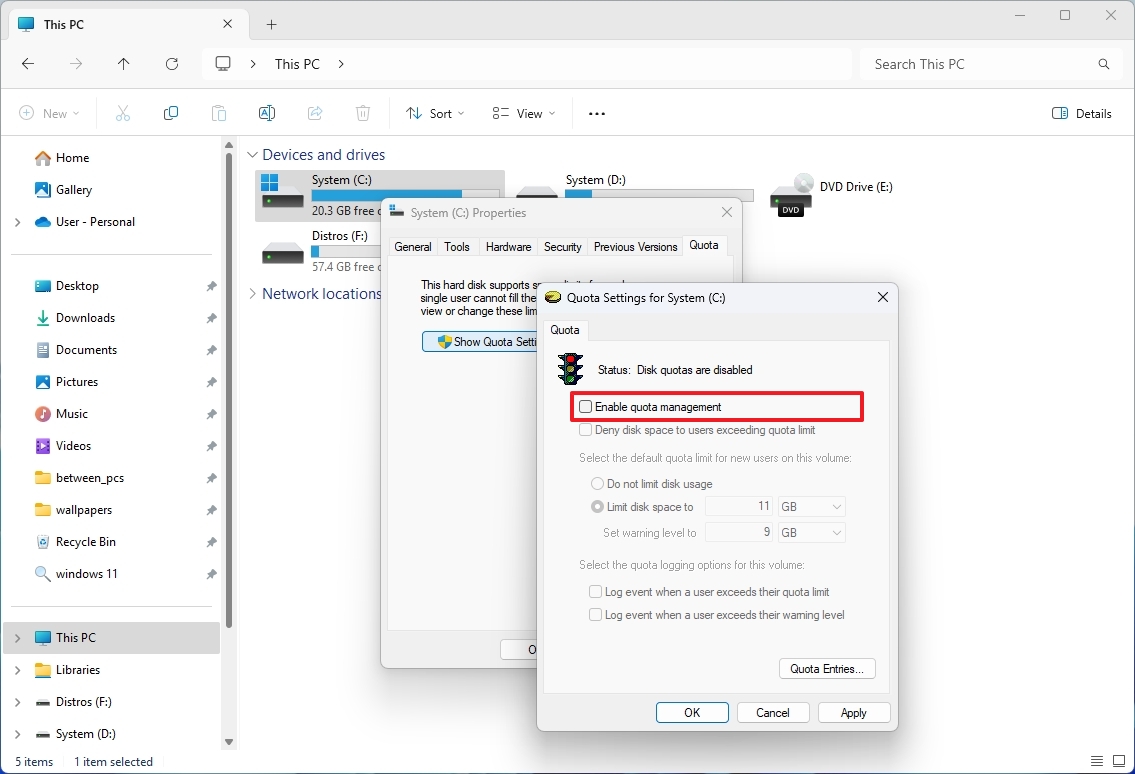
- Click the Quota tab.
- Click the “Show Quota Settings” button.
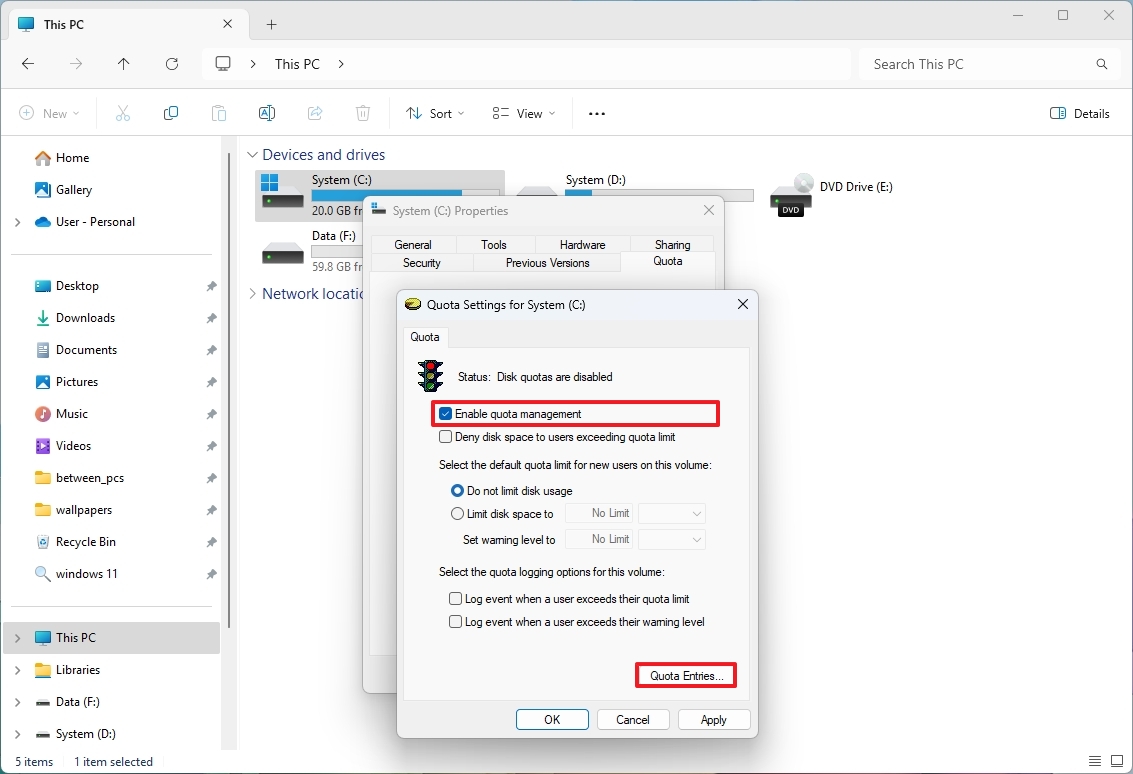
- Check the “Enable quota management” option.
- (Optional) Check the “Deny disk space to users exceeding quota” limit option.
- Select the “Limit disk space to” option, confirm the storage allowance for all users, and specify the storage unit.
- (Optional) Confirm the storage amount in the “Set warning level to” setting to trigger a warning when users are getting closer to their limit.
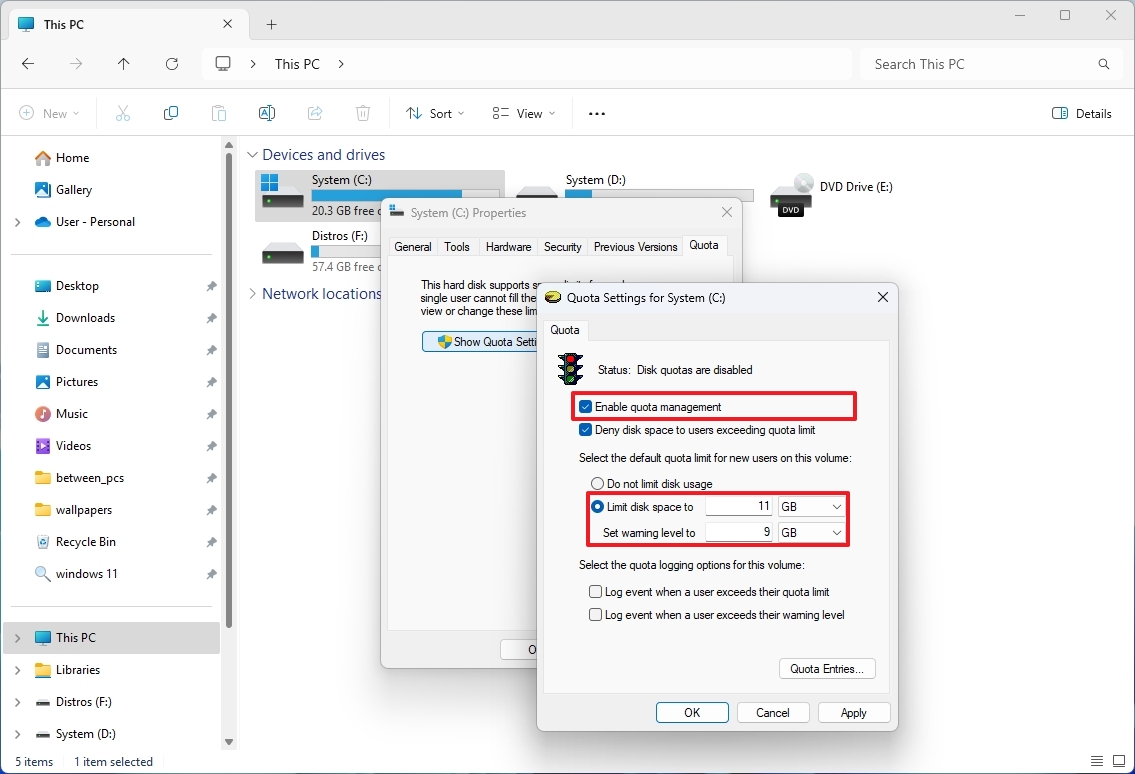
- Quick note: You want to put this setting lower than the total amount.
- Click the Apply button.
- Click the OK button.
After finishing the steps, the settings will take effect, resulting in all users on the computer sharing a common, predetermined storage limit.
Disable Disk Quotas for all users
To undo the changes to disable Disk Quotas, use these steps:
- Open File Explorer.
- Click on This PC from the left side.
- Right-click the main drive and choose the Properties option.
- Click the Quota tab.
- Click the “Show Quota Settings” button.
- Clear the “Enable quota management” option.
- Click the Apply button.
- Click the OK button.
Once you’ve finished the given tasks, the specific feature will no longer be active, granting unrestricted access to the entire storage capacity for all users.
How to set up Disk Quotas for a specific user on Windows 11
To configure Disk Quotas for a specific user, use these steps:
- Open File Explorer.
- Click on This PC from the left side.
- Right-click the main drive and choose the Properties option.
- Click the Quota tab.
- Click the “Show Quota Settings” button.
- Check the “Enable quota management” option.
- (Optional) Check the “Deny disk space to users exceeding quota” limit option.
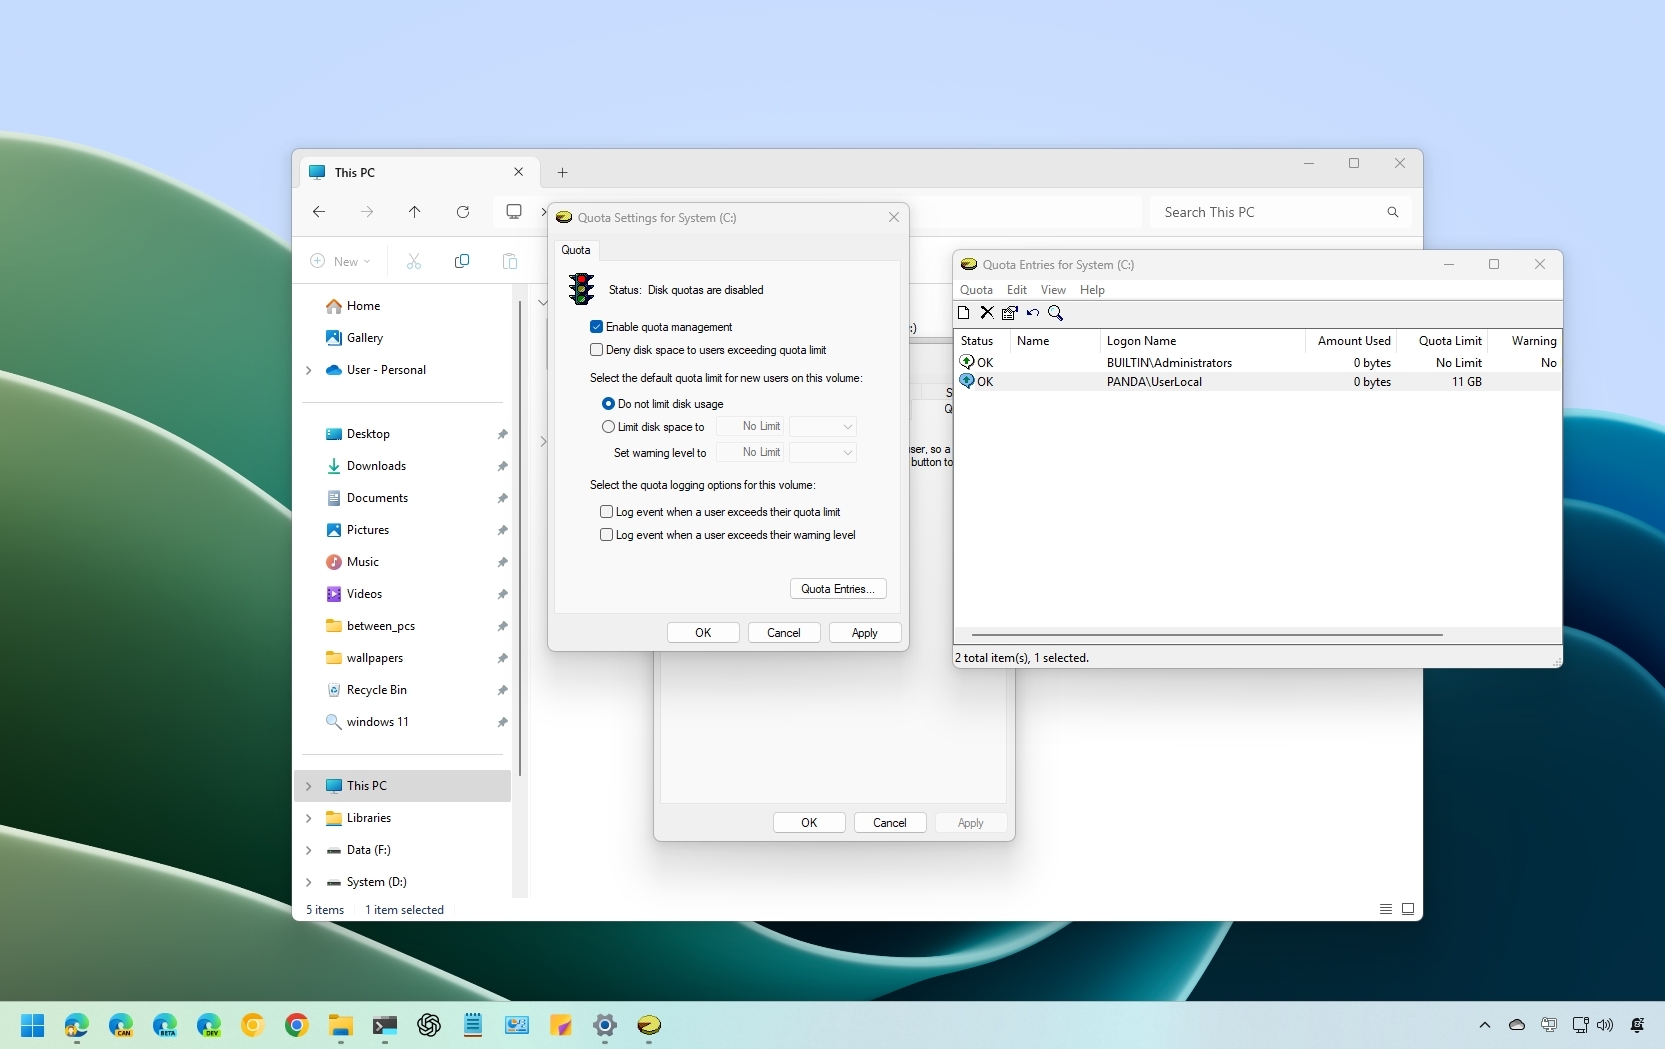
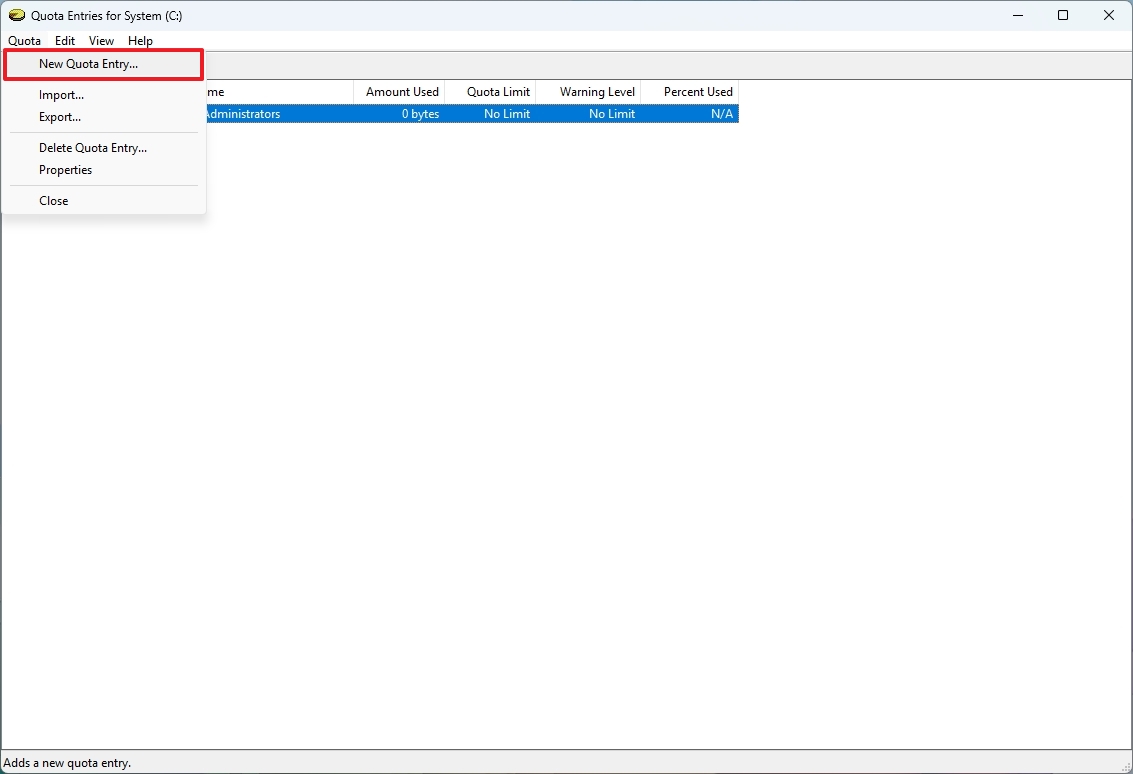
- Click the Quota Entries button.
- Open the Quota menu and choose the “New Quota Entry” option.
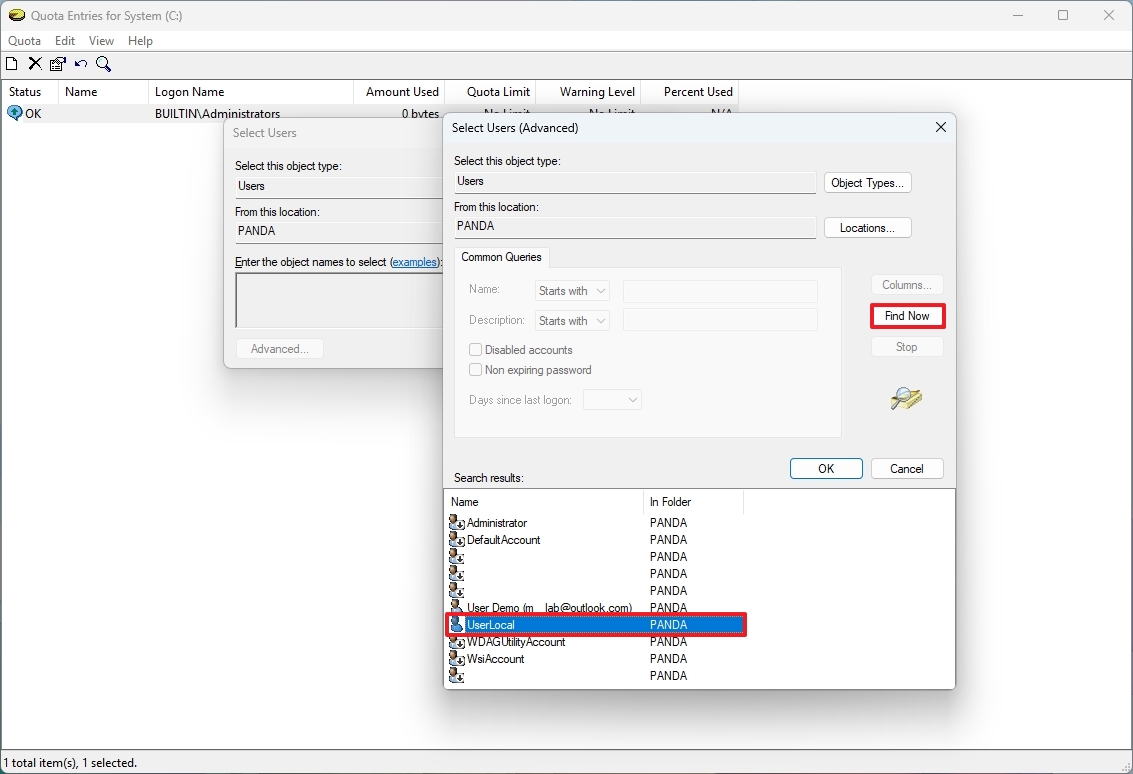
- Click the OK button.
- Click the OK button again.
- Select the “Limit disk space to” option, confirm the storage allowance for all users, and specify the storage unit.
- (Optional) Confirm the storage amount in the “Set warning level to” setting to trigger a warning when users are getting closer to their limit.
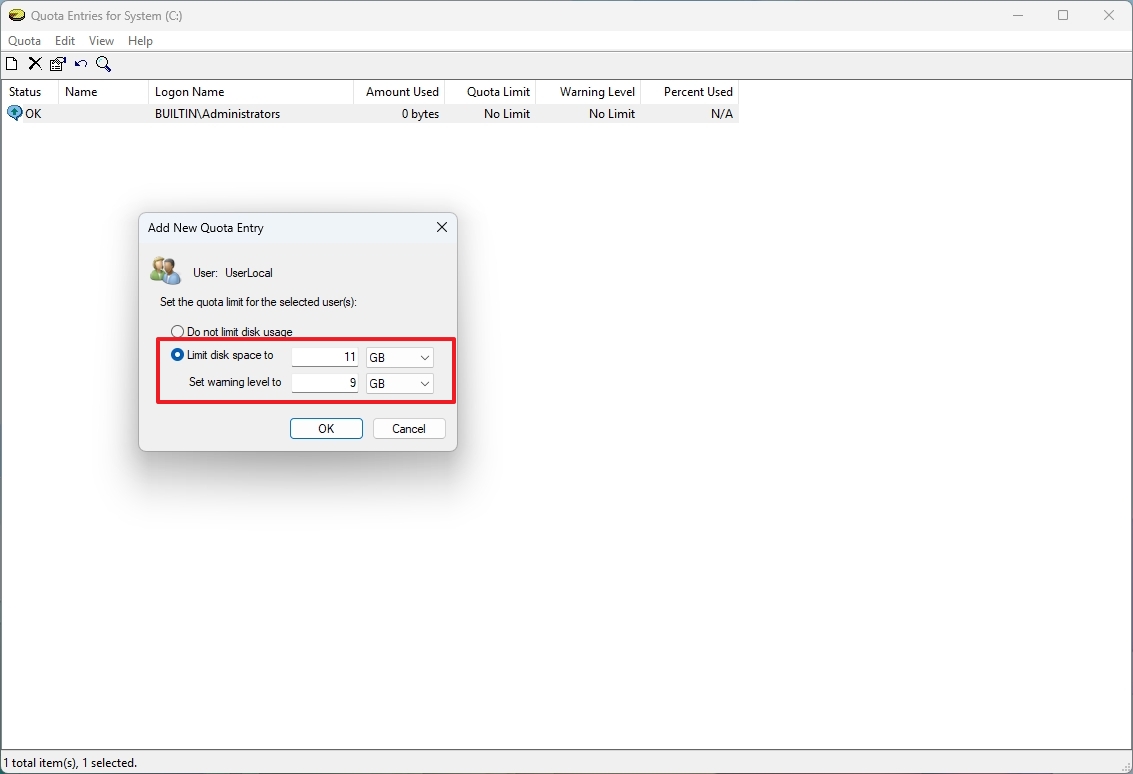
- Click the OK button.
After finishing the given procedures, a storage restriction will be set for the designated user. To manage storage limitations for additional users on your device, you might need to carry out these steps again.
Disable Disk Quotas for a specific user
To disable Disk Quotas for one user, use these steps:
- Open File Explorer.
- Click on This PC from the left side.
- Right-click the main drive and choose the Properties option.
- Click the Quota tab.
- Click the Quota Entries button.
- Right-click the user and select the Properties option.
- Choose the “Do not limit disk usage” option.
- Click the Apply button.
- Click the OK button.
- (Optional) Repeat steps 4 through 7 to disable the feature for other users.
- Close the Quota Entries app.
- (Optional) Clear the “Enable quota management” option to disable the feature as necessary.
- Click the Apply button.
- Click the OK button.
Once the procedures are finished, there will be no more storage file restrictions for the user on your computer.
How to check storage usage for users using Disk Quotas
To check the storage usage for everyone configured on the computer, use these steps:
- Open File Explorer.
- Click on This PC from the left side.
- Right-click the main drive and choose the Properties option.
- Confirm the storage usage next to the user name.
- Confirm the storage usage next to the user name.
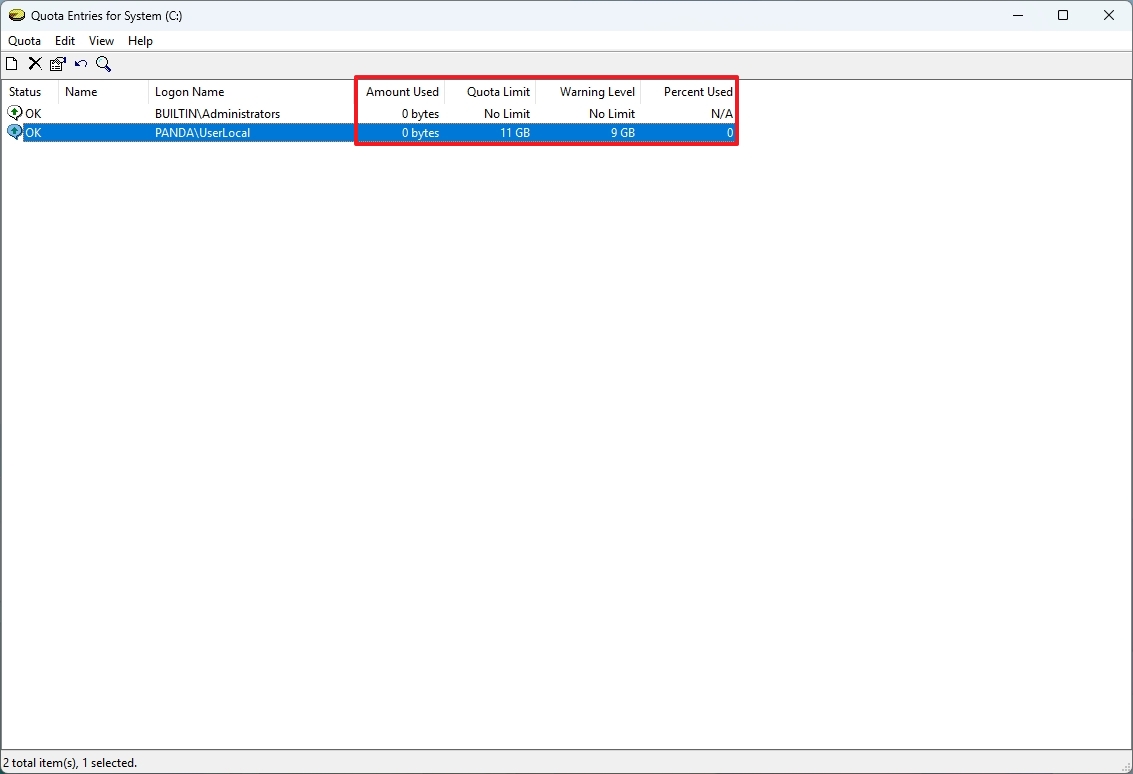
On the application, you can determine the amount of storage being used and the current limits.
To apply Disk Quotas, the procedure is simple, however, ensure that your drive has been formatted using the NTFS file system. If you opt for FAT32 or exFAT instead, this feature will not be accessible to you.
1. To verify the file system, navigate to “File Explorer > This PC“, right-click on the drive, then select the “Properties” option for confirmation.
OR
2. In “File Explorer > This PC“, right-click your drive and choose the “Properties” option to confirm the file system.
As a user, I’ve come to realize that the Disk Quota settings are tailored for each drive individually. This means that I need to personally adjust the Disk Quota settings for every single drive in my system.
If you’re having trouble using this feature, you can always open Event Viewer > Windows Logs > Application, check the errors related to disk quotas and research online to find a solution. Restarting the computer usually fixes most issues.
Finally, only administrator users can manage this feature.
More resources
Read More
- Forza Horizon 5 Update Available Now, Includes Several PS5-Specific Fixes
- Gold Rate Forecast
- ‘The budget card to beat right now’ — Radeon RX 9060 XT reviews are in, and it looks like a win for AMD
- Masters Toronto 2025: Everything You Need to Know
- We Loved Both of These Classic Sci-Fi Films (But They’re Pretty Much the Same Movie)
- Valorant Champions 2025: Paris Set to Host Esports’ Premier Event Across Two Iconic Venues
- Karate Kid: Legends Hits Important Global Box Office Milestone, Showing Promise Despite 59% RT Score
- Eddie Murphy Reveals the Role That Defines His Hollywood Career
- Discover the New Psion Subclasses in D&D’s Latest Unearthed Arcana!
- Street Fighter 6 Game-Key Card on Switch 2 is Considered to be a Digital Copy by Capcom
2025-02-14 15:22