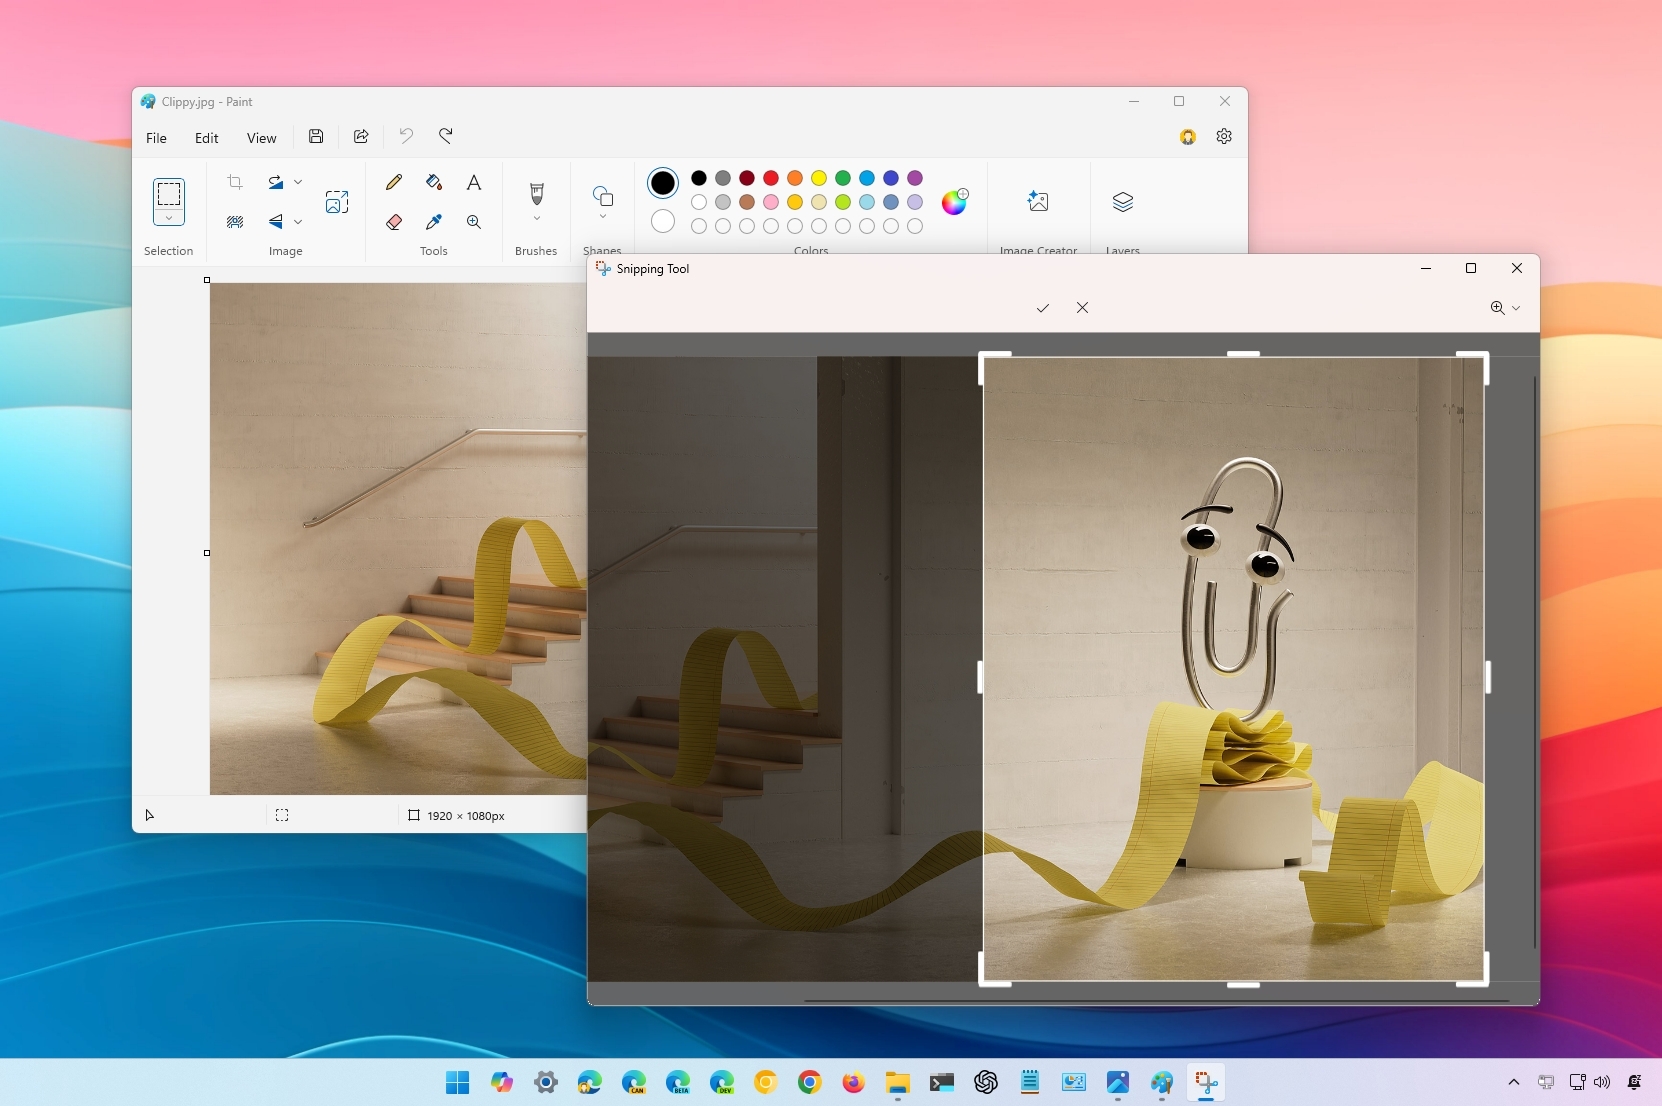
As a seasoned tech enthusiast with years of experience under my belt, I find it fascinating how versatile Windows 11 can be when it comes to image editing tasks like cropping. Although AI-powered tools for image manipulation are all the rage these days, sometimes, simplicity and built-in solutions are the way to go.
Even with AI tools available for partial image removal, it’s worth considering simple cropping techniques when dealing with unwanted areas or elements in an image. If you’re using a Windows 11 computer, there are several methods to trim, remove unnecessary parts, or resize your images effectively.
Regardless of the reason, Windows 11 doesn’t include a native cropping tool, but you can use built-in applications, such as the Snipping Tool, Photos, and even the Paint app, to complete this task.
In this step-by-step tutorial, I’ll walk you through various methods to trim an image file directly with built-in tools in Windows 11, without requiring any external software.
How to crop a picture from Snipping Tool
To crop an image file with the Snipping Tool on Windows 11, use these steps:
- Open File Explorer.
- Open the folder with the image to crop.
- Right-click the image, select the “Open with” menu, and choose the Snipping Tool option.
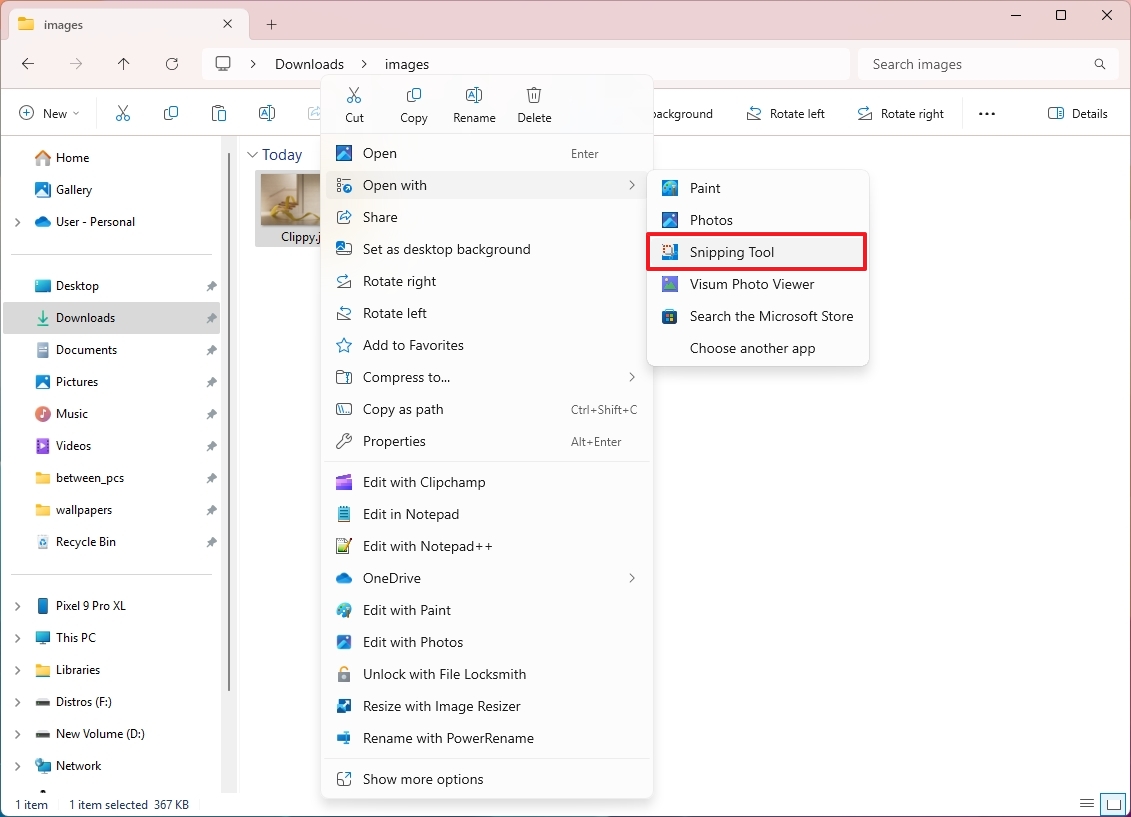
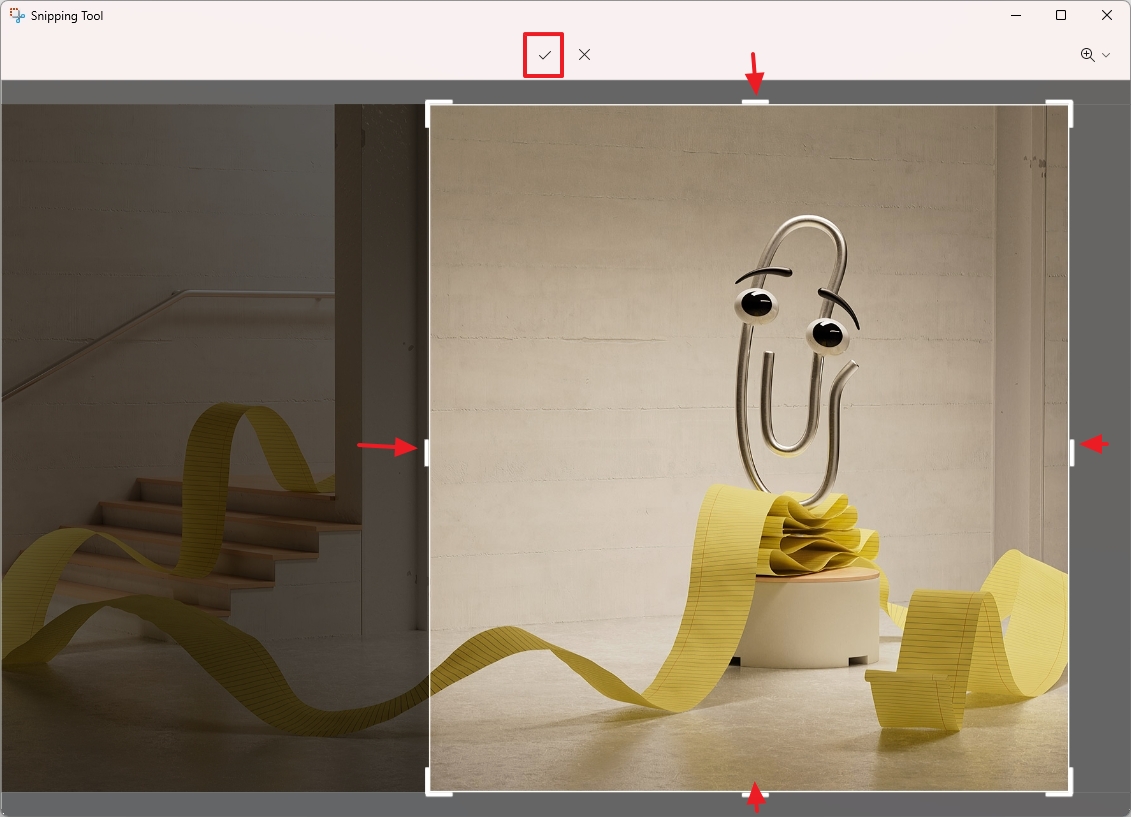
- Click the Image Crop button in the toolbar.

- Drag the borders inwards using the mouse to crop the image.
- Click the Apply button.
- Click the “Save as” button from the top-right.
- Select the folder location.
- Click the Save button.
Once you complete the steps, a copy of the image will be created with the new modifications.
How to crop a picture from Photos
To crop a picture with the Photos app, use these steps:
- Open the Photos app.
- Open the picture you want to crop.
- Click the Edit button from the top-left corner.

- Click the Crop tool from the toolbar.
- (Option 1) Drag the borders inwards using the mouse to crop the image.
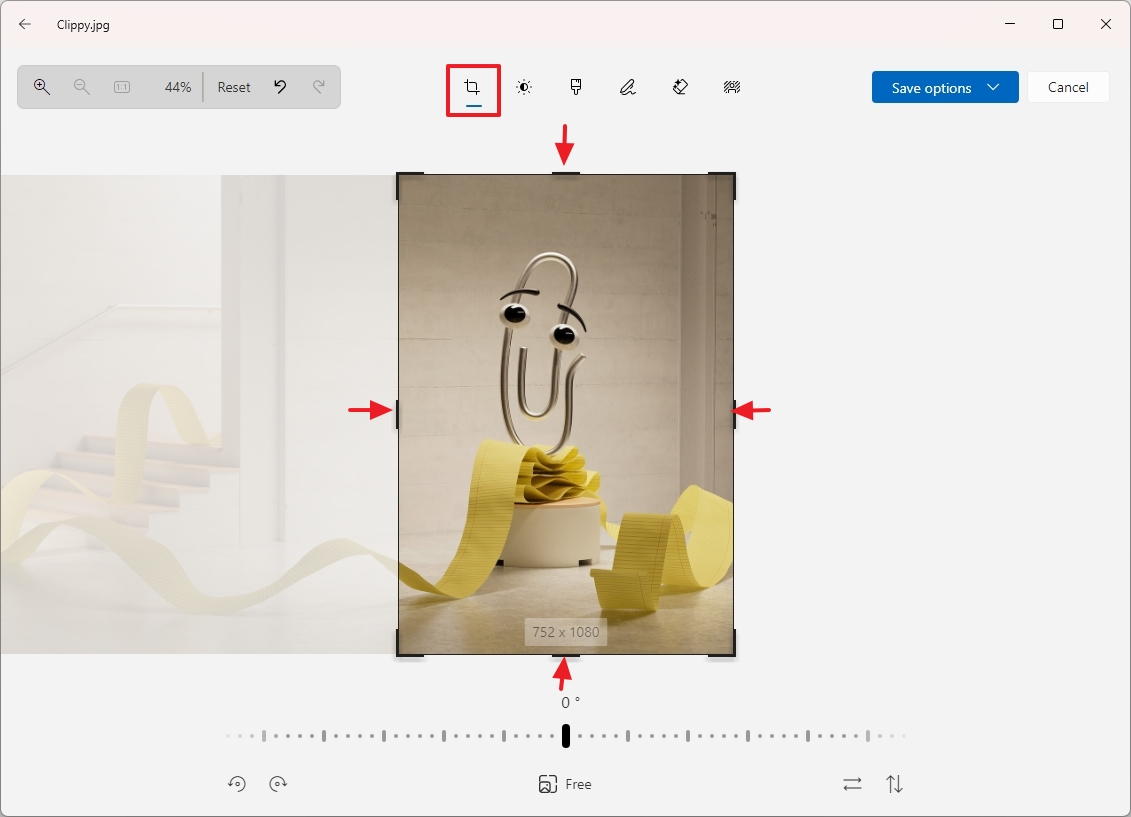
- (Option 2) Click the Free button.
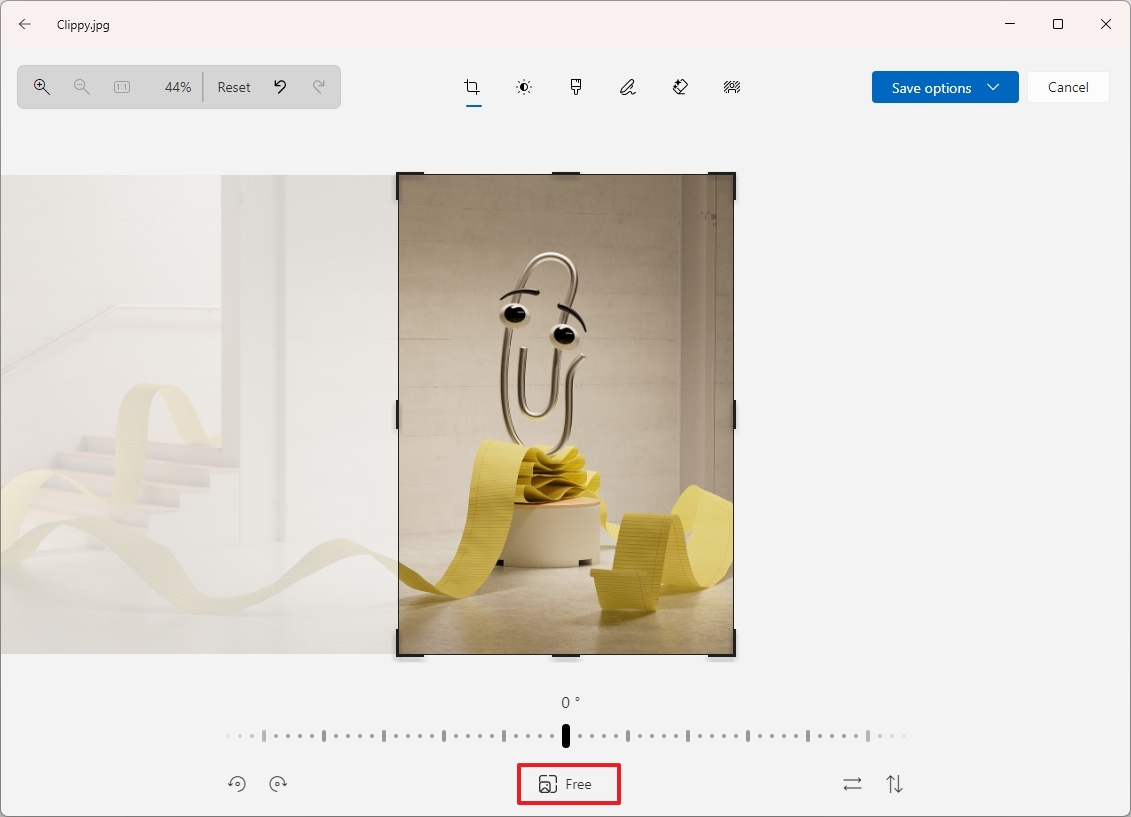
- Select one of the crop formats available, including square, 16:9, 3:3, etc.
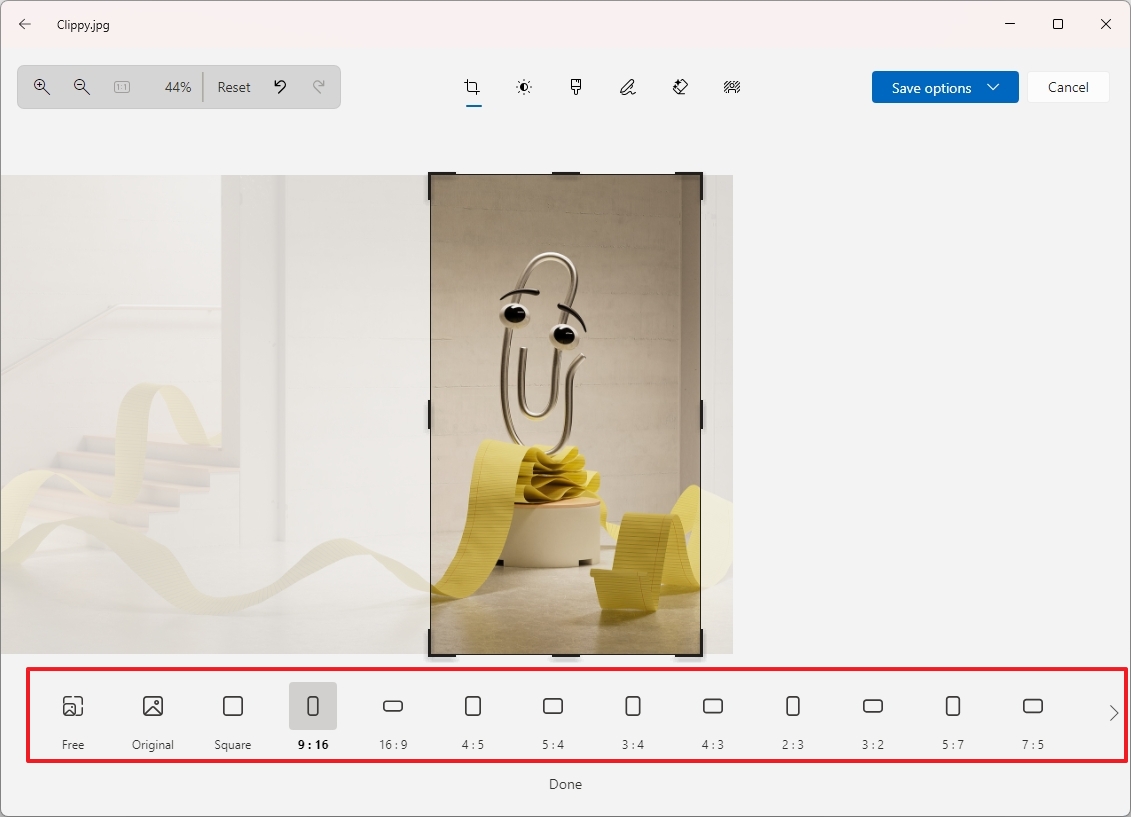
- Click the Done button.
- Click the Save options button.
- Choose the “Save as copy” option.
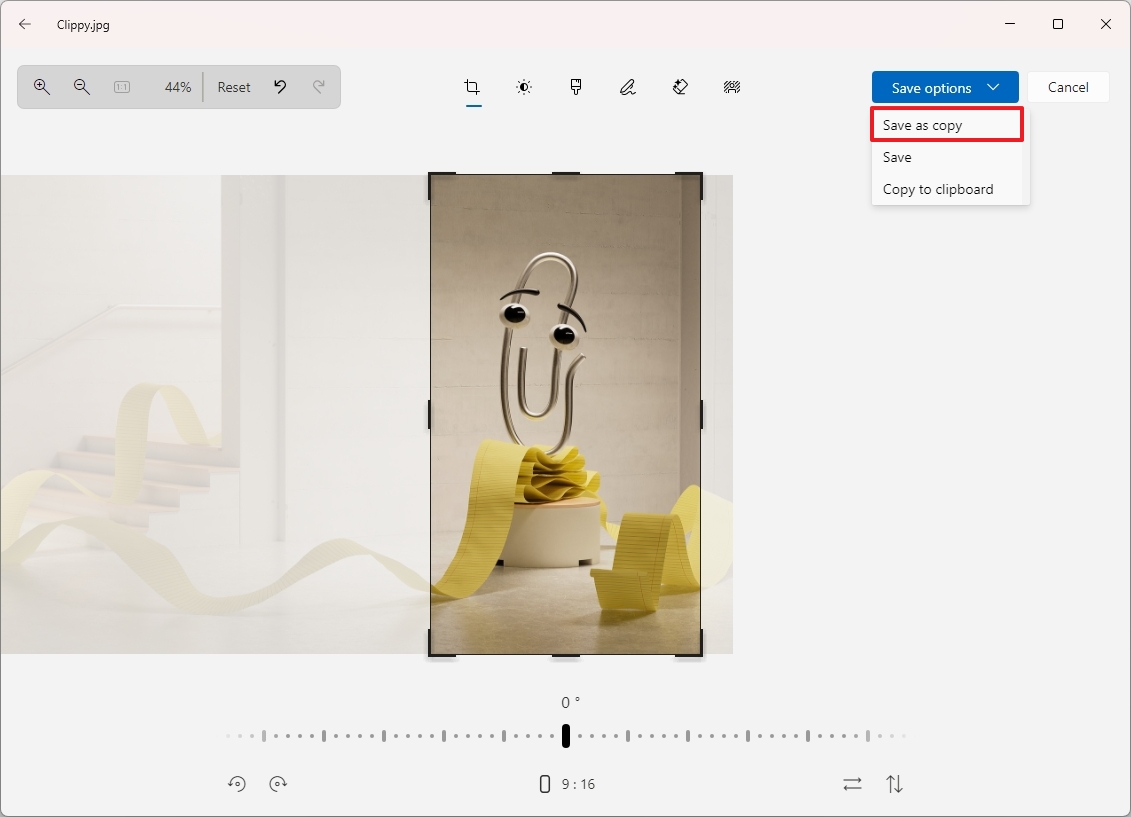
- Select the location to save the cropped image.
- Confirm a new file name.
- Click the Save button.
After you complete the steps, the Photos app will save a cropped version of the picture.
How to crop a picture from Paint
To crop an image with the Microsoft Paint app, use these steps:
- Open the Paint app.
- Click on the File menu and choose the Open option.
- Select the image to crop and click the Open button.
- (Option 1) Drag the borders inwards using the mouse to crop the image.
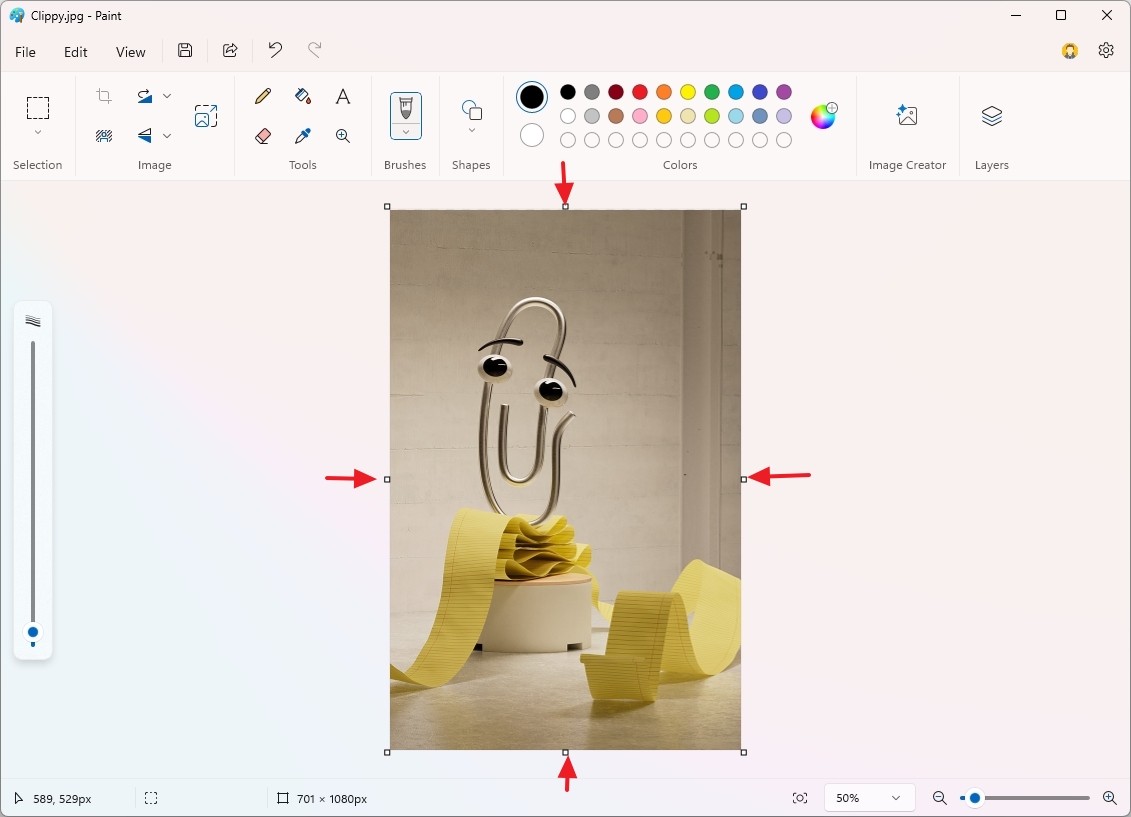
- (Option 2) Open the Select tool menu and choose the Rectangle or Free-form option.
- Select the area of the image to crop.
- Click the Crop button from the toolbar.
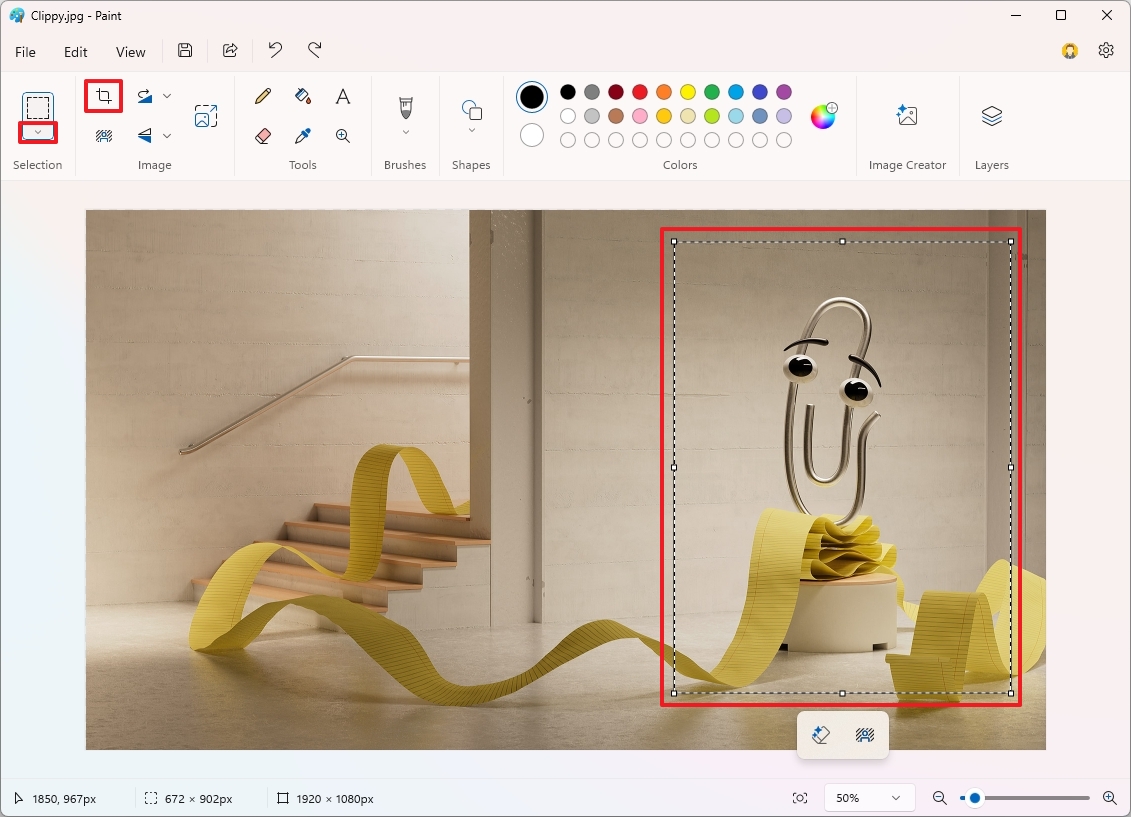
- Click on the File menu, select the Save as menu, and choose the format to save the file.
- Select the location to save the cropped image.
- Confirm a new file name.
- Click the Save button.
Once you complete the steps, the Paint app will save a copy of the cropped image on your computer.
Among the apps discussed in this guide, any one will do a good job of cropping an image. But if you’re dealing with a photo, I’d suggest utilizing the Photos app as it offers additional photography-focused editing tools. For screenshots or other image types, you can resort to the Snipping Tool or Paint.
More resources
Read More
2024-12-19 16:39