In Windows 11, you will encounter an upgraded Sticky Notes feature that is actually a revamped version seamlessly incorporated into the OneNote application.
As a researcher, I’ve noticed that while the fundamental functionalities are consistent with the previous version, there have been some updates. The most conspicuous change is that the app is now integrated within OneNote instead of operating as a separate program. Microsoft has also introduced a sleeker, more contemporary design that boasts organizational enhancements. Lastly, this new edition supports automatic source linking and allows for screenshots.
In this how-to guide, I’ll outline the steps to start using the Sticky Notes app on Windows 11.
How to get started with Sticky Notes on Windows 11
If you want to get familiar with Sticky Notes, you must know the steps to get and manage it.
Install Sticky Notes
As a devoted user, I’m thrilled to share that my beloved Sticky Notes are now integrated into the OneNote app! However, just a heads-up, in order to access your notes, you’ll first need to download and install the OneNote app on your device. Enjoy the seamless experience!
If you haven’t been utilizing Microsoft 365 applications and OneNote isn’t installed on your computer yet, here’s what you can do instead:
a. Visit the official Microsoft website or any trusted download source to get the OneNote application.
b. Follow the instructions provided to download and install OneNote on your device.
c. Once installed, open the app and start using it for organizing your notes effectively!
- Open the OneNote page in the Microsoft Store.
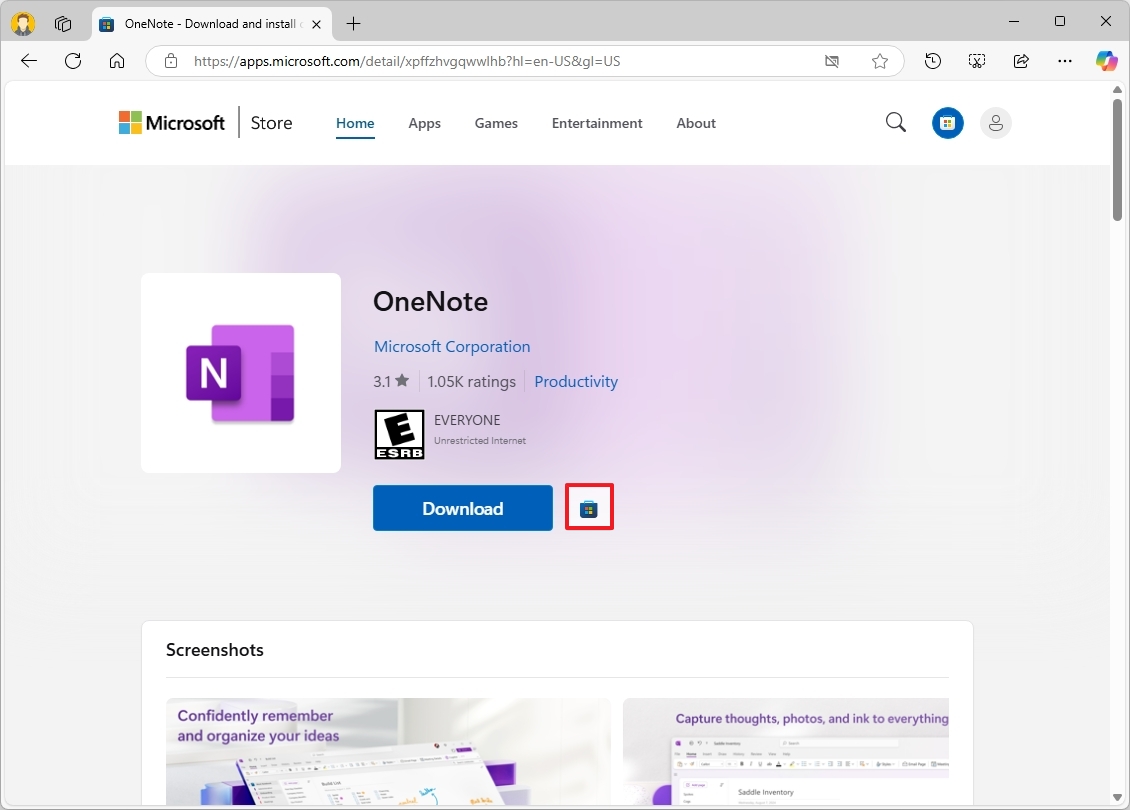
- Click the “View in Store” button.
- Click the Install (or Get) button.
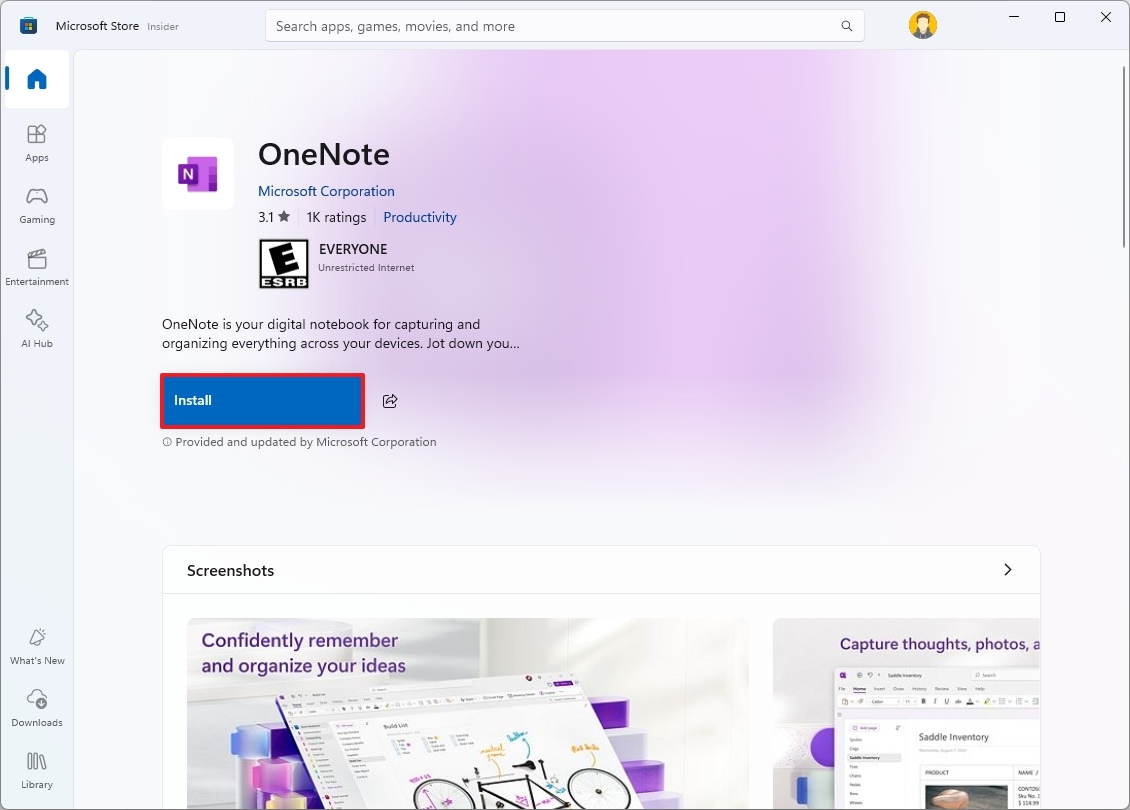
Once you complete the steps, you can start using OneNote and Sticky Notes.
Access Sticky Notes
To access the Sticky Notes app, use these steps:
- Open Start.
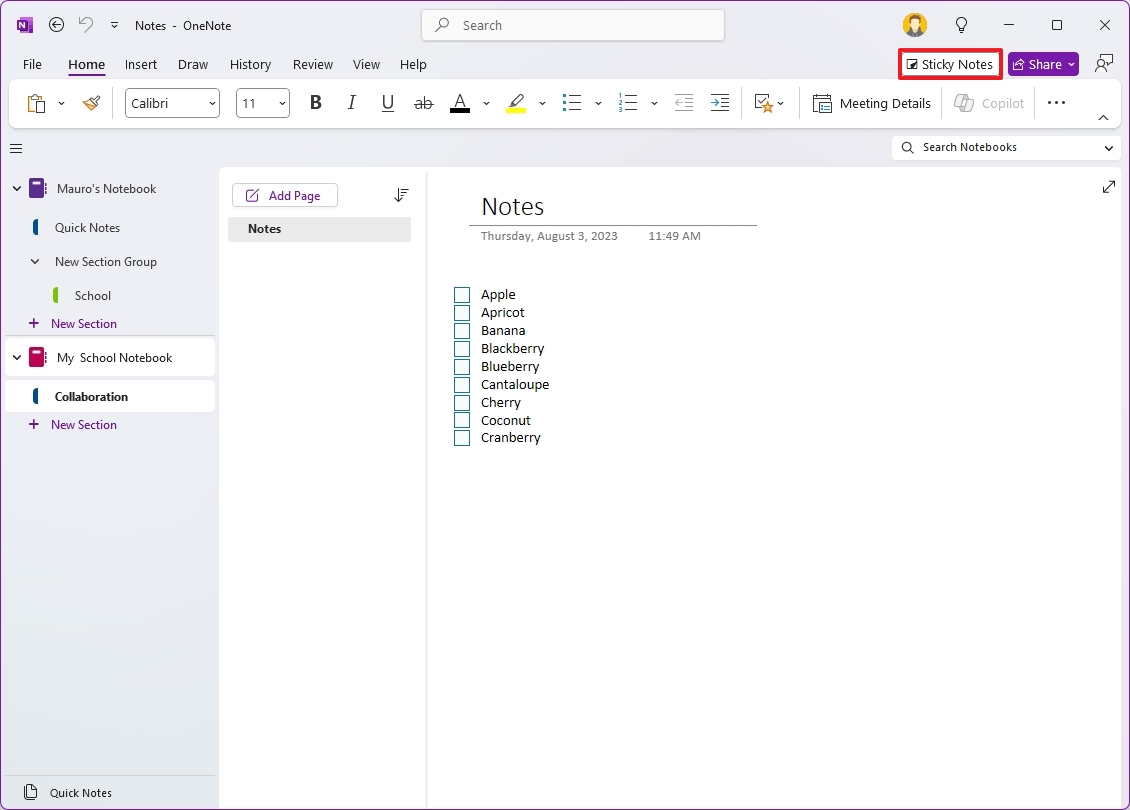
- Search for OneNote and click the top result to open the app.
- Click the Sign in button from the top-right side (if applicable).
- Sign in with your Microsoft account.
- Click the Sticky Notes buttons from the top-right side.
- Quick note: You only have to go through the process of opening the app from OneNote the first time, and then it’ll be available from the Start menu and Taskbar.
- Right-click the Sticky Notes app in the Taskbar and choose the “Pin to Taskbar” option.
After you complete the steps, you can start managing your notes through the desktop experience.
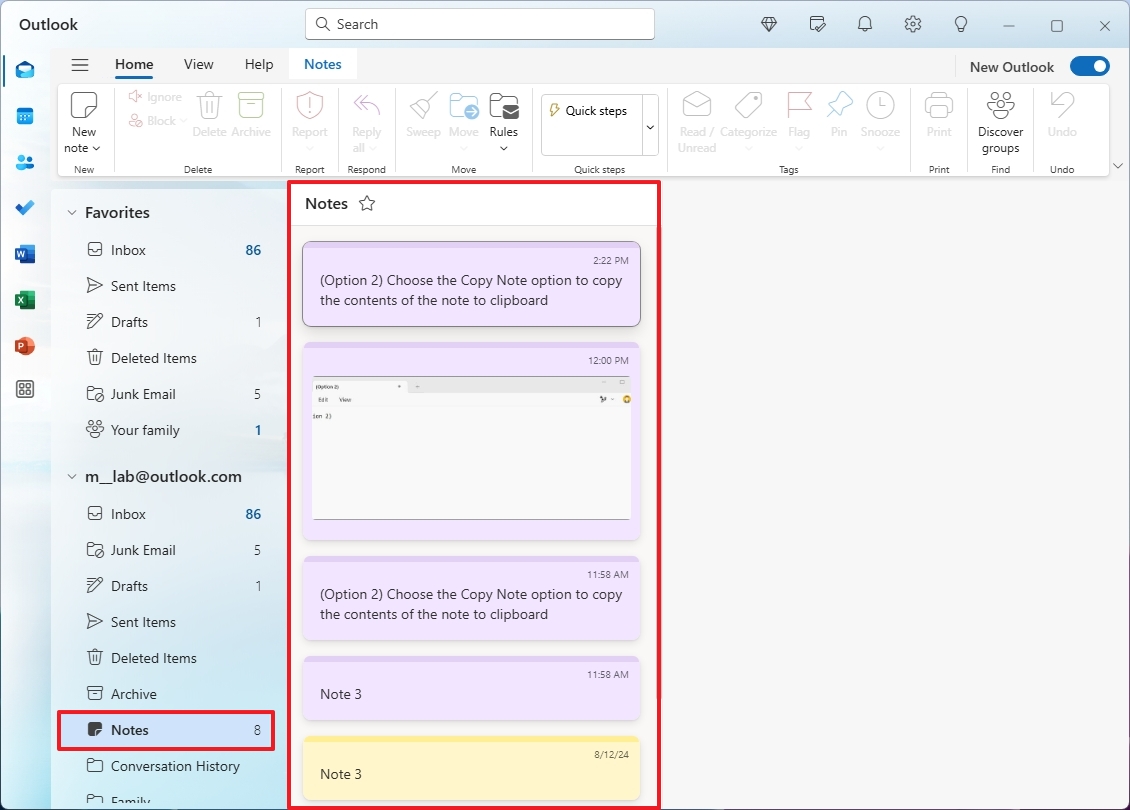
Another option is using Sticky Notes within the Outlook application (either through its web interface or mobile app). Additionally, you can utilize OneNote, which is accessible via both web and mobile devices as well.
In the Outlook application or on its website, you can find your notes when you’re logged into your Outlook.com account, within the “Notes” area.
Create and delete Sticky Notes
To create, edit, and delete notes, use these steps:
- Open Start.
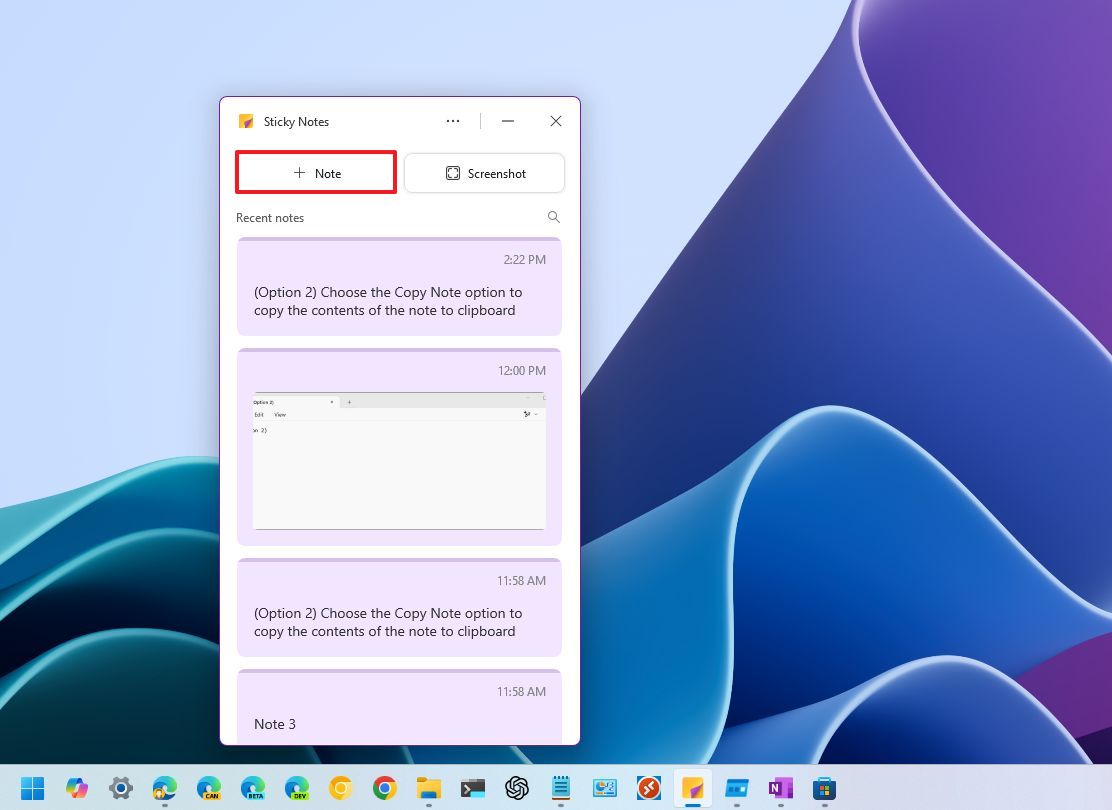
- Search for Sticky Notes and click the top result to open the app or click the app from the Taskbar.
- Click the Note button.
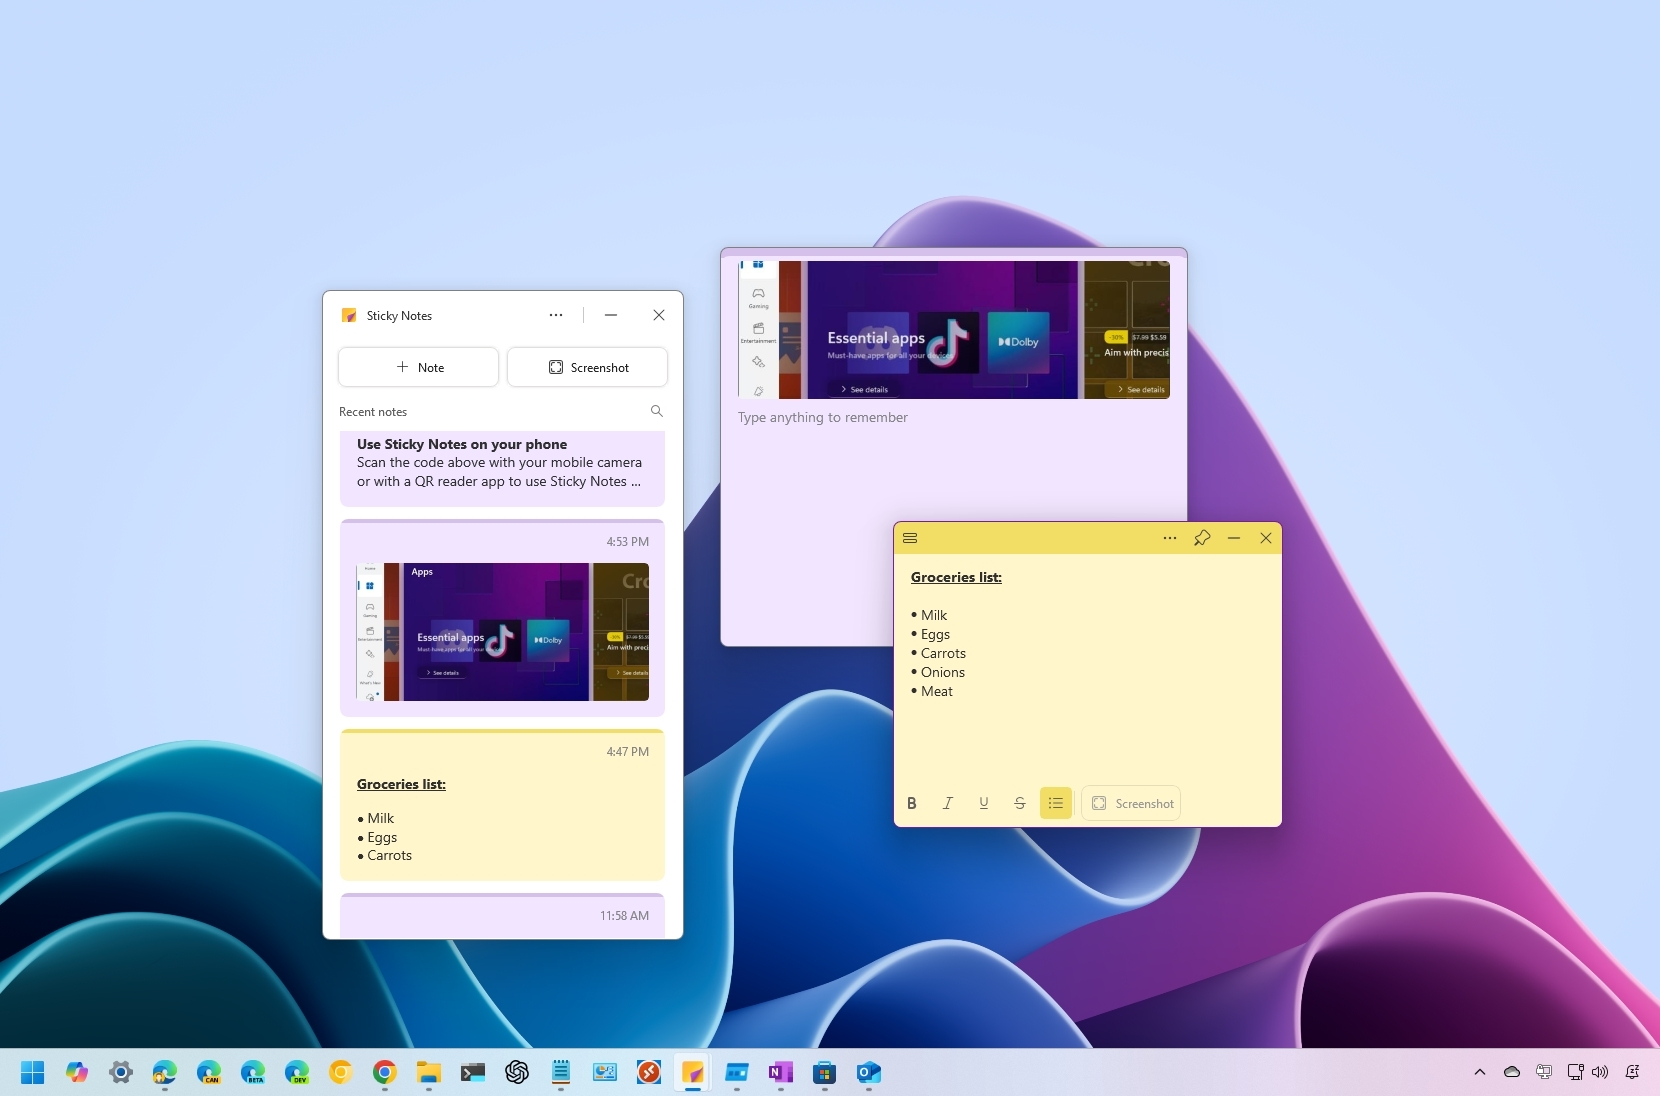
- Compose your note with the information you want.
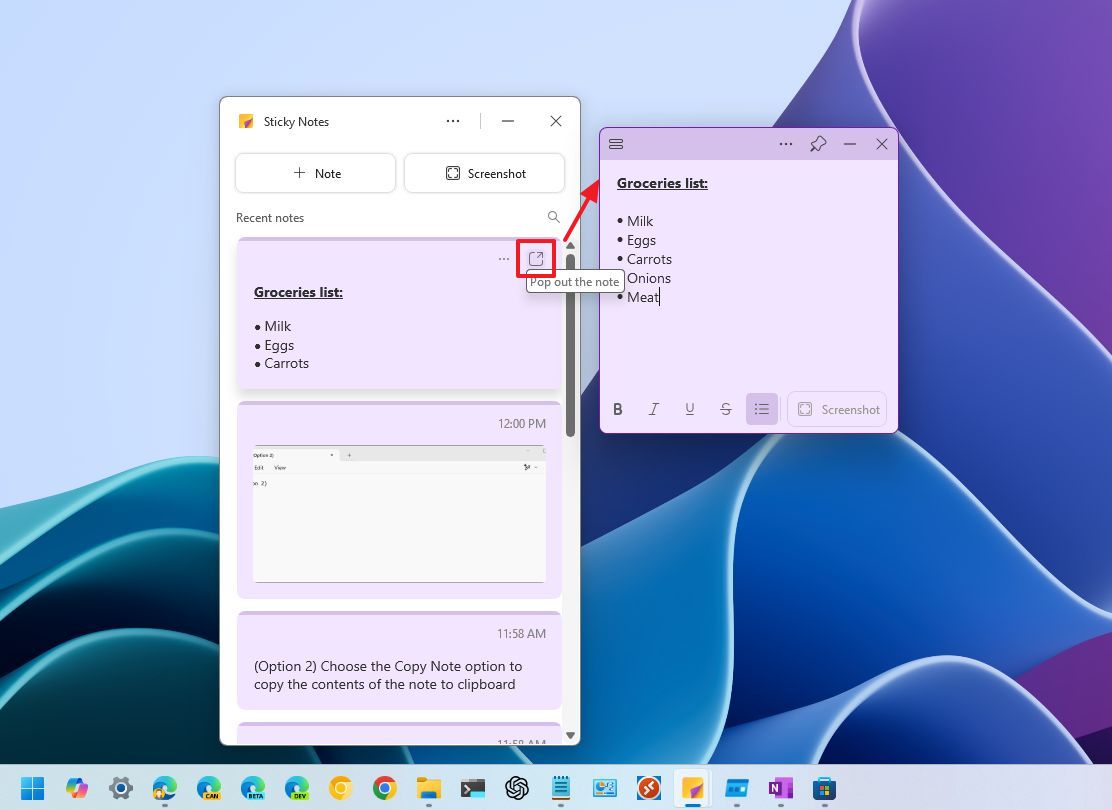
- You can access writing features such as bold, italic, underline, bullet points, etc., using the toolbar at the bottom.

- (Optional) Click the “Pop out the note” button from the top-right to detach the note and add it to the desktop.
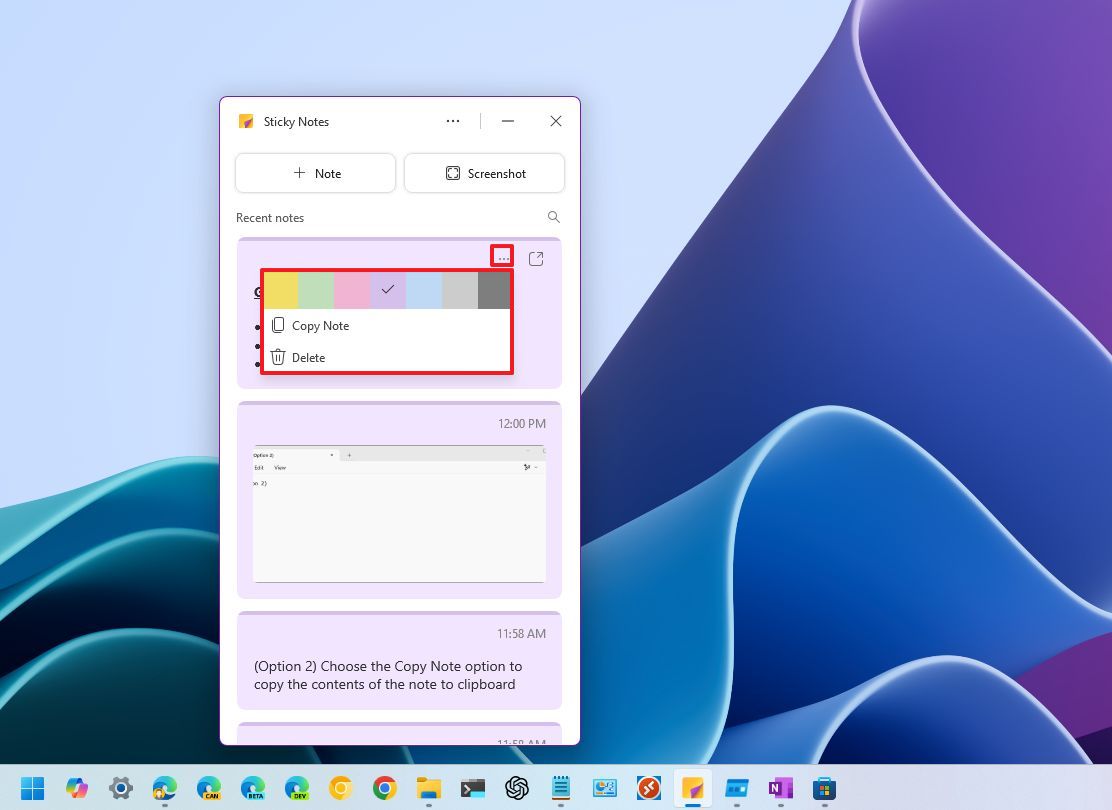
- Click the three-dots menu button from the top-right.
- (Option 1) Choose a color for the Sticky Note.
- (Option 2) Choose the Copy Note option to copy the contents of the note to the clipboard, but only to create a new note.
- (Option 3) Choose the Delete option to erase the note.
After finishing these steps, you’ll grasp the essentials of handling notes using this app.
If the sticky note is separated from the primary window, you can click on its border to display the toolbar. The left menu icon will open a list of all your notes, whereas the “Pin” button activates the always-on-top mode, allowing the note to remain visible above other applications while you multitask and switch between programs.
Take screenshots with Sticky Notes
To take screenshots with Sticky Notes, use these steps:
- Open Start.
- Search for Sticky Notes and click the top result to open the app or click the app from the Taskbar.
- Click the Screenshot button to create a capture of the active application and save it into a note automatically.
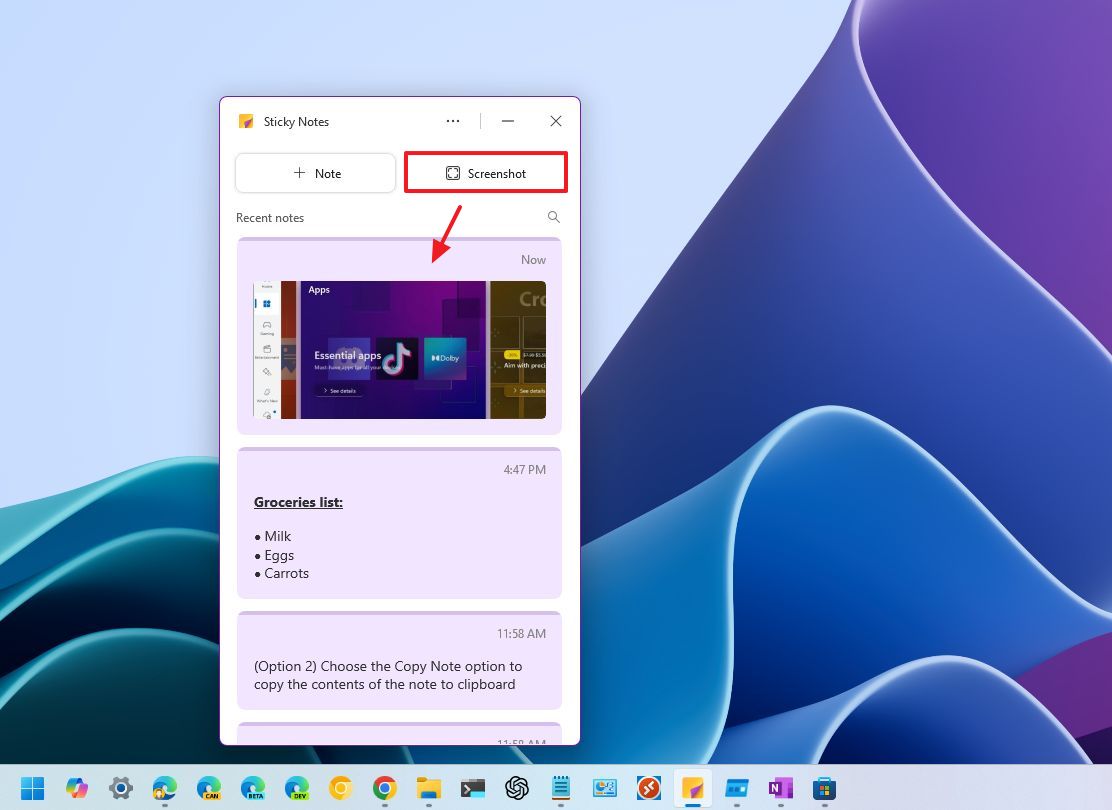
- Click on the note to add more context as needed.
Another option is to press the “‘Capture Screen’” button right inside your note. Remember, Sticky Notes software permits just a single screenshot capture for each individual note.
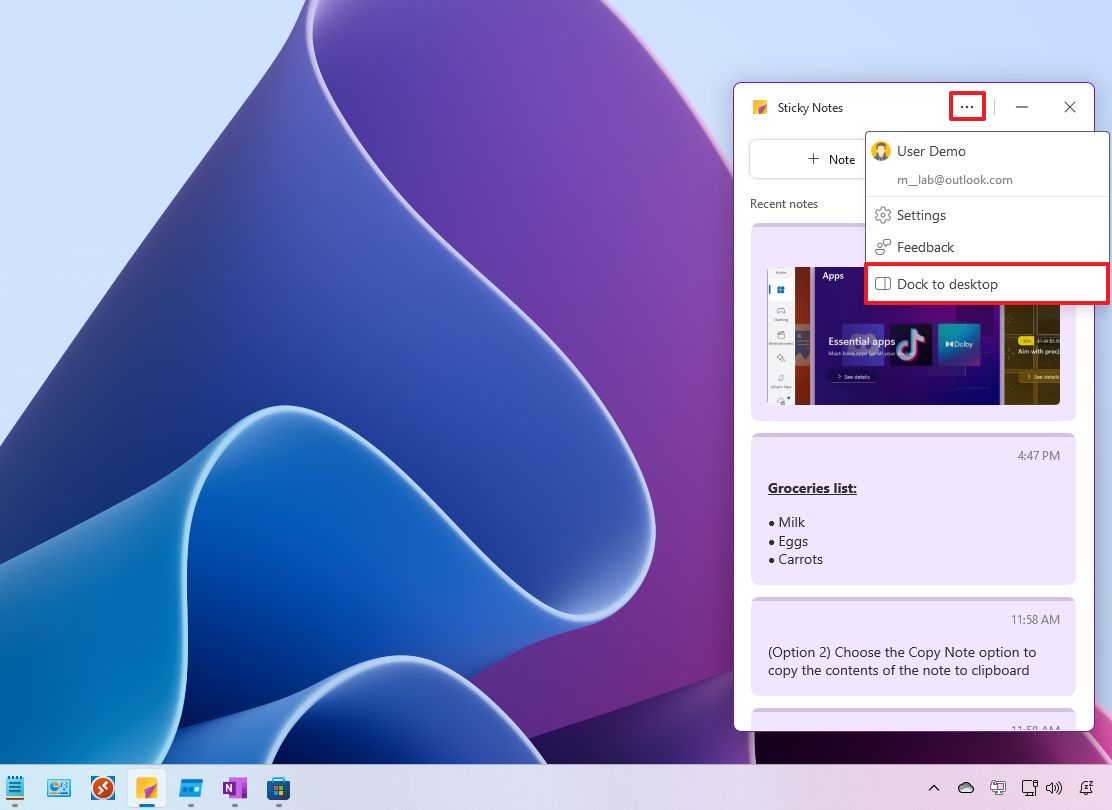
Dock Sticky Notes to desktop
To dock the Sticky Notes interface on Windows 11, use these steps:
- Open Start.
- Search for Sticky Notes and click the top result to open the app, or click the app from the Taskbar.
- Click the three-dots button to access the main menu.
- (Option 1) Choose the “Dock to desktop” option to dock the app to the right
- (Option 2) Choose the “Undock to desktop” option to undock the app.
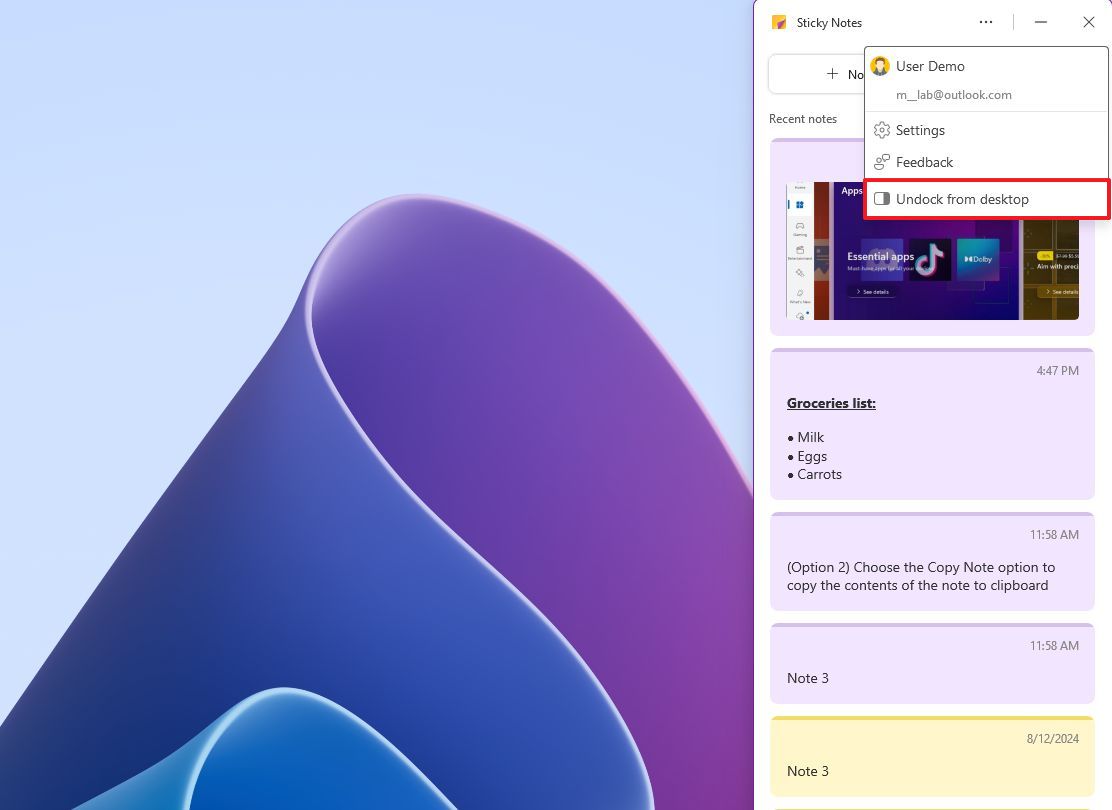
Once you finish the procedures, the Sticky Notes workspace will attach itself to the edge of your screen, remaining at the top and floating above all other windows, causing them to shift towards the left.
More resources
Read More
- Solo Leveling Season 3: What You NEED to Know!
- OM PREDICTION. OM cryptocurrency
- Rachel Zegler Claps Back at Critics While Ignoring Snow White Controversies!
- How to Get to Frostcrag Spire in Oblivion Remastered
- Captain America: Brave New World’s Shocking Leader Design Change Explained!
- Oshi no Ko Season 3: Release Date, Cast, and What to Expect!
- Fantastic Four: First Steps Cast’s Surprising Best Roles and Streaming Guides!
- Daredevil’s Wilson Bethel Wants to “Out-Crazy” Colin Farrell as Bullseye in Born Again
- tWitch’s Legacy Sparks Family Feud: Mom vs. Widow in Explosive Claims
- Oblivion Remastered: The Ultimate Race Guide & Tier List
2025-01-22 22:09