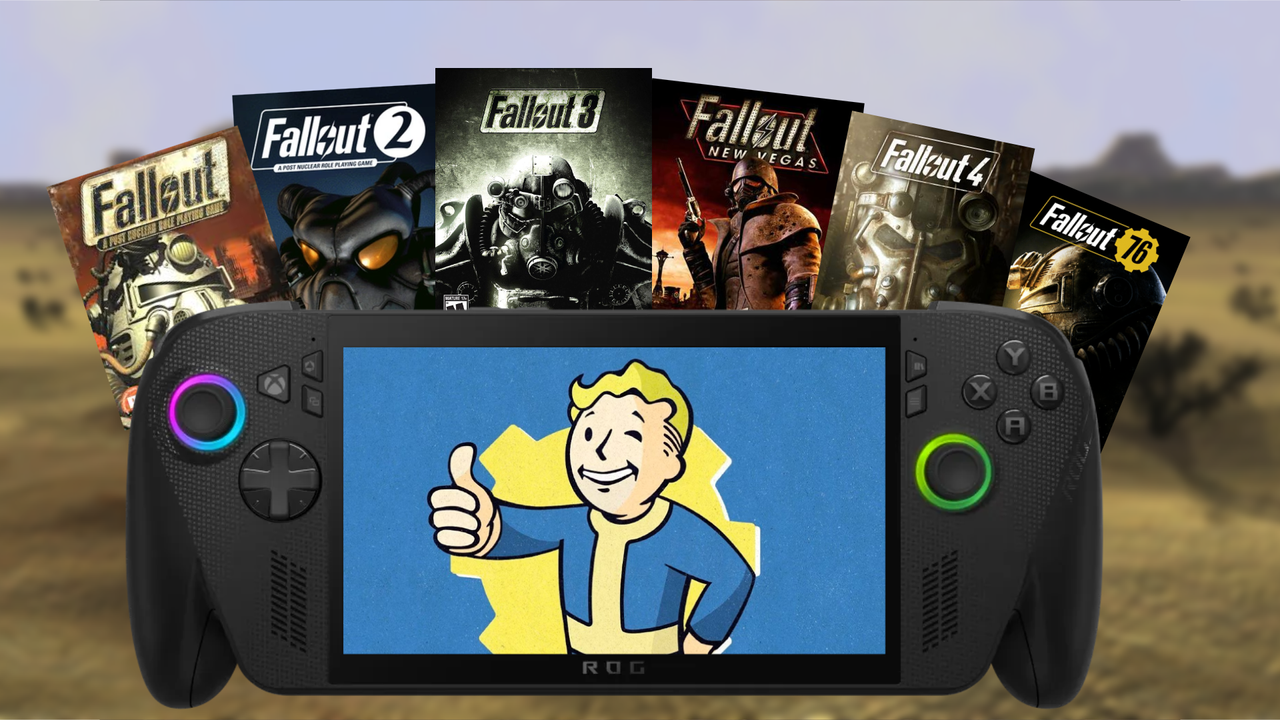
With the upcoming second season of Amazon’s Fallout show, I tested how well each Fallout game runs on handheld PCs like the Xbox Ally X, Steam Deck, and Legion Go 2. I’m sharing my findings and tips to help you get the best performance on these devices.
I expected testing to be simple: launch each game on both Steam and the Xbox app, adjust the graphics settings, and find the lowest power usage that still delivered a smooth 60 frames per second. Unfortunately, it turned out to be much more complicated than I thought.
Don’t worry! I’ve found solutions to get all the Fallout games working on handheld gaming PCs like the Xbox Ally X, and I’ve included easy-to-follow, step-by-step instructions right here. This guide covers Fallout, Fallout 2, Fallout 3, Fallout: New Vegas, Fallout 4, and Fallout 76 on both Steam and the Xbox App.
Prerequisites: Handheld system settings
To get the best performance when playing Fallout games on a handheld device, you’ll need to adjust a few settings first. I recommend manually setting how much VRAM your device uses and turning on the HYPR-RX graphics suite.
If you have an ASUS ROG handheld, see the instructions below. If you’re using a Lenovo Legion Go, check out our dedicated guide for that device instead.
How to change VRAM allocation on Xbox Ally X (and other ASUS ROG handhelds)
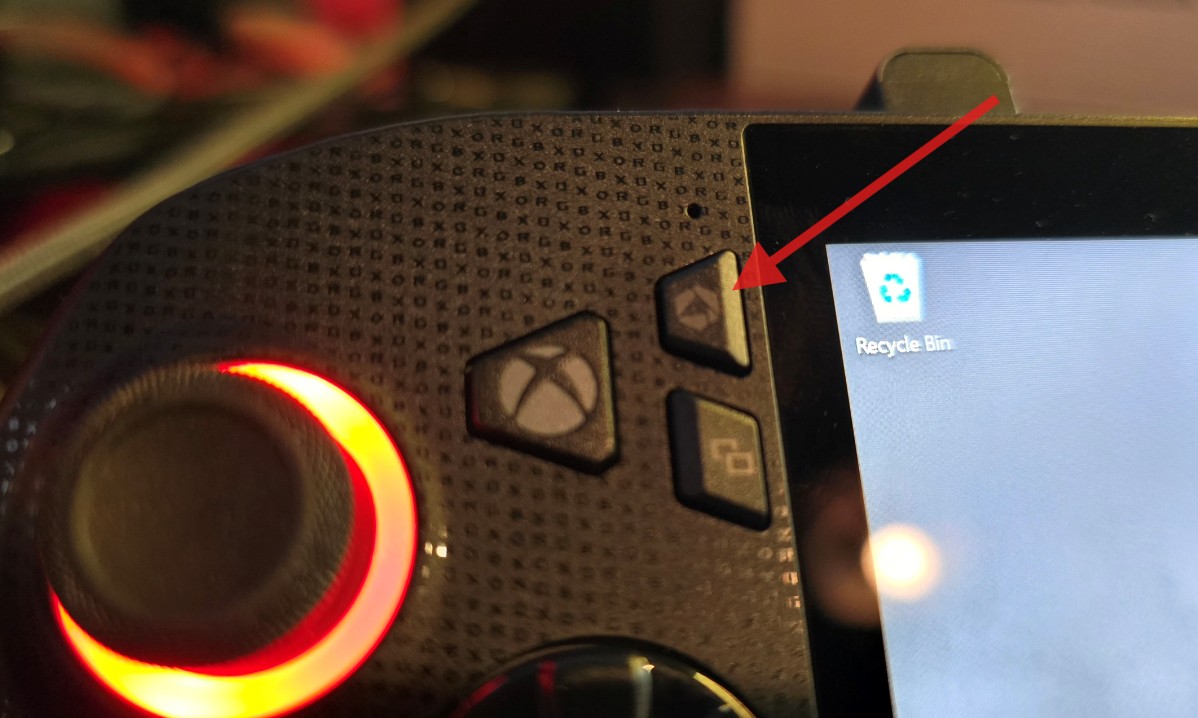
- Start by pressing the Armoury Crate button to open the Armory Crate Command Center. Select Open Armory Crate SE.
- Once Armoury Crate opens, head to Settings using the cogwheel icon.
- From there, select Performance.
- Next, tap the GPU Settings tab.
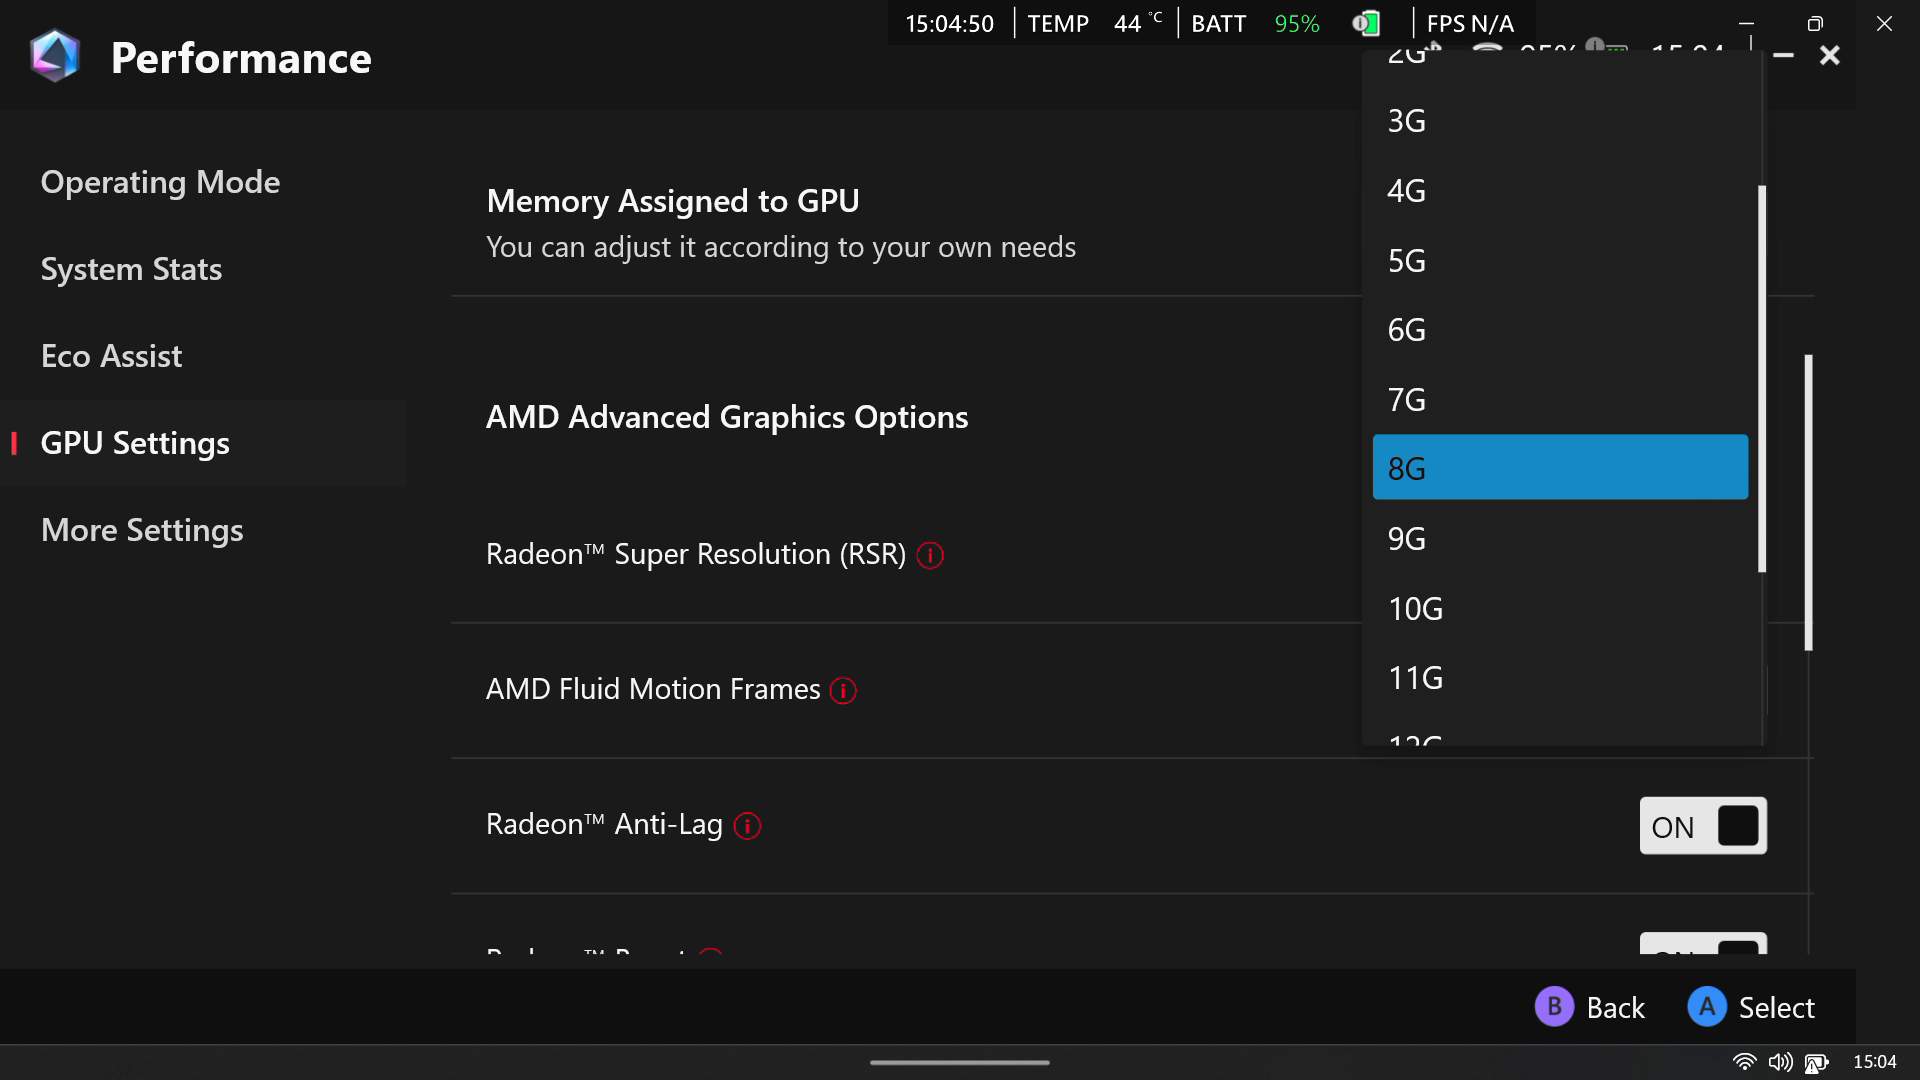
- Tap the dropdown box to the right of where it says “Memory Assigned to GPU.”
- Change VRAM to 6G.
- Wait while the handheld automatically restarts.
Okay, so I’ve been tweaking things with my Fallout games, and here’s what I’ve found: giving your graphics card 6GB of VRAM seems to hit the sweet spot. A lot of the games can struggle if you only give them the default 4GB, but honestly, bumping it up to 8GB rarely makes a noticeable difference and can actually *decrease* how much memory your system has available overall. It’s all about finding that balance!
If you don’t see the VRAM setting, first check for updates on your device, and then restart it before trying again.
How to enable HYPR-RX on Xbox Ally X

Many portable gaming devices powered by AMD Z1 or Z2 series processors can use HYPR-RX, a software package that makes games run better.
AMD Software allows you to use one graphics setting for all your games at once. This is helpful if you want everything to run smoothly with the same settings, without having to adjust each game separately.
- To enable HYPR-RX, open the AMD Software app, by searching for it (this is easier in Windows Desktop mode).
- Go to the Gaming tab.
- Select Graphics.
- From here, turn on HYPR-RX.
For the best experience on handheld gaming devices like the Xbox Ally X, ROG Ally, and Legion Go, we recommend using HYPR-RX. It automatically adjusts settings for optimal performance. The standard Xbox Ally doesn’t work with HYPR-RX, but it does have a built-in Performance mode you can use.
This menu also lets you use features like Radeon Super Resolution, Anti-Lag, Fluid Motion Frames, and Radeon Boost. These settings work with all your games, so it’s best to adjust them once and leave them – you don’t need to change them for each game you play.
Fallout 1 and Fallout 2 handheld optimization
To play the original Fallout 1 or Fallout 2 on Xbox App or Steam, you can either follow the steps I’ve explained below, or manually configure the controls using the recommended keyboard setups for Fallout 1 and Fallout 2.
Getting Fallout 1 and 2 running on handheld devices requires a somewhat lengthy and repetitive process, so be prepared for that.
When you try to start these games through the Xbox App or Steam, you’ll see an unattractive launch screen. Clicking ‘Play’ then displays an error message saying, “Error initializing video mode: 1024×768.”
To fix this, we have to do either of the following (I did both just in case):
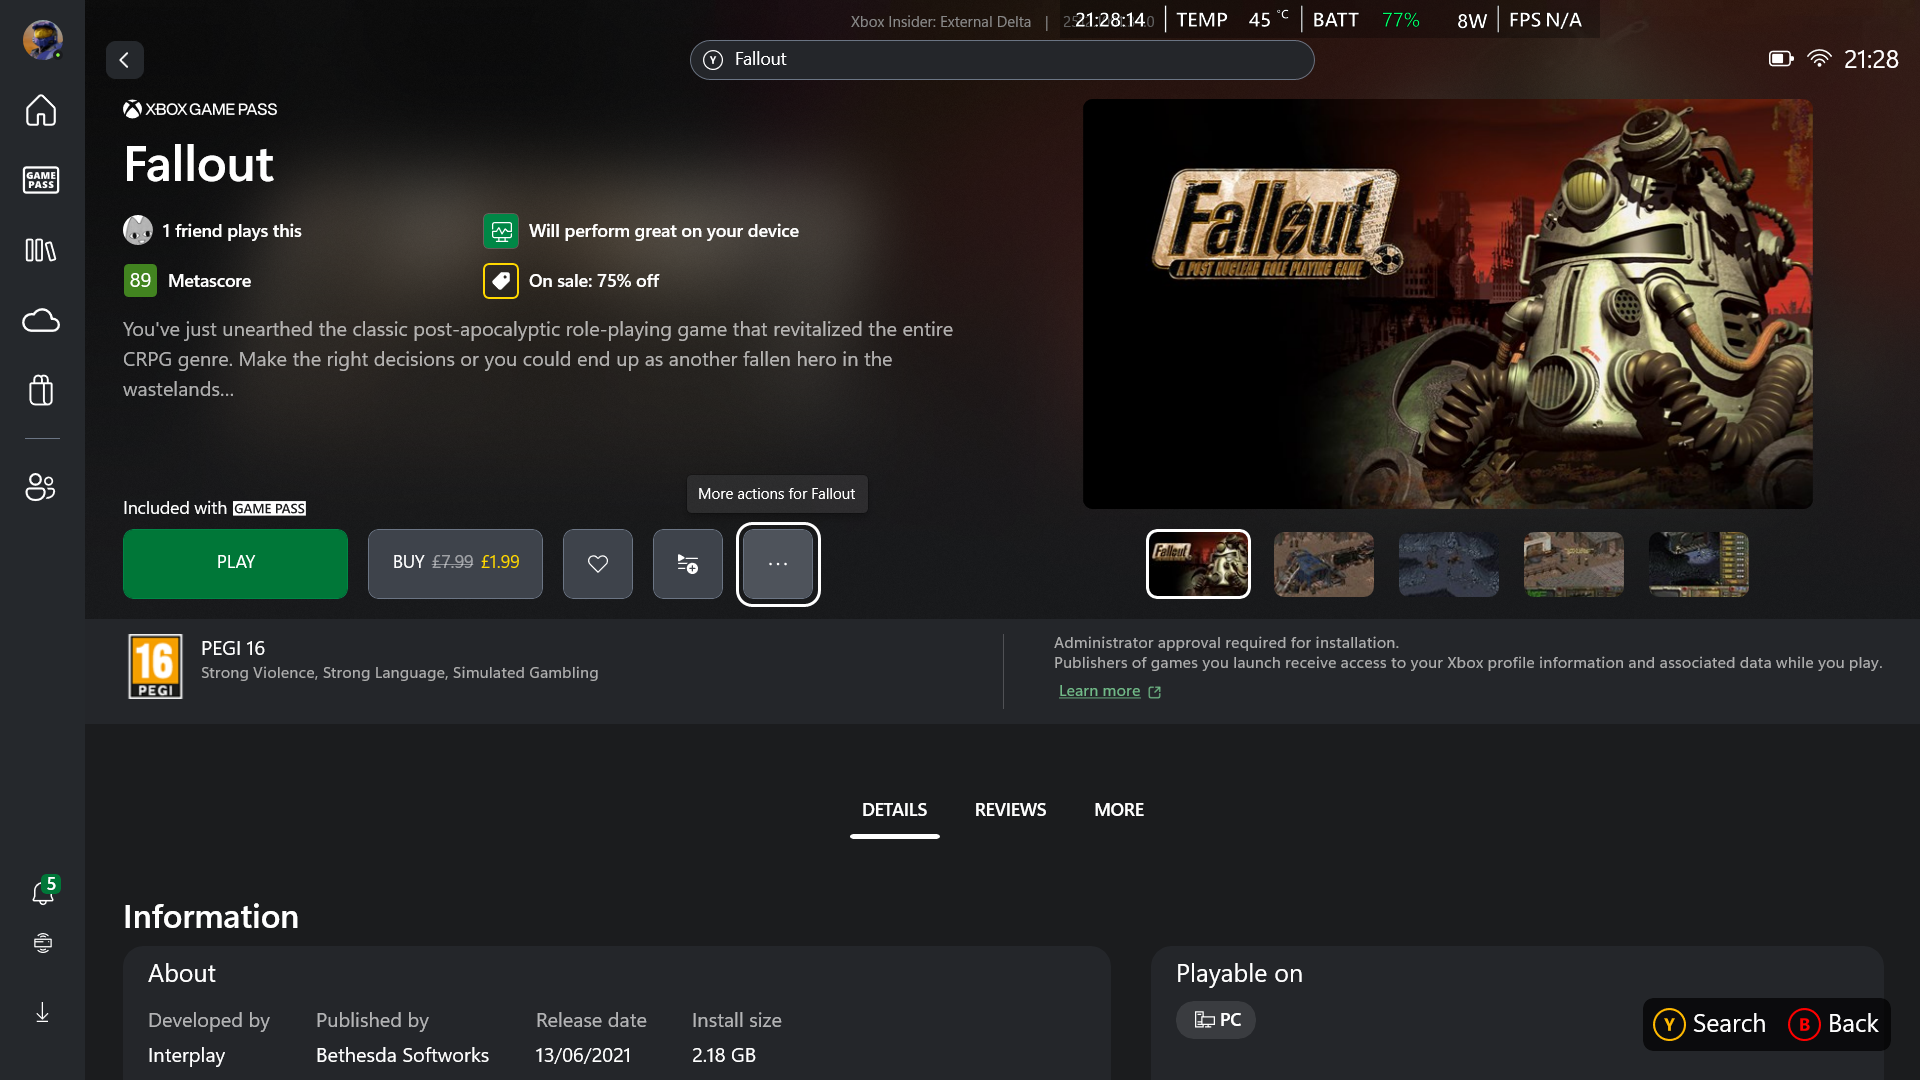
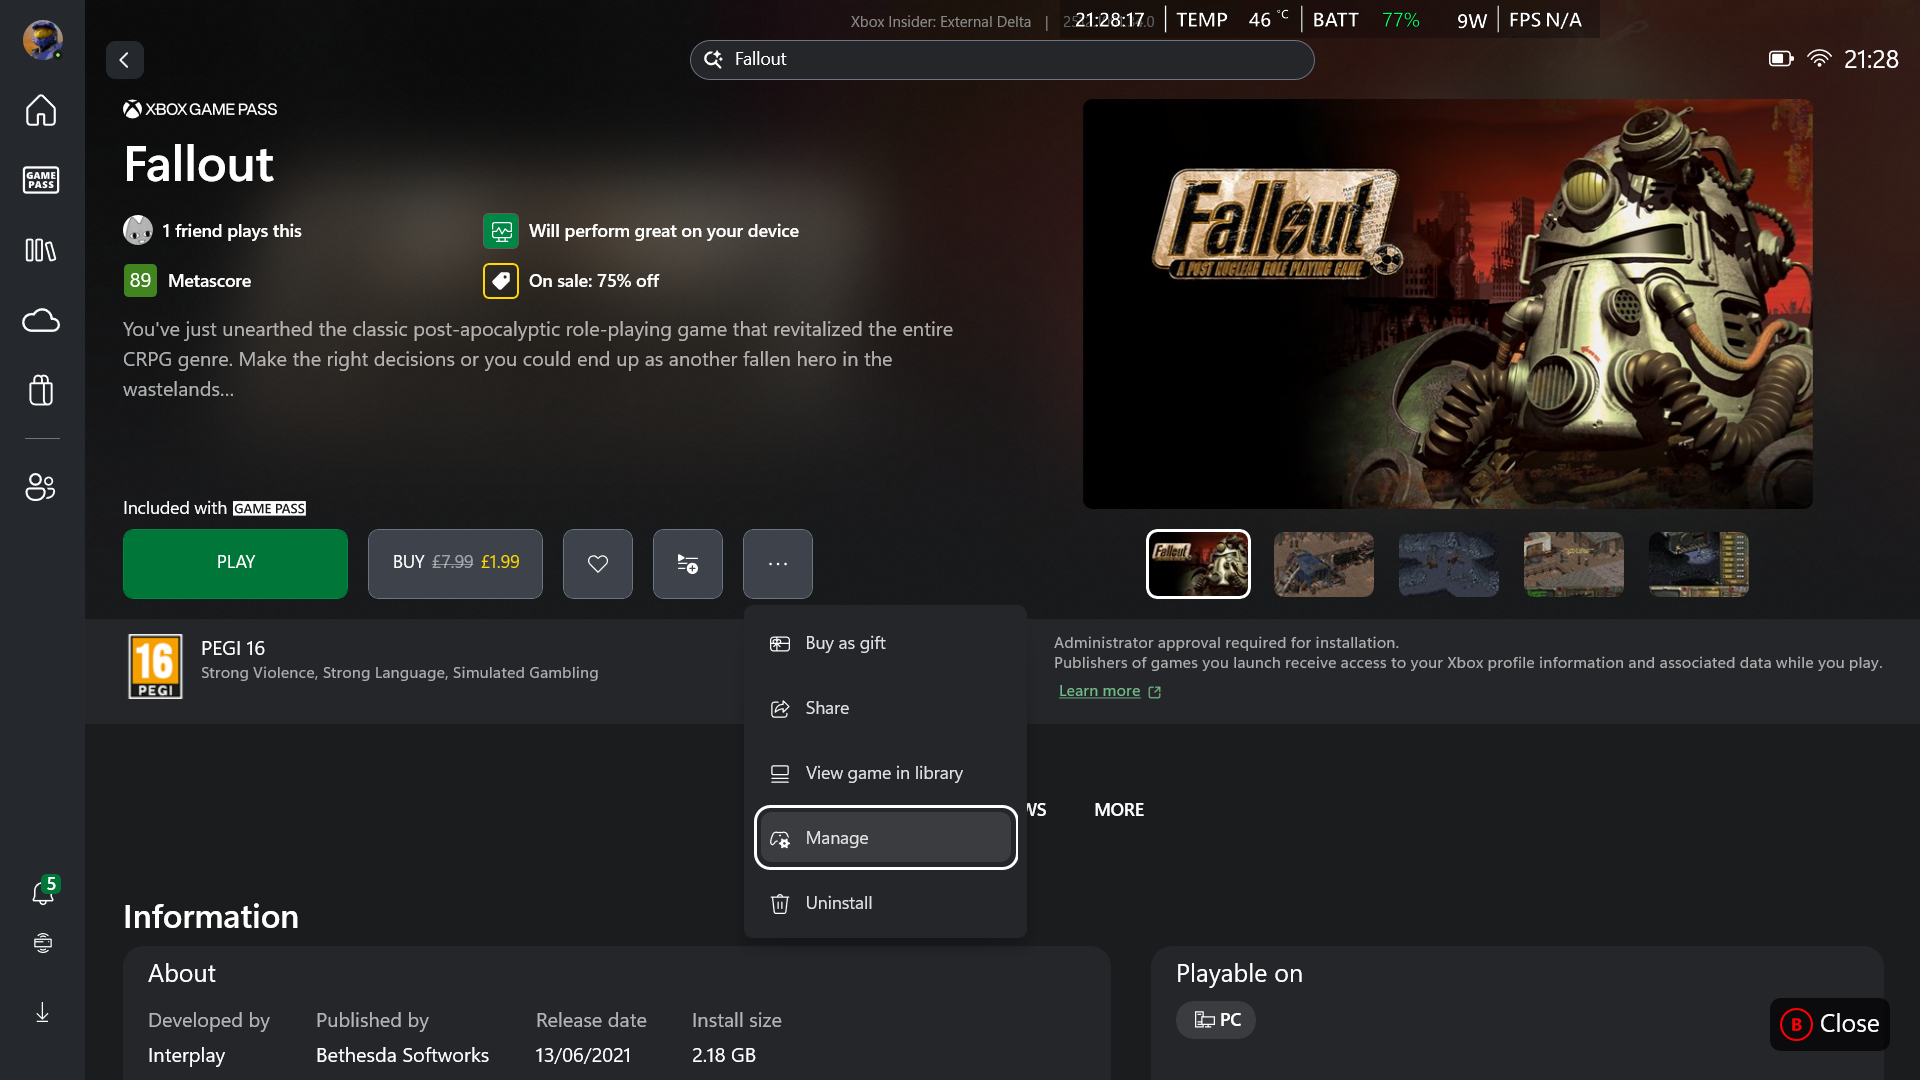
- Open the Xbox App and navigate to the Fallout game page.
- Select the More Actions button that has the three dots on it.
- Select Manage.
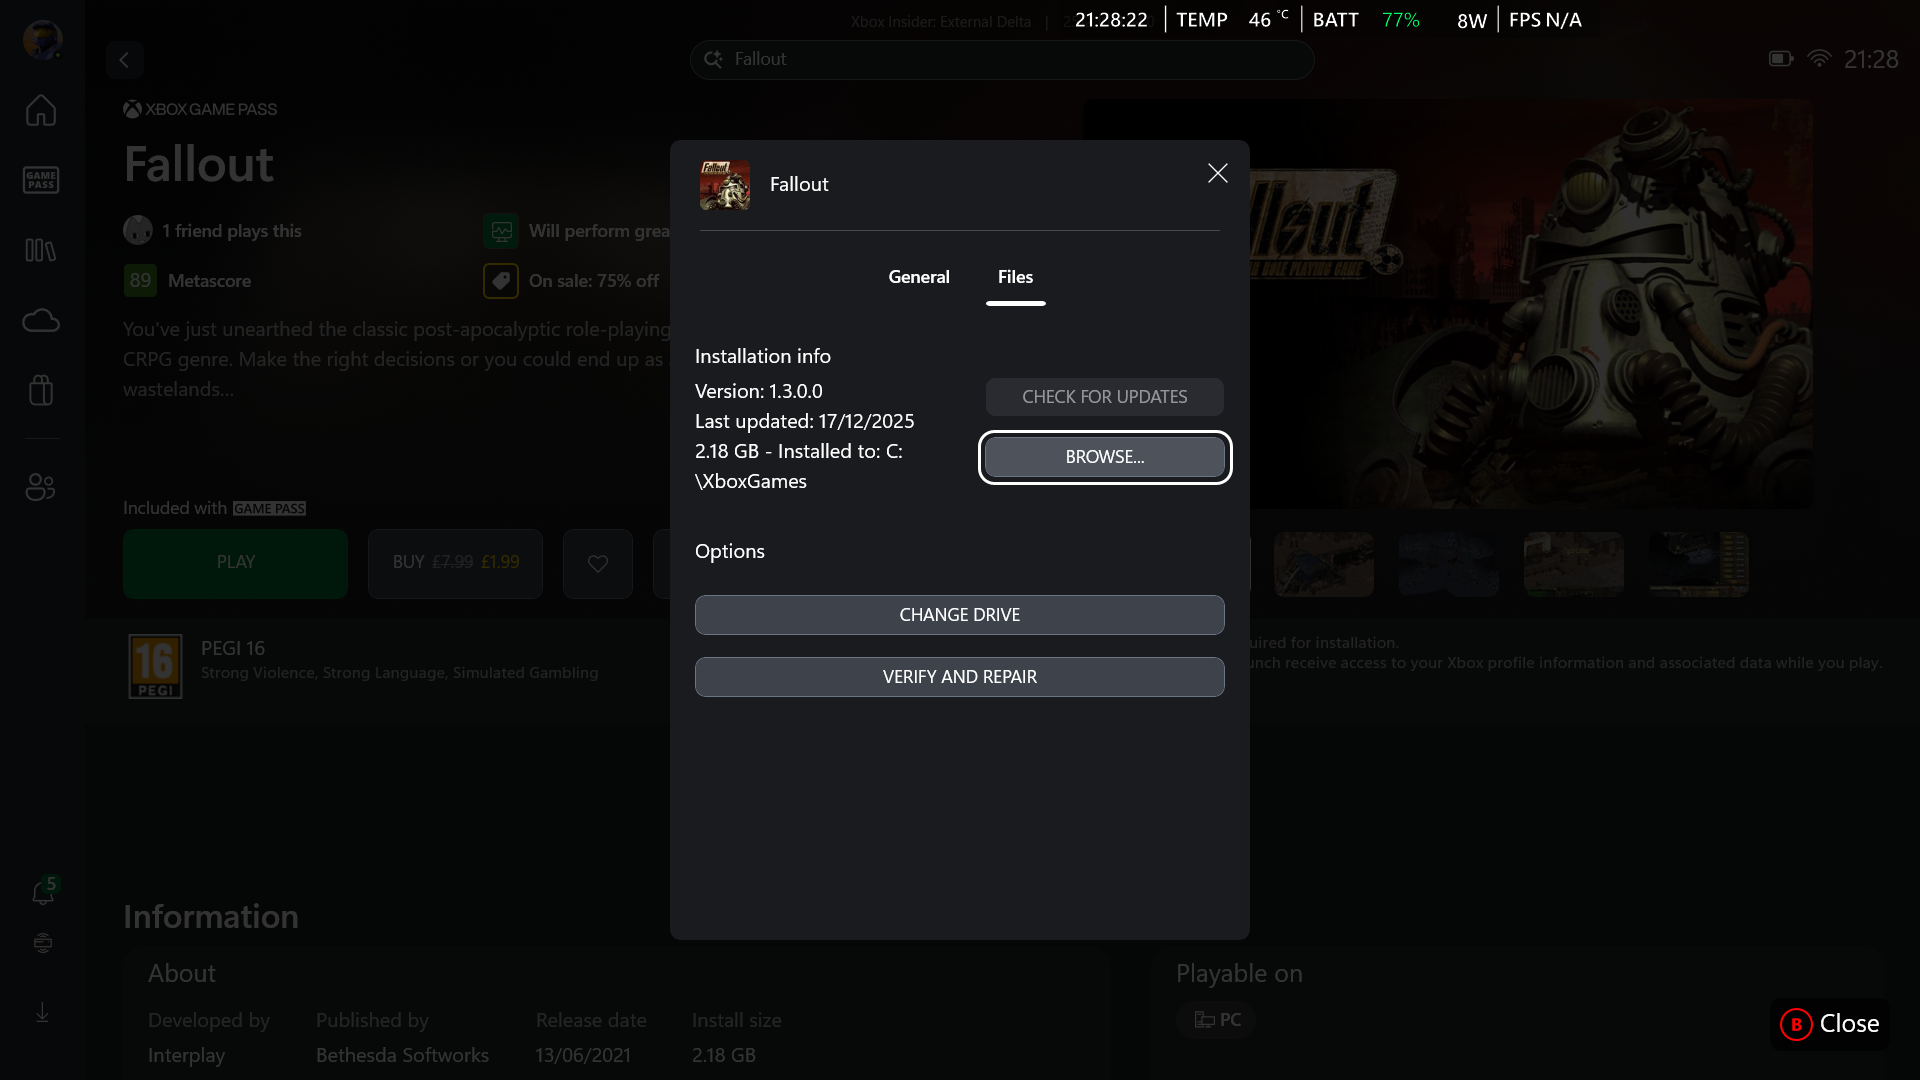
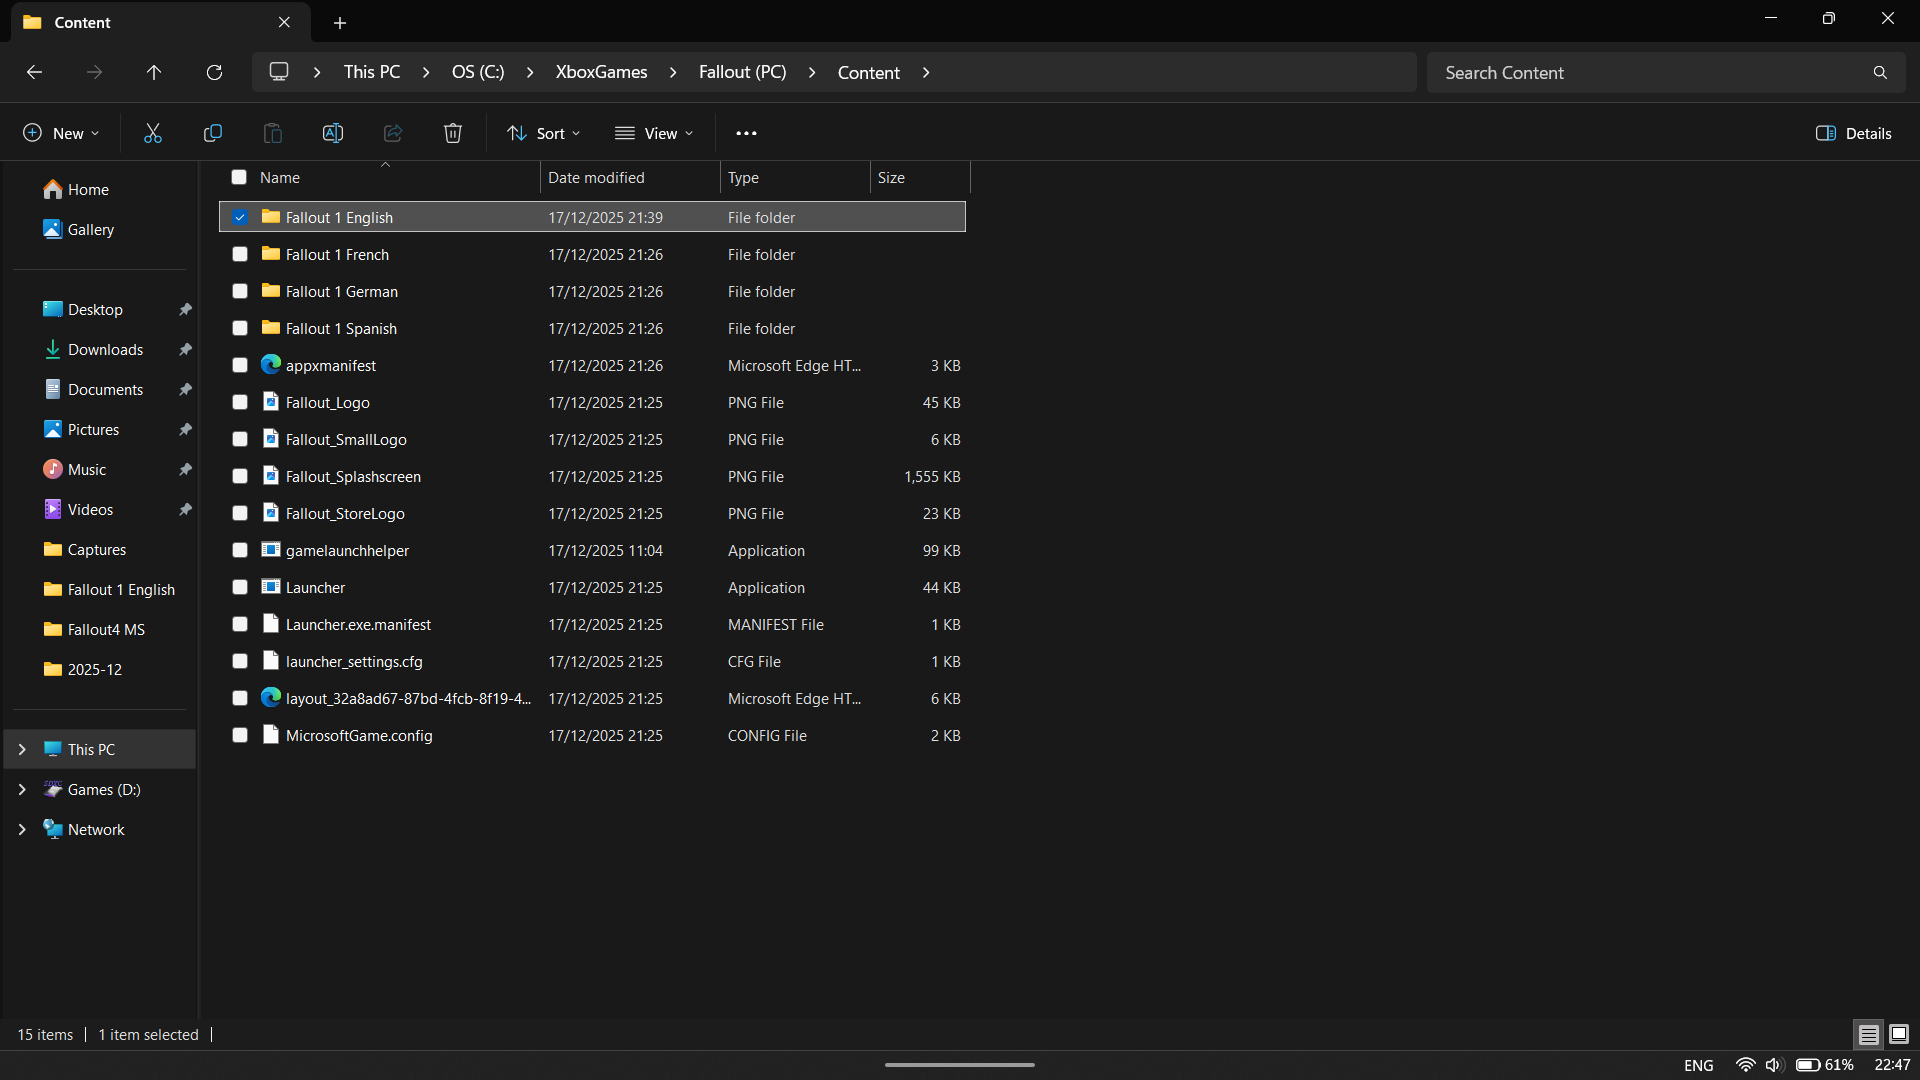
- Once here, go to Files and select Browse.
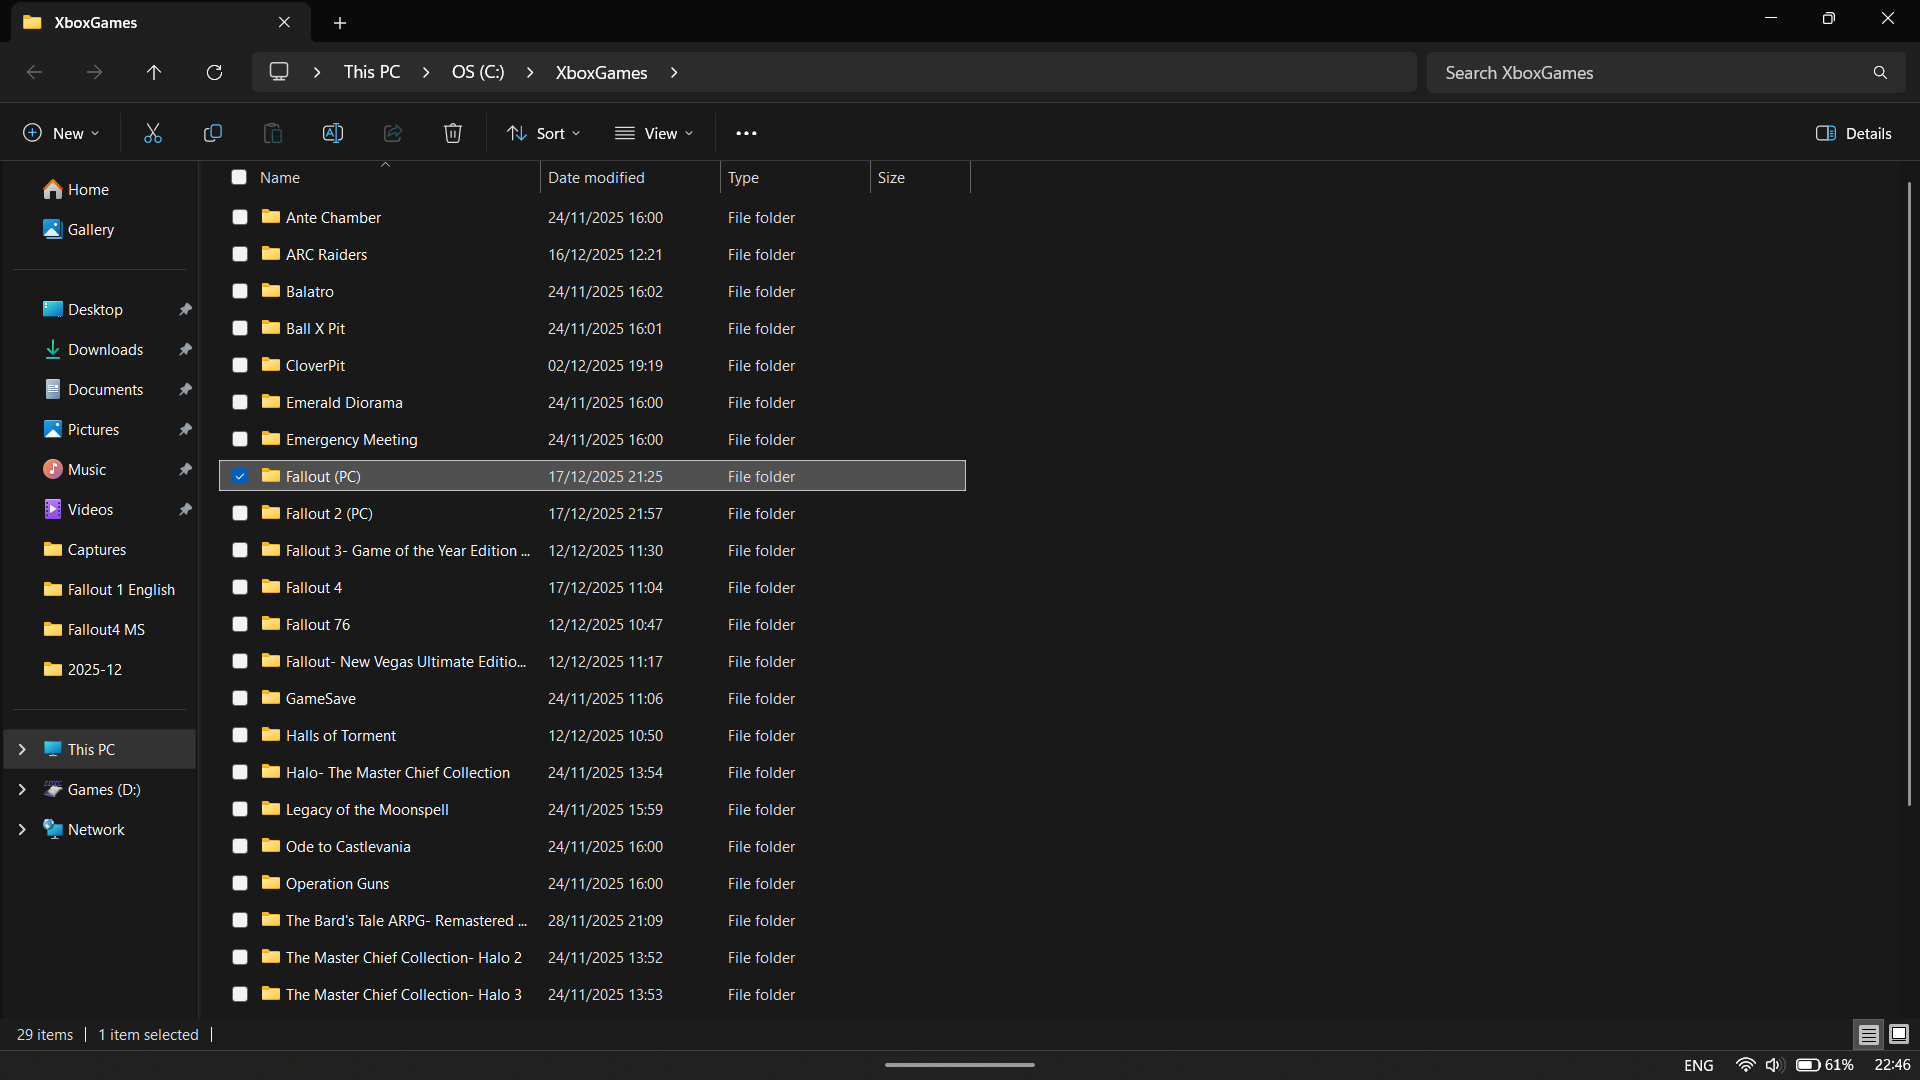
- When the File Explorer comes up, select Fallout (PC) or Fallout 2 (PC), depending on which you’re fixing (also choose your language of choice).
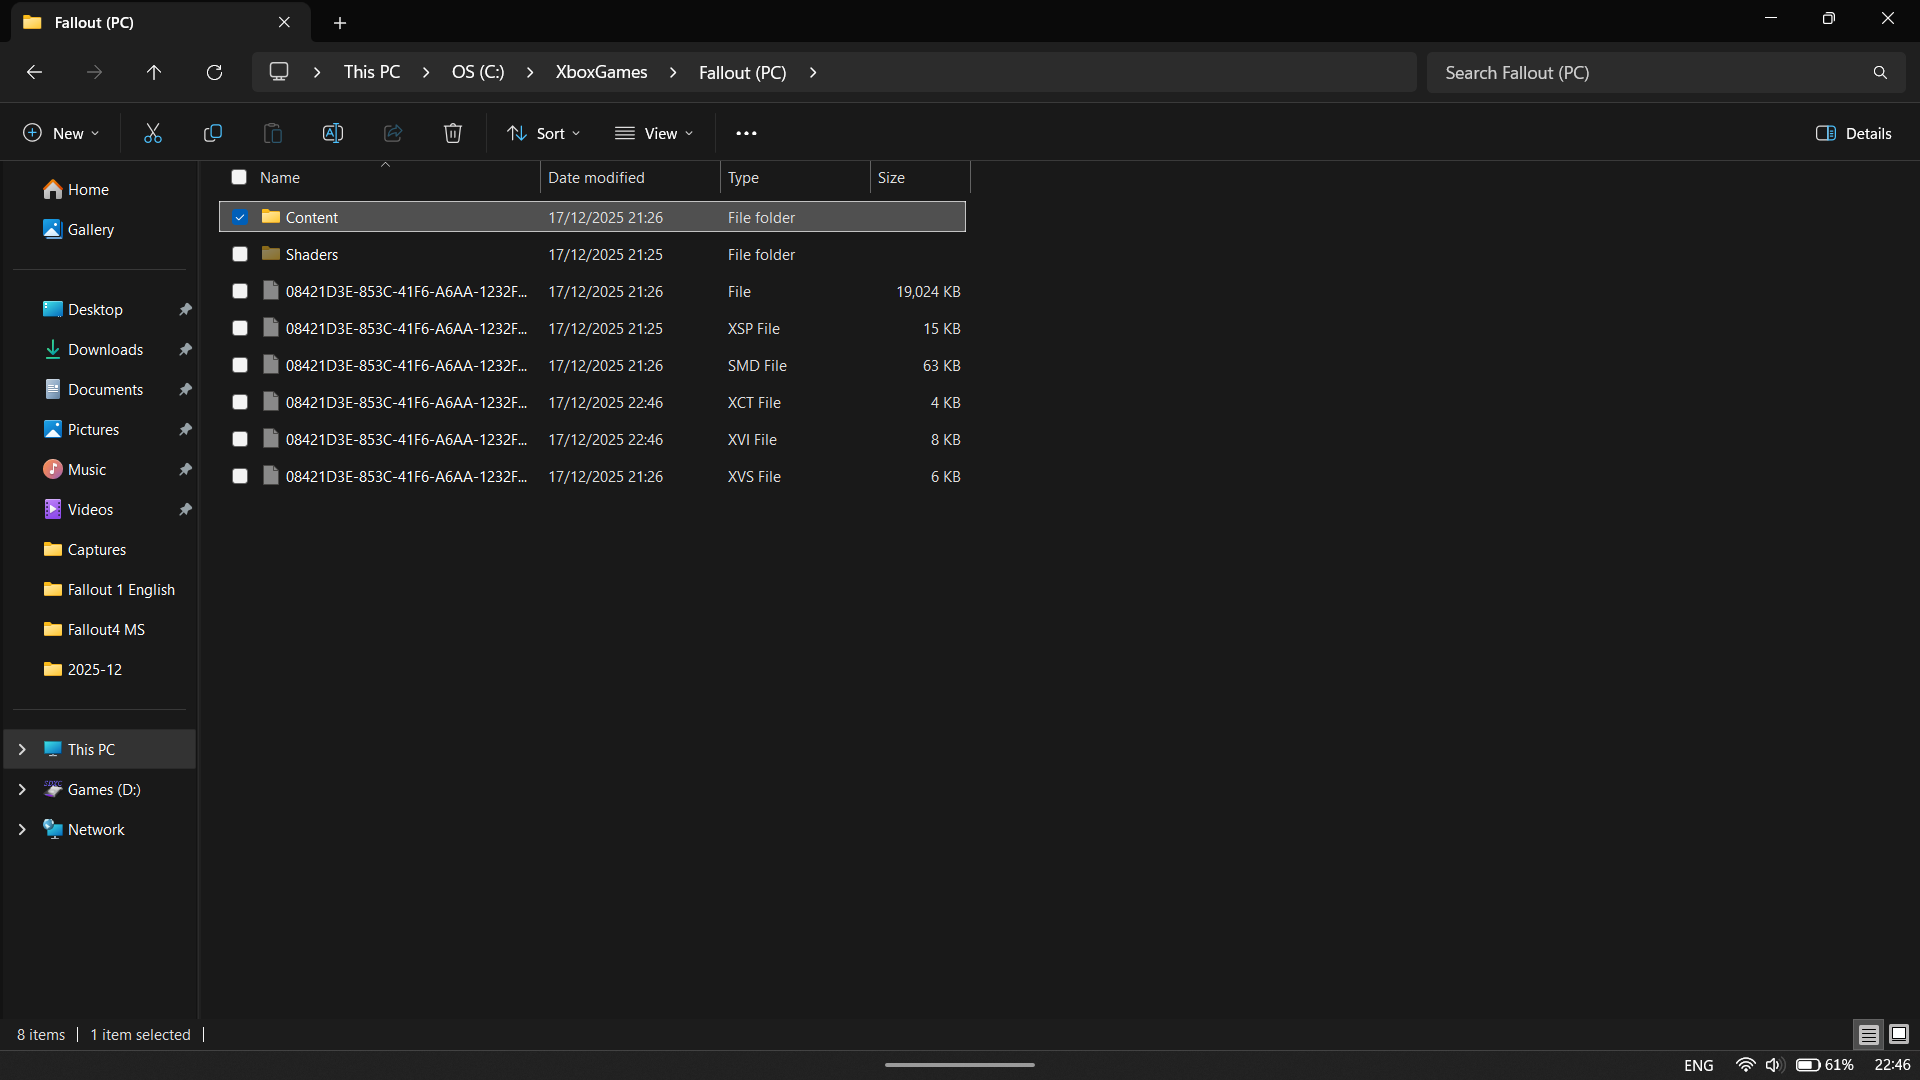
- Go to Content.
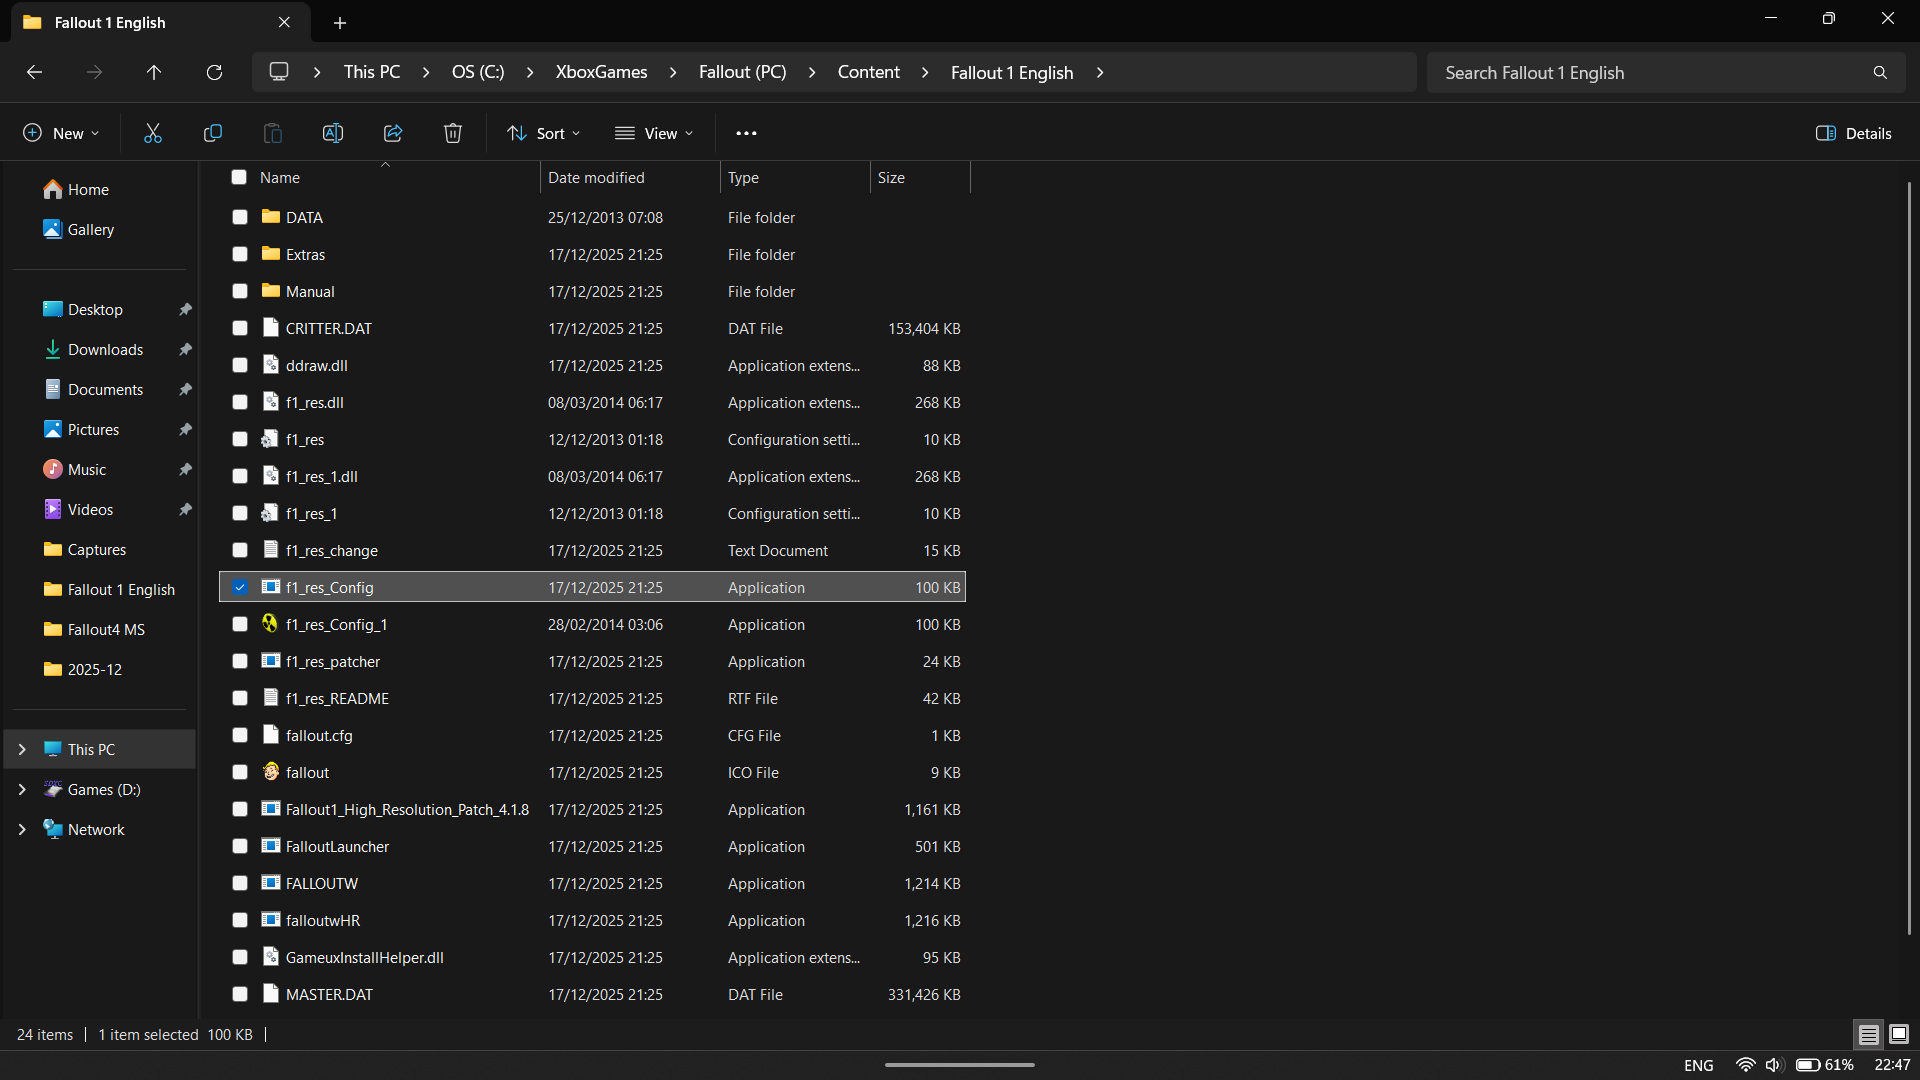
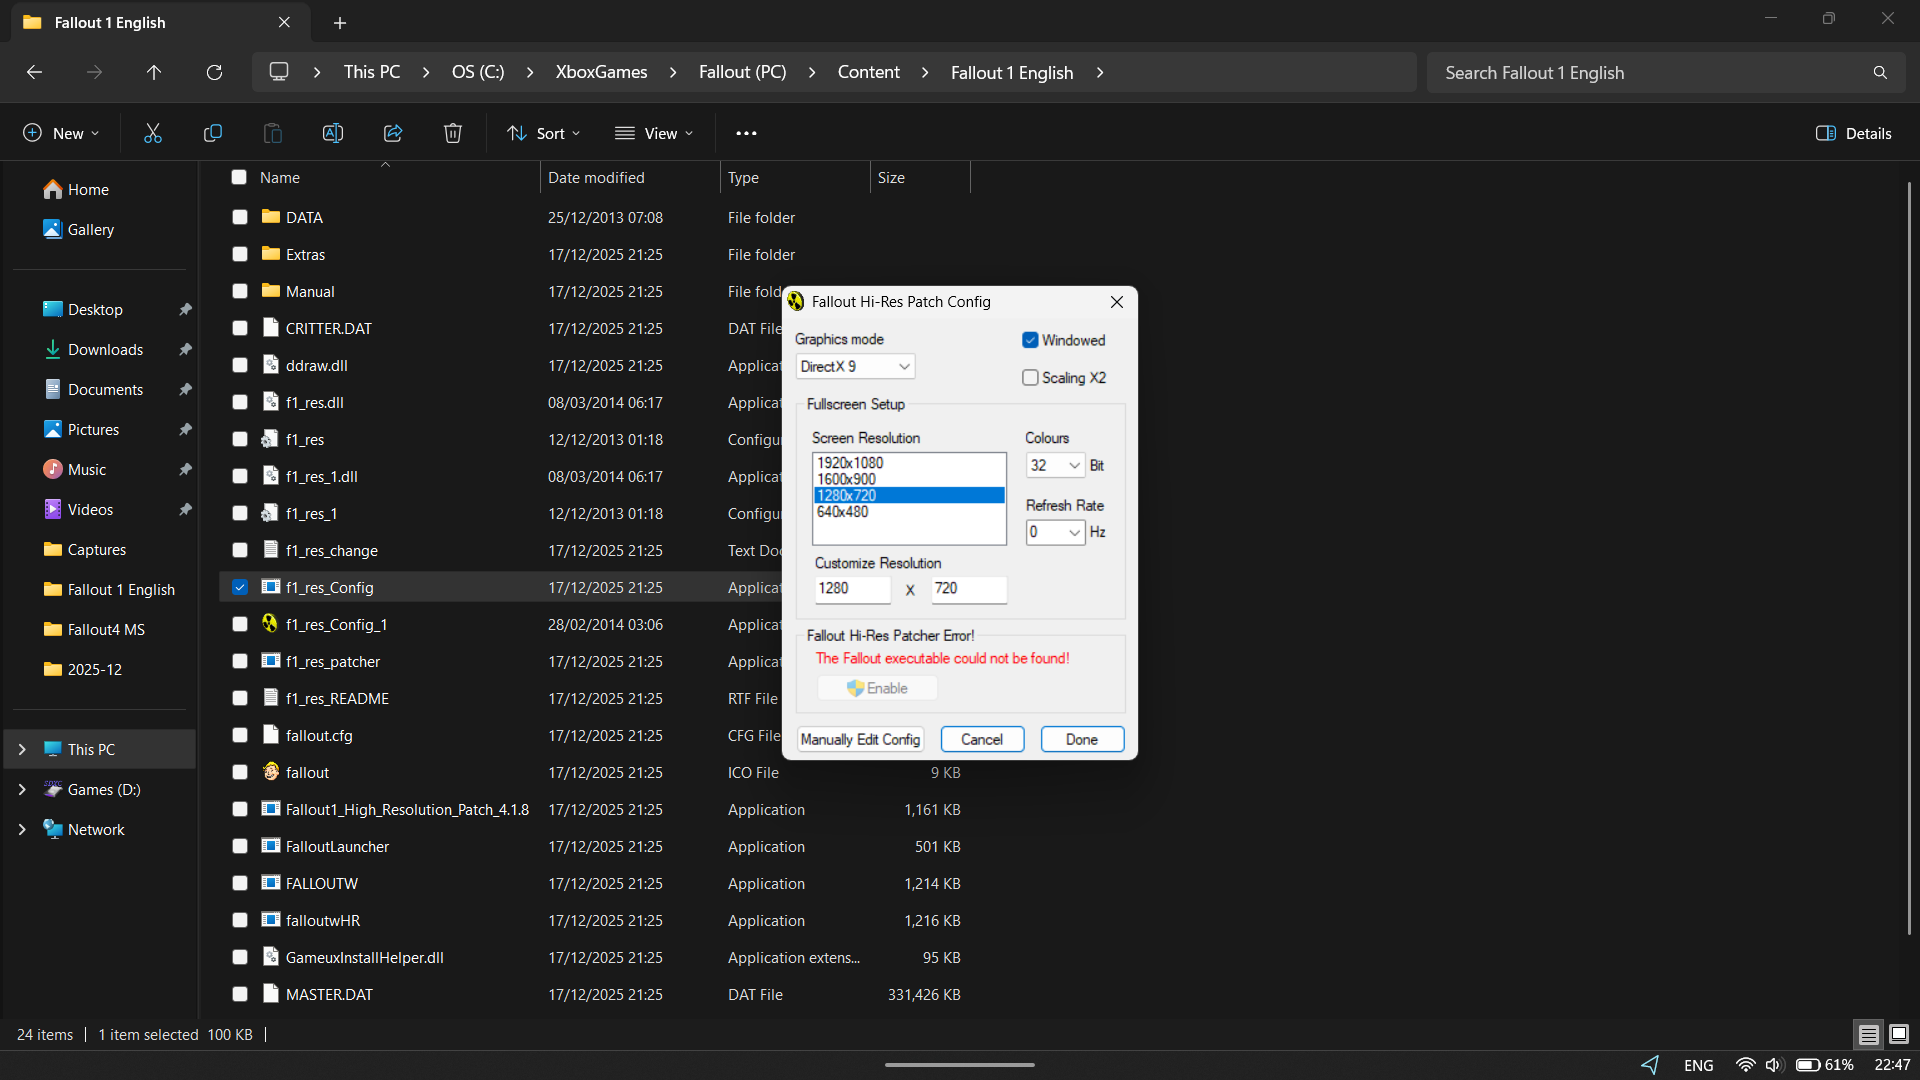
- Select f1_res_Config or f2_res_config.
- A new Window will open. In here, select “Manually Edit Config,”or choose your target resolution and select Enable if available.
- This should open in Notepad, but if prompted, select Notepad.
- Next, you want to change SCR_WIDTH to 1920.
- After that, change SCR_HEIGHT to 1080.
- If you encounter other issues, try setting the options WINDOWED=1 and WINDOWED_FULLSCREEN=0 to match here.
- Now, save and close the file.
If you downloaded the game through Steam, it should now launch without any problems. But if you’re using the Xbox App, you might need to take one additional step to get it running, just like I did.
I ran into some trouble here because the previous step didn’t work when I tried it through the Xbox App. I had to manually edit files in the WindowsApps folder instead. Here’s how I did that:
Additional steps for Fallout 1 & 2 on the Xbox App
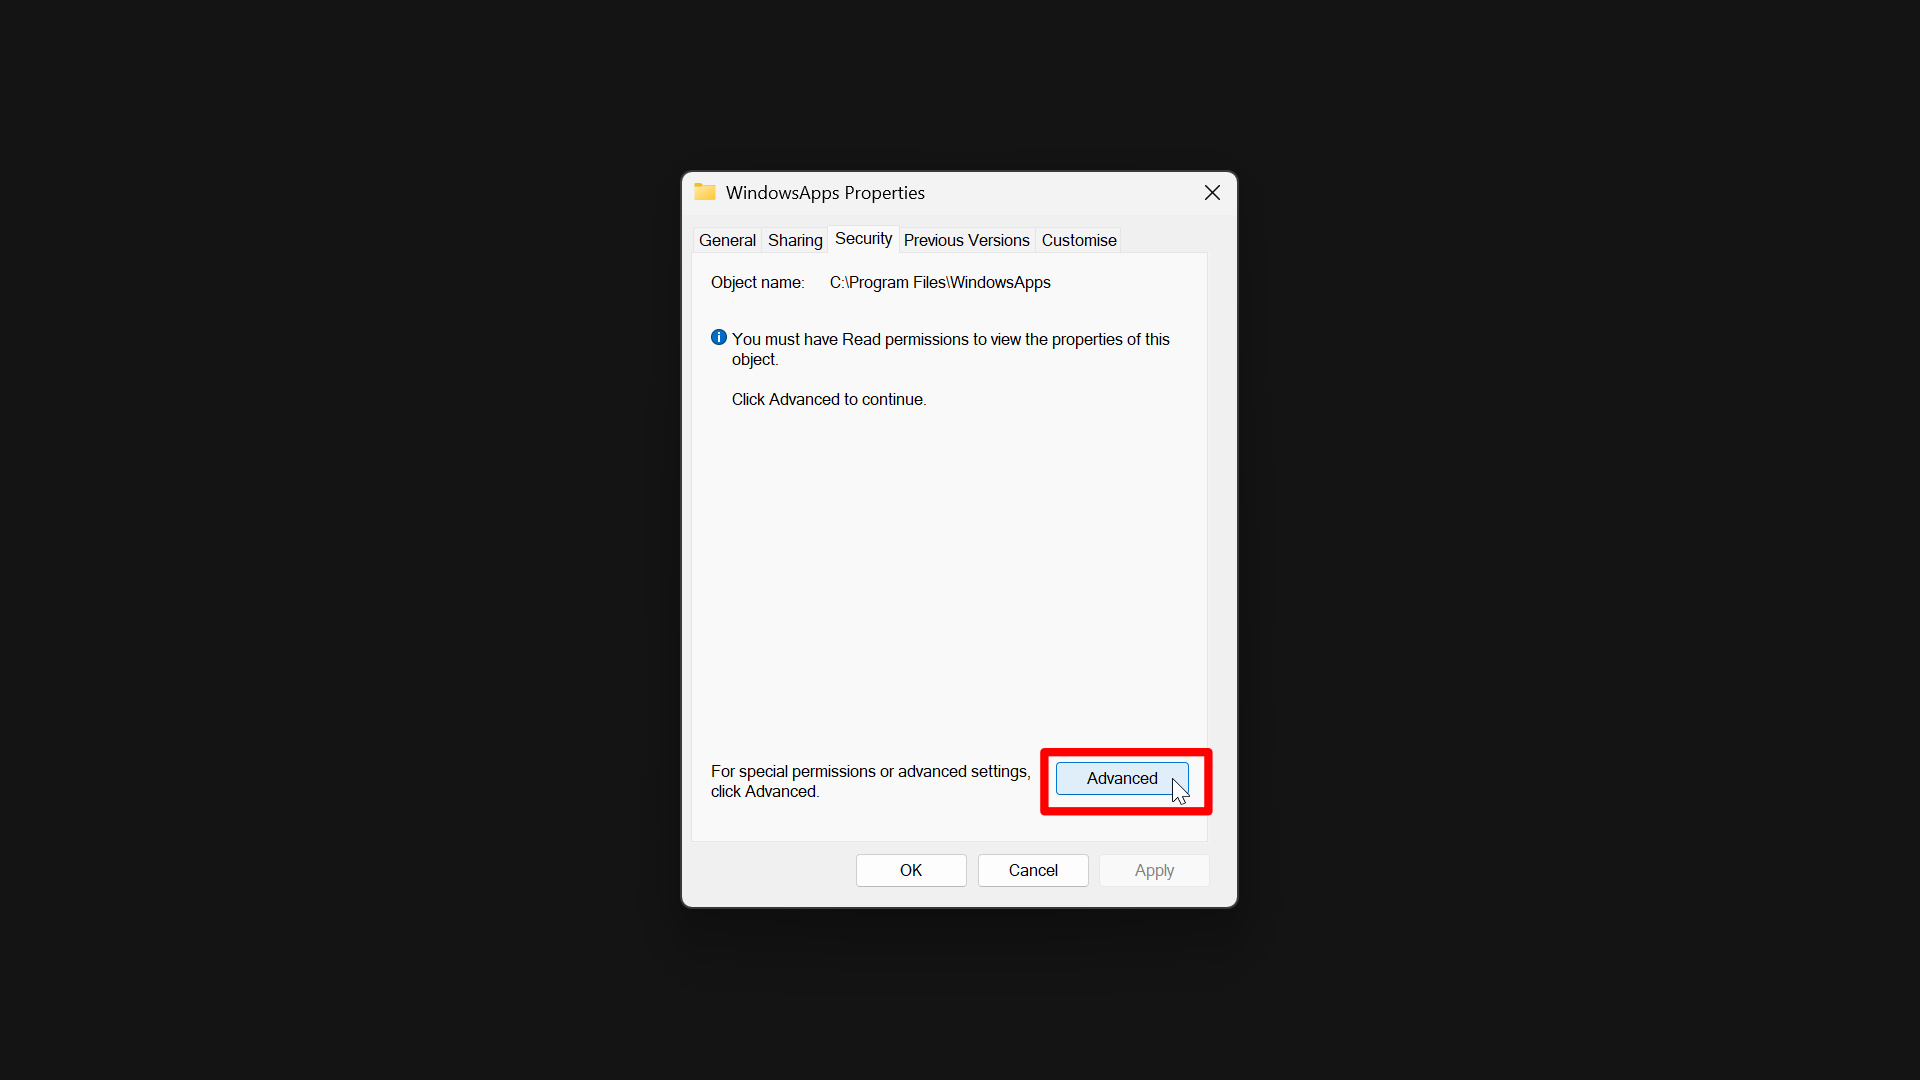
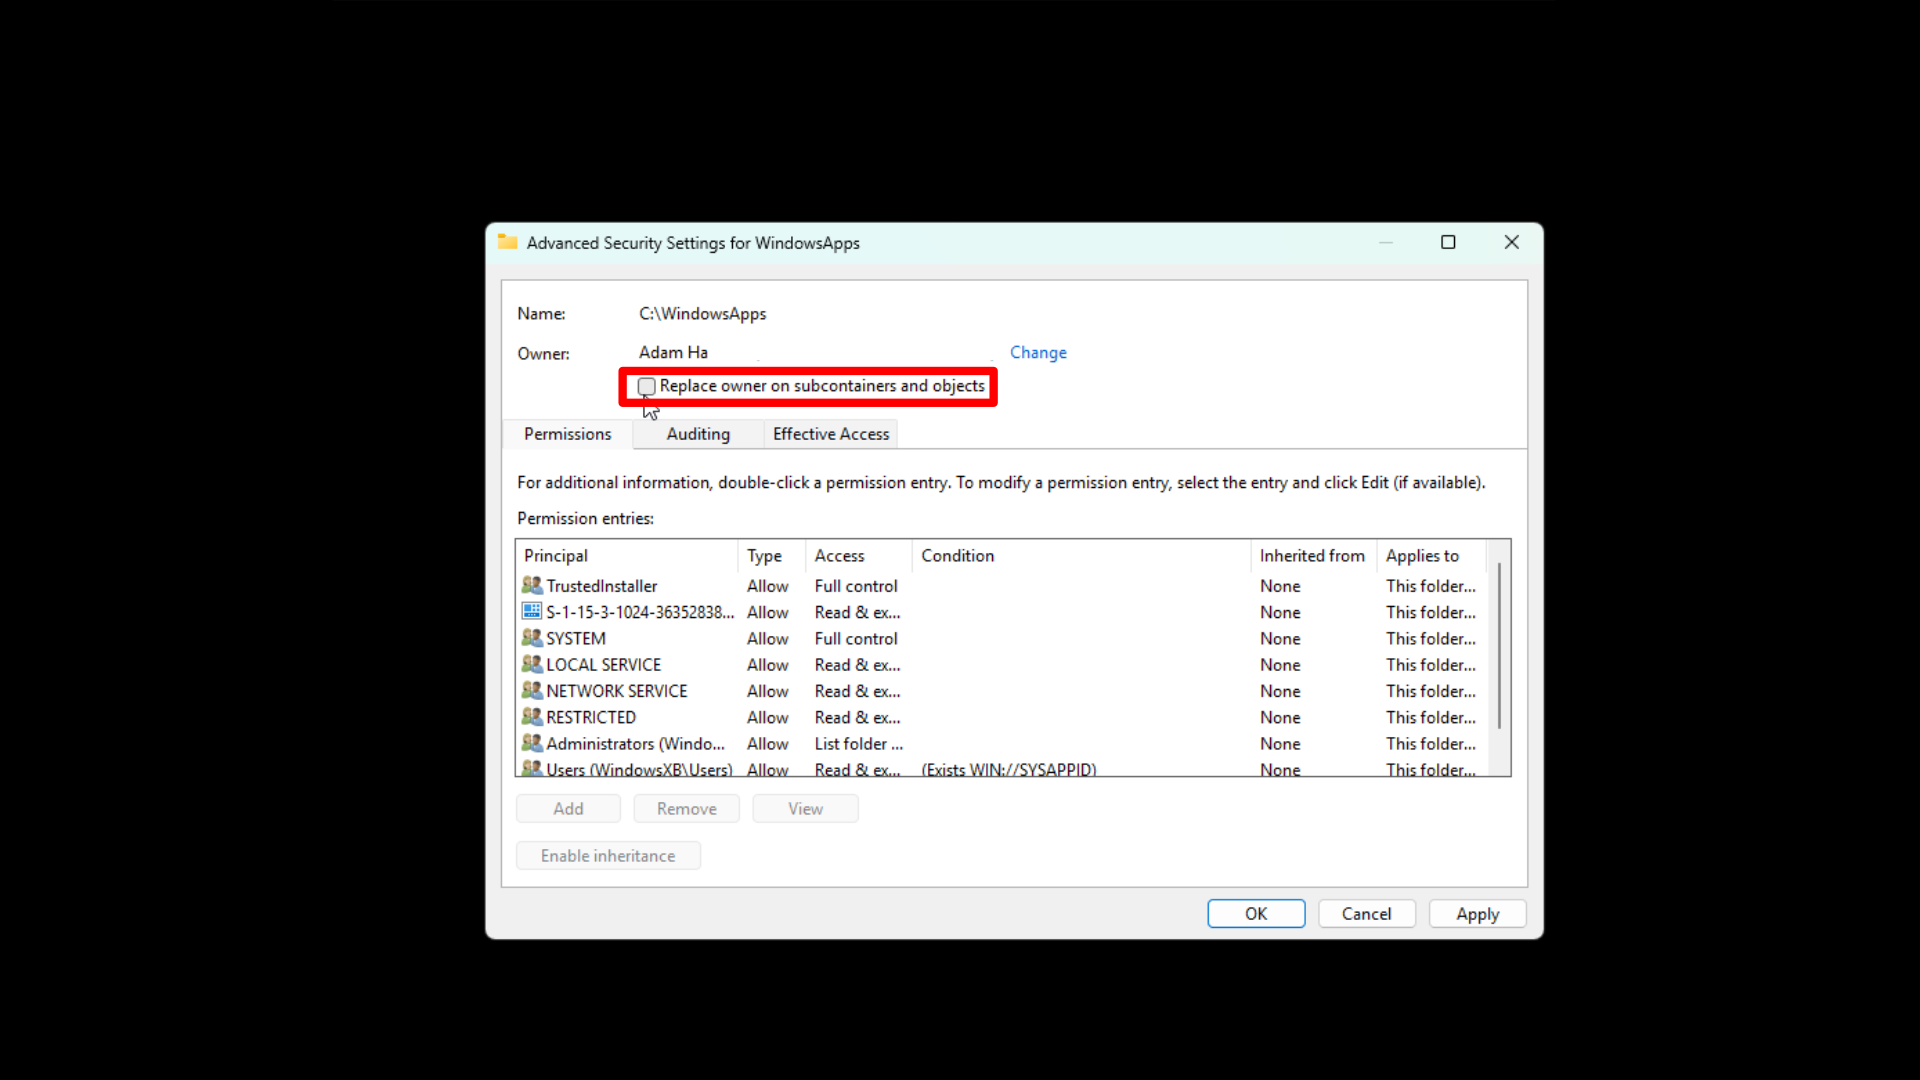
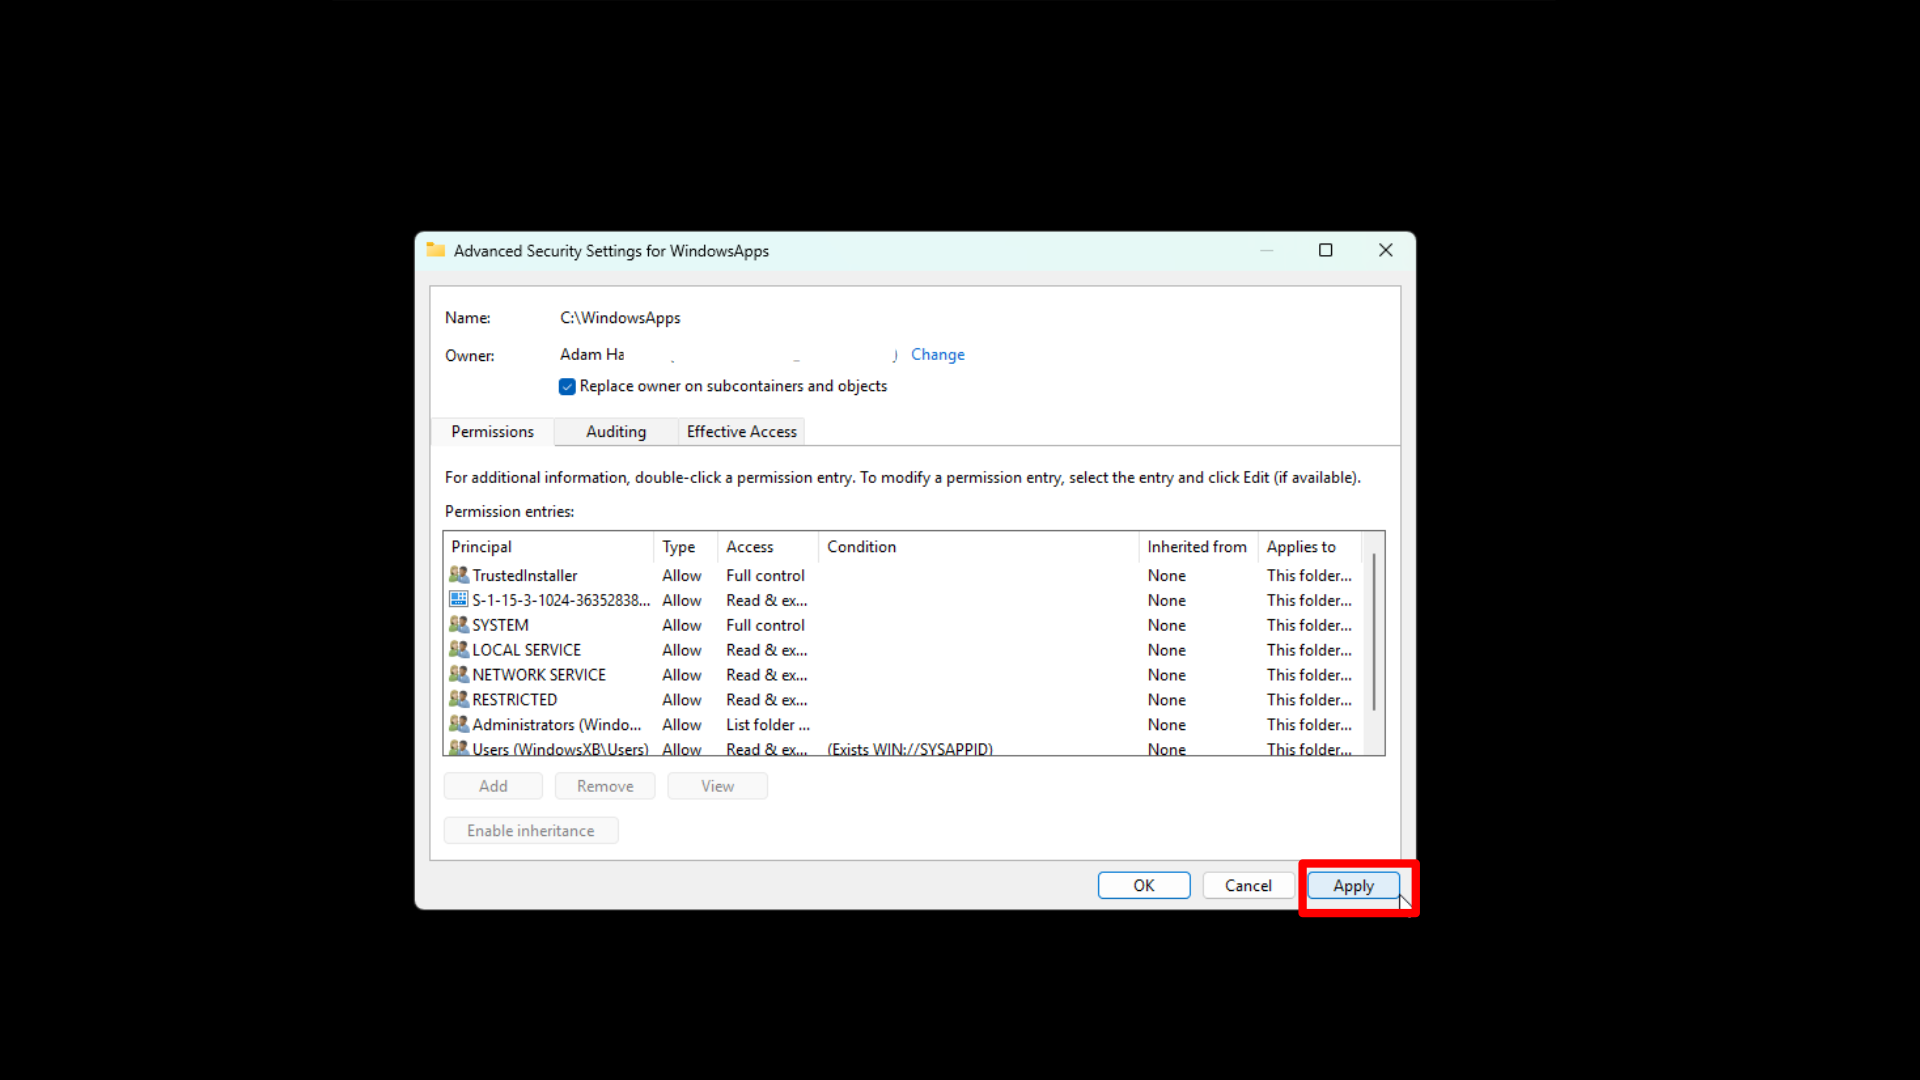
Make sure the “Replace owner or subcontainers and objects” box is checked. It’s currently unchecked in the picture, but should be checked in the following one.
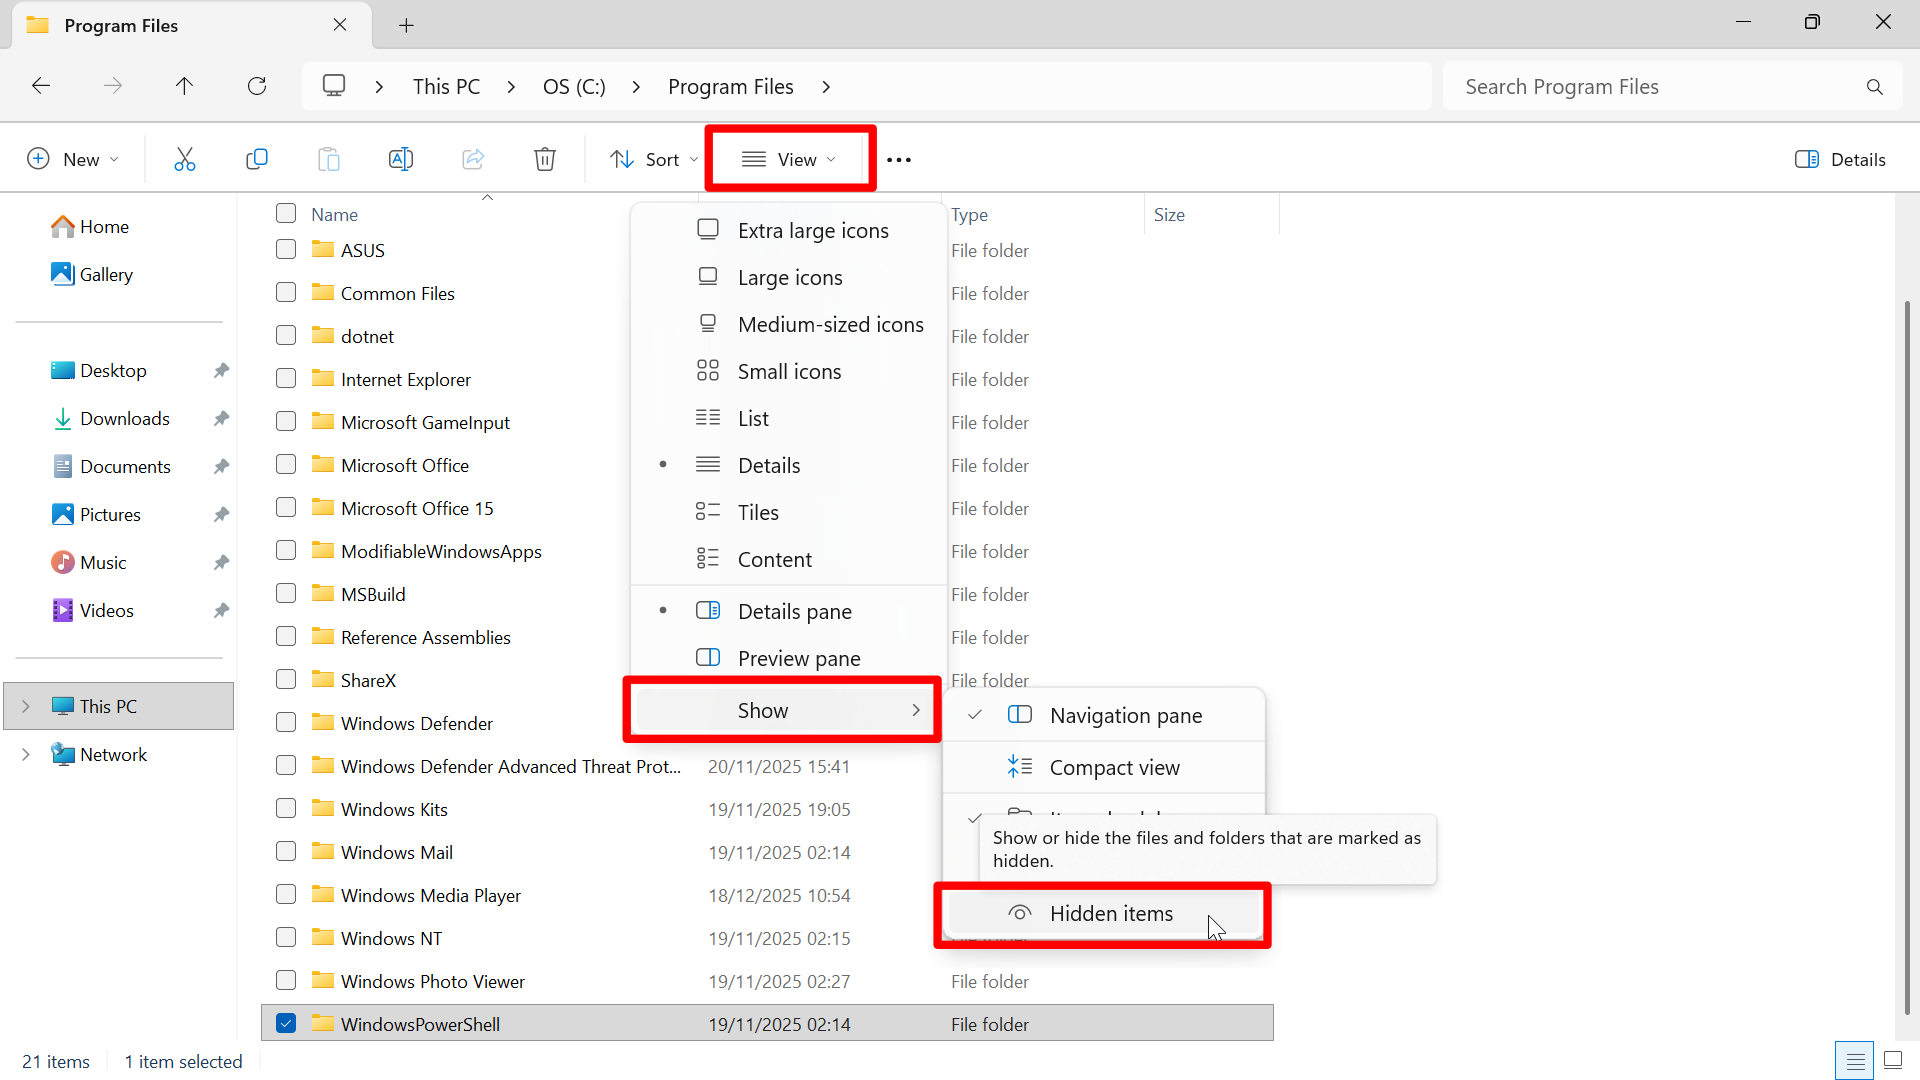
- Within File Explorer, select View, then Show, and make sure Hidden items is enabled.
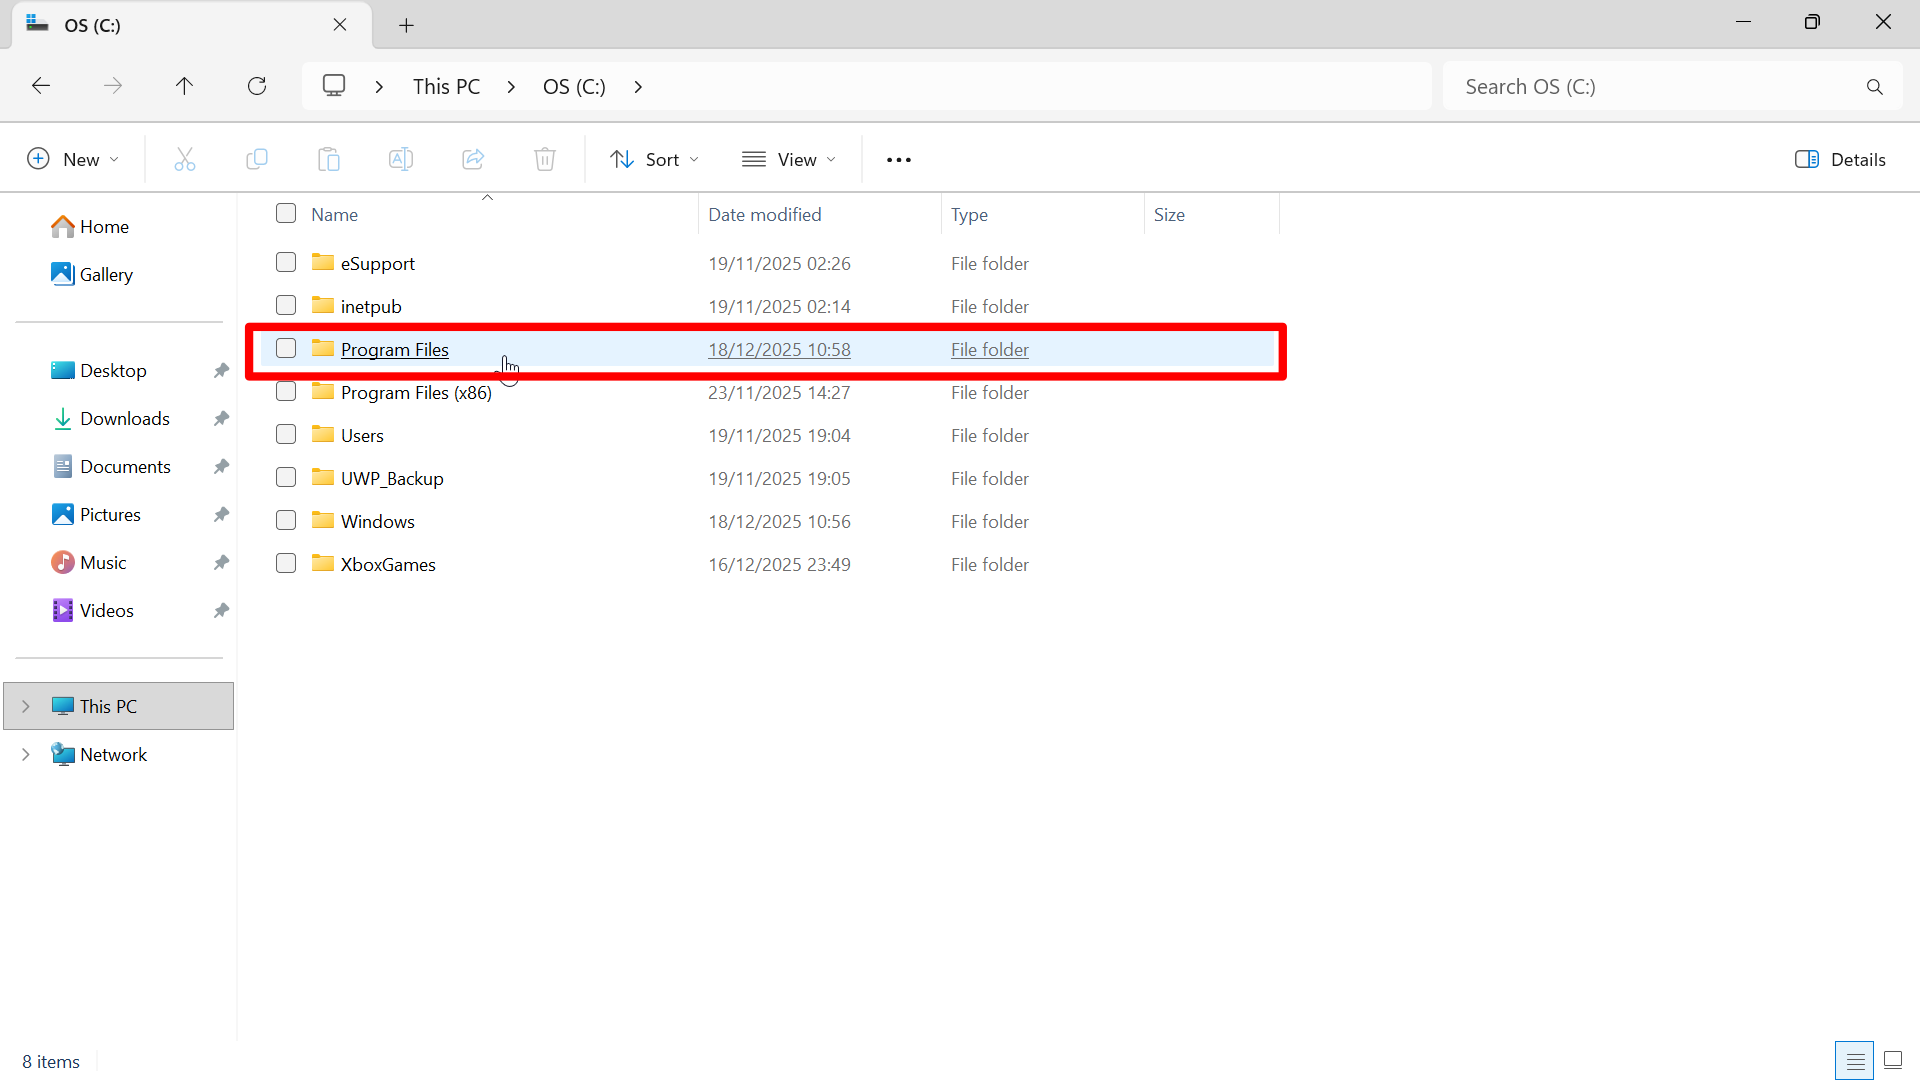
- Next, open File Explorer and go to your C drive.
- Open Program Files, and locate WindowsApps.
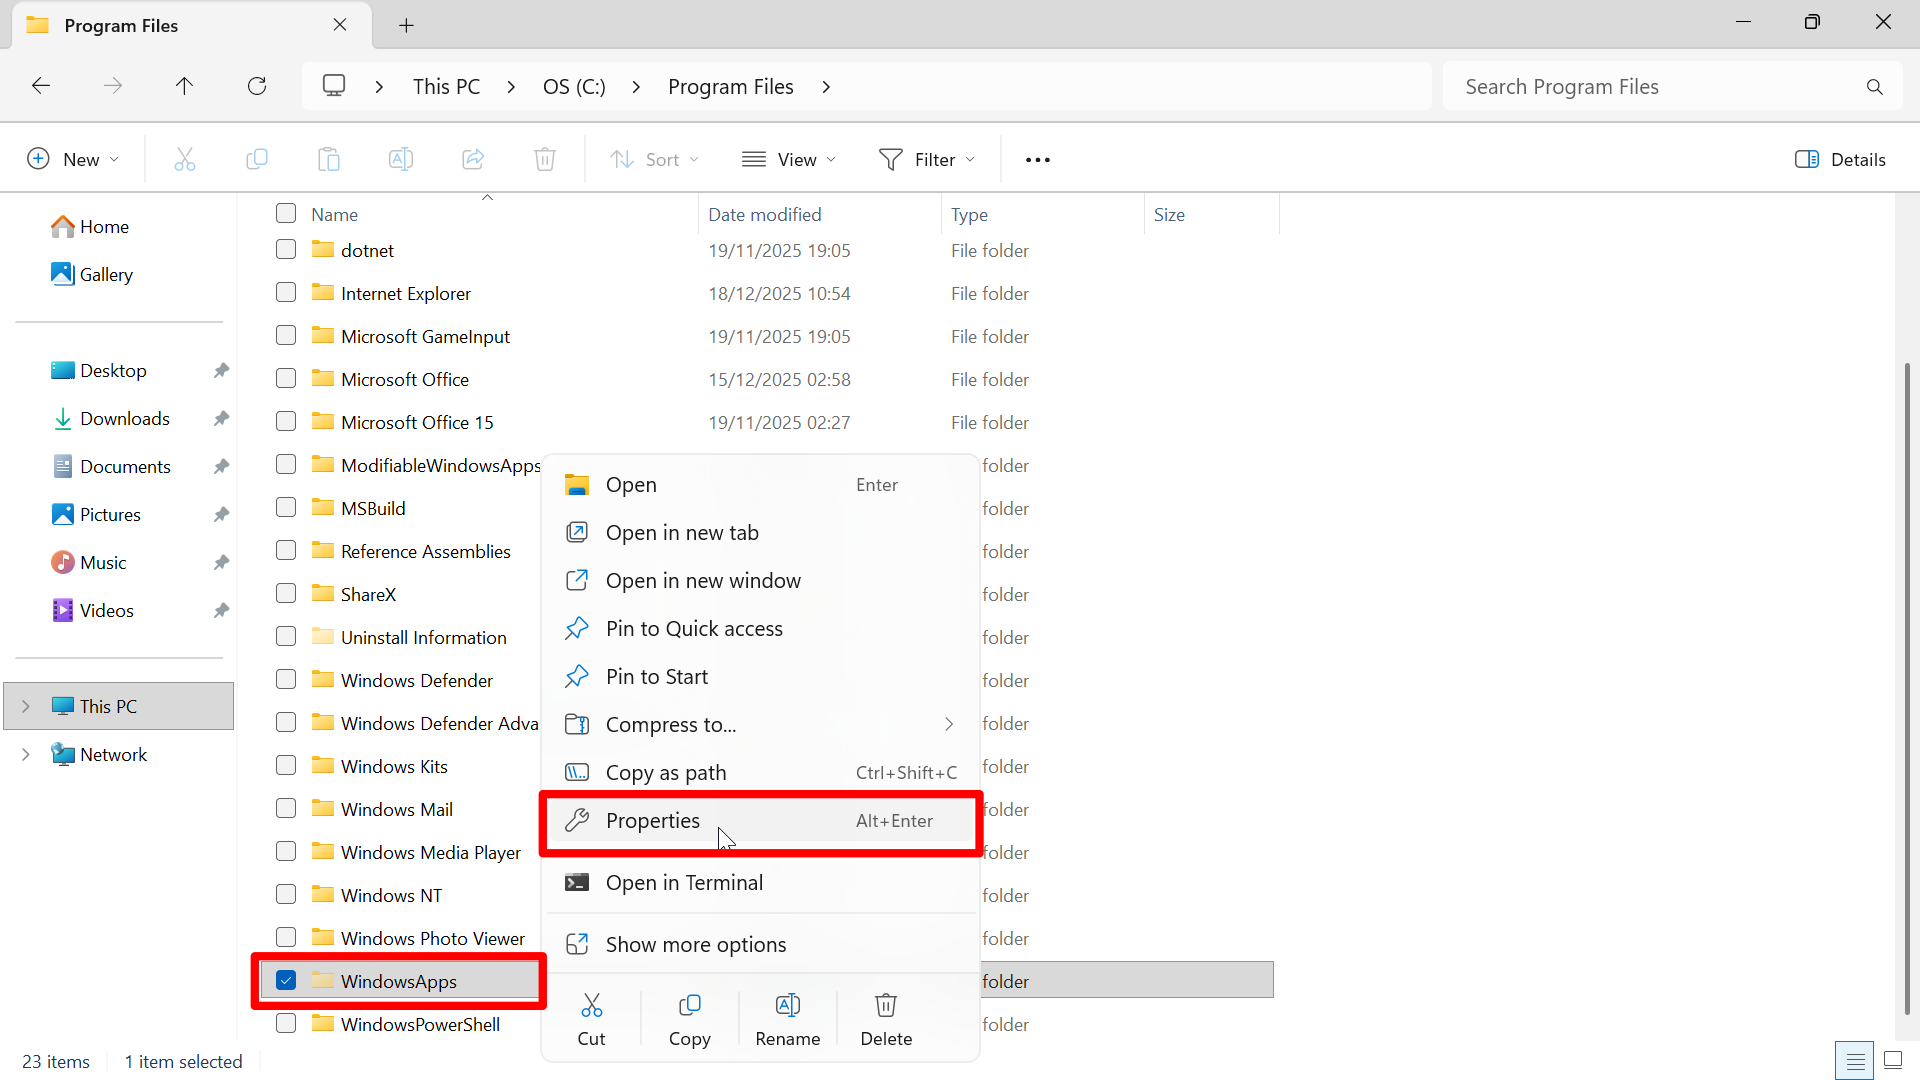
- Right-click WindowsApps.
- Select Properties.
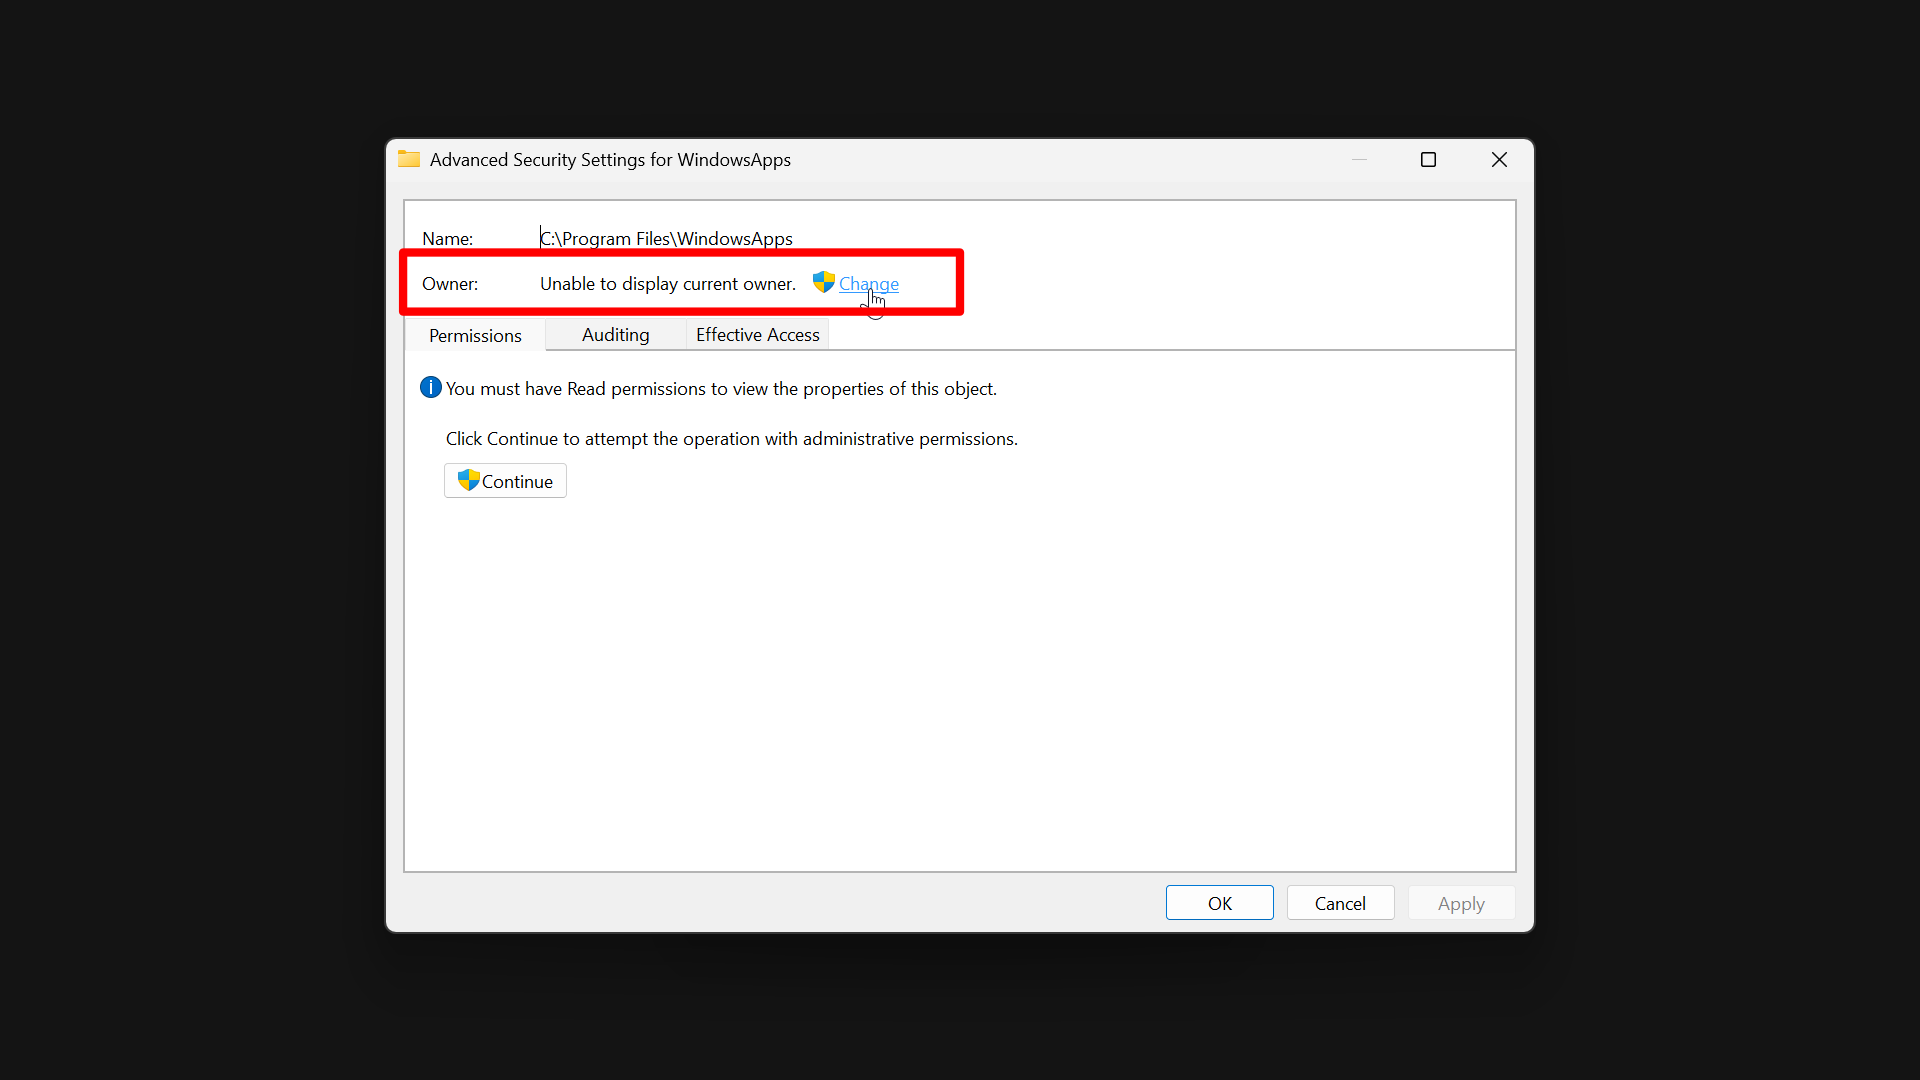
- Go to the Security tab, then select Advanced.
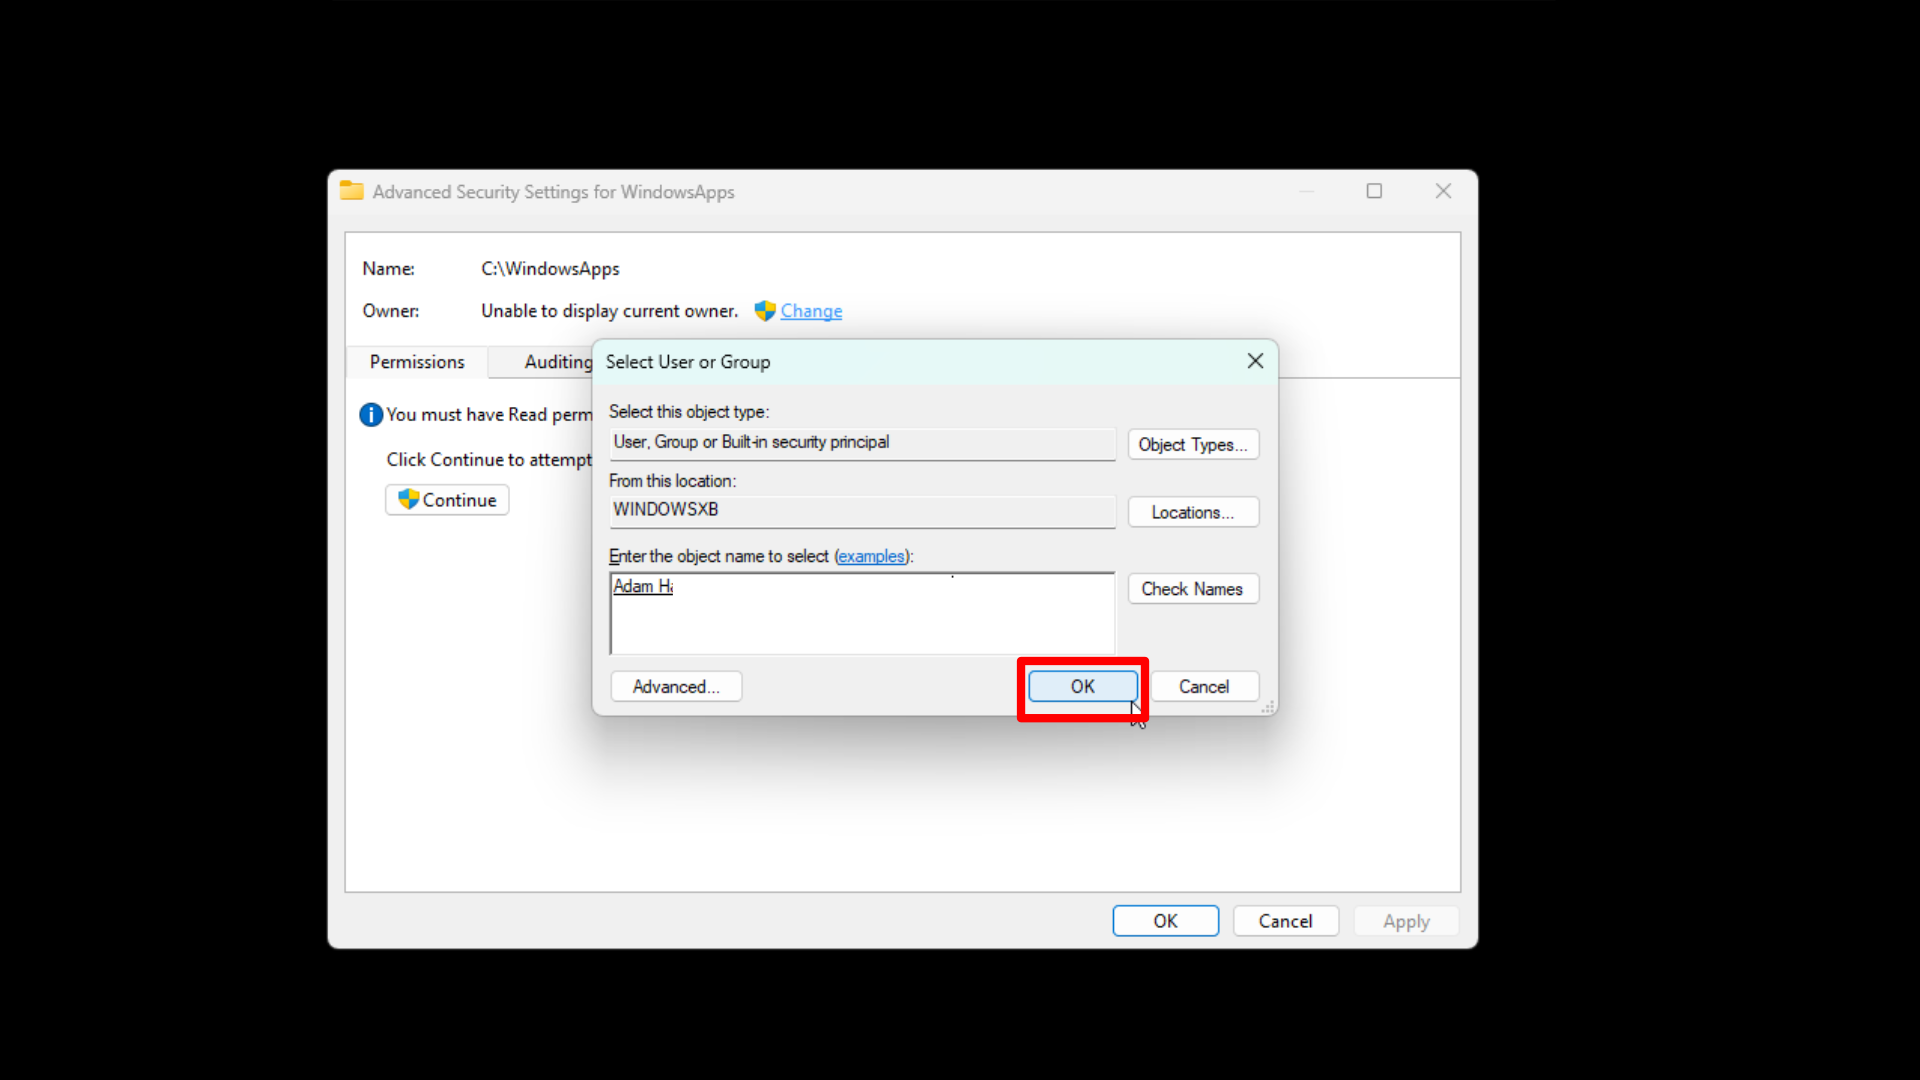
- At the top,next to Owner, select Change.
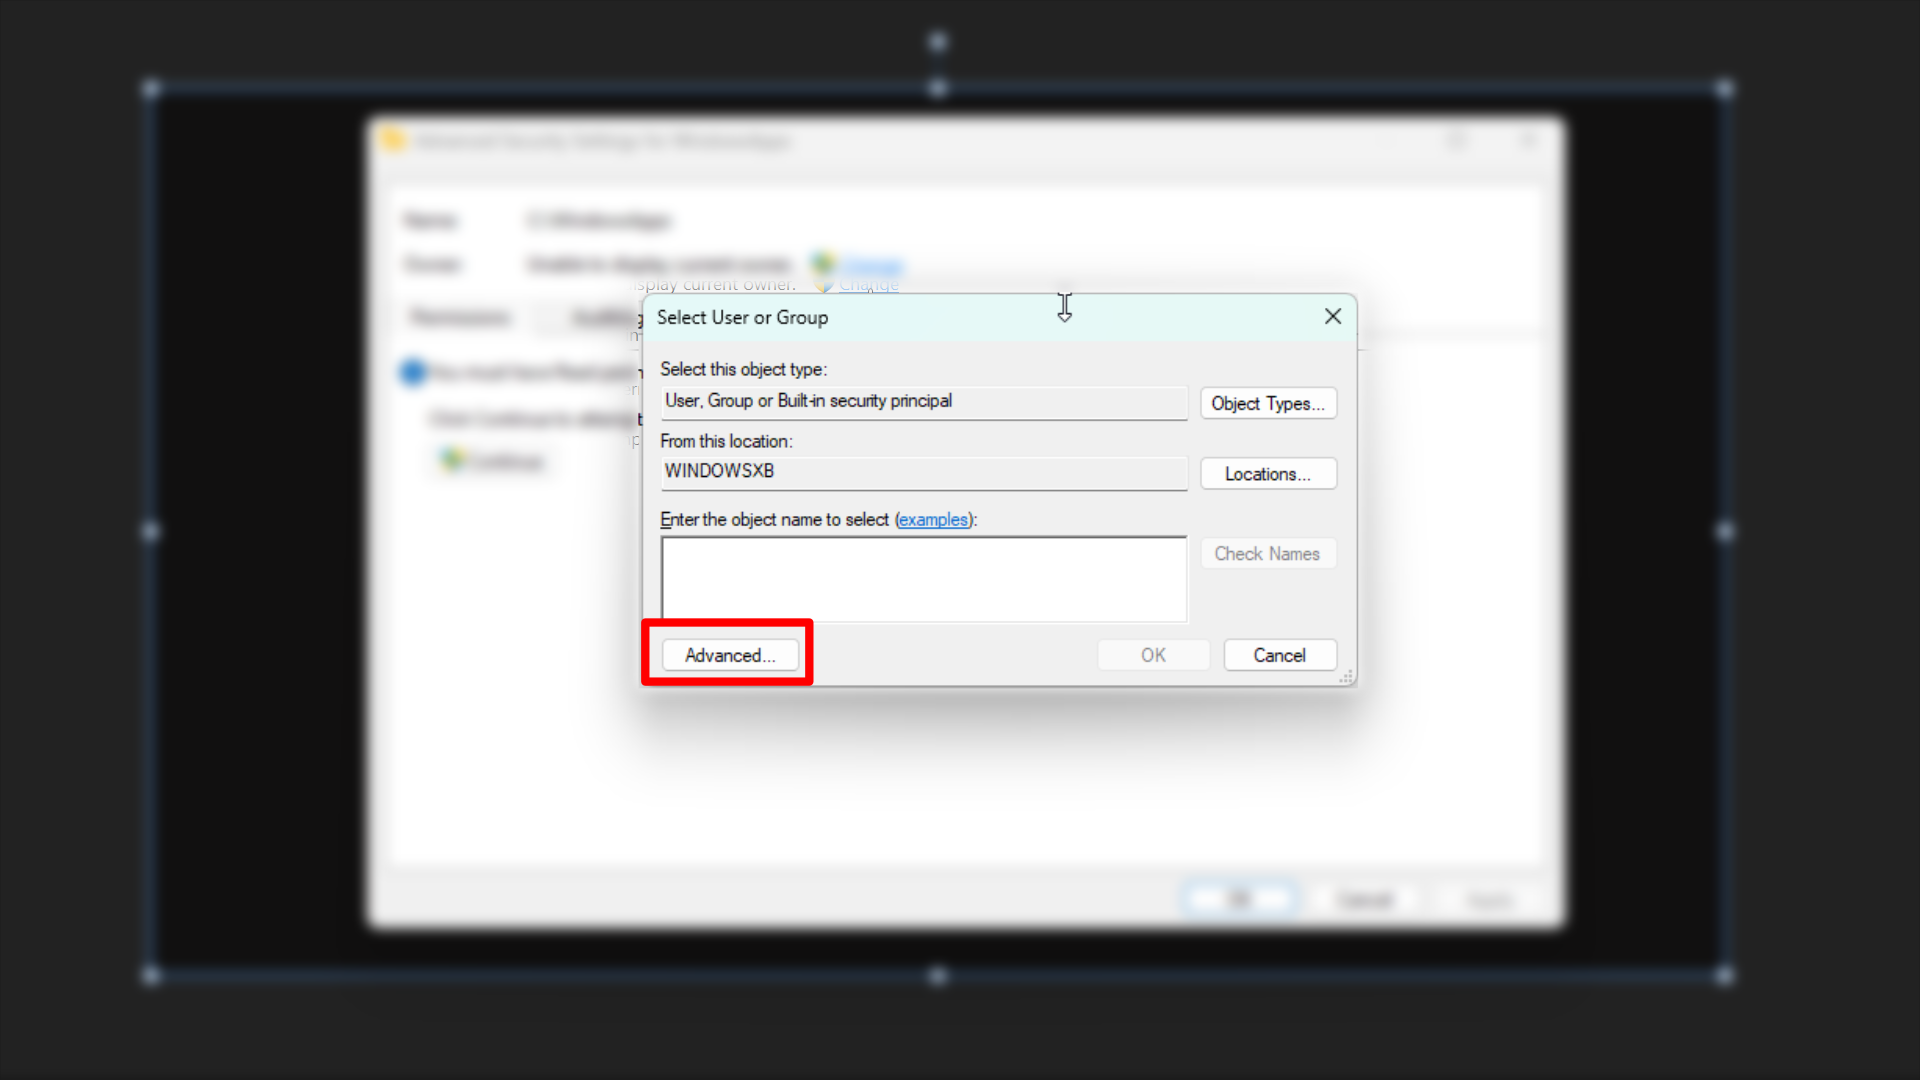
- Select Advanced.
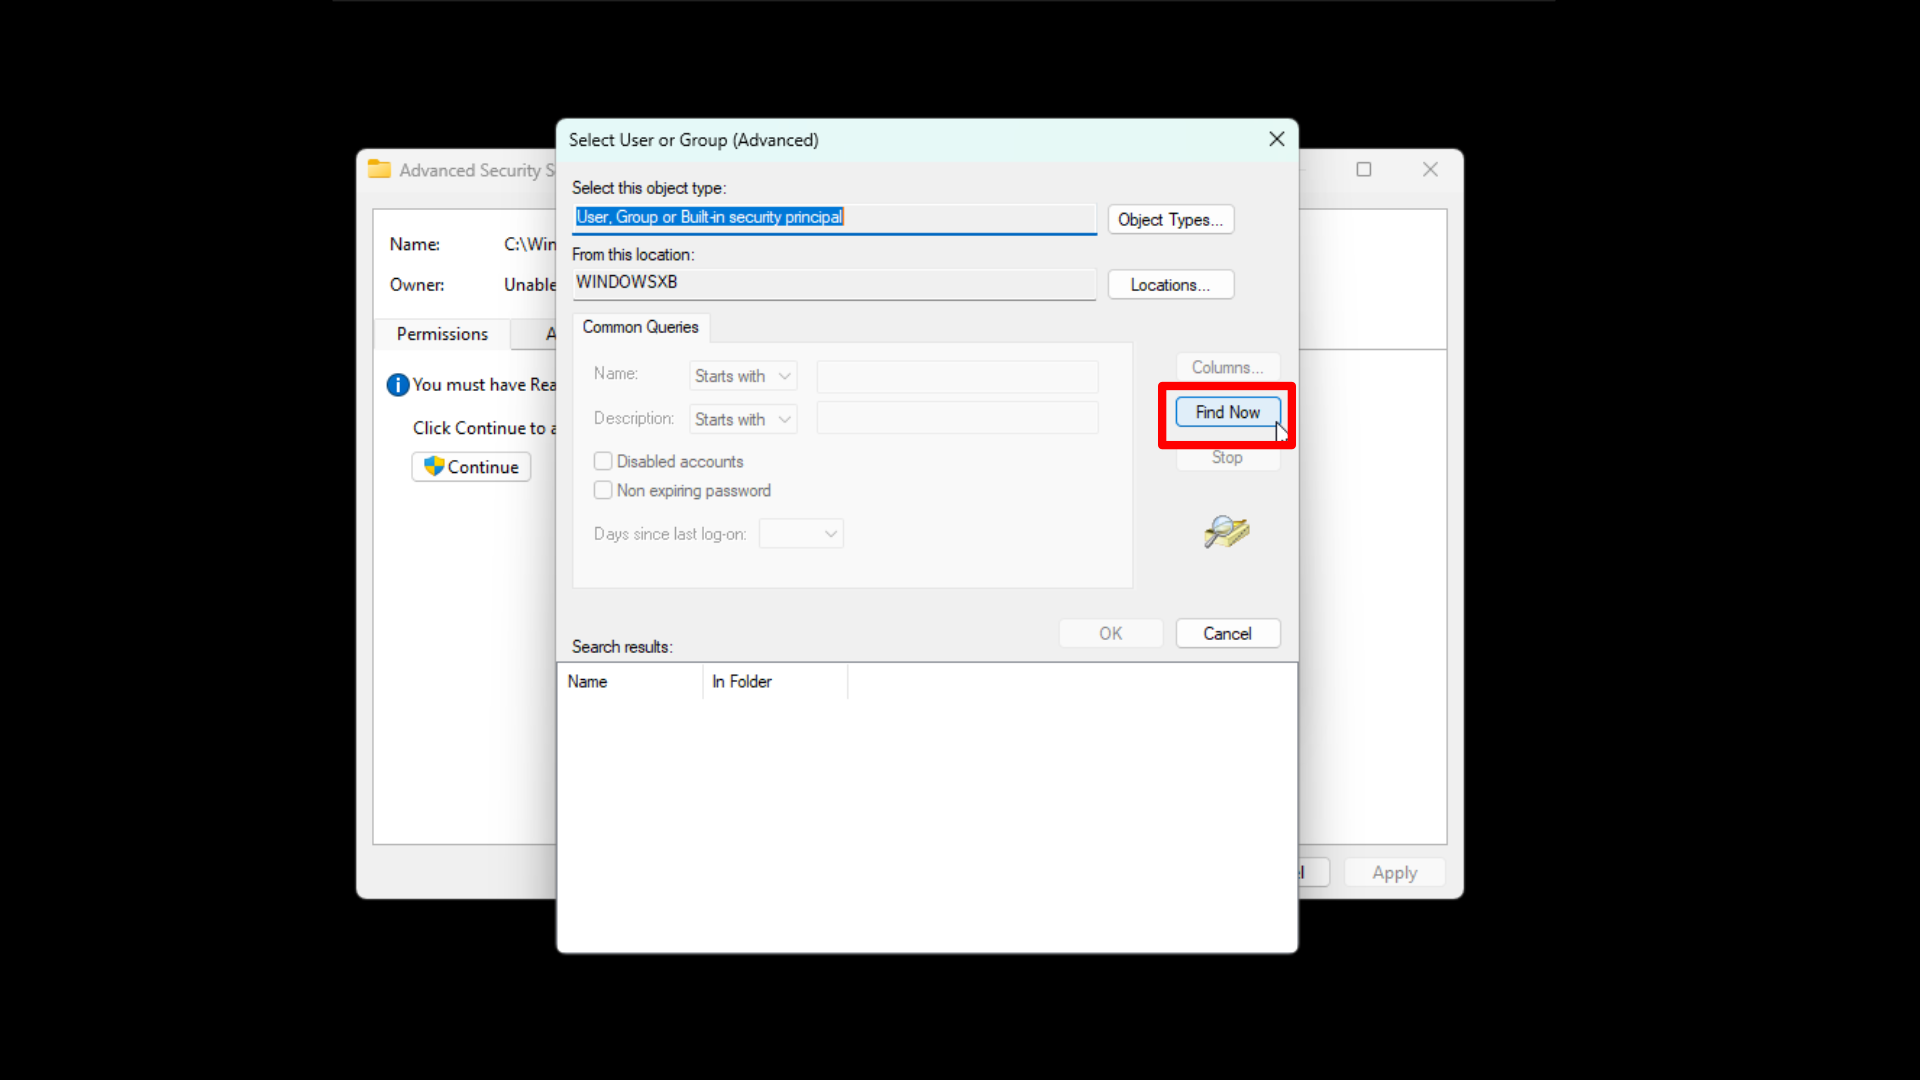
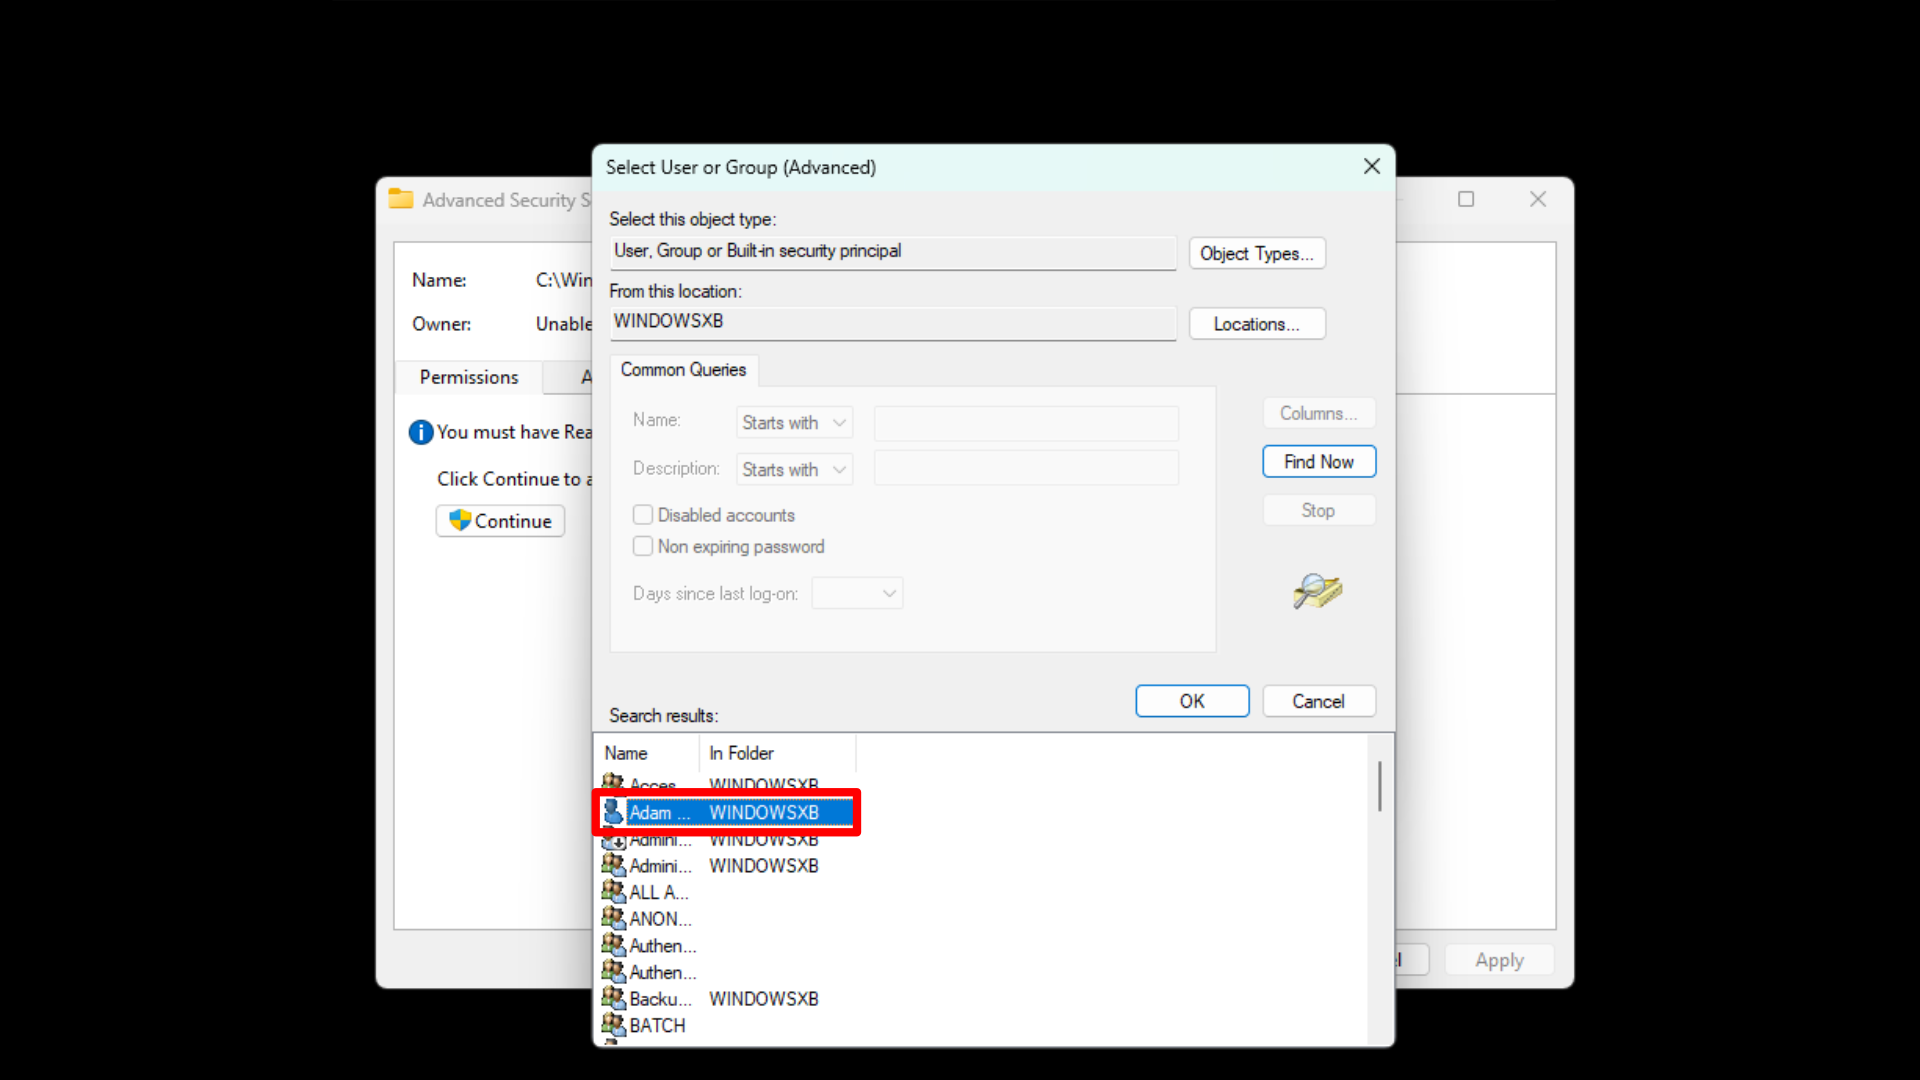
- Choose the option Find Now.
- You’ll want to select your user account and click OK.
- Click on the box next to Replace owner on subcontainers and objects.
- Select Apply, then select OK.
- Return to the Security tab and select Edit.
- Select your user account, then enable Full control.
- Select Apply, then select OK.
- Now open WindowsApps, and you should be able to browse it normally.
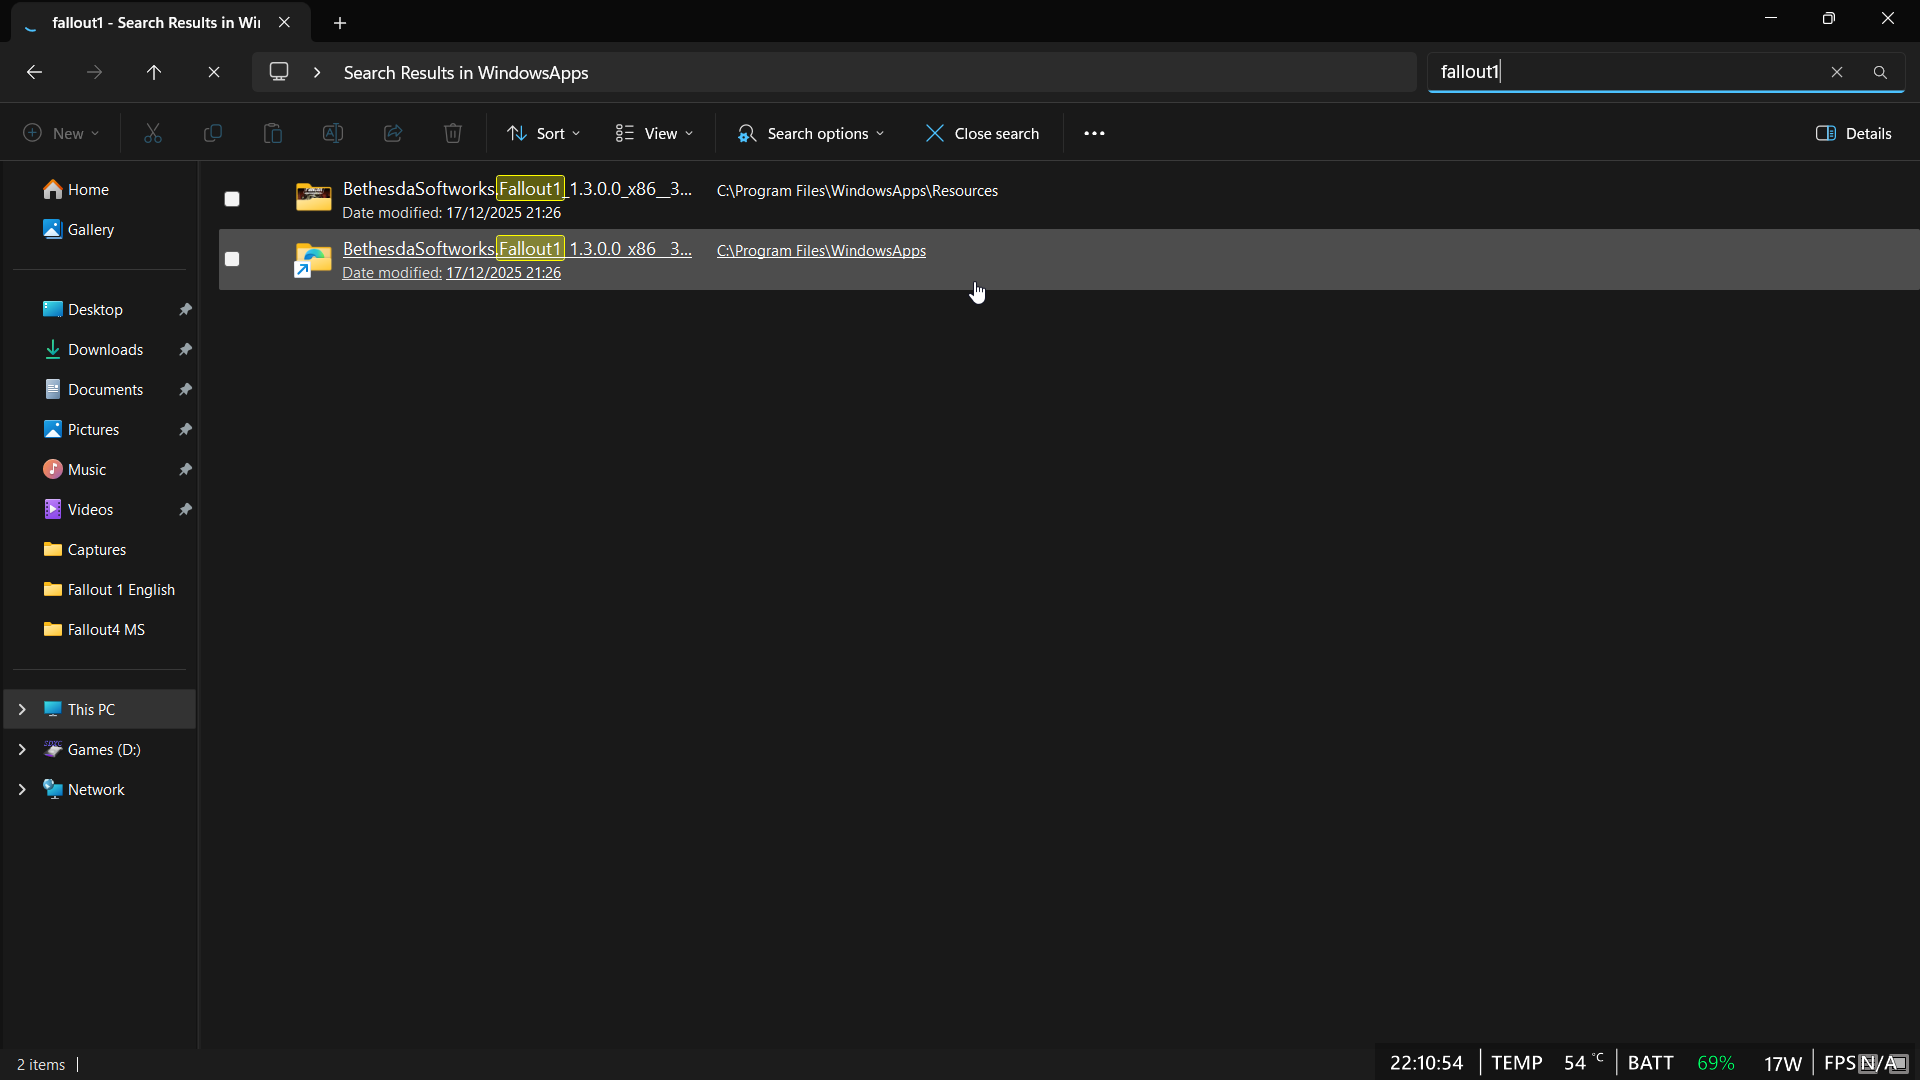
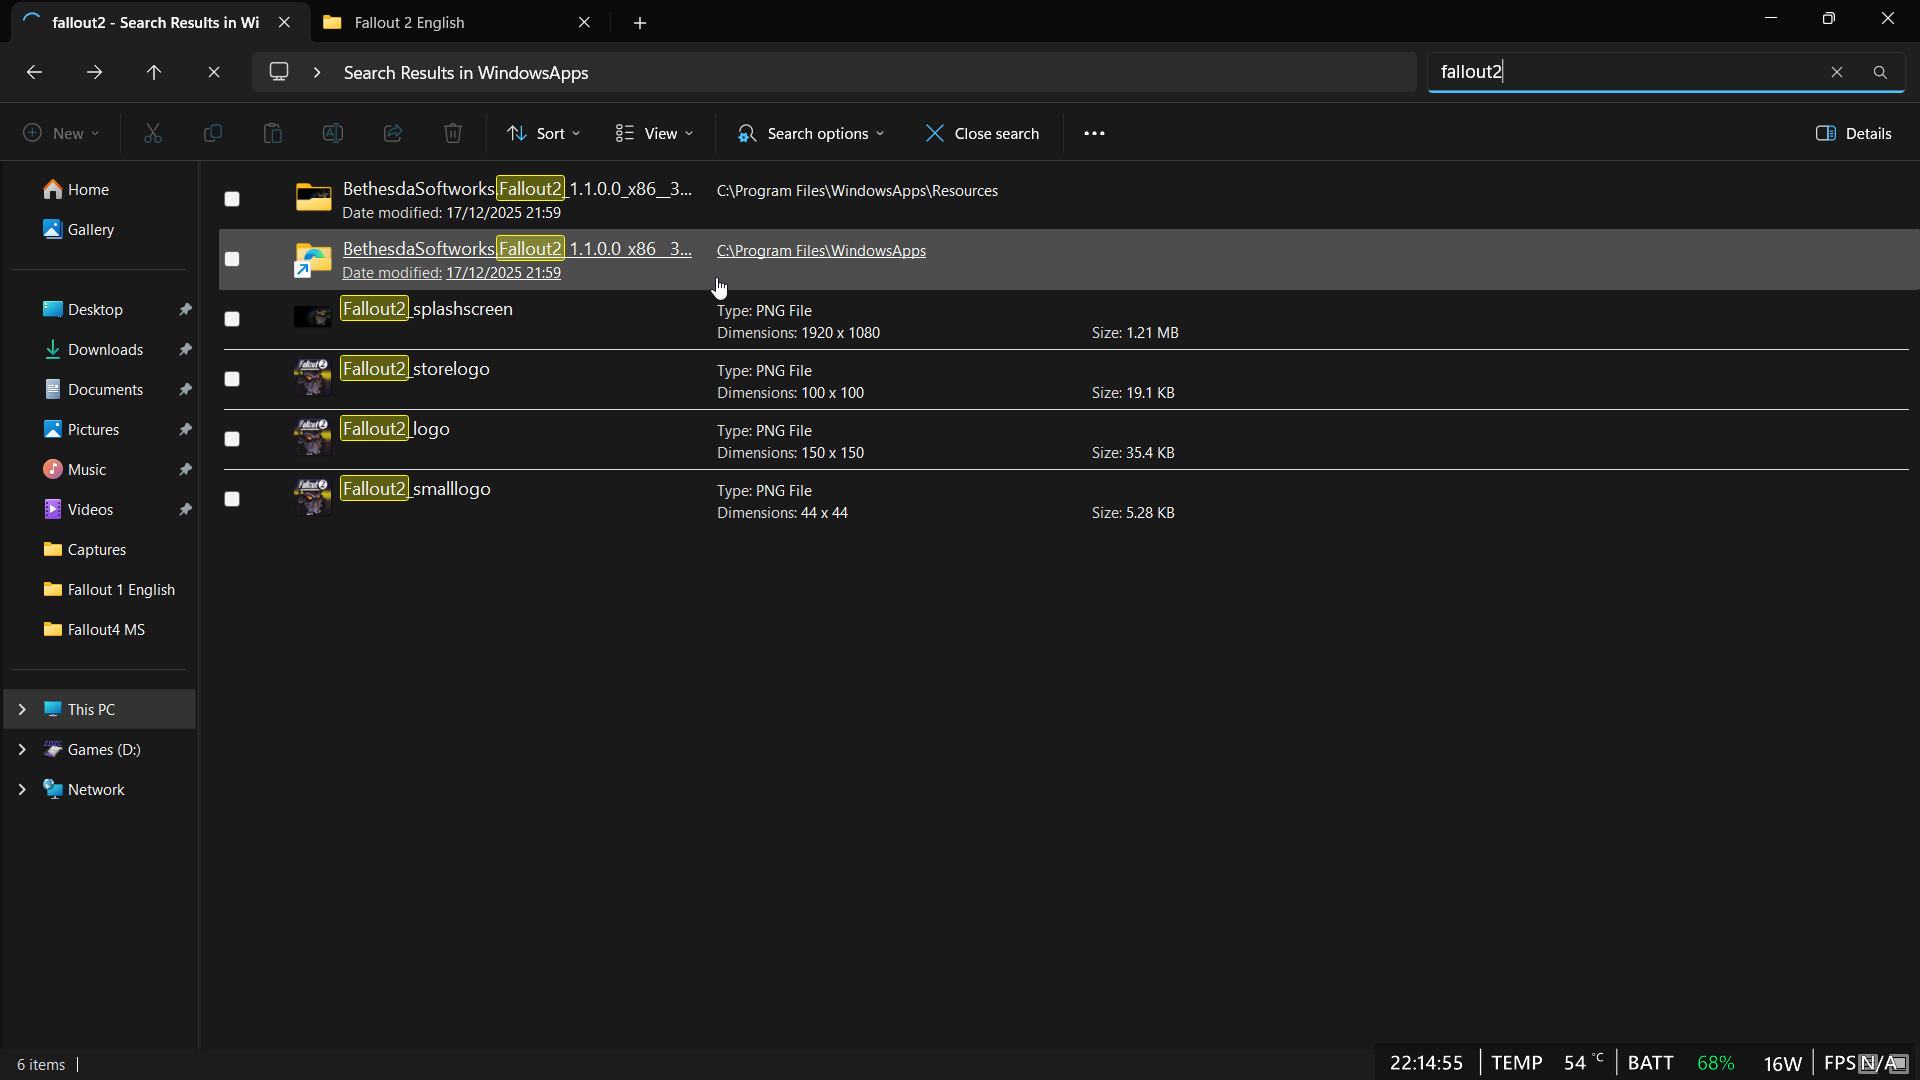
Now, repeat those initial steps, but this time use your preferred language. If you do that, you should be able to start the game using the Xbox App.
This solution also applies to the Steam version of the game, though the folder you need to access is in a different place. You should be able to install “Fallout1_High_Resolution_Patch_4.1.8” without any issues. If it doesn’t work, I’ll explain what to do next.
Additional steps for Fallout 1 & 2 on Steam
Here’s how you get to the same folder but if you installed the game via Steam:
- Within Steam, right-click Fallout 1 or Fallout 2 in your library and select Properties.
- Select Installed Files from the menu on the left.
- Click Browse to open the game’s install directory in File Explorer.
- Now try to install the Fallout1_High_Resolution_Patch_4.1.8 or Fallout2_High_Resolution_Patch_4.1.8 patch.
- You will be prompted to extract files. Select Yes and then select Yes to all.
- If this doesn’t work, follow the same guide as above and open up f1_res_Config or f2_res_config.
- A new window will open. In here, Select “Manually Edit Config”.
- This should open in Notepad, but if prompted, select Notepad.
- Next, you want to change SCR_WIDTH to 1920.
- After that, change SCR_HEIGHT to 1080.
- Make sure WINDOWED=1 and WINDOWED_FULLSCREEN=0 are like this.
- Finally, save and close the file.
After completing these steps, you should now be able to play Fallout 1 or Fallout 2 on your handheld PC, whether you’re using the Xbox App or Steam.
Fallout 3 handheld optimization
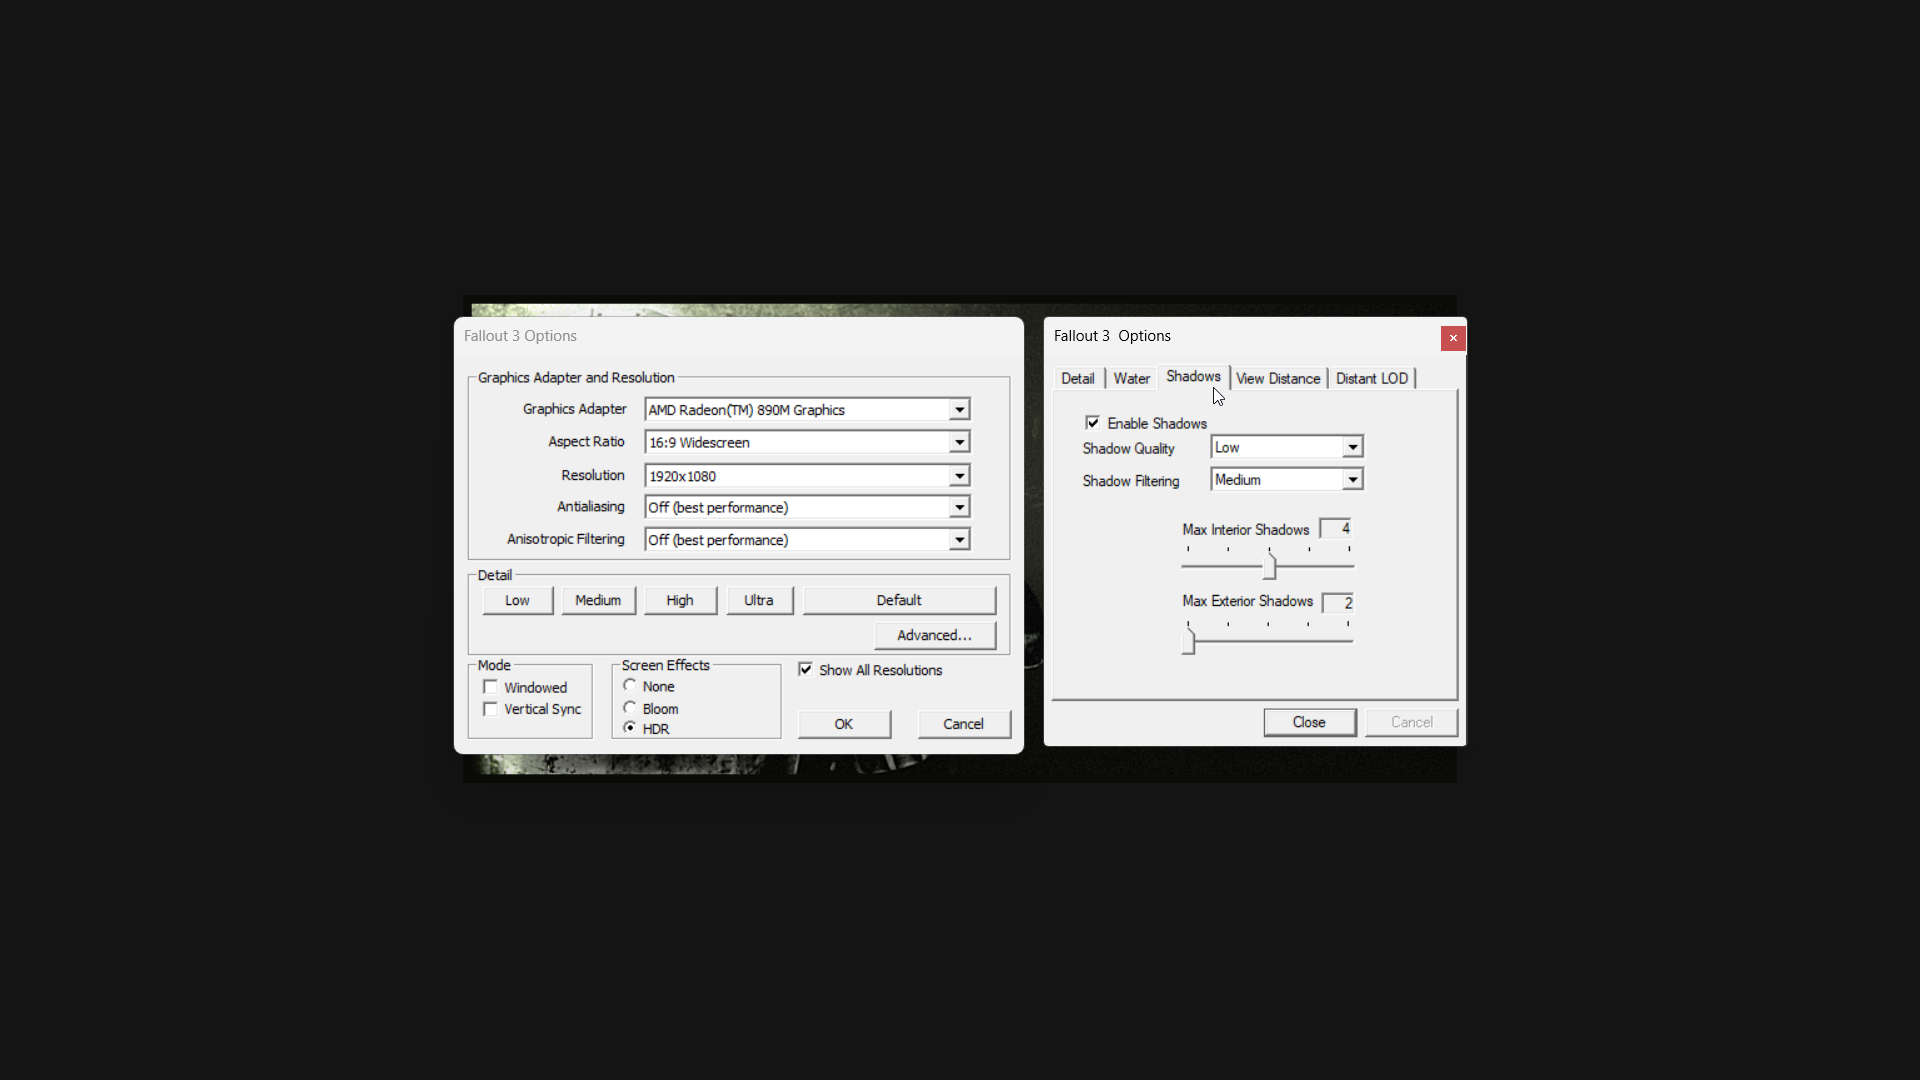
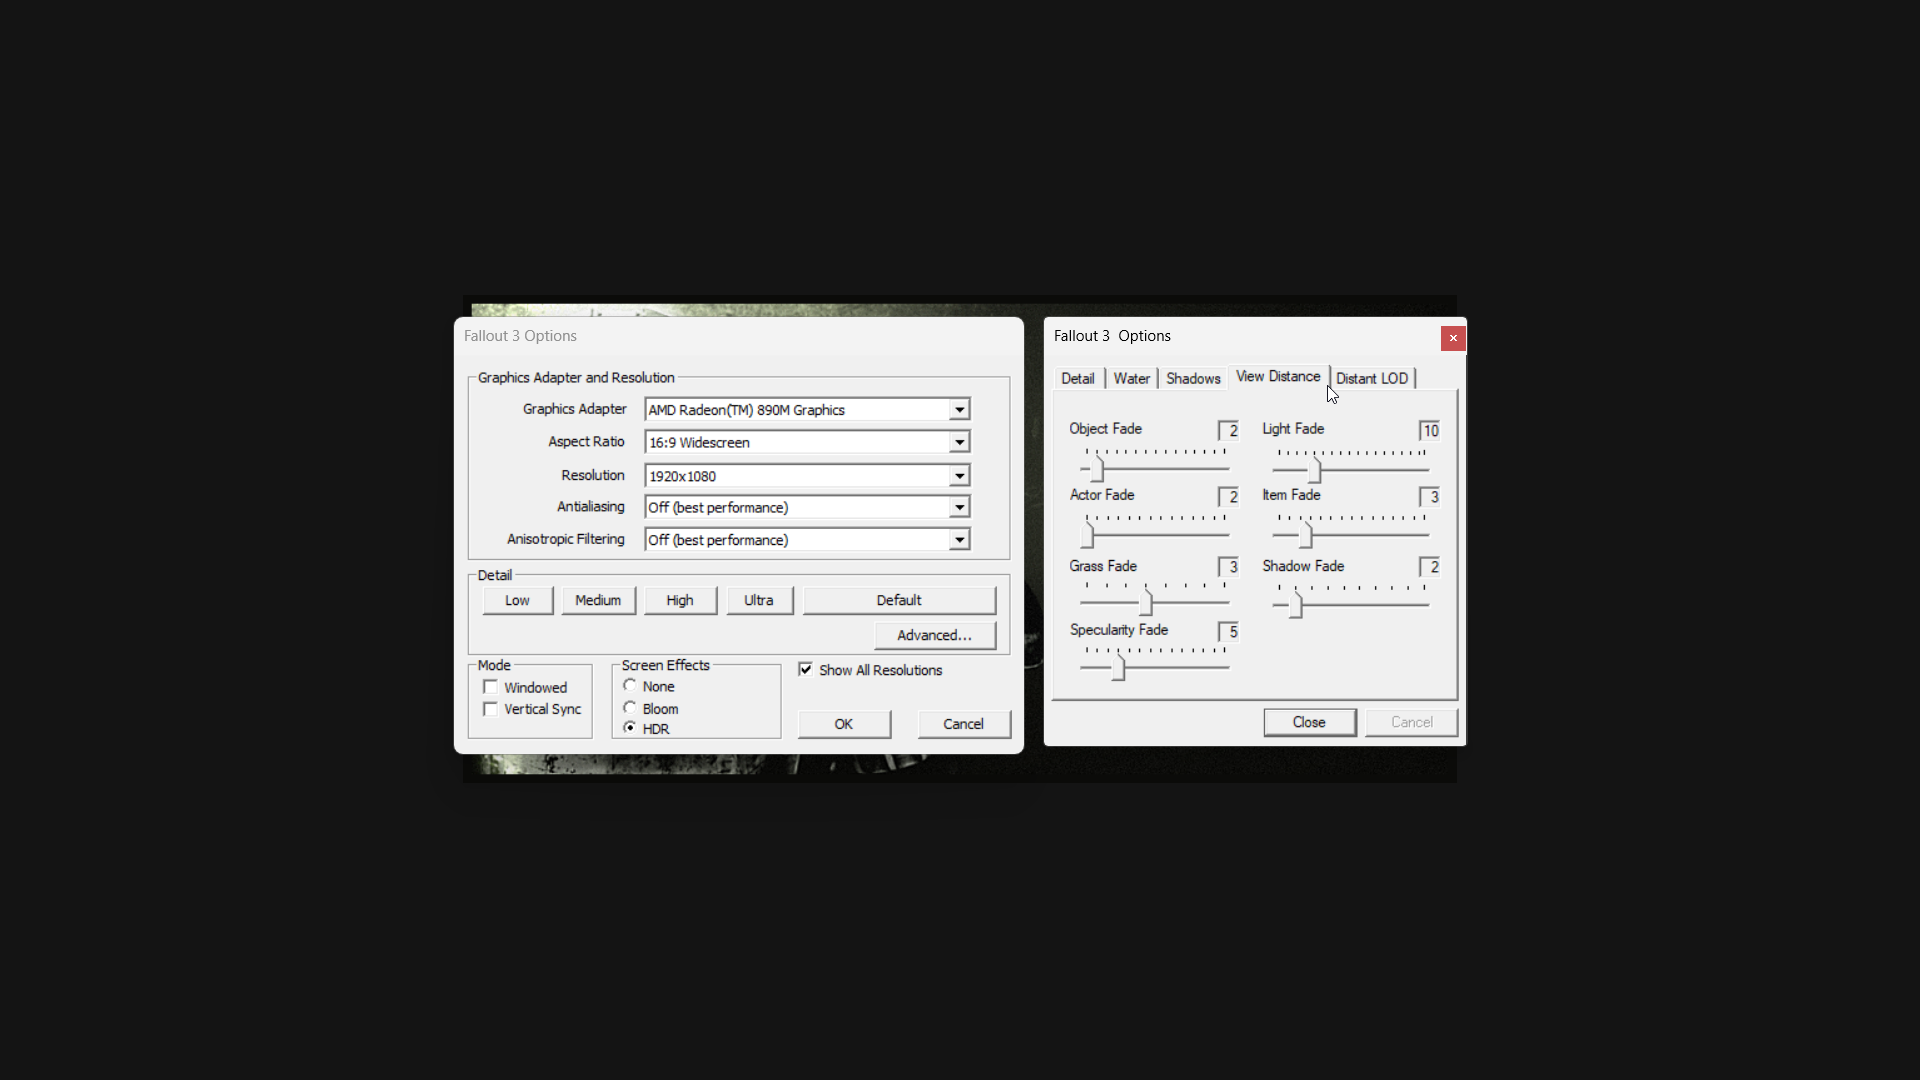
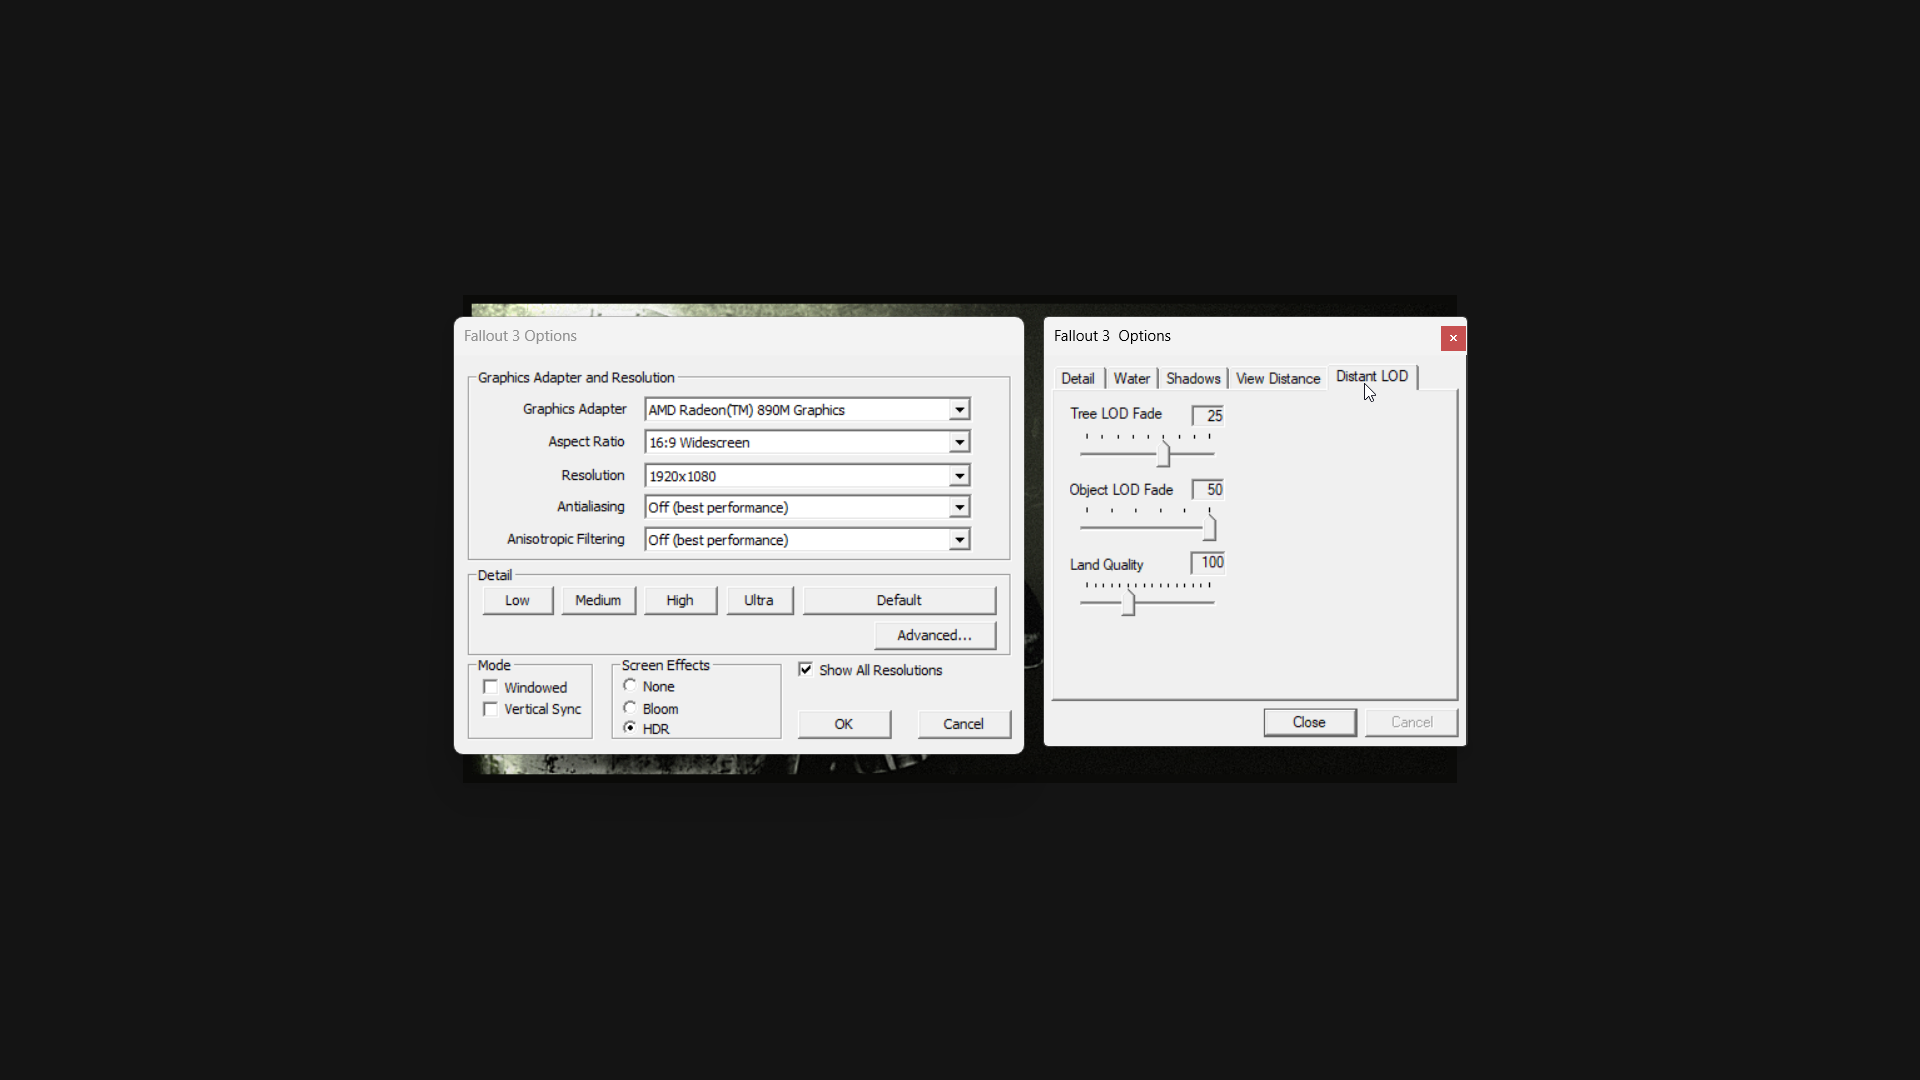
I’ve found that Fallout 3 runs surprisingly well at 1080p with a combination of high and medium graphics settings, consistently hitting 60 frames per second while using just 17 watts of power.
I figured out why I was having performance problems: the FPS counter in Armory Crate was slowing things down and making the game feel choppy. Turning it off fixed the issue and improved performance.
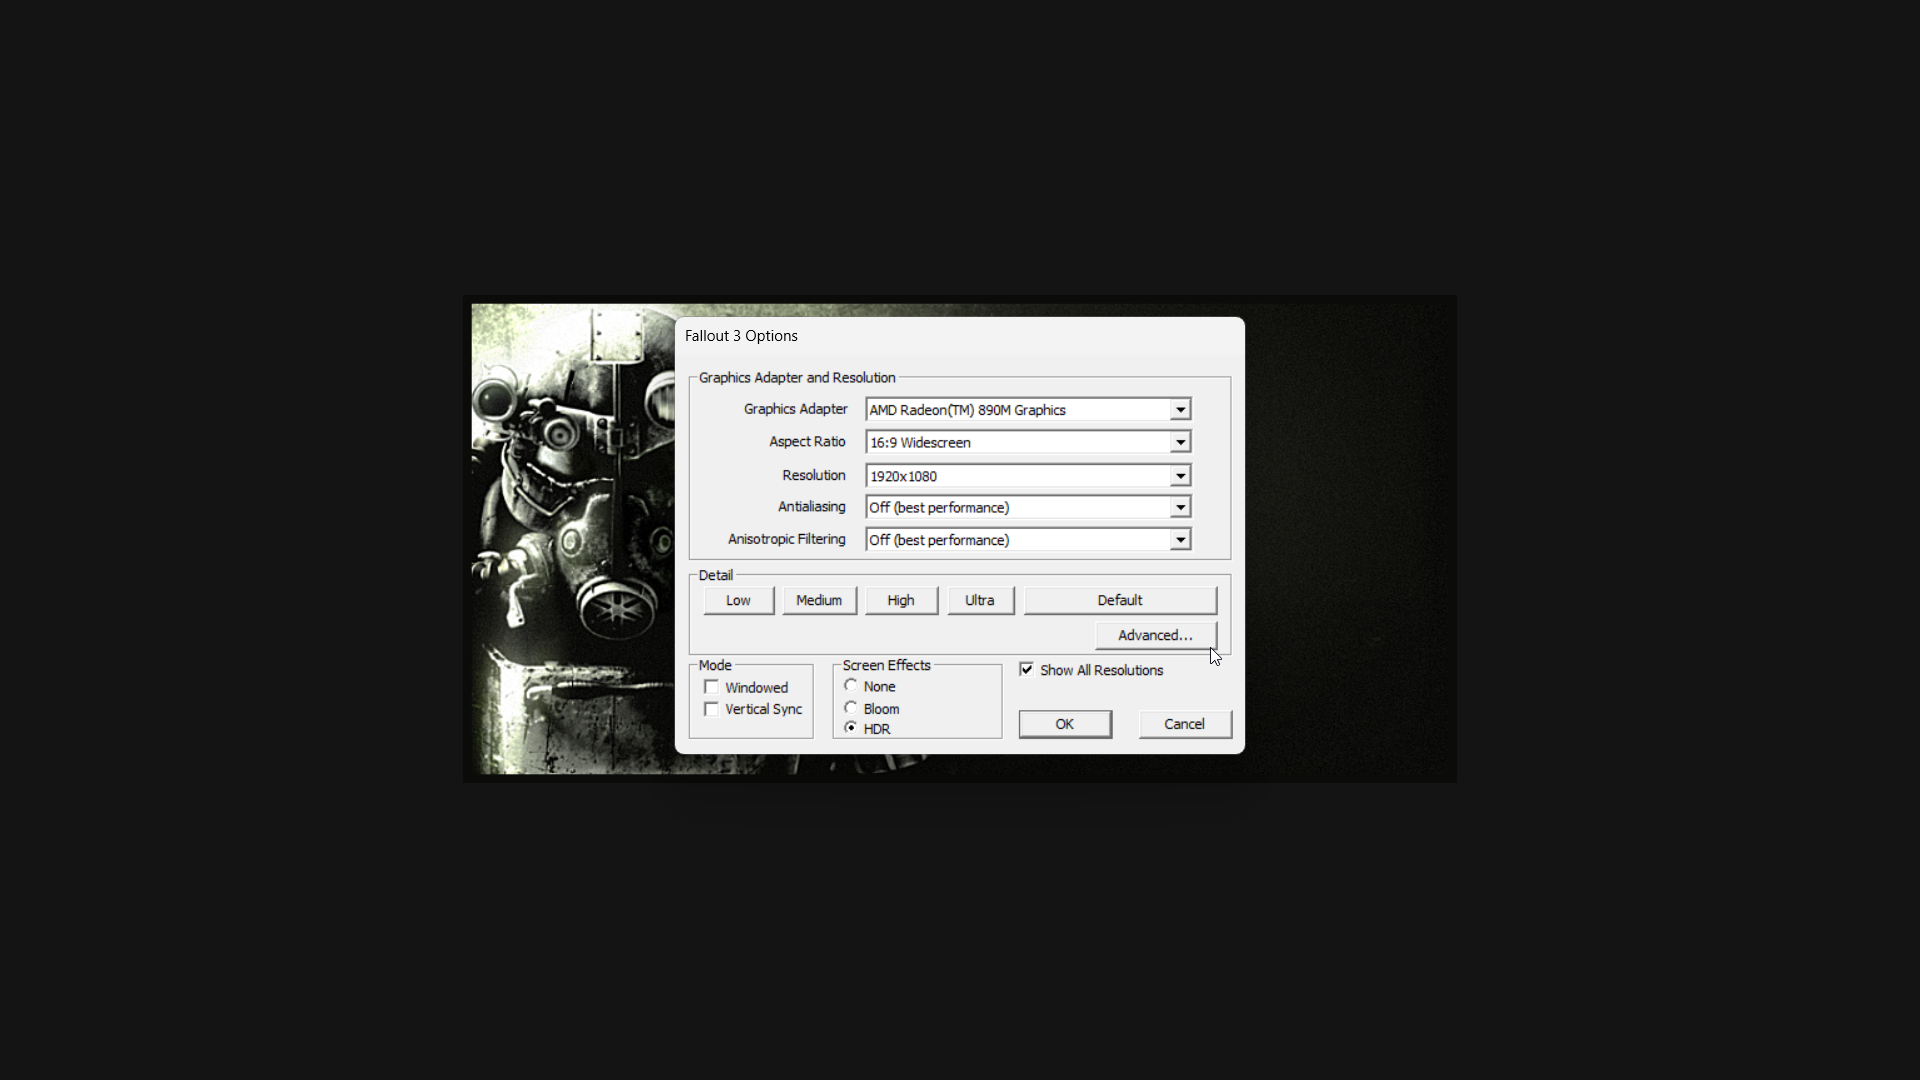
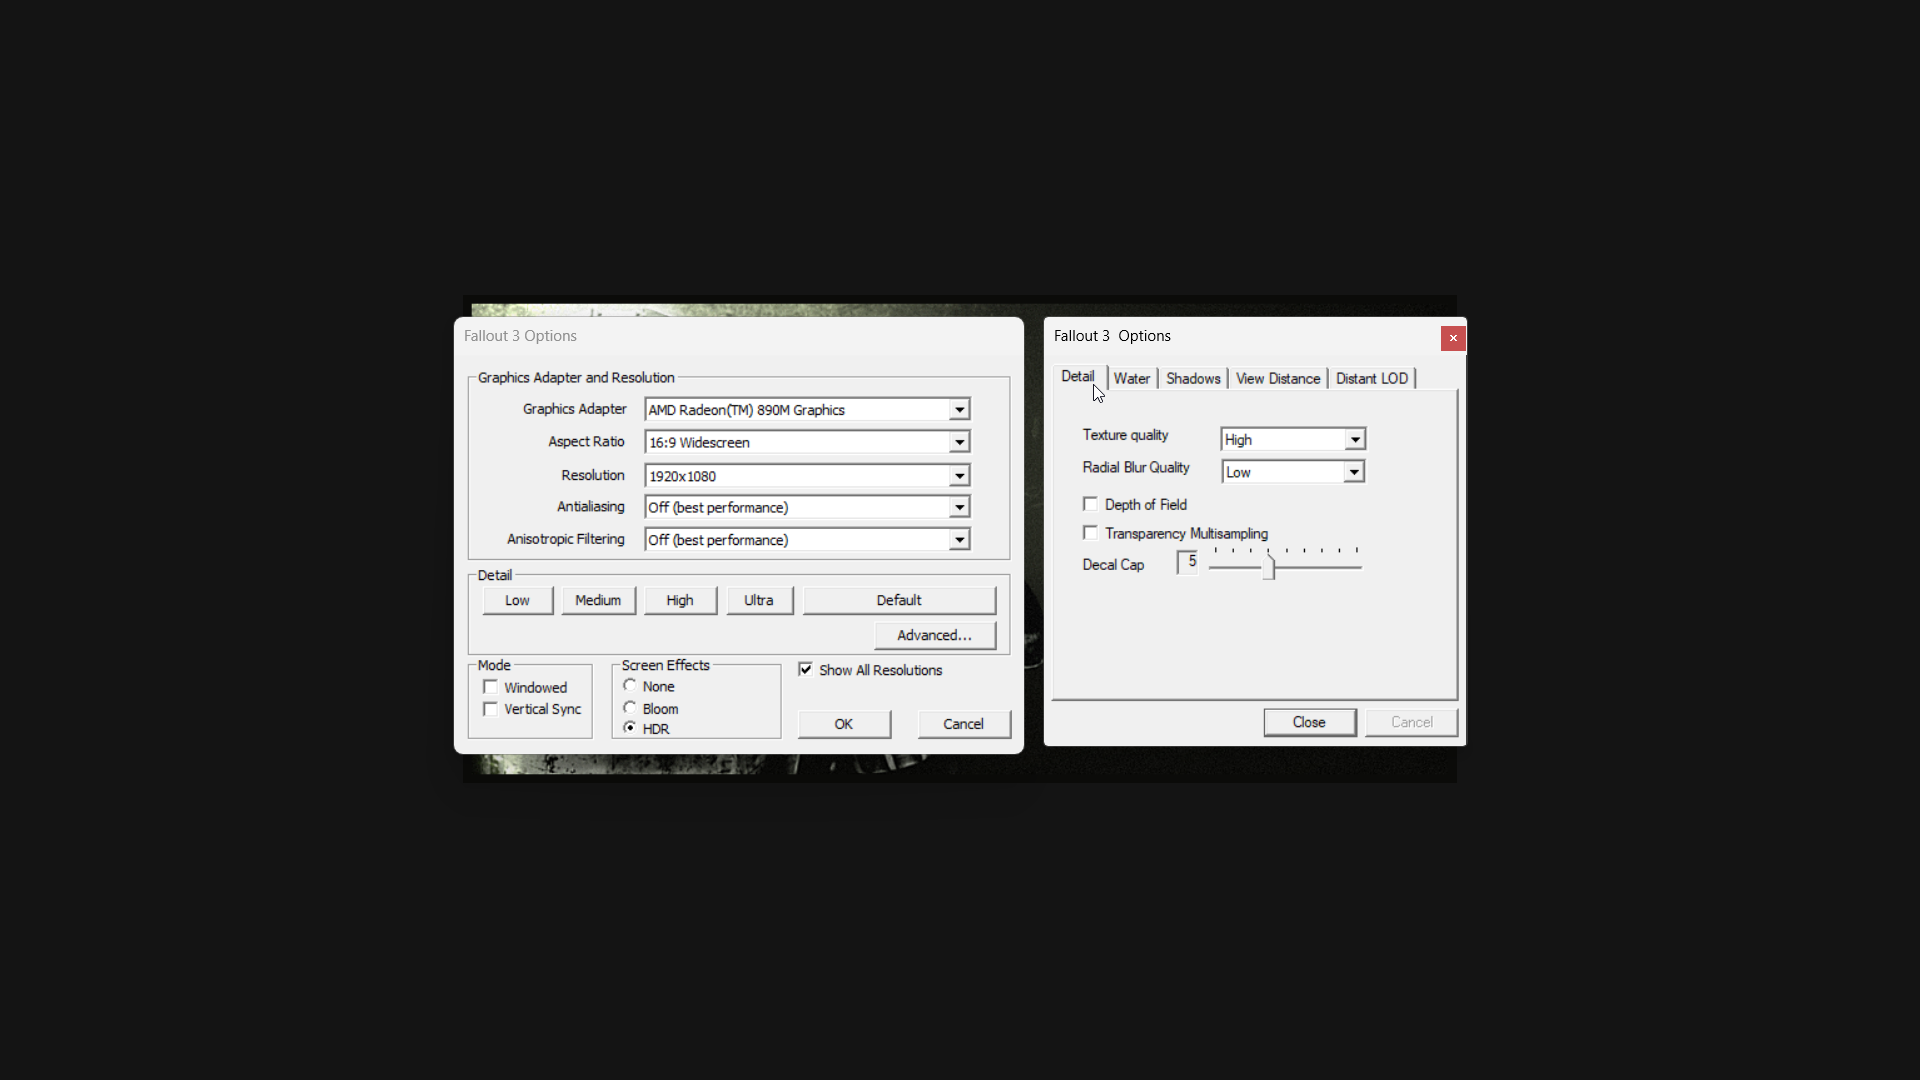
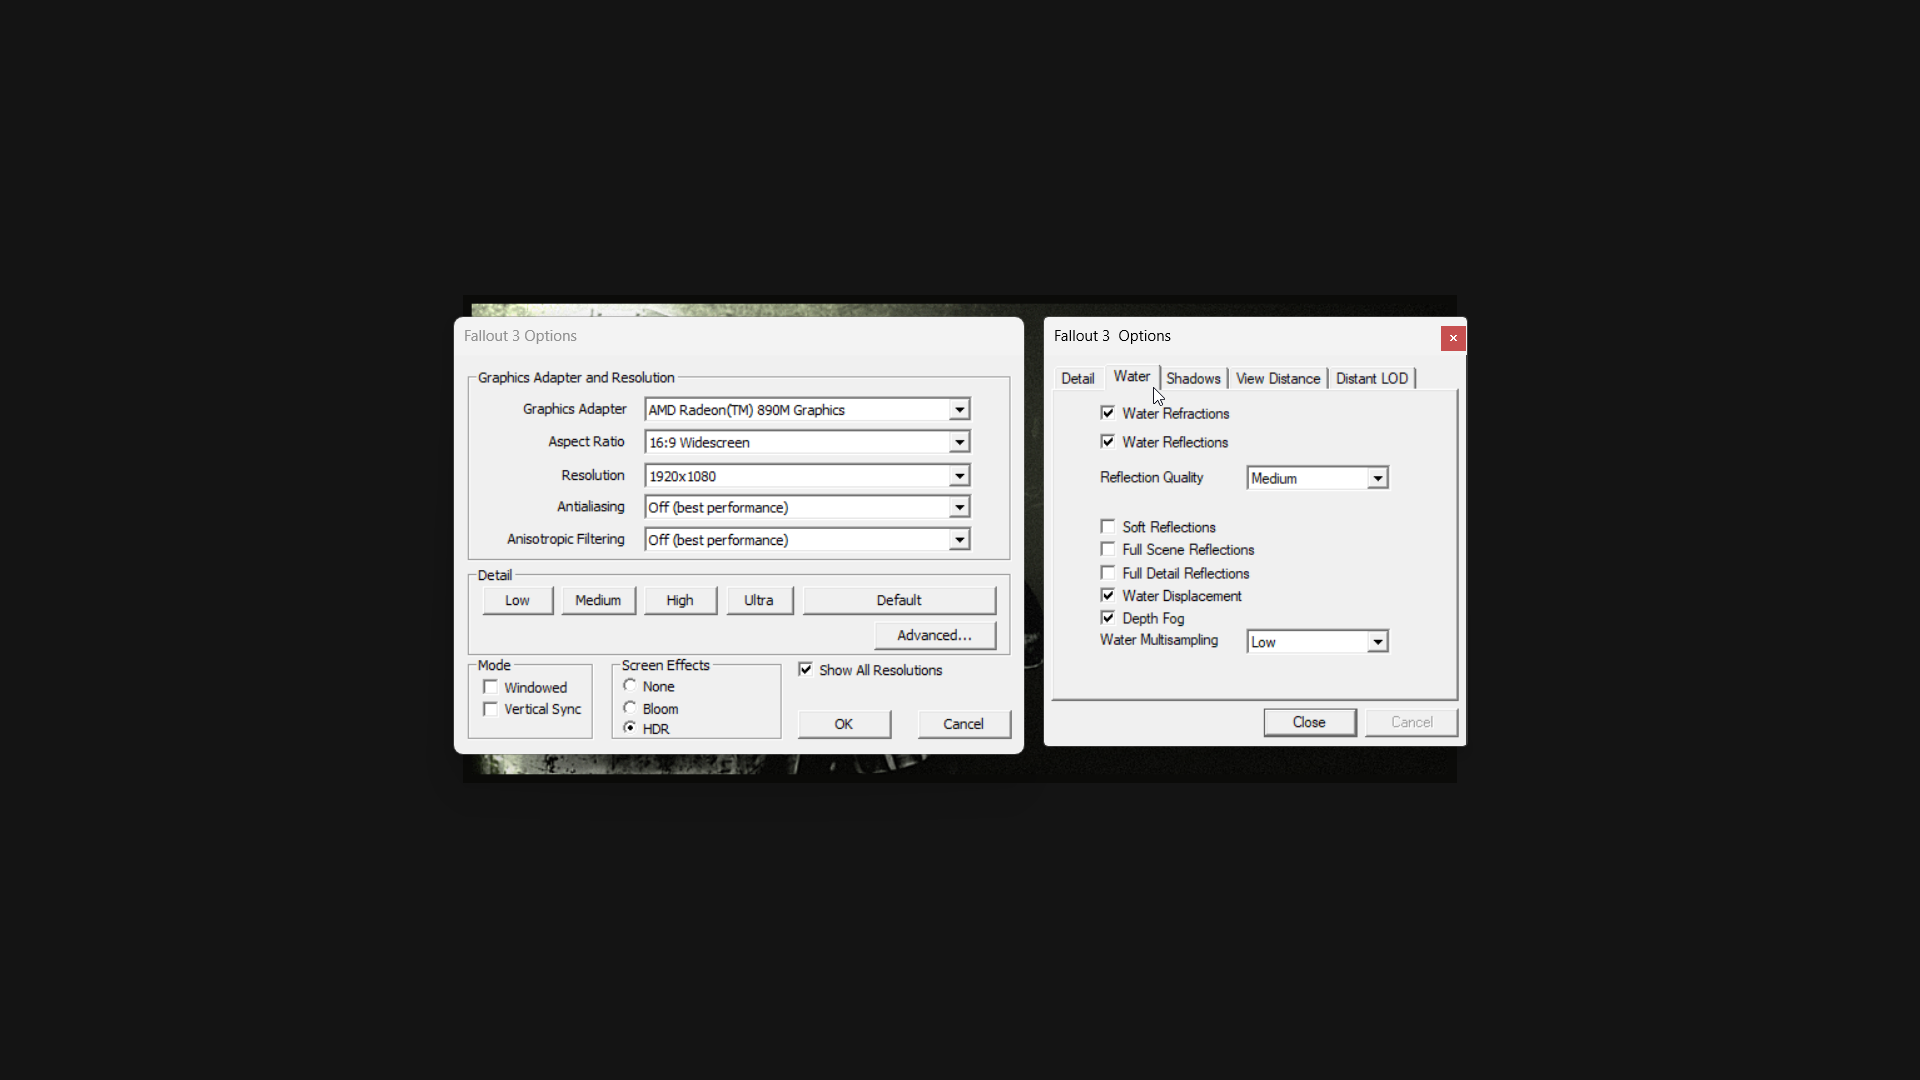
- Launch Fallout 3. Note that the game opens its external launcher rather than booting straight into gameplay.
- From here, select Config to access the video settings.
- Change settings to your preferred options (we’ve included recommended settings below).
- Note that you must either use Desktop Mode or tap the screen to interact with the launcher. You can change to Desktop Mode by pressing the Armoury Crate button and then tapping the Control Mode button until it changes from Gamepad to Desktop.
- Once your settings are configured, select Okay.
- Double-press Play to launch the game.
For playing Fallout 3 on handheld devices, the game’s automatic settings at 1080p are generally okay, but it’s best to confirm them yourself. I found the medium graphics preset looked the best. Turning off vertical sync is also recommended, but not required.
I first tried to limit the frame rate to 60FPS with Armory Crate, but it wasn’t consistently effective.
The Armory Crate FPS overlay caused significant performance problems, so it’s best to turn it off completely when playing Fallout 3.
Important: You can’t change the graphics settings in Fallout 3 while you’re playing the game. Make any adjustments you want through the game launcher before you start.
If you notice performance slowing down in demanding games or apps, increasing the device’s power limit (TDP) can often improve things, but it will use battery power more quickly. I found that a setting of 35W worked best on my Xbox Ally X.
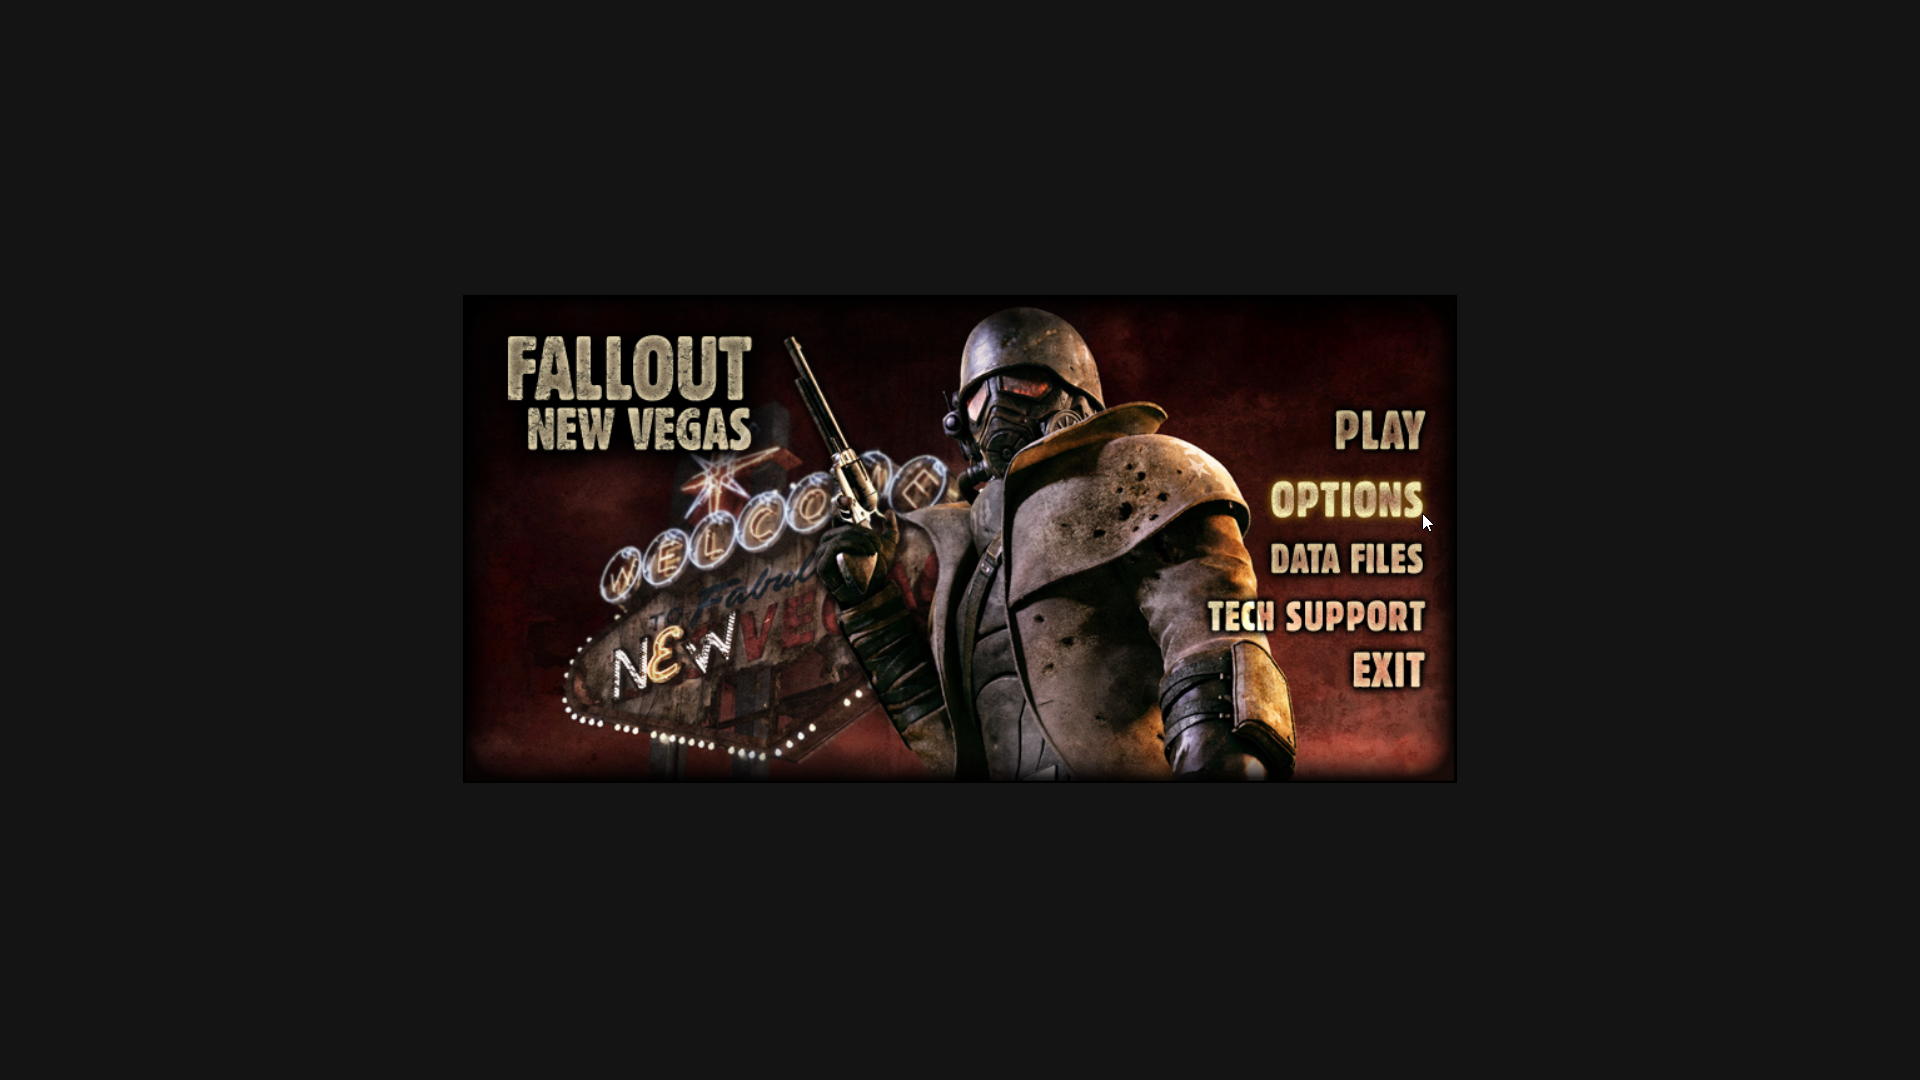
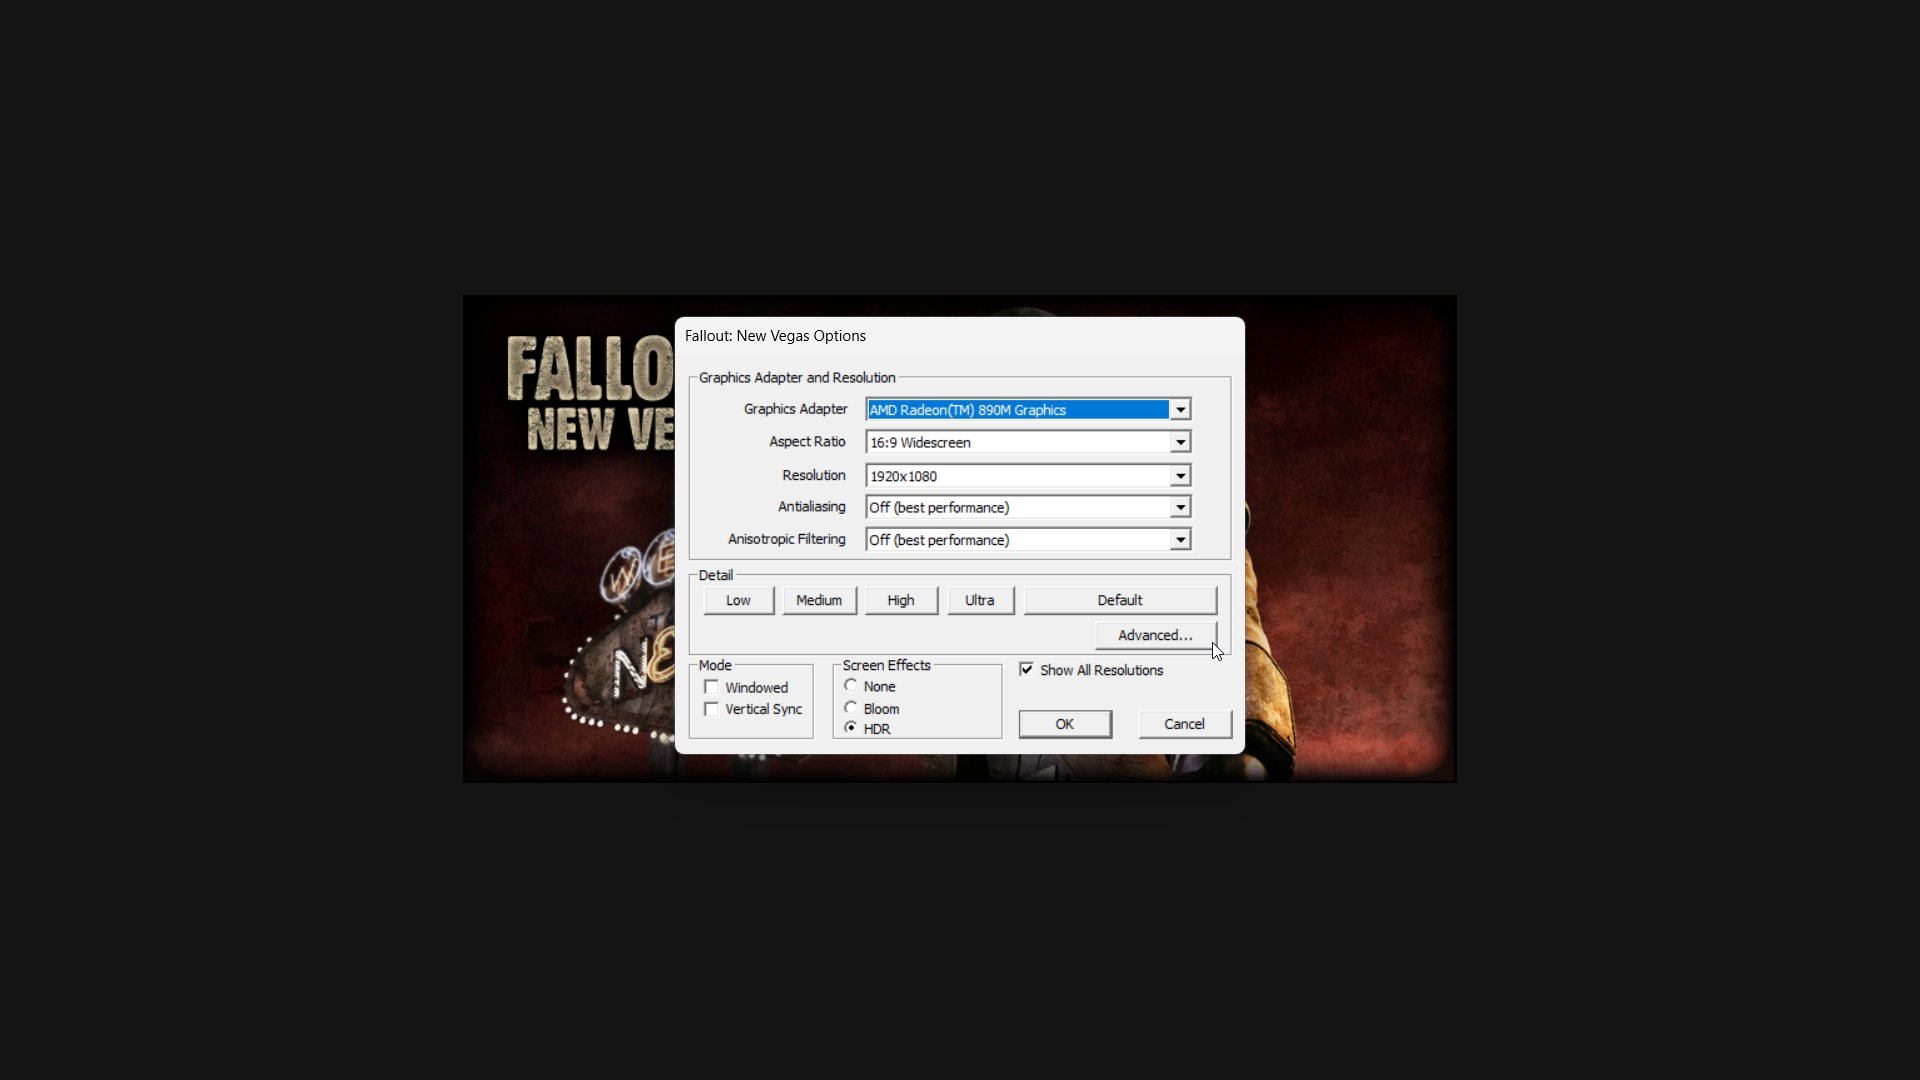
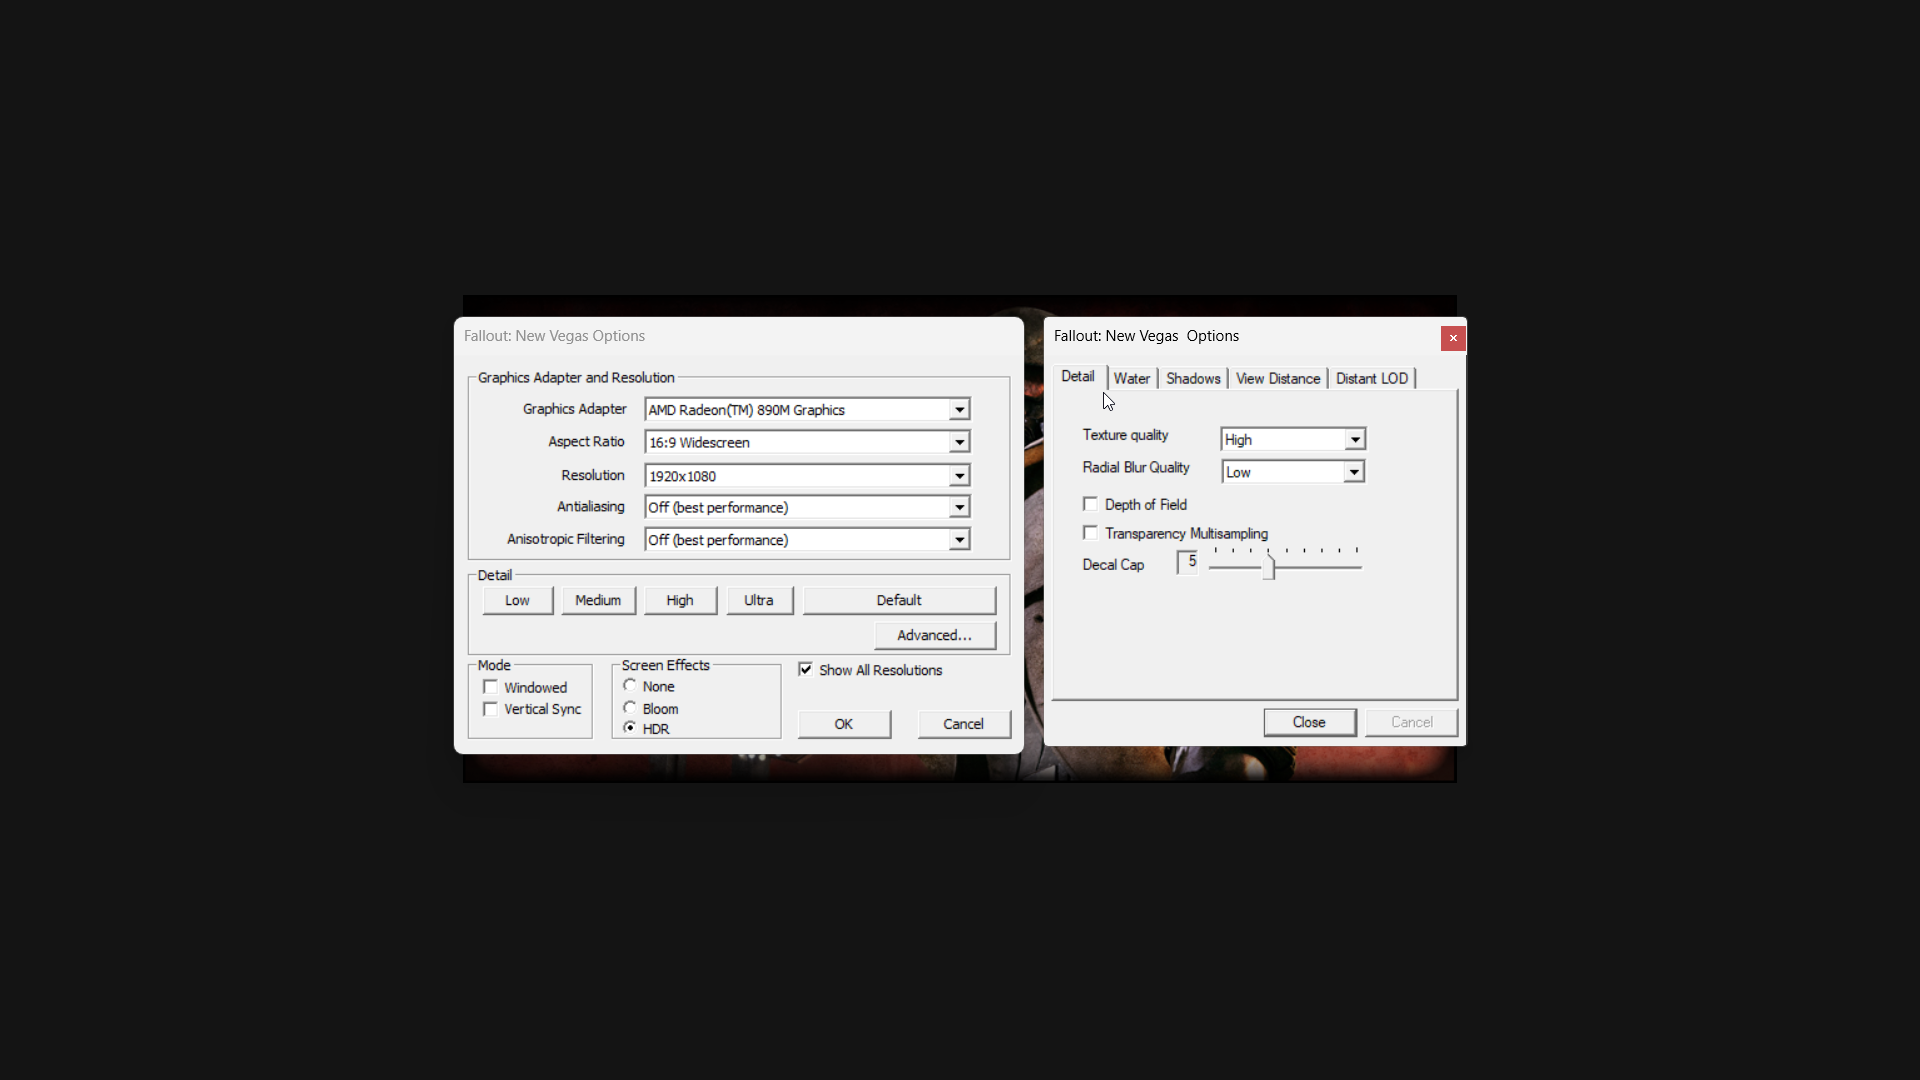
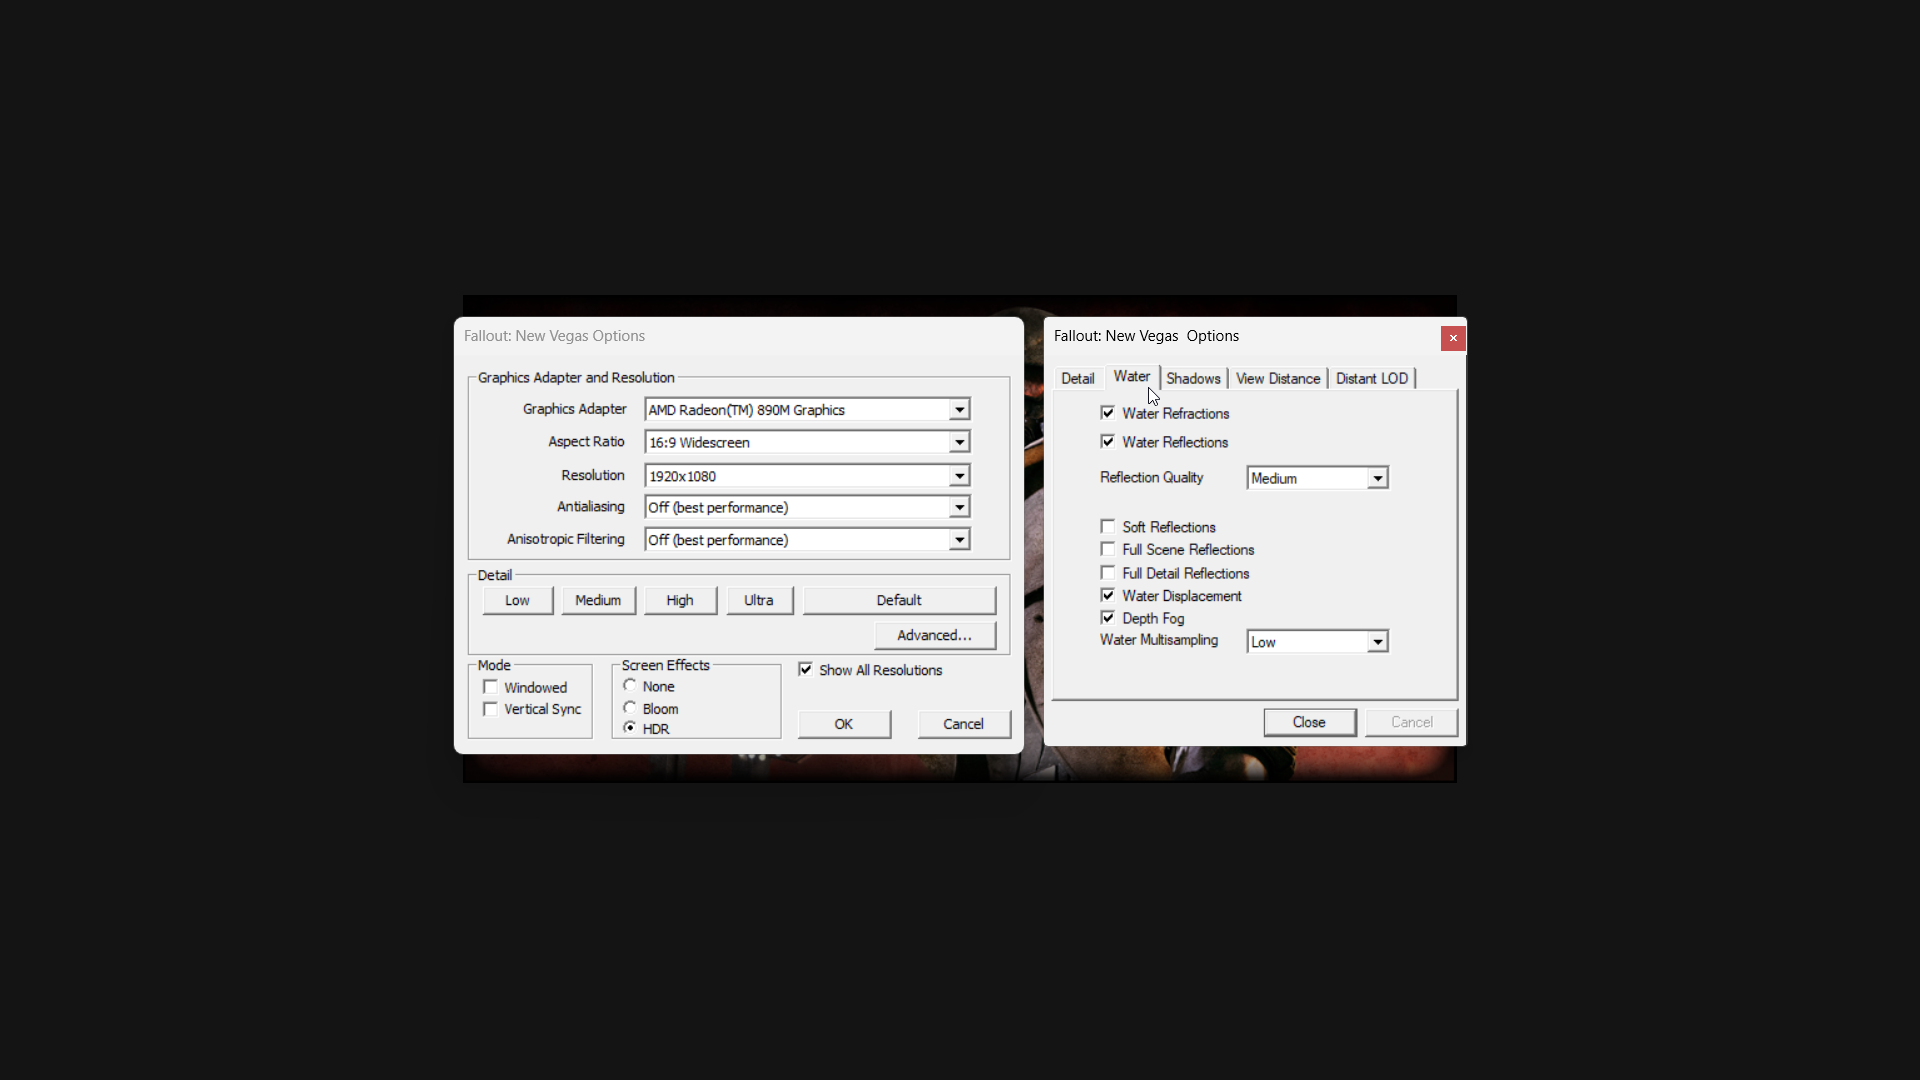
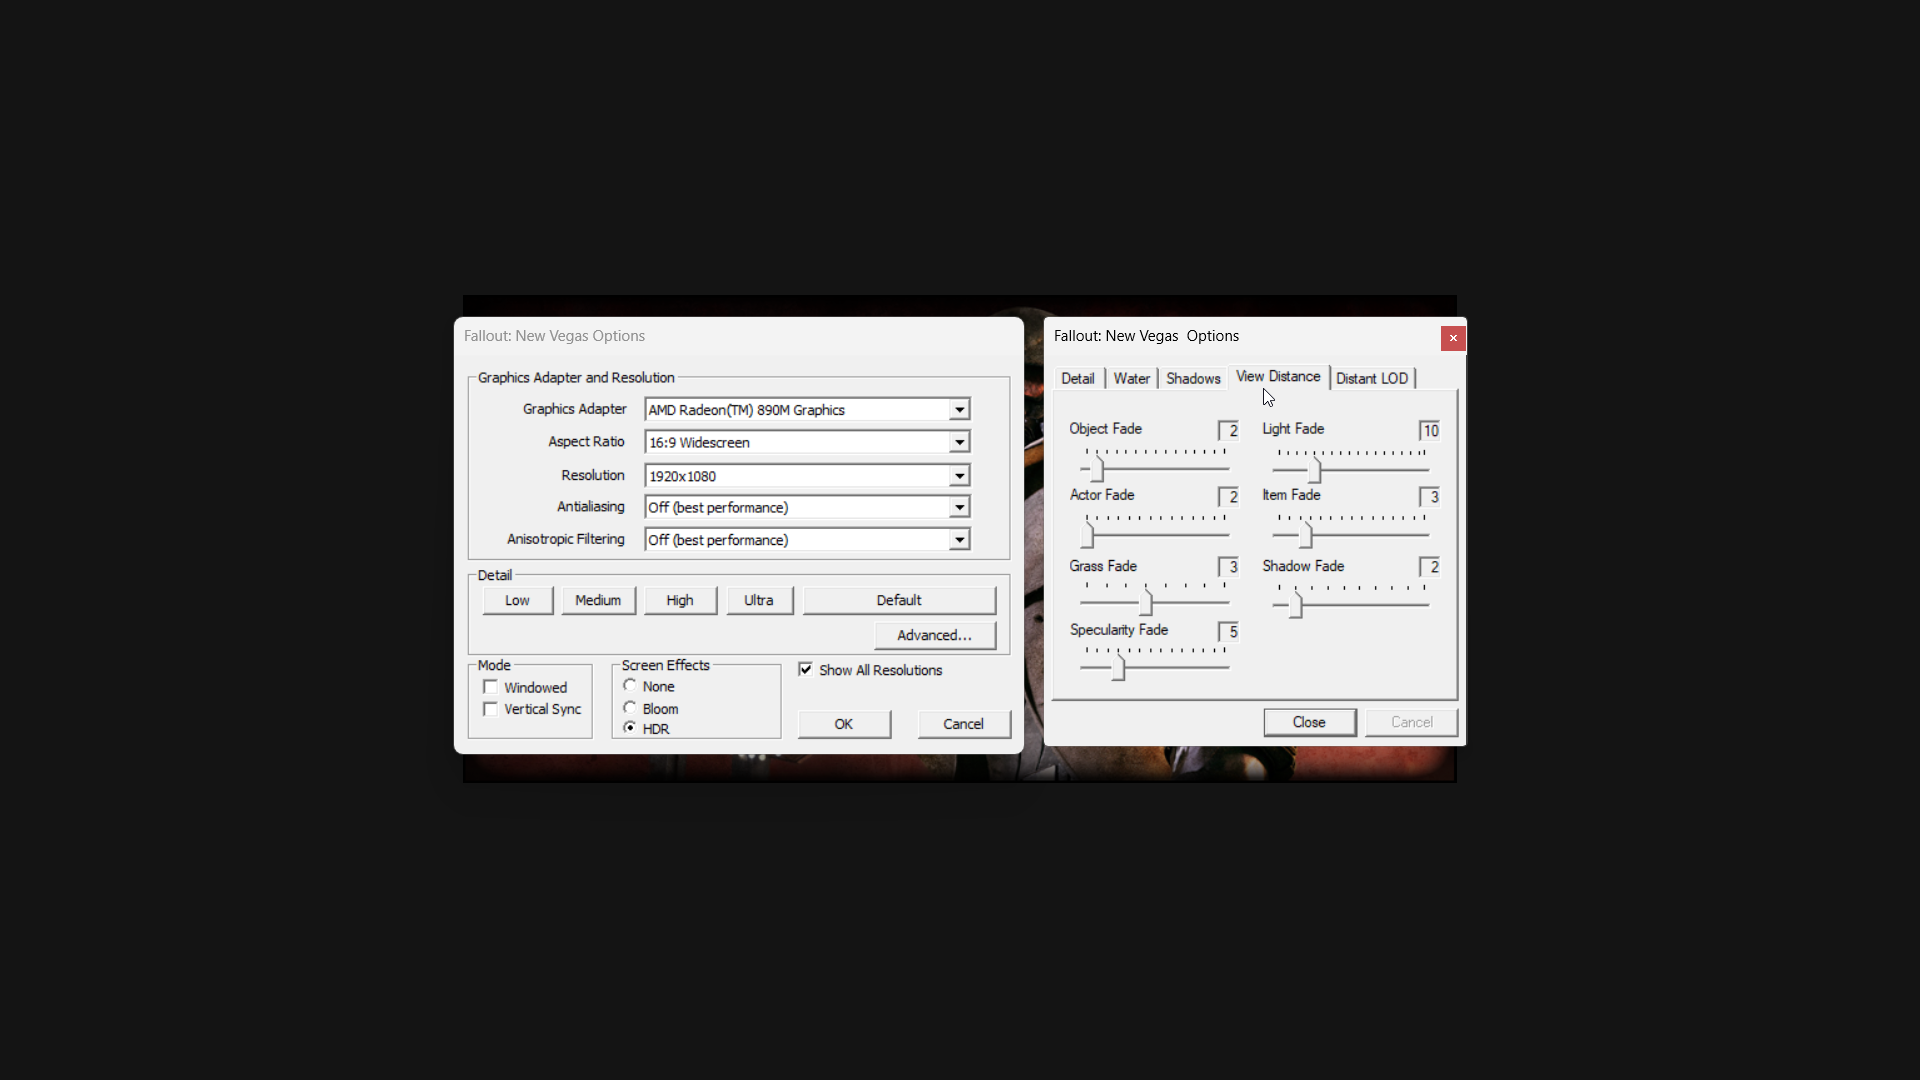
Fallout: New Vegas handheld optimization

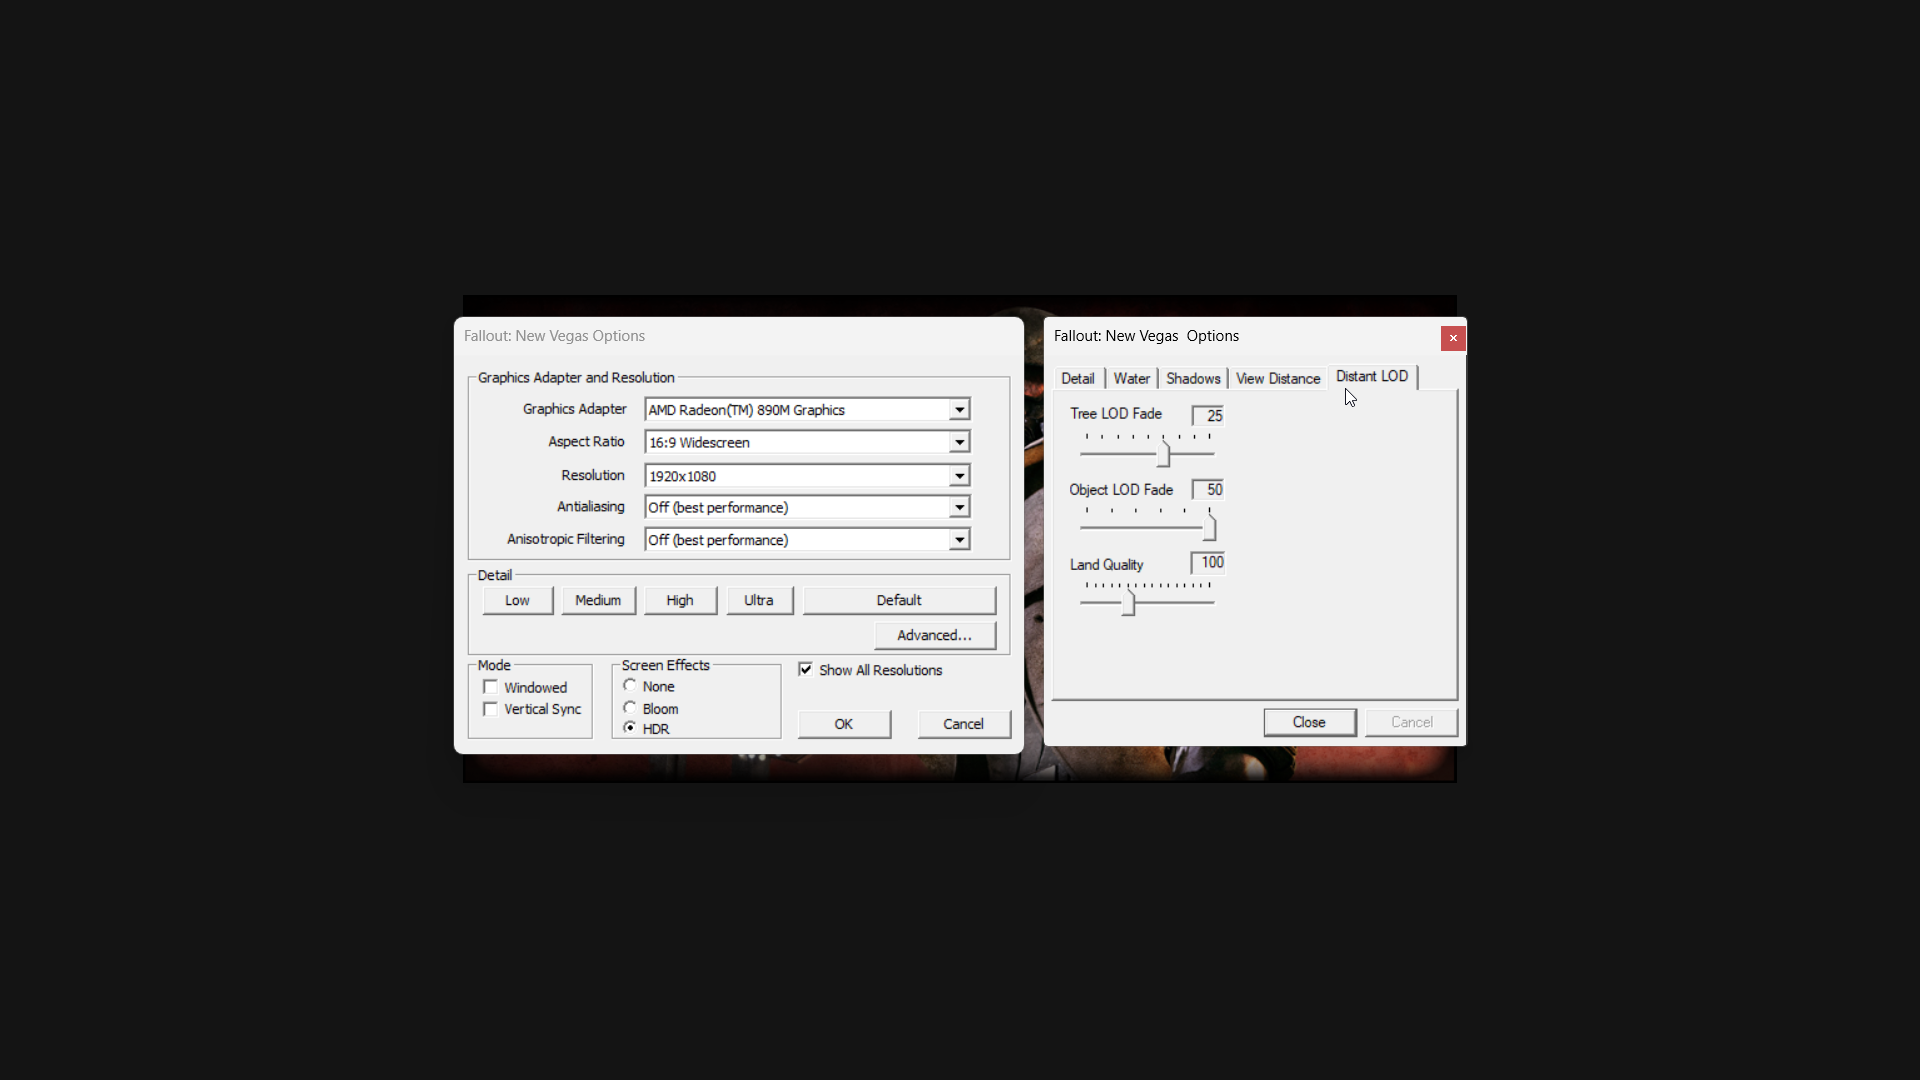
Fallout: New Vegas plays much like Fallout 3, and again, the problems I was having with performance weren’t solely caused by the game.
When the Armory Crate FPS overlay is turned off, Fallout: New Vegas runs smoothly at 1080p with medium settings. I consistently get 60 frames per second while using 17 watts of power, and sometimes even more than that.
Here’s how to change Fallout: New Vegas settings for handhelds:
- Launch Fallout: New Vegas, to bring up the game’s external launcher.
- Select Config to access the video settings.
- Now it’s time to change settings to your preferred options (we’ve included setting recommendations below).
- Note that you must either use Desktop Mode or tap the screen to interact with the launcher. You can change to Desktop Mode by pressing the Armoury Crate button and then tapping the Control Mode button until it changes from Gamepad to Desktop.
- When you’re done making changes, select OK.
- Select Play to start the game.
RECOMMENDED FALLOUT: NEW VEGAS SETTINGS FOR HANDHELDS:
When playing at 1080p, the game’s automatic settings are generally good, similar to what we saw in Fallout 3. Still, it’s a good idea to double-check them yourself. I found that Medium settings worked best, and I avoided the highest, Ultra, option. Turning off vertical sync is up to you, but I prefer to leave it disabled, just like in Fallout 3.
The FPS overlay actually caused problems with how smoothly the game ran and its performance, so it’s best to keep it turned off.
Important: Just like in Fallout 3, you can’t change the graphics settings in Fallout: New Vegas while the game is running. You need to adjust everything through the game launcher *before* you start playing.
If you’re still experiencing performance issues, try increasing your handheld device’s TDP. Keep in mind that a higher TDP setting will use more battery power.
Fallout 4 handheld optimization

Fallout 4 plays quite differently than older titles like Fallout 3 and Fallout: New Vegas. The usual game launcher doesn’t work, and on handheld devices, you might not even see graphics settings within the game.
If you can’t find the graphics options, don’t worry – you can still adjust them by editing a configuration file. Here’s how:
- Before making any changes, make sure you have launched the game at least once so the necessary config files are generated on your handheld.
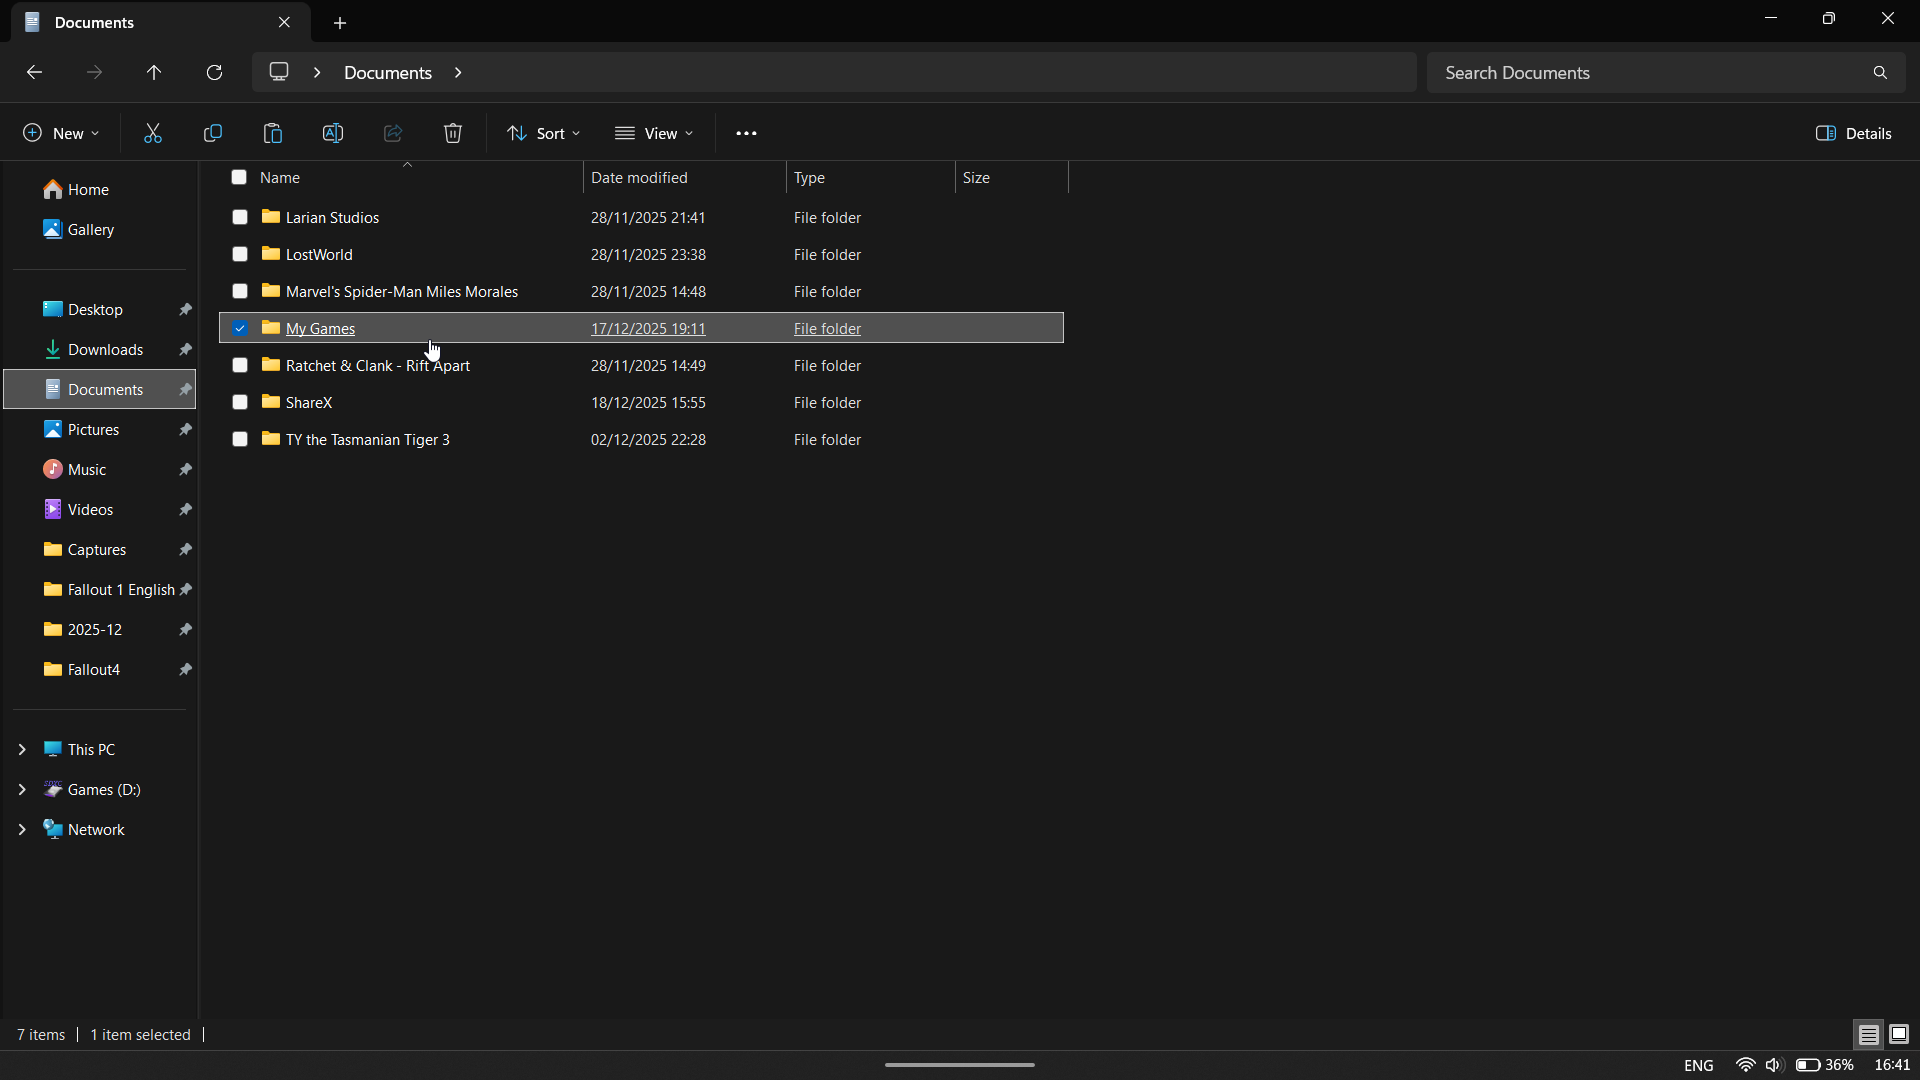
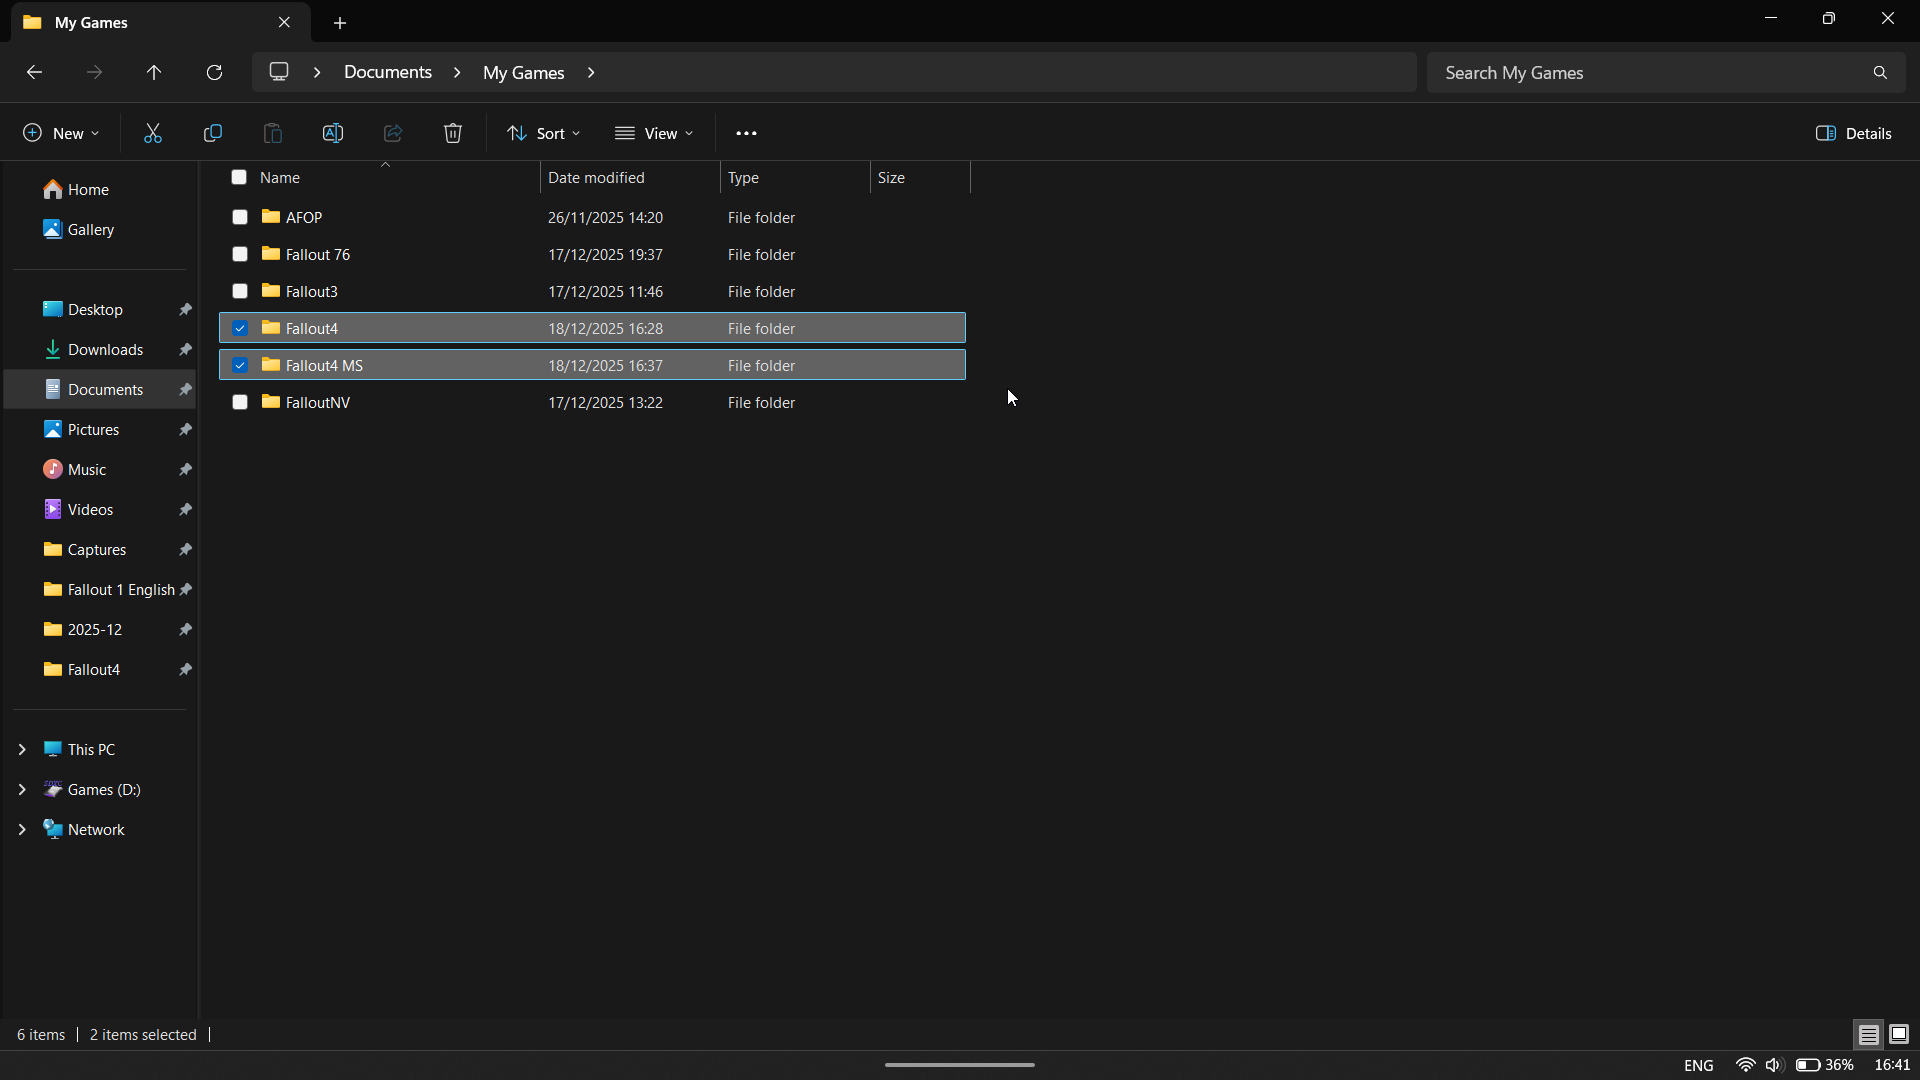
- Locate the Fallout4Prefs.ini and Fallout4.ini graphics settings files for Fallout 4.
- Graphics settings for the Xbox App version of Fallout 4 are stored in Documents\My Games\Fallout4 MS.
- Graphic Settings for the Steam Version of Fallout 4 are stored in: Documents\My Games\Fallout4 MS.
- Before editing anything, create a backup of these files and store them somewhere safe.
- Once the backup is created, download the files from NexusMods.
- Once downloaded, extract the contents of these new files.
- Choose the Low options.
- Once extracted, replace the Fallout4Prefs.ini and Fallout4.ini files that were in either Documents\My Games\Fallout4 MS or Documents\My Games\Fallout4 MS with the files from whichever preset you choose.
Even with the lowest settings, I still noticed occasional slowdowns, probably while the game was loading textures and other assets. However, it was definitely smoother than running with the default settings.
Just keep in mind this is mainly for troubleshooting, and it’s especially helpful for devices that aren’t as powerful as something like an Xbox Ally X or similar high-end hardware.
RECOMMENDED FALLOUT 4 SETTINGS FOR HANDHELDS:
I’ve been having performance problems with Fallout 4, similar to those I saw in Fallout 3 and New Vegas. It turns out the FPS counter in Armoury Crate was causing the slowdown, so I suggest disabling it while you play Fallout 4.
If you don’t manually adjust the settings, Fallout 4 will automatically detect your system’s capabilities and generally run well. If you experience performance issues, try lowering all the graphics settings to their lowest options.
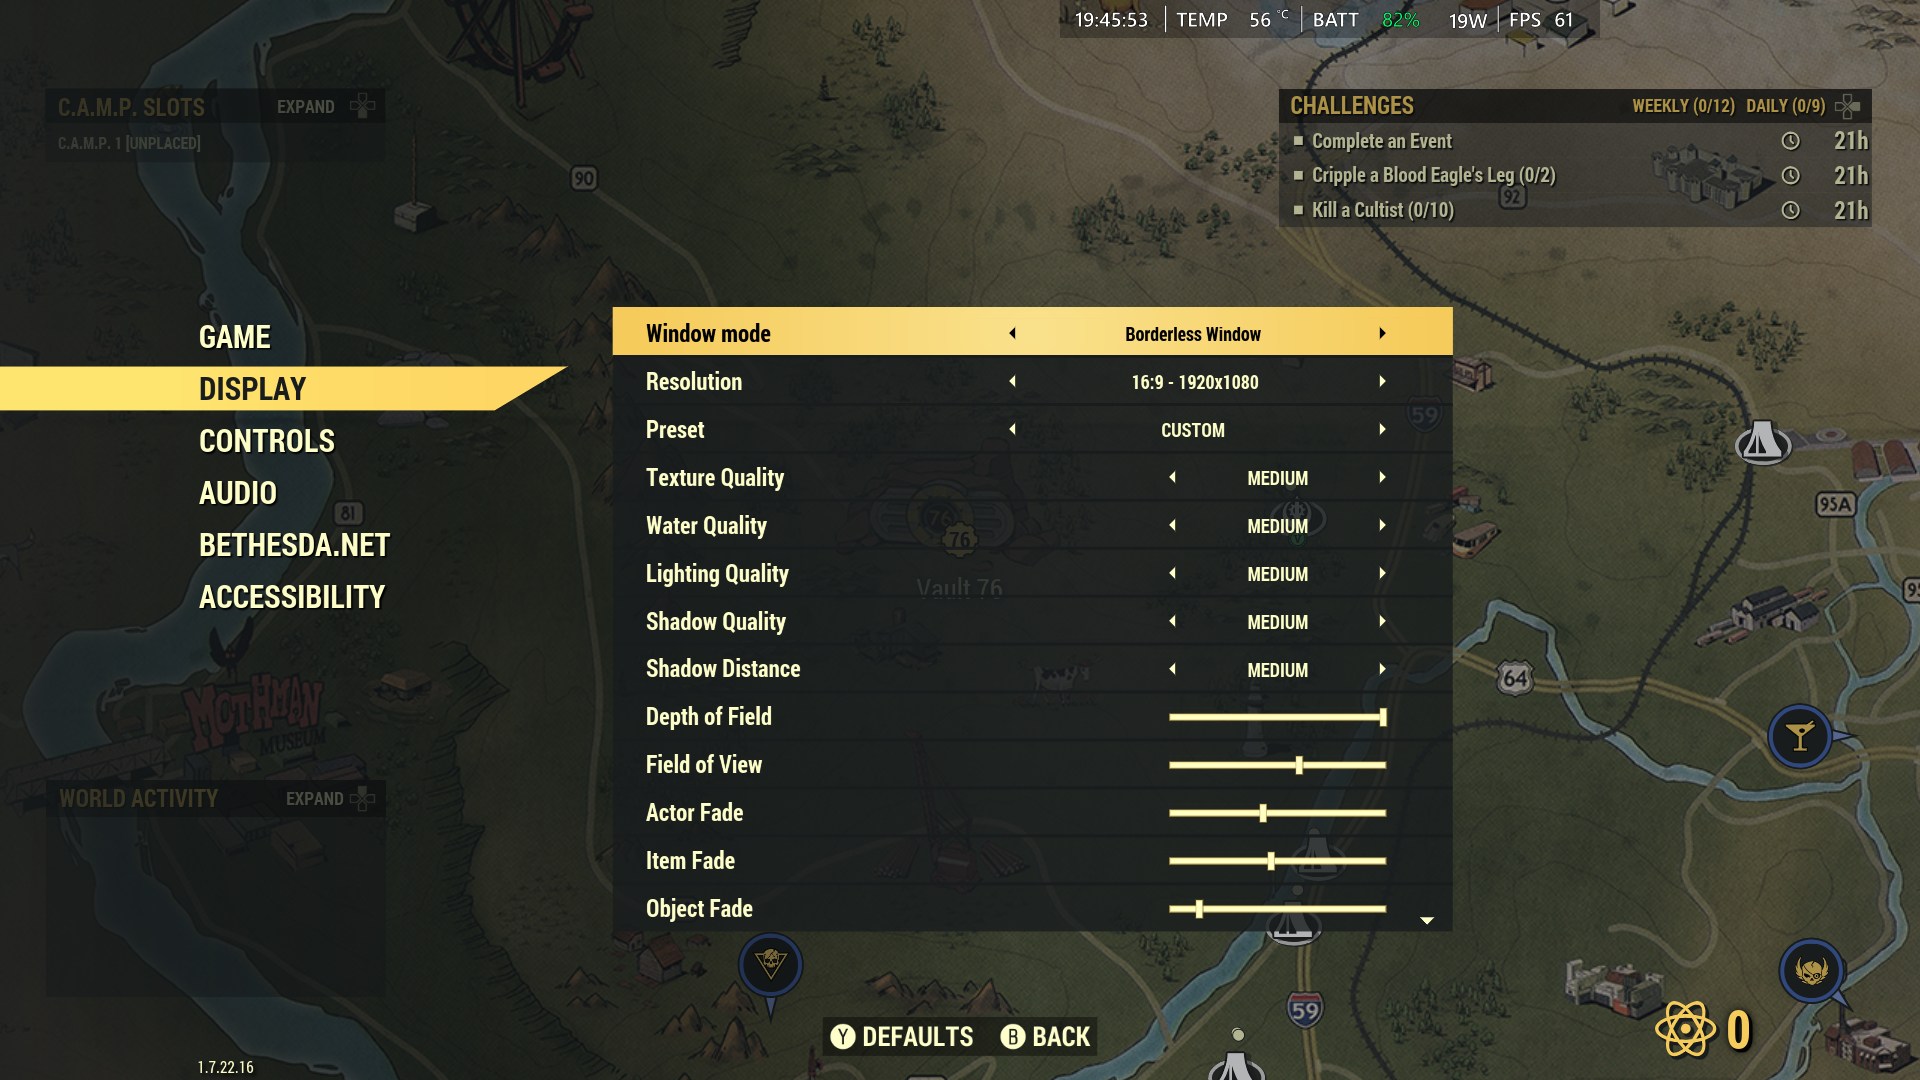
Fallout 76 handheld optimization
The first time you start Fallout 76, you’ll need to sign in with your Bethesda account. I found that the keyboard didn’t pop up on screen automatically, so here’s how to get it working:
- Press the Armory Crate button
- Select the Keyboard option.
The keyboard that appears on the screen covers up what you’re currently typing, so it’s best to type carefully. Unfortunately, you can’t use the backspace key to fix errors, which means if you make a mistake, you’ll have to exit and restart the game.
You can also use a regular keyboard to type in your information, and that’s usually a much easier and more straightforward way to do it.
By the way, we highly recommend the Artciety Foldable Bluetooth Keyboard for handheld users.
How to adjust Fallout 76 settings on handhelds
Unlike previous Fallout games like Fallout 3, New Vegas, and Fallout 4, Fallout 76 lets you adjust the graphics settings directly within the game.
- Run Fallout 76.
- Press the Start button whilst in-game.
- Tap LB to move across the menu and select Settings.
- Then go to Display.
You can also find these settings outside of the game itself. Just go to the main menu, then choose “Settings” and select “Display”.
Fallout 76 automatically starts with most graphics settings turned up to the highest level. While my Xbox Series X can handle that surprisingly well, I like to focus on getting a smooth frame rate, so I prefer to lower the graphics settings. I recommend trying different settings to find what works best for you.
You should be ready to play Fallout on your handheld now
This guide shows you how to play all the main Fallout games on a handheld Windows device, and we hope you found it helpful.
These settings worked well for my setup, but your results might be different depending on your device. You might be able to adjust them further – perhaps increasing performance or reducing power consumption even more – but I focused on getting the longest possible battery life without sacrificing a smooth gaming experience above 60 frames per second.
Each initial configuration provides a reliable starting point, and you can customize it later to prioritize either faster performance or extended battery life.
Read More
- Adam Levine Looks So Different After Shaving His Beard Off
- Gold Rate Forecast
- Welcome to Demon School! Iruma-kun season 4 release schedule: When are new episodes on Crunchyroll?
- Dialoop coming to Switch on June 17
- Steam Makes Sci-Fi Game 100% Free for 72 Hours
- Tekken 8 Fans Furious as Tifa Tipped for Street Fighter 6 Instead
- Nintendo Switch 2 Reportedly Getting Remake of One of the Best PS3 and Xbox 360 Games
- 10 Movies That Were Banned in Different Countries For Random Reasons
- Michael Jackson Biopic’s Record-Breaking Debut Unseats 2026’s Biggest Box Office Hit On U.S. Chart
- When Things Fall Apart: A New View of Phase Transitions
2025-12-19 01:16