Windows 11 offers ways to free up system memory, which can make your computer run faster, more reliably, and handle multiple tasks more smoothly. This guide will walk you through the best methods for doing so.
Even though your computer is built to handle memory well, things like programs running in the background, apps that start automatically, fancy visual effects, and demanding software can all use a lot of it. When your computer runs low on memory, you might notice apps taking longer to open, things feeling jerky, delays when switching between tasks, or your hard drive working overtime.
Because RAM prices can change a lot and are often going up, upgrading your computer’s memory isn’t always a good solution. Luckily, there are several reliable methods to help Windows 11 use less memory without impacting performance or essential functions.
These changes help manage how your computer starts up and runs by controlling which apps launch automatically and limiting unnecessary activity in the background. We’re tweaking system settings and helping apps use memory more efficiently. The aim isn’t to simplify the operating system, but to free up memory so your PC runs faster and smoother when you’re browsing the web, working, doing light creative tasks, or playing games.
This guide will show you how to reduce the amount of memory your Windows 11 computer uses, with simple, step-by-step instructions.
Best tips to reduce memory usage on Windows 11
Okay, so I’m going to walk you through how I keep my PC running smoothly. I usually start by cleaning up system resources and getting rid of apps I don’t use anymore. Then, I make sure everything is up-to-date with Windows and my drivers. I also pay attention to how much memory my browser is using – it can be a real hog! Of course, I run a full malware scan regularly just to be safe. And finally, I love using features like the Xbox Full Screen experience and the Microsoft PC Manager to really optimize things.
Adjust system settings to minimize memory consumption
First, you can stop certain apps from automatically opening when you start your computer. You can also manage what runs in the background and which system services are active.
Disable startup apps
To prevent certain apps from running at startup to minimize RAM usage, use these steps:
- Open Settings.
- Click on Apps.
- Click the Startup page on the right side.
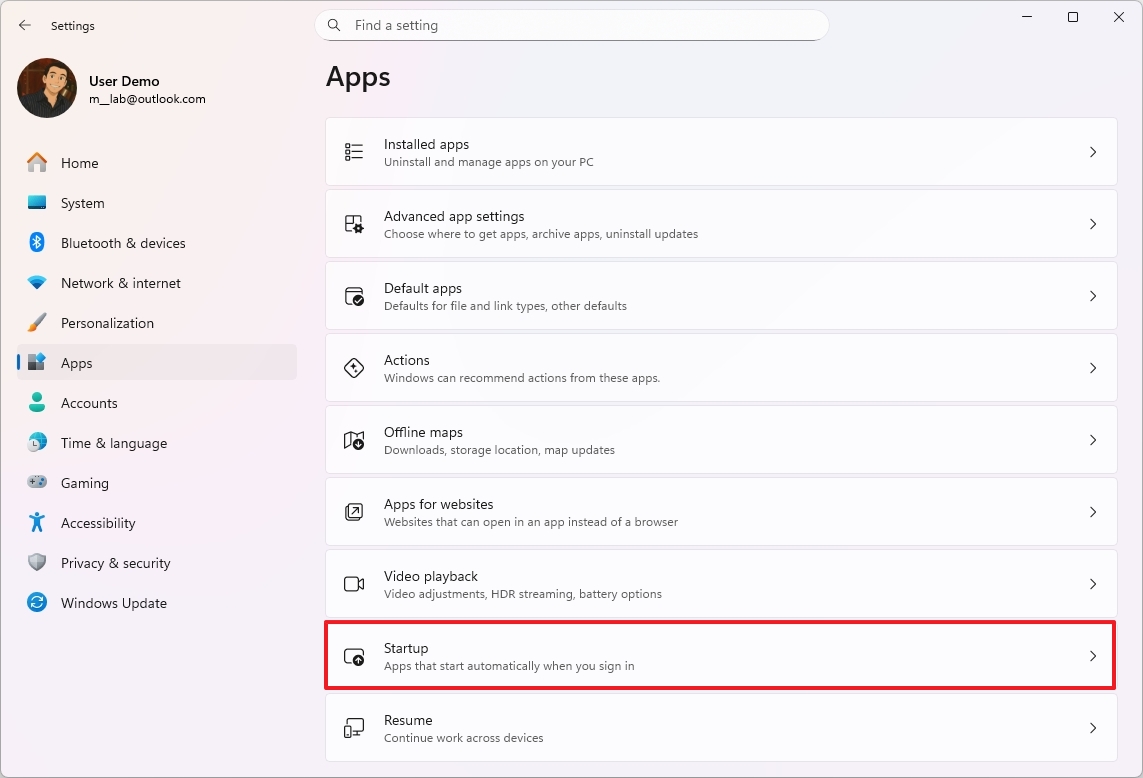
- Select the “Startup impact” option from the “Sort by” option.
- Turn off the toggle switch for apps impacting memory usage.
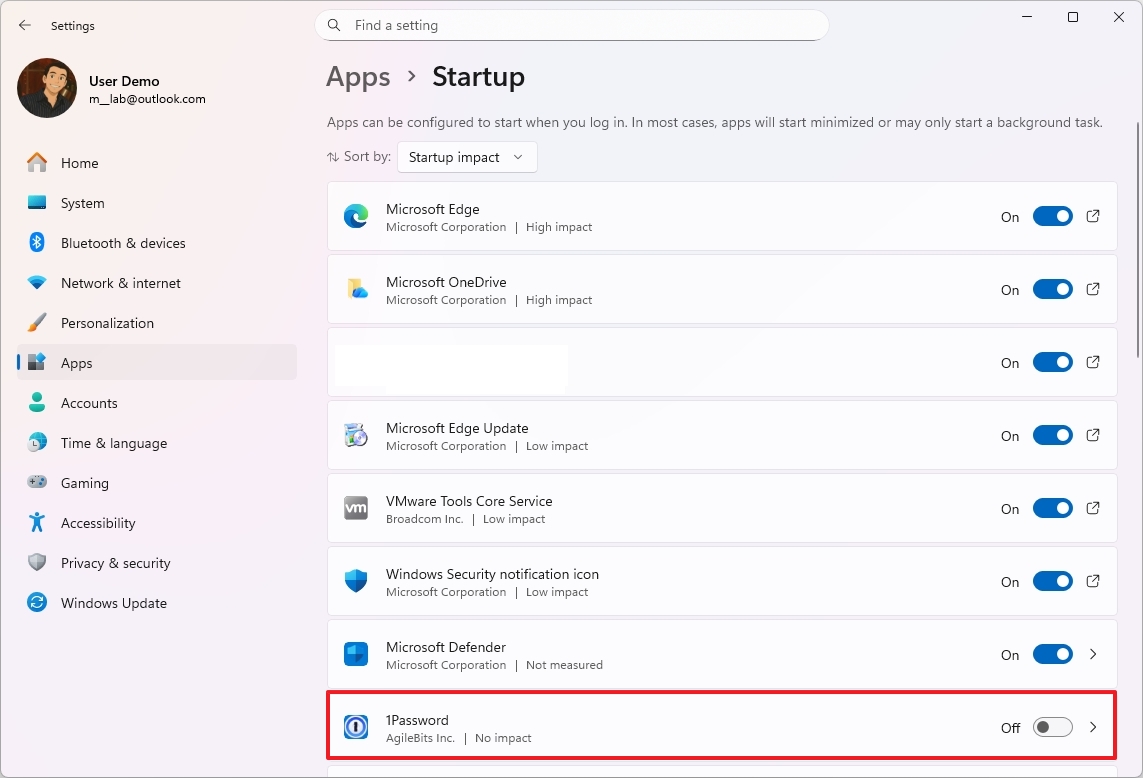
- Quick tip: Only disable the applications you know are hogging memory, and don’t turn off system services.
After following these steps, apps will no longer automatically run in the background, allowing your system to prioritize resources for essential tasks.
Disable background processes for apps
Besides stopping apps from launching automatically, some apps downloaded from the Microsoft Store can continue running in the background, using up your computer’s memory. You can control which apps are allowed to run these background processes, which can help free up memory and improve performance.
To disable background processes for Store apps on Windows 11, use these steps:
- Open Settings.
- Click on Apps.
- Click the Installed apps page on the right side.
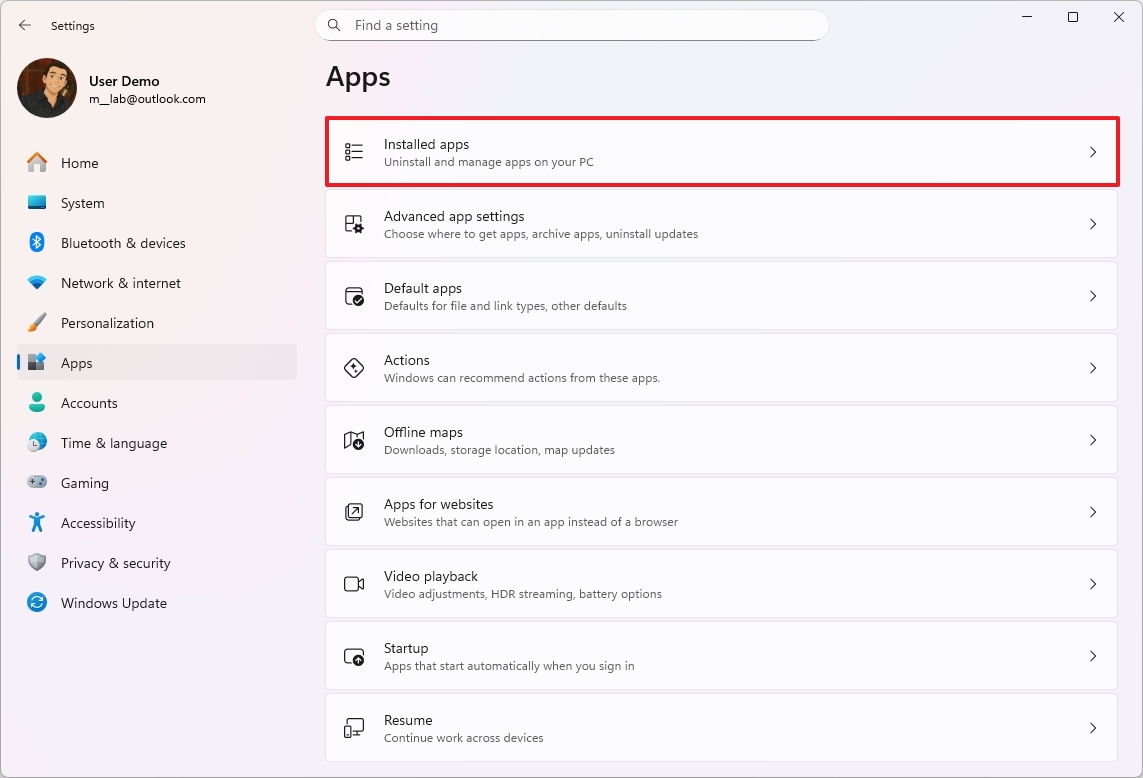
- Select the app and open the menu (three dots) on the right side.
- Click on Advanced options.
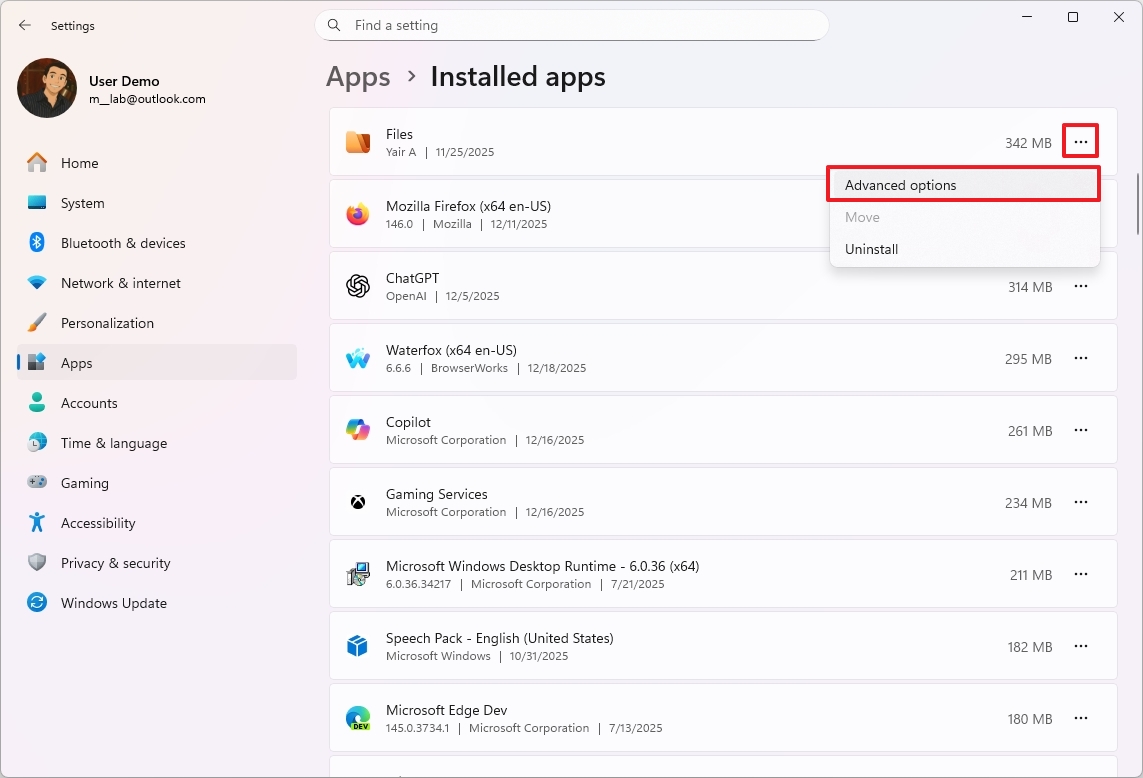
- Select the Never option under the “Background app permissions” section.
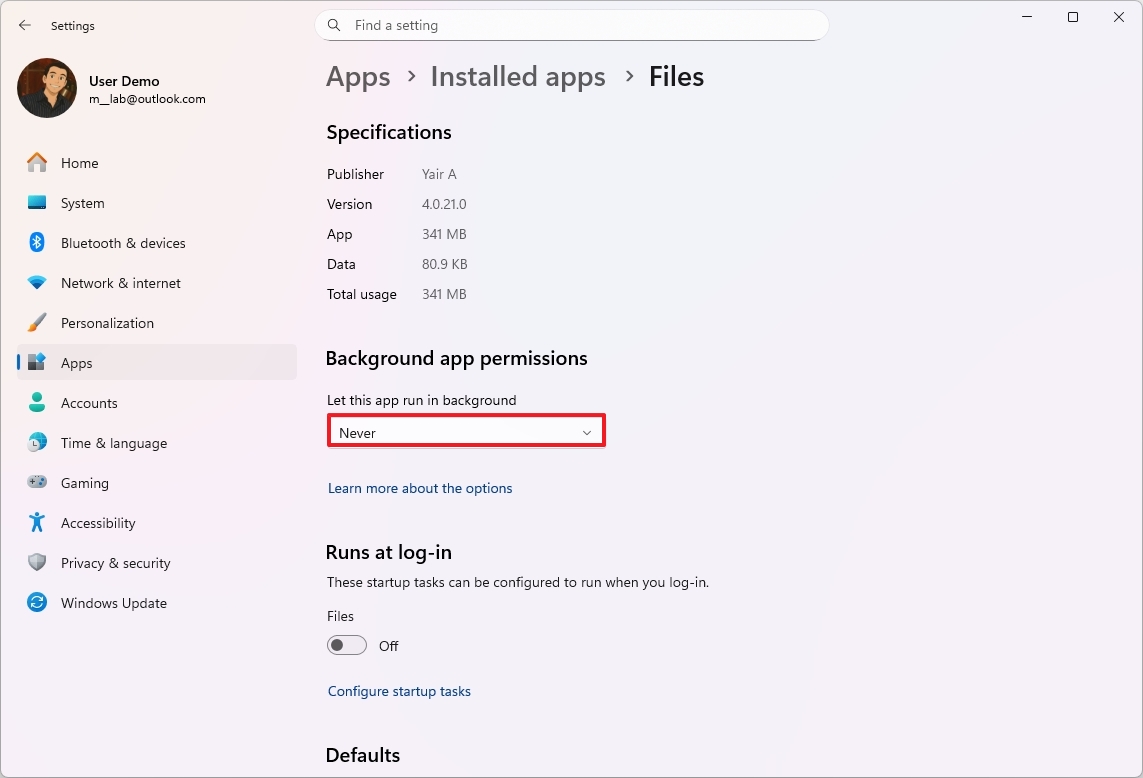
After you complete the steps, the specific app will no longer run in the background.
Disable system services
Windows 11 automatically starts many processes in the background. While most are important for keeping your computer running, you can turn off the ones you don’t need to free up memory (RAM).
Only attempt these steps if you’re confident in your abilities. If you’re unsure, it’s best to choose one of the simpler alternatives.
To turn off system services on Windows 11, use these steps:
- Open Start.
- Search for Services and click the top result to open the console.
- Right-click the service (for example, the “Print Spooler” if you don’t have a printer connected to the device), then choose Properties.
- Click the Stop button to terminate its process.
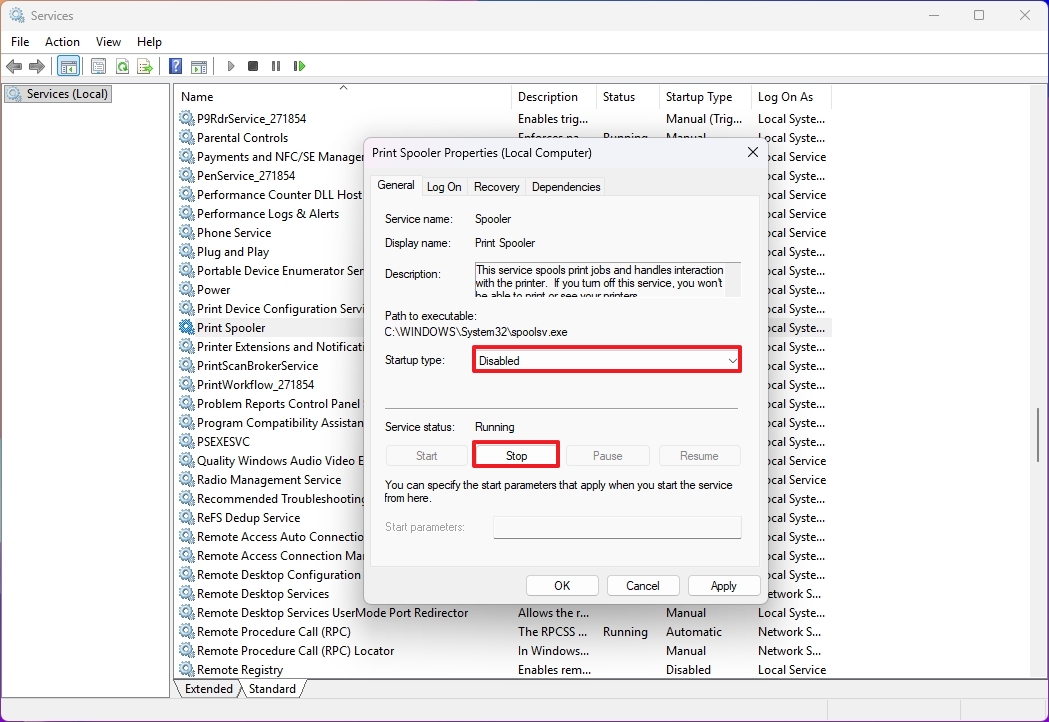
- (Optional) Select the Disabled or Manual option for the “Startup type” setting.
- Click the Apply button.
- Click the OK button.
Once you complete the steps, continue turning off other services to lower the system memory usage.
Optimize memory usage with Microsoft PC Manager
If you have the PC Manager app installed, you can use its Boost feature to help your computer use less memory.
To reduce the memory usage of your device, after installing the PC Manager app, use these steps:
- Open Start menu.
- Search for PC Manager and click the top result to open the app.
- Click on Home.
- Click the Boost button to reduce memory usage immediately.
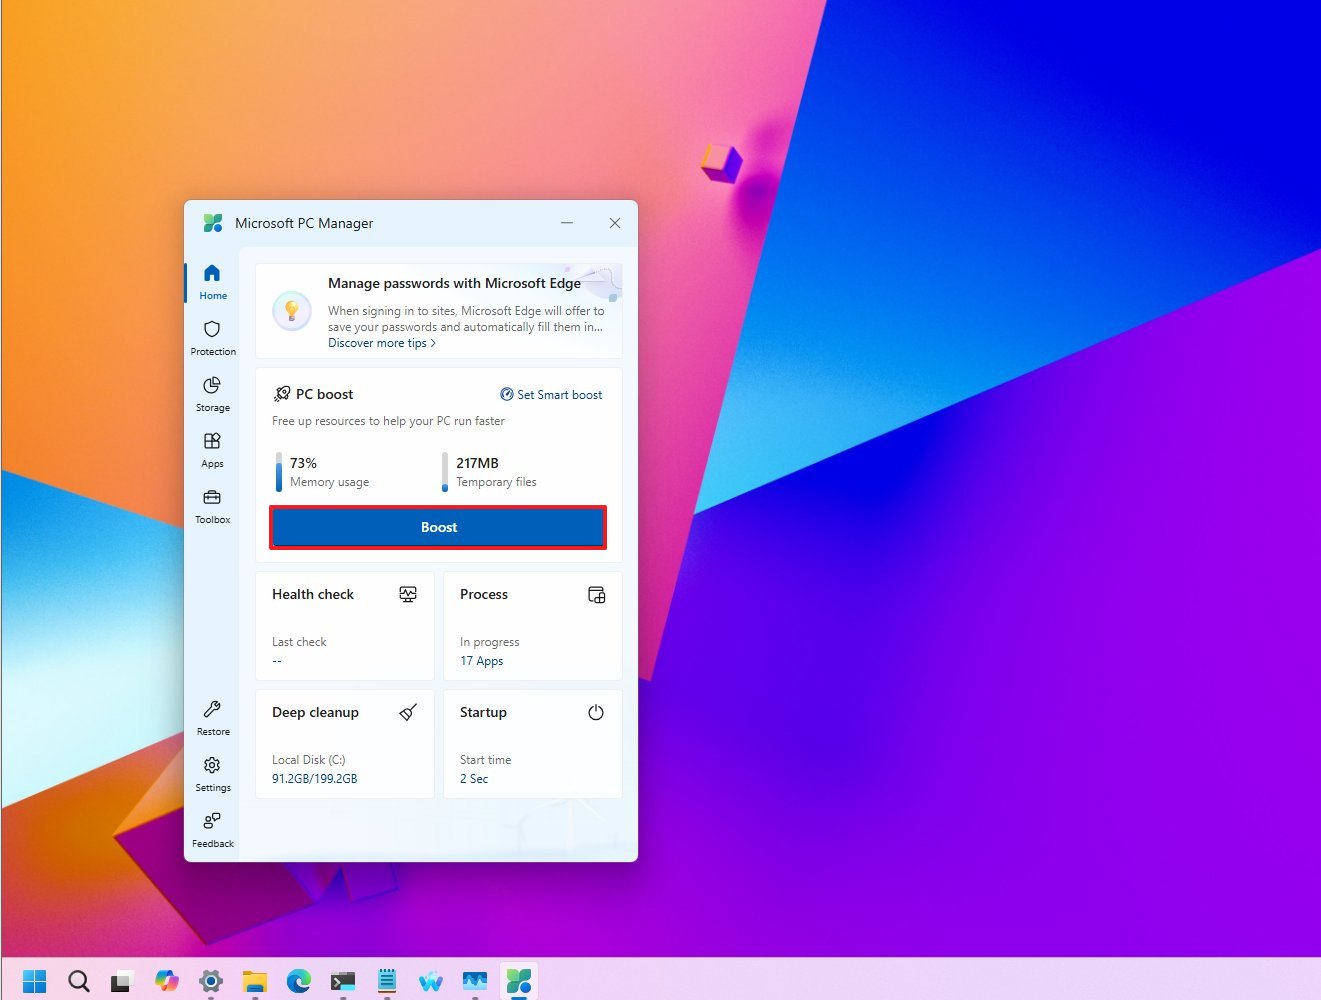
- Quick note: This feature also deletes temporary files, which can also affect performance.
- (Optional) Click the “Set Smart boost” option.
- Turn on the “Start boost setting” toggle switch to enable the feature to lower memory usage when usage is high automatically.
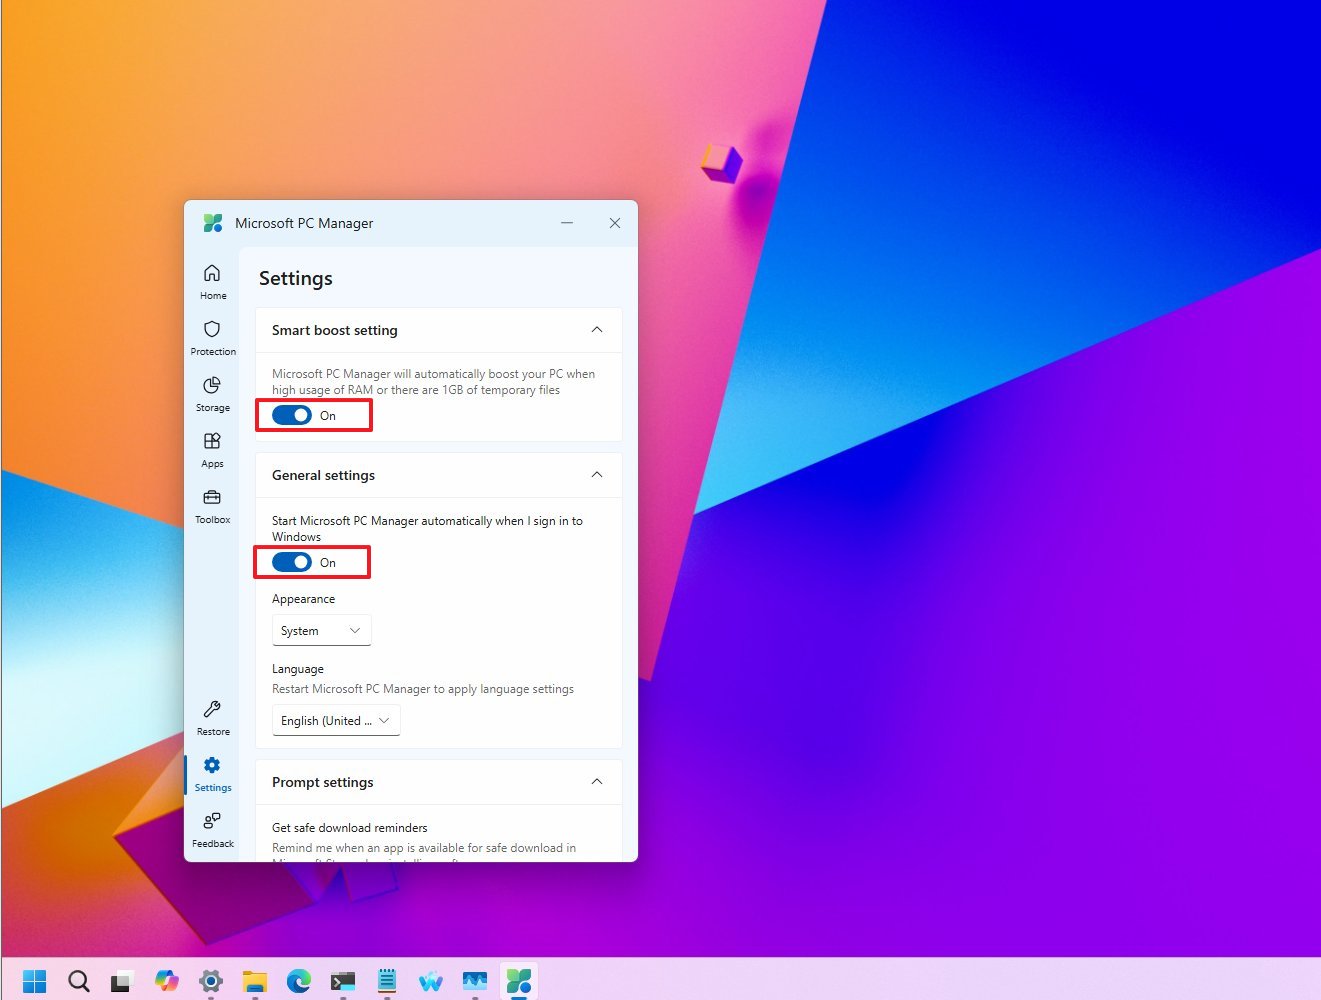
- Turn on the “Start Microsoft PC Manager automatically when I sign in to Windows” toggle switch to have the application start automatically and run the optimizations.
Once you finish the process, the feature will start working, which will help your system run faster by clearing up memory.
Remove unused apps to improve system memory
To free up your device’s resources, the best thing to do is get rid of apps you don’t use. Removing unused applications stops them from running in the background, which saves memory and gives you more storage space.
We’ve already discussed how to limit apps running in the background and prevent them from automatically starting up. But these fixes aren’t always permanent – some apps will restart background activity after updates, and others are simply programmed to do so. Therefore, the most effective way to manage your computer’s resources is to uninstall apps you don’t use often.
The same idea holds true for apps that use a lot of memory. If an app frequently uses a large amount of your computer’s RAM, and there’s a similar app that uses less, switching to the lighter version can make your system noticeably faster, particularly if you don’t have much RAM.
When you can, it’s best to use apps specifically designed for Windows 11. Many new apps are actually just websites packaged to look like applications. While this makes development easier, these apps usually use a lot more computer memory than traditional ones.
A good example of this is WhatsApp on Windows 11. Meta switched from a traditional Windows app to one built using web technology, and many users have reported that this new version uses a lot more computer memory. This shows that using apps specifically designed for your operating system, or getting rid of apps that slow things down, can make your computer run better.
To uninstall a native or web application, use these steps:
- Open Settings.
- Click on Apps.
- Click the Installed apps page on the right side.
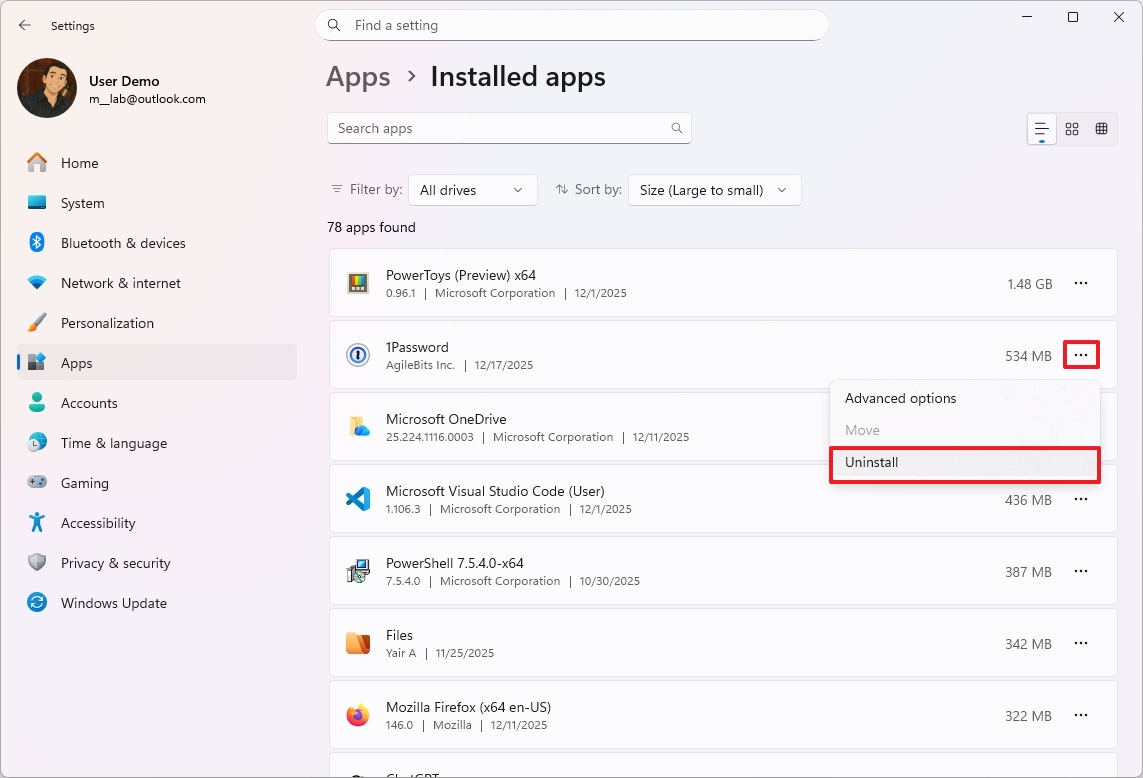
- Select the app, then open its menu using the three dots on the right.
- Select the Uninstall option.
- Click the Uninstall button again.
- Continue with the on-screen directions (if applicable).
After finishing these steps, you might need to repeat them to remove any other apps you want to get rid of.
Scan for malware and unwanted software
If your computer is using a lot more memory than usual, it might be due to a virus or other harmful software.
We suggest running a complete scan for malware using Microsoft Defender Antivirus or your preferred antivirus program.
To perform a full scan and remove viruses affecting the system memory usage, use these steps:
- Open Start.
- Search for Windows Security and click the top result to open the app.
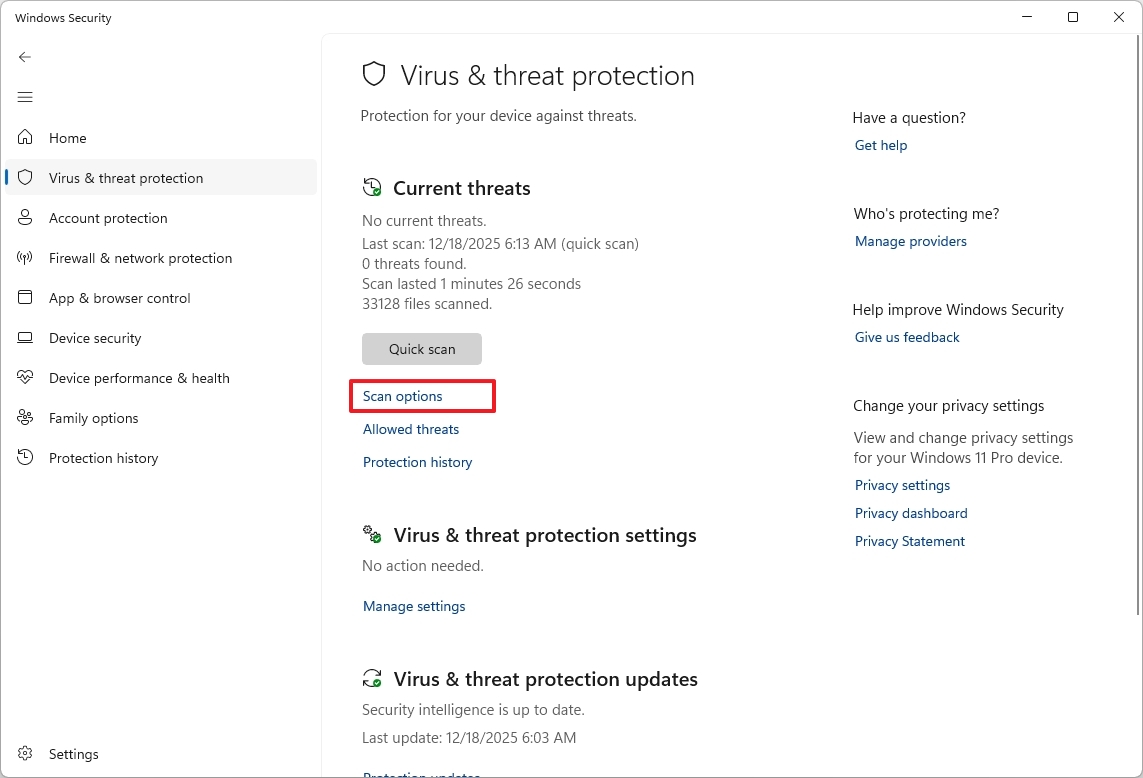
- Click on Virus & threat protection.
- Click on “Scan options” on the right side.
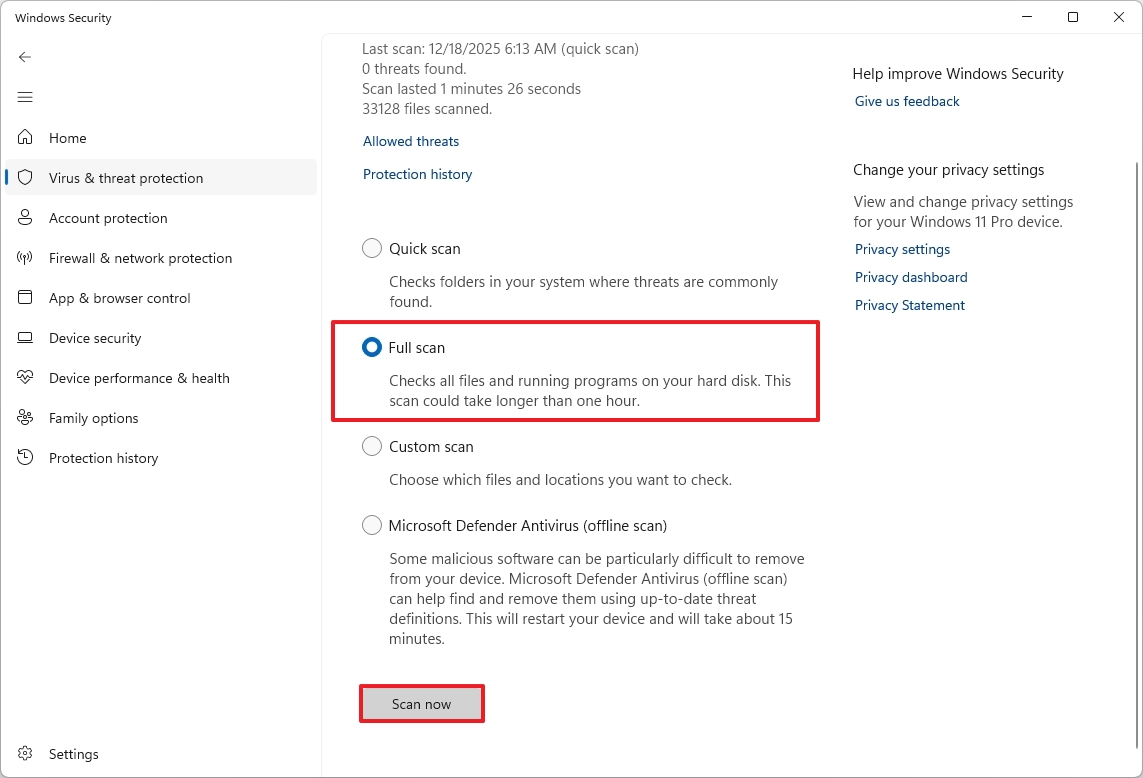
- Select the Full scan option.
- Click the Scan now button.
After you complete the steps, the antivirus will scan and remove any malware detected.
If a full scan didn’t fix the problem, you can try running a scan while your device isn’t connected to the internet. Here’s how to do it.
Install the latest system and driver updates
Occasionally, issues stem from problems within the operating system itself. While updates can sometimes cause temporary difficulties, they’re crucial for fixing bugs and security flaws. That’s why it’s important to regularly install the newest system and driver updates to keep your computer running smoothly and securely.
System updates
To download and install system updates, use these steps:
- Open Settings.
- Click on Windows Update.
- (Optional) Turn on the “Get the latest updates as soon as they’re available” toggle switch.
- Click the “Check for updates” button.
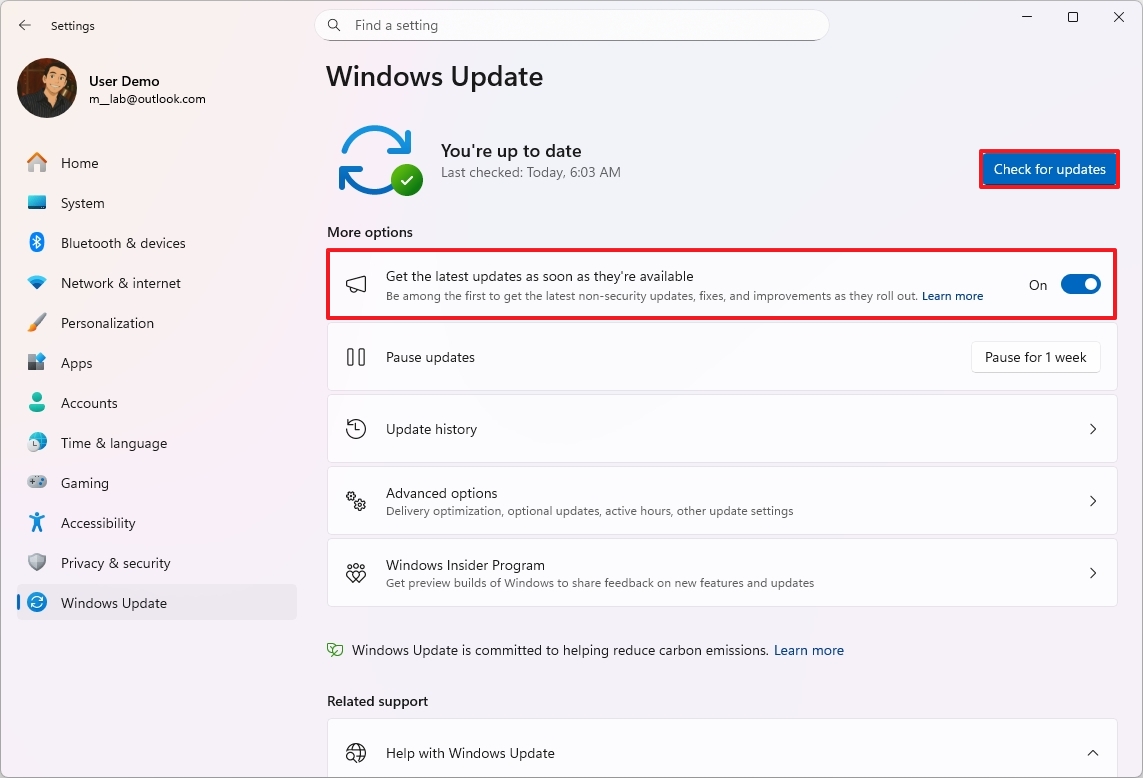
After you complete the steps, the operating system will download and install any available updates.
Driver updates
To download and install driver updates, use these steps:
- Open Settings.
- Click on Windows Update.
- Click the Advanced options page on the right side.
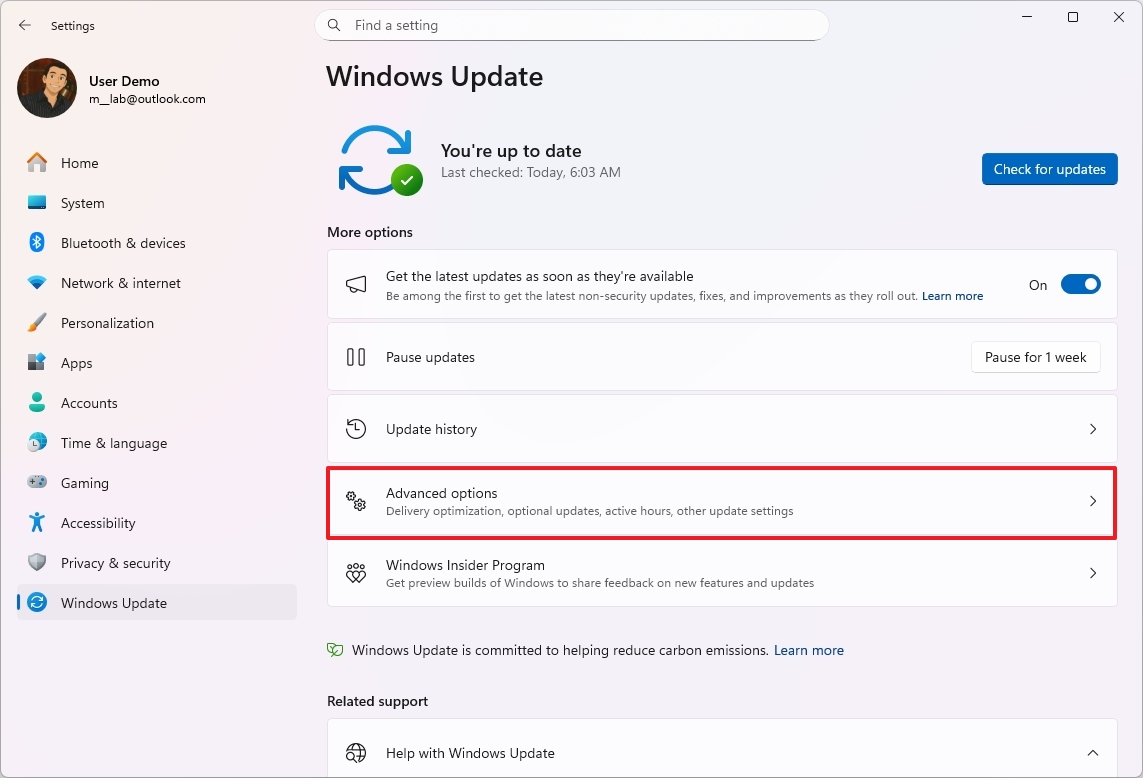
- Click the Optional updates settings under the “Additional options” section
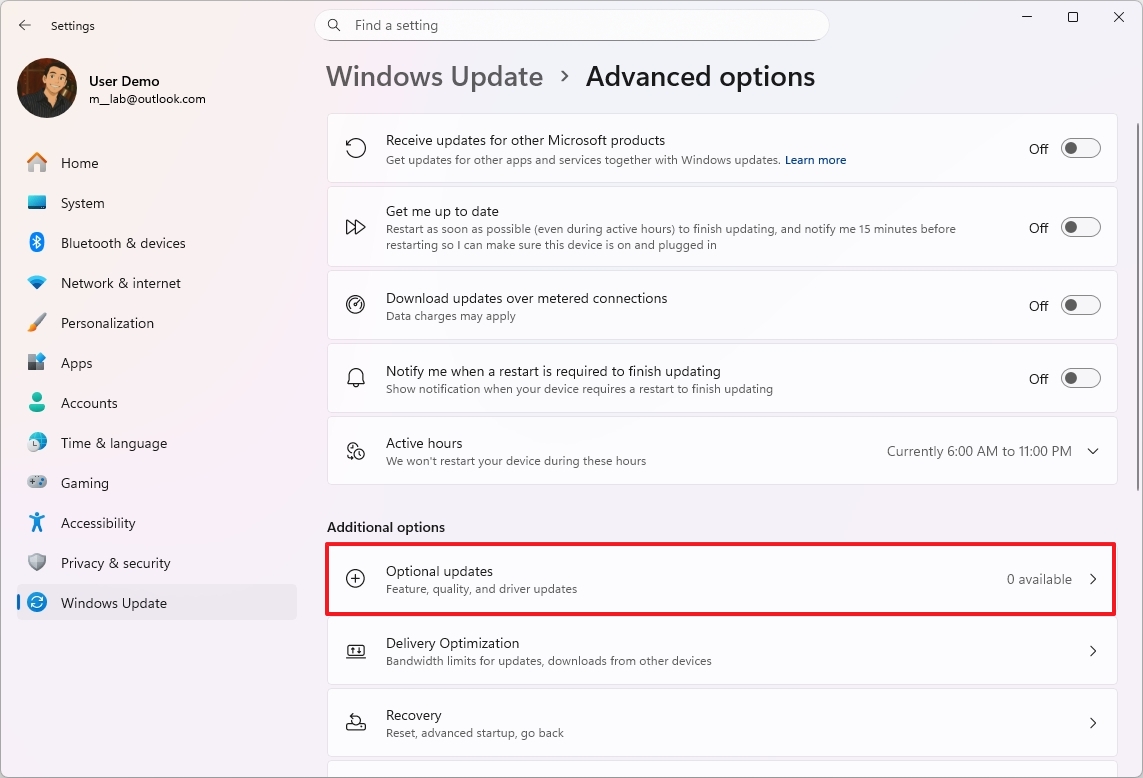
- Select the available device driver updates (if applicable).
- Quick note: This page lists the current drivers available through the Windows Update servers. If you don’t see anything, then the system doesn’t have any updates available for your device at that specific time.
- Click the “Download & install” button.
After you finish these steps, your computer’s memory usage should improve automatically.
You can also find and install the latest drivers for your device directly from the manufacturer’s website.
App updates
To download updates for apps from the Microsoft Store, use these steps:
- Open the Microsoft Store app.
- Click the Downloads tab in the bottom-left corner.
- Click the “Check for updates” button.
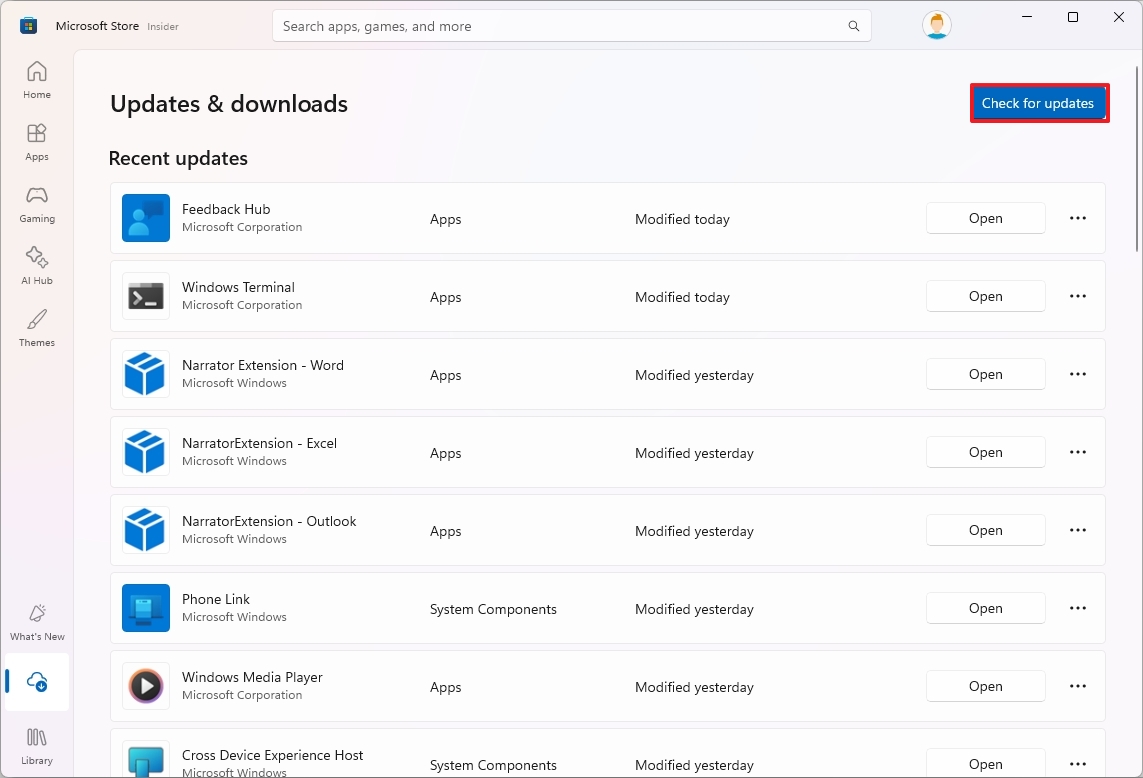
After you complete the steps, any available updates will download and install on the computer.
If you’ve installed apps from outside the official app store, make sure they’re up to date. You can usually check for updates right in the app, or by visiting the software developer’s website.
Enable Xbox Full Screen Experience to lower memory usage
You can free up roughly 2GB of RAM on handheld gaming PCs by using the desktop mode with Xbox Full Screen Experience.
With the 25H2 update to Windows 11, the Xbox Full Screen Experience (FSE) changes your desktop to look and feel more like a gaming console, making it easier to play games with a controller.
The system replaces your usual desktop with the full-screen Xbox app, making it run more efficiently by turning off Windows Explorer and closing unused programs in the background.
The feature first launched on the ASUS ROG Ally and Ally X, and then became available on other handheld devices in 2025. Microsoft intends to extend support to even more types of devices in the future.
To enable the Xbox Full Screen Experience on your handheld gaming PC, use these steps:
- Open Settings.
- Click on Gaming.
- Click the “Full Screen Experience” page on the right side.

- Select the Xbox app in the “Choose home app” setting.
- Turn on the “Enter full screen experience on startup” toggle switch.
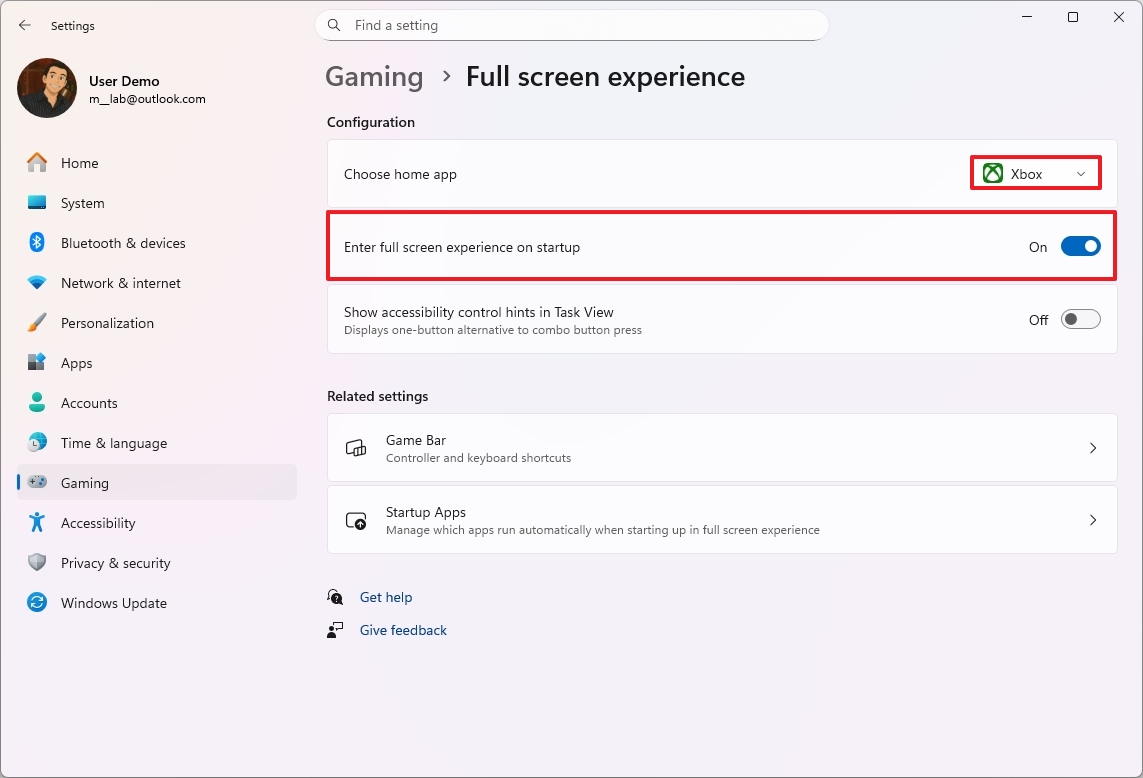
- (Optional) Turn on the “Show accessibility control hints in Task view” toggle switch.
- Restart the handheld gaming PC.
Once I finished the setup, the device rebooted. Then, after signing in, it began functioning more like a traditional console through the Xbox app, and I noticed it was using memory more efficiently – the exact amount depended on how my device was configured.
Reduce RAM usage by optimizing your web browser
As a tech enthusiast, I’ve noticed Windows 11 browsers can really hog RAM. But it’s not always the browser’s fault directly! It mostly comes down to what websites are loading – things like high-quality images, videos, and all those fancy animations. Plus, all the ads and complex code running in the background add up. I find that having a ton of tabs open, using a lot of browser extensions, and leaving web apps running constantly can quickly max out your memory, even if you have a decent amount of RAM.
As a tech enthusiast, I’ve noticed a big difference in how well computers handle memory these days. It’s cool to see browsers really stepping up their game in this area – some are *way* more efficient than others. I’ve found Microsoft Edge to be particularly good; it’s generally lighter on your system resources. It does this by smartly putting inactive tabs to sleep and limiting what’s running in the background, which is a huge help when you have a lot of tabs open!
You don’t need to change browsers, but it’s good to know that different browsers can affect how quickly your computer runs.
If you’re using the built-in browser on Windows 11, you can lower its memory usage with a few settings. Try enabling features that control resources, put inactive tabs to sleep, or use efficiency modes. It’s also helpful to disable background mode, which stops the browser from using memory even after you close it.
Also, regularly getting rid of extensions you don’t need, keeping fewer tabs open, and closing unused websites can really improve performance. These simple steps work together to help manage memory and make Windows 11 run more smoothly and quickly.
Customise Microsoft Edge resource features
To enable resource controls on Microsoft Edge, use these steps:
- Open Microsoft Edge.
- Open the main menu using the Alt + F keyboard shortcut.
- Choose the Settings option.
- Click on “System and performance” from the left pane.
- Click the Background mode tab.
- Turn off the Startup boost toggle switch to prevent the browser from pre-loading during startup using additional memory.

- Turn off the “Continue running background extensions and apps when Edge is closed” to reduce the memory footprint while the browser is closed.
- Click on “System and performance” from the left pane one more time.
- Click the Performance setting.
- Turn on the “Save resources with sleeping tabs” toggle switch to put inactive tabs to sleep after a specified time to save system resources.
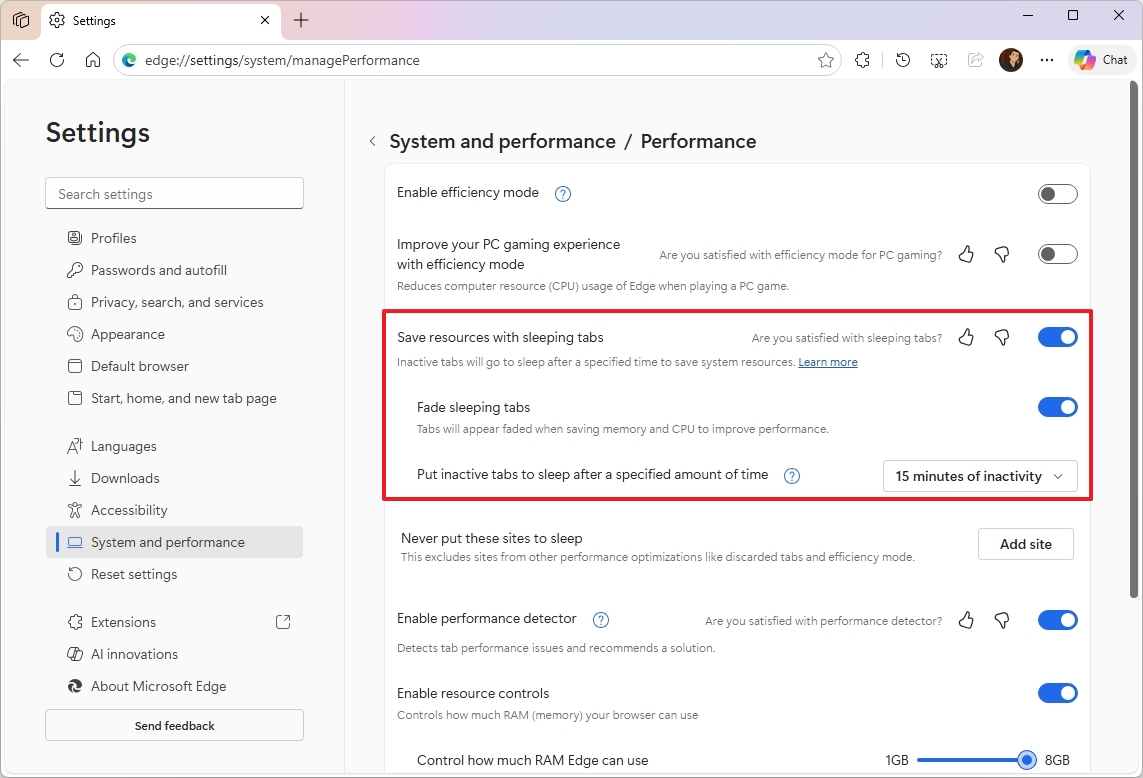
- Set the “Put inactive tabs to sleep after a specified amount of time” option to 15 minutes to improve memory usage more quickly.
- (Optional) Turn on the “Enable performance detector” toggle switch to detect tab performance issues and recommend a solution.
- Turn on the “Enable resource controls” toggle switch to control how much RAM the browser is allowed to use.
- Confirm the amount of memory the browser should use, but consider that this can also affect browsing speeds.
- Choose the Always option for the “Choose when to control resources” setting.
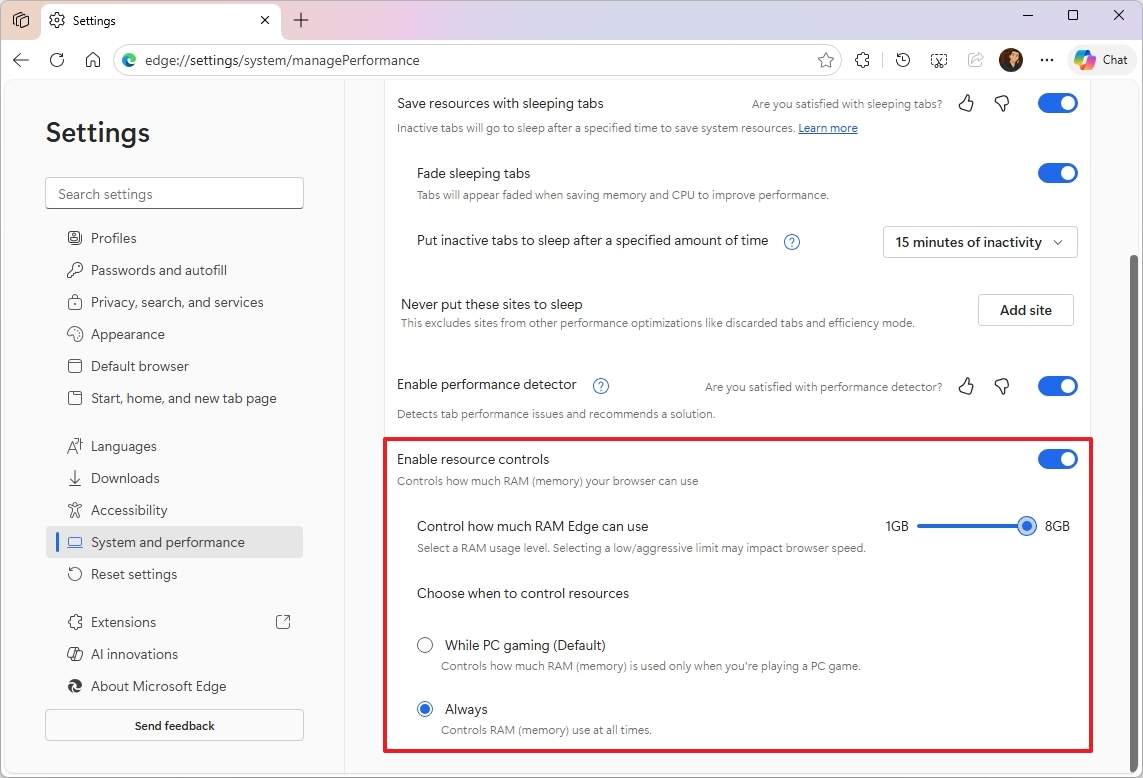
As an analyst, I’ve observed that after following these steps, you should see a clear decrease in the amount of computer memory Microsoft Edge uses. It should run more efficiently.
Uninstall browser extensions
To uninstall extensions from Microsoft Edge, use these steps
- Open Microsoft Edge.
- Open the main menu using the Alt + F keyboard shortcut.
- Select Extensions and click on Manage Extensions.
- Click the Remove button for the extension using excessive system memory.
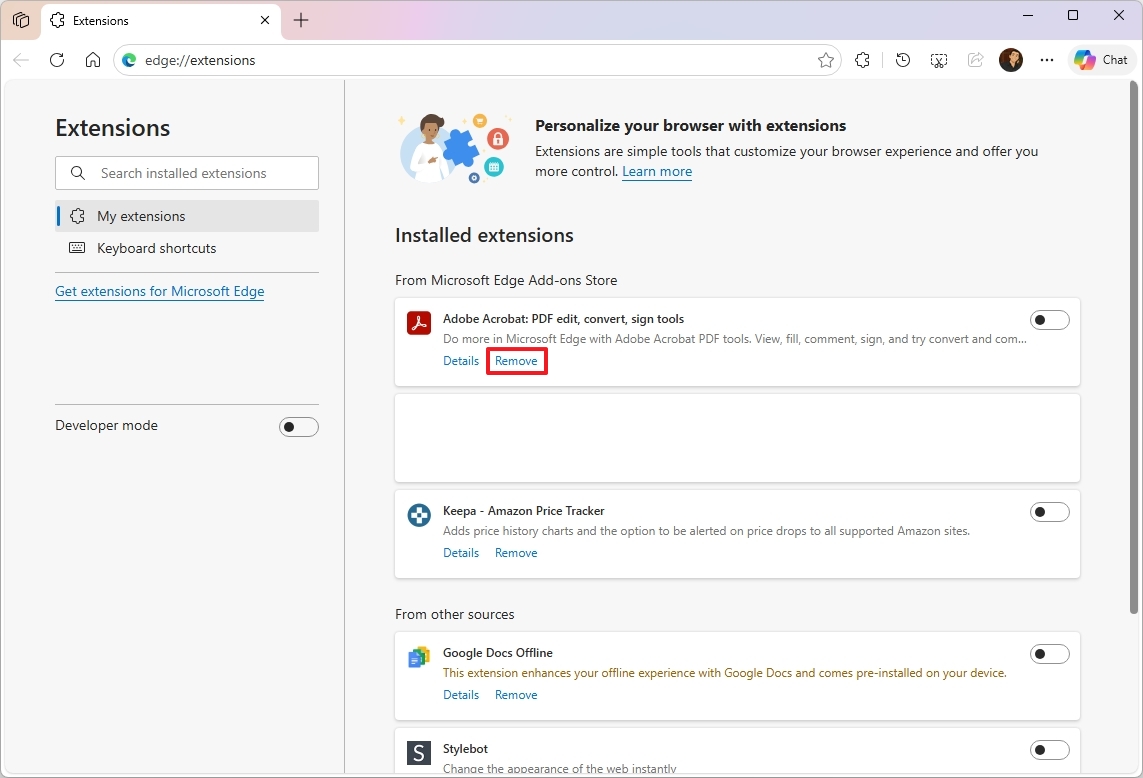
- Click the Remove button one more time.
Once I finished those steps, I moved on to removing any other extensions that seemed to be using a lot of memory. It was about streamlining things and freeing up resources.
Okay, so if my Edge browser is hogging memory and I can’t figure out why, I just go to the main menu – those three dots in the upper right corner. Then, I click ‘More tools’, and from there, I can open the ‘Browser task manager’. It shows me exactly which extensions or tabs are using up all the resources, which is super helpful!
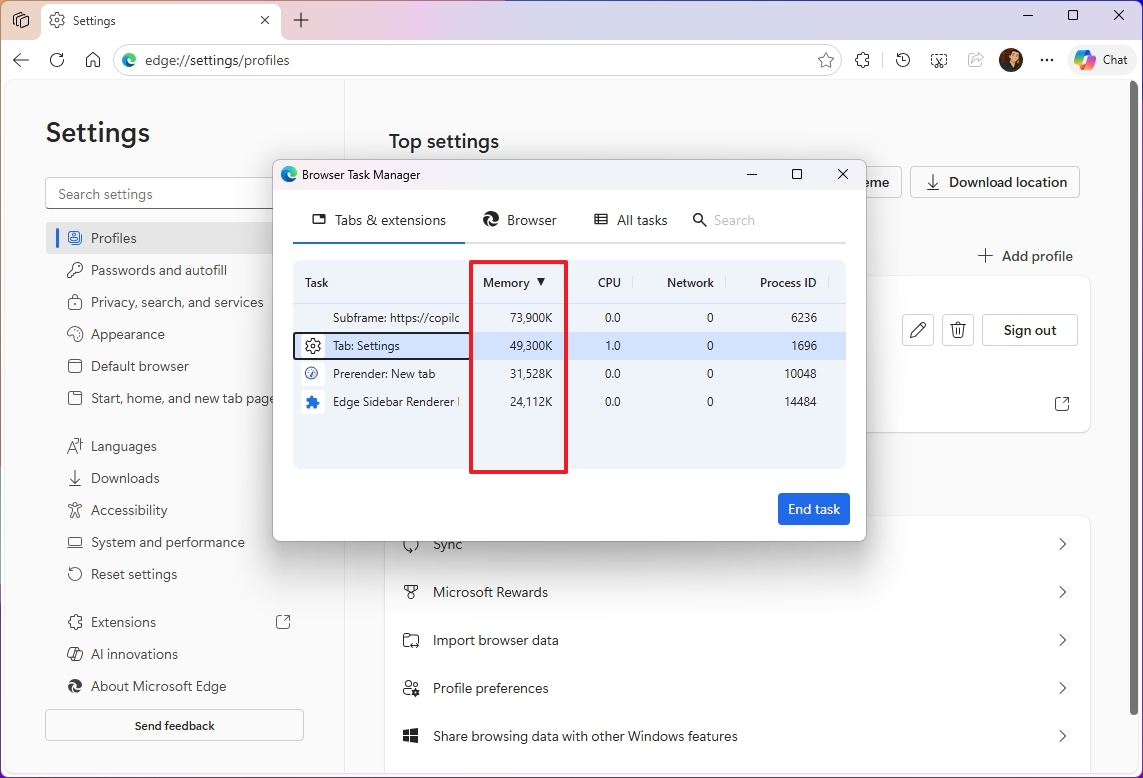
Go to the “Memory” tab to see your extensions sorted by how much memory they use. This helps you find and remove the ones using the most resources.
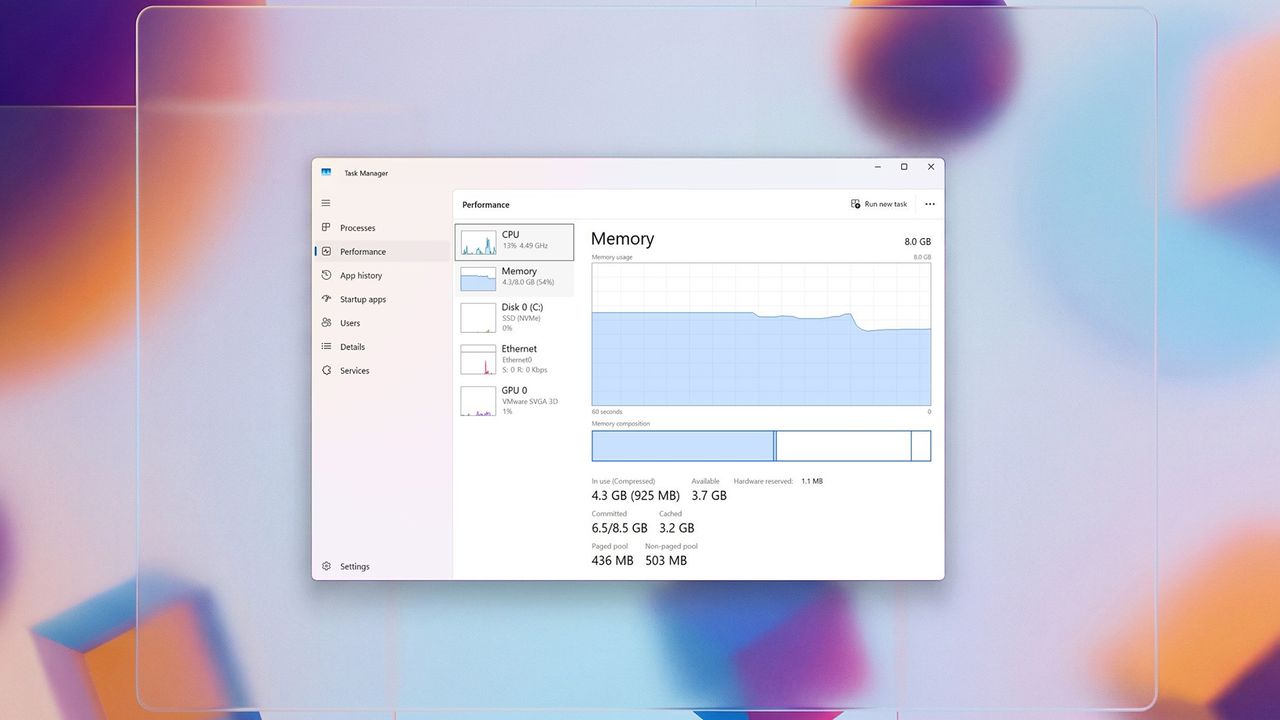
Find apps consuming excessive RAM in Task Manager
If you’re unsure what’s slowing down your computer, Task Manager can help you identify which programs are using the most resources.
- Open Start.
- Search for Task Manager and click the top result to open the tool.
- Click the Process tab.
- Click the “Memory” header to sort all running programs.
- Confirm the apps at the top of the list that are currently using the most RAM.
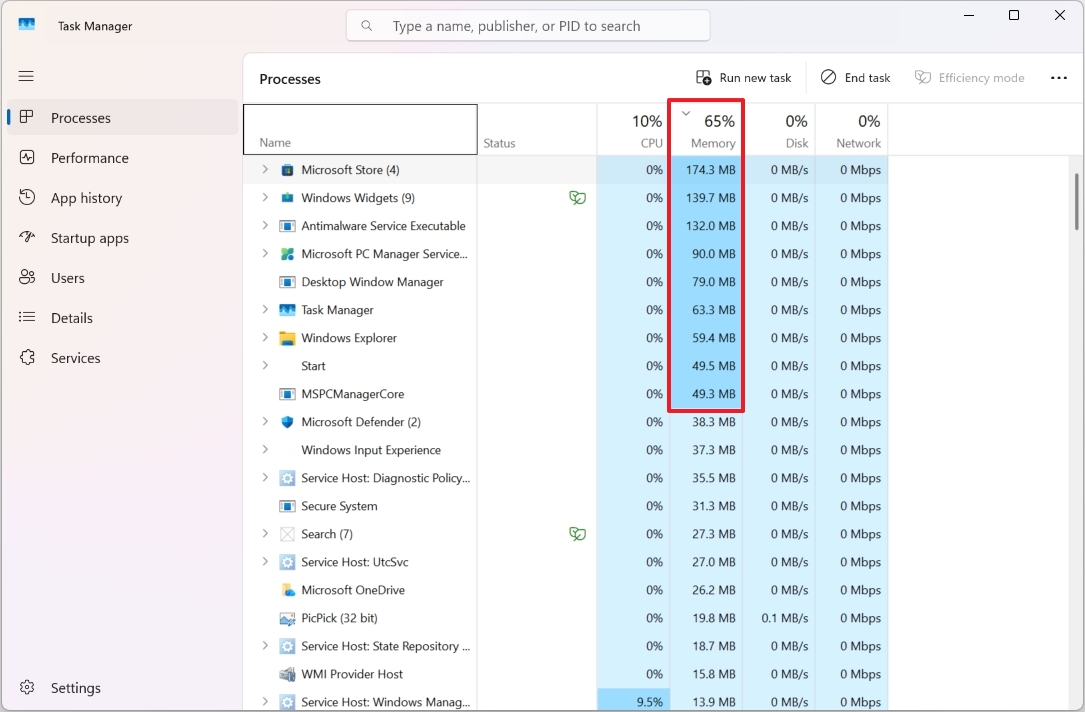
After you complete the steps, you will know the apps that are consuming the most system memory.
Browsers such as Google Chrome and Microsoft Edge often show up with many entries in task managers because each new tab you open actually runs as its own separate process. If you click the small arrow next to the browser’s name, you can see a list of all these individual processes.
This feature also lets you see which extensions are using the most of your computer’s power. While Microsoft Edge provides these details, other browsers like Google Chrome don’t display extension information in the Task Manager.
Perform a clean installation of Windows 11
If your computer is still using a lot of memory even after trying several fixes, you might want to reinstall Windows 11 completely. This can often fix memory problems, as well as improve overall performance and resolve other errors.
This guide will help you install a new copy of Windows 11. We’ll cover everything from getting your device ready and creating the installation media, to actually installing Windows and finishing the setup process.
I realize that upgrading the system memory might seem expensive right now. However, if your system allows it, it’s the best way to improve performance.
While Windows 11 can run with 4GB of RAM, we recommend having at least 16GB for everyday use and playing games.
More resources
Read More
- FRONT MISSION 3: Remake coming to PS5, Xbox Series, PS4, Xbox One, and PC on January 30, 2026
- Taylor Sheridan’s Gritty 5-Part Crime Show Reveals New Final Season Villain
- The Boys Season 5, Episode 5 Ending Explained: Why Homelander Does THAT
- ‘The Bride!’ Review: Jessie Buckley Breathes Life into a Monstrous Mess
- Mark Zuckerberg & Wife Priscilla Chan Make Surprise Debut at Met Gala
- Why There’s No Ghosts Tonight (Nov 27) & When Season 5, Episode 7 Releases
- Welcome to Demon School! Iruma-kun season 4 release schedule: When are new episodes on Crunchyroll?
- Ashley’s Powers in The Boys Season 5 Explained & Why They Don’t Work On [SPOILER]
- How to Build Water Elevators and Fountains in Enshrouded
- Invincible Season 4 Episode 4 Post-Credits Unveils a Demonic Return & More
2025-12-19 16:15