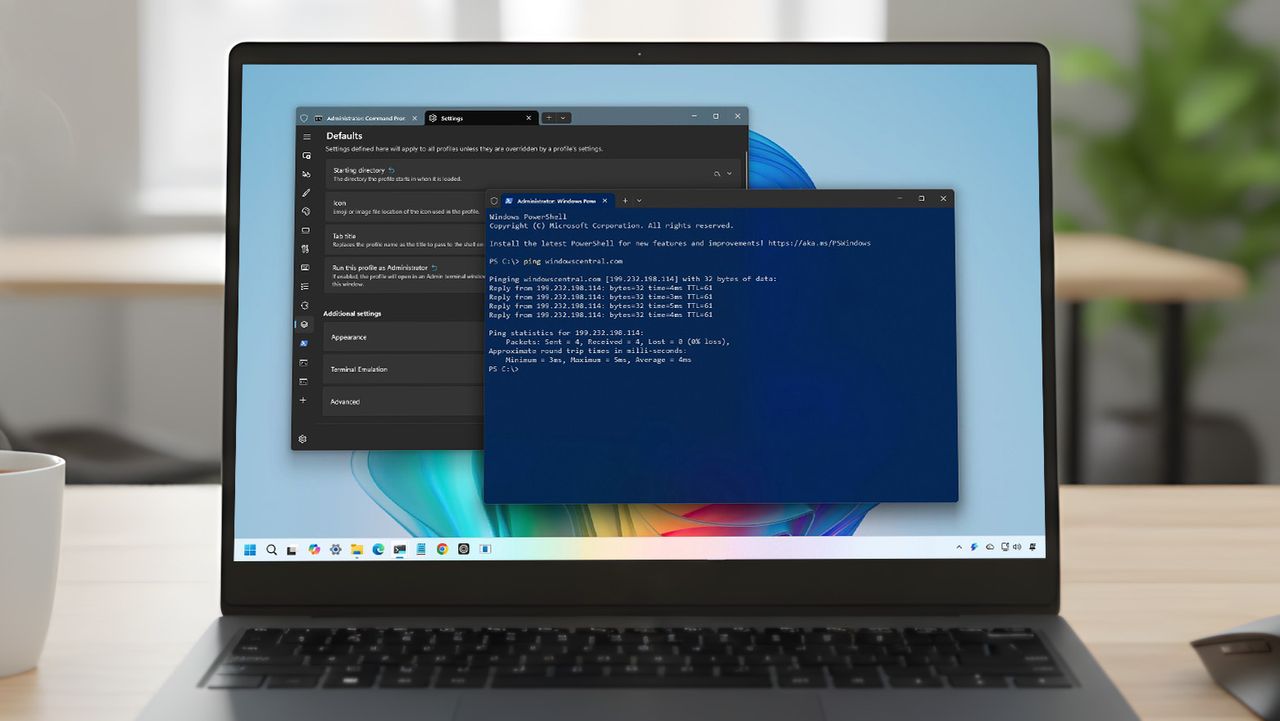
Windows Terminal is a modern command-line tool that works with things like PowerShell, Command Prompt, and the Windows Subsystem for Linux. While it’s great, the default settings aren’t perfect for everyone. Whenever I install a fresh copy of Windows 11, whether on a new or old computer, I always customize its settings before I start working.
These updates go beyond just appearance. They make the Terminal easier to read, smoother to use when switching between different command-line environments, and ensure it works the same way on any Windows computer. No matter if you prefer PowerShell, Command Prompt, WSL, or use them all, these settings will transform Windows Terminal from a decent starting point into a truly customized and effective tool.
This guide will show you exactly how I set up Windows Terminal on Windows 11 – it’s the configuration I use every time.
This is a list of my favorite settings and how I customize Windows Terminal. It’s not exhaustive – there are many other options available – but these are the changes I use daily. Feel free to pick and choose what works best for you and how you like to work.
My essential customization tweaks for Windows Terminal
As an analyst, I spend a lot of time in the Windows Terminal, so I’ve really dialed in the settings to work best for me. What I’m sharing isn’t a step-by-step guide, but rather a collection of tweaks I’ve made to boost my efficiency and keep things consistent day-to-day. These are just my personal preferences, and I’ve organized them in no particular order.
1. Set Command Prompt as the default startup profile
Even though I usually prefer PowerShell, I always find myself using Command Prompt instead. Because of this, I’ve configured my system to automatically open Command Prompt when I start up.
To set Command Prompt as the default command-line experience, use these steps:
- Open Start.
- Search for Windows Terminal and click the top result to open the app.
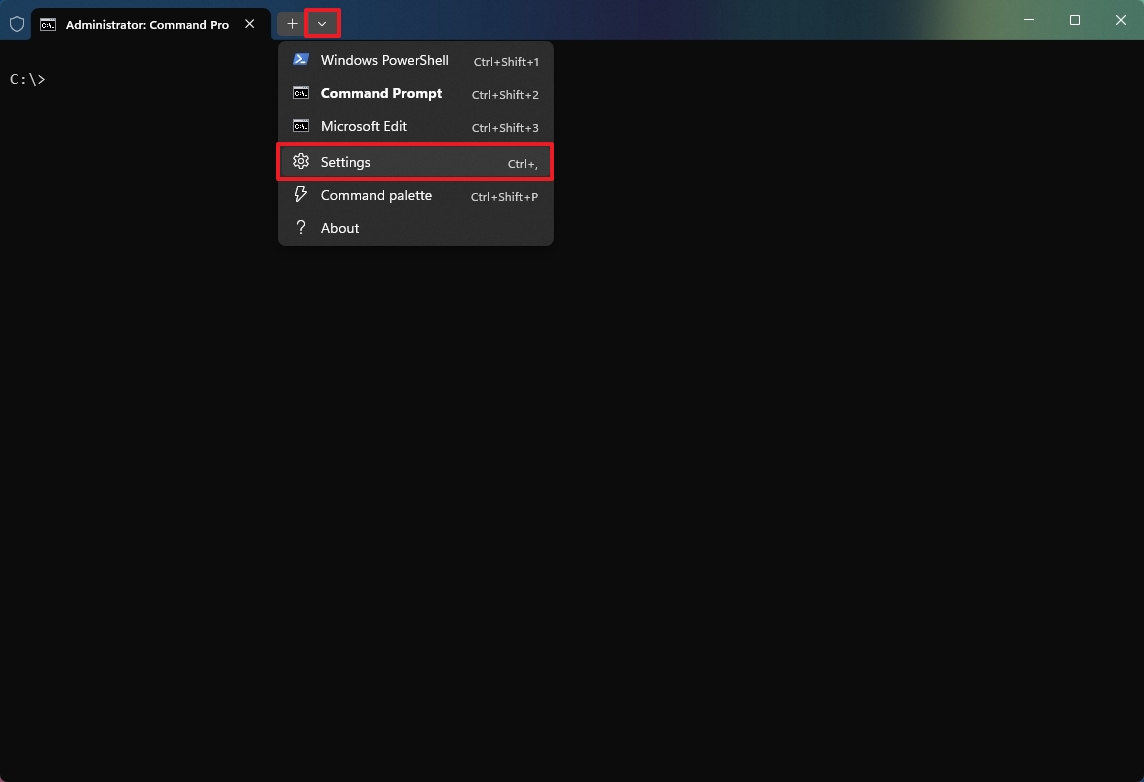
- Click the main menu and choose the Settings (Ctrl+,) option.
- Click on Startup.
- Select the Command Prompt option in the “Default profile” setting.
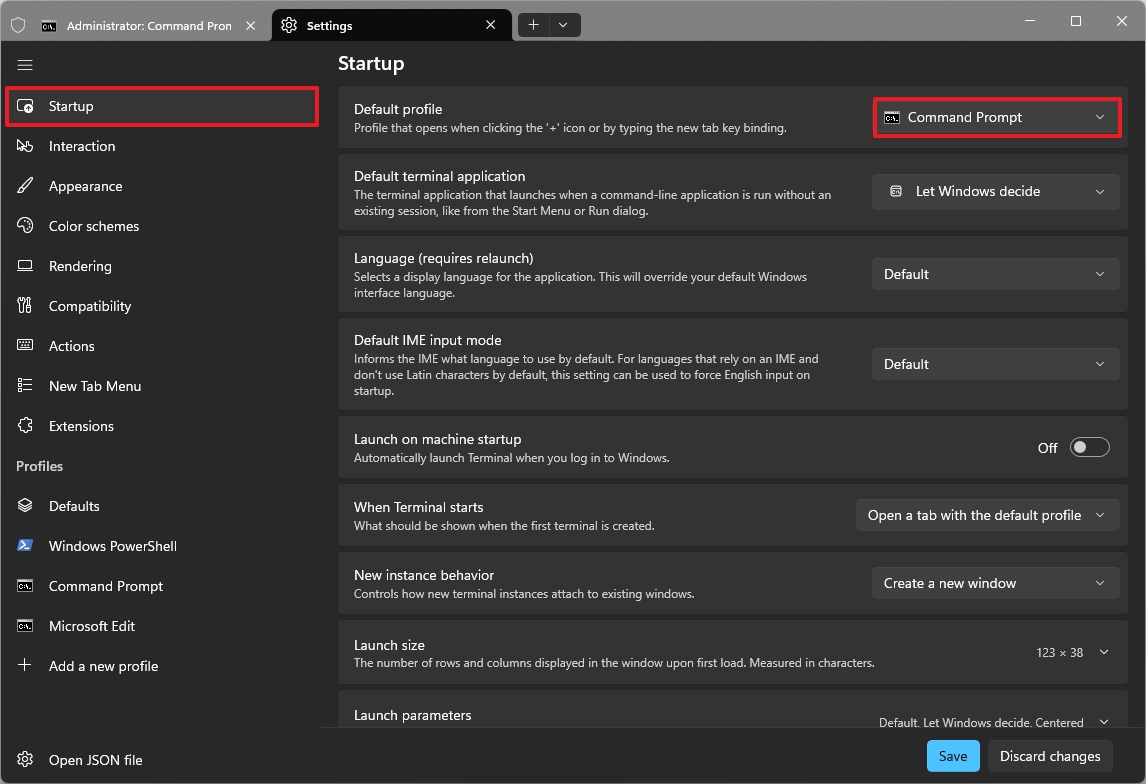
- Click the Save button.
After finishing these steps, the Command Prompt will automatically open whenever you start the Terminal, instead of PowerShell.
2. Choose a global starting directory for every shell
If you frequently navigate to the same folder in Windows Terminal, you can set it to automatically open there whenever you launch the application.
To start the Windows Terminal in a specific folder location, use these steps:
- Open Start.
- Search for Windows Terminal and click the top result to open the app.
- Click the main menu and choose the Settings (Ctrl+,) option.
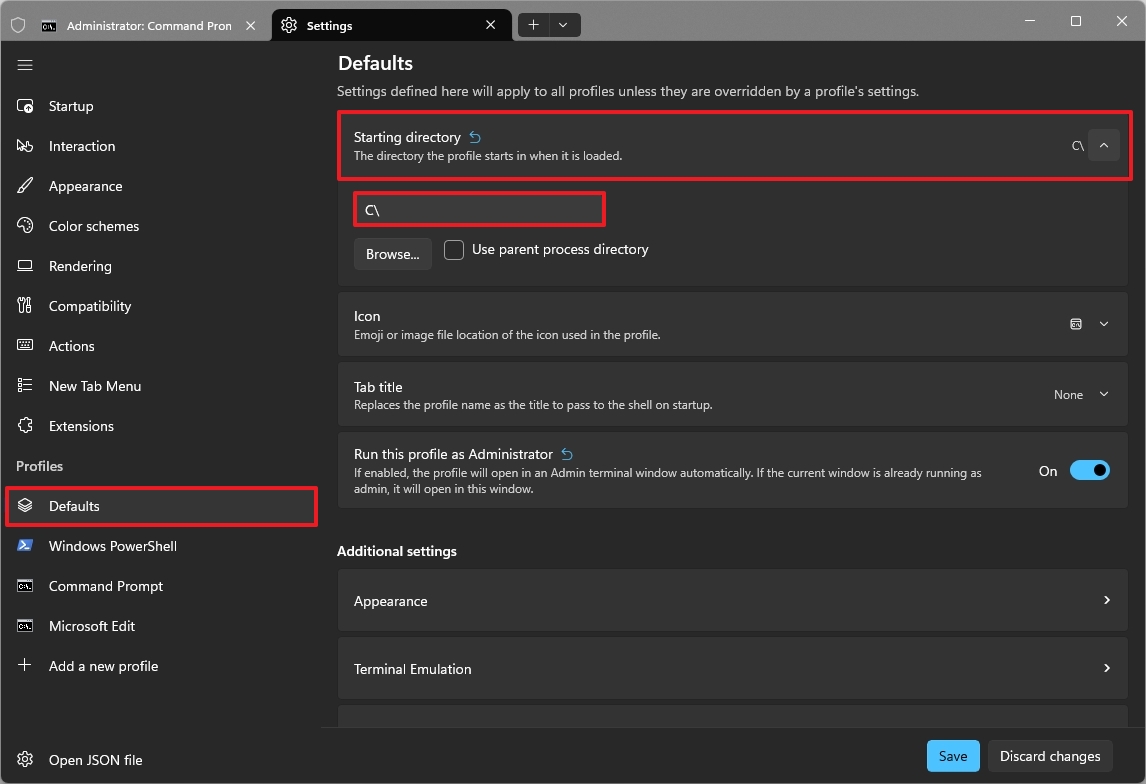
- Click on Defaults.
- Click the Starting directory setting.
- Click the Browse button.
- Select the starting directory, such as C:\.
- Click the Select Folder button.
- Click the Save button.
Once you’ve finished the setup, the command line will open directly in the folder you chose, whether you use Terminal within Command Prompt or PowerShell.
3. Remove unused and duplicate Terminal profiles
The Windows Terminal comes with several pre-set profiles, like access to Azure Cloud Shell and a PowerShell version (7.x), that many people don’t need. If you want a simpler setup, you can easily remove any profiles you aren’t using.
To delete unnecessary profiles, use the steps:
- Open Start.
- Search for Windows Terminal and click the top result to open the app.
- Click the main menu and choose the Settings (Ctrl+,) option.
- Click the Azure Cloud Shell profile under the “Profiles” section (if applicable).
- Click the Delete profile button.
- Click the PowerShell profile under the “Profiles” section (if applicable).
- Quick note: This entry is for the new version of PowerShell, not the legacy “Windows PowerShell”. If you have the entry for the legacy version, don’t delete it.
- Click the Delete profile button.
After finishing these steps, you might need to repeat them to get rid of any other profiles you don’t need.
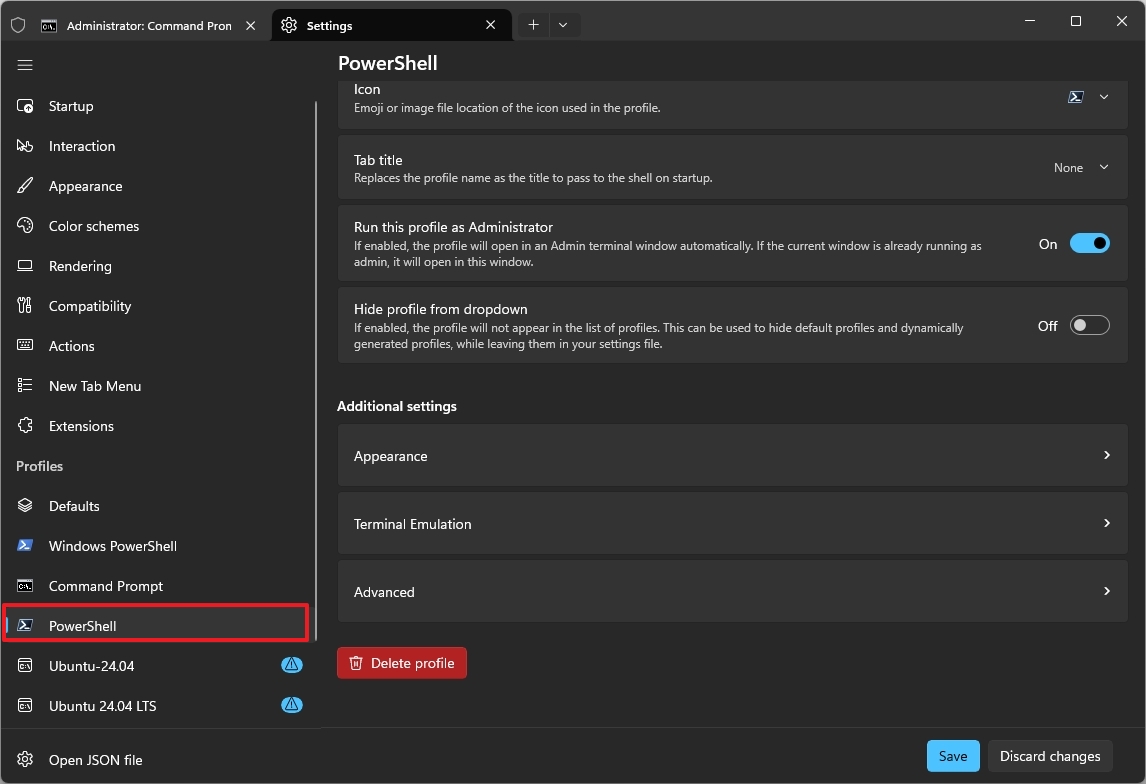
4. Always launch Windows Terminal with administrator privileges
For better security, it’s best to use Command Prompt or PowerShell as a regular user, not an administrator. This follows the principle of least privilege, which helps prevent mistakes and stops harmful commands from accidentally damaging your system.
If you frequently need to run Terminal with administrator privileges, you can set it to always open that way.
To always run the Windows Terminal as an administrator, use these steps:
- Open Start.
- Search for Windows Terminal and click the top result to open the app.
- Click the main menu and choose the Settings (Ctrl+,) option.
- Quick note: Changes made under “Defaults” apply globally to every Terminal profile. To customize a single shell, select that specific profile from the list and adjust its settings individually.
- Click on Defaults.
- Turn on the “Run this profile as Administrator” toggle switch.
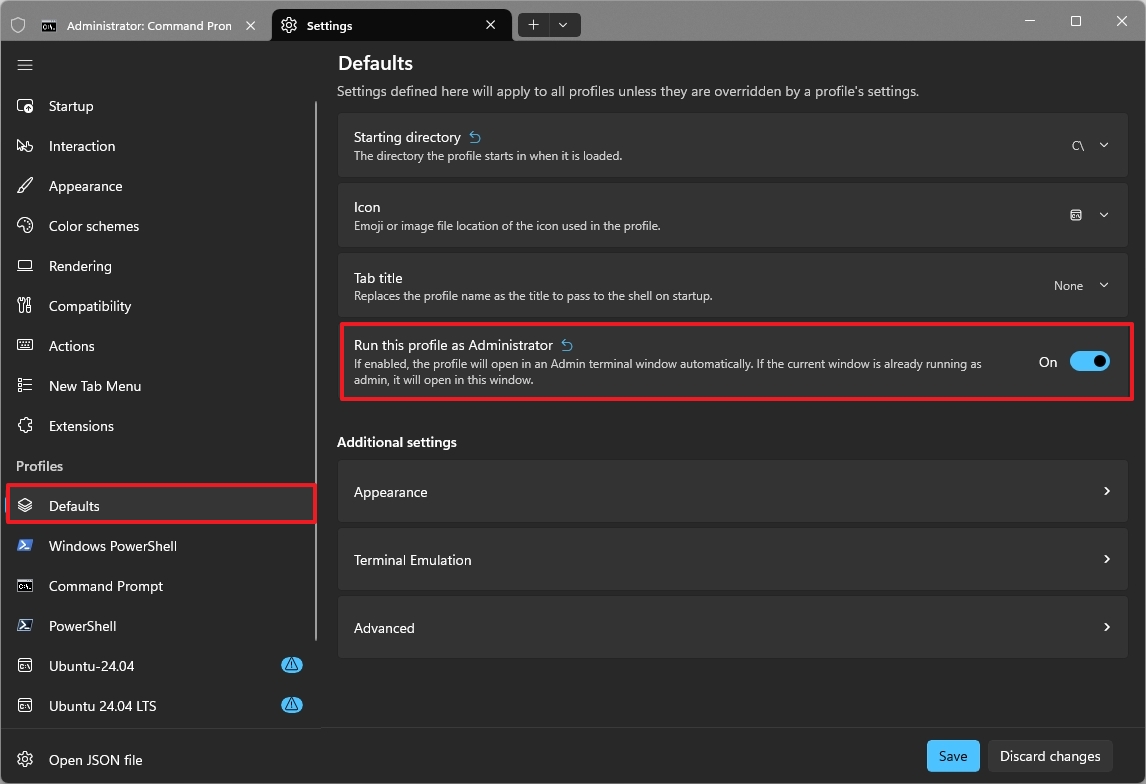
- Click the Save button.
Once you finish these steps, Windows Terminal will automatically open with administrator access whenever you start Command Prompt, PowerShell, or any other shell.
5. Turn off unnecessary Terminal extensions
Microsoft has added new features to Windows Terminal, but it works differently than extensions in browsers like Chrome. Instead of traditional extensions, it uses something called JSON Fragment Extensions and Shell Plugins.
To turn off extensions from Windows Terminal, use these steps:
- Open Start.
- Search for Windows Terminal and click the top result to open the app.
- Click the main menu and choose the Settings (Ctrl+,) option.
- Click on Extensions.
- Turn off the toggle switch for the extensions you don’t want to use.
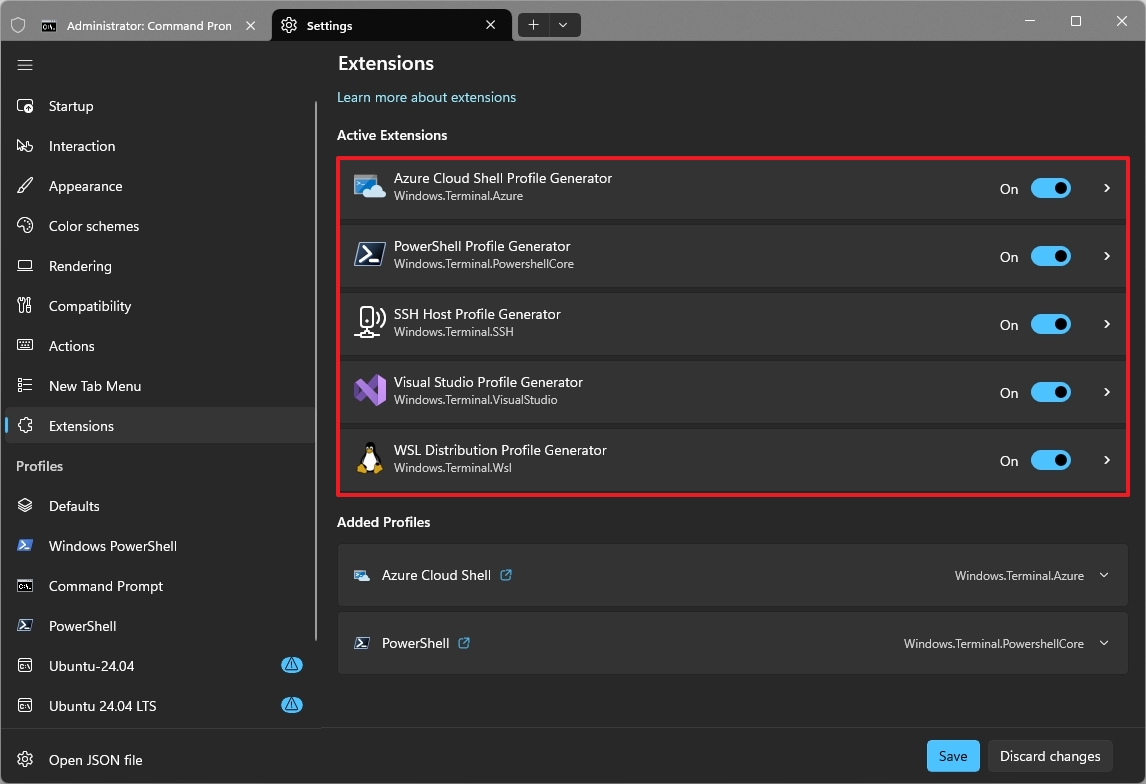
- Click the Save button.
After you finish the process, the parts of the configuration file related to each extension will be removed.
6. Set a custom default window size for all shells
Windows Terminal usually starts with a window size of 120 columns and 30 rows, creating a rectangular shape. If you often adjust the window size with your mouse, you can save time and effort by setting a larger default size when you first open it.
To change the default application frame size, use these steps:
- Open Start.
- Search for Windows Terminal and click the top result to open the app.
- Click the main menu and choose the Settings (Ctrl+,) option.
- Click on Startup.
- Click the Launch size setting.
- Choose the number of columns and rows.
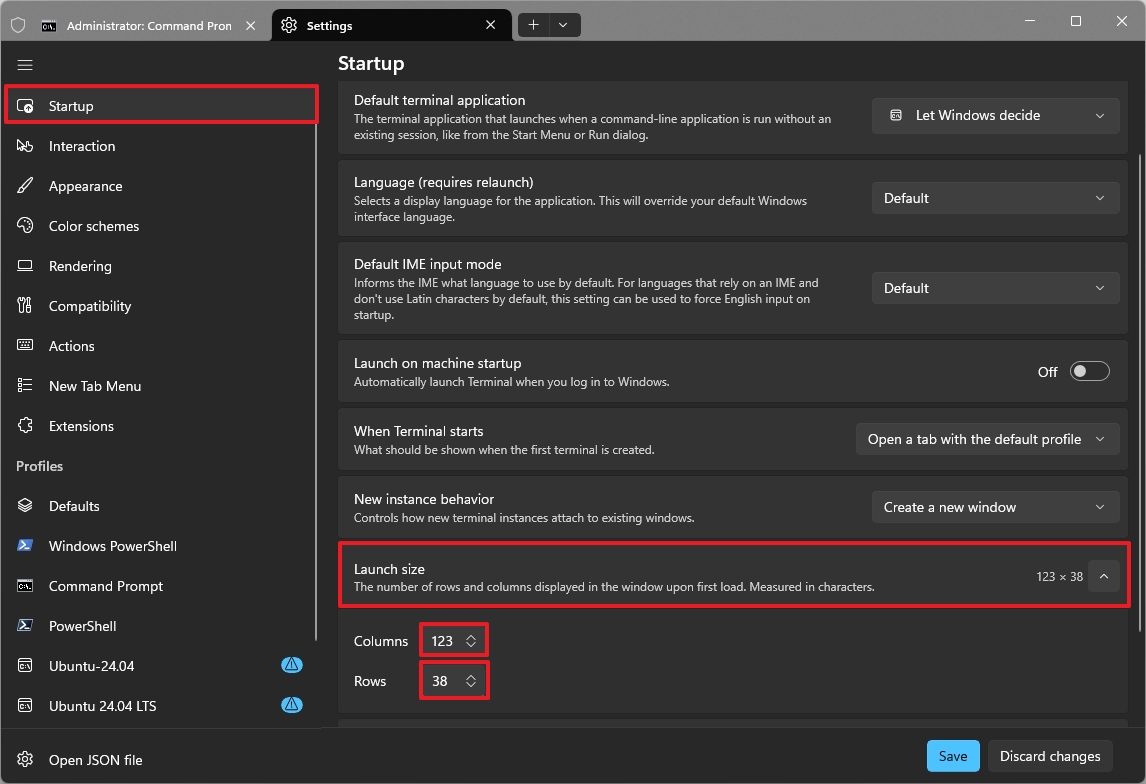
- Quick note: This configuration is up to your preferences. I like a more square shape, so I typically use 123 for “Columns” and 38 for “Rows.”
- Click the Save button.
After you complete the steps, the Windows Terminal will launch with the specified window size.
7. Restore the classic blue color scheme in PowerShell
This app introduces a new dark theme for all your profiles. If you prefer the older blue look in PowerShell, you can easily switch back to it in the profile settings.
To restore the familiar dark blue color scheme for PowerShell, use these steps:
- Open Start.
- Search for Windows Terminal and click the top result to open the app.
- Click the main menu and choose the Settings (Ctrl+,) option.
- Click on Windows PowerShell.
- Click the Appearance setting under the “Additional settings” section.
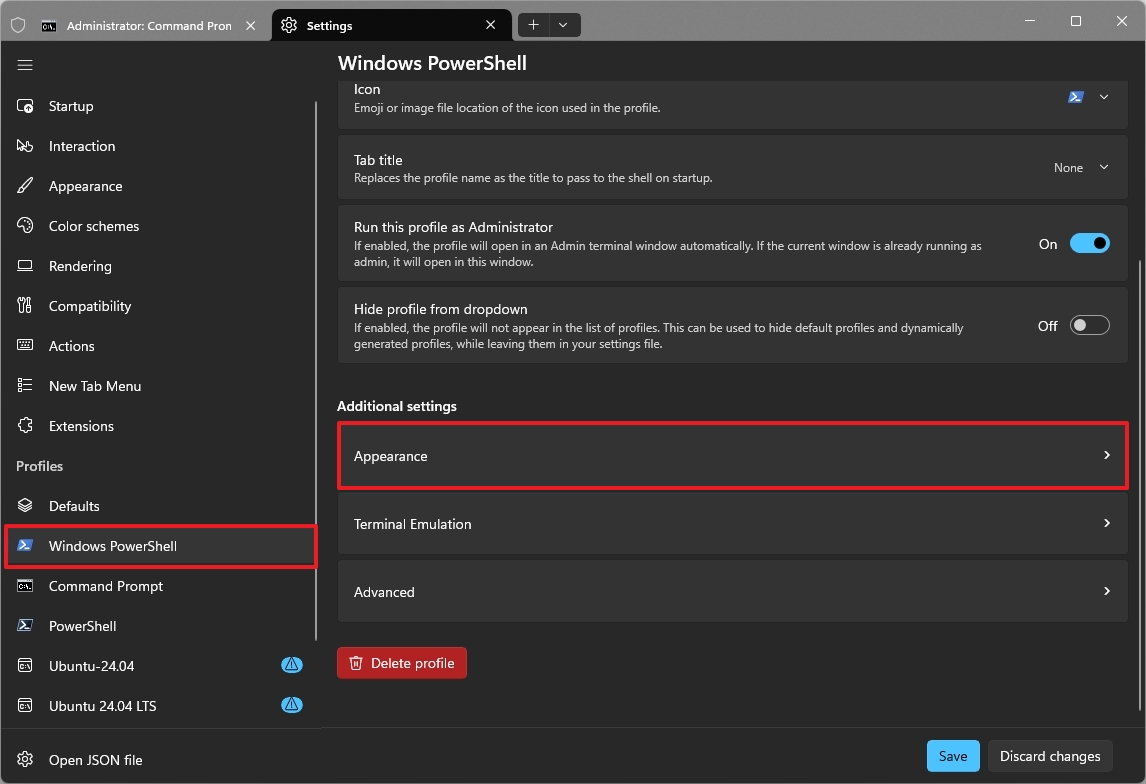
- Choose the Campbell PowerShell option in the “Color scheme” setting.
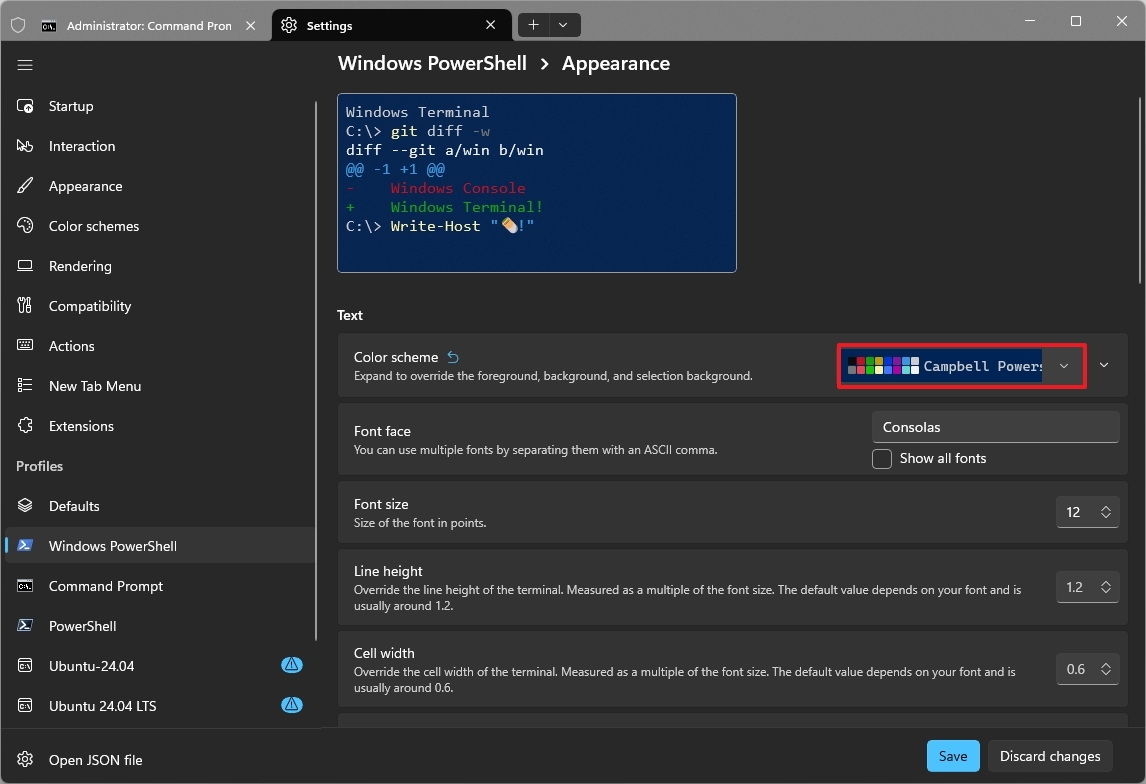
- Click the Save button.
After finishing these steps, your command-line interface will look like the older version, with a classic dark blue color scheme.
8. Change the font family for better readability
The older Command Prompt used to come with the Consolas font, but Windows Terminal now uses Cascadia Mono by default. You can easily change it back to Consolas if you prefer.
To restore the Command Prompt’s font family when using the Windows Terminal, use these steps:
- Open Start.
- Search for Windows Terminal and click the top result to open the app.
- Click the main menu and choose the Settings (Ctrl+,) option.
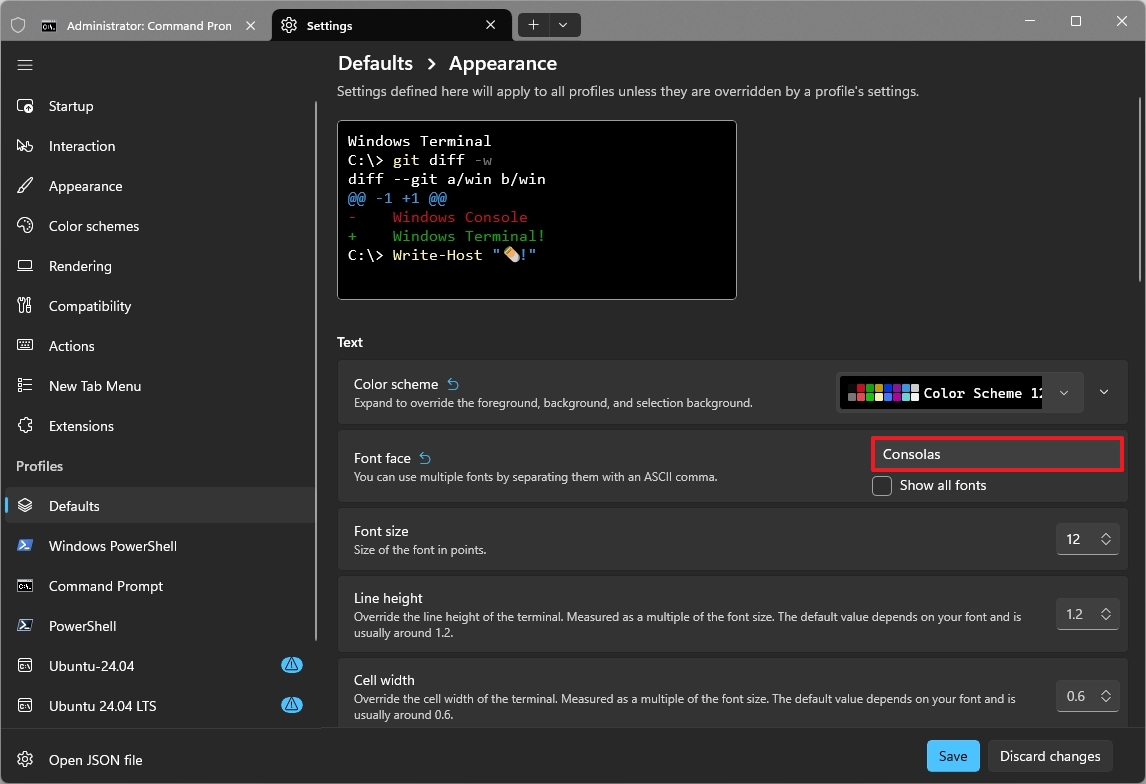
- Click on Defaults.
- Click the Appearance setting under the “Additional settings” section.
- Choose the Consolas font family in the “Font face” setting.
- Click the Save button.
Once you finish these steps, your Terminal will display commands in a more classic font style when you use PowerShell, Command Prompt, or any other command-line tool you’ve set up.
9. Back up and restore your Windows Terminal settings
I always save a copy of my settings, which makes it easy to use the same setup on all my devices.
Backup Terminal settings
To export your Windows Terminal settings, use these steps:
- Open Start.
- Search for Windows Terminal and click the top result to open the app.
- Click the main menu and choose the Settings (Ctrl+,) option.
- Click on Open JSON file.

- Click the File menu and choose the Save As option.
- Select the location to save the file.
- Change the name to backup-settings.json.
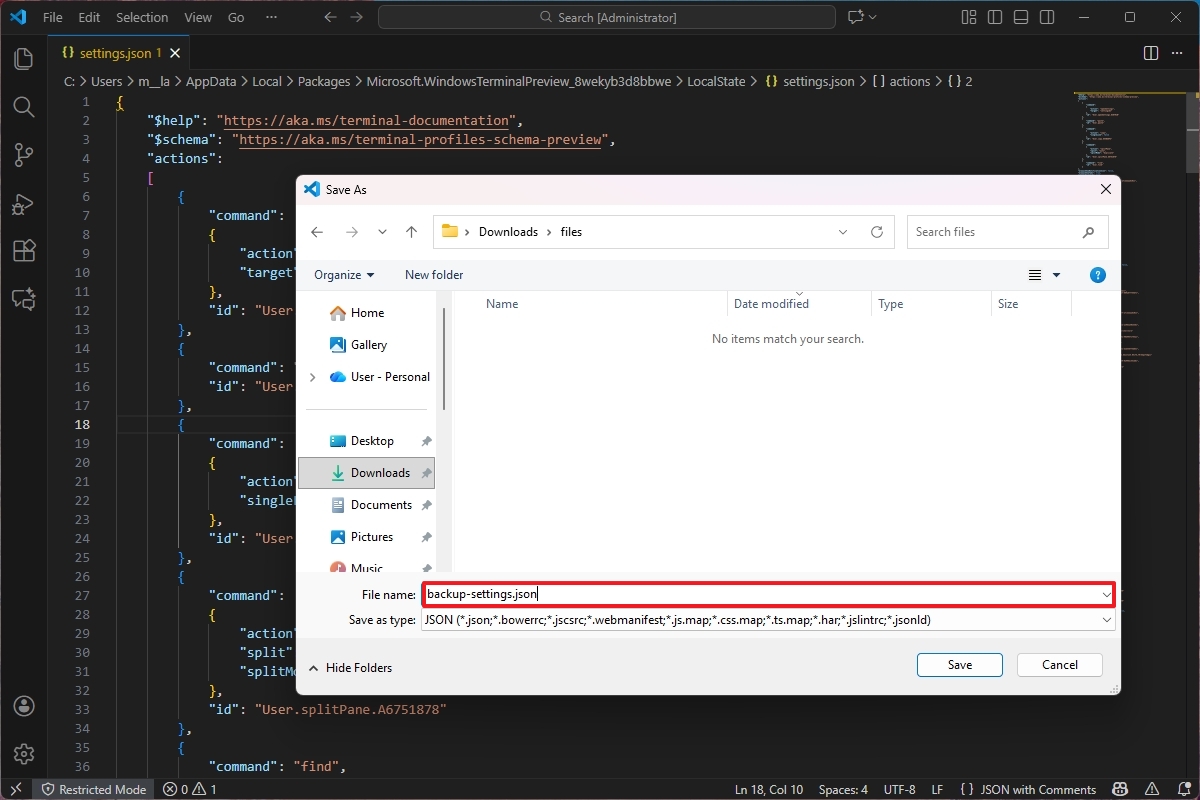
- Click the Save button.
After finishing the setup, your personalized settings will be saved to a JSON file. You can use this file to easily restore your preferences if you make adjustments, or even transfer them to a different device.
Restore Terminal settings
To import your Terminal settings to the same or a different computer, use these steps:
- Open the backup file location.
- Right-click the backup-settings.json and choose the “Edit in Notepad” option.
- Select everything using the “Ctrl + A” and “Ctrl + C” keyboard shortcuts.
- Open Start.
- Search for Windows Terminal and click the top result to open the app.
- Click the main menu and choose the Settings (Ctrl+,) option.
- Click on Open JSON file.
- Select everything using the “Ctrl + A” keyboard shortcut and click the Delete button.
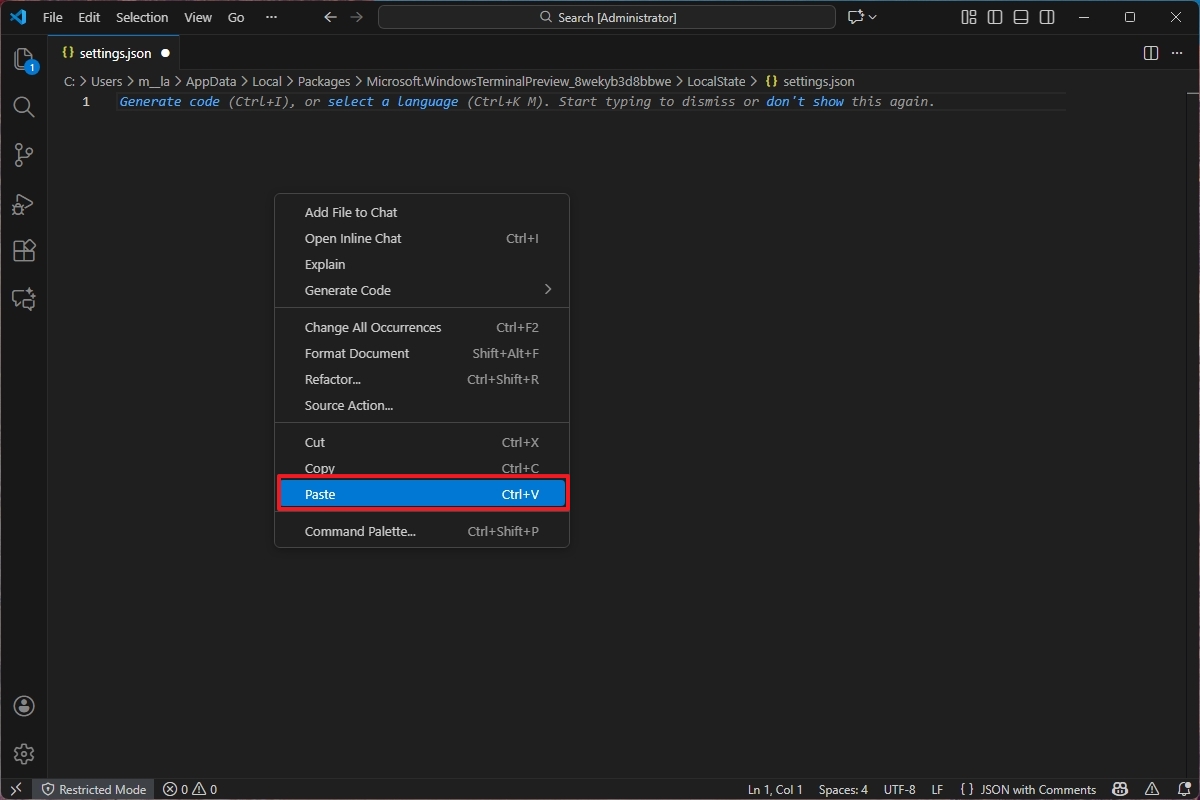
- Use the “Ctrl + V” keyboard shortcut to paste the configuration from backup.
- Use the “Ctrl + S” shortcut to save the configuration.
Once you finish the steps, your new settings will be saved right away, replacing your old ones.
Do you regularly personalize your Windows Terminal settings? Share your favorite customizations in the comments below!
FAQs about customizing Windows Terminal
These are common questions regarding changing the Windows Terminal settings on Windows 11.
Can I set a different default shell other than Command Prompt in Windows Terminal?
Windows Terminal lets you choose which shell automatically opens when you launch it. You can set PowerShell, a Linux distribution from WSL, or any other installed terminal as the default. To change this, go to Settings, then Startup, and finally Default profile.
How do I make Windows Terminal always open in a specific folder?
You can set a default folder for all new shells. To do this, go to Settings, then Defaults, and select ‘Starting directory’. Choose the folder you want, and save your changes.
Is it safe to delete unused Terminal profiles?
It’s safe to remove profiles, but don’t delete your old “Windows PowerShell” profile if you still use it. Getting rid of profiles you don’t need will make the Terminal cleaner and quicker to use.
Can I always run Windows Terminal as administrator by default?
To always start the program with administrator privileges, go to Settings then Defaults and turn on the “Run this profile as Administrator” option. Be careful when using this setting, as it could make your system more vulnerable to unintended modifications.
How can I change the default window size for the Terminal?
To adjust the Terminal’s opening size, go to Settings, then Startup, and finally Launch size. Here, you can set your preferred number of columns and rows, so you won’t have to manually resize the window every time you open it.
Can I restore the classic PowerShell blue color scheme?
To restore the classic blue background of older PowerShell versions, go to Settings > Windows PowerShell > Appearance > Color scheme and choose “Campbell PowerShell.”
How do I change the font for better readability?
To change the font, go to Settings > Defaults > Appearance > Font face and choose the style you like. For a classic Command Prompt look, try “Consolas.”
How can I back up and restore my Terminal settings?
You can back up and restore your settings by saving them as a JSON file. To do this, go to Settings, then Open JSON file, and choose Save As. To restore settings on this or another computer, simply paste the contents of the JSON file back into the JSON file within the Terminal. This helps keep your settings consistent across all your devices.
More resources

Stay up-to-date with the latest from Windows Central by following us on Google News! You’ll get our news, insights, and features right in your feed.
Read More
- Arknights: Endfield – Everything You Need to Know Before You Jump In
- Every Creepy Clown in American Horror Story Ranked
- Best X-Men Movies (September 2025)
- 4 TV Shows To Watch While You Wait for Wednesday Season 3
- Gold Rate Forecast
- PlayStation Plus Game Catalog and Classics Catalog lineup for July 2025 announced
- 10 Best Buffy the Vampire Slayer Characters Ranked
- Chill with You: Lo-Fi Story launches November 17
- 40 Inspiring Optimus Prime Quotes
- Jack Osbourne Shares Heartbreaking Tribute to Late Dad Ozzy Osbourne
2026-01-18 23:14