
If you always use the same apps to begin your day or switch between tasks on Windows 11, PowerToys Workspaces can set everything up automatically. It simplifies your workflow by opening and organizing your favorite apps just how you like them.
Workspaces help you get to work faster and keep your desktop organized. Instead of manually opening programs and arranging windows each time, you can set up a specific layout with everything you need and launch it with just one click. You choose which applications open, how they’re arranged, and where they appear, creating a saved setup for any task.
If you usually only work with a couple of apps, Workspaces might not seem like a big improvement. But for people who juggle many tasks or follow a specific work process, Workspaces can help you save time, keep your screen organized, and create a consistent work environment. This guide will show you how to create and personalize a Workspace with the apps you use most often.
How to install PowerToys on Windows 11
If you don’t already have PowerToys installed on the computer, use these steps:
- Open Start.
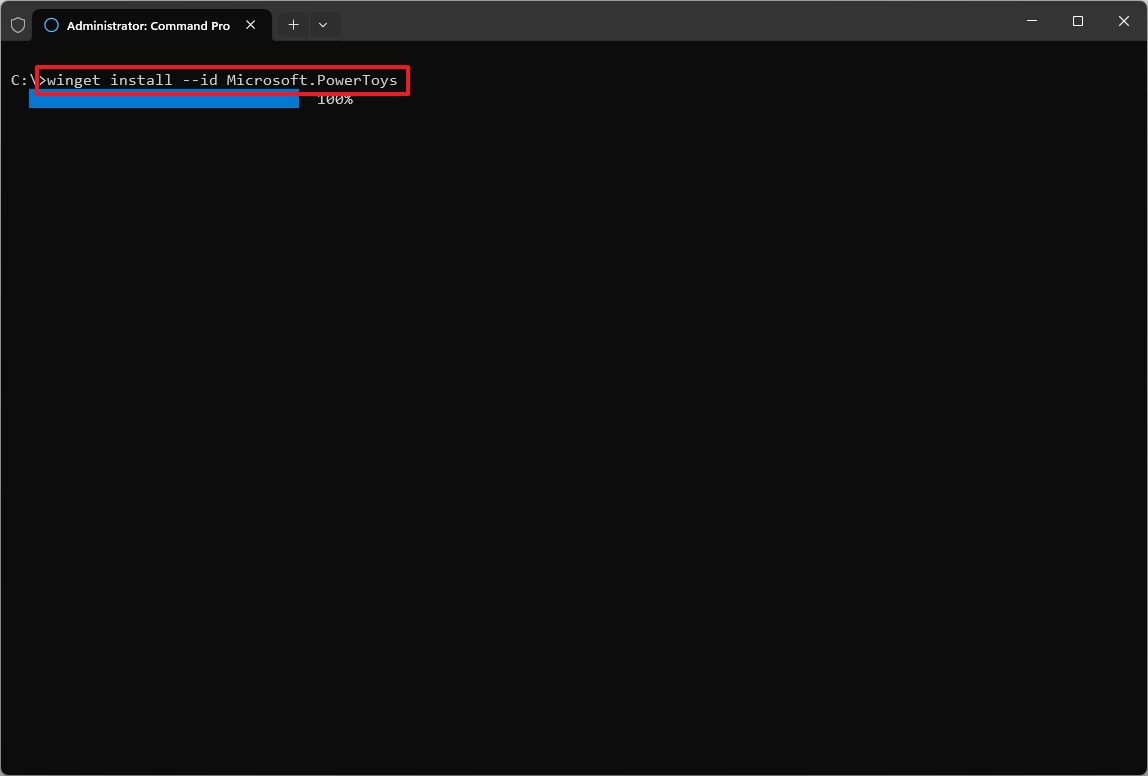
- Search for Command Prompt, right-click the top result, and select the Run as administrator option.
- (Option 1) Type the following command to install the latest preview of PowerToys and press Enter: winget install –id Microsoft.PowerToys
- (Option 2) Type the following command to install the stable version of PowerToys from the Microsoft Store and press Enter: winget -s msstore powertoys
Once you’ve finished these steps, you can create a workspace to automatically open and organize your apps.
How to create a workspace with PowerToys
To create a workspace with PowerToys, use these steps:
- Open PowerToys.
- Click on Windowing & Layouts.
- Click on Workspaces.
- Turn on the Enable Workspaces toggle switch.
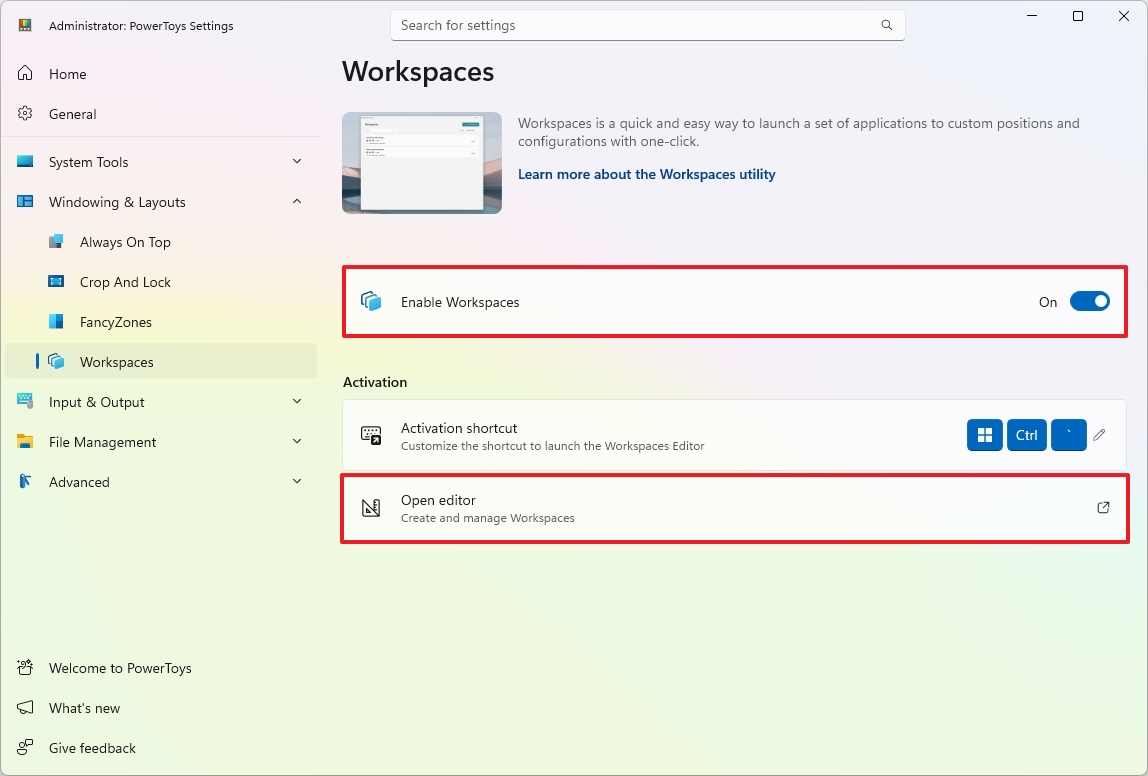
- Click the Open editor option.
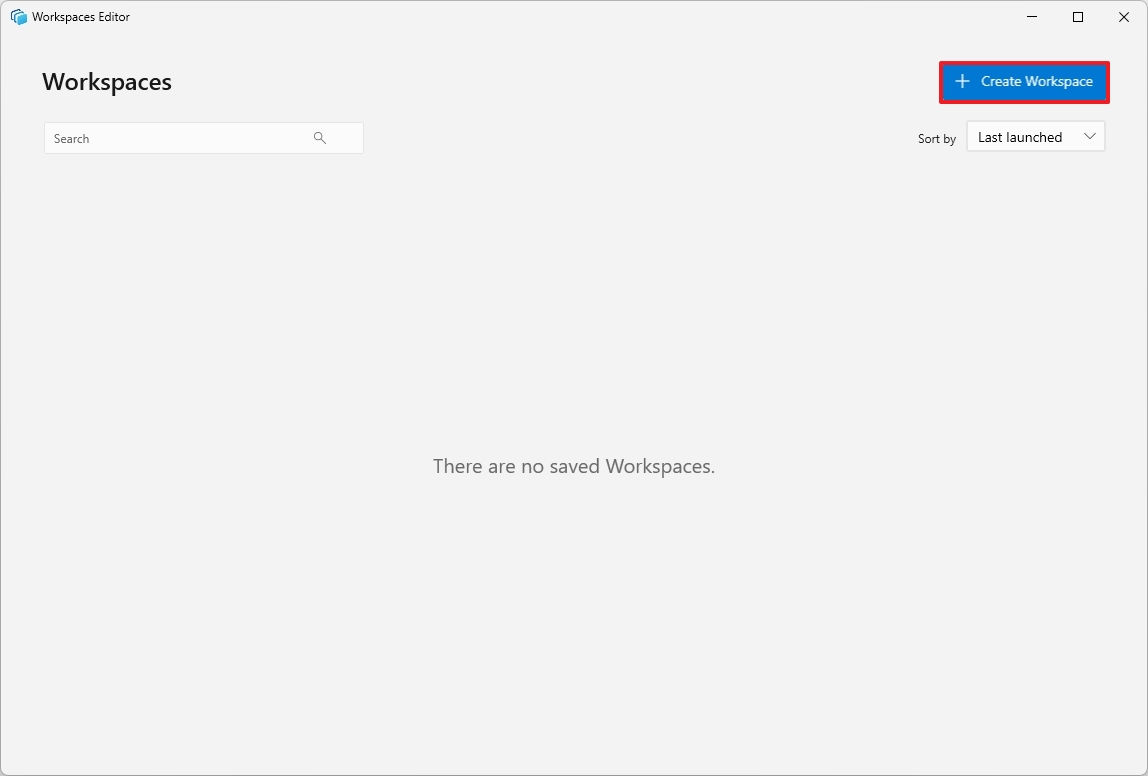
- Click the Create Workspace button.
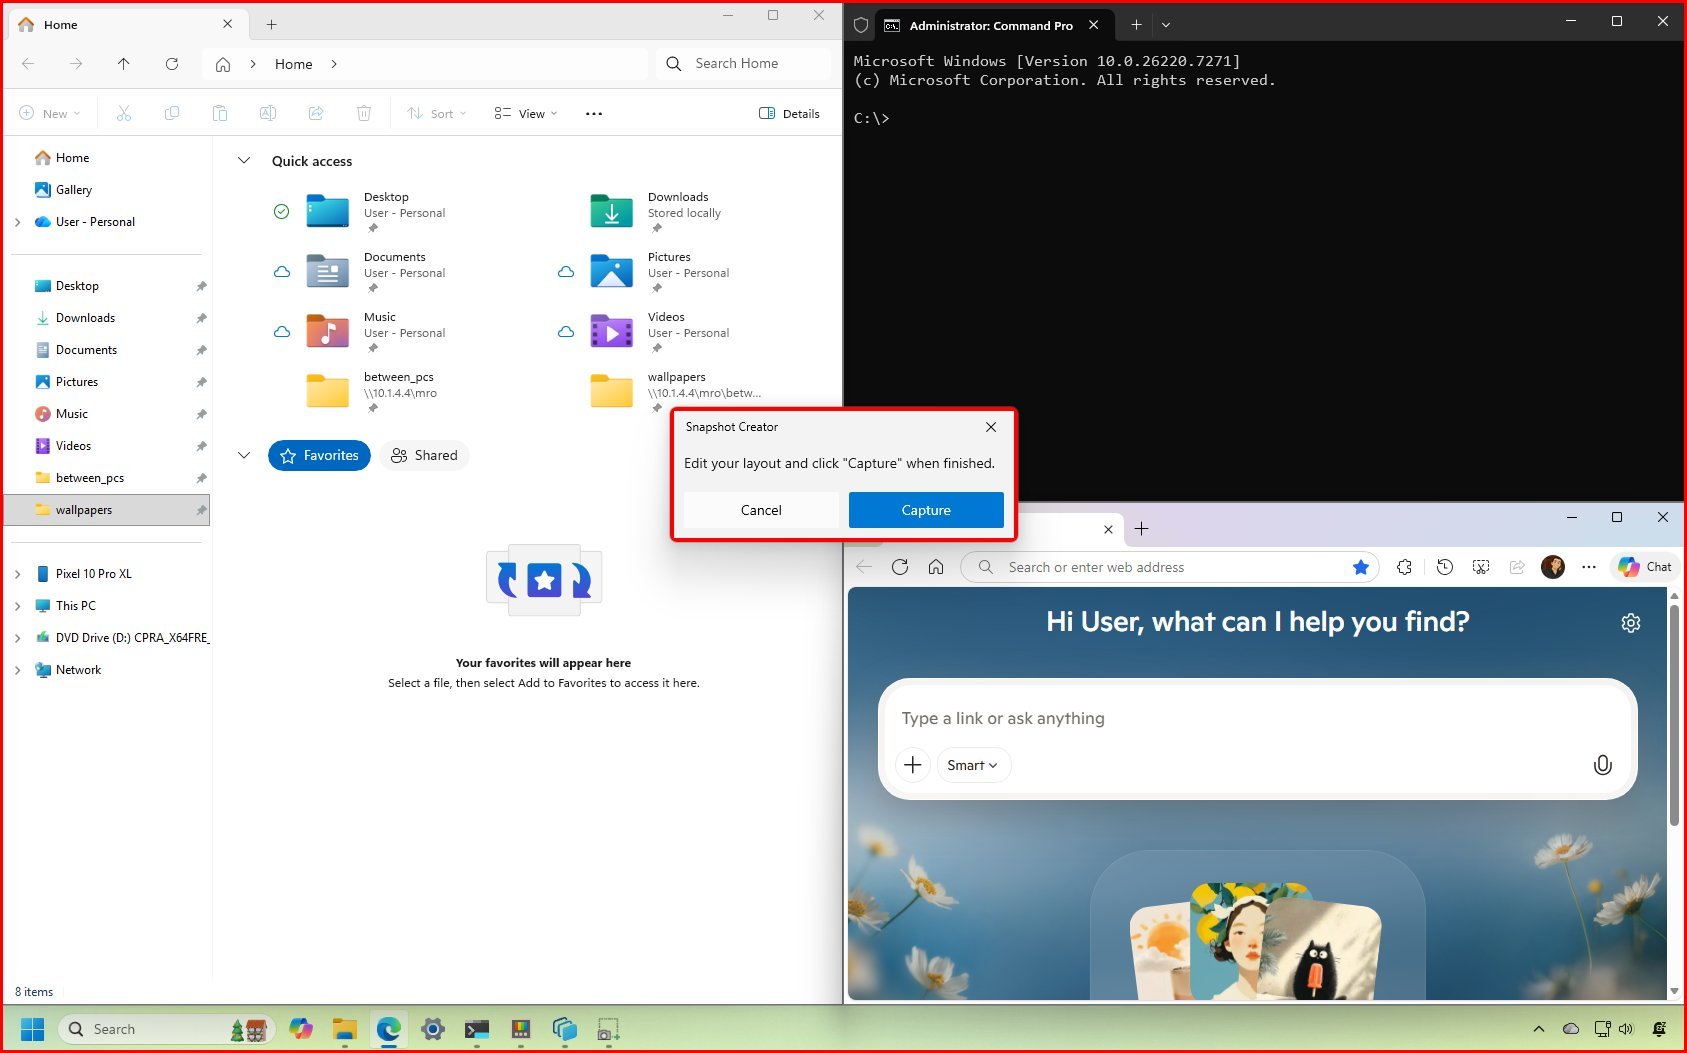
- Open the applications and rearrange them so that the system remembers them.
- Click the Capture button.
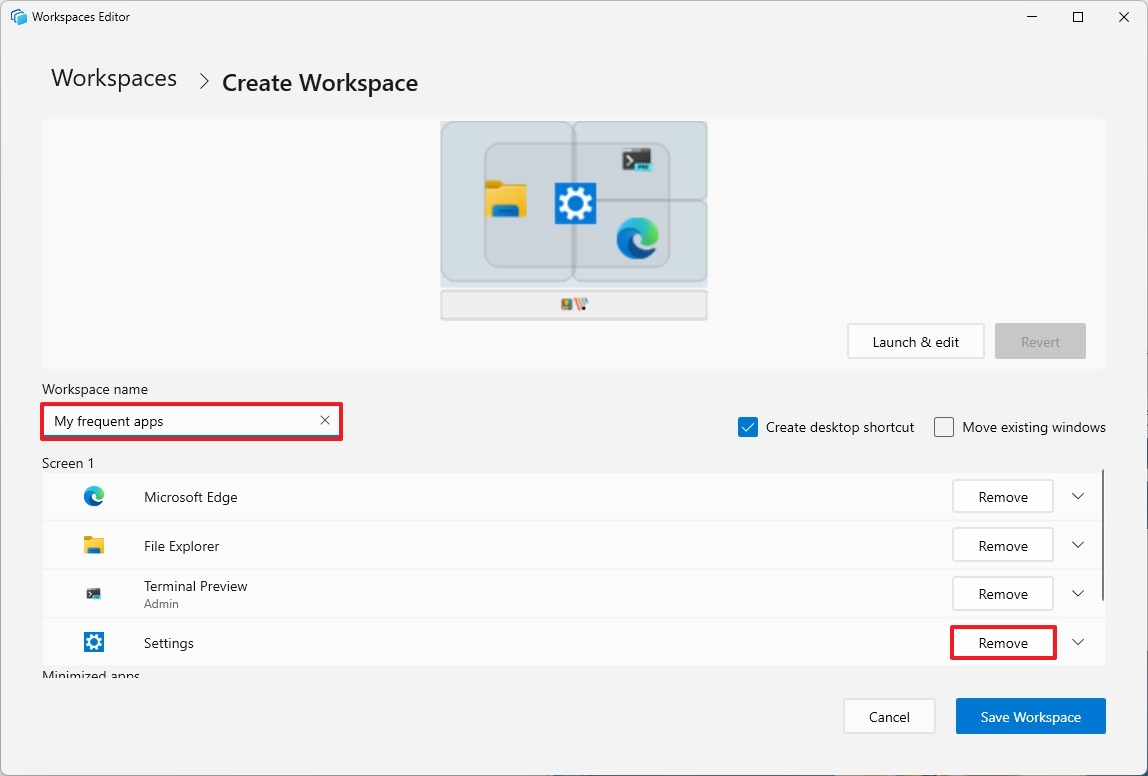
- Click the Remove button to dismiss apps you want the system to remember (if applicable).
- Confirm a name for the layout in the “Workspace name” option.
- (Optional) Click on an app to reveal its customization settings.
- Configure the arguments you want with the application.
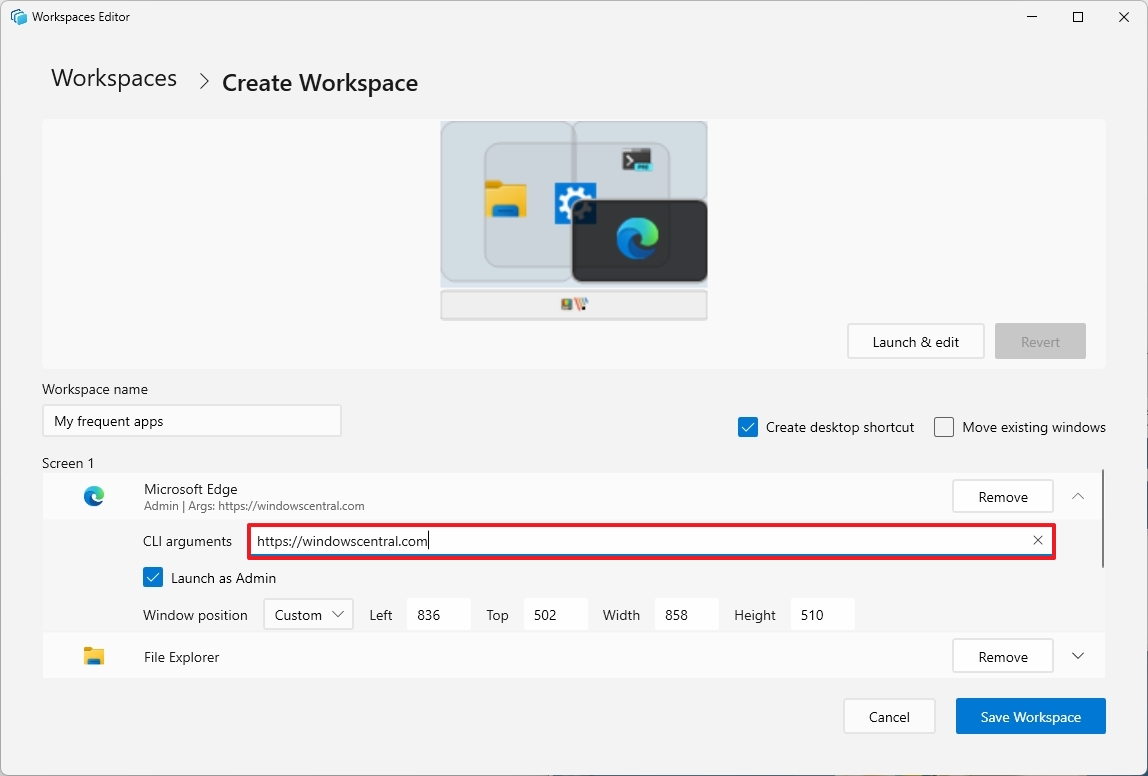
- Quick tip: You can also set the app to launch as an administrator, and it’s even possible to set a custom screen position.
- (Optional) Check the Create desktop shortcut option to launch a specific workspace using a shortcut.
After finishing the setup, you can start your workspace – which includes all the necessary applications – by clicking the “Launch” button in the Workspace Editor, or by using the shortcut on your desktop.
You can always repeat the steps outlined above to create as many workspaces as you need.
This update is designed to quickly launch and organize things with a single click, but I’ve found that some apps, like File Explorer, don’t always arrange as expected.
If you’re running an app with administrator privileges – like Windows Terminal – you’ll need to open PowerToys as an administrator too, so it can find and track that app.
More resources

Stay up-to-date with the latest from Windows Central by following us on Google News! You’ll get all our news, helpful insights, and feature articles right in your feed.
Read More
- Looks Like SEGA Is Reheating PS5, PS4 Fan Favourite Sonic Frontiers in Definitive Edition
- Gold Rate Forecast
- Dune 3 Gets the Huge Update Fans Have Been Waiting For
- Pluribus Star Rhea Seehorn Weighs In On That First Kiss
- Kelly Osbourne Slams “Disgusting” Comments on Her Appearance
- Tomodachi Life: Living the Dream ‘Welcome Version’ demo now available
- Arknights: Endfield – Everything You Need to Know Before You Jump In
- Antiferromagnetic Oscillators: Unlocking Stable Spin Dynamics
- Alien & Predator Shared Universe Explained: All Crossovers, Connections, Canon & Secret 3rd Sci-Fi Franchise
- Deus Ex Remastered Delayed to “Better Meet Fan Expectations”
2025-11-27 17:39