In the initial zone of Wuchang: Fallen Feathers, named Worship’s Rise, you’ll discover 12 shrines. Though the main storyline will lead you to encounter several of these shrines, some are concealed within optional areas. Moreover, due to the expansive distances between certain shrines, players might occasionally suspect they missed one. This guide is designed for such players and offers the exact locations of every shrine within Wuchang: Fallen Feathers, as detailed below.
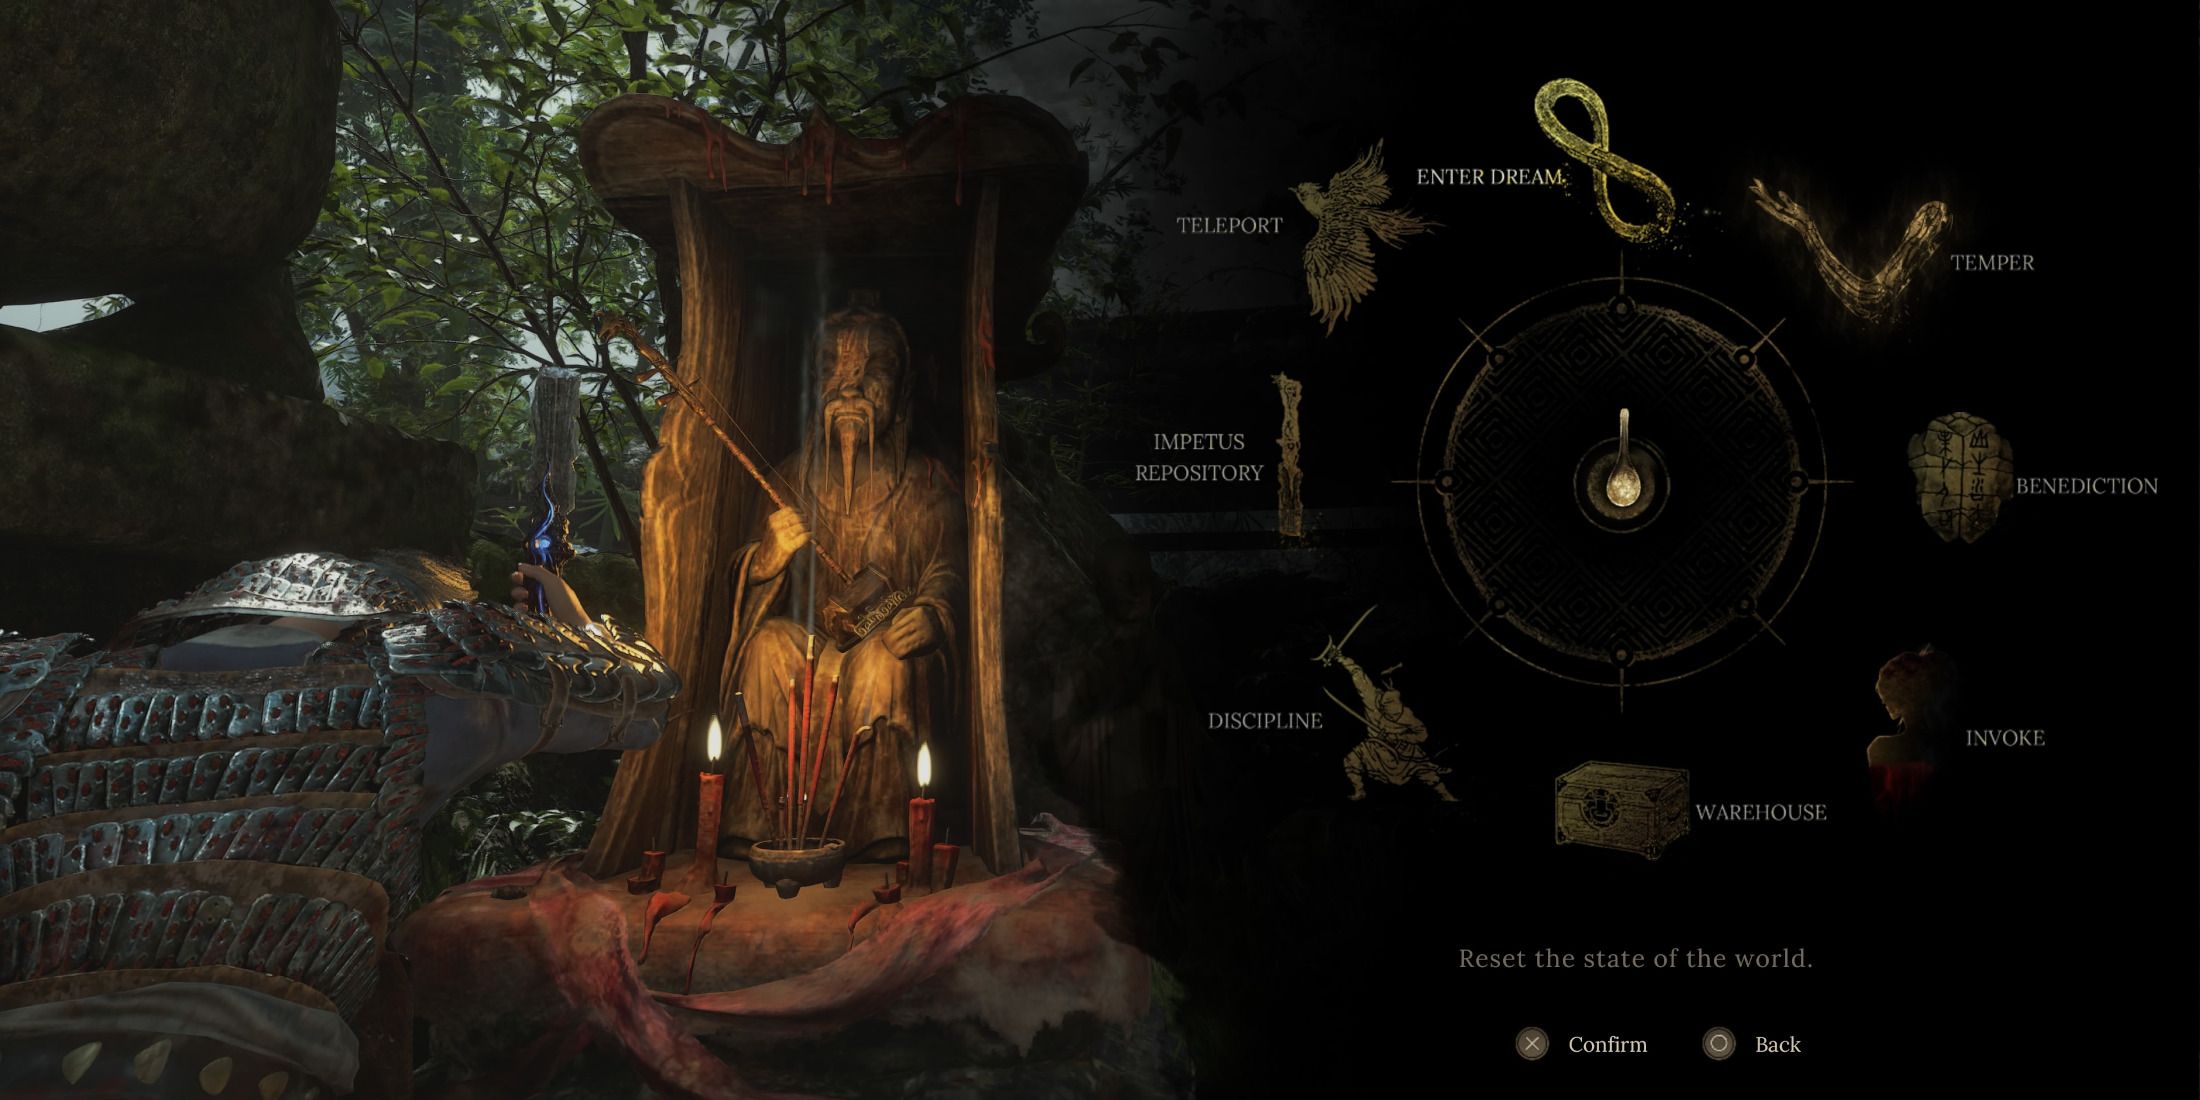
A reddish symbol or indicator pops up along the edge of the screen’s lower right corner if an unactivated Shrine is close by on the compass. Although this symbol does not serve as a direct guide to all Shrines, it can aid players in identifying the exact location of one more accurately.
Where to Find All Shrines in Worship’s Rise – Wuchang Fallen Feathers
Reverent Temple
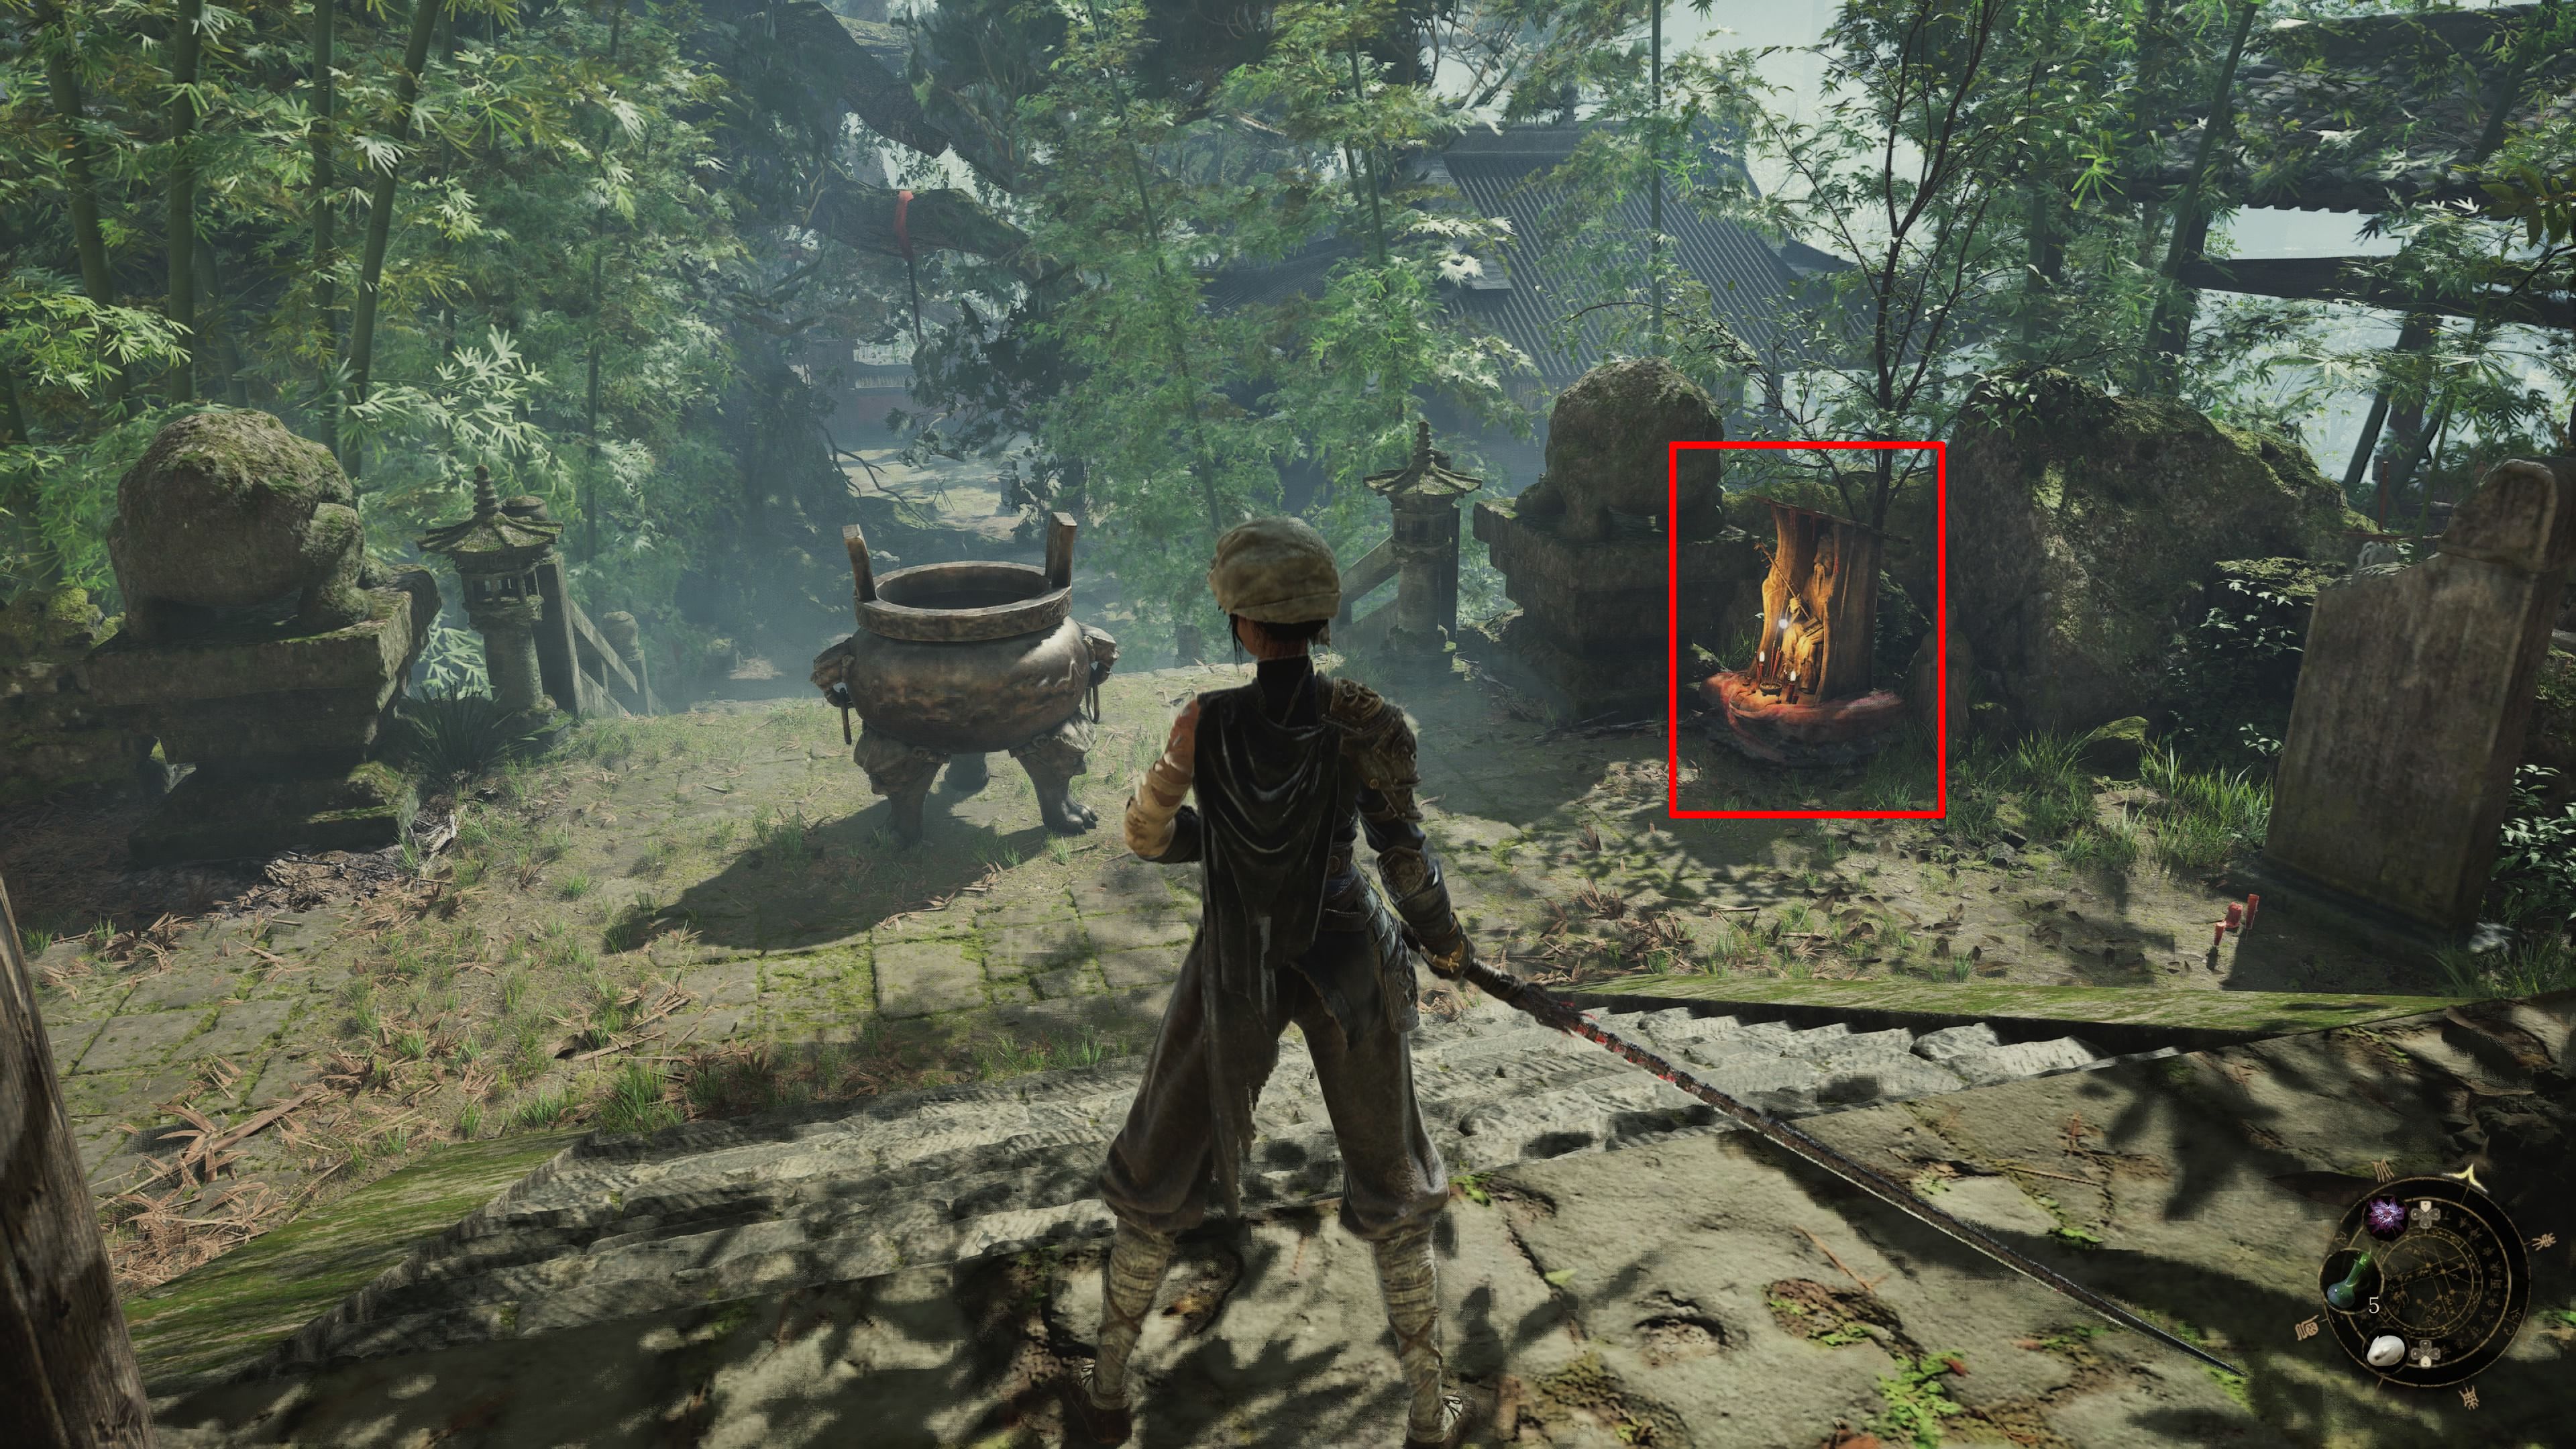
As they commence the game, players will spot the Reverent Temple Shrine on their right side immediately upon exiting the initial structure.
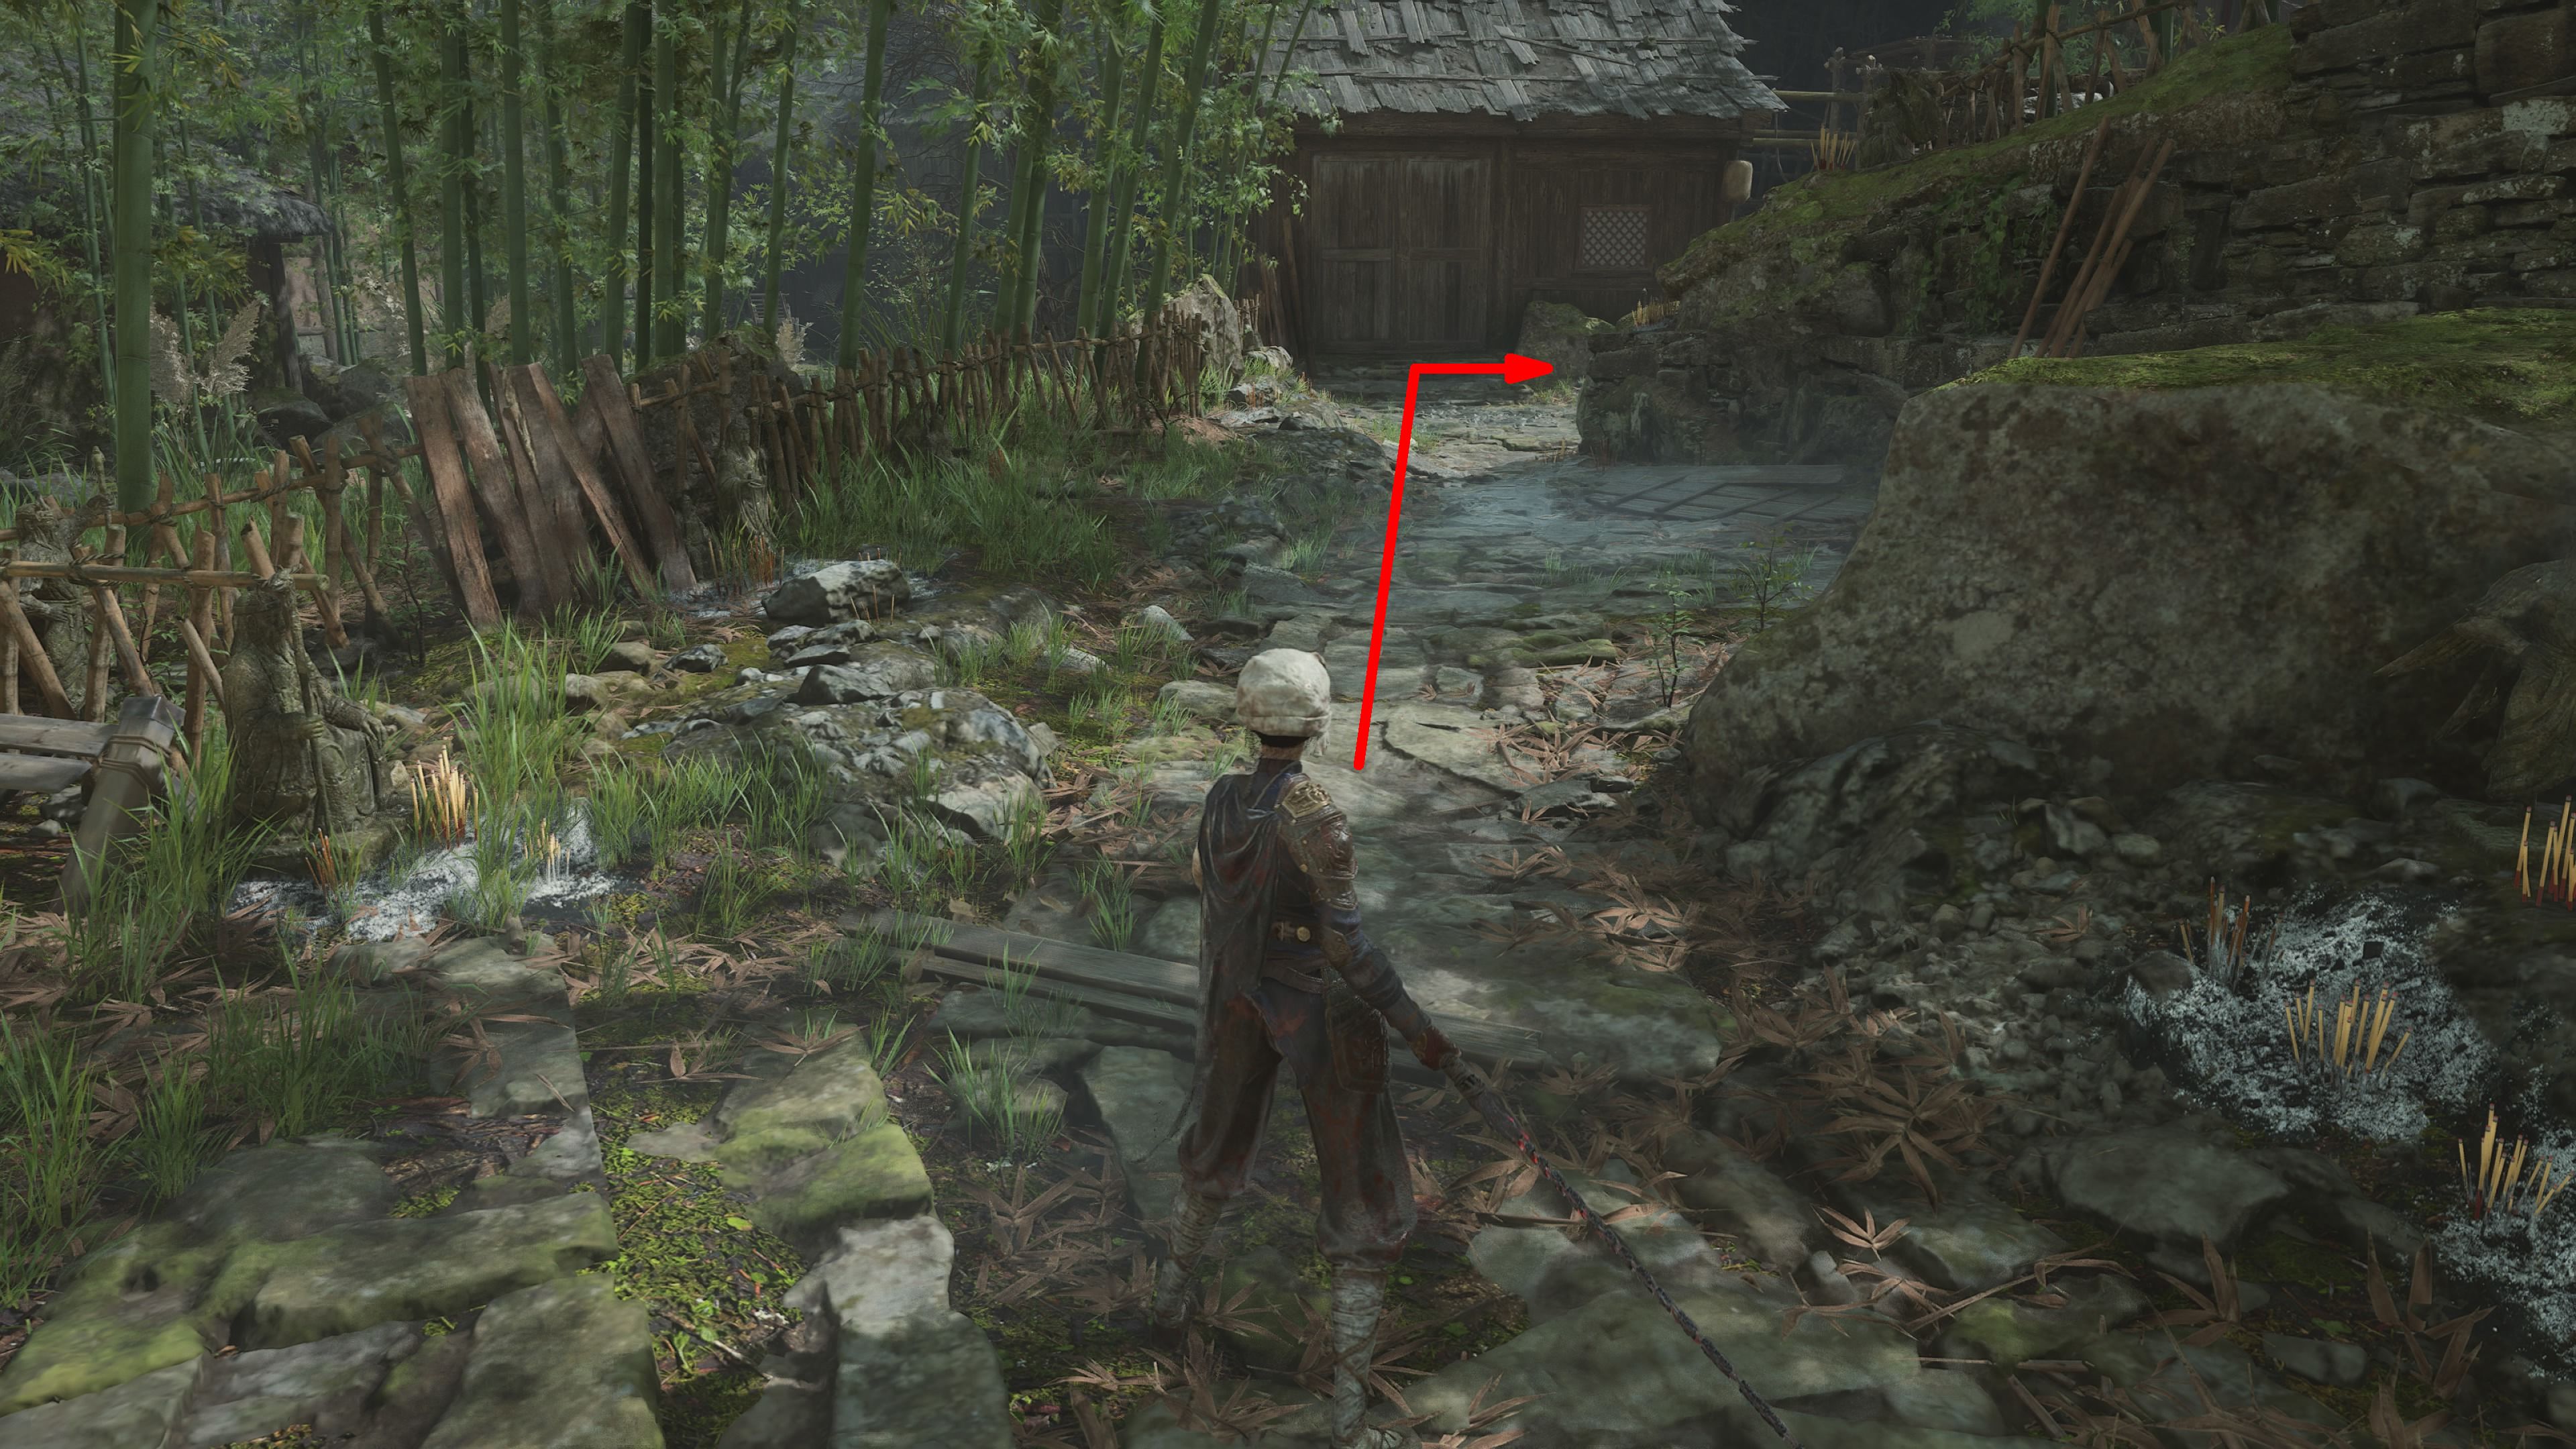
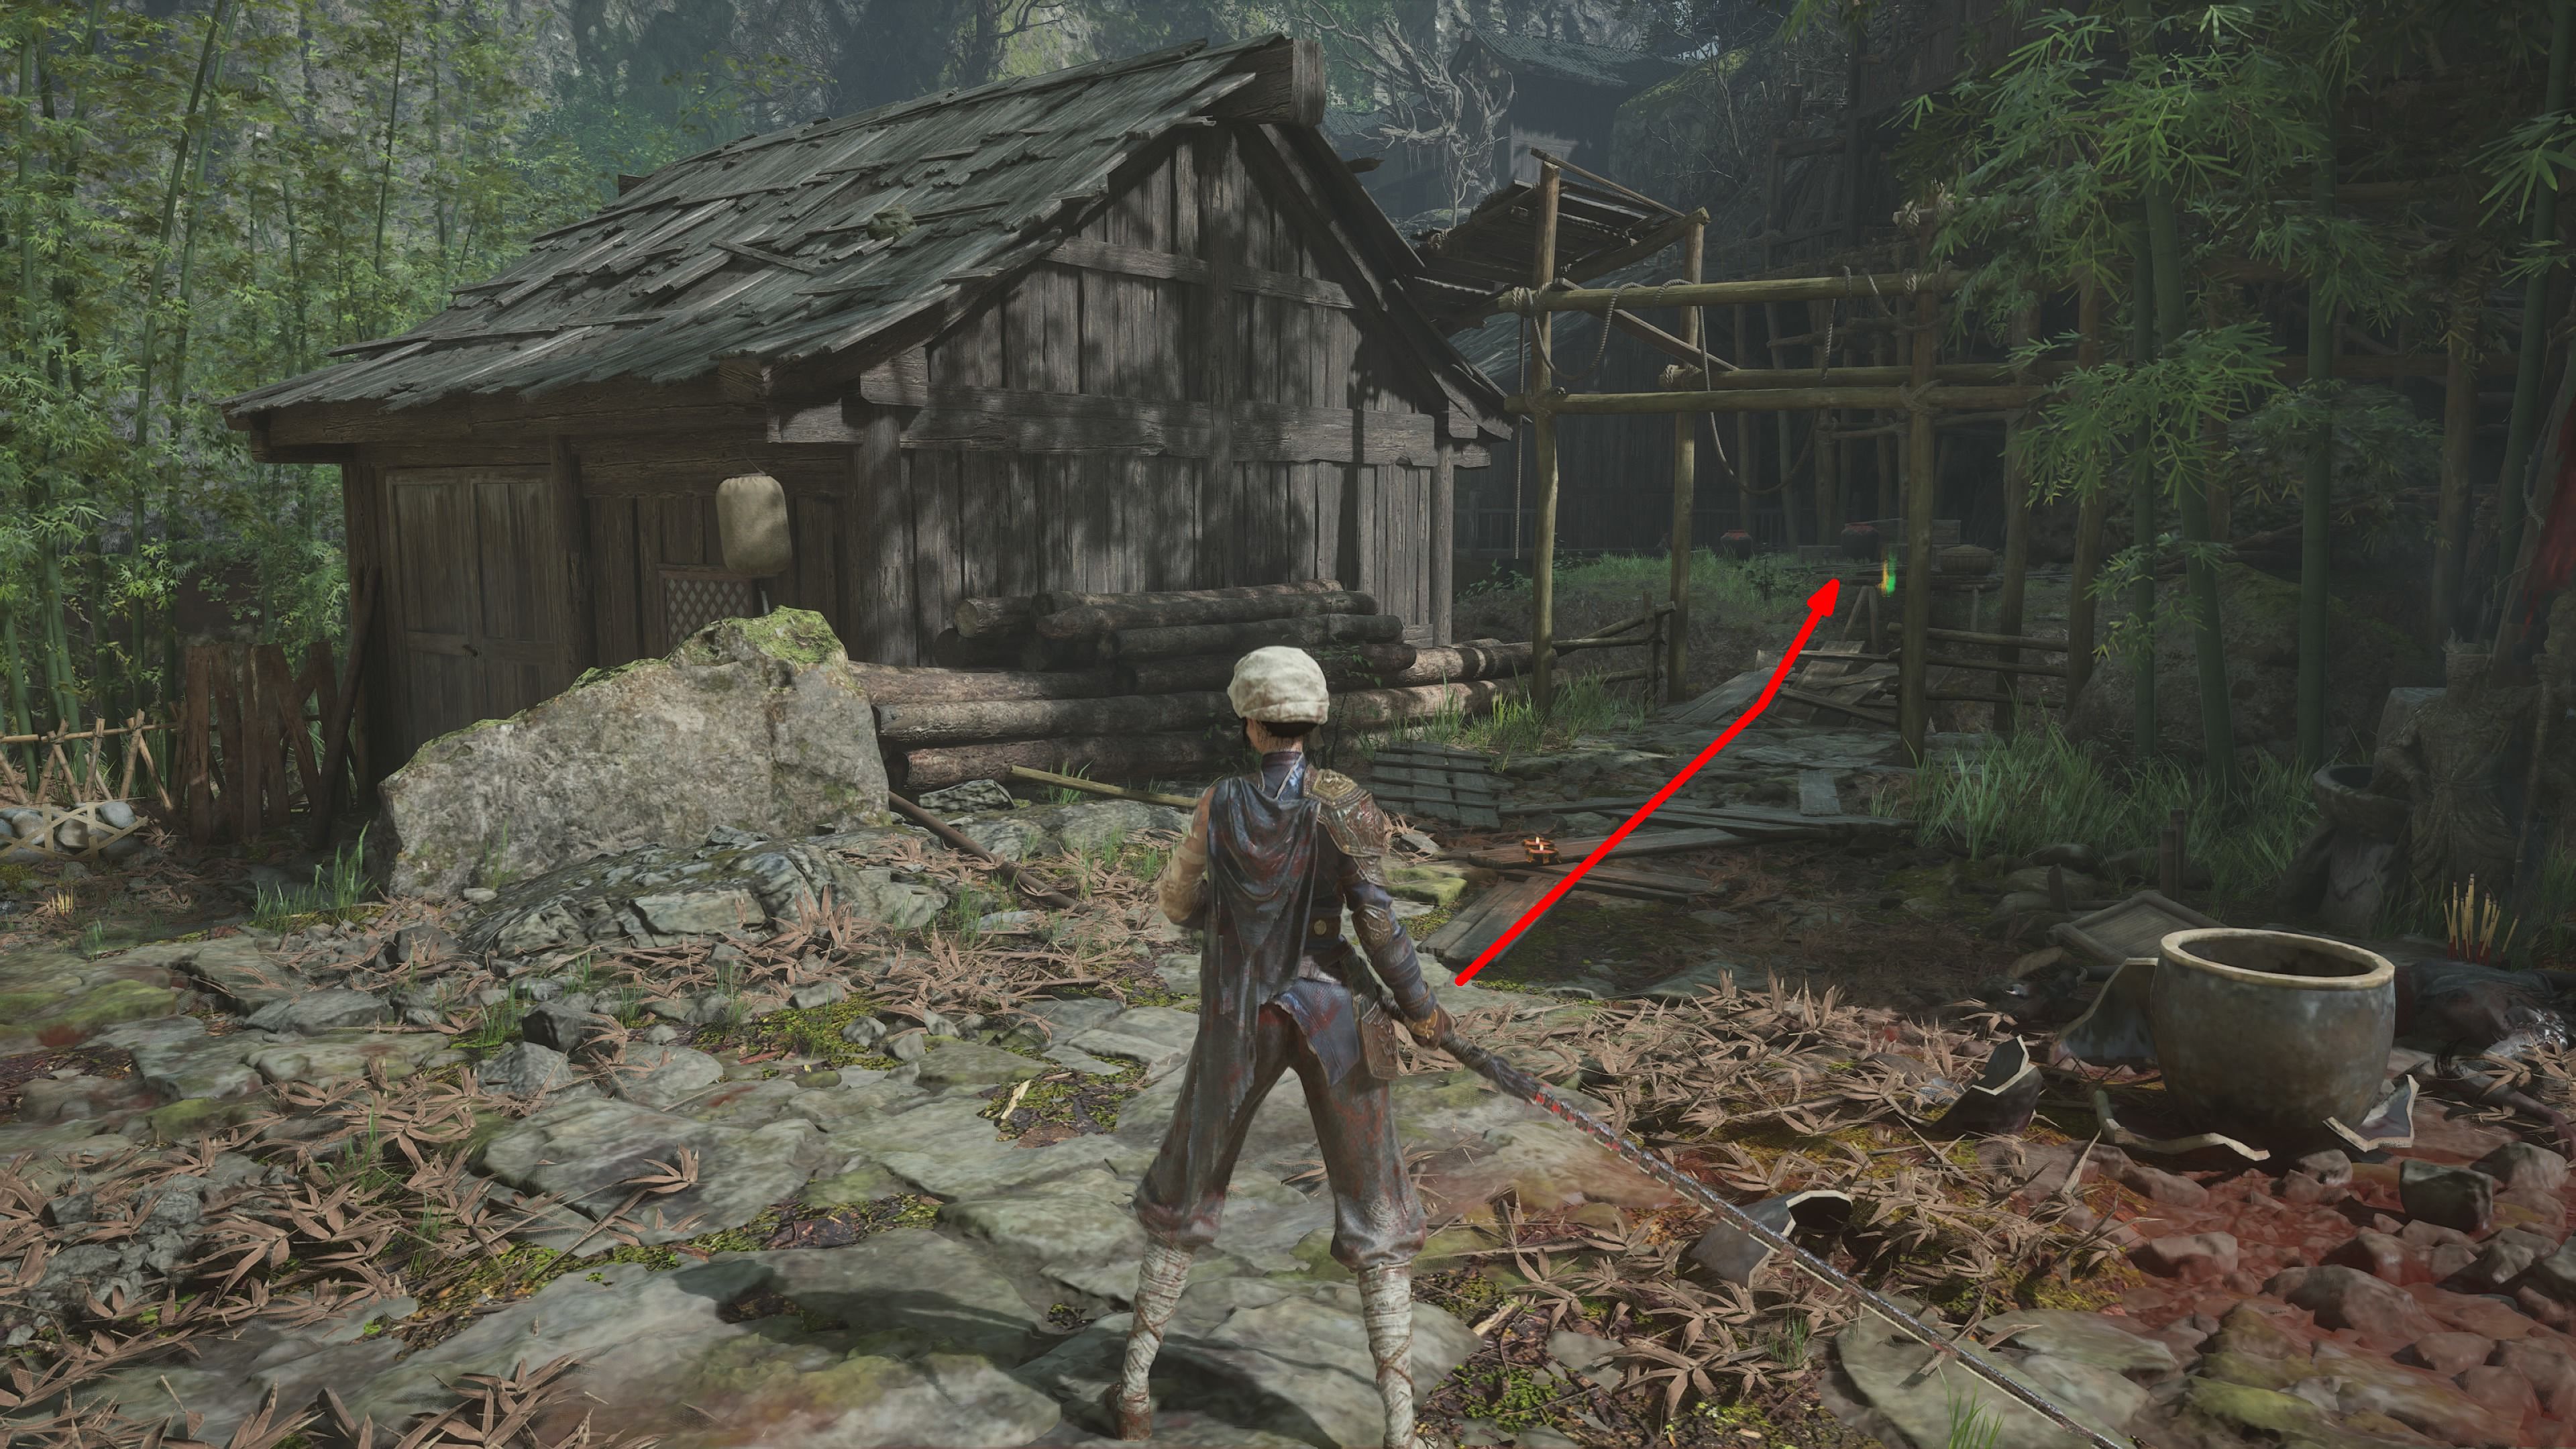
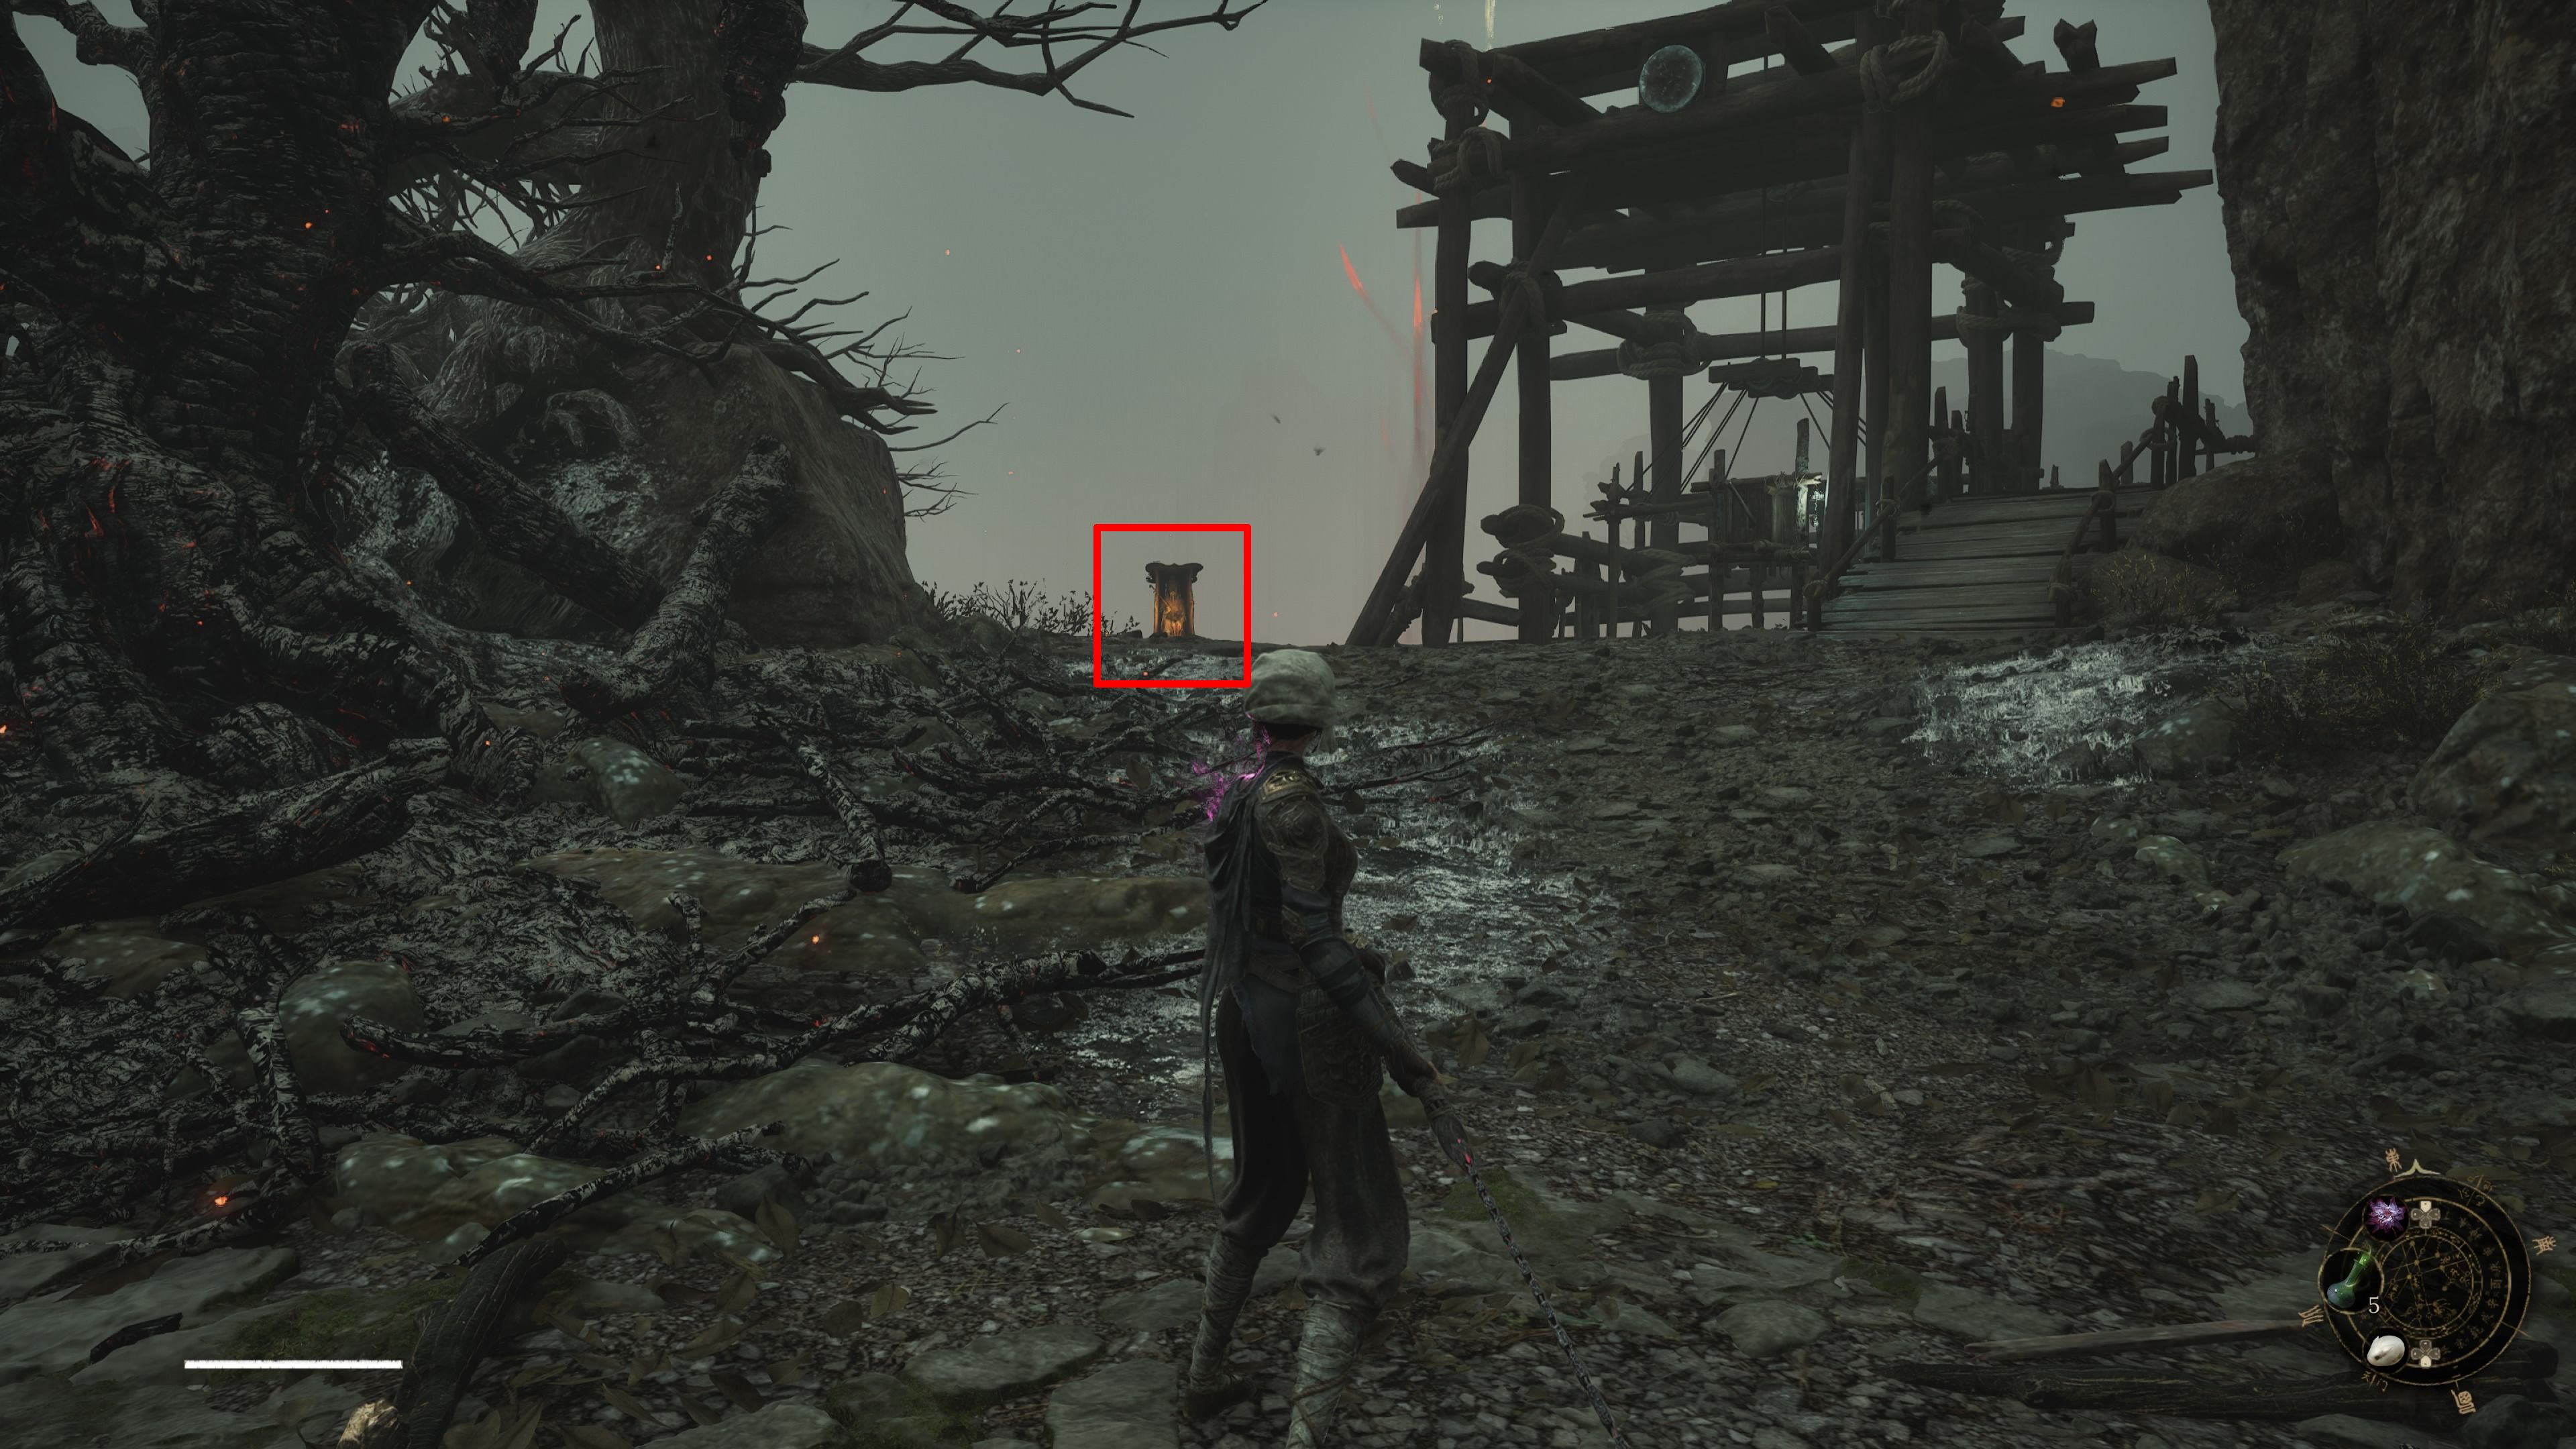
Buddha Cliffs
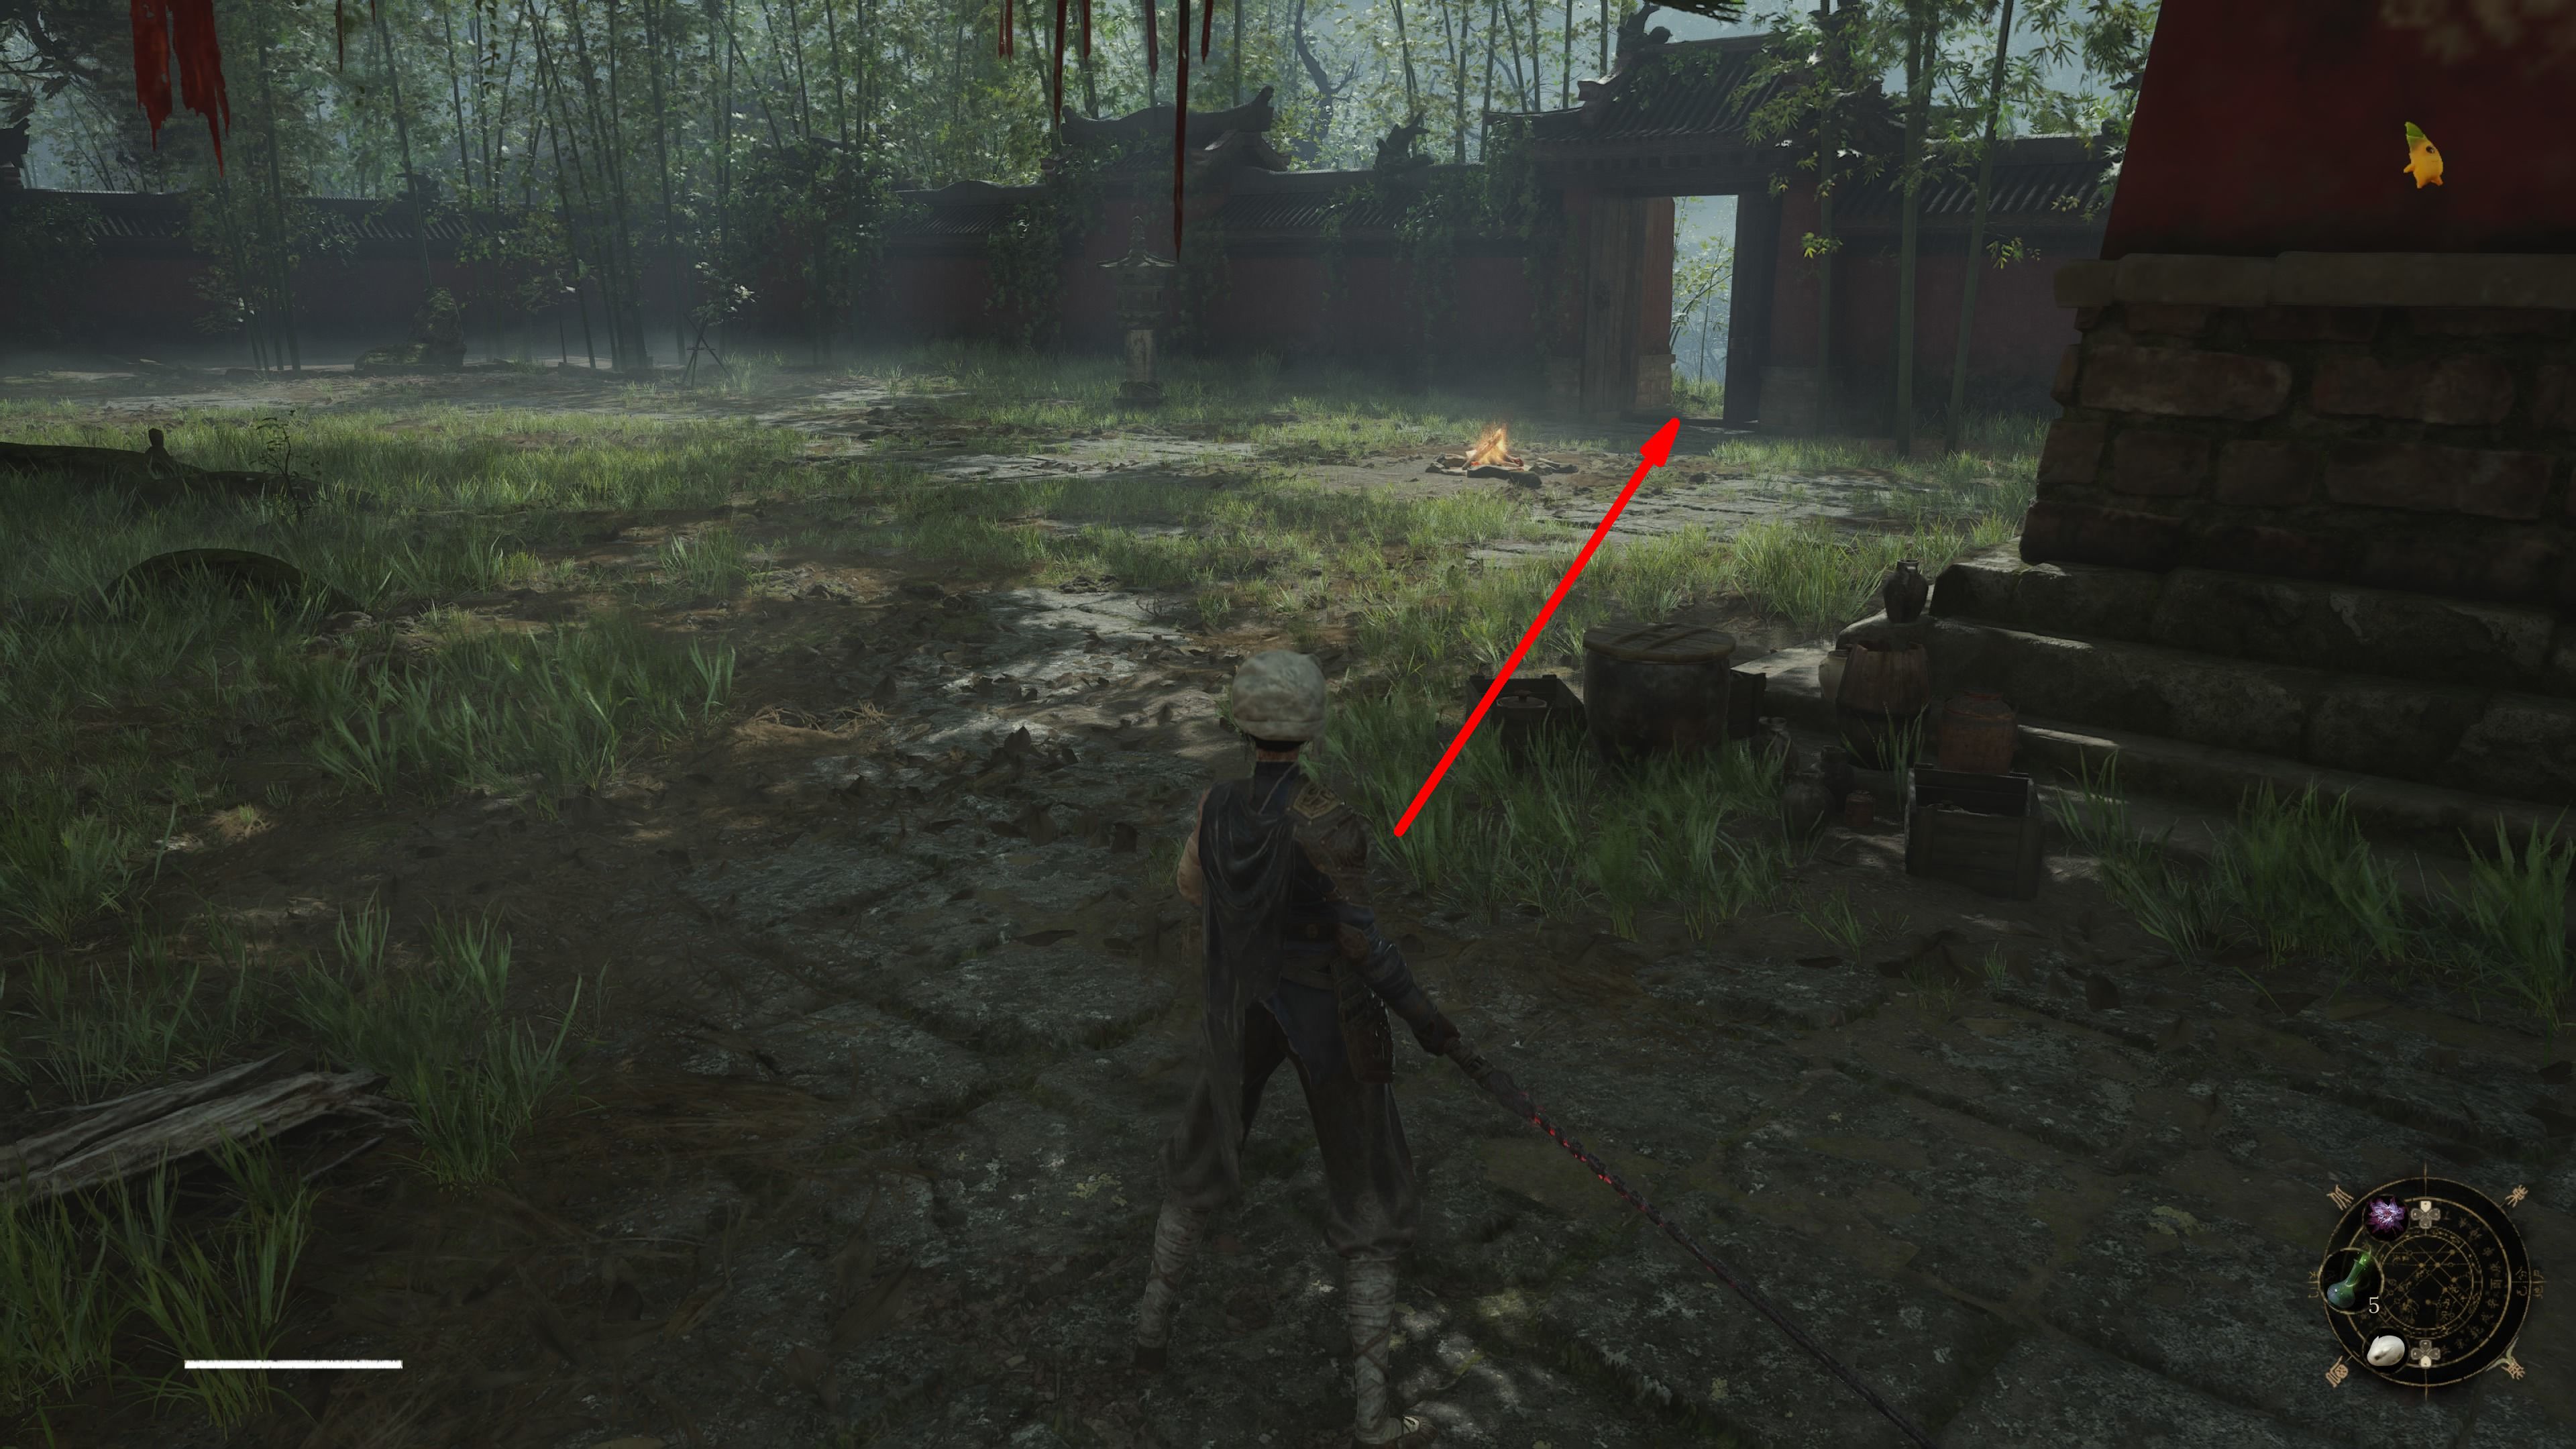
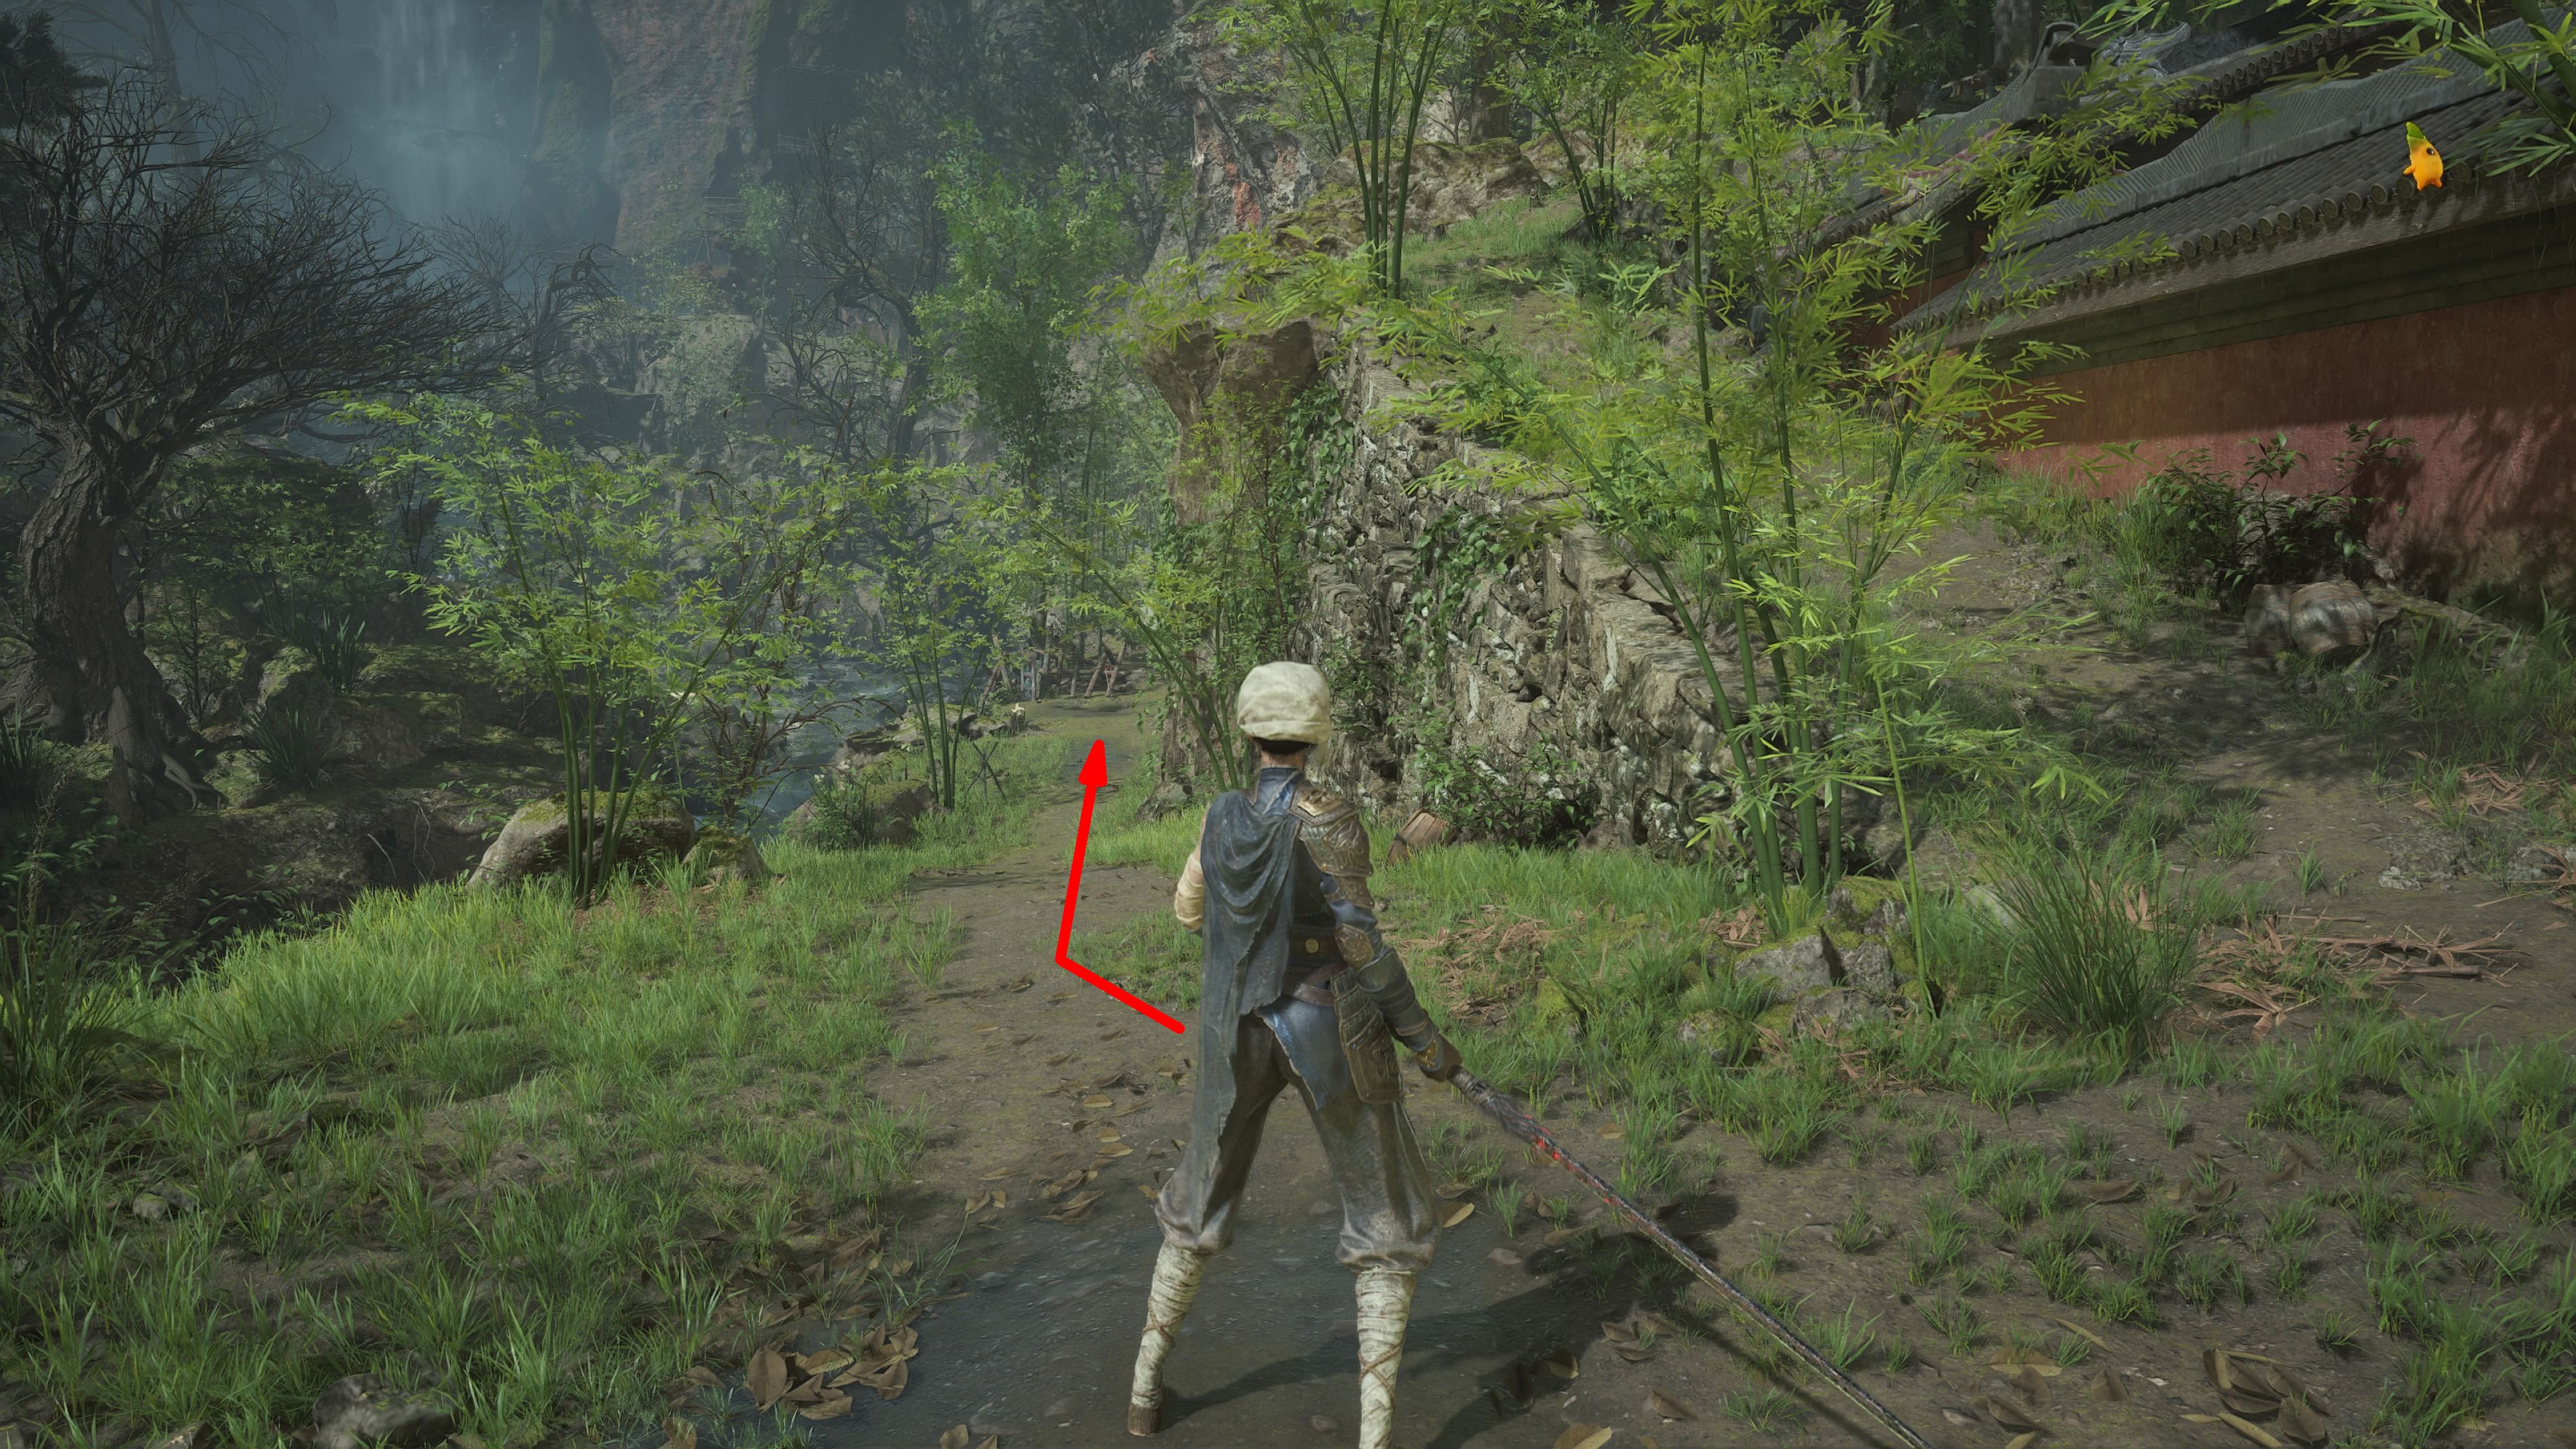
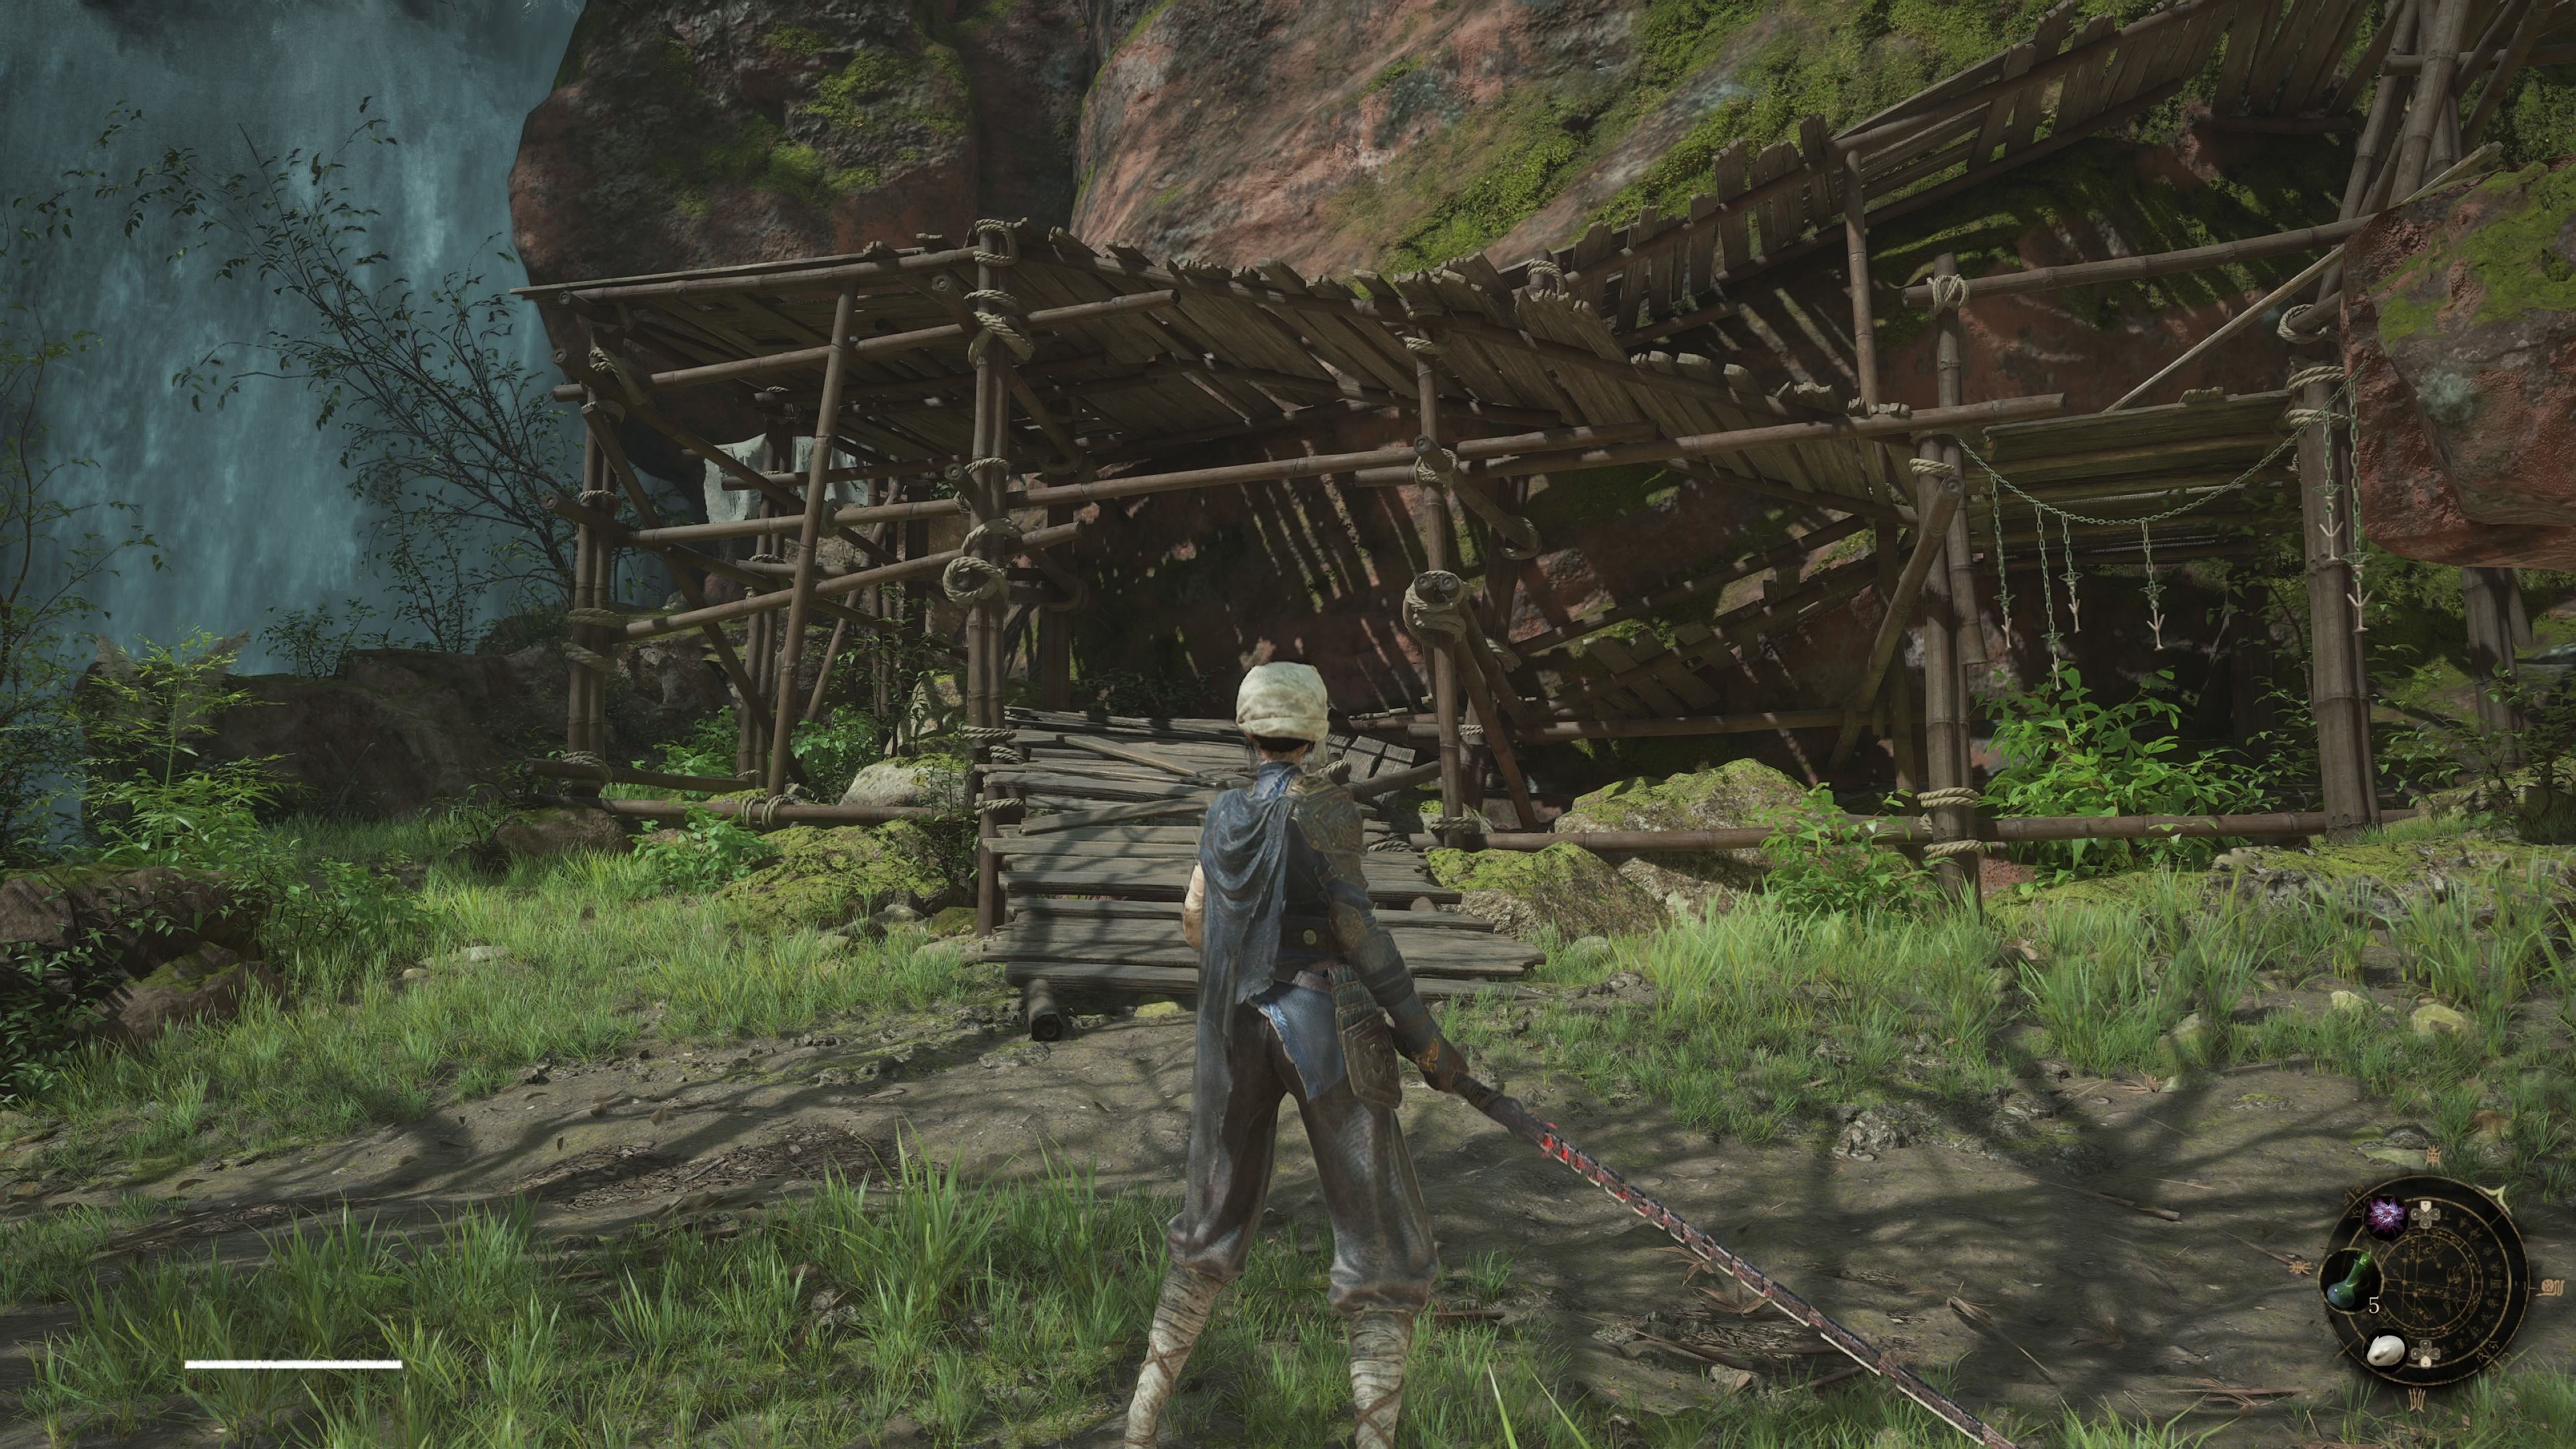
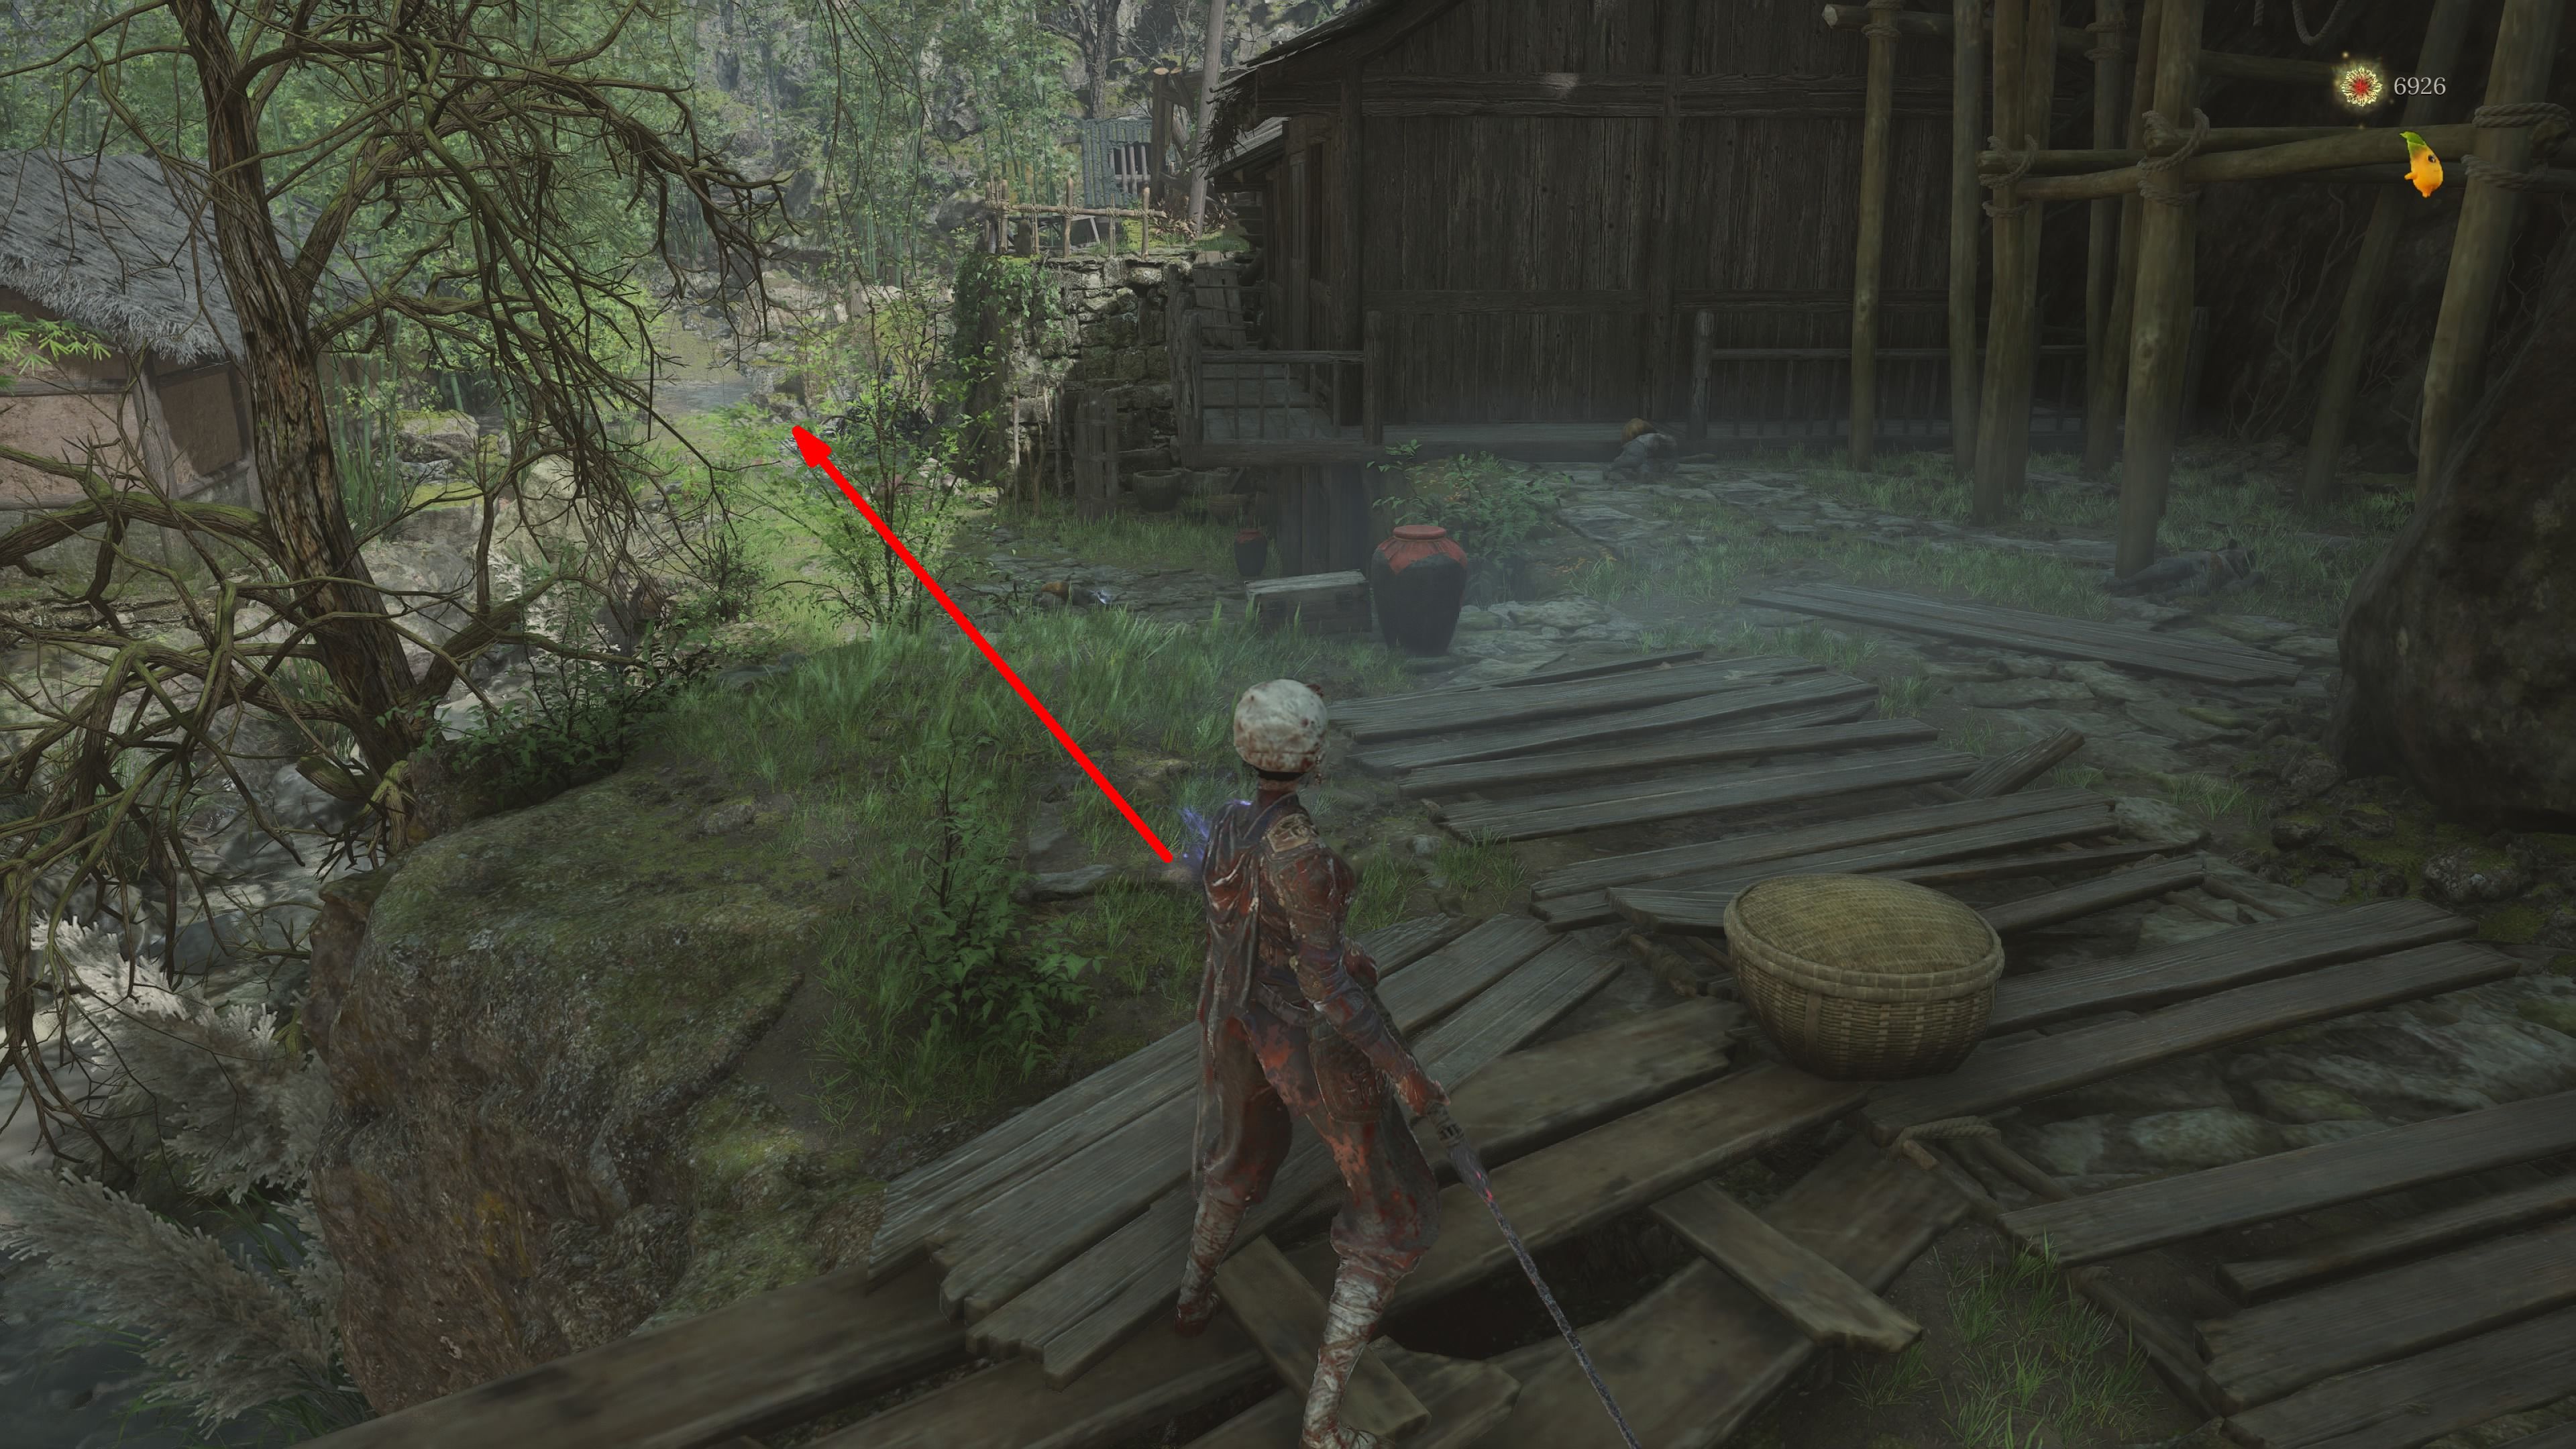
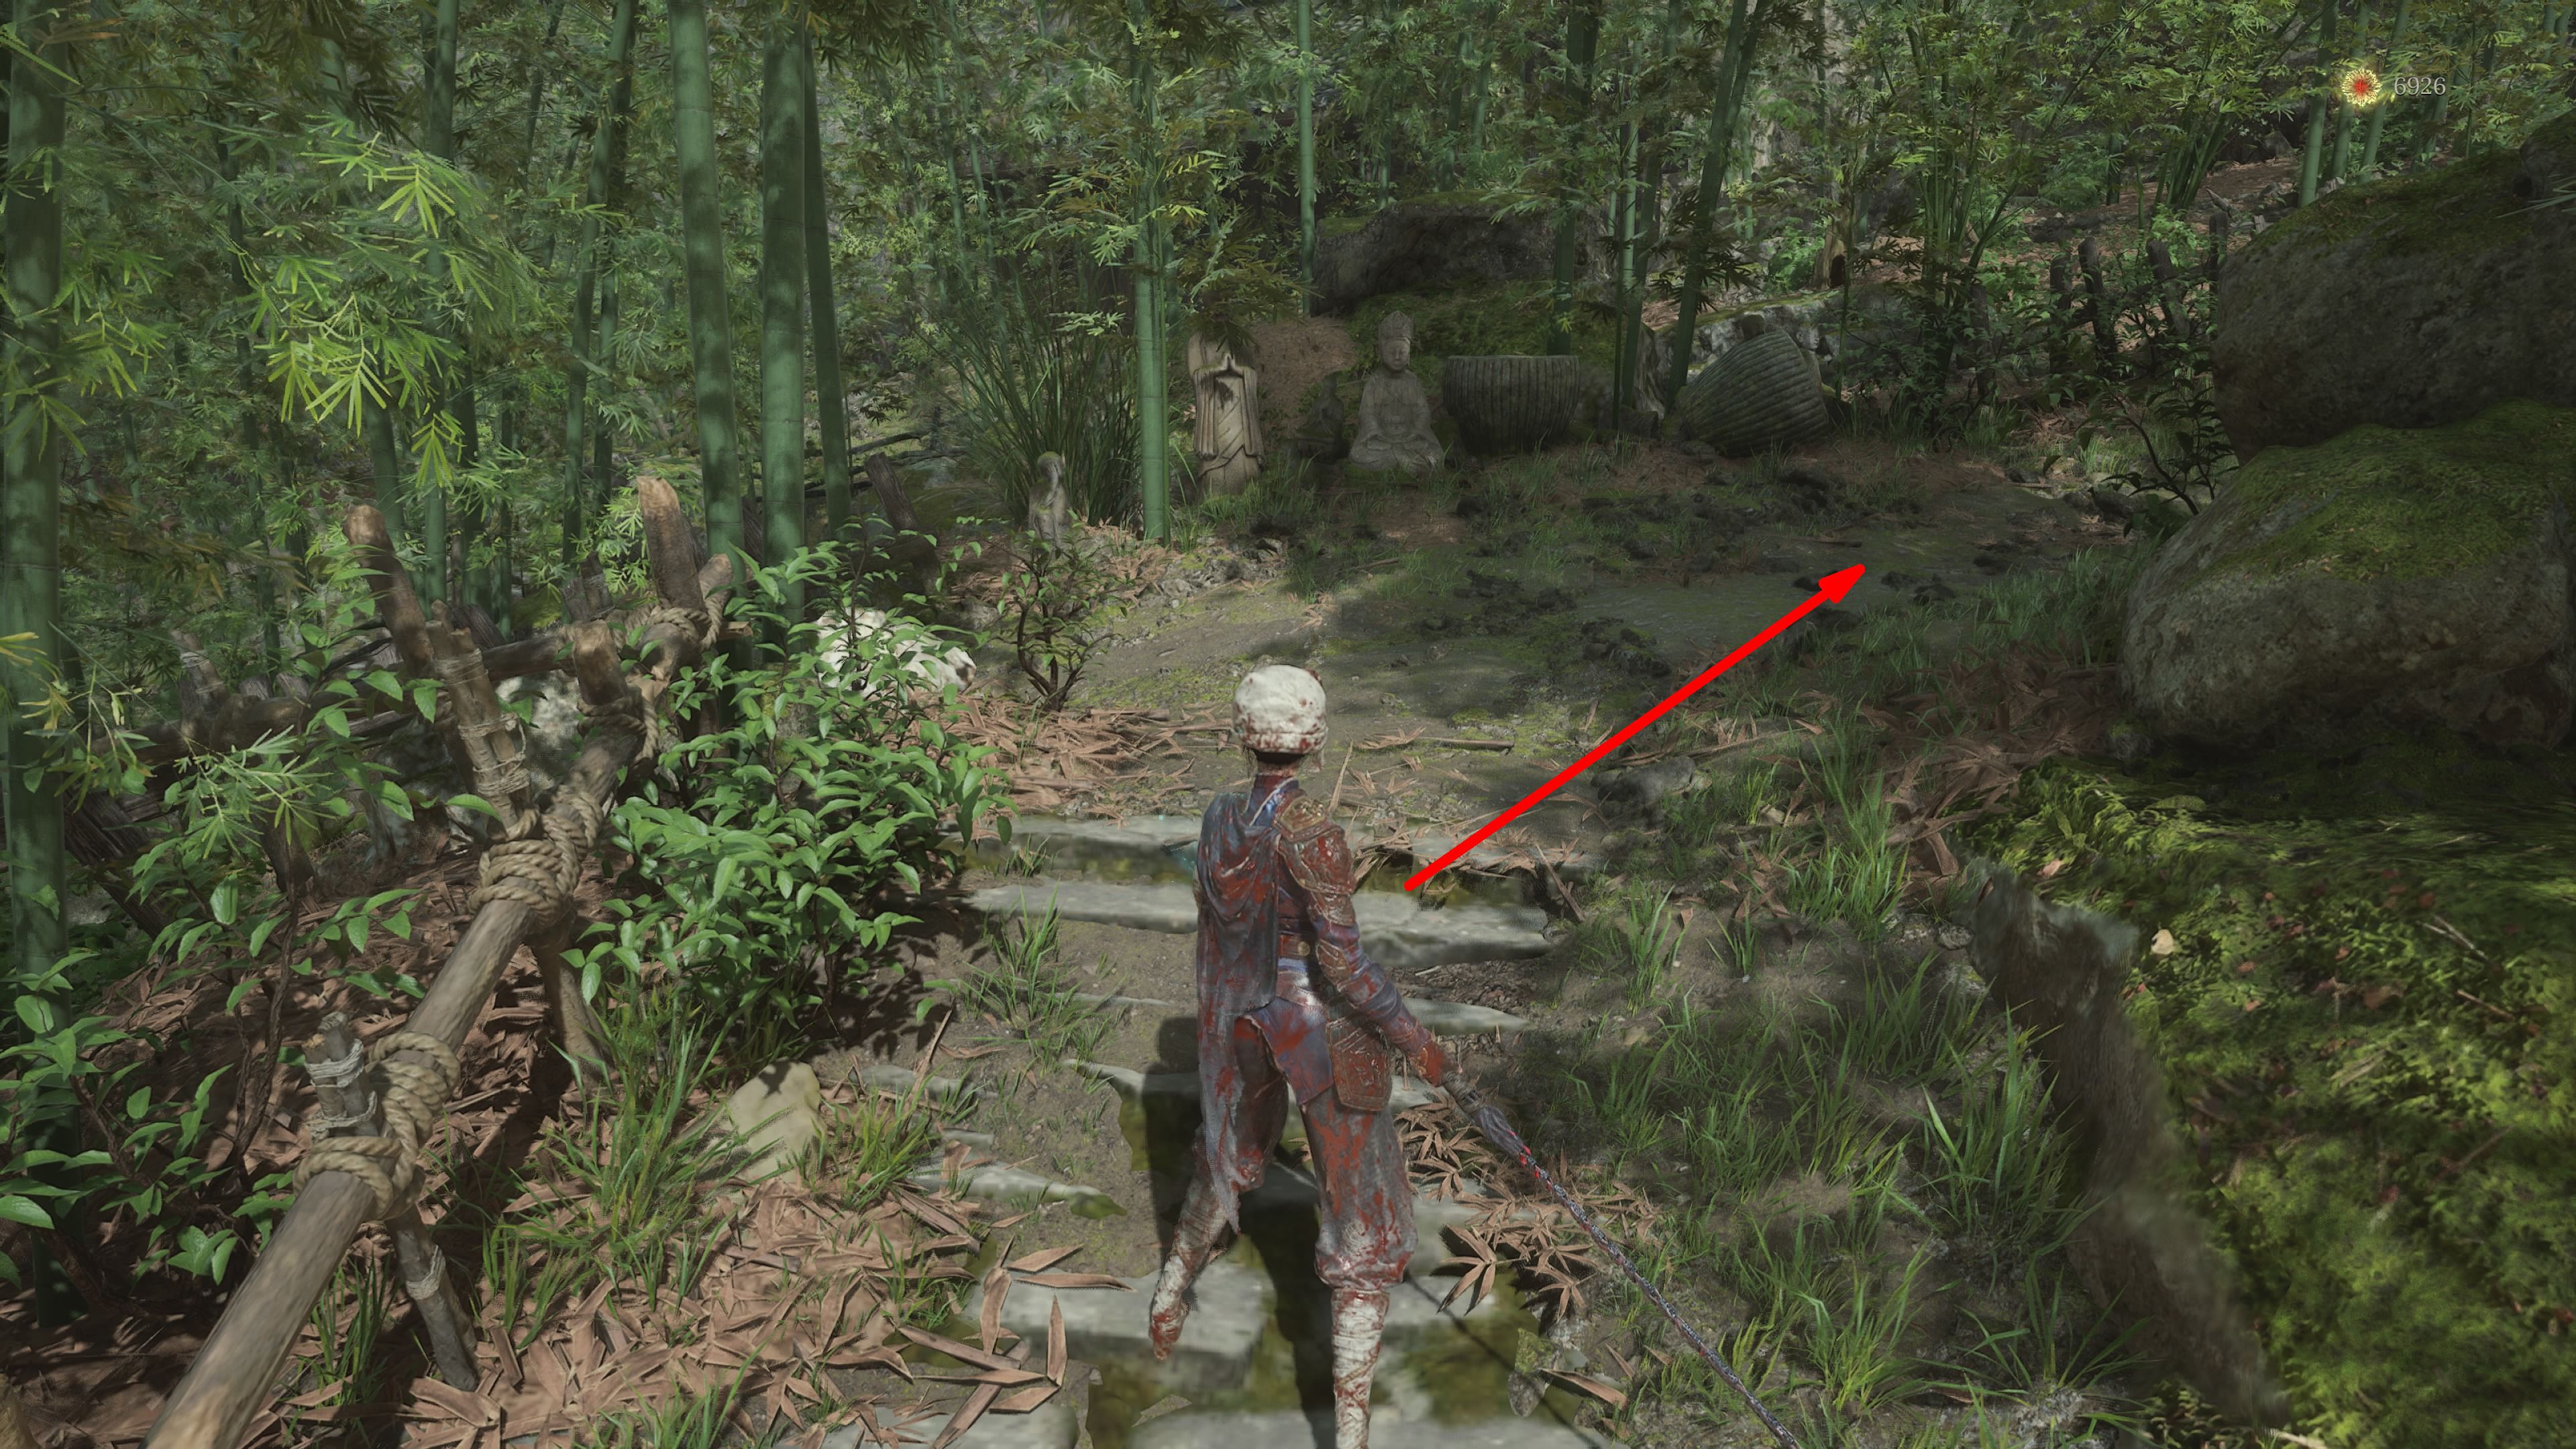
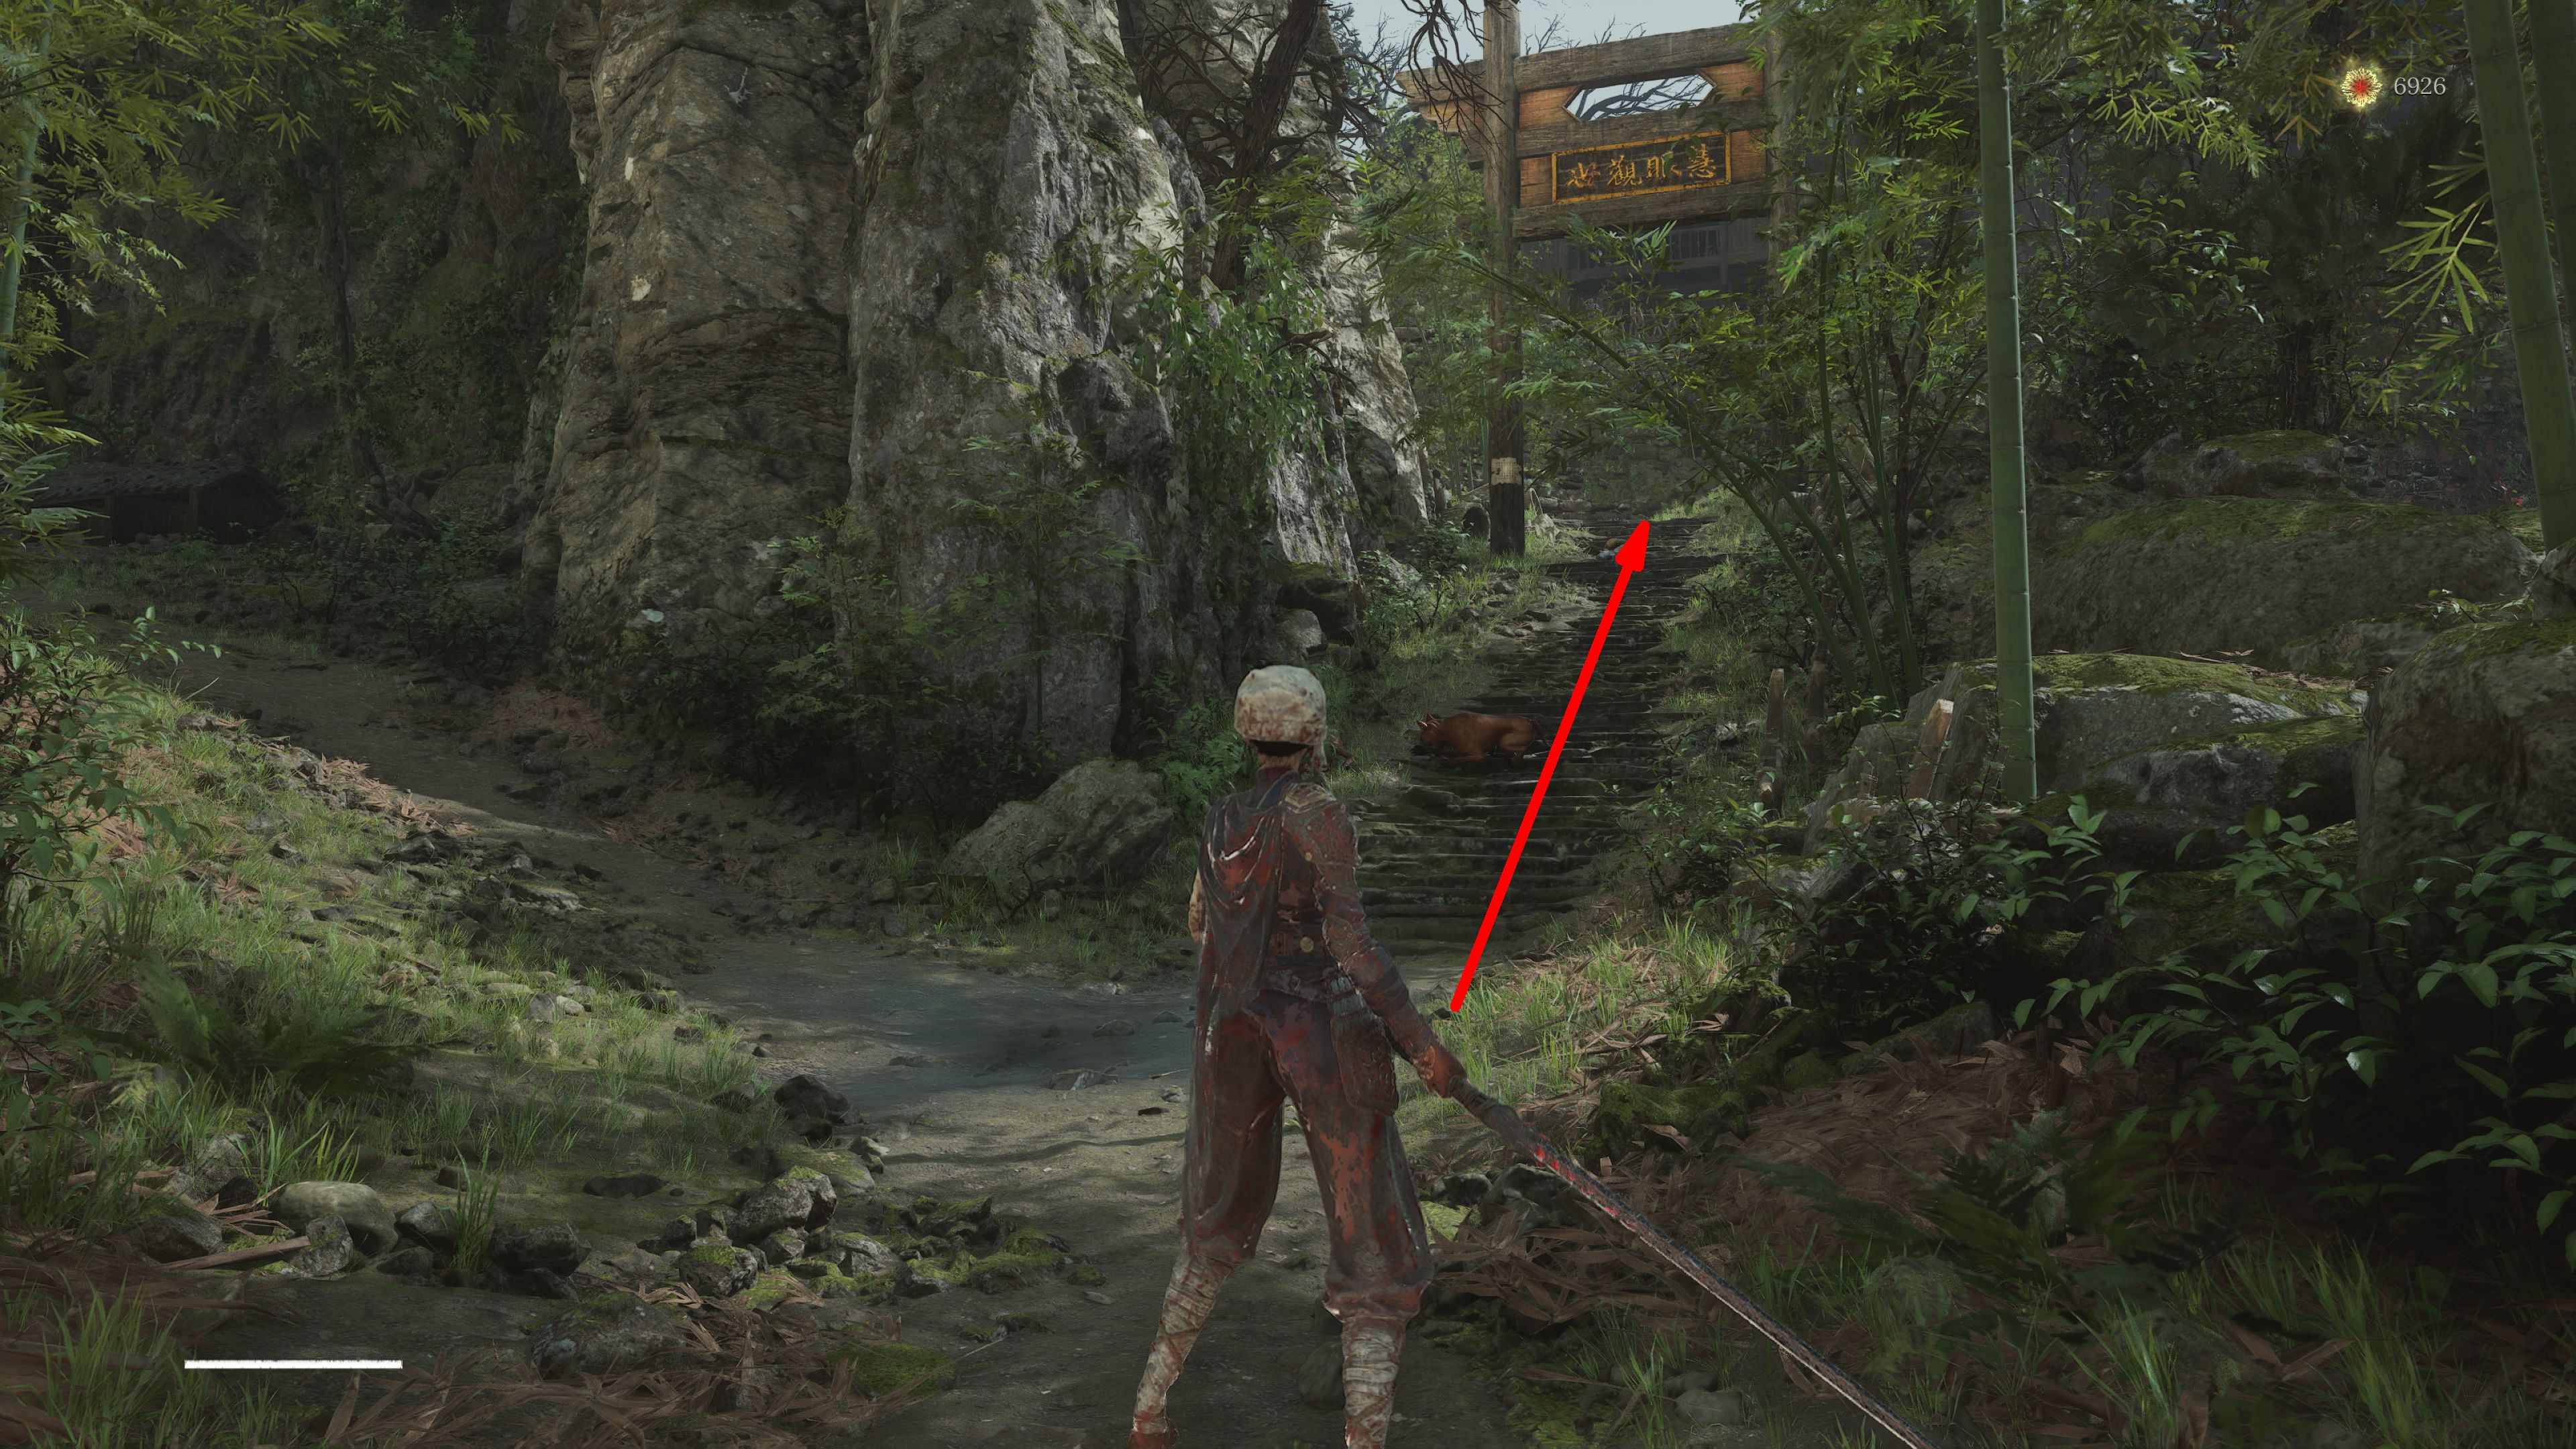
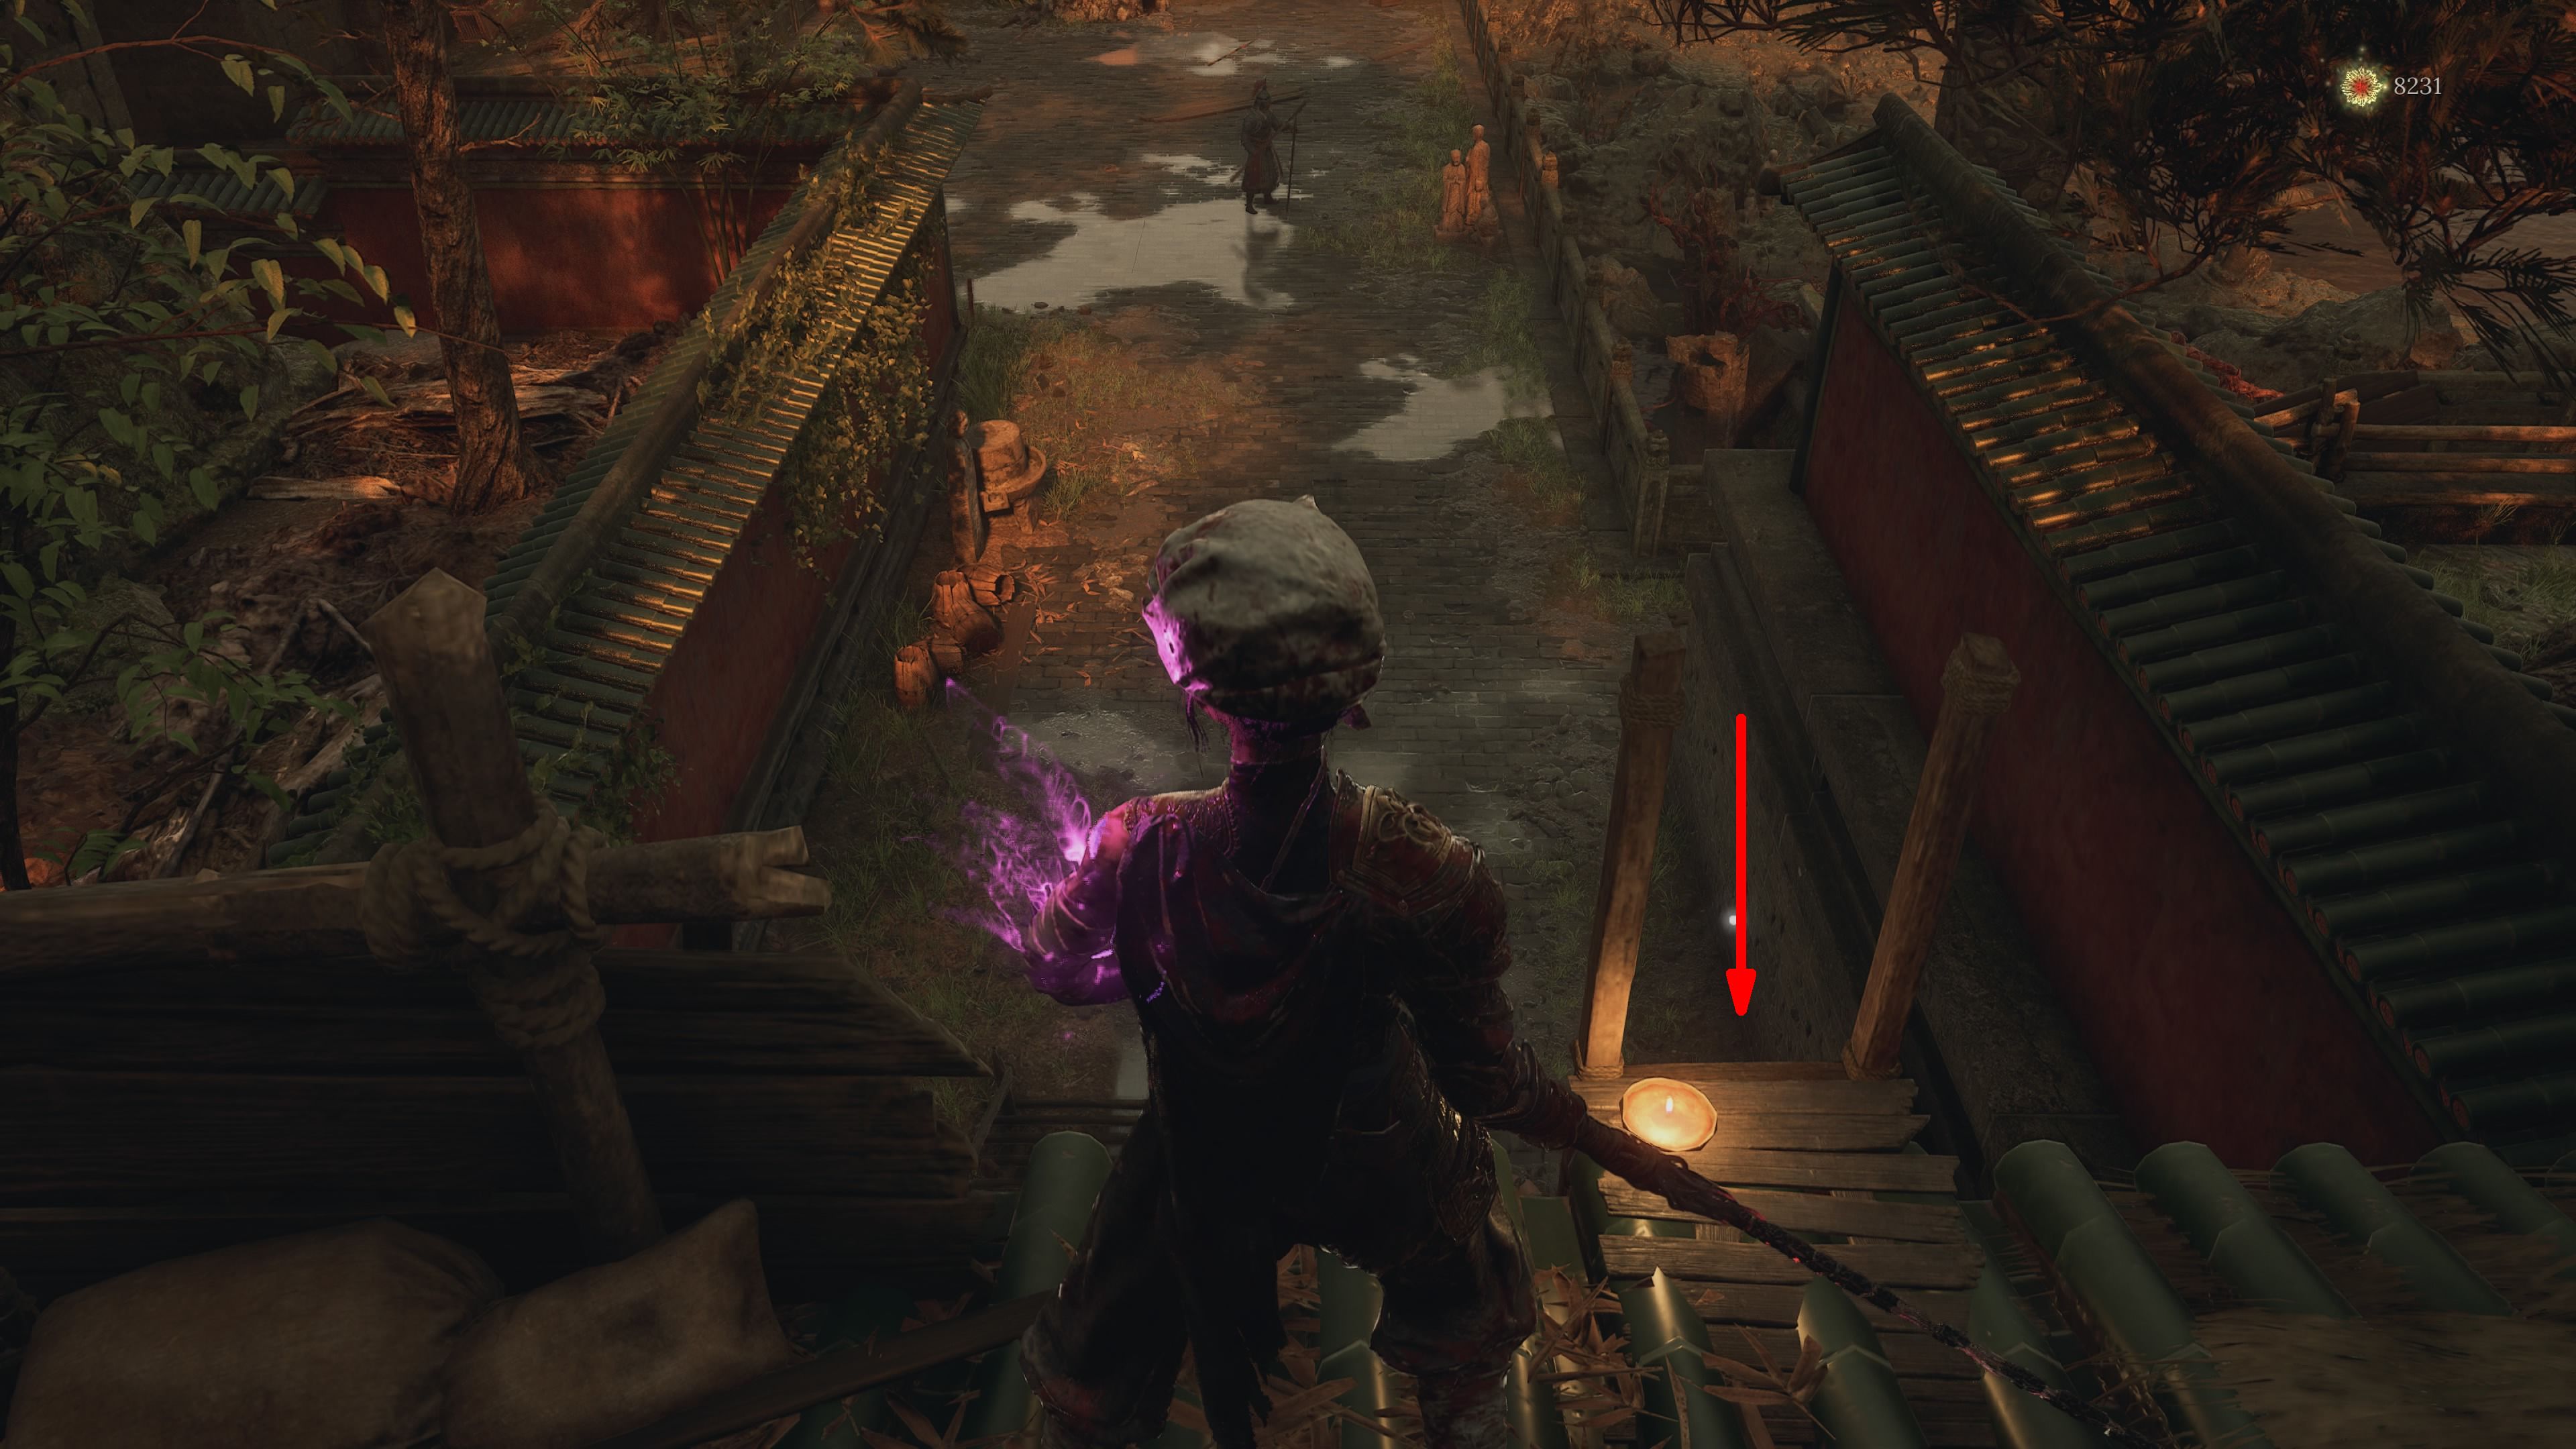
To get there, proceed along the path past the Reverent Temple Shrine until you come across an open area. In this area, look for a gate on your right side and pass through it. Then, keep moving forward on the downward sloping path and maintain your direction to arrive at a spot where wooden structures dominate, specifically wooden scaffolding. Atop this scaffolding is the Buddha Cliffs Shrine.
Lightzen Temple
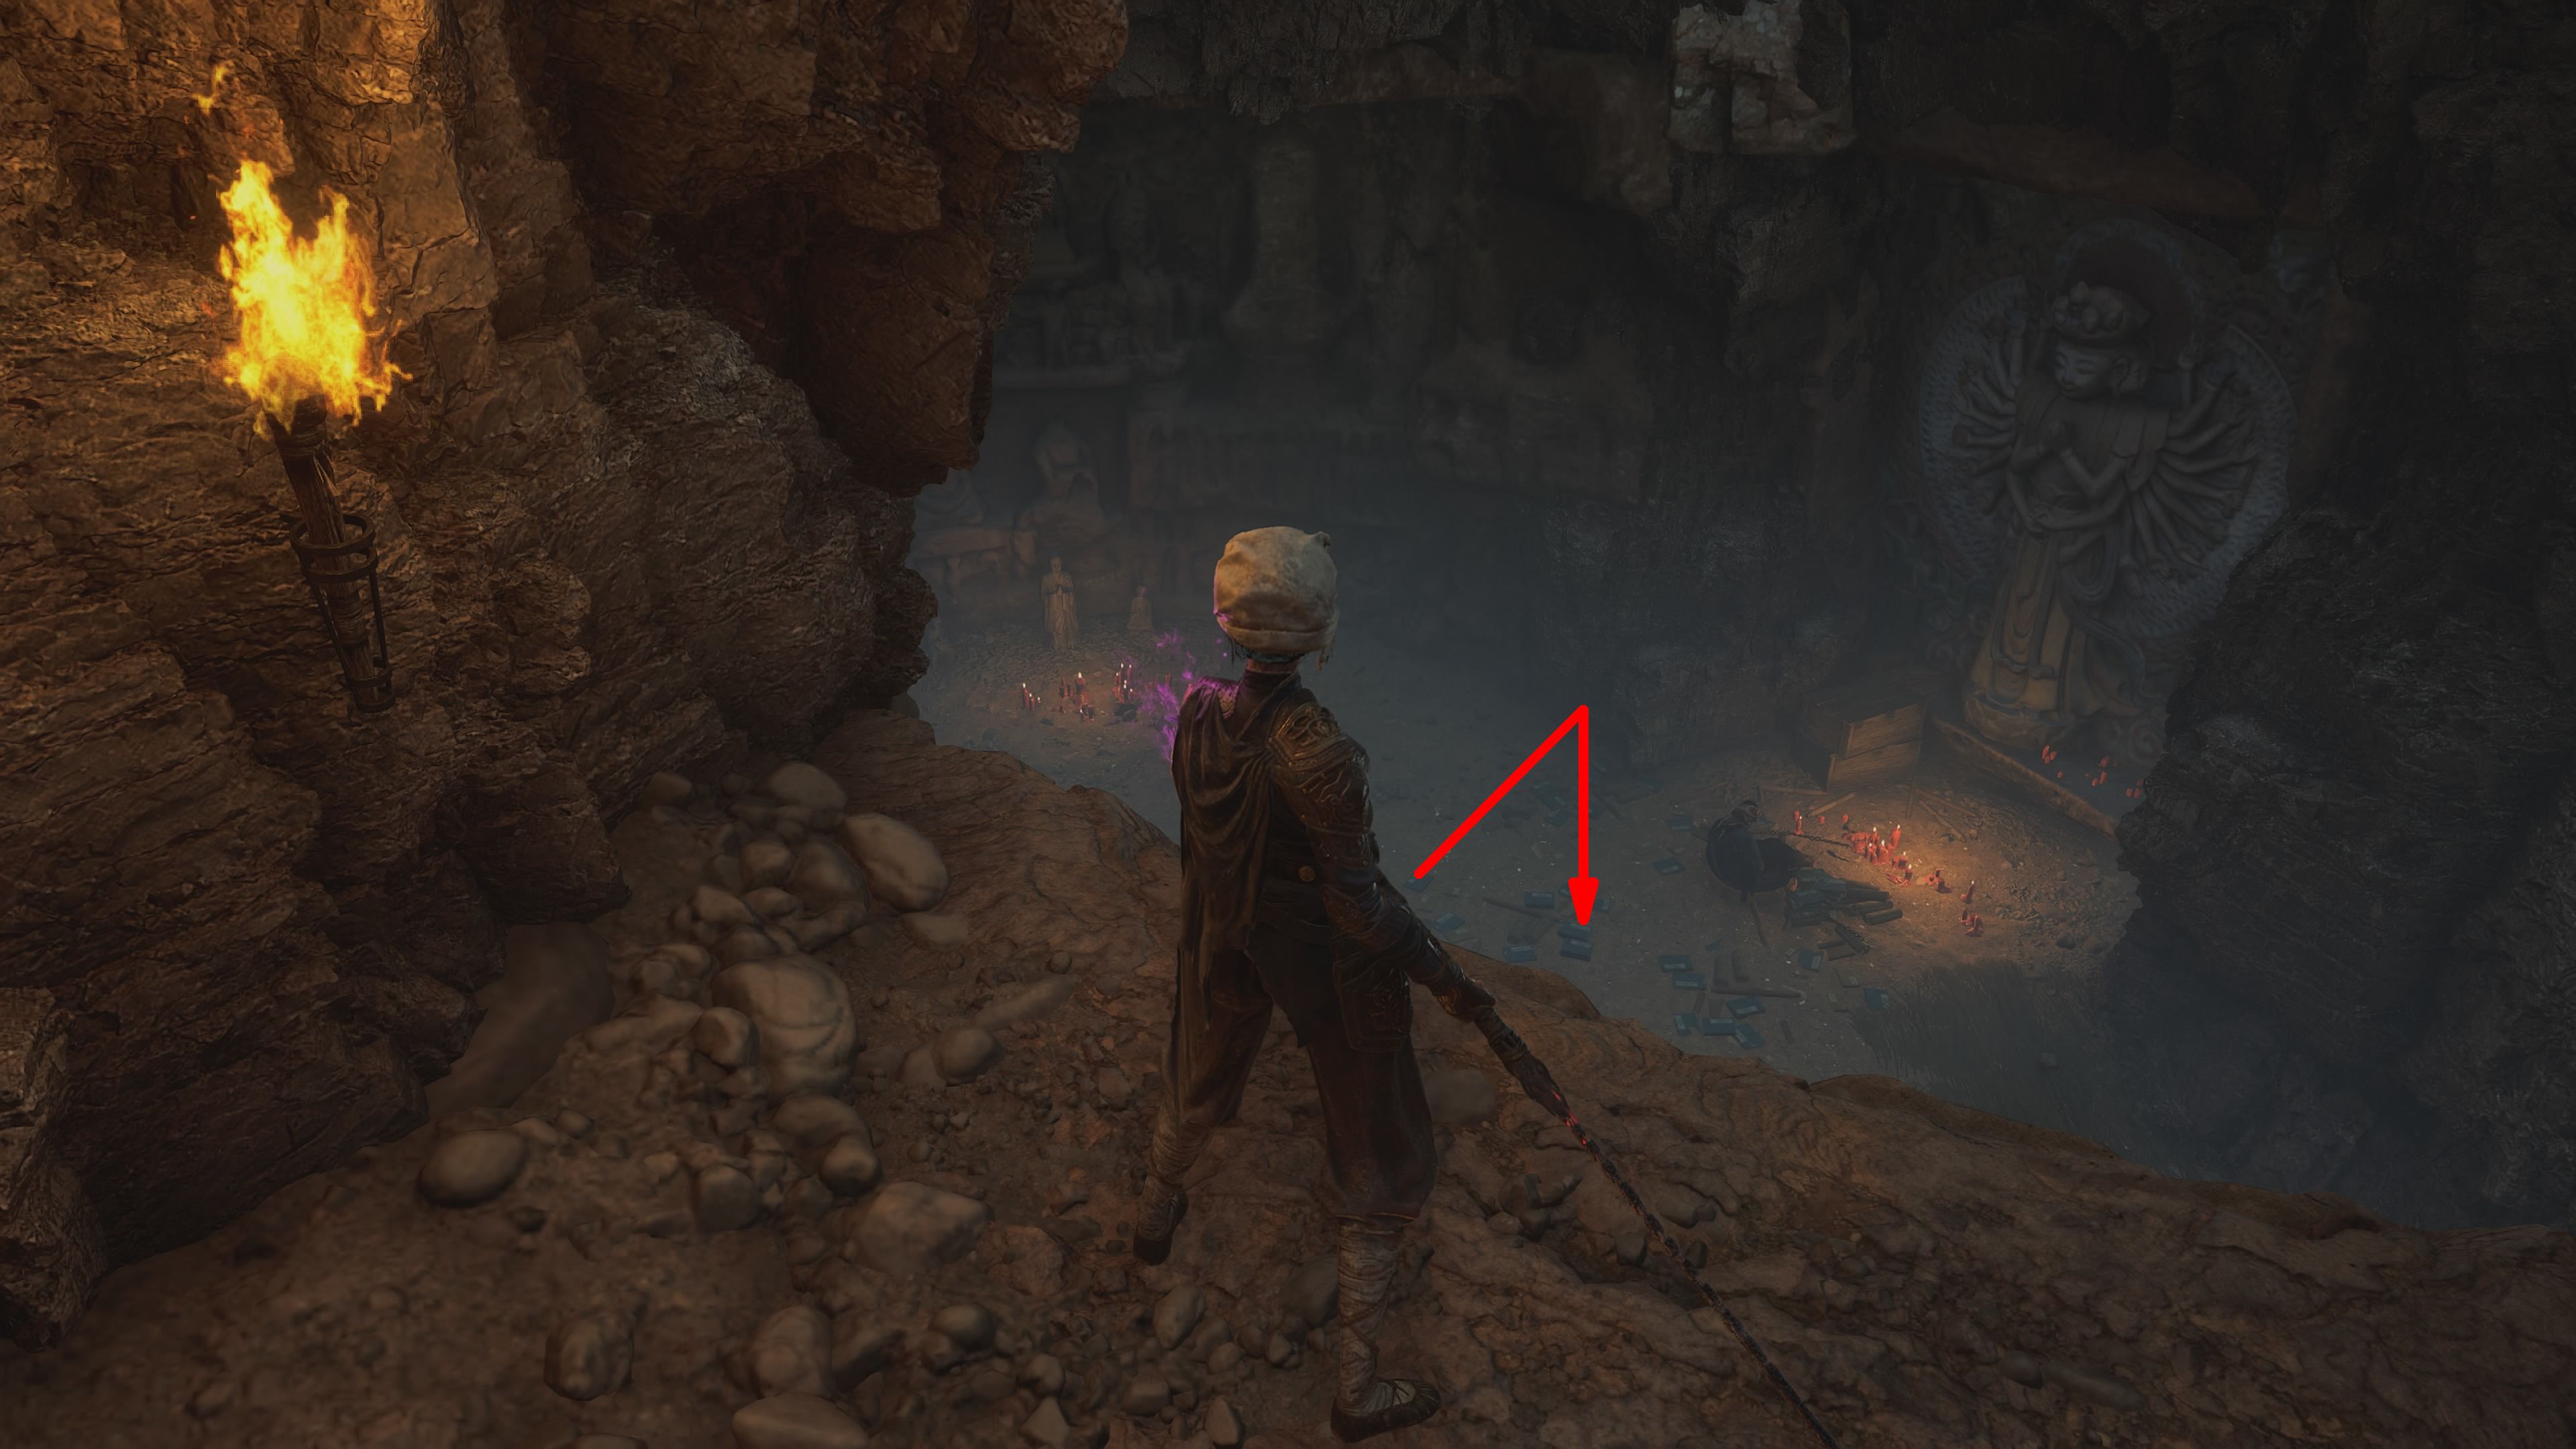
Walk down the ladder that stands beside the Buddha Cliffs Shrine, then proceed through the cave at its base. When you emerge from the cave, keep going straight ahead and slightly to your right to continue your descent. Take a left turn at the very bottom of this path to reach the Lightzen Temple area. The Lightzen Temple Shrine will be directly in front of you, located on the right side.
Shu Sanctum
Multiple routes lead you to the Shu Sanctum Shrine, and there are surrounding spots worth checking out. Although it’s not compulsory, players might find it enticing to spend some time investigating these areas before moving on to the next Shrine.
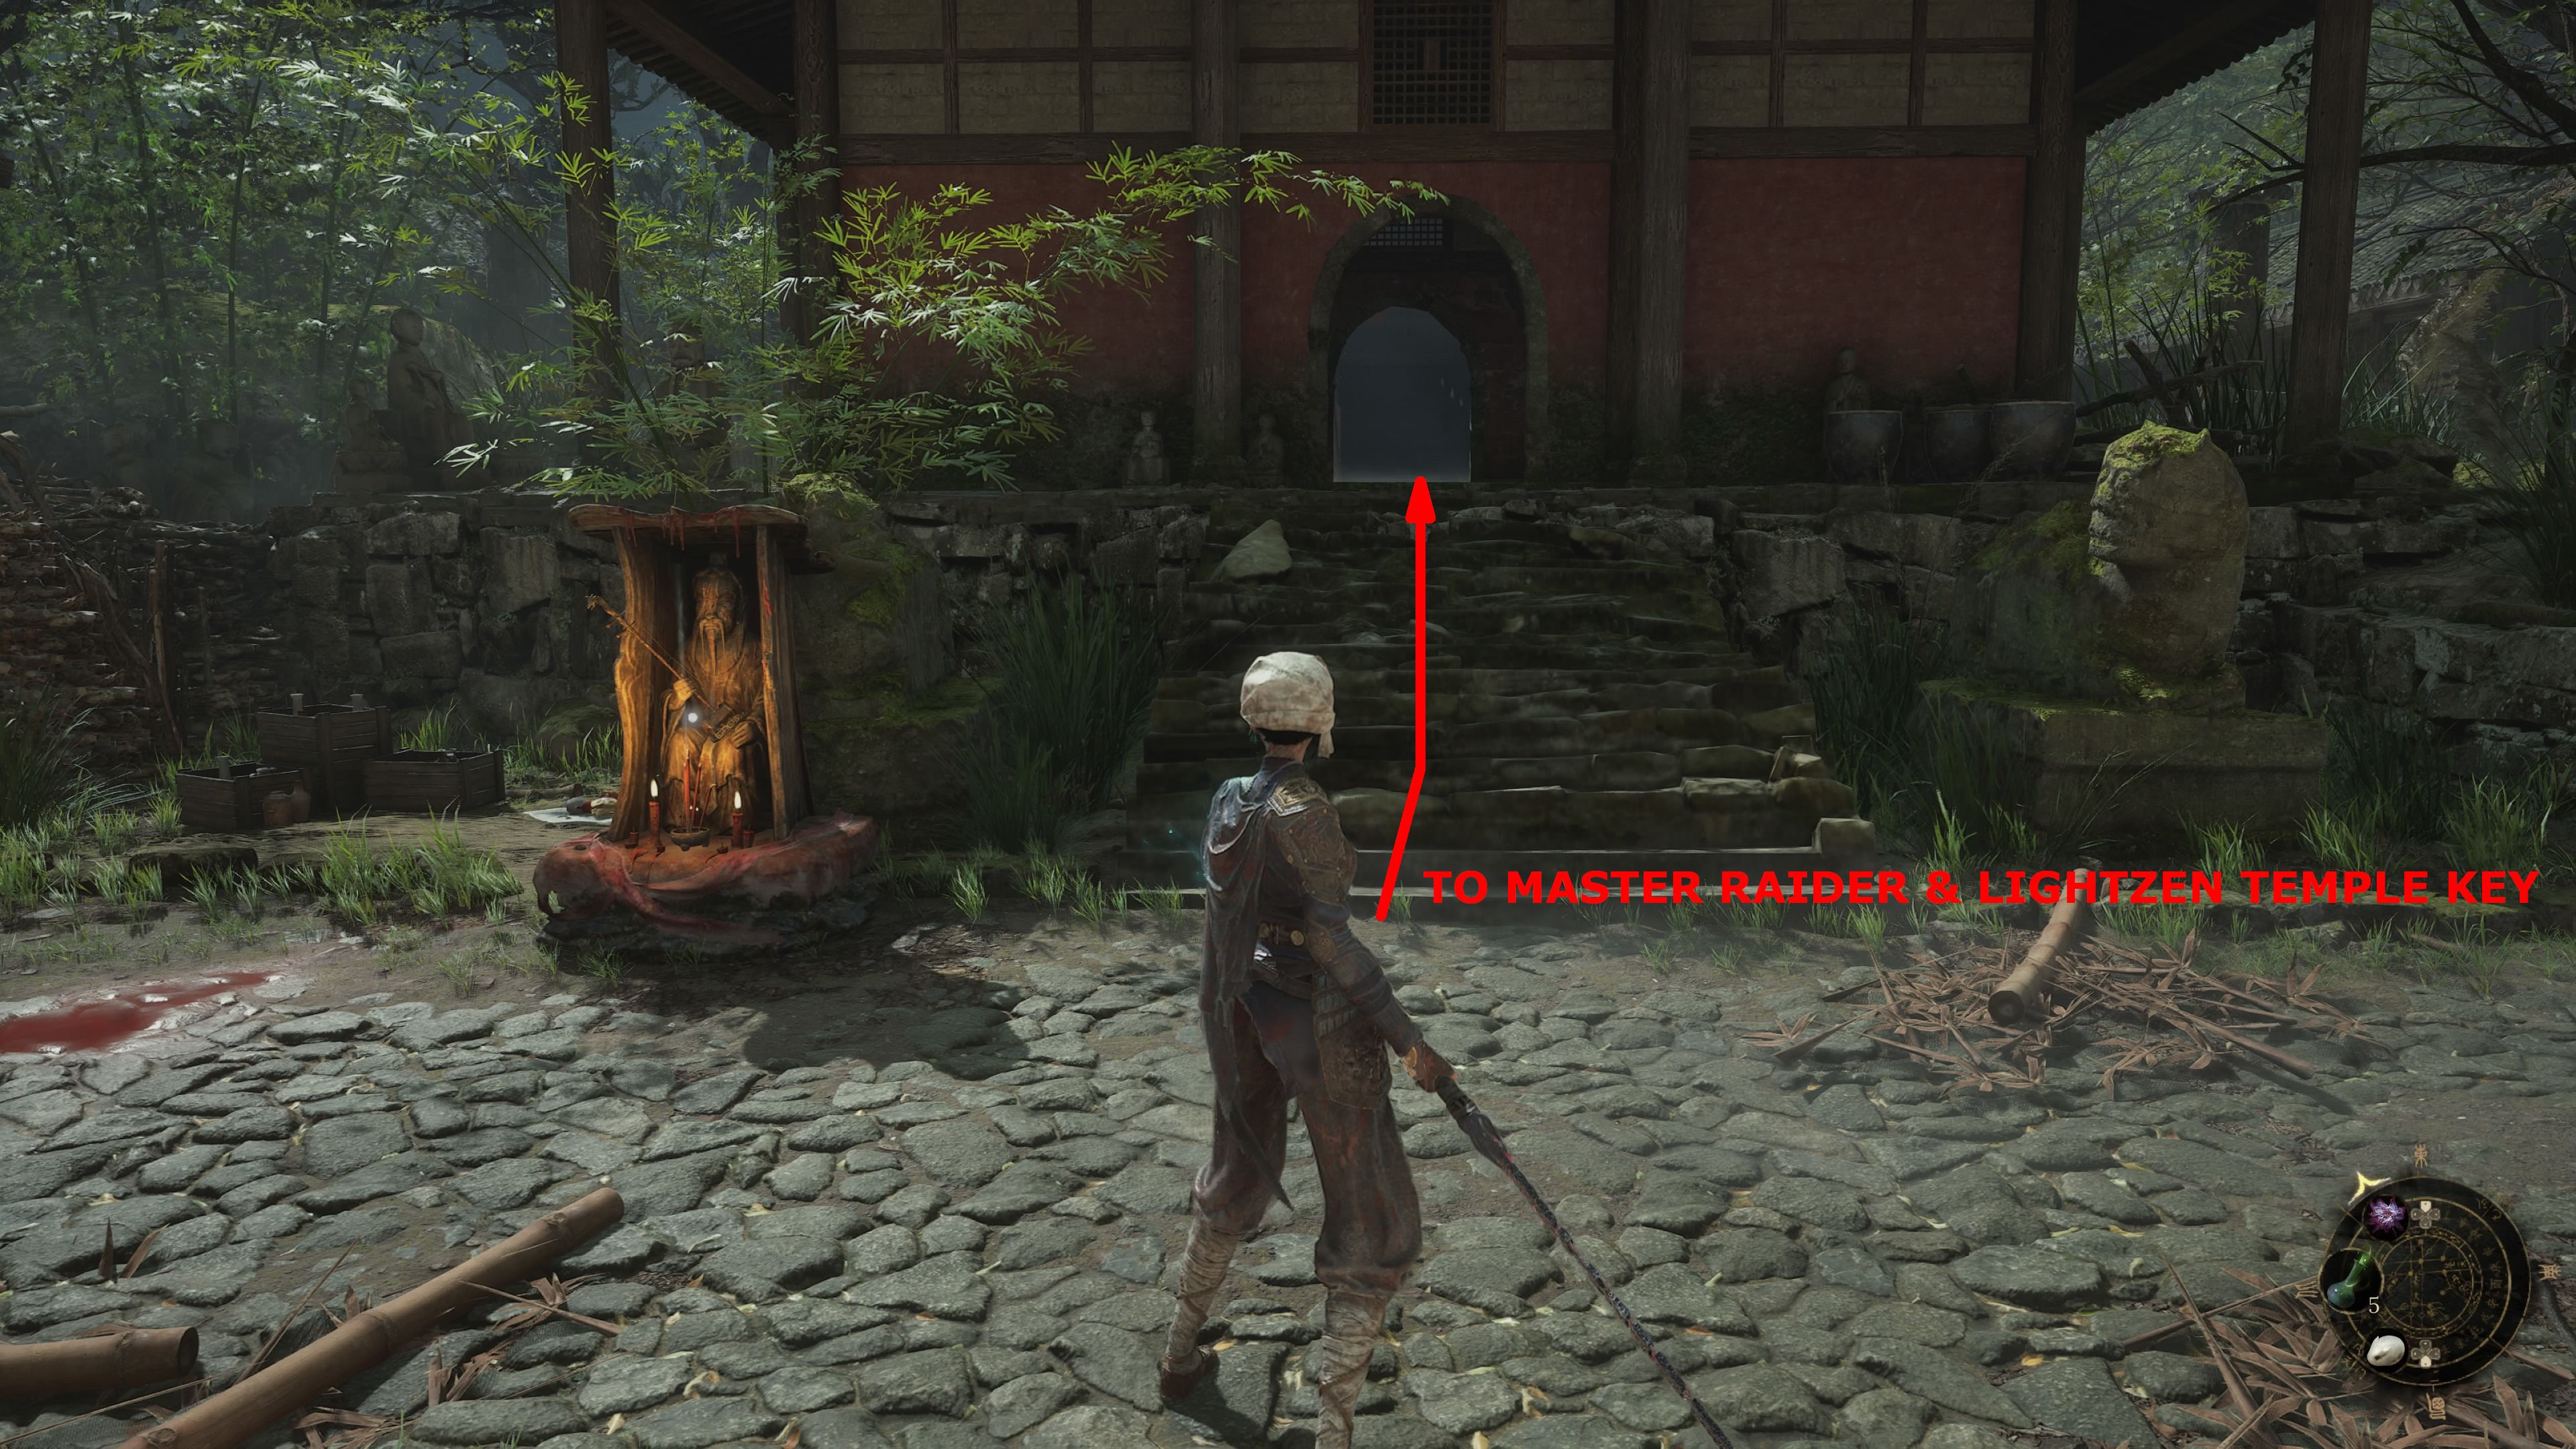
Once you’ve triggered the Lightzen Temple Shrine, locate the staircase beside it and walk along the pathway. This will lead you to Master Raider – Man-eating Dhutanga, a formidable boss. Defeat him to acquire the key for the Lightzen Temple.
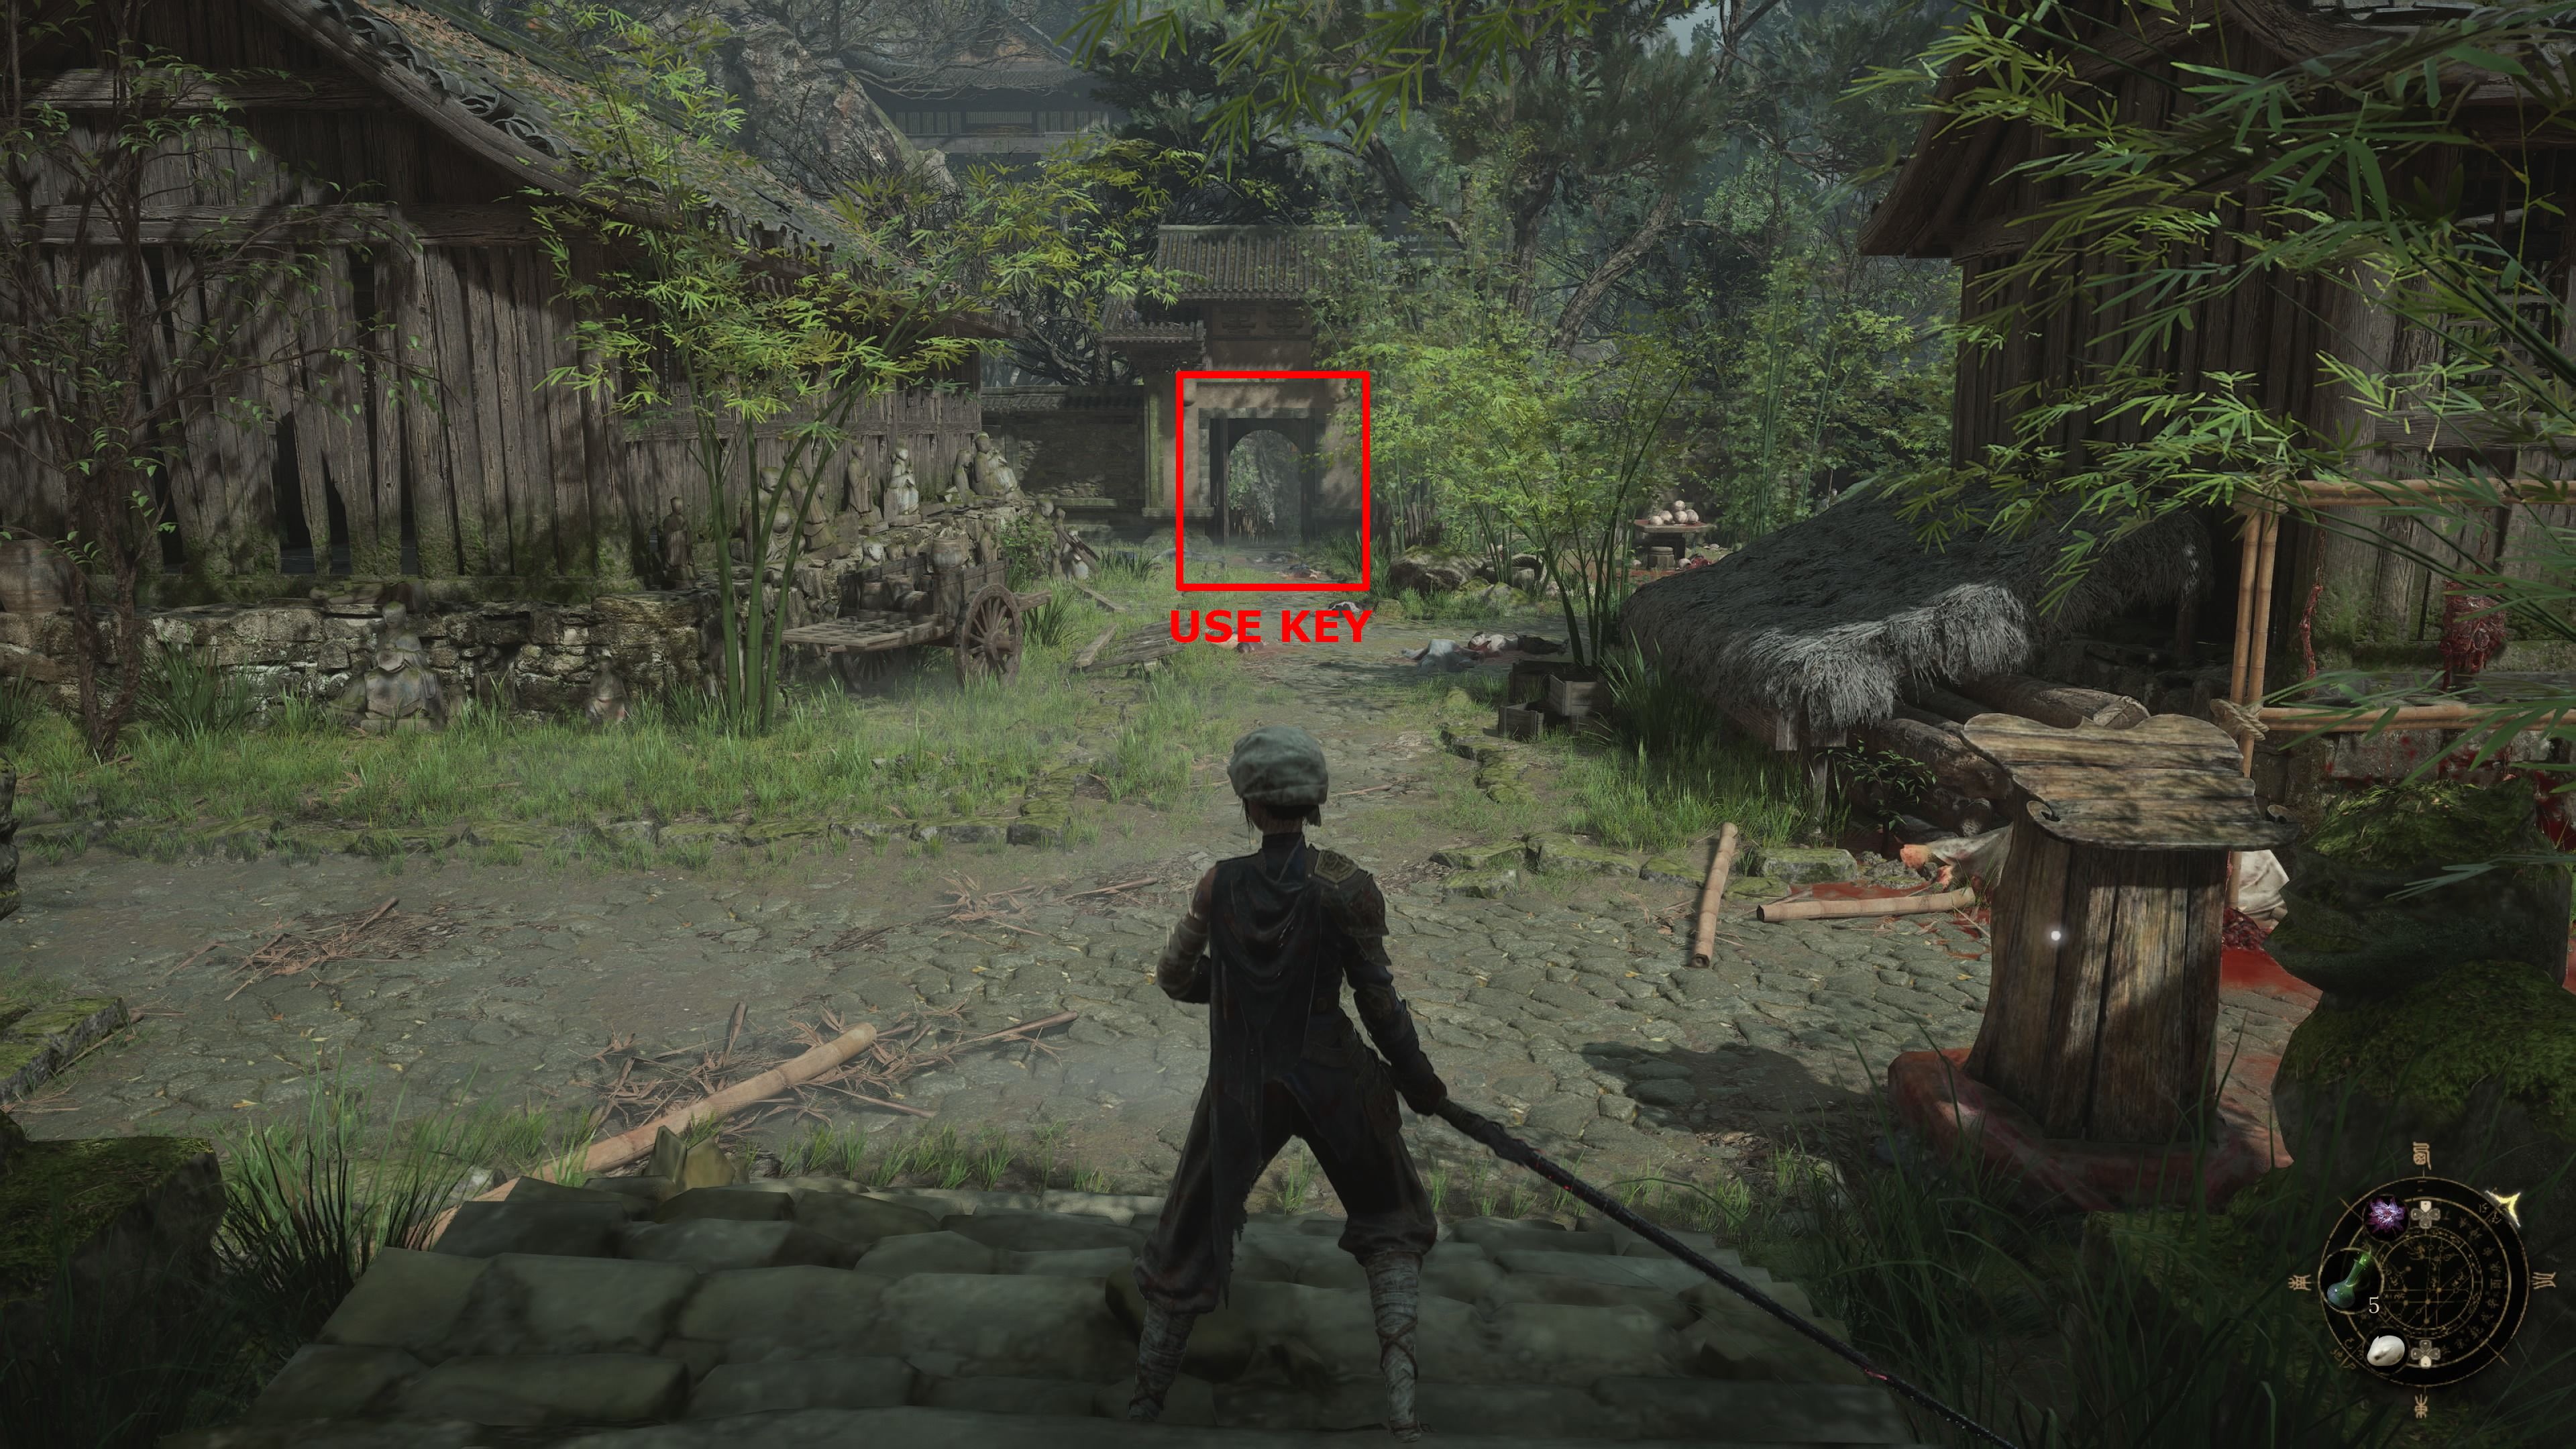
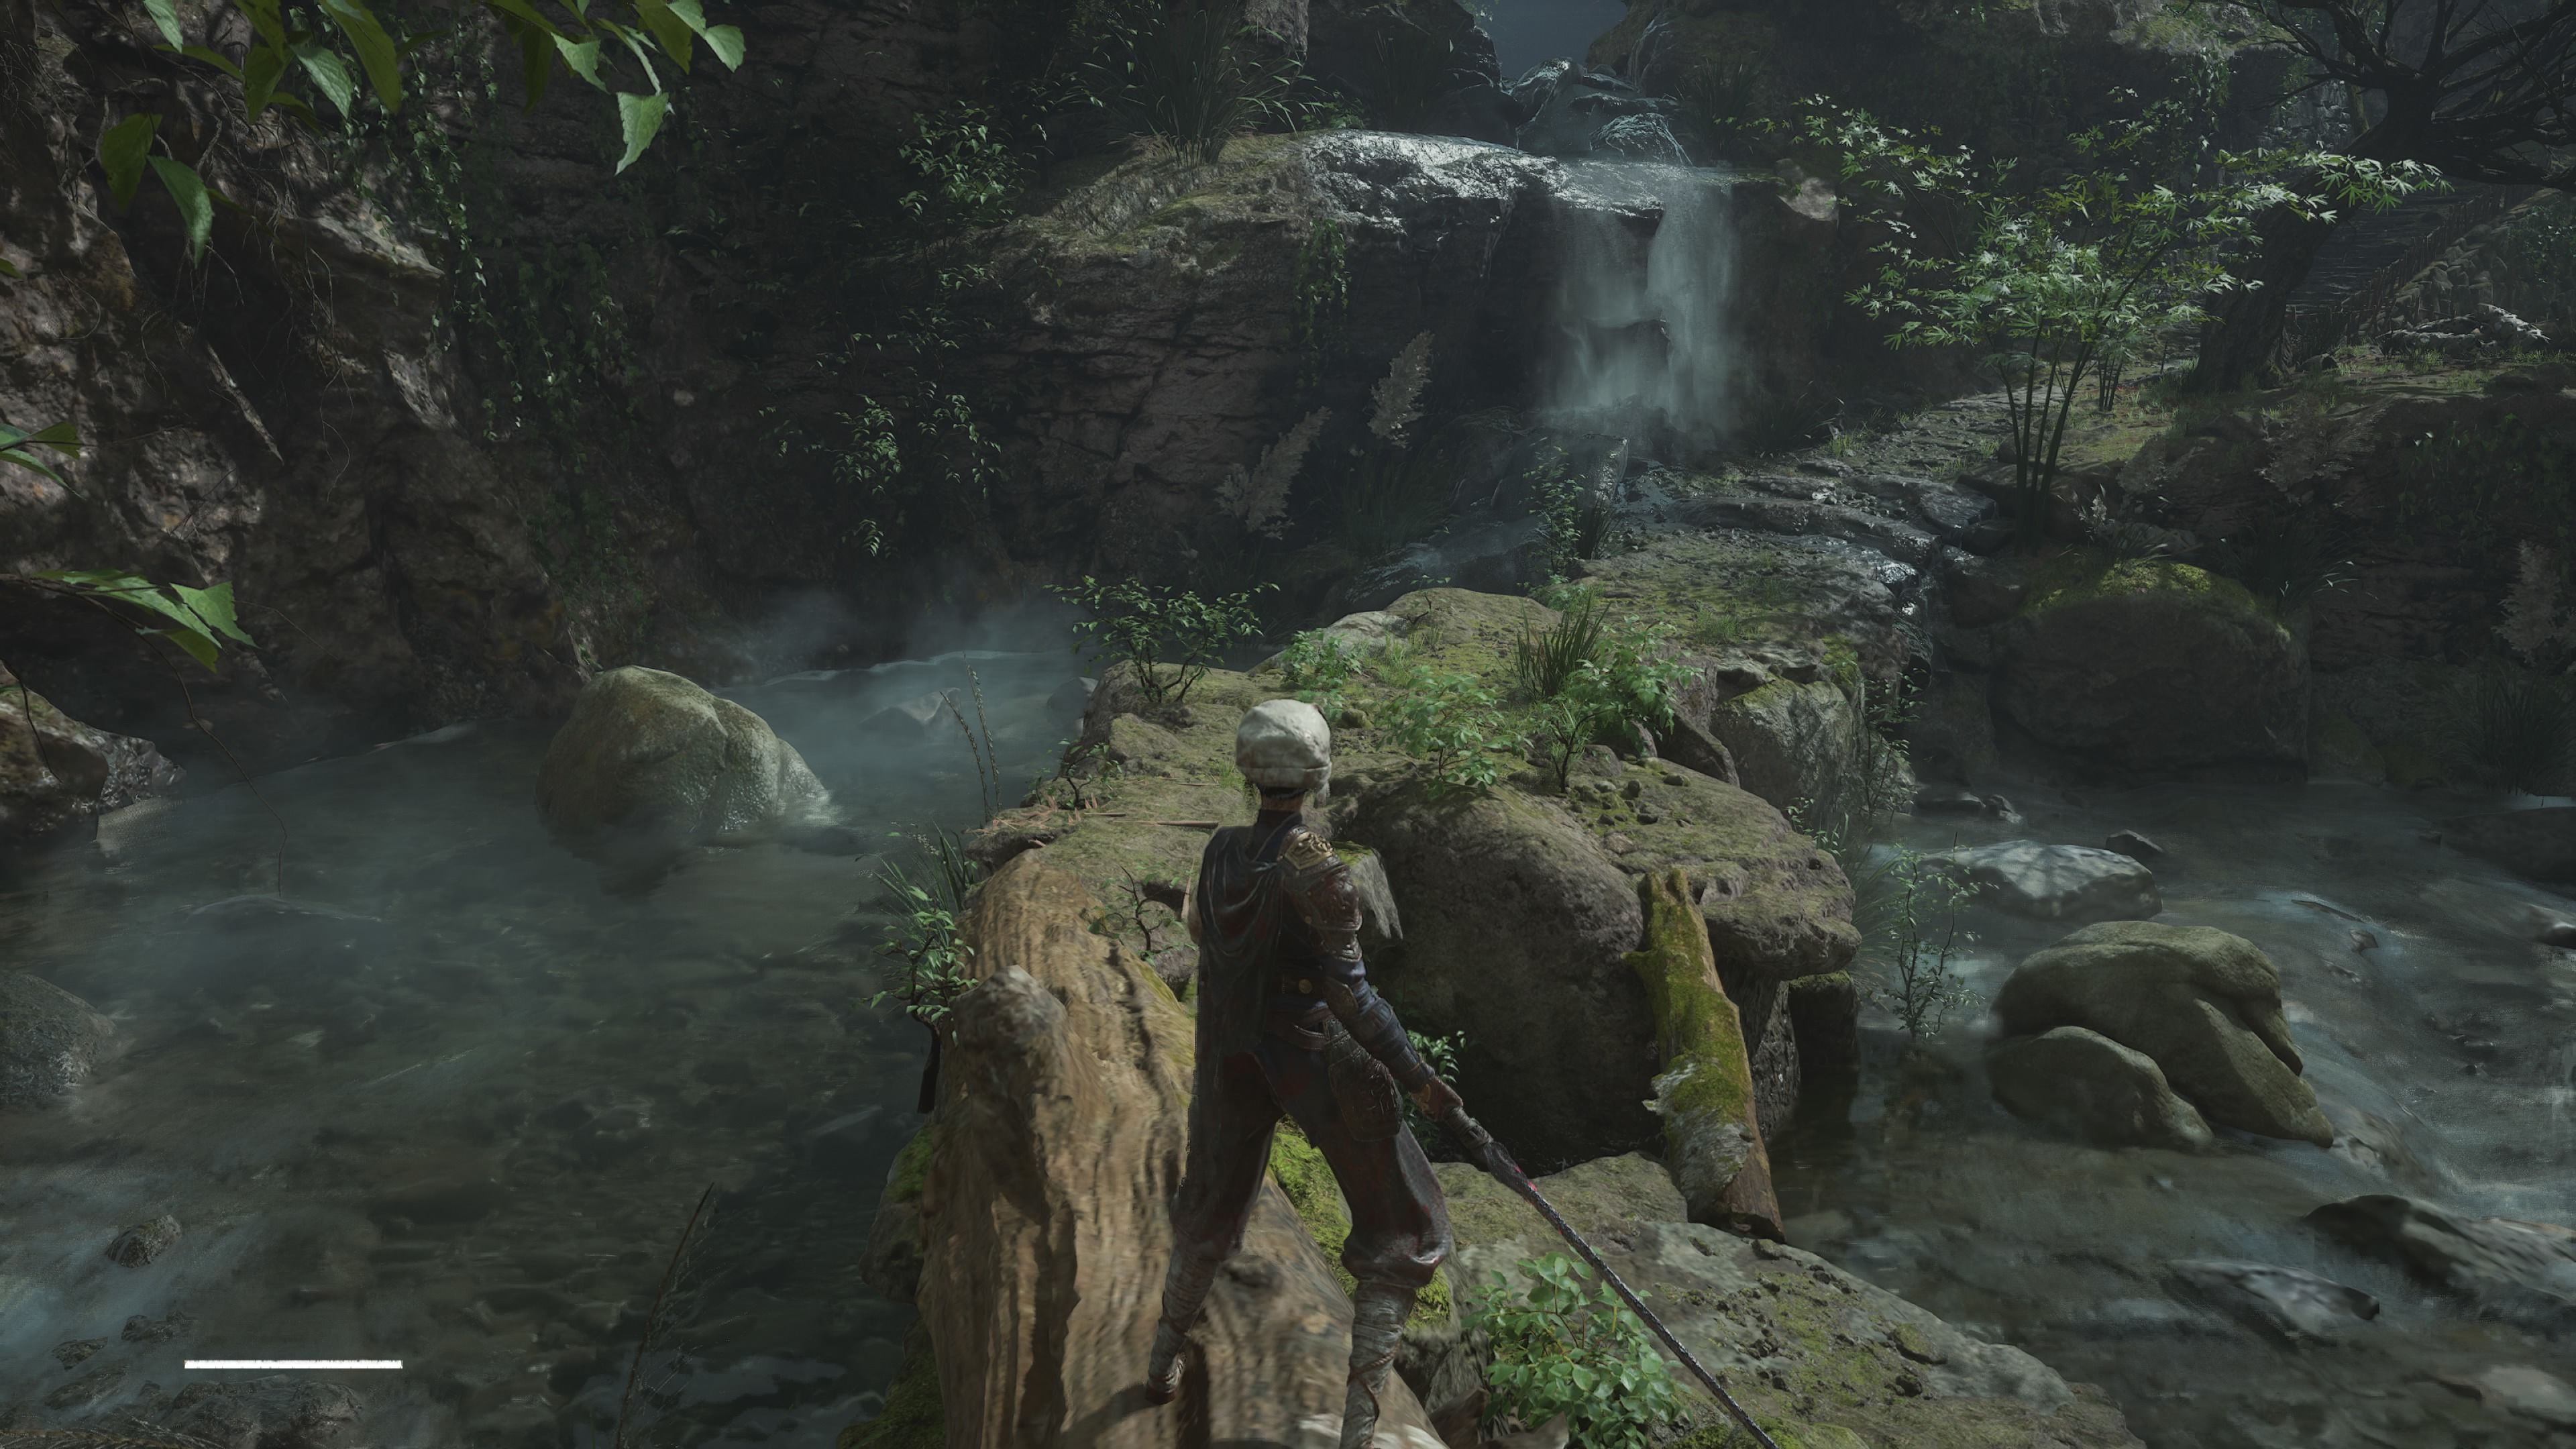
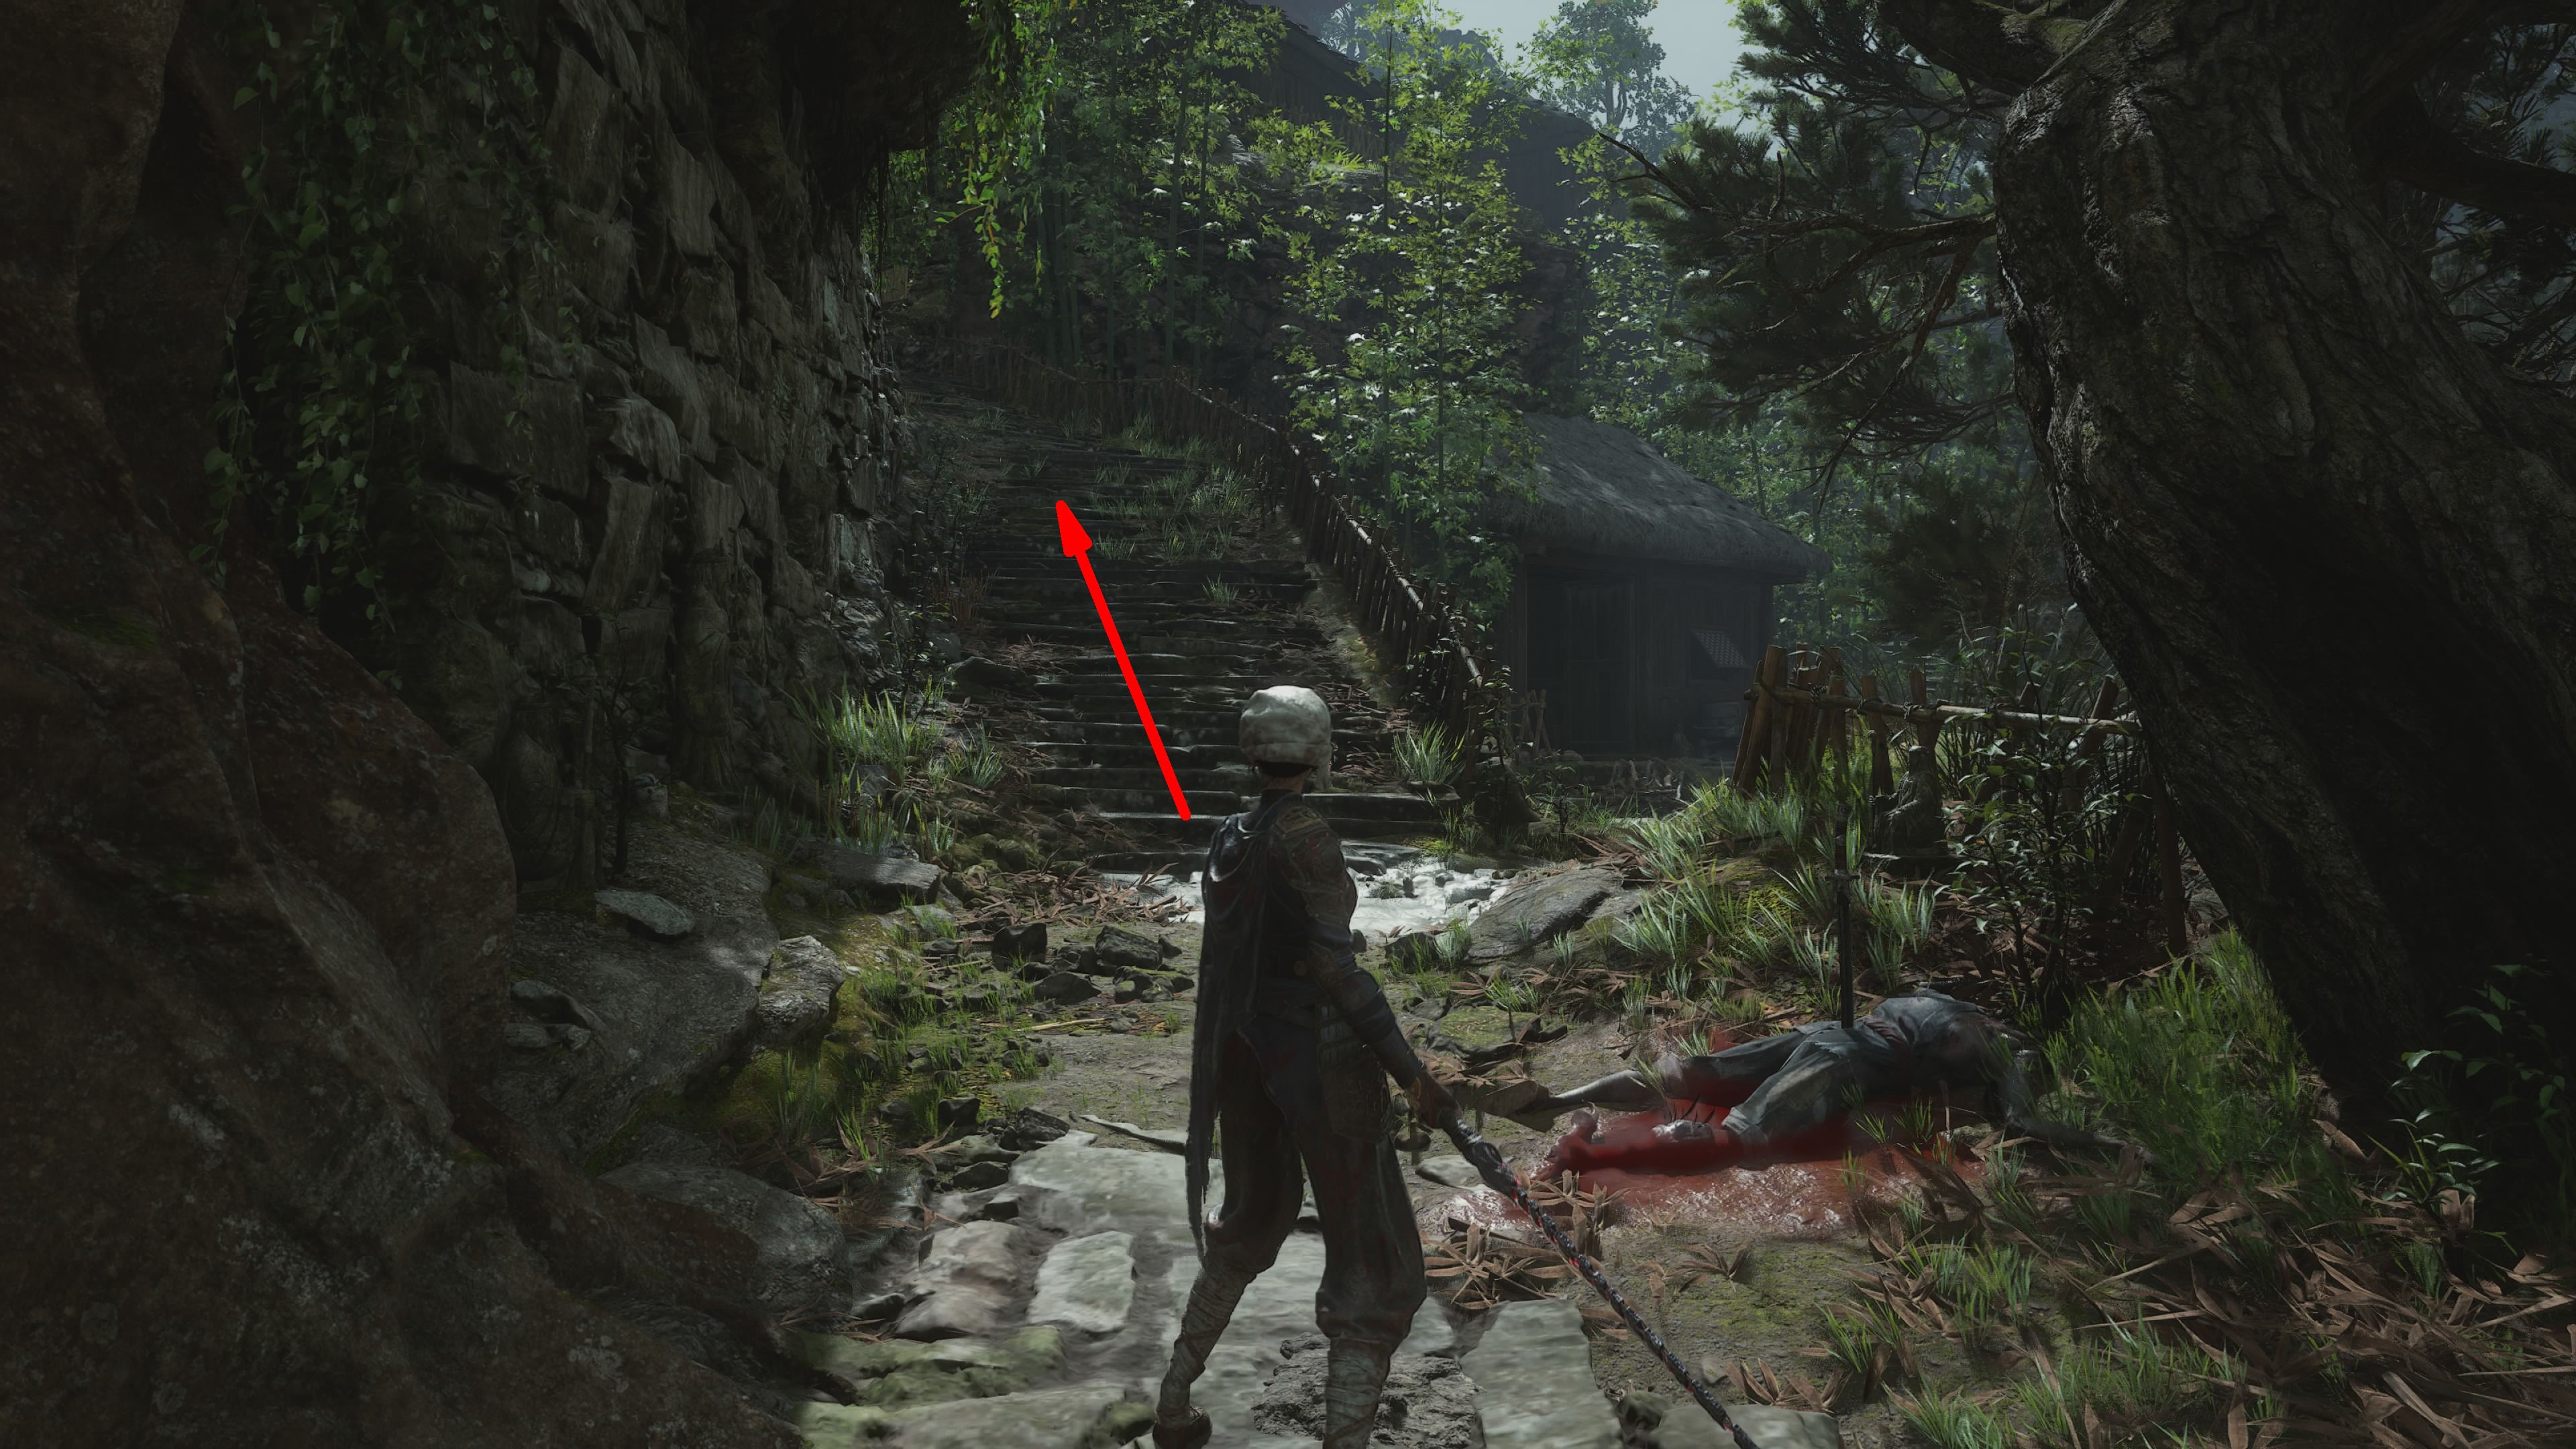
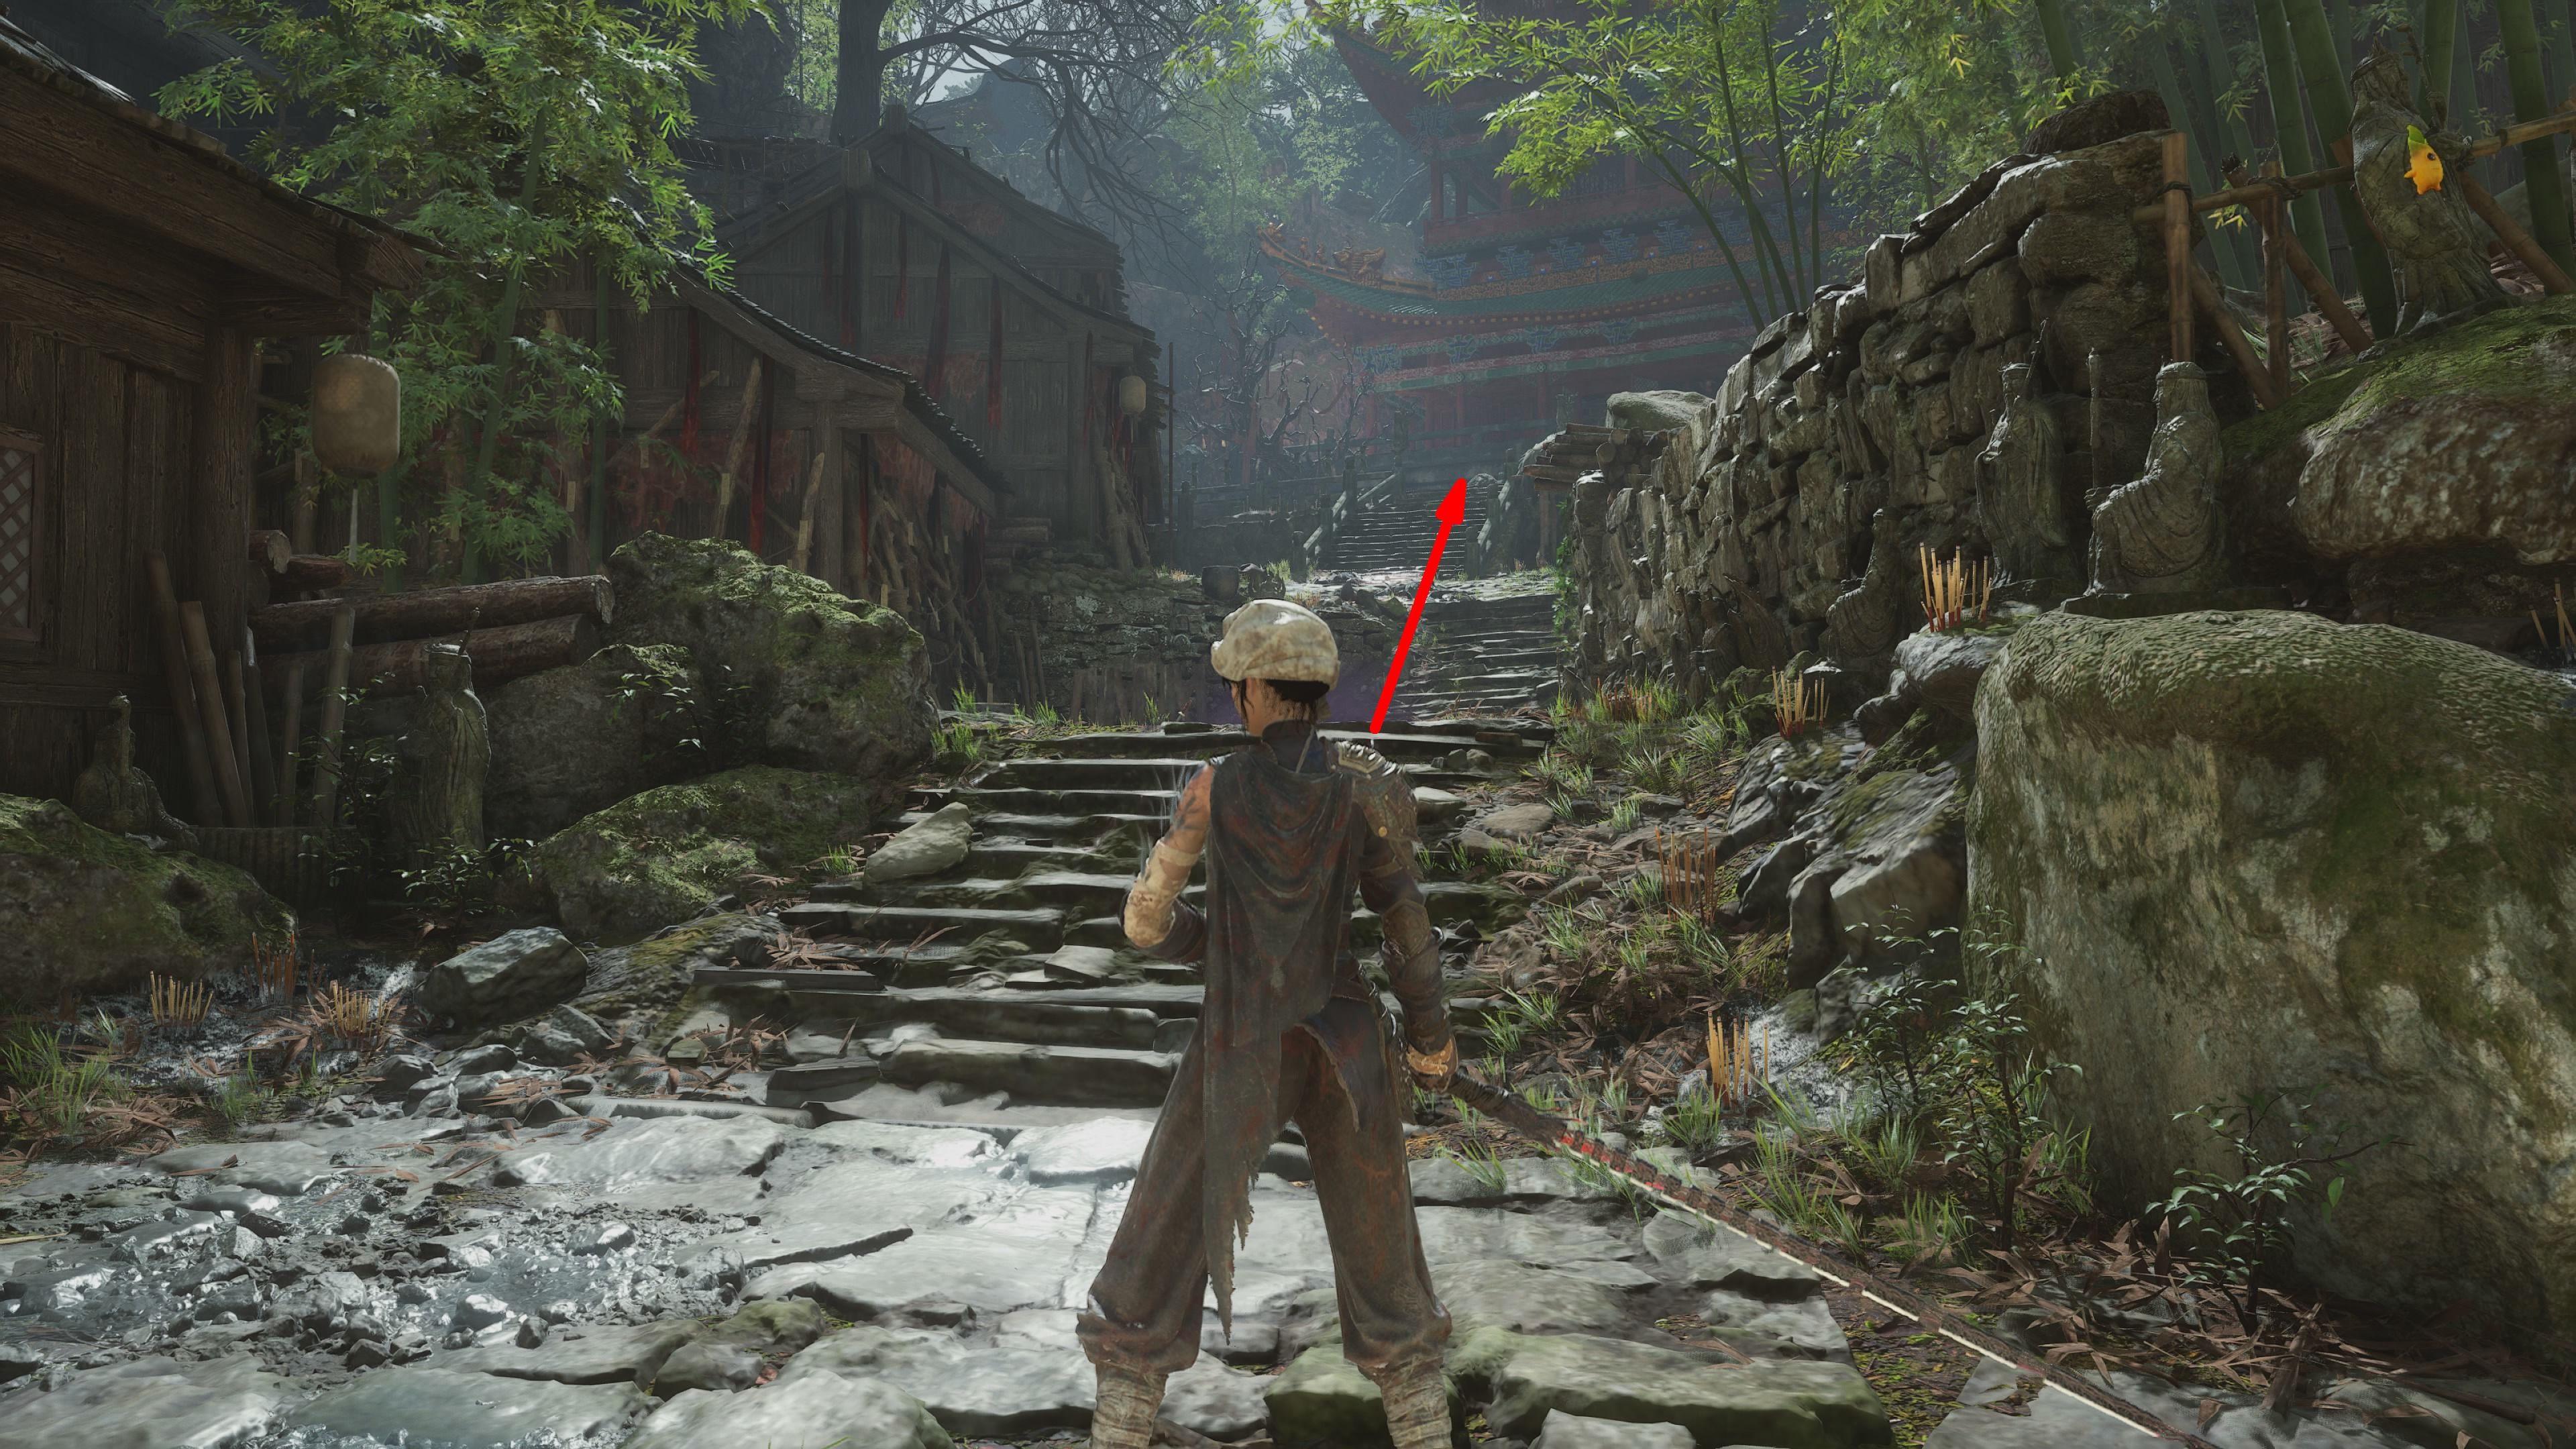
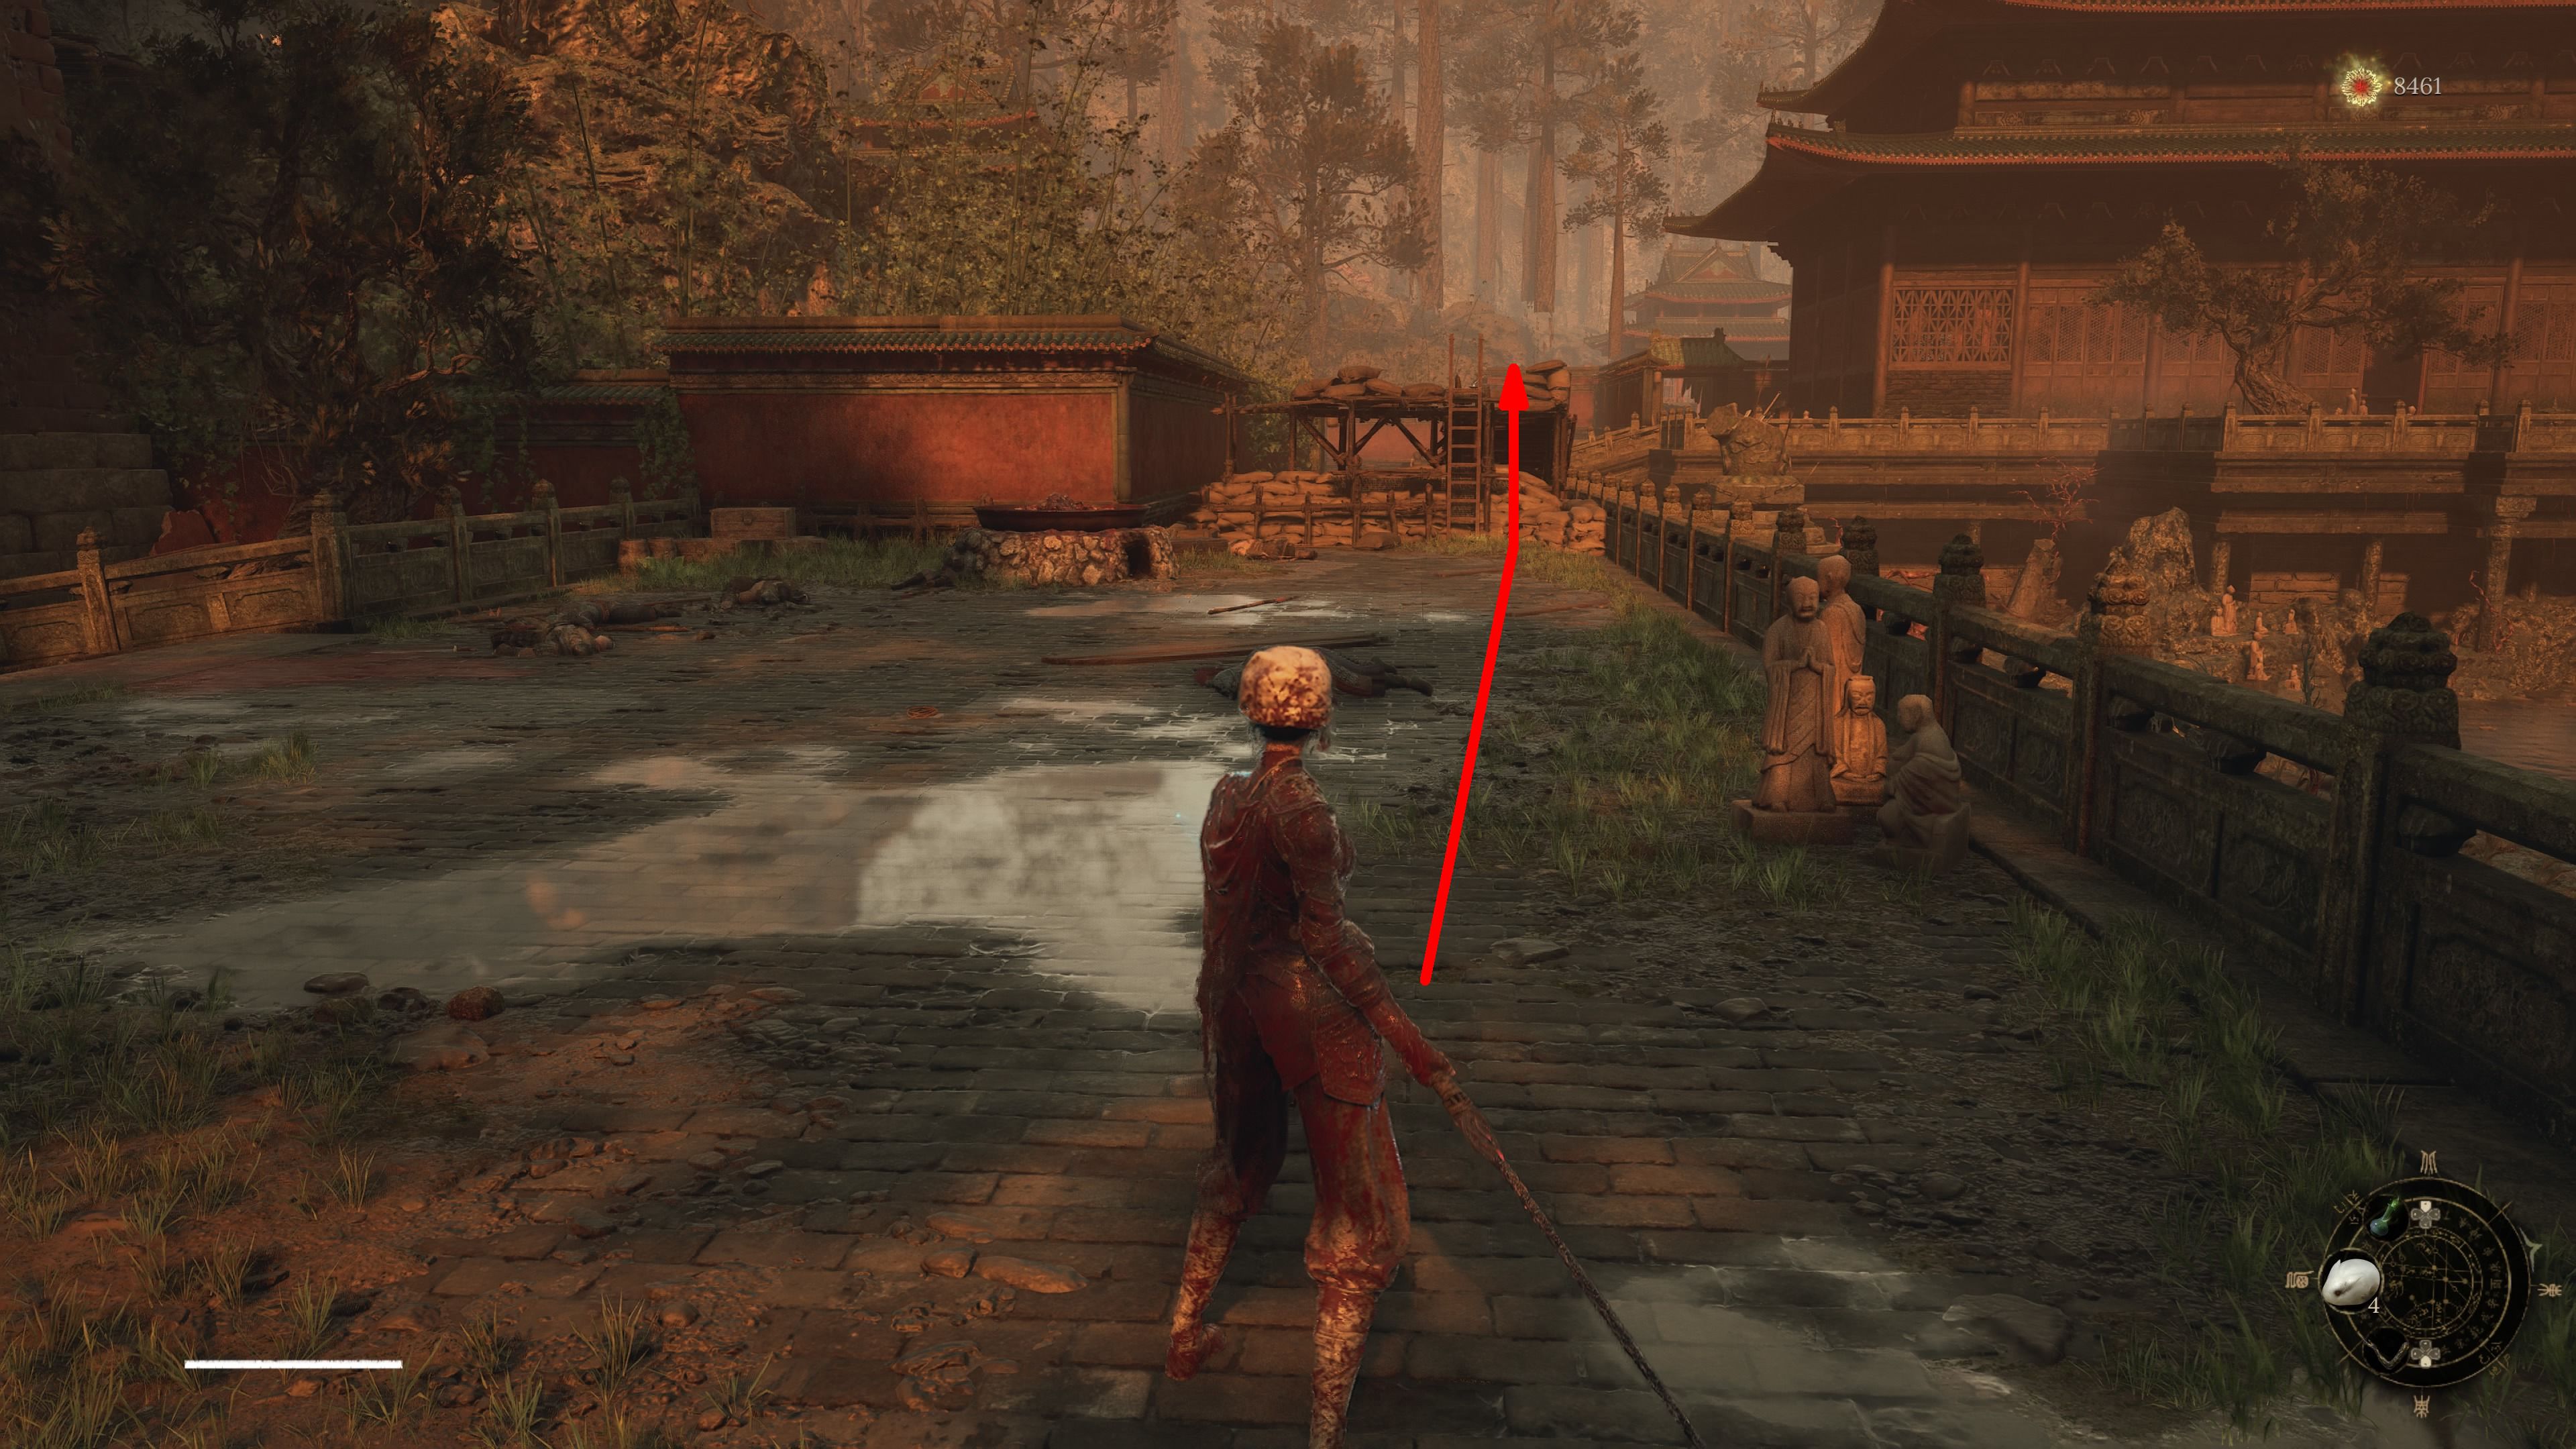
After going back to the Shrine, face away from it and walk across the courtyard to locate an open gate that can be accessed with the Lightzen Temple Key. Proceed through the gate, then cross a narrow pathway, and ascend the stairs when the path forks. Once you reach the top, move forward until you encounter a building; turn right and ascend the stairs to enter Shu Sanctum. The Shrine within Shu Sanctum is located on the ground floor.
Annalum
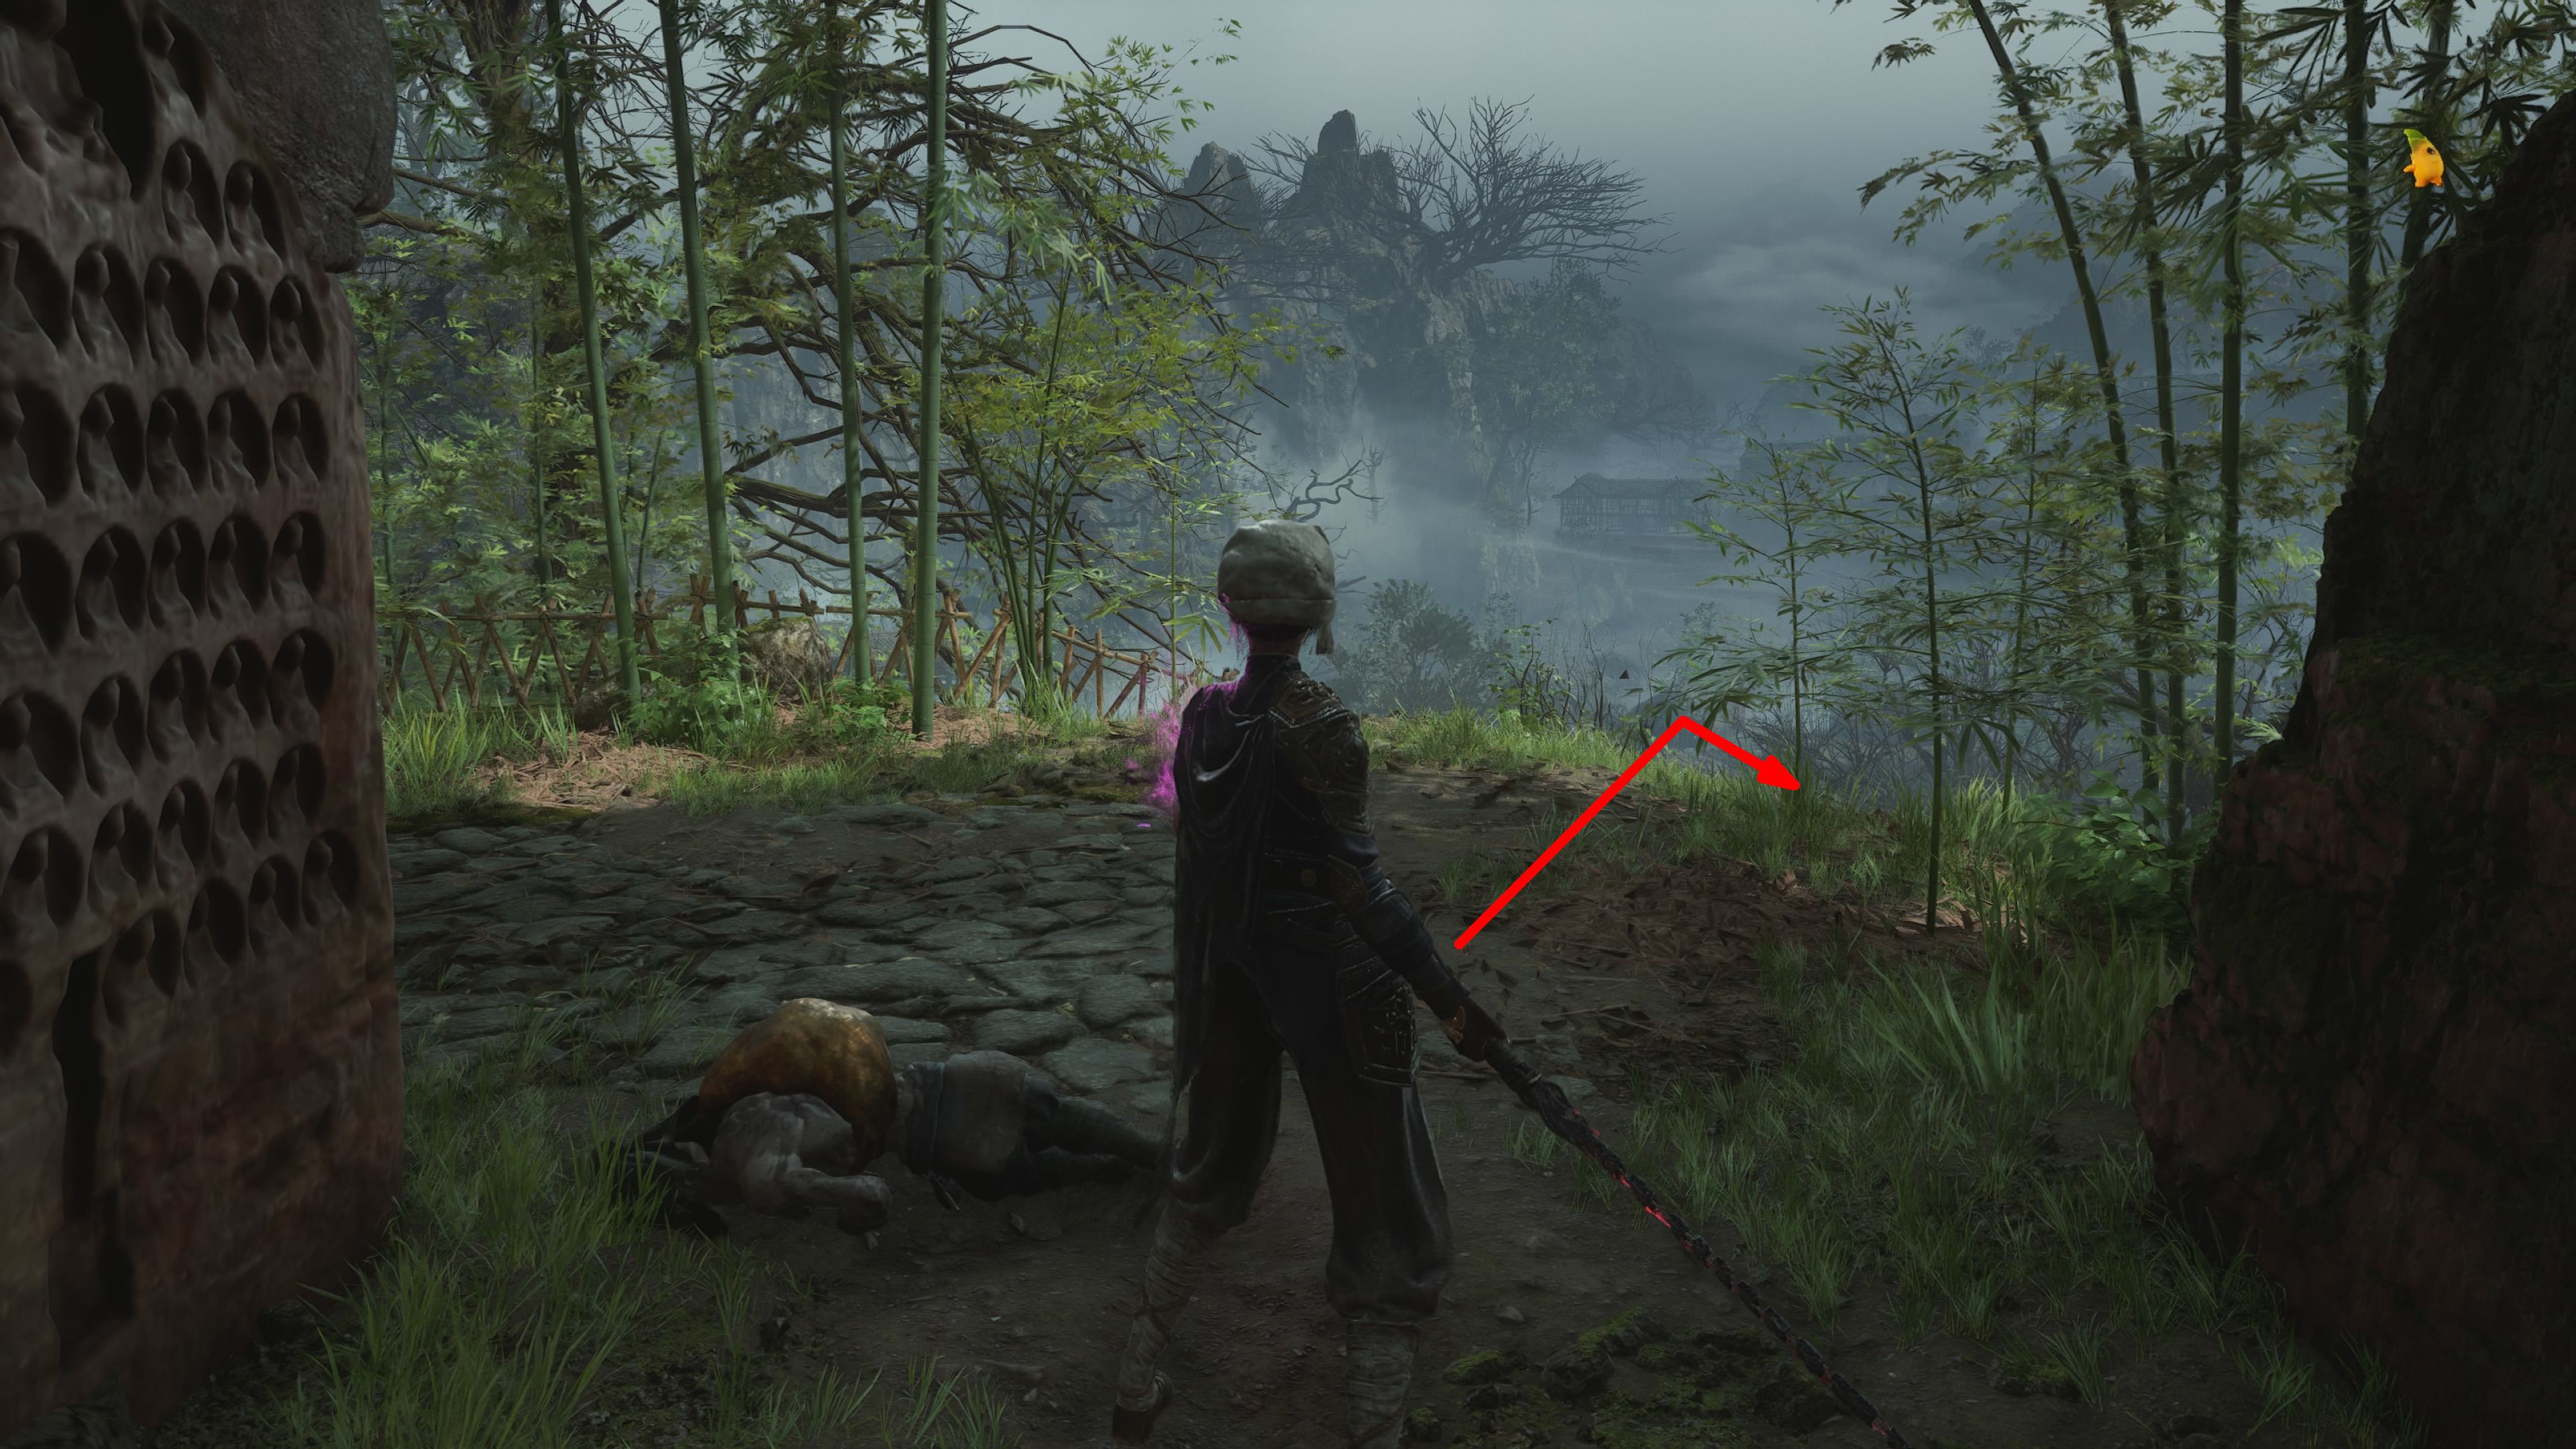
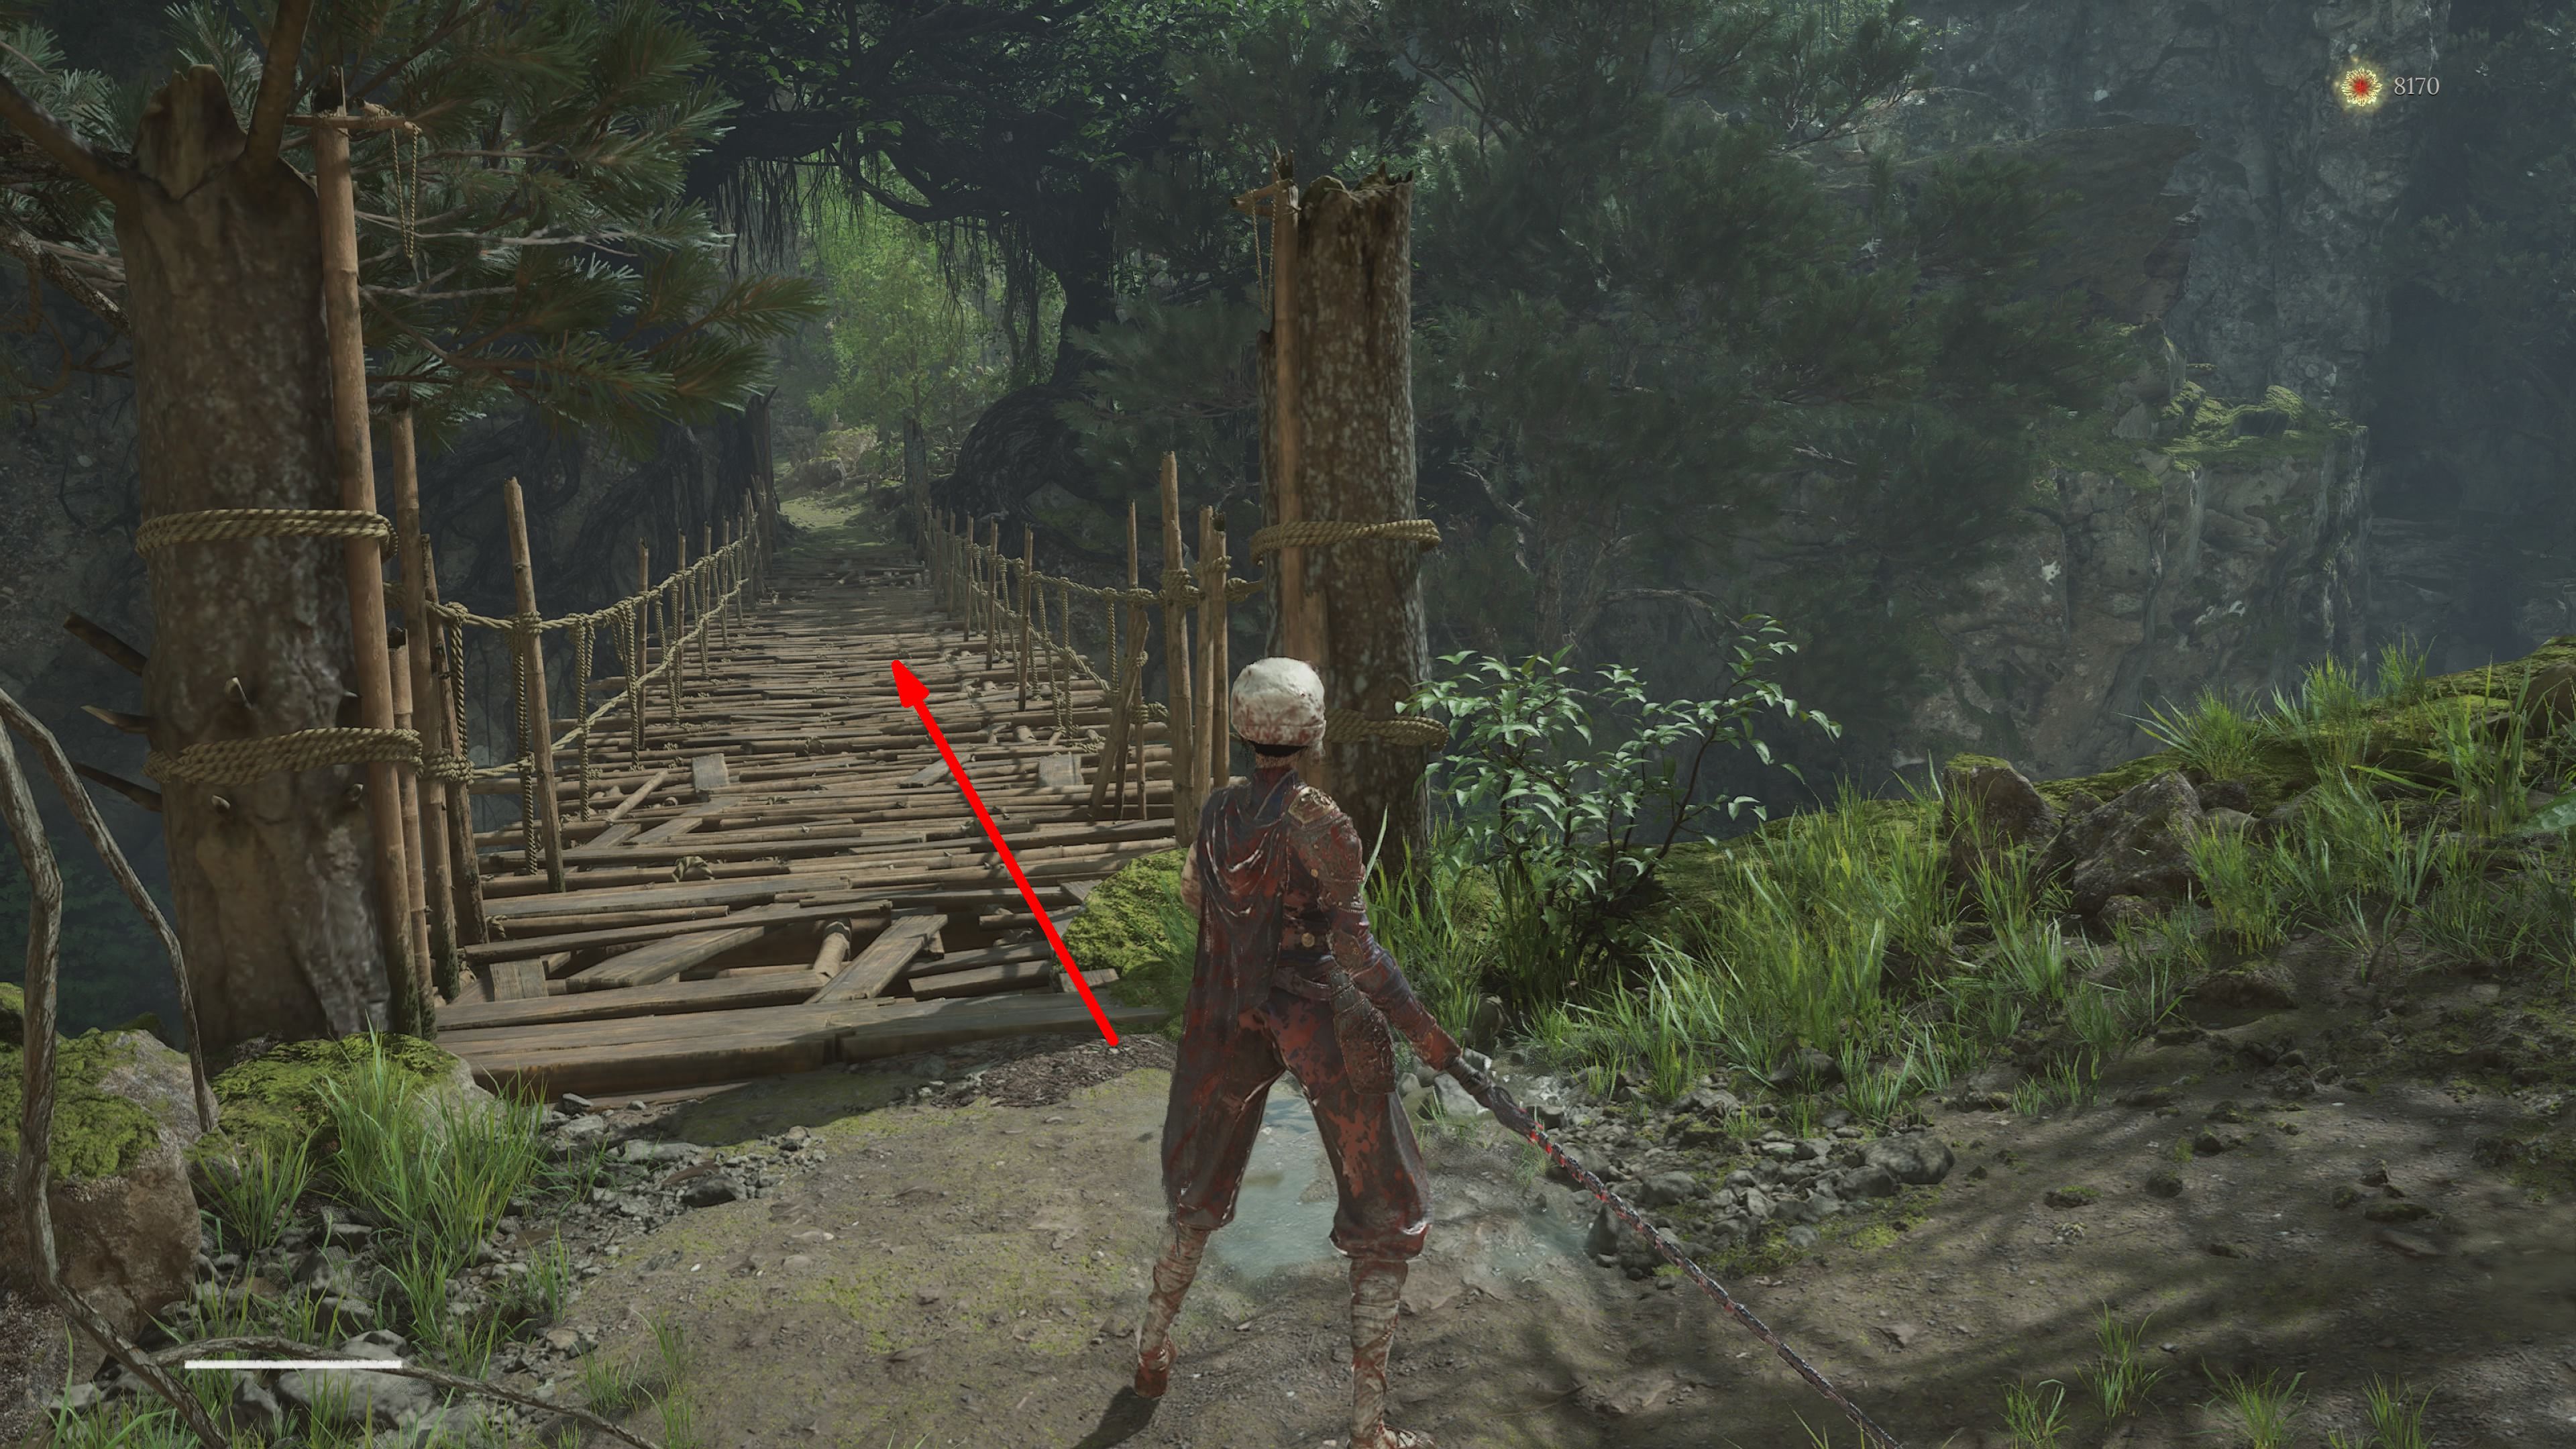
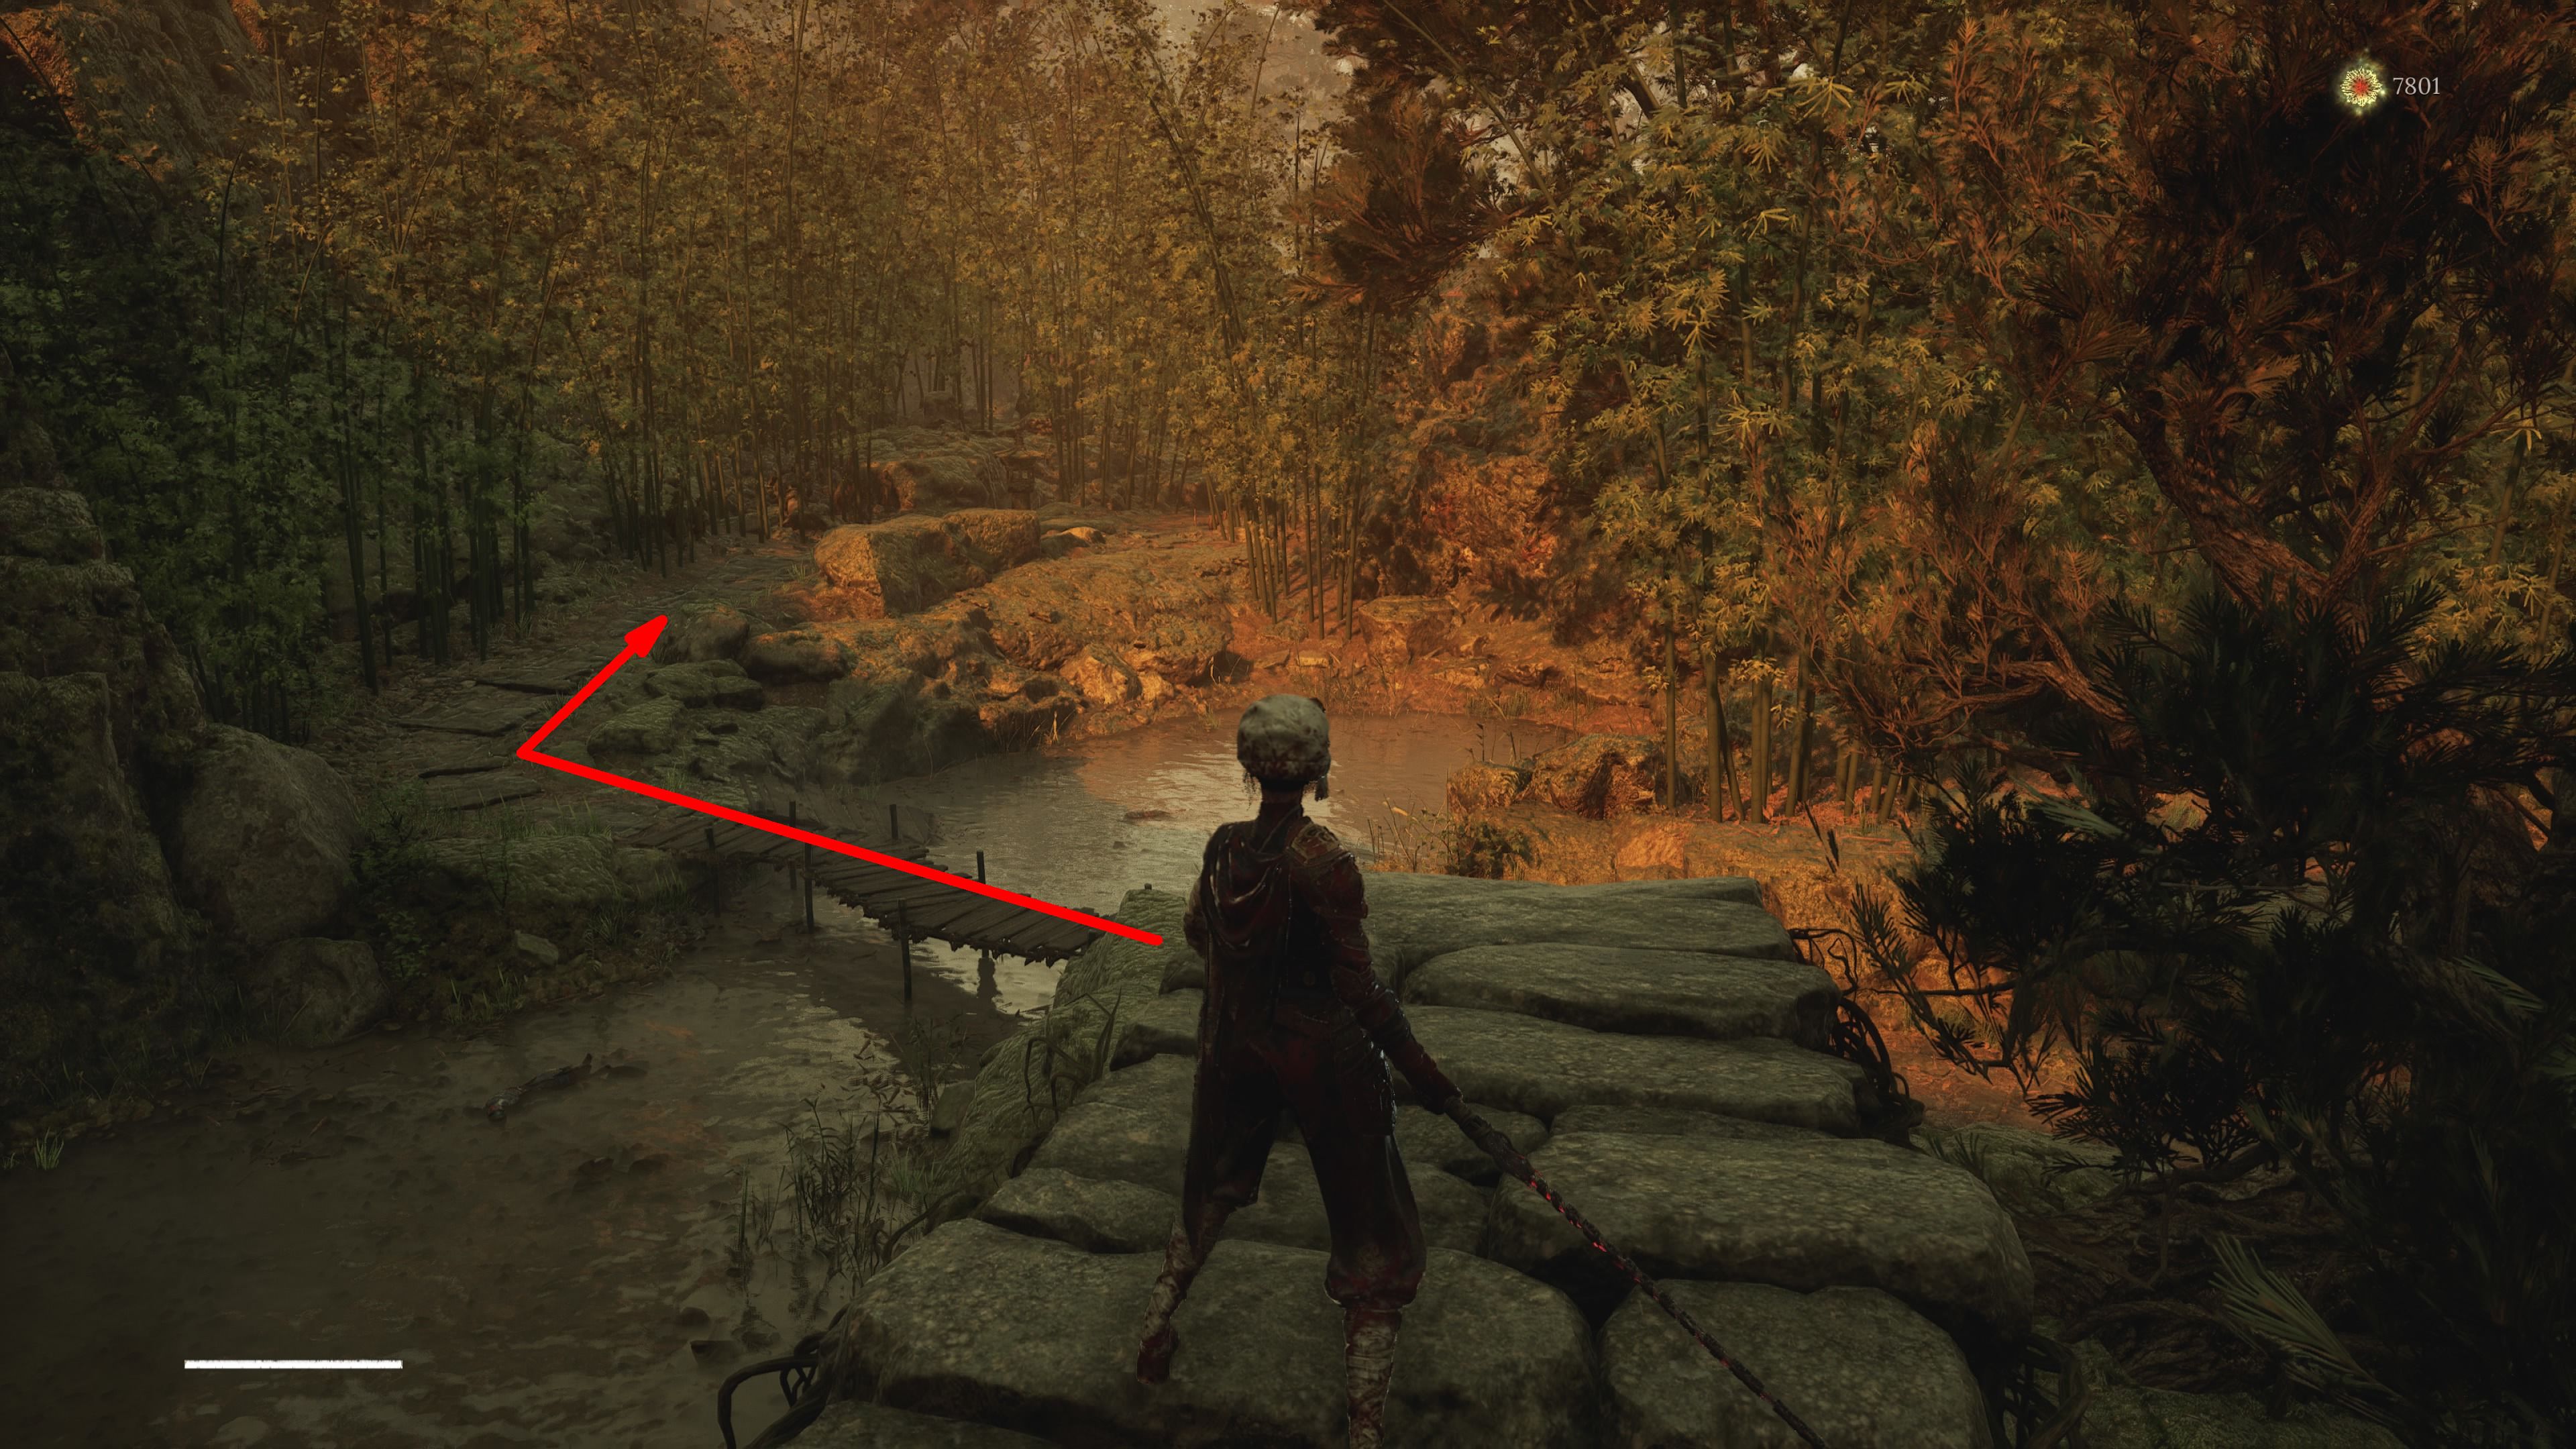
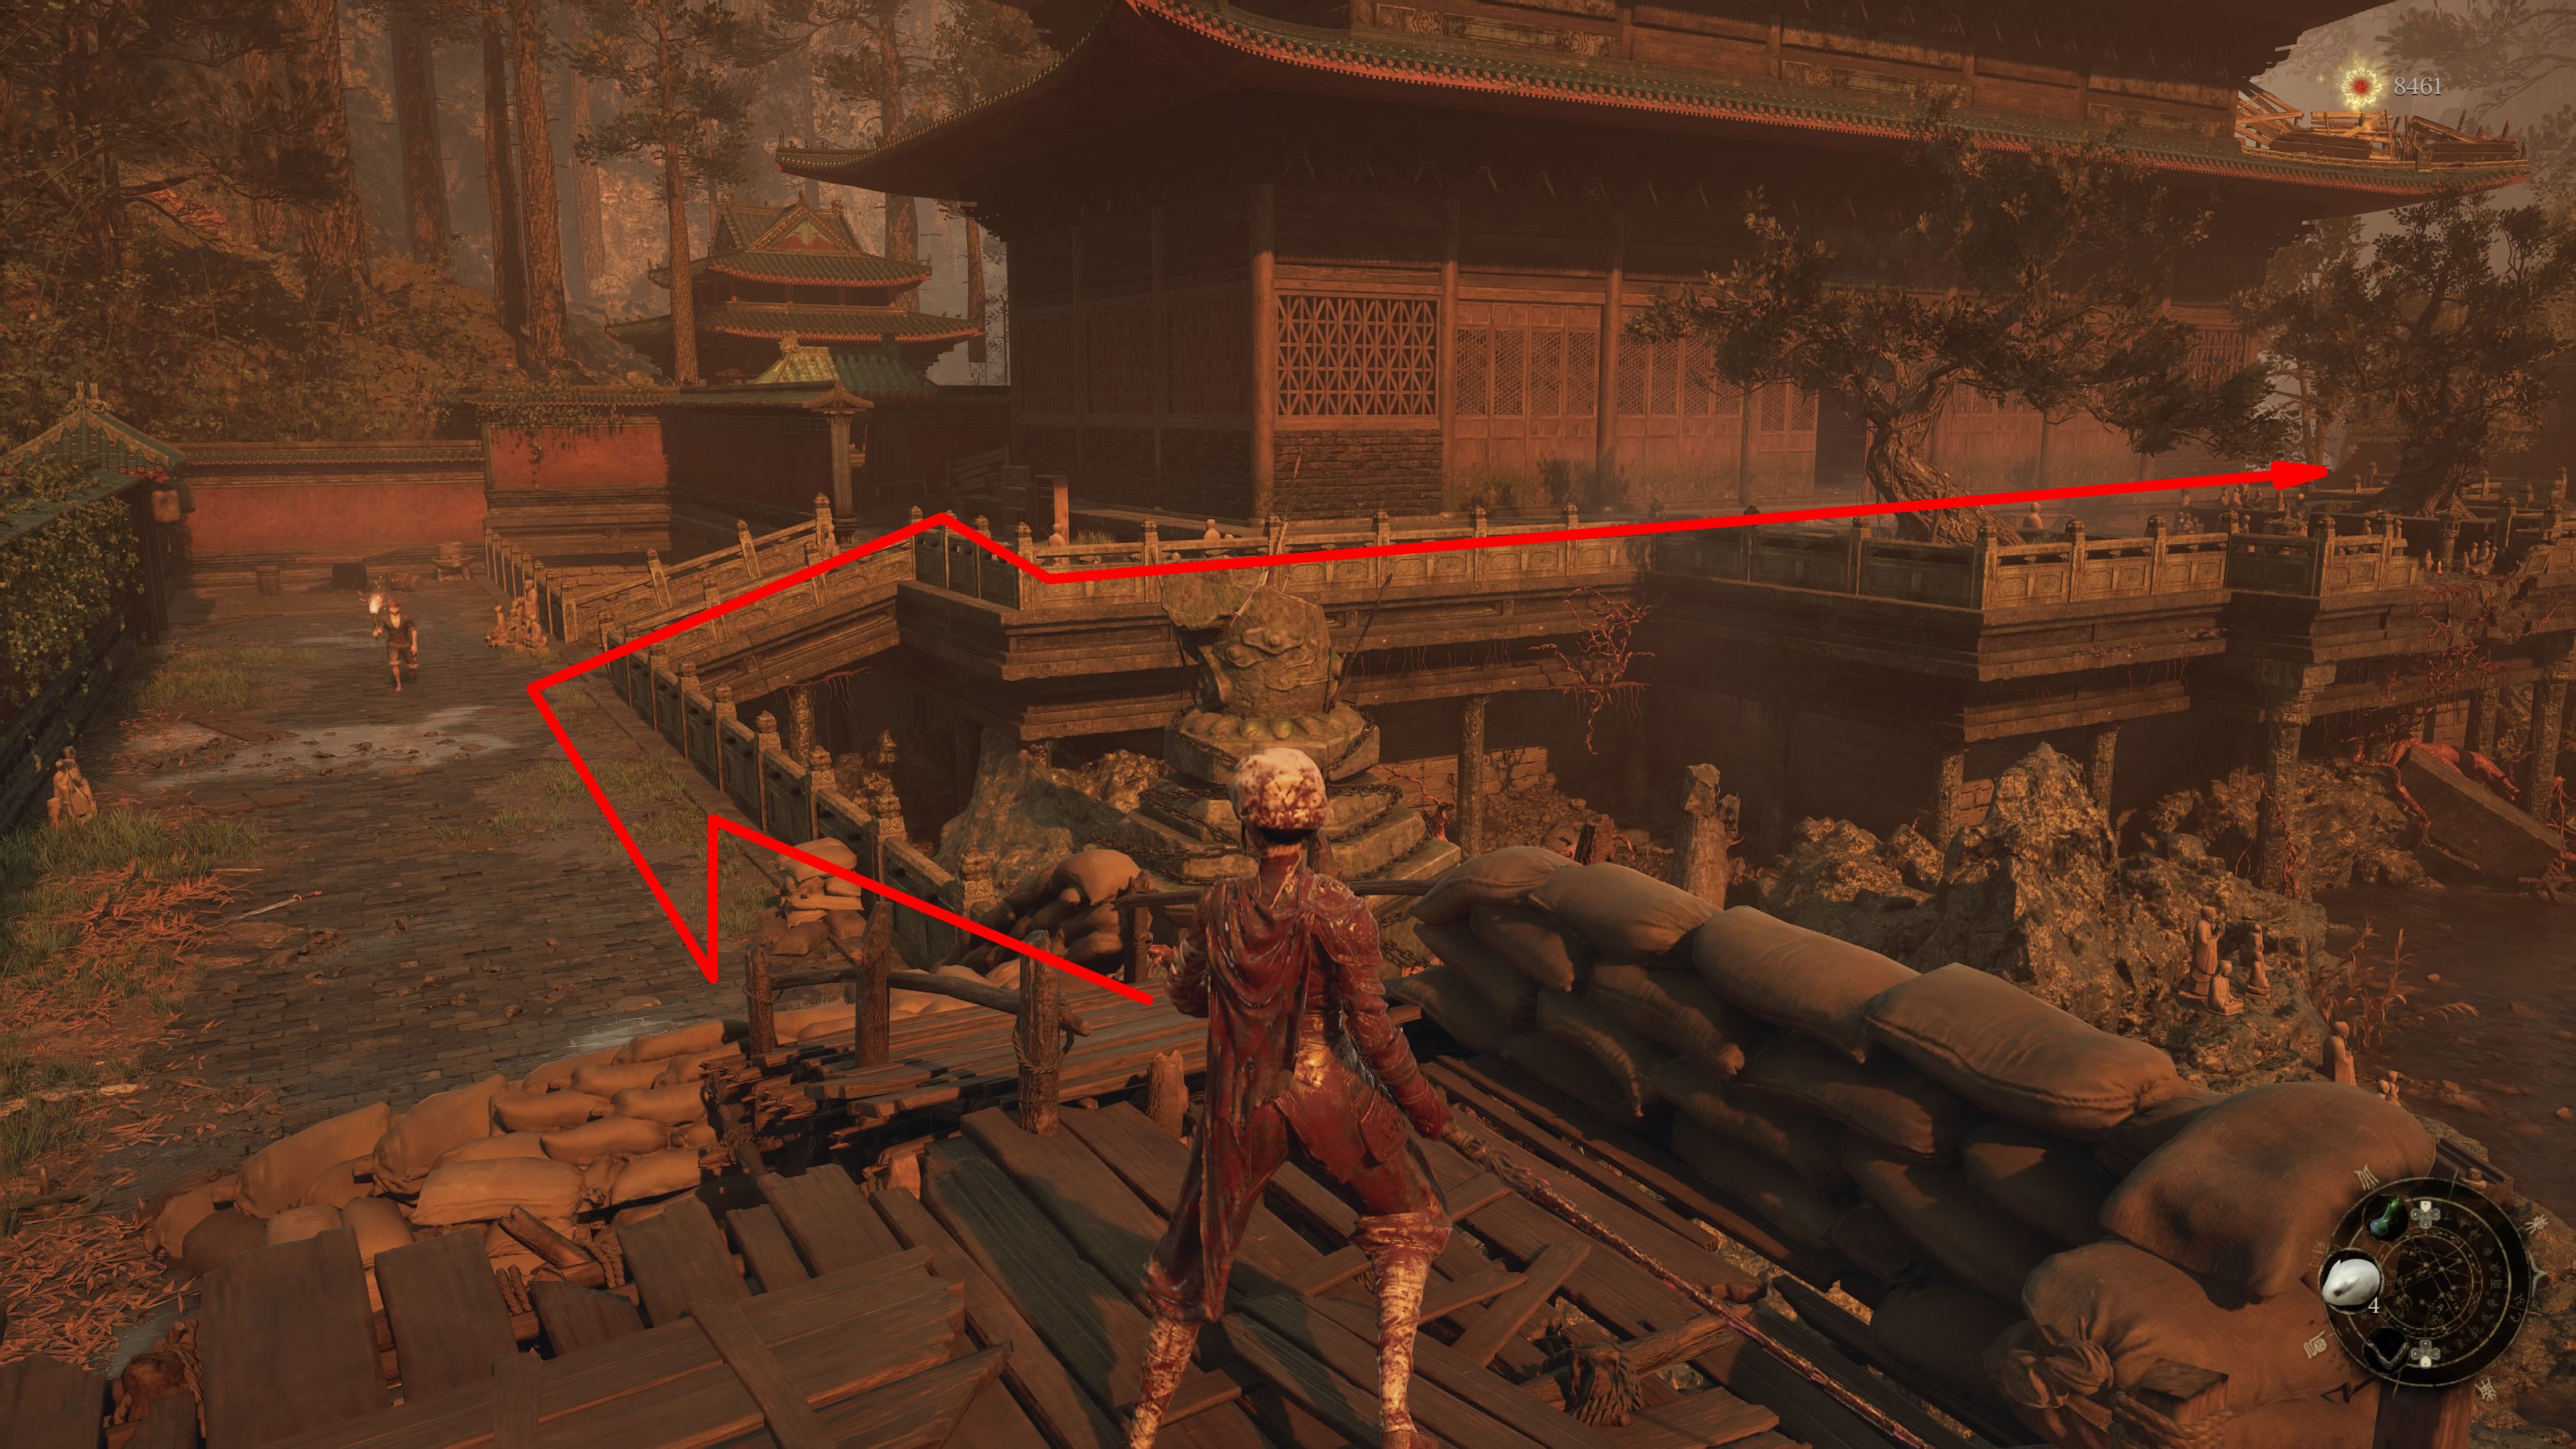
As I step out of Shu Sanctum, I retrace my steps through the entrance door. I’m keeping a keen eye on the right side as I carefully make my way down the stairs. There seems to be a damaged-looking bridge on that side, but don’t let appearances fool you – it’s safe to walk across. Once I’ve crossed, I veer left and follow the path ahead. At the fork up ahead, I’ll go right to continue my journey.
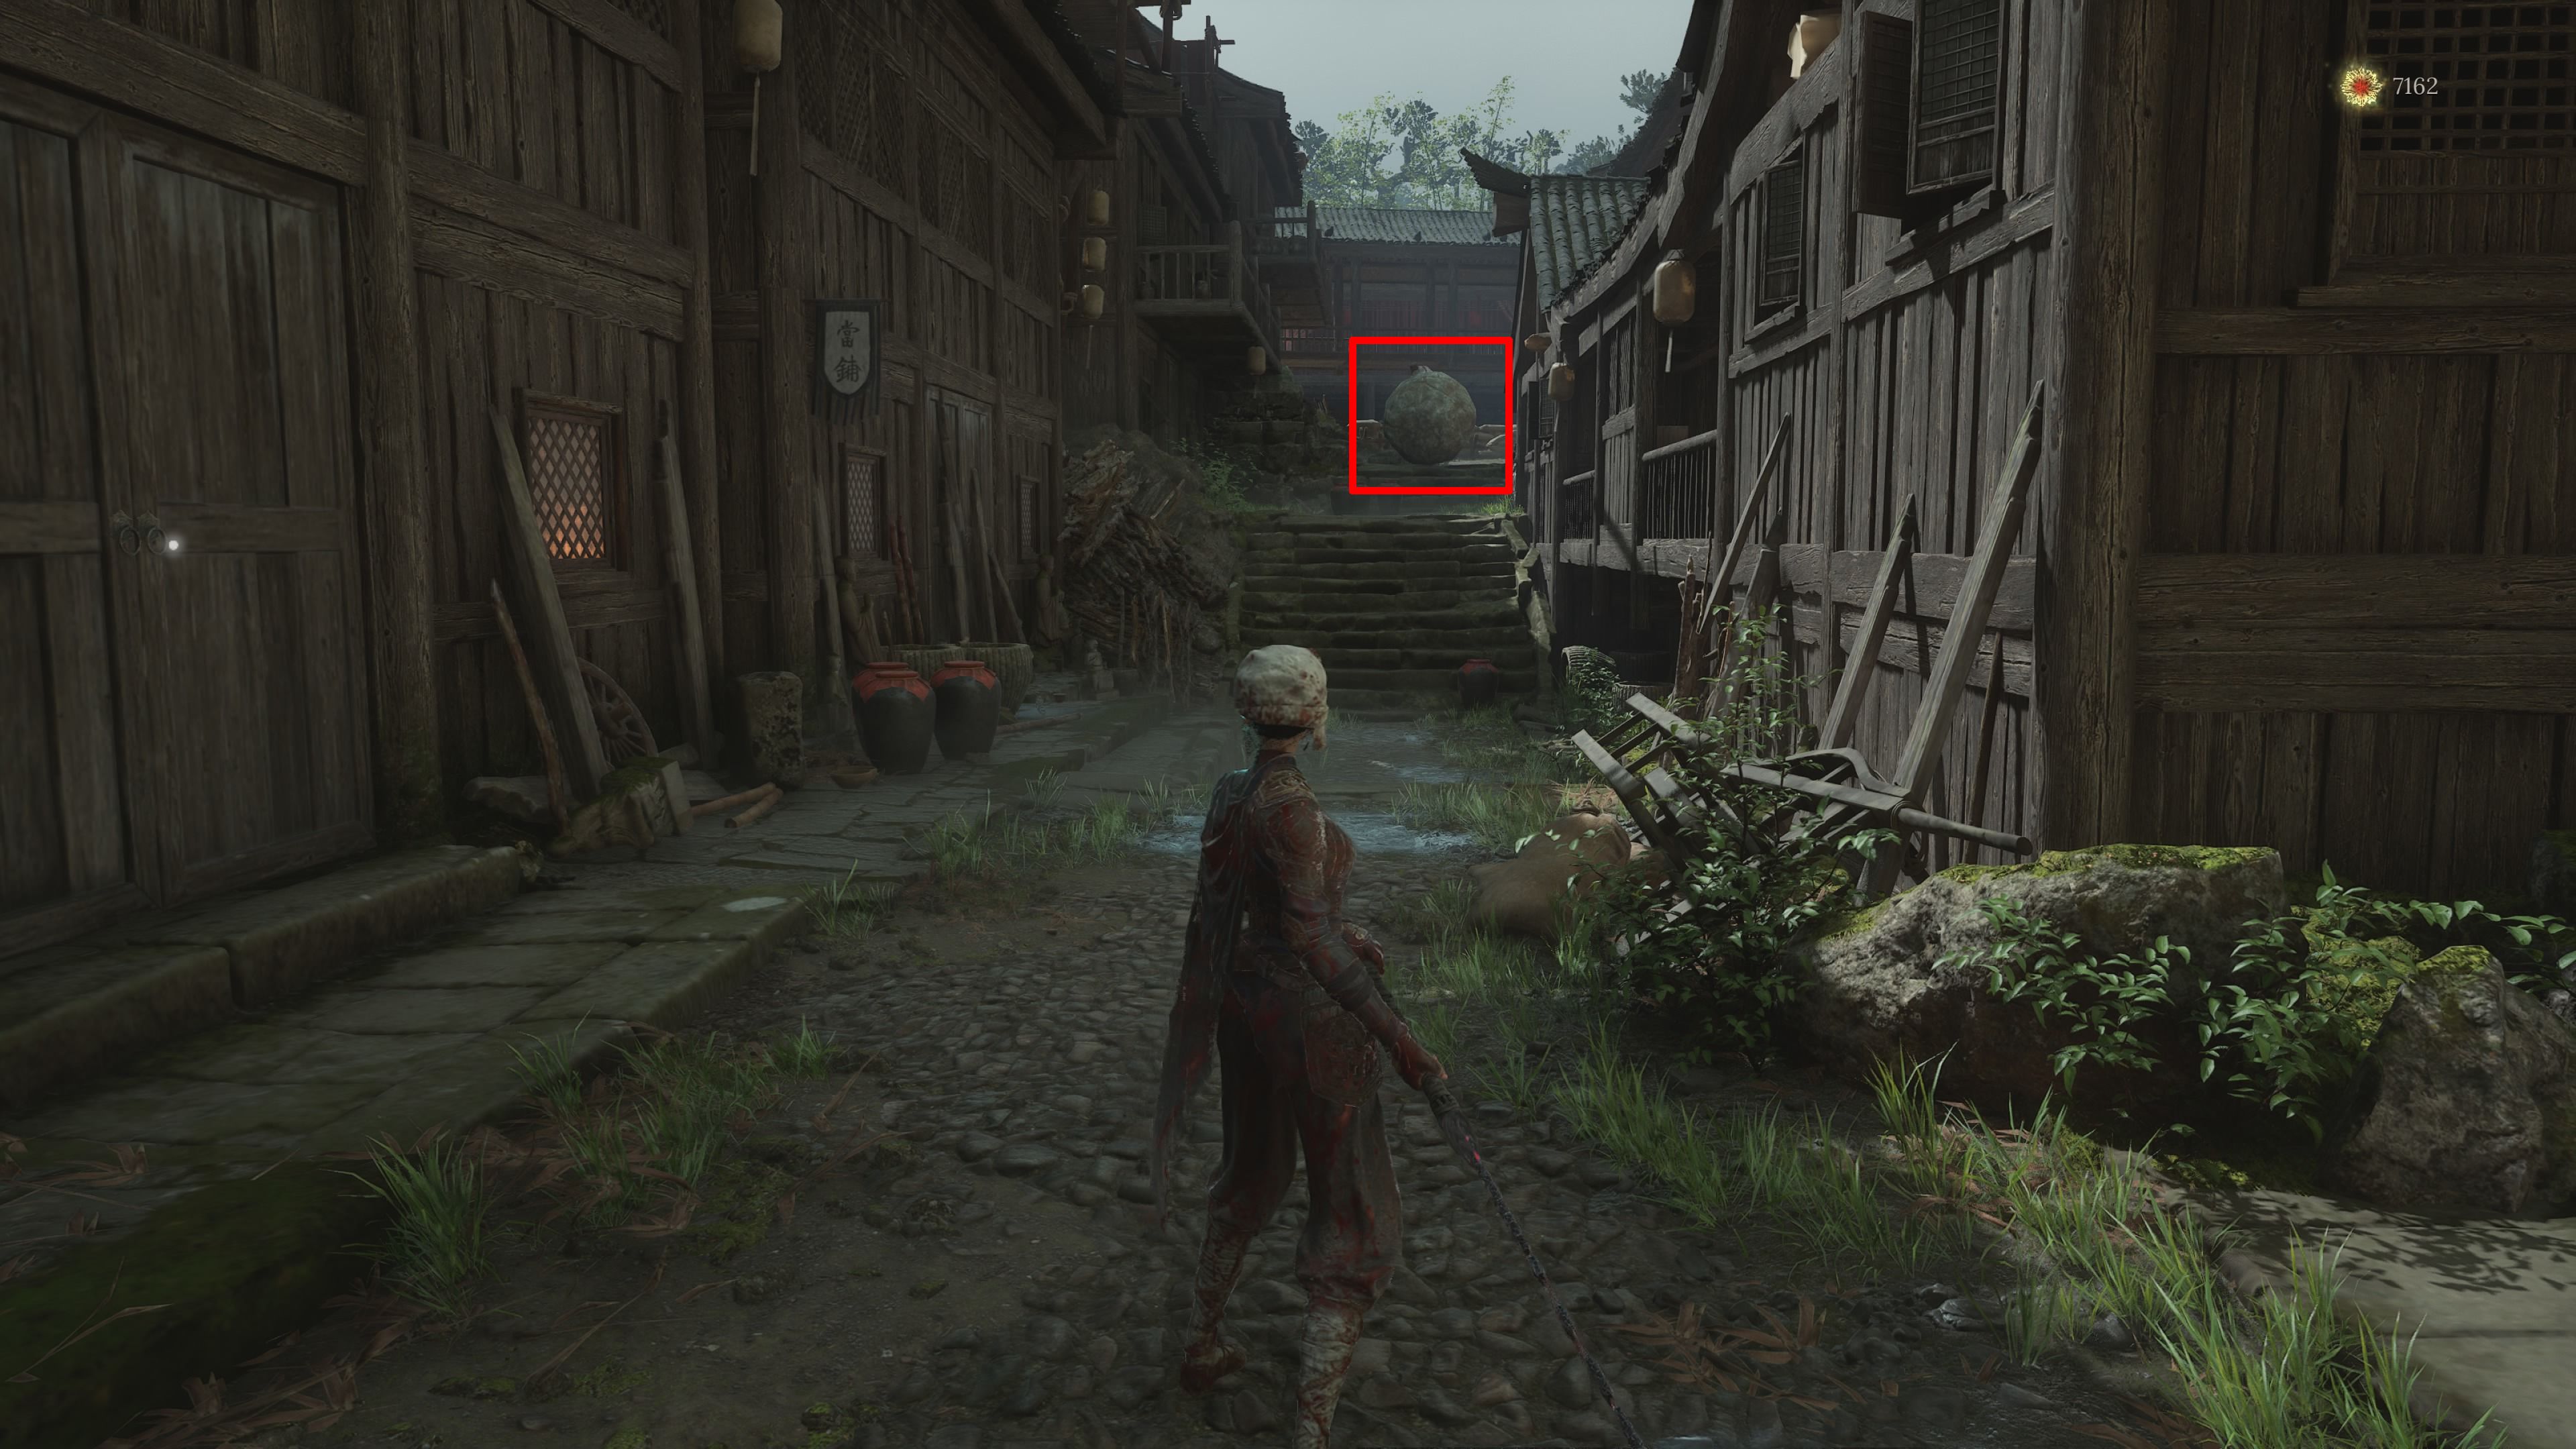
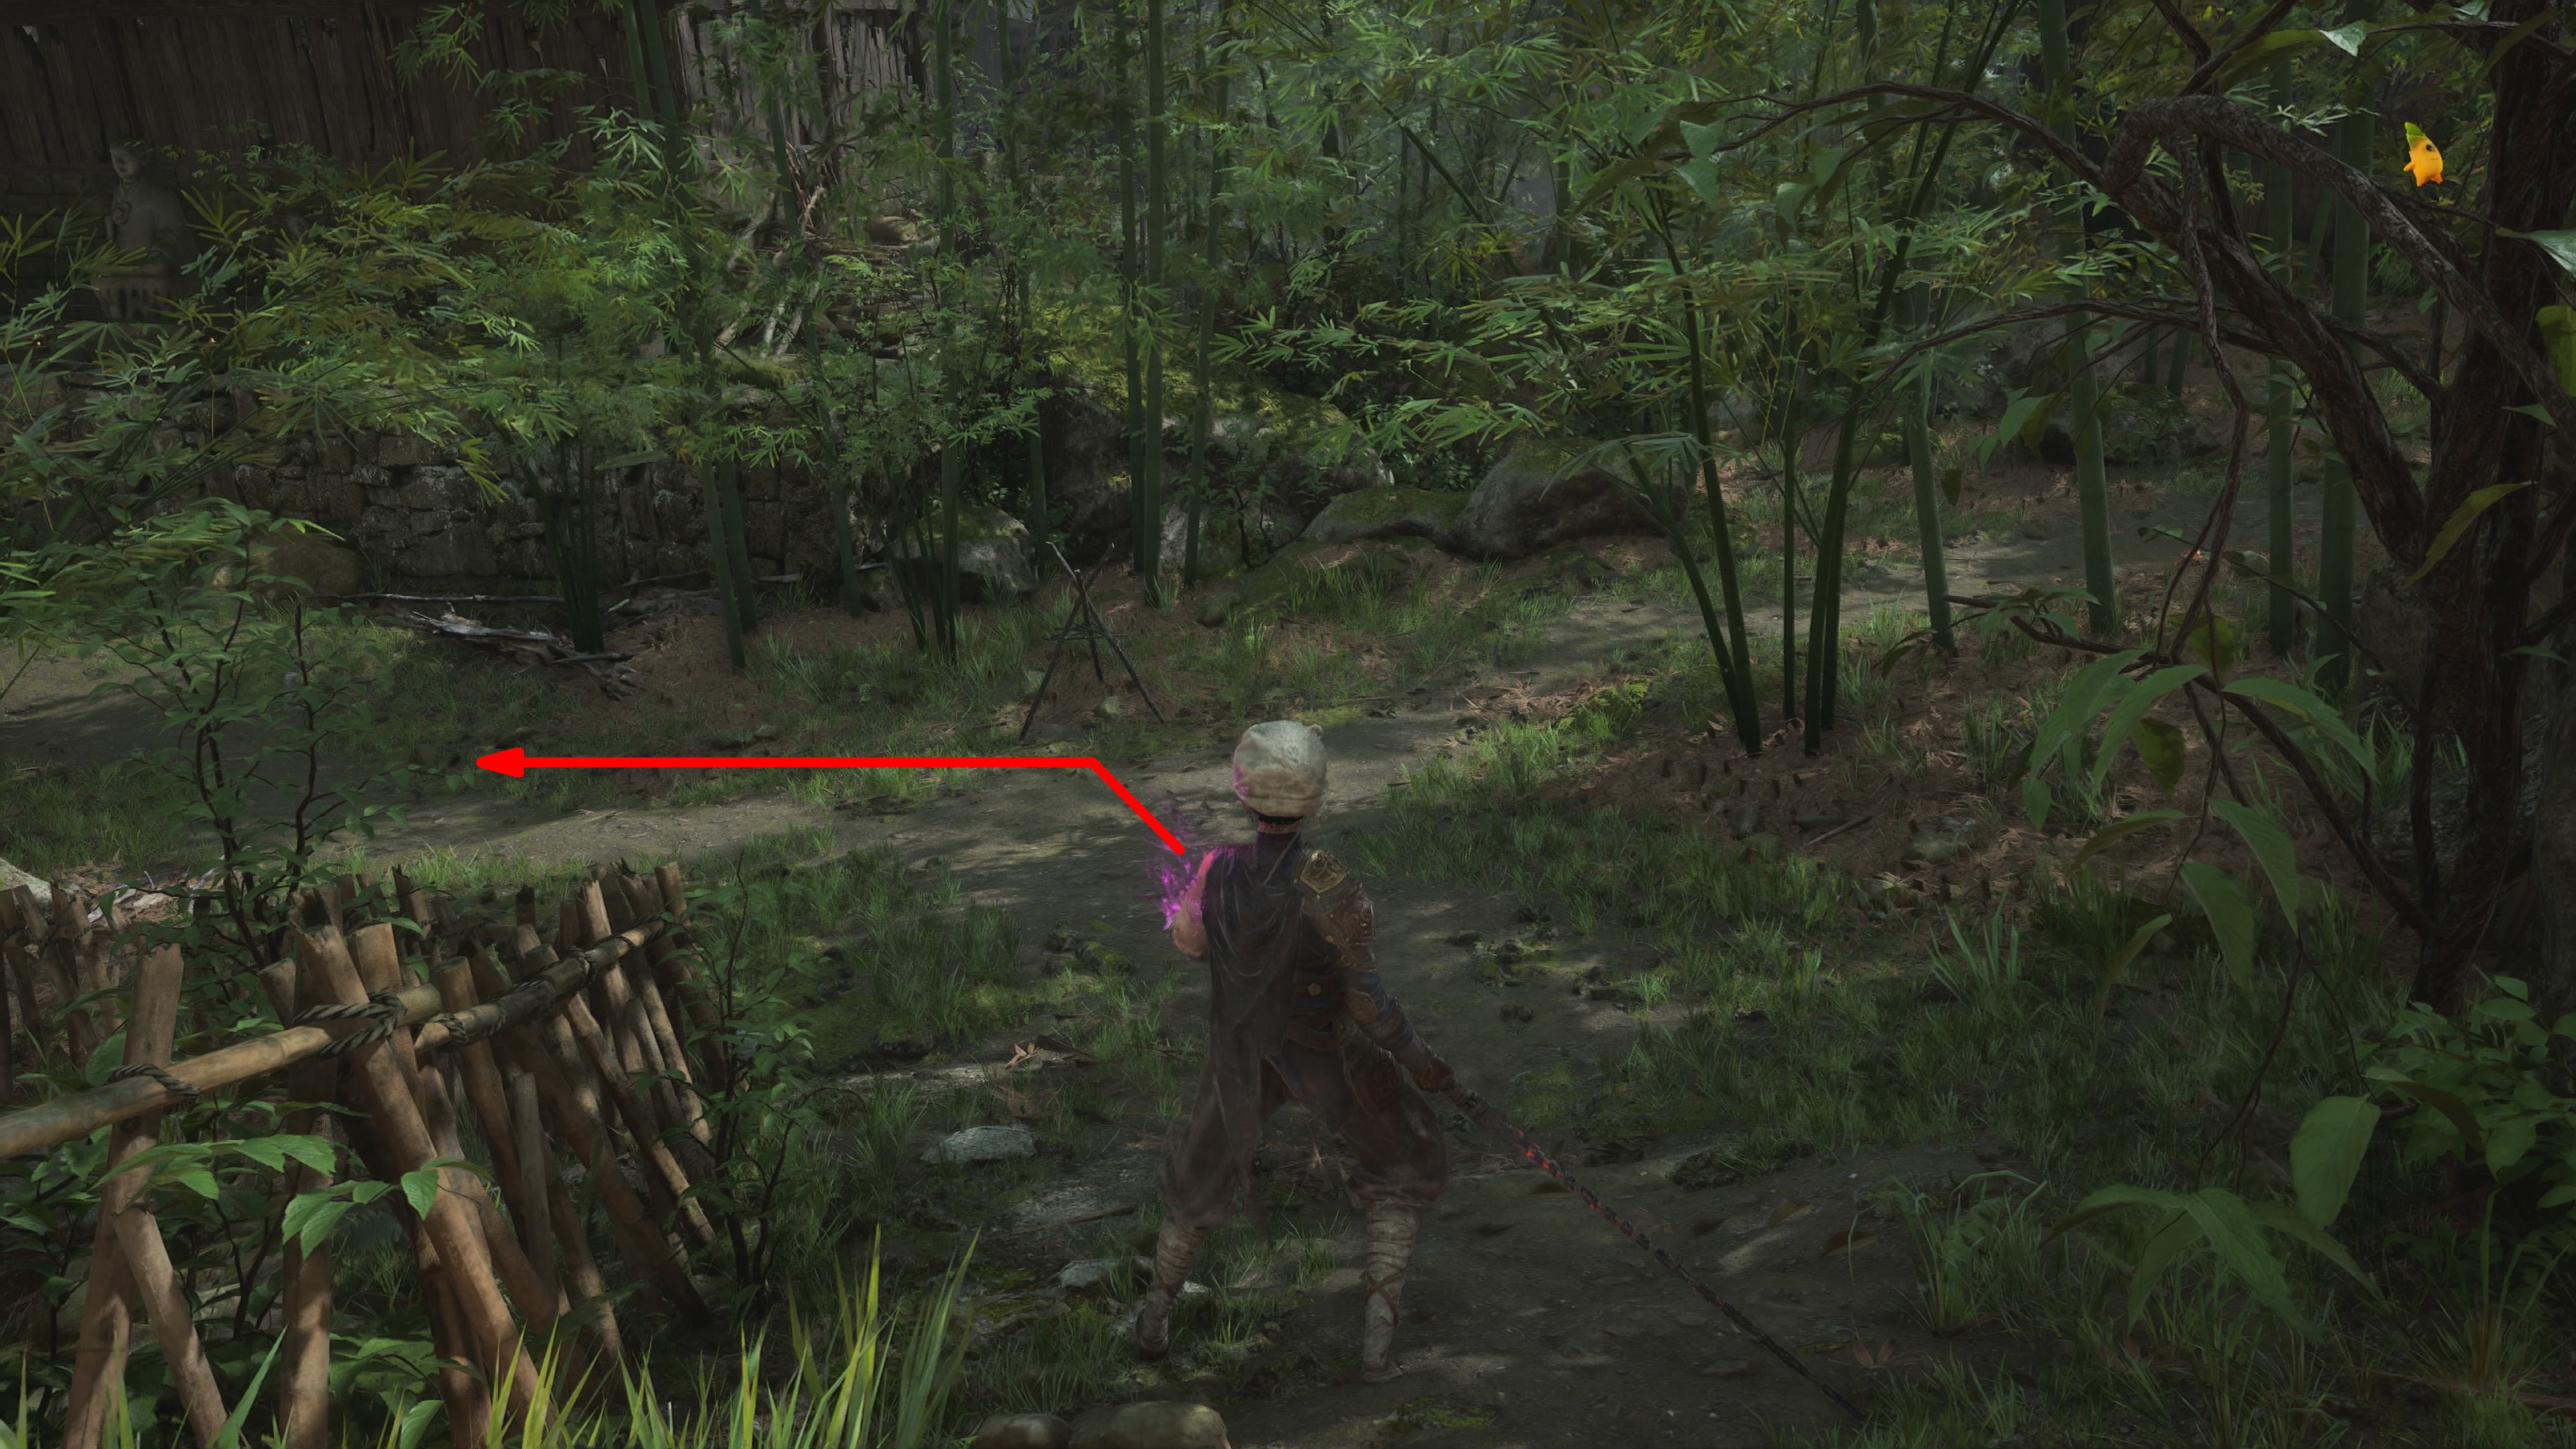
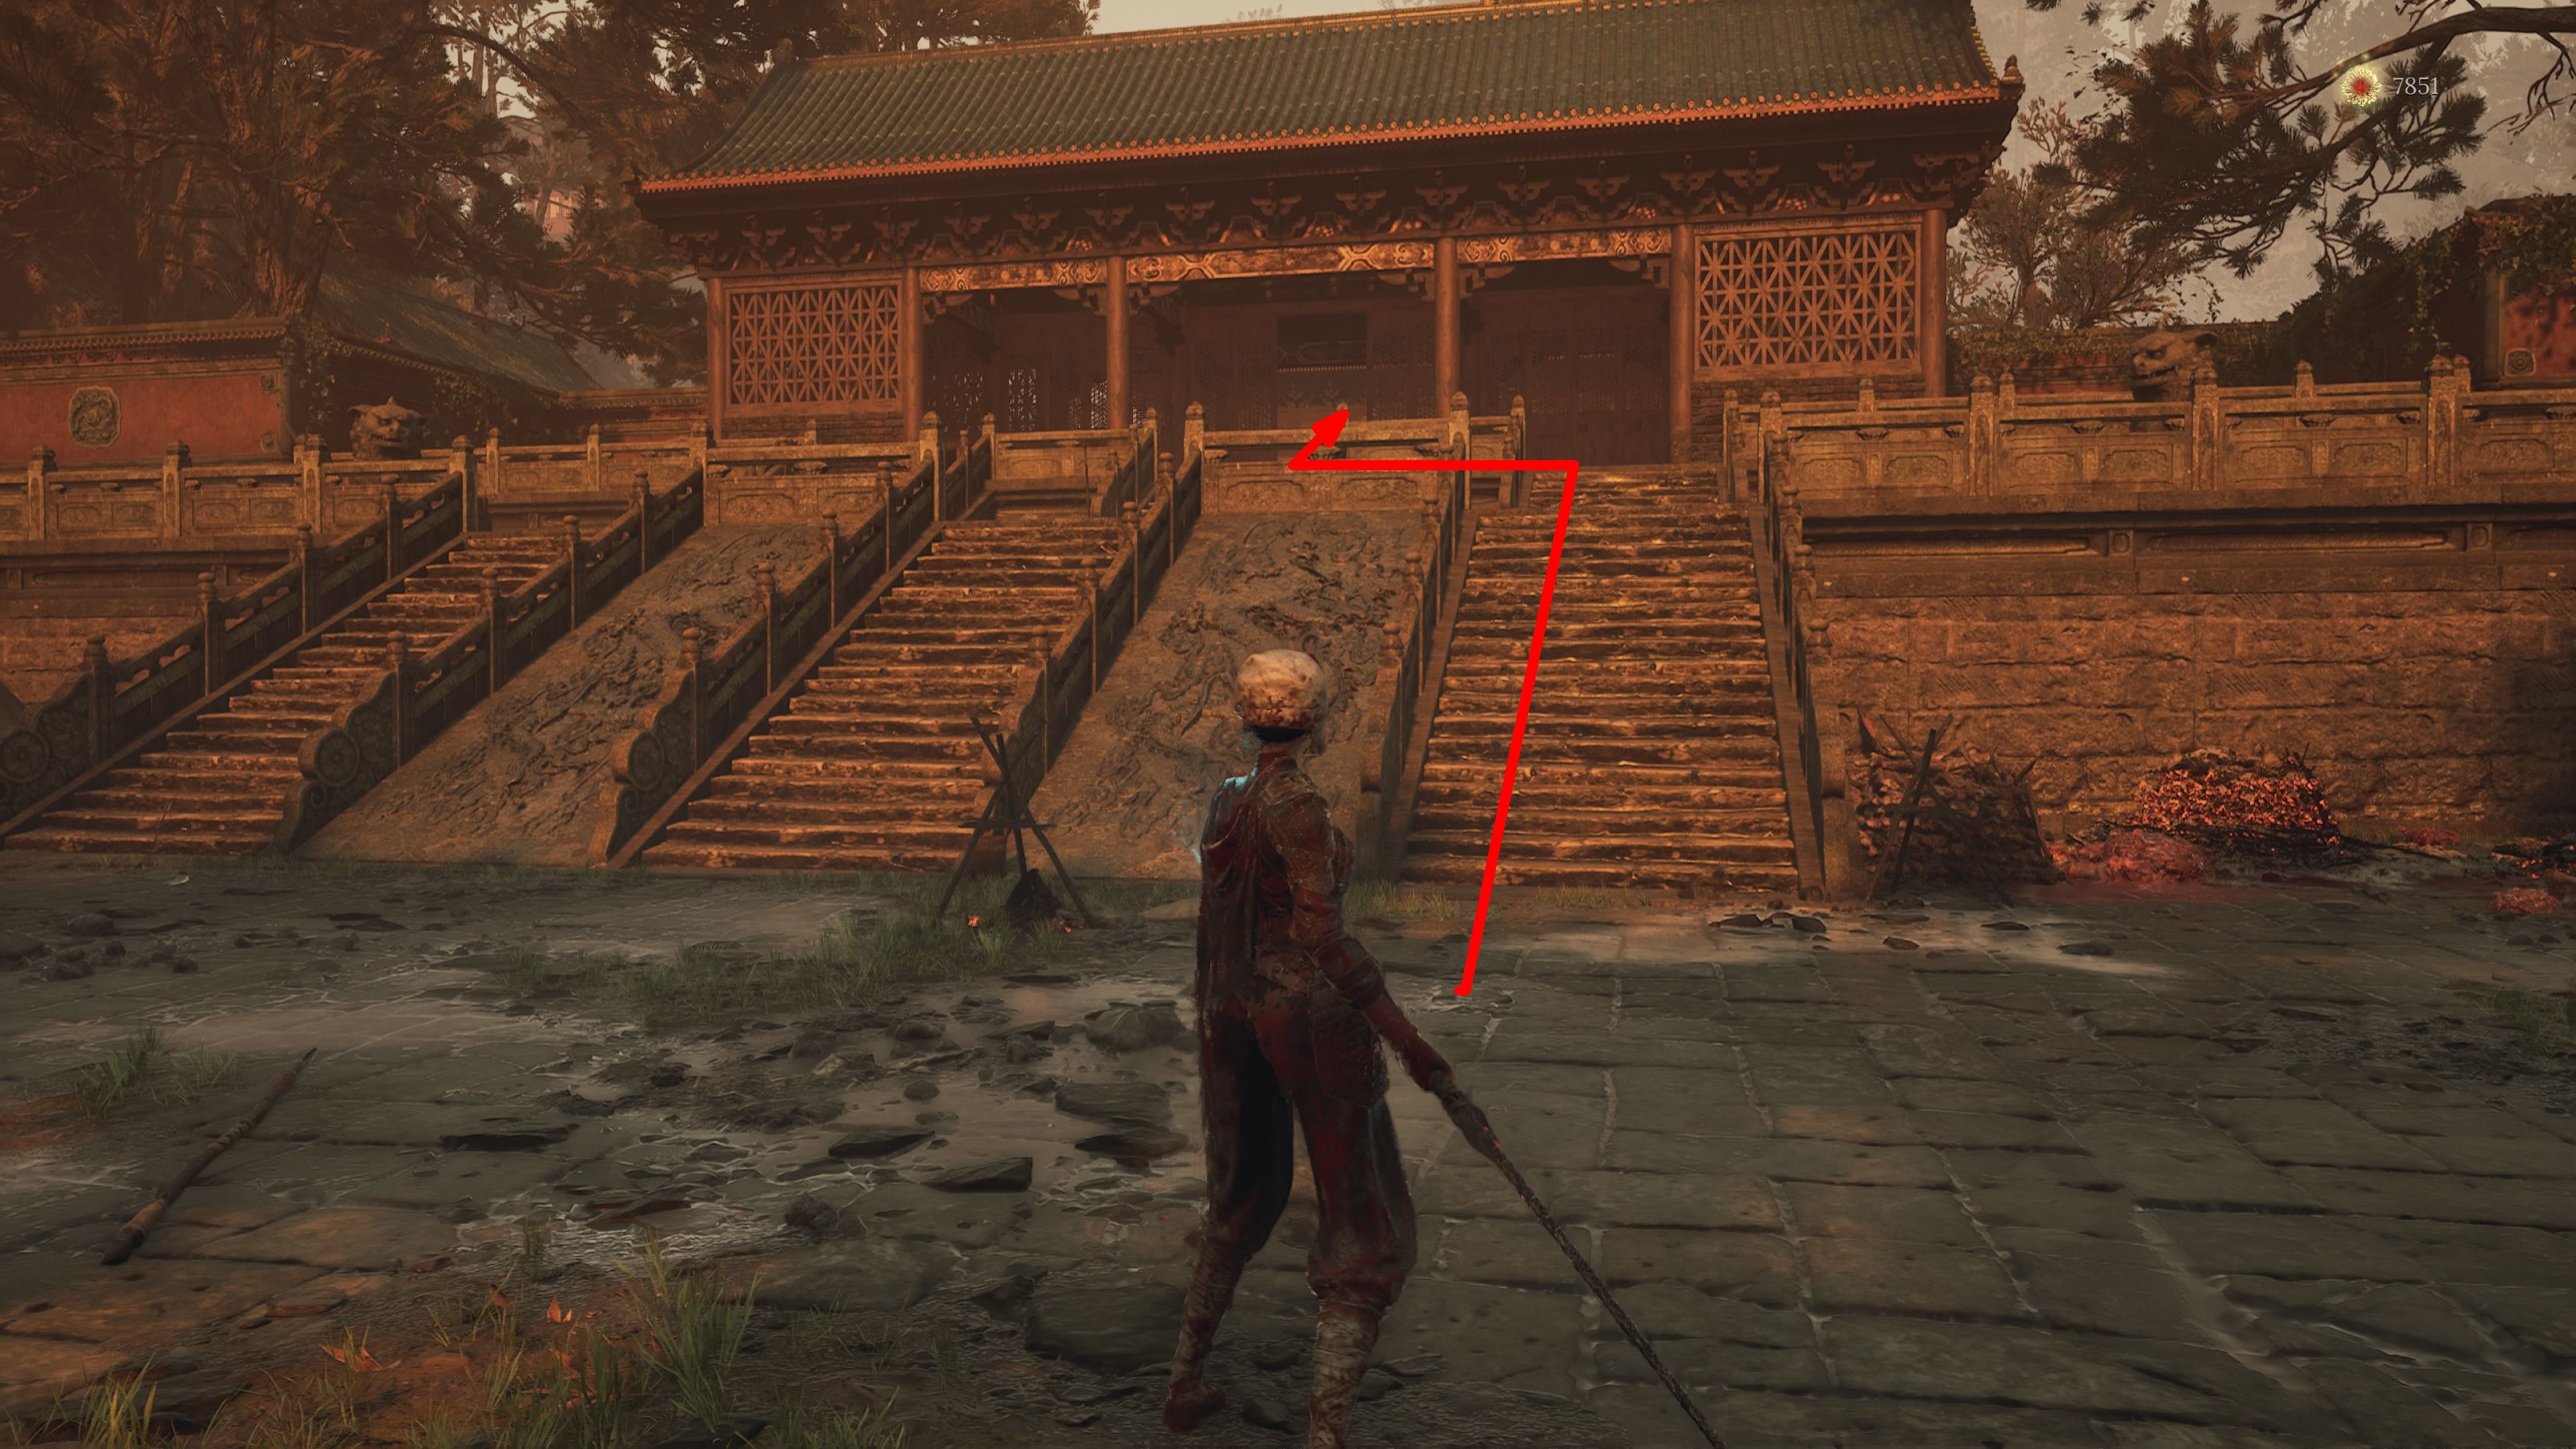
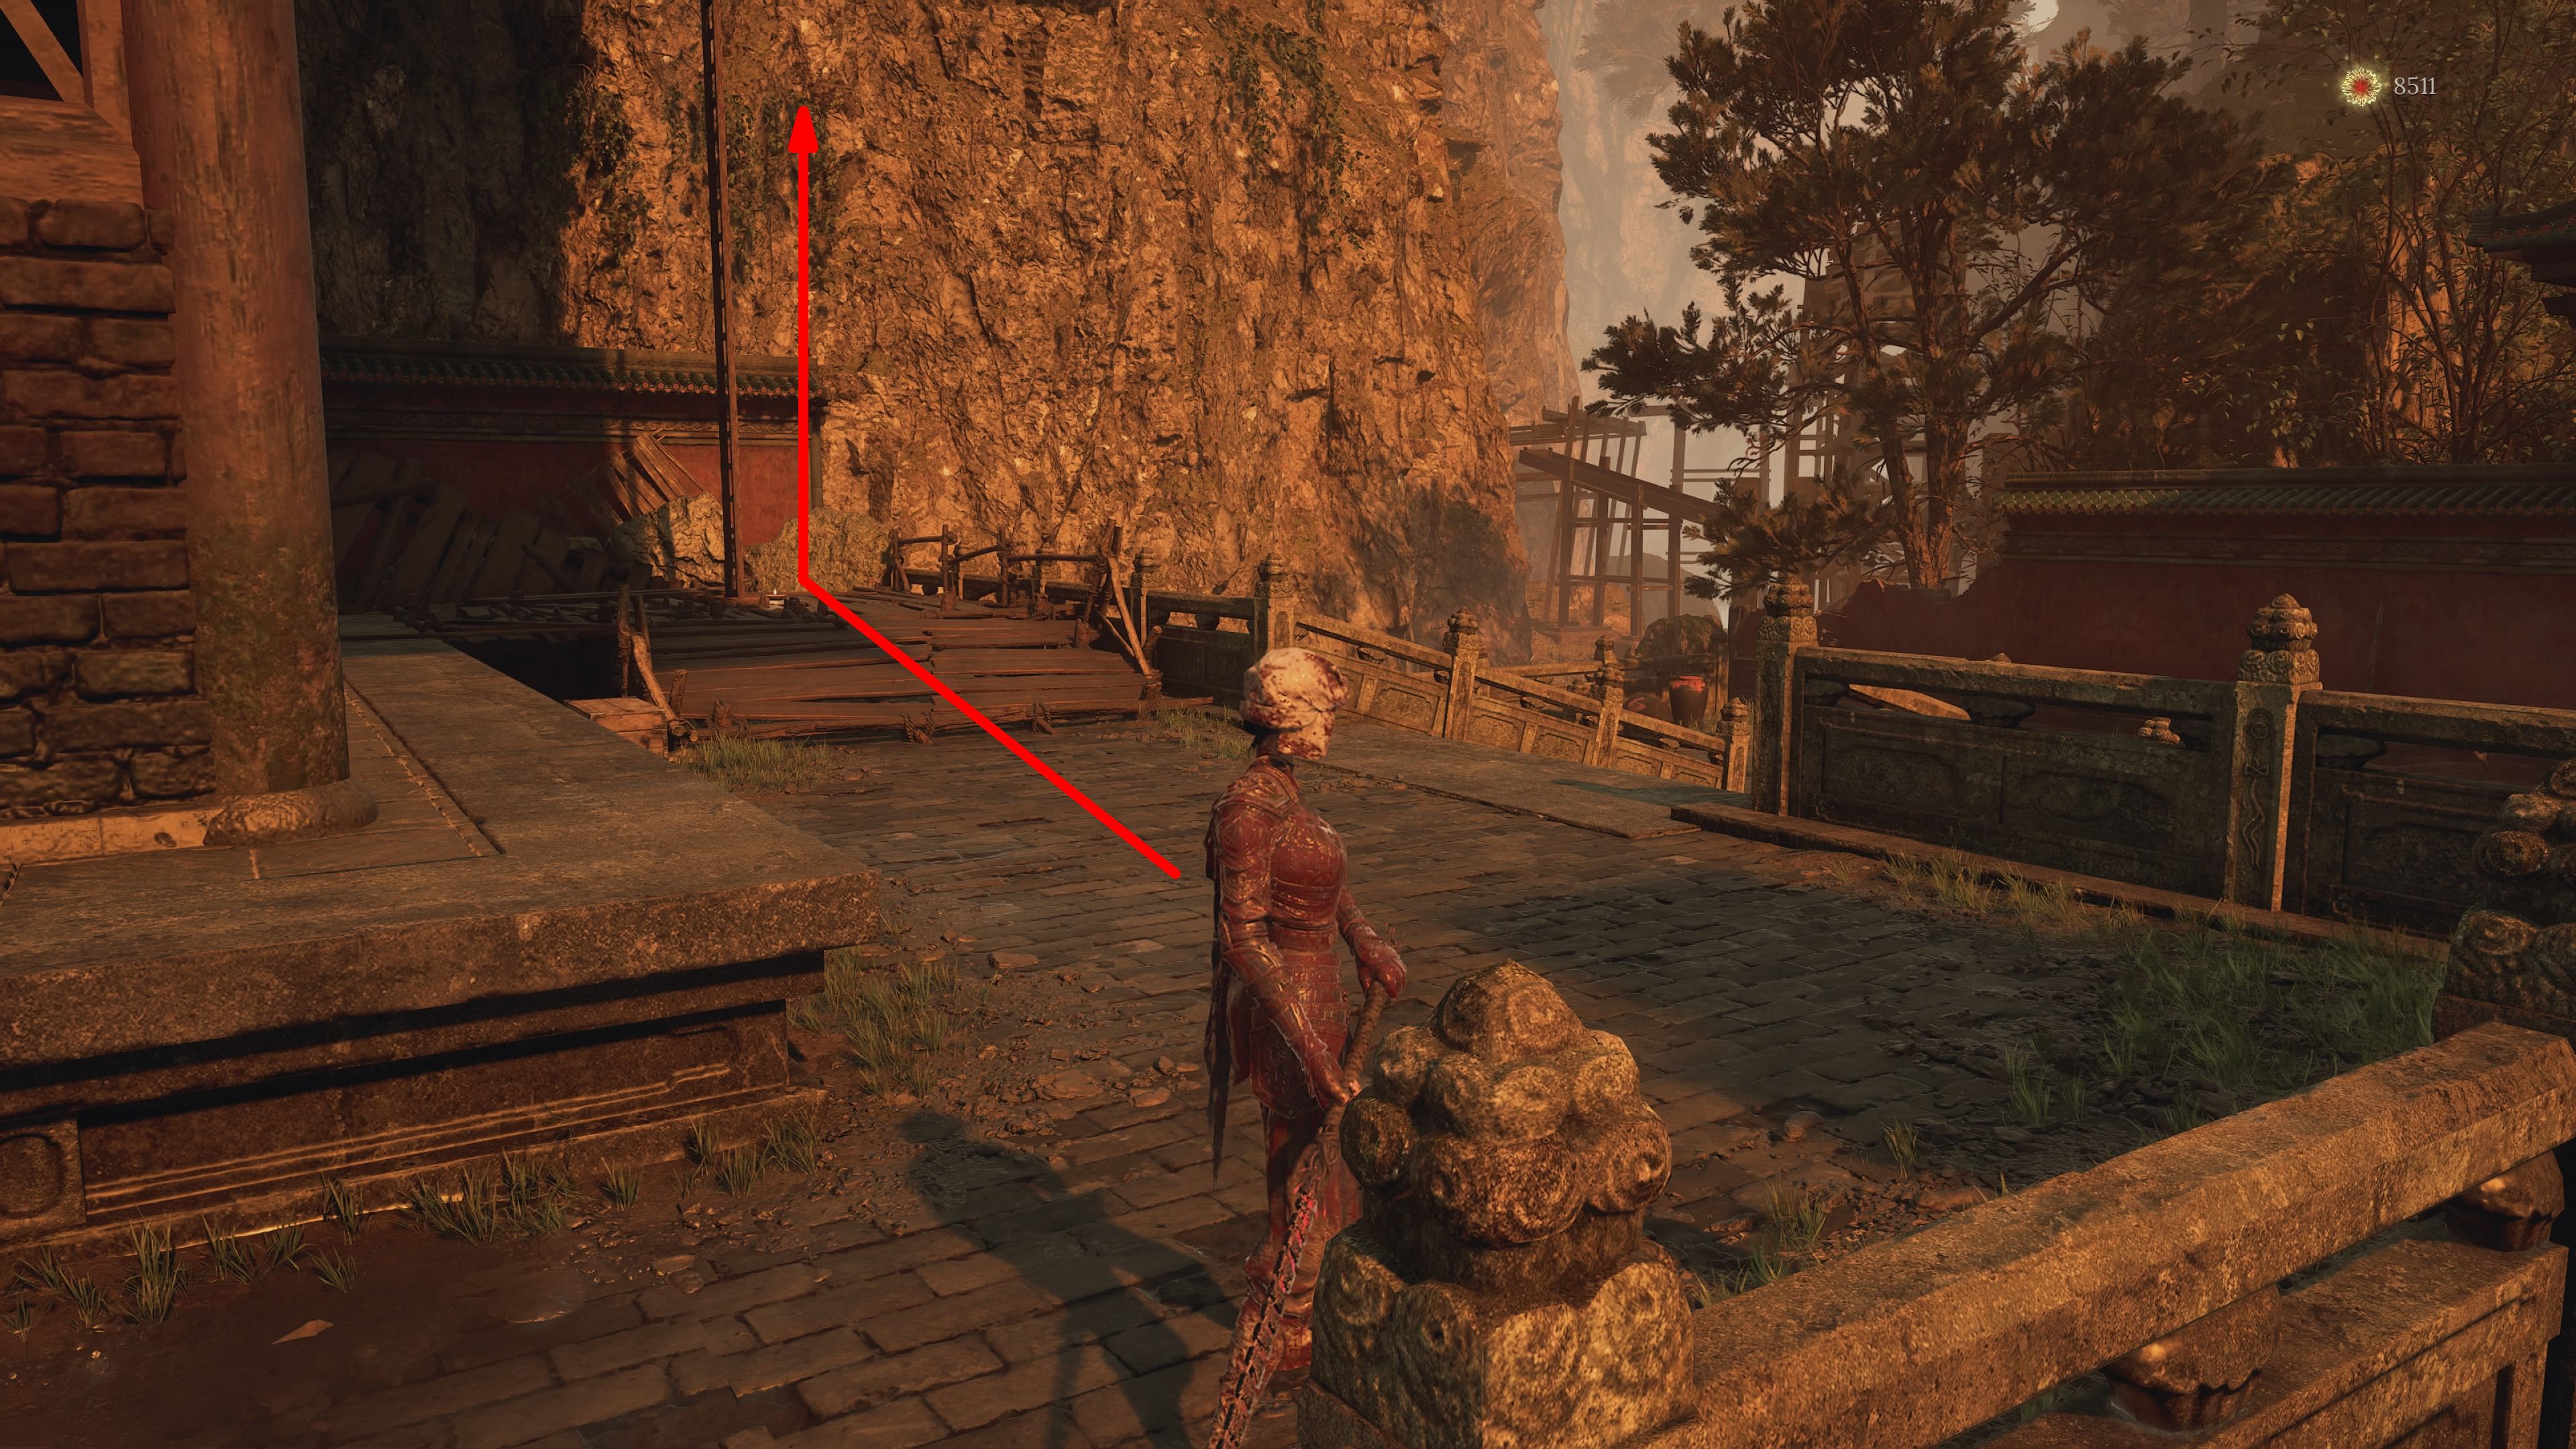
Now, players need to swiftly go right and ascend a considerable set of stairs, passing beneath a sign along the way. Once they reach the summit, they should turn back and proceed forward towards a staircase where a massive enemy resides, pushing a boulder. At the pinnacle of those stairs, facing the enemy, you’ll discover a ramp that leads onto a rooftop. This rooftop provides players with an opportunity to climb a ladder situated on the side of a building.
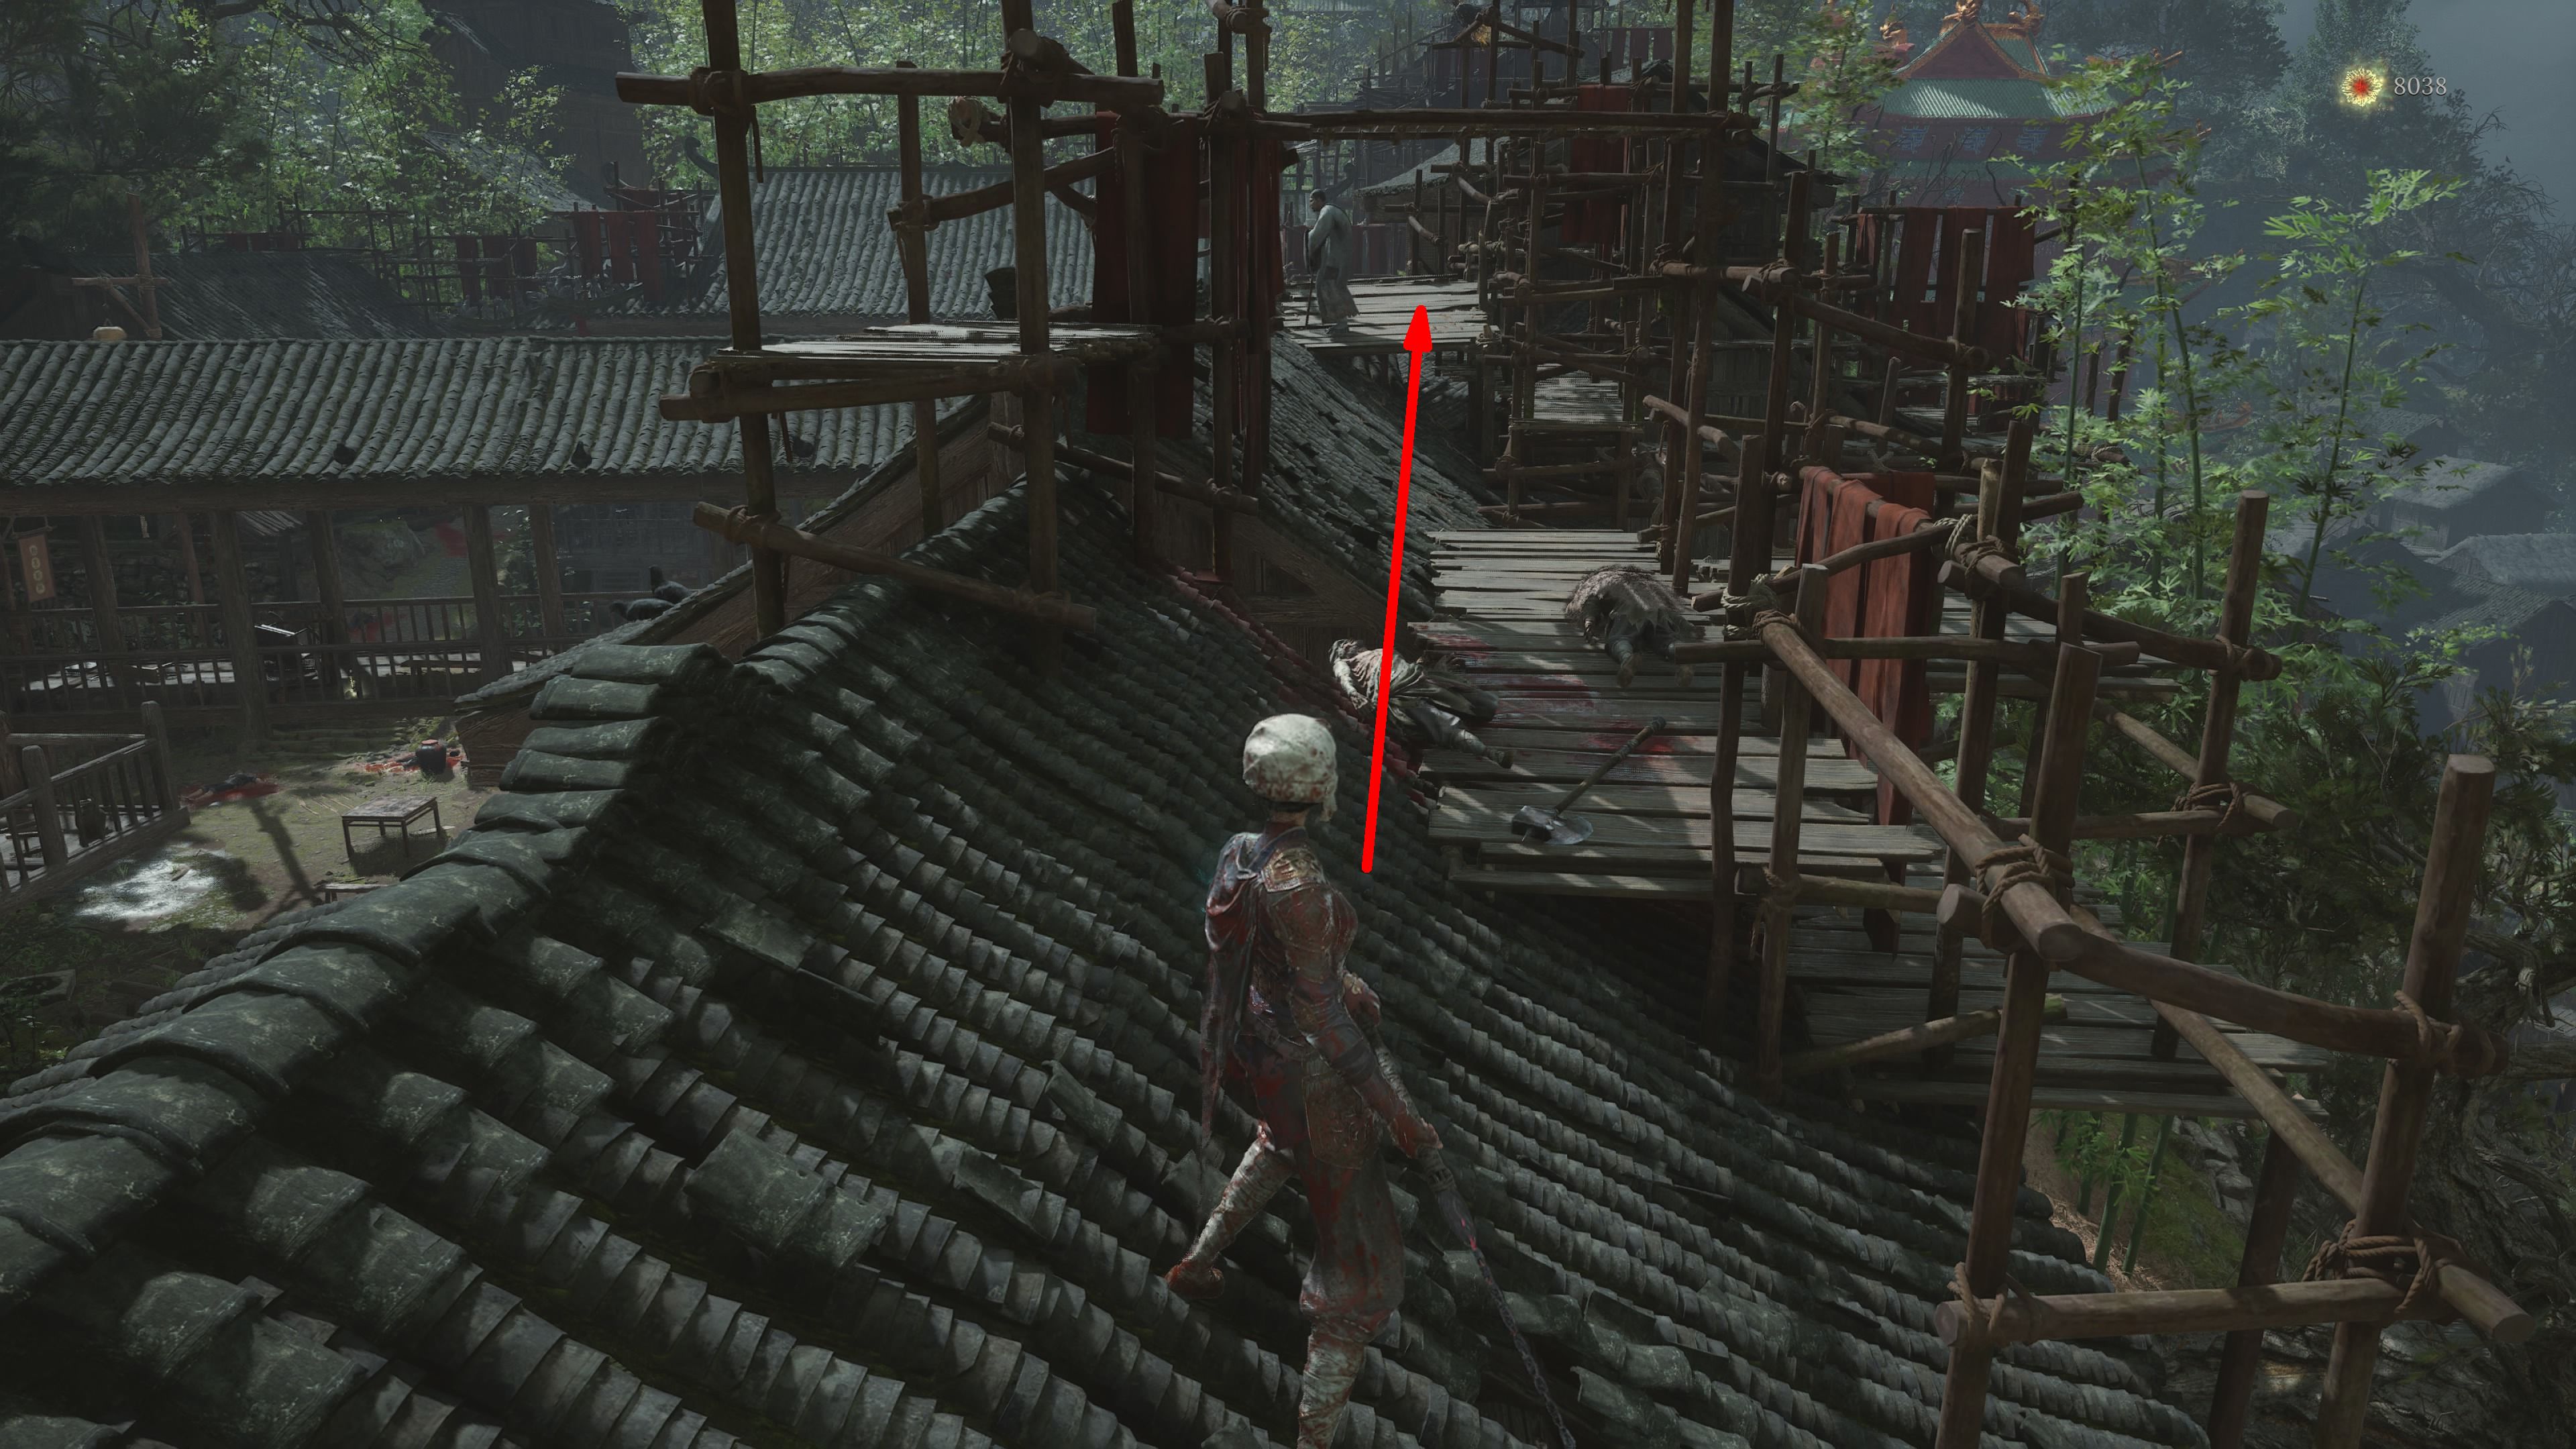
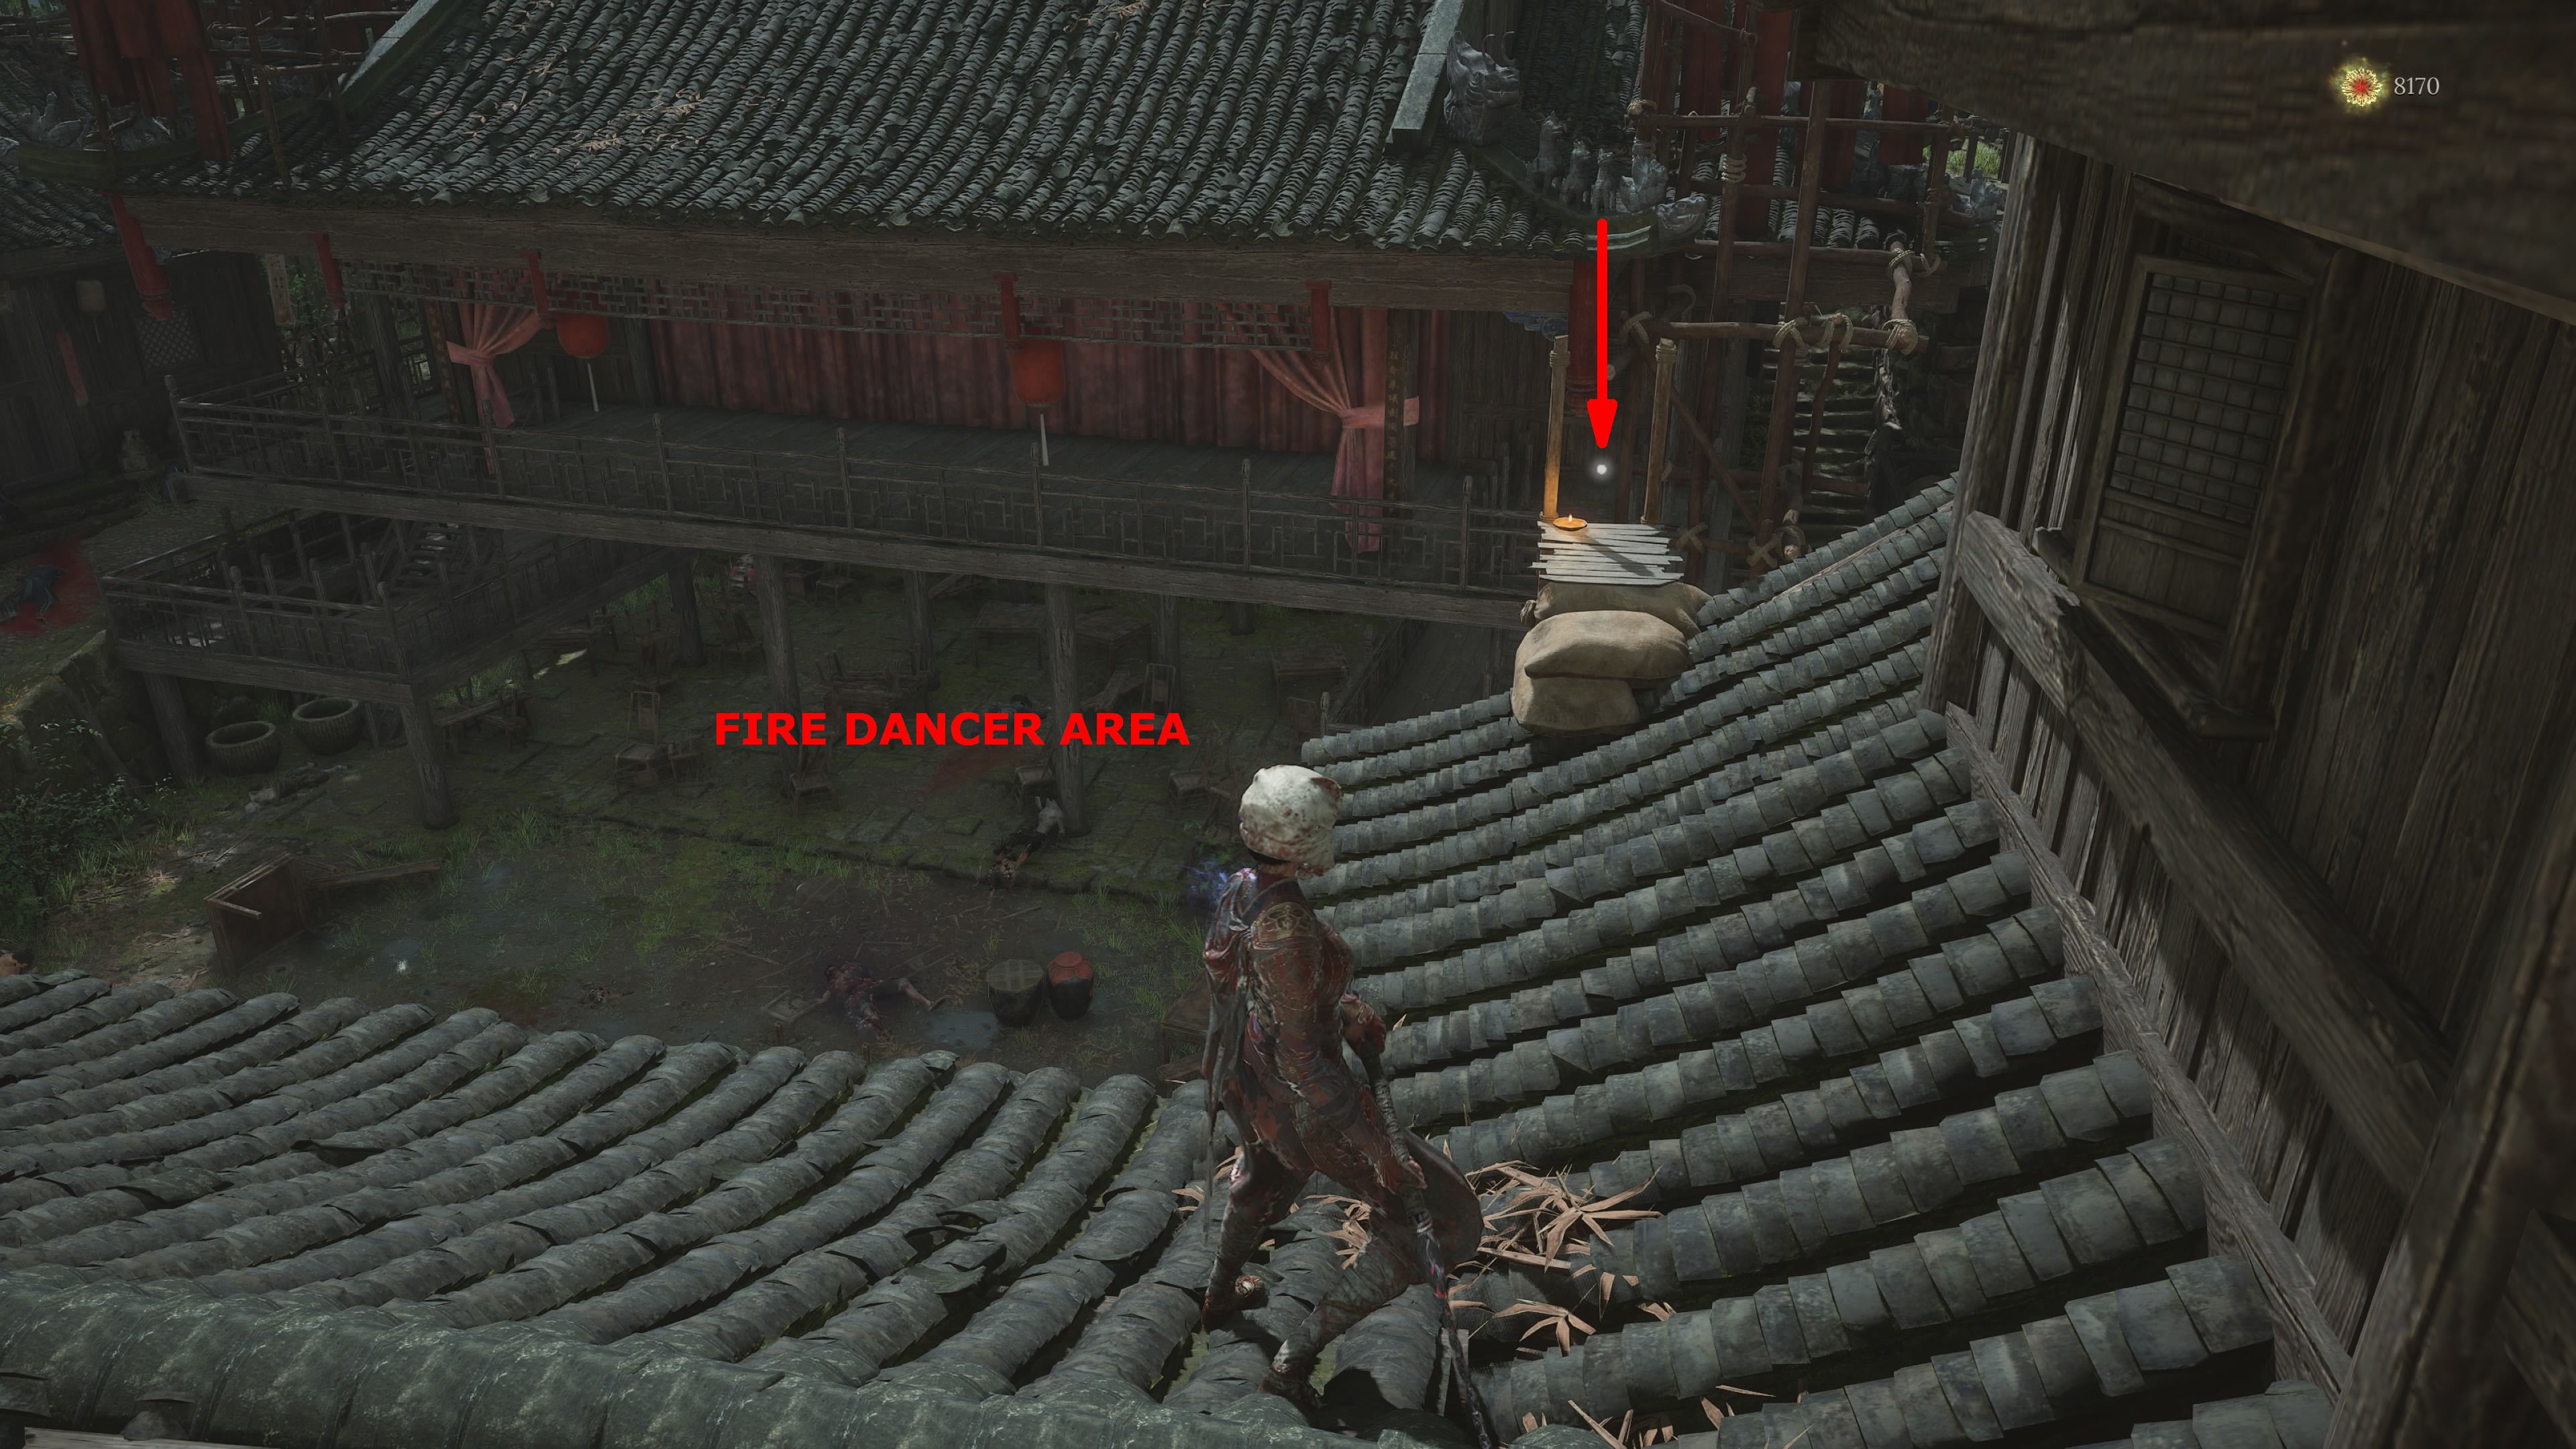
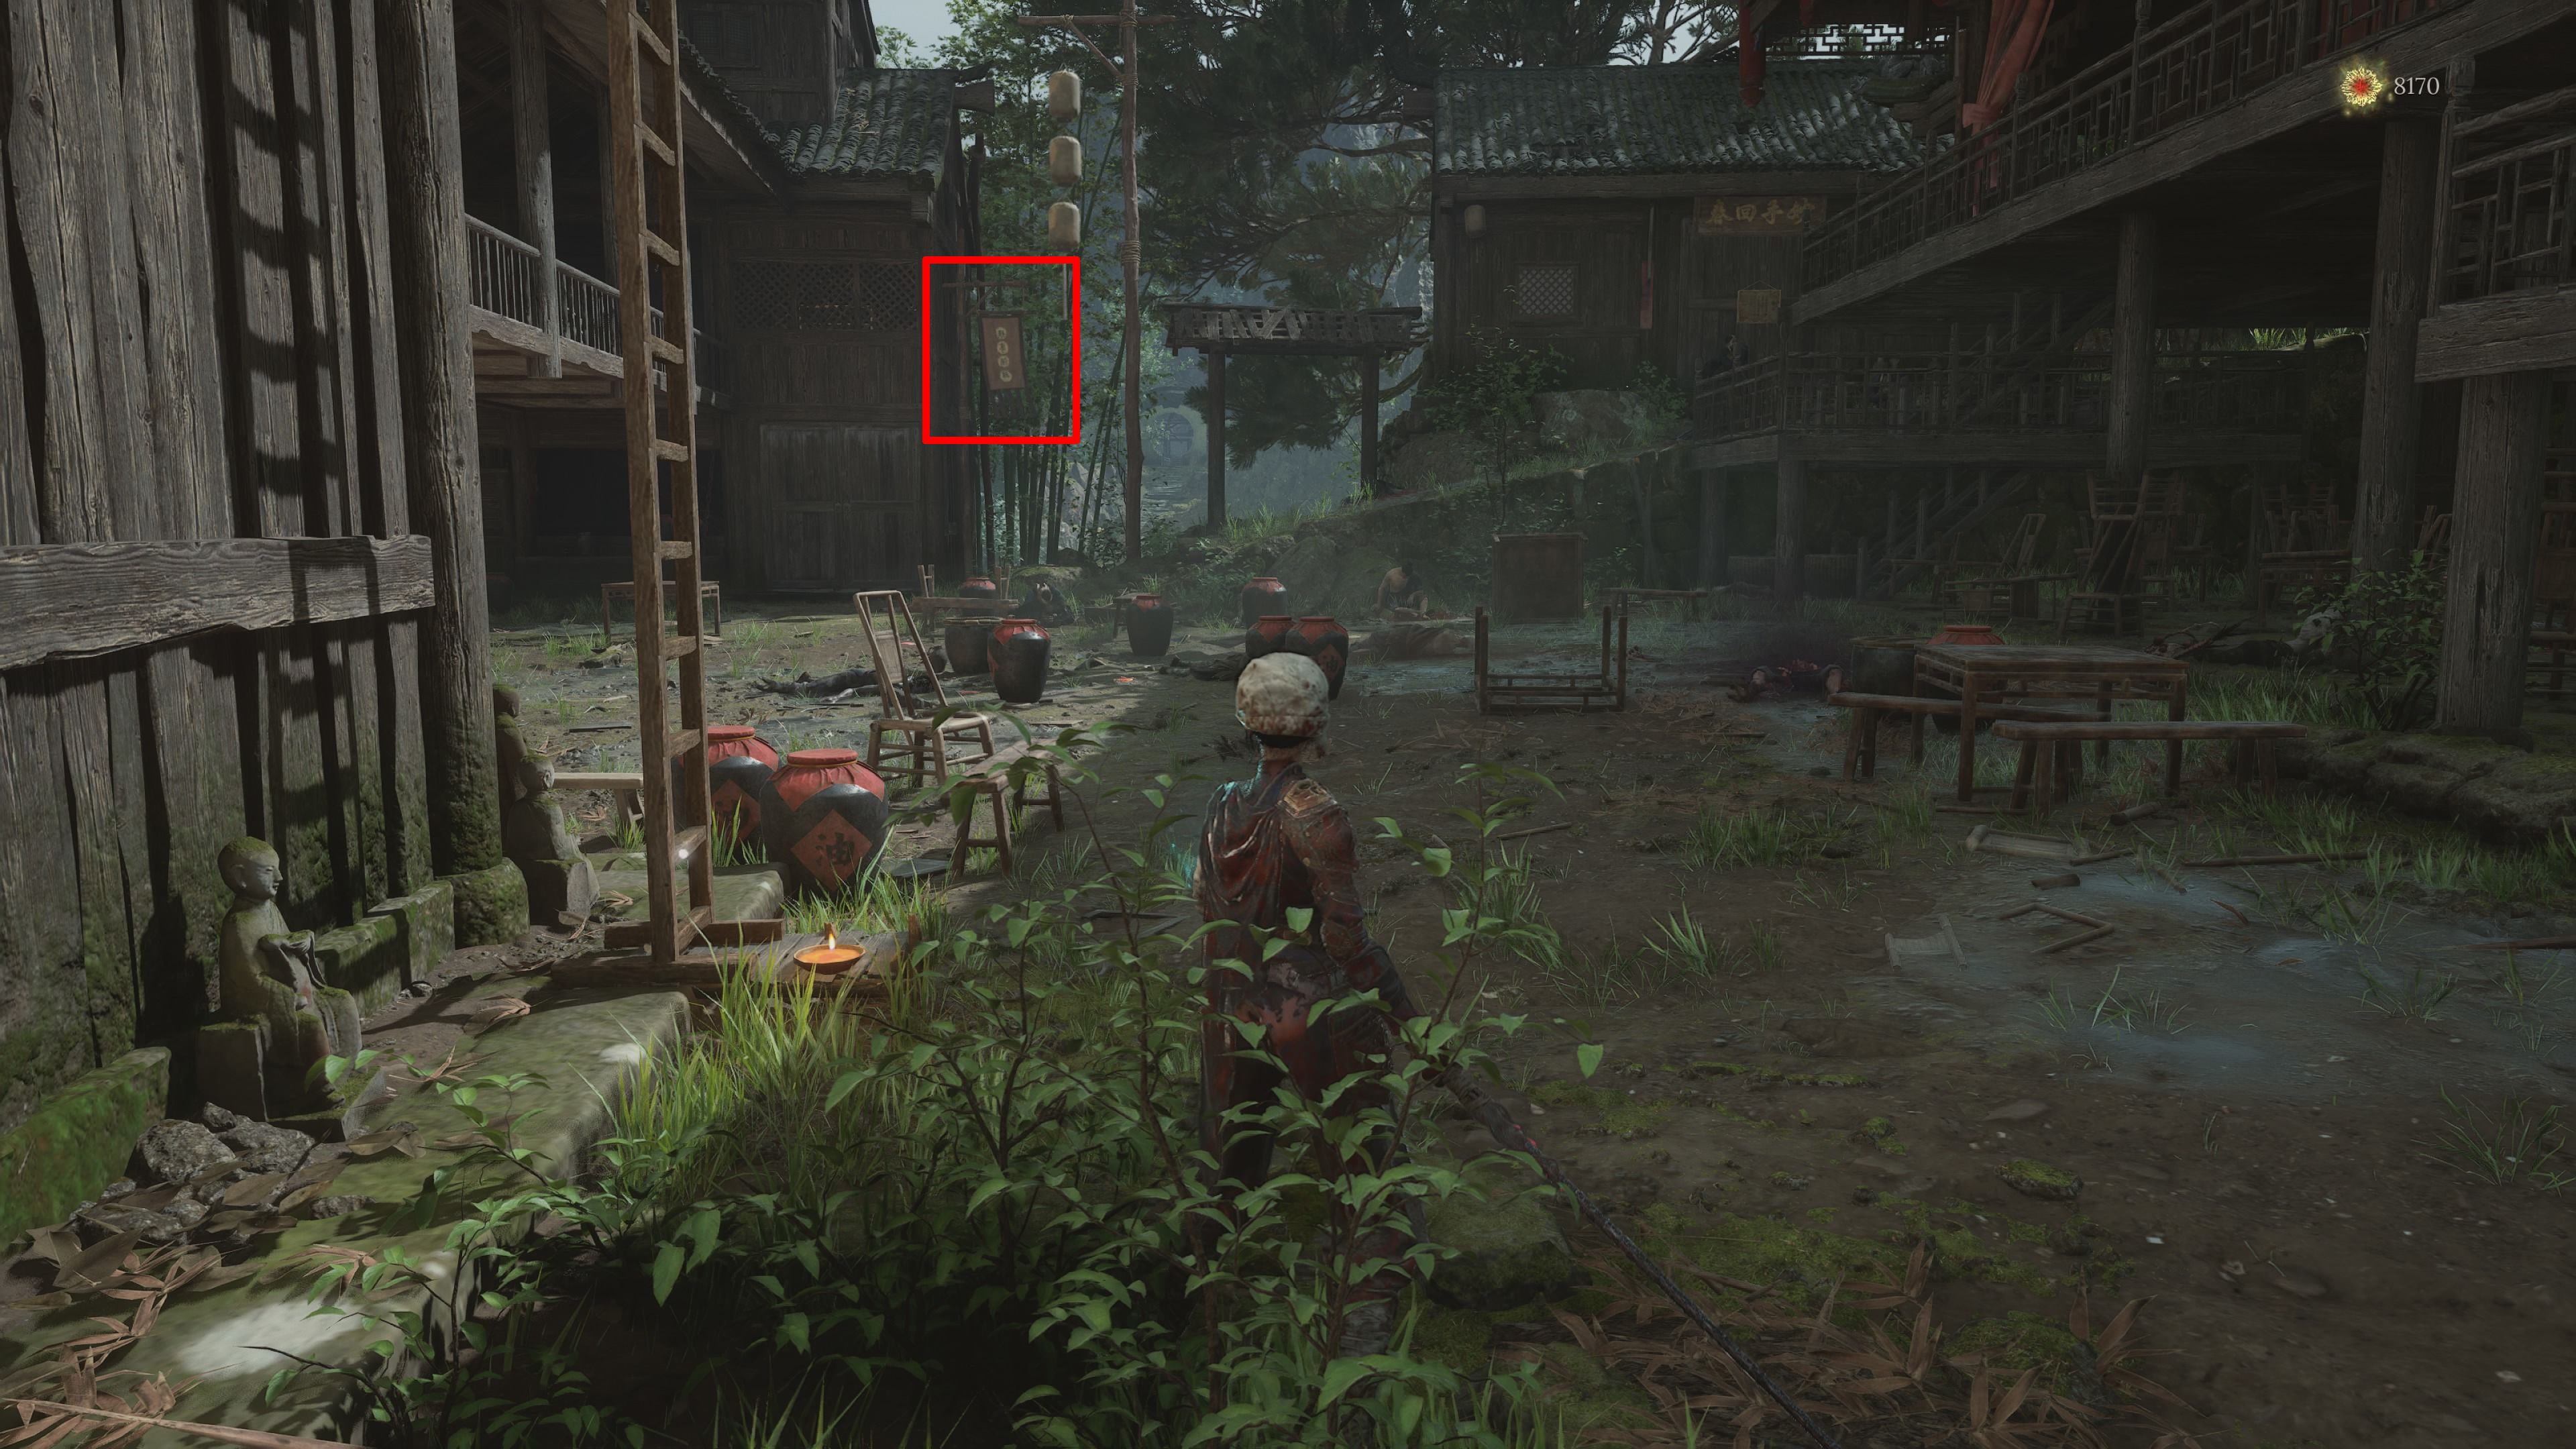
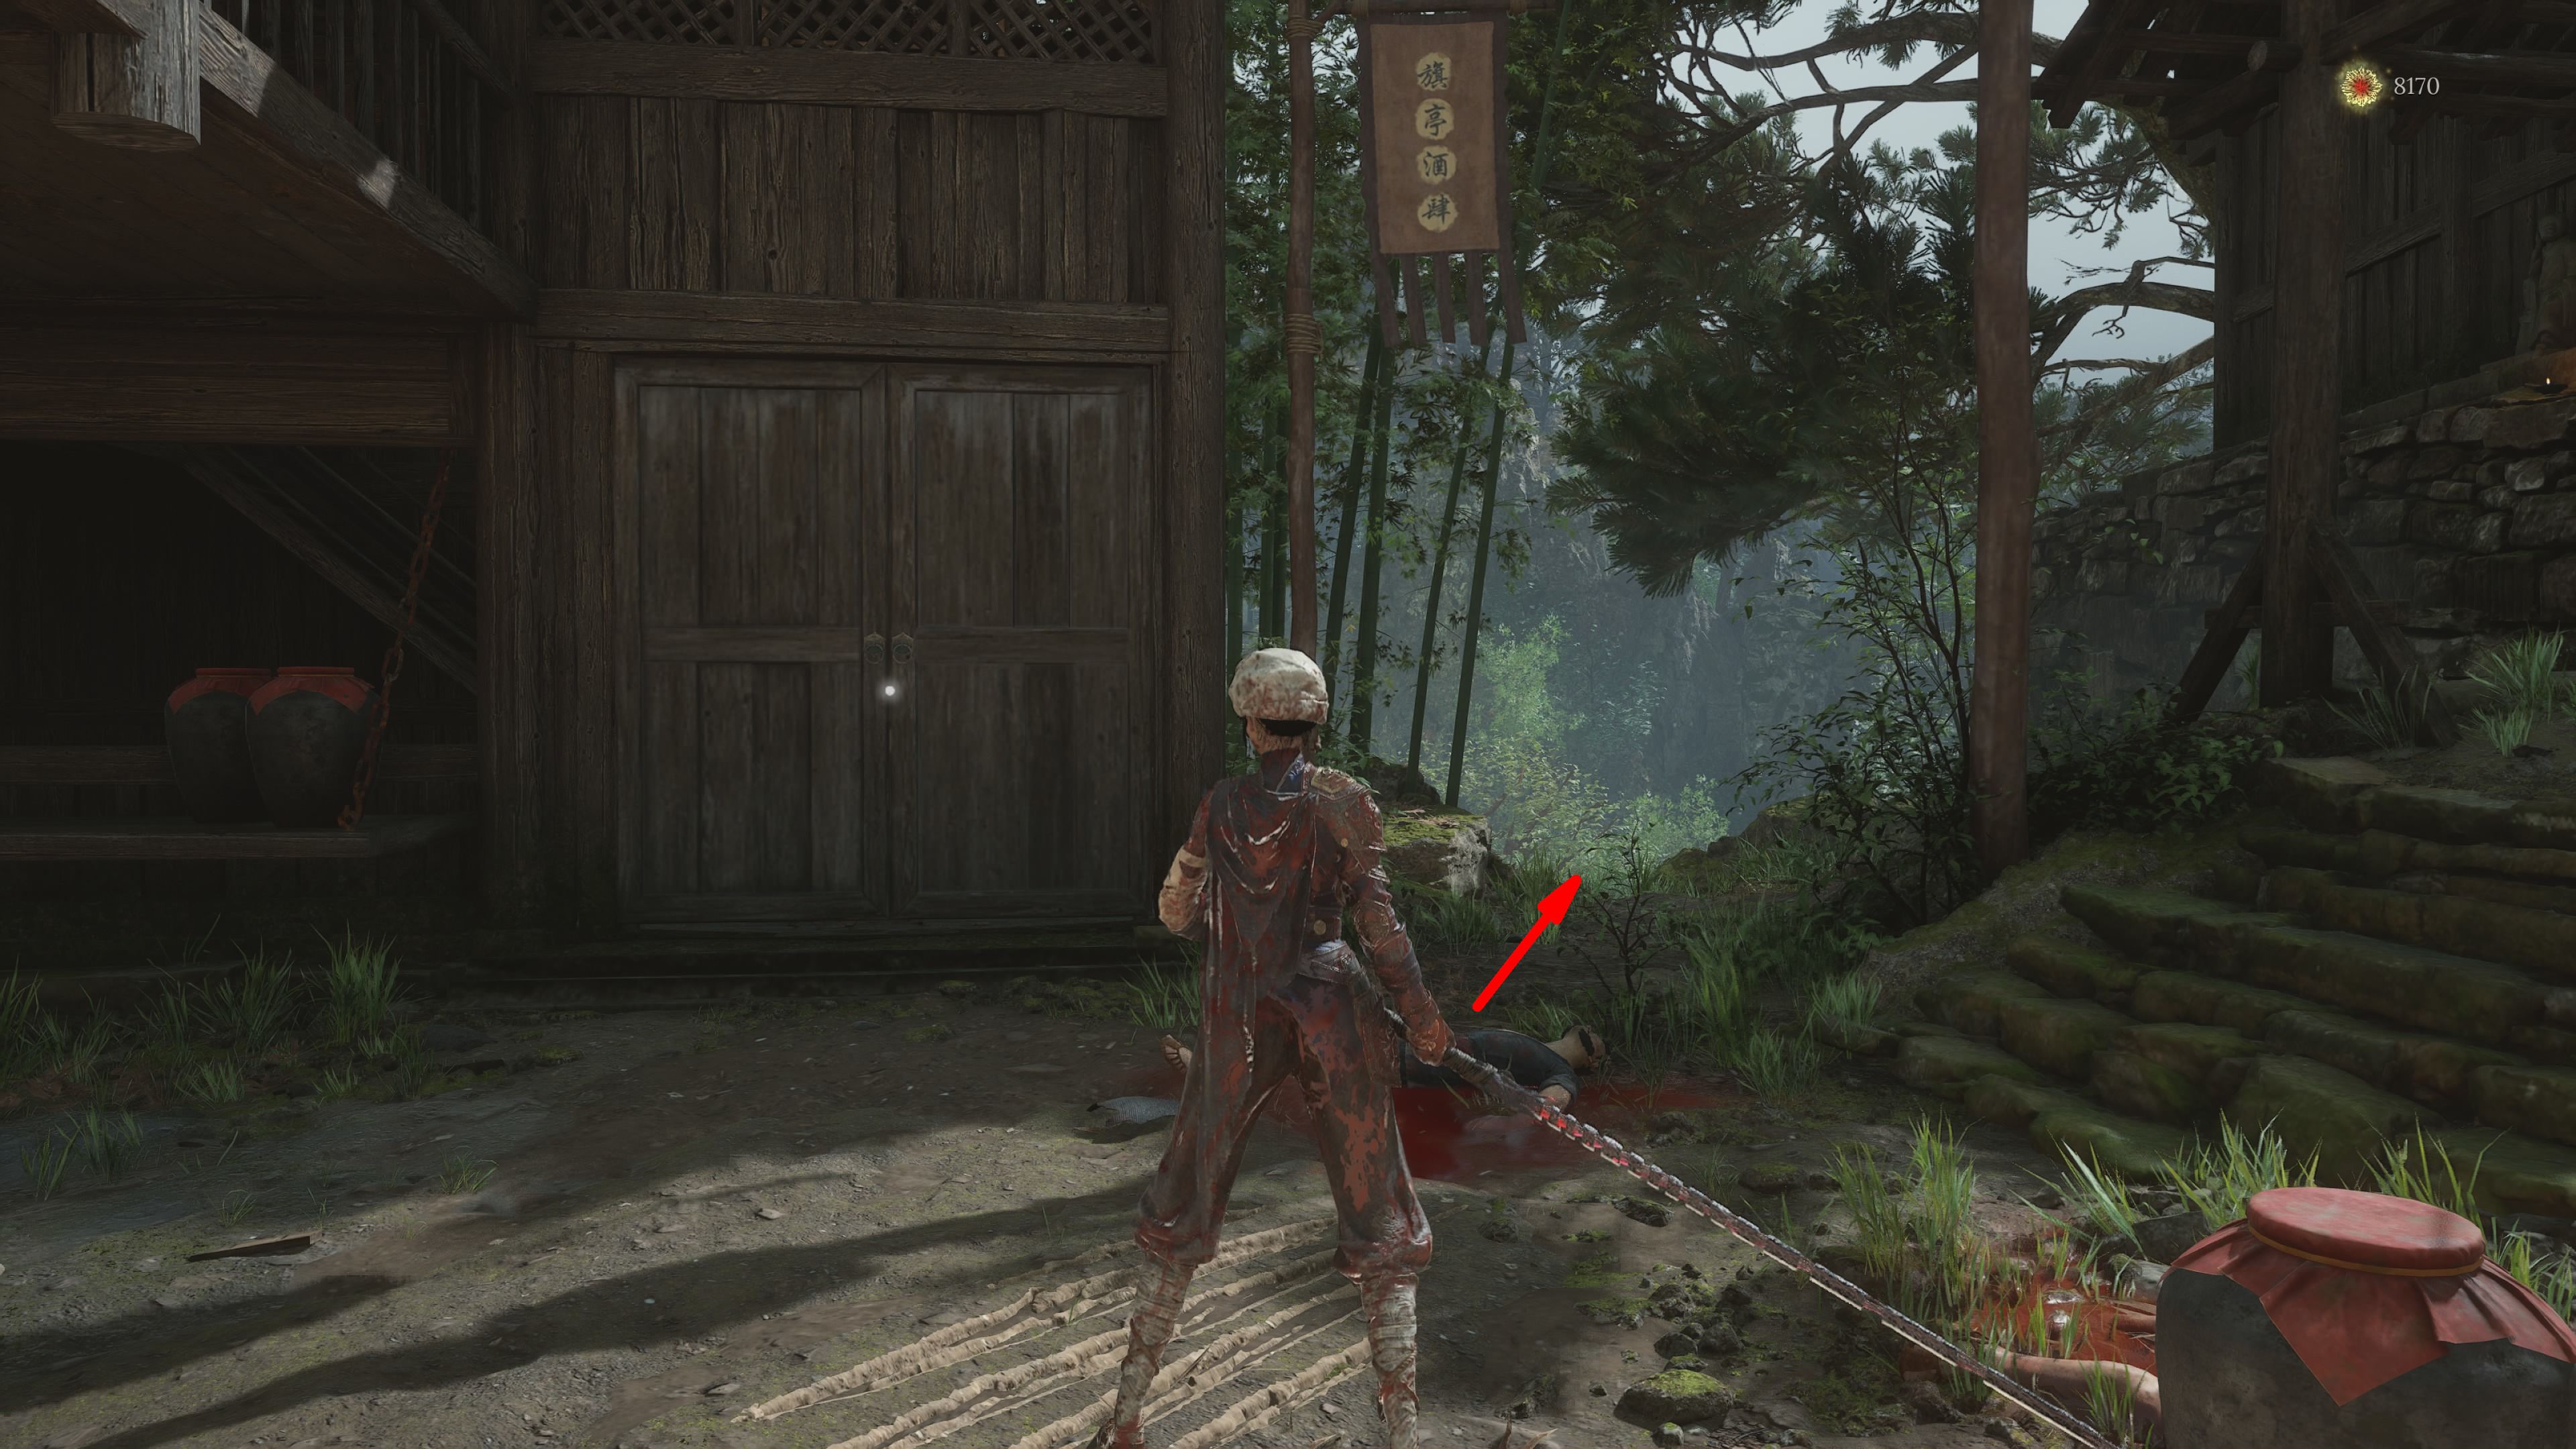
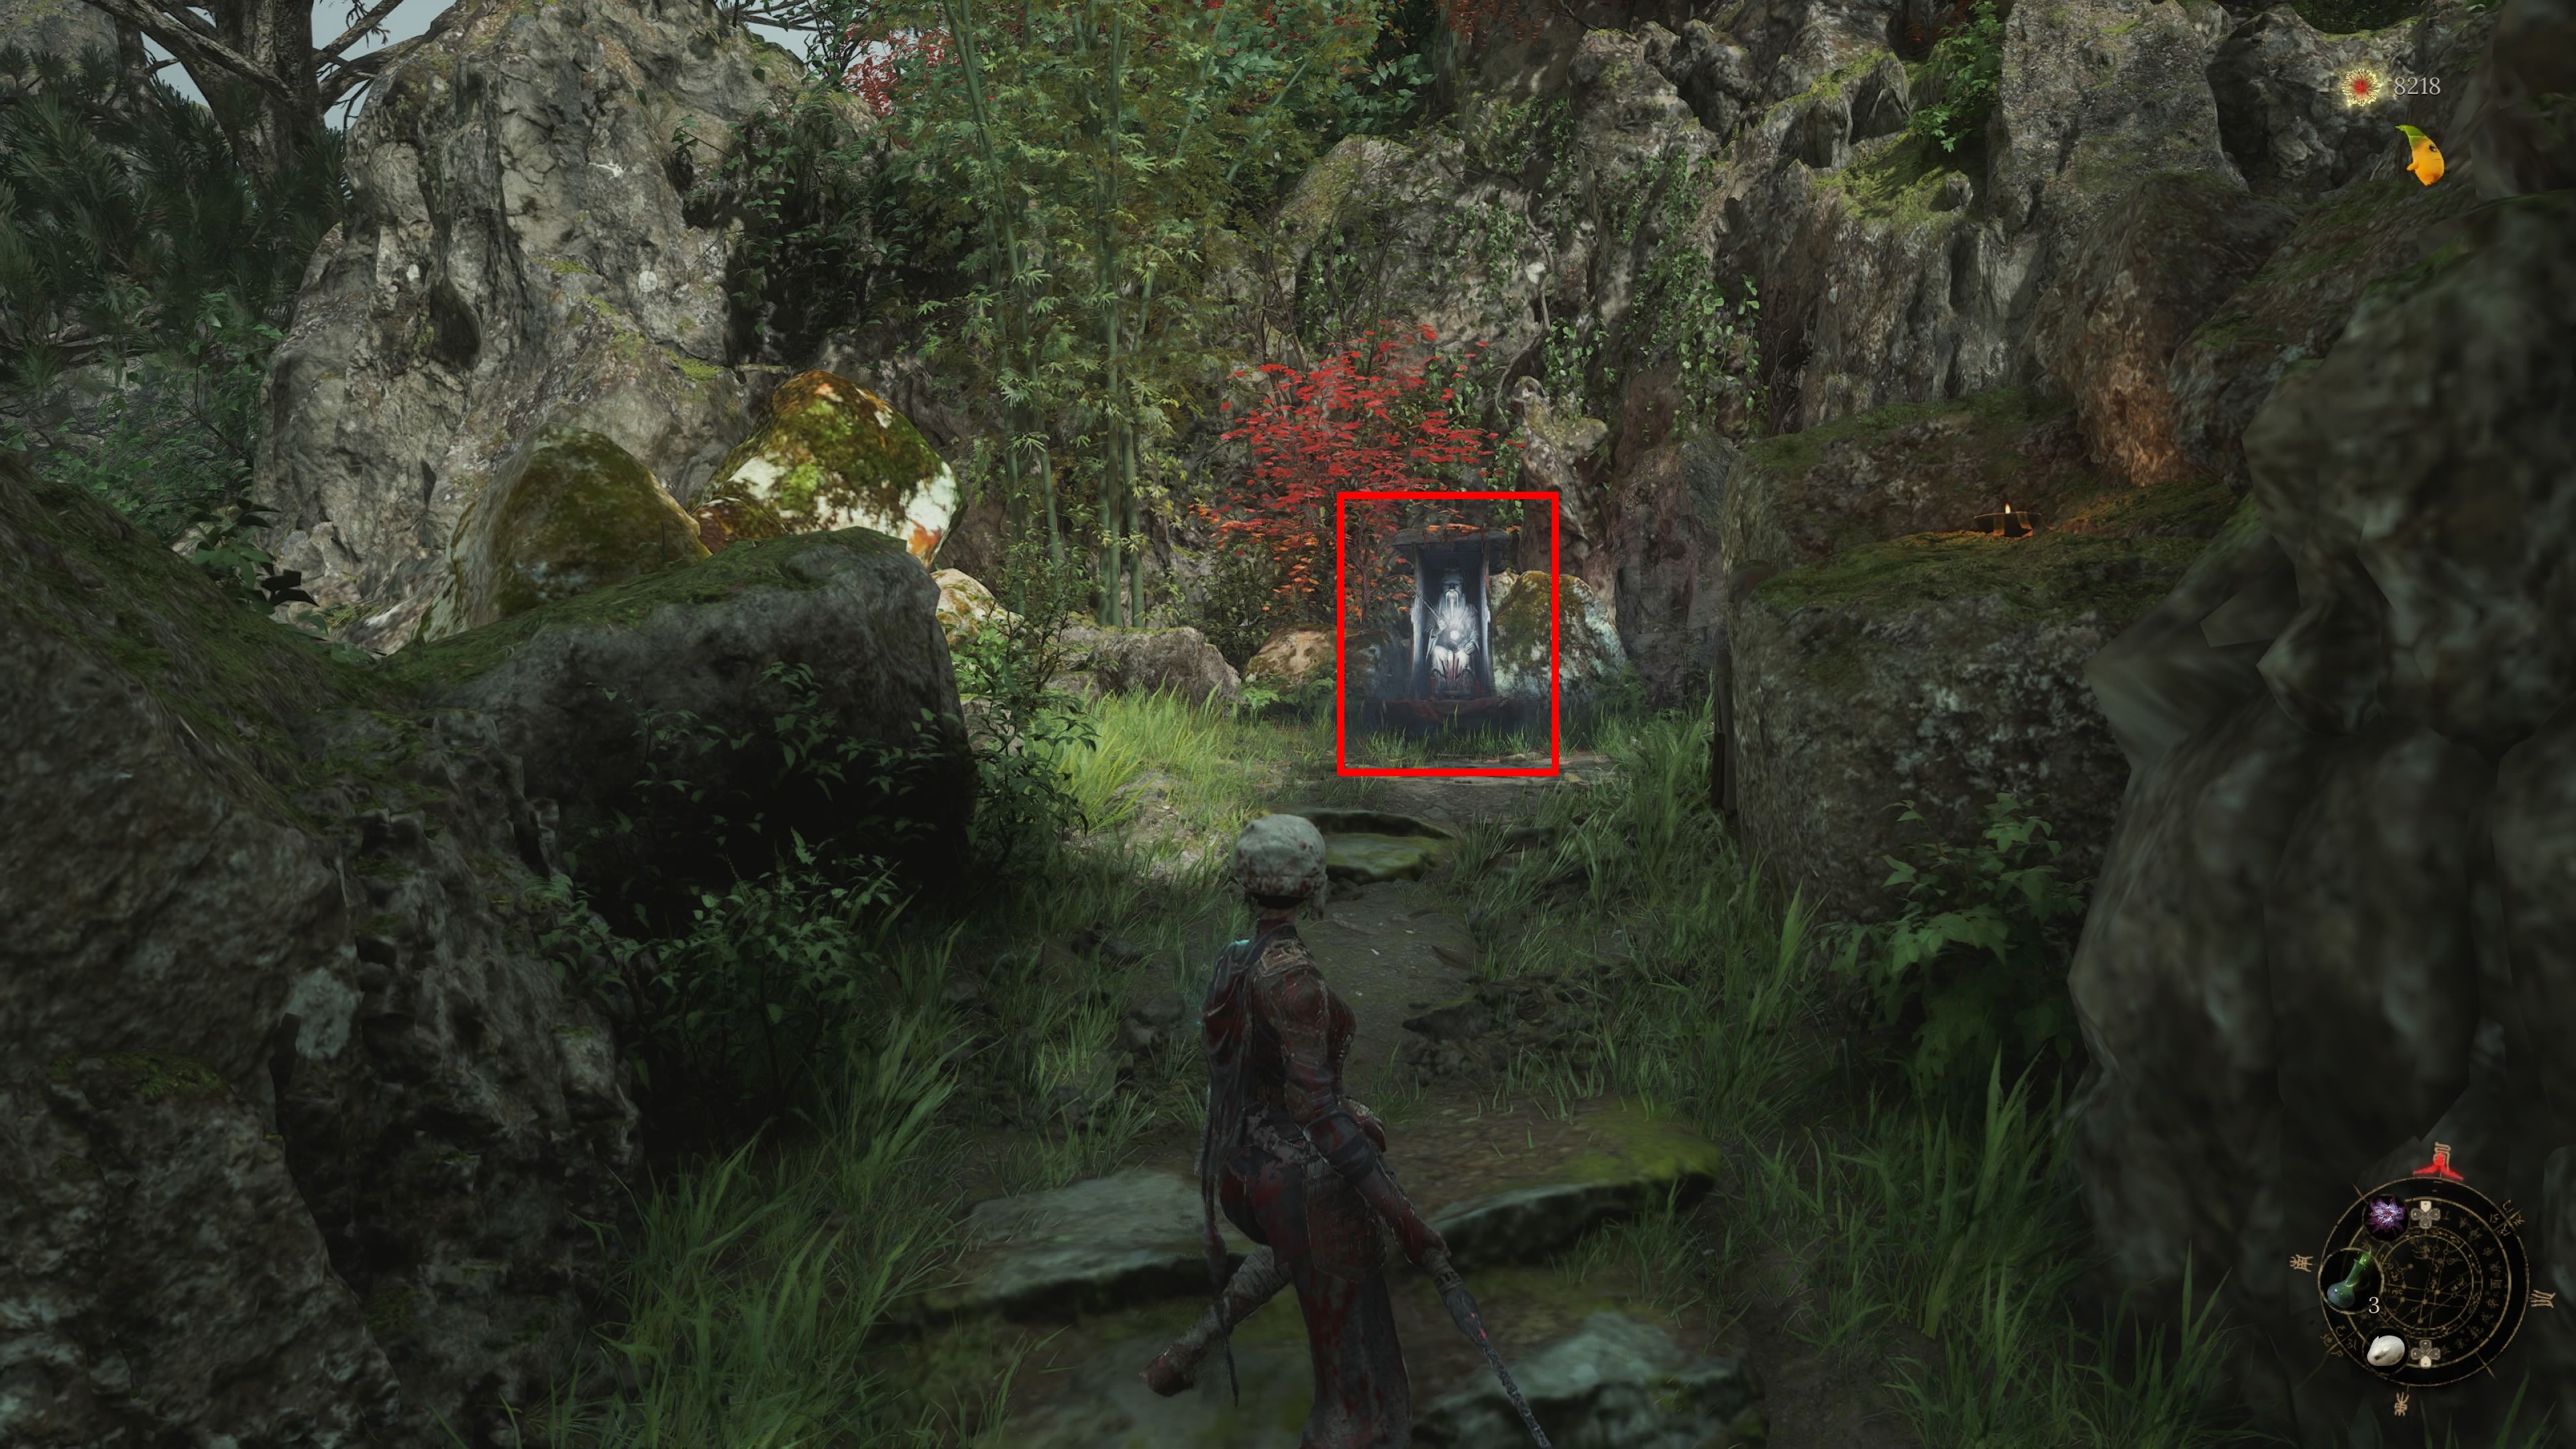
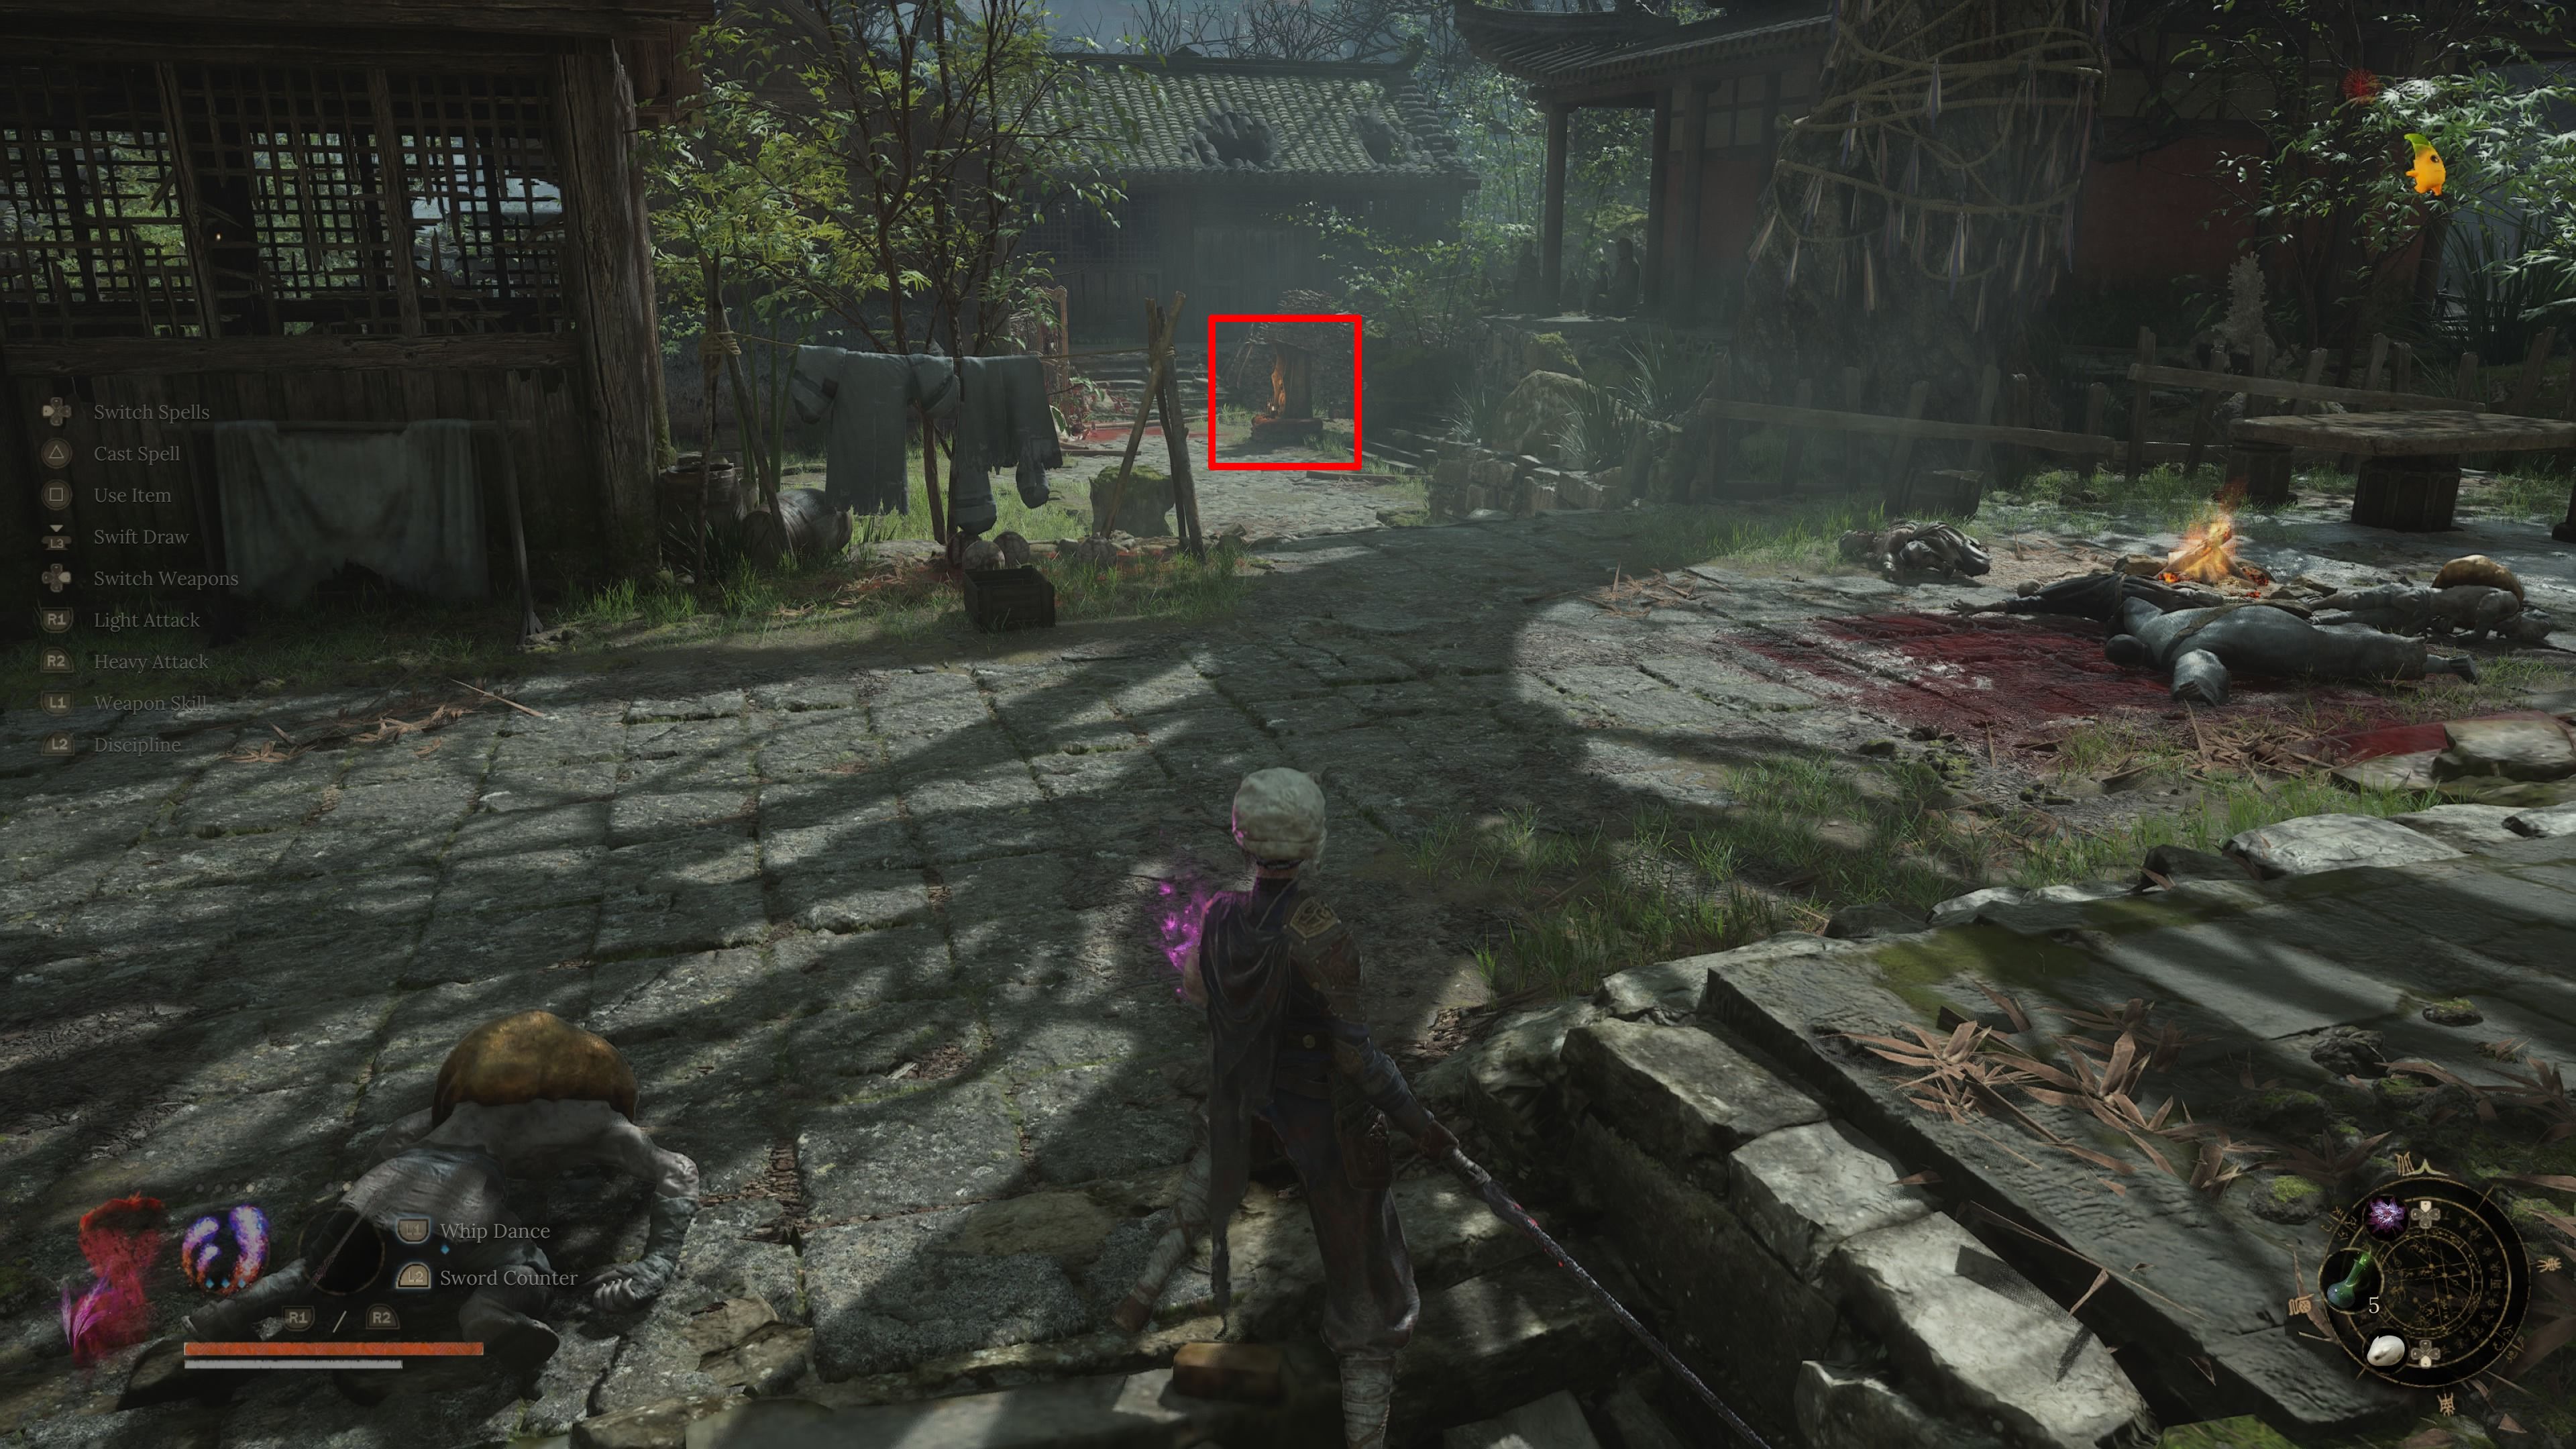
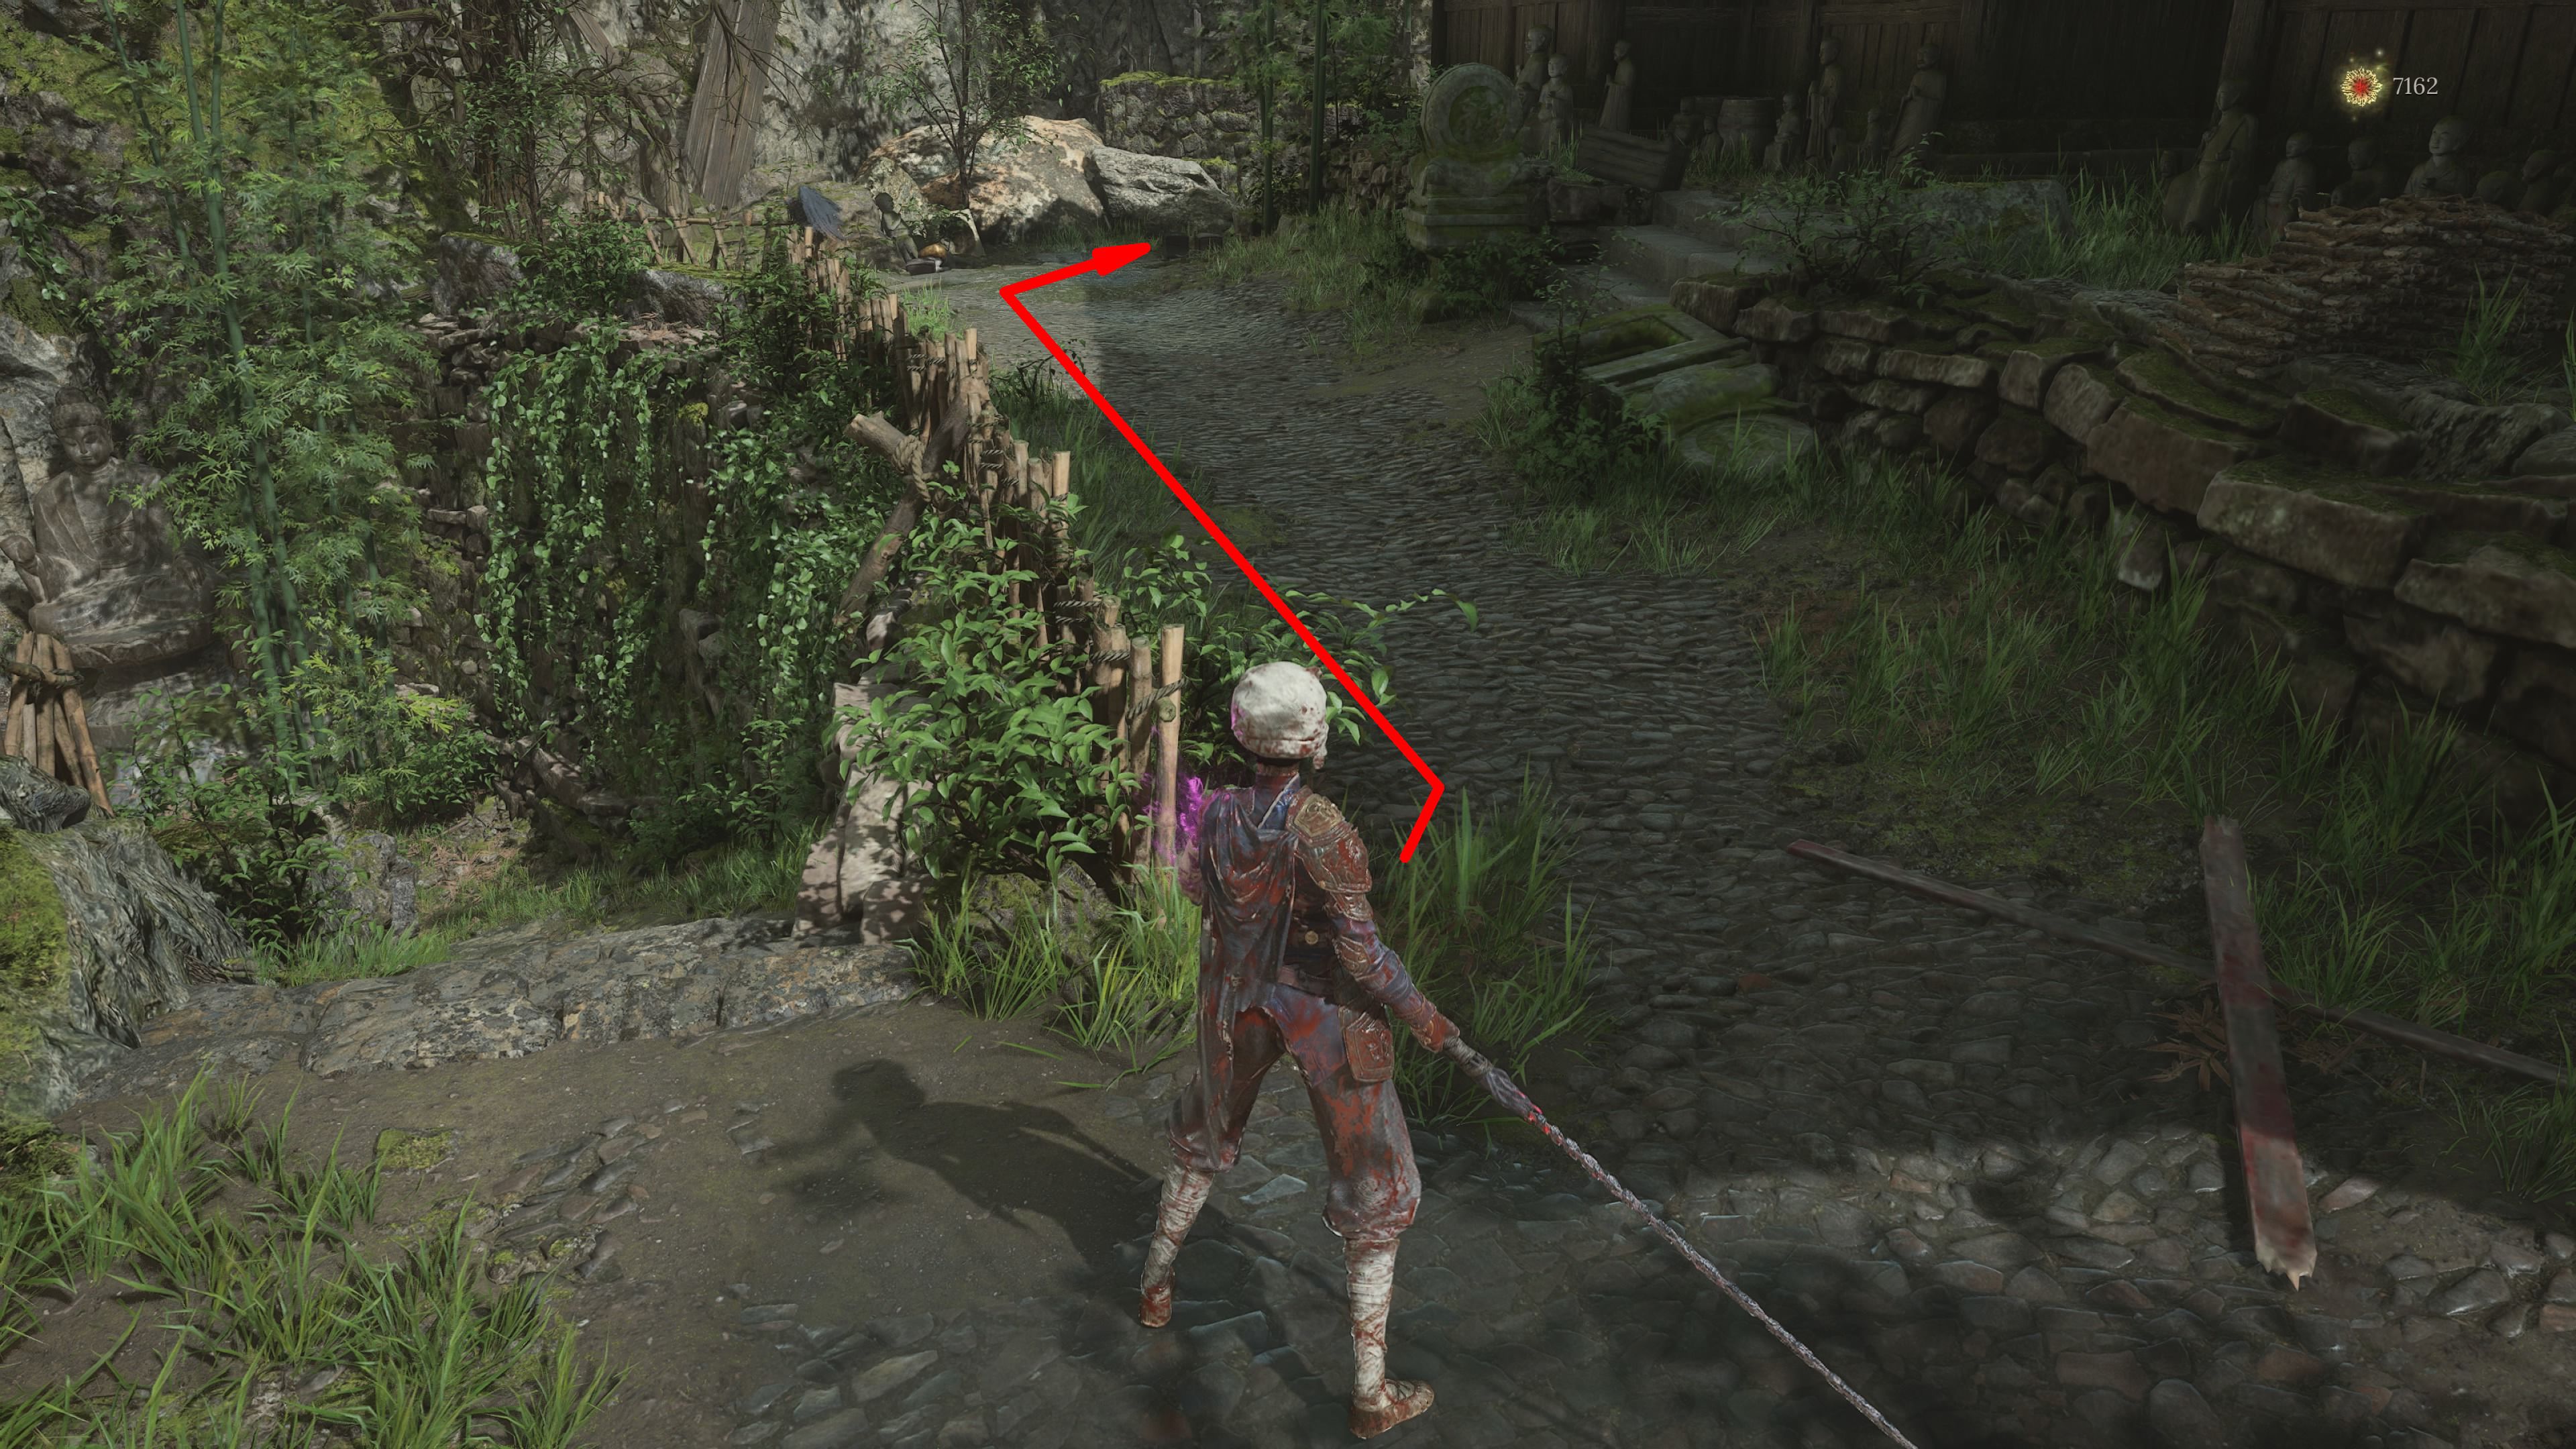
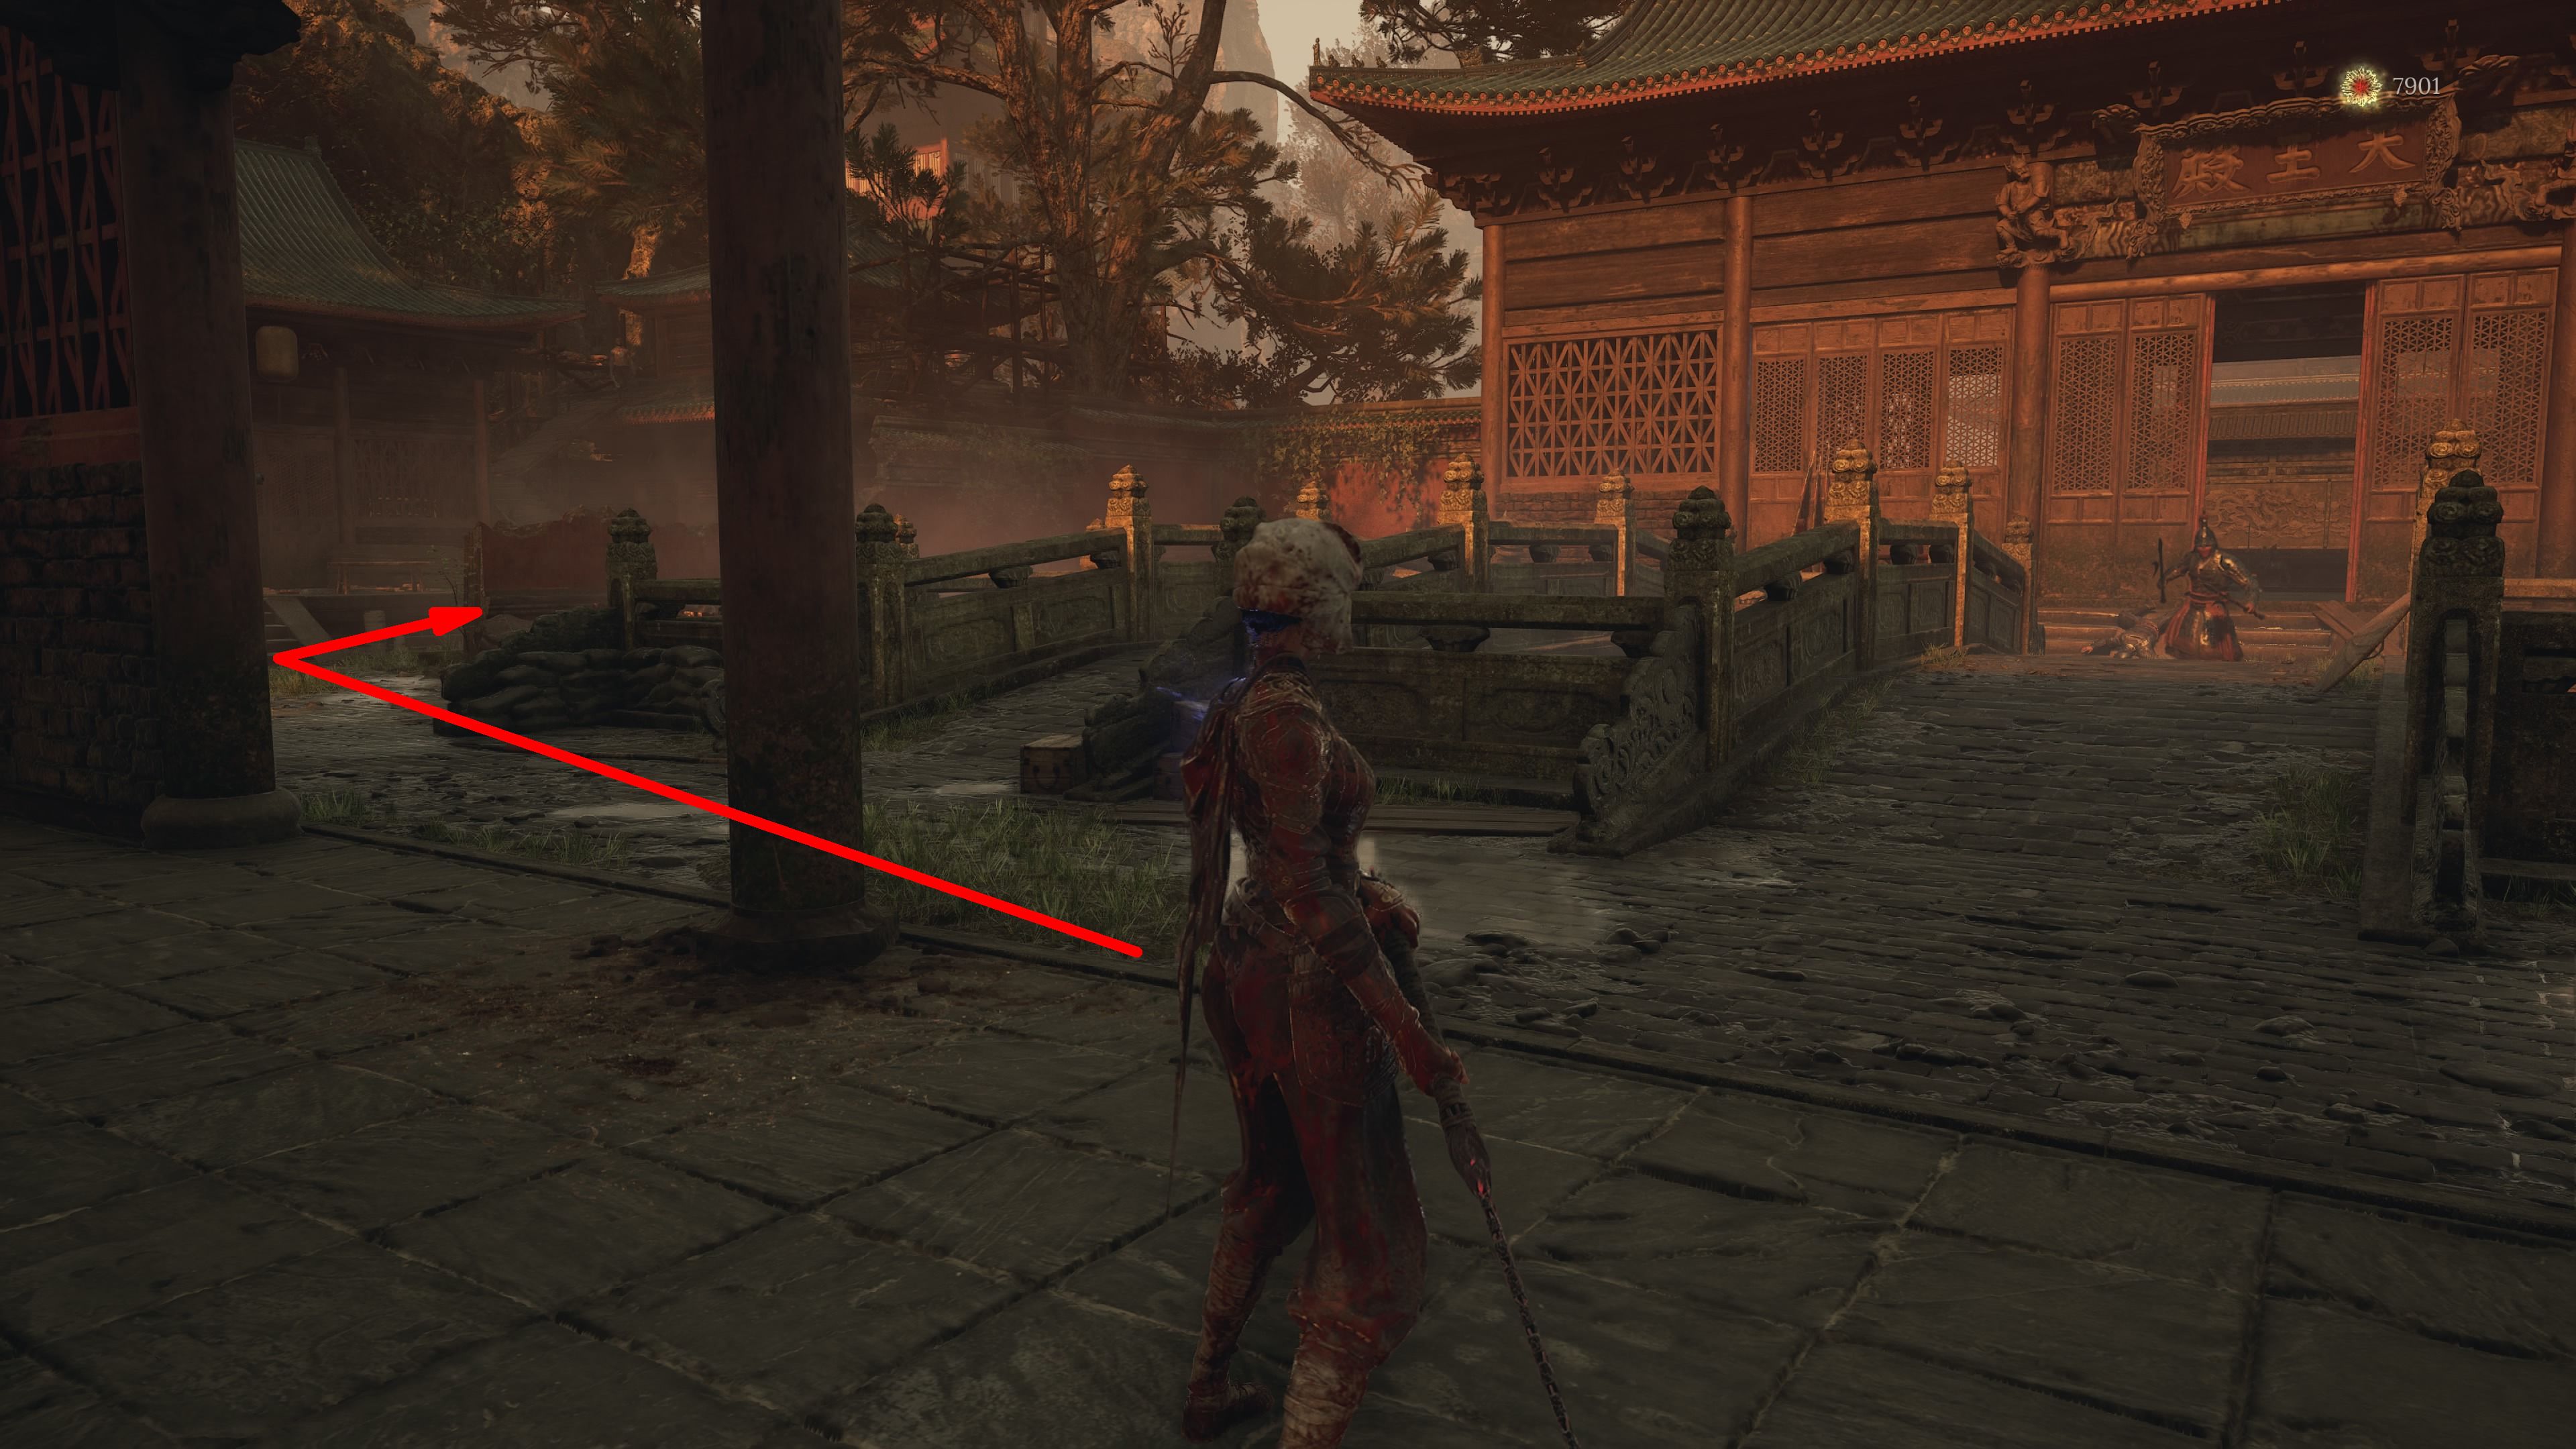
As I scale the towering structure, I traverse the rooftop to find another descent ladder. This leads me into an open expanse, where a fiery adversary known as a ‘fire dancer’ awaits. After vanquishing this foe, I position myself next to the descended ladder, ensuring it’s on my left side. Then, I stride forward, following a path that leads me close to a building adorned with a banner. Continuing along this path takes me across a bridge, eventually leading me to the Annalum Shrine, which is nestled next to a tree bearing vibrant red leaves.
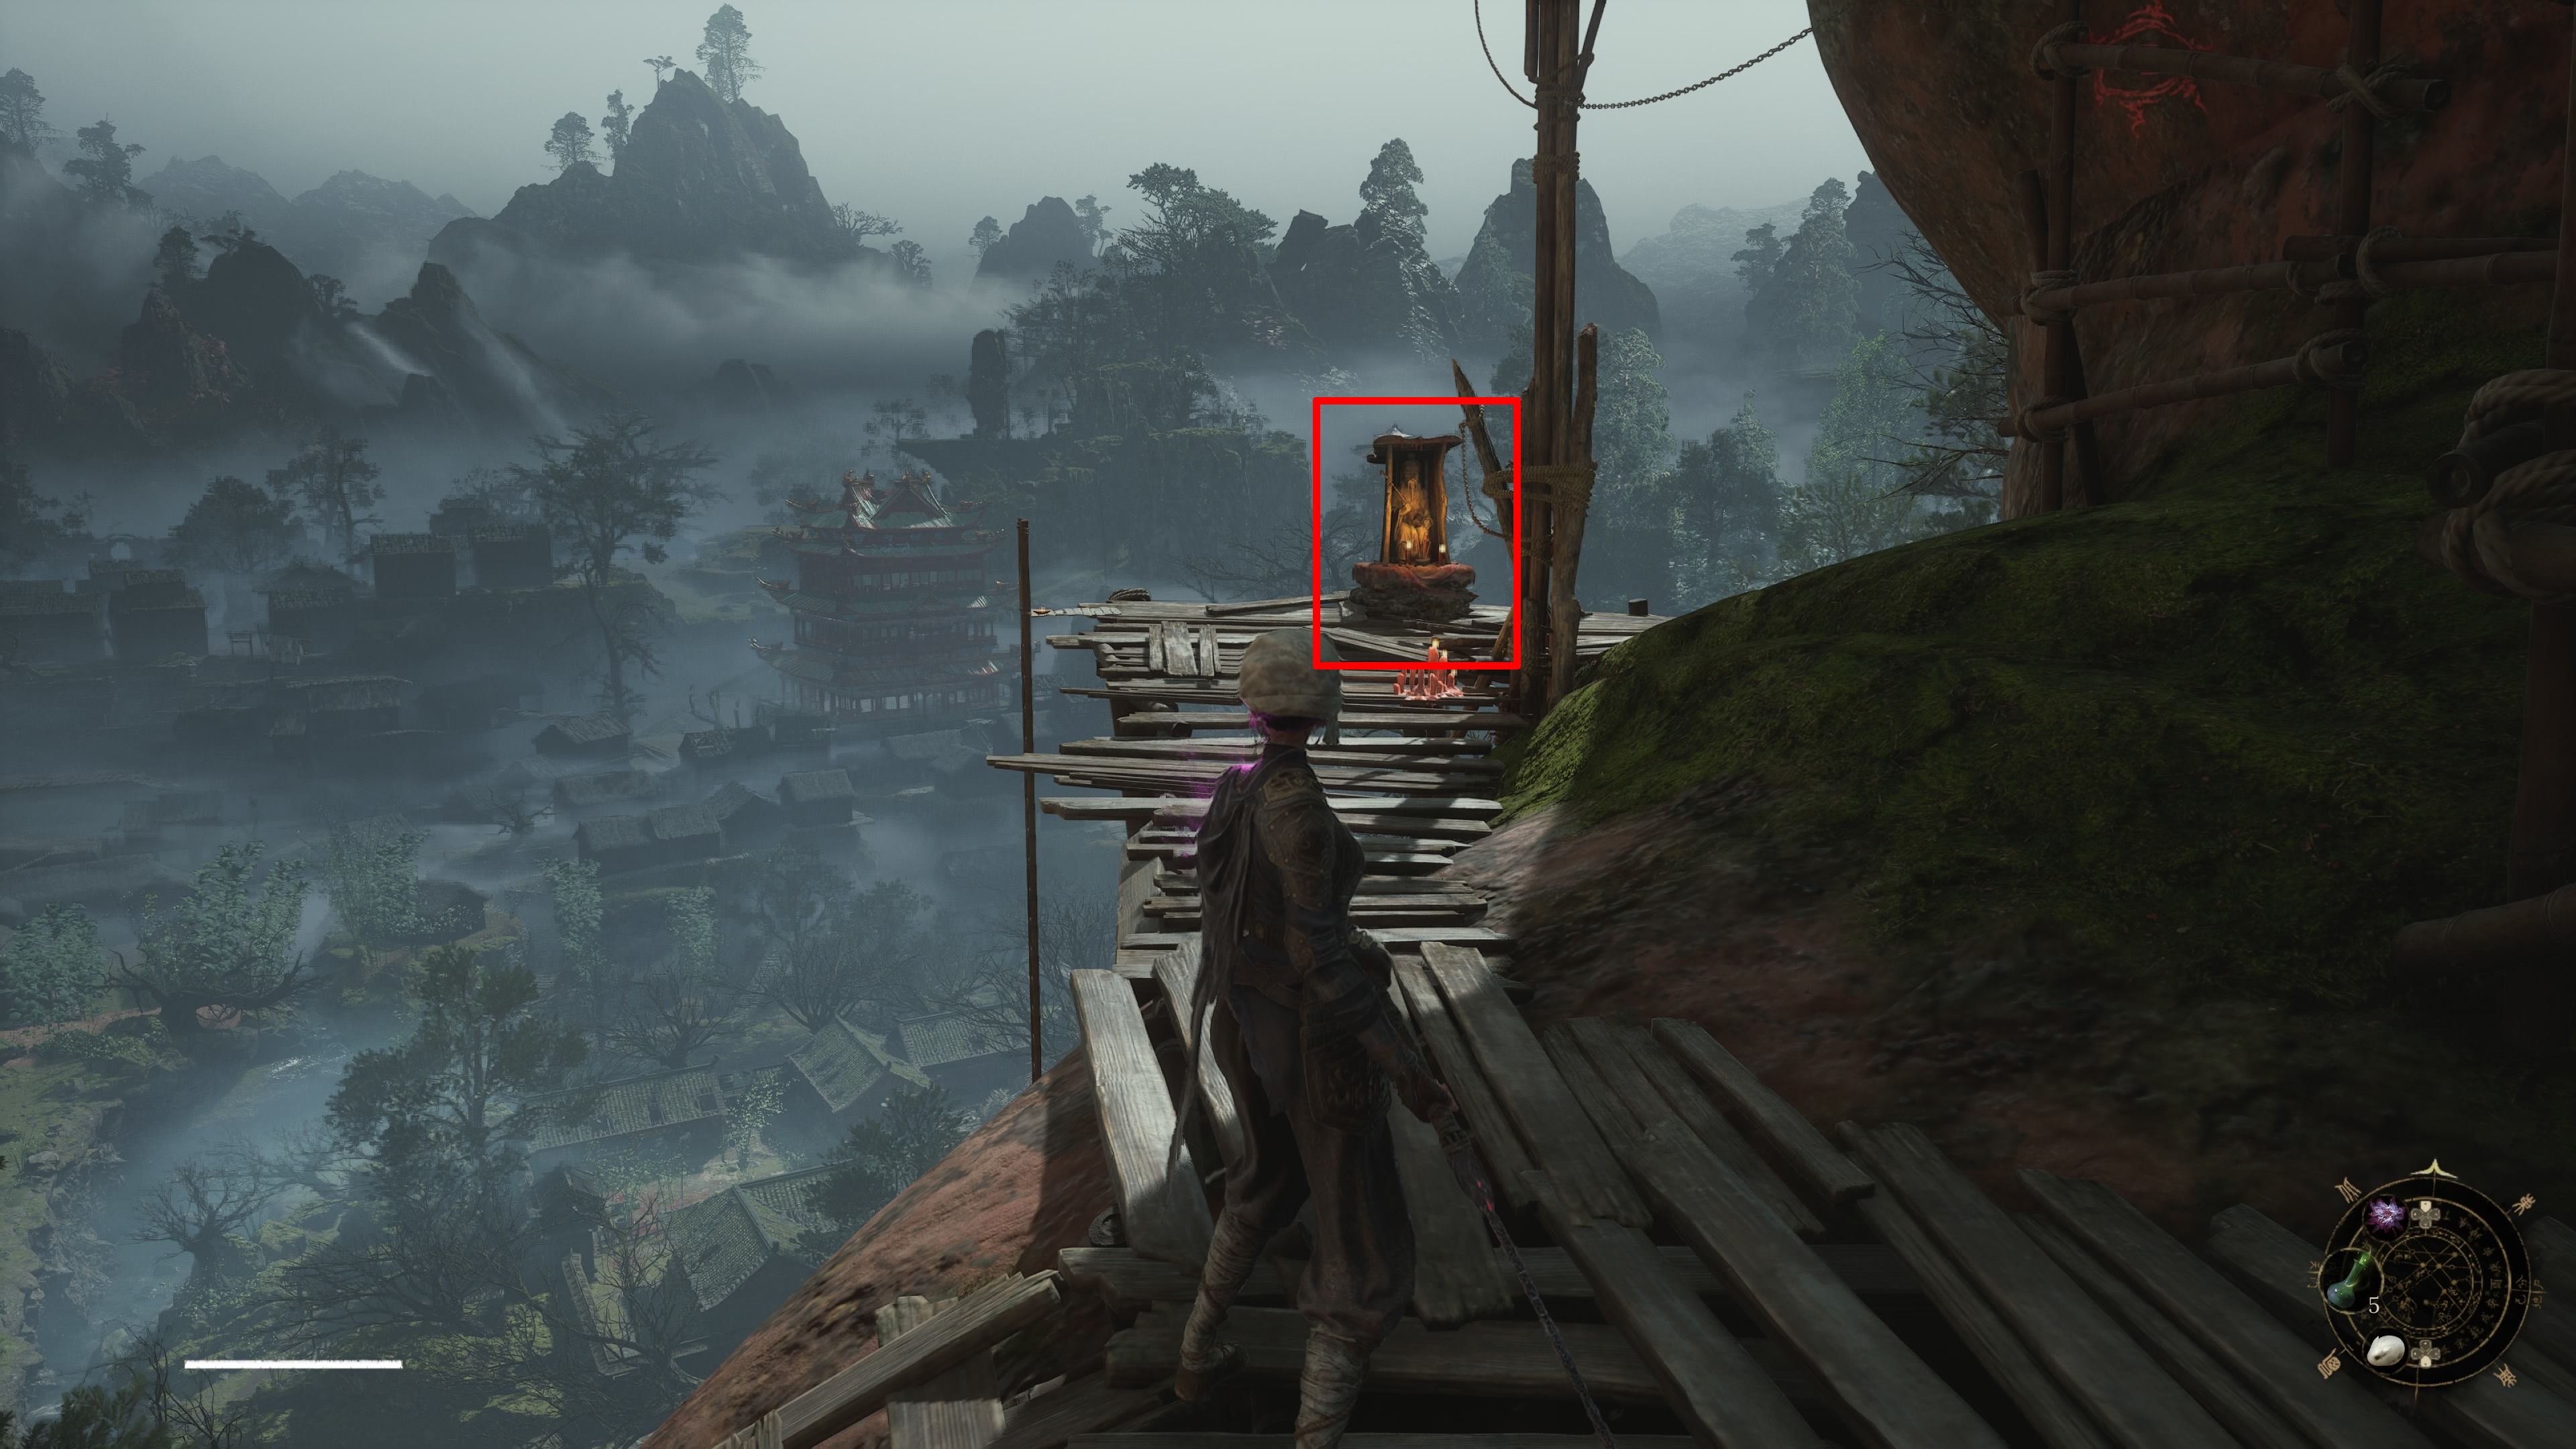
Mercury Workshop
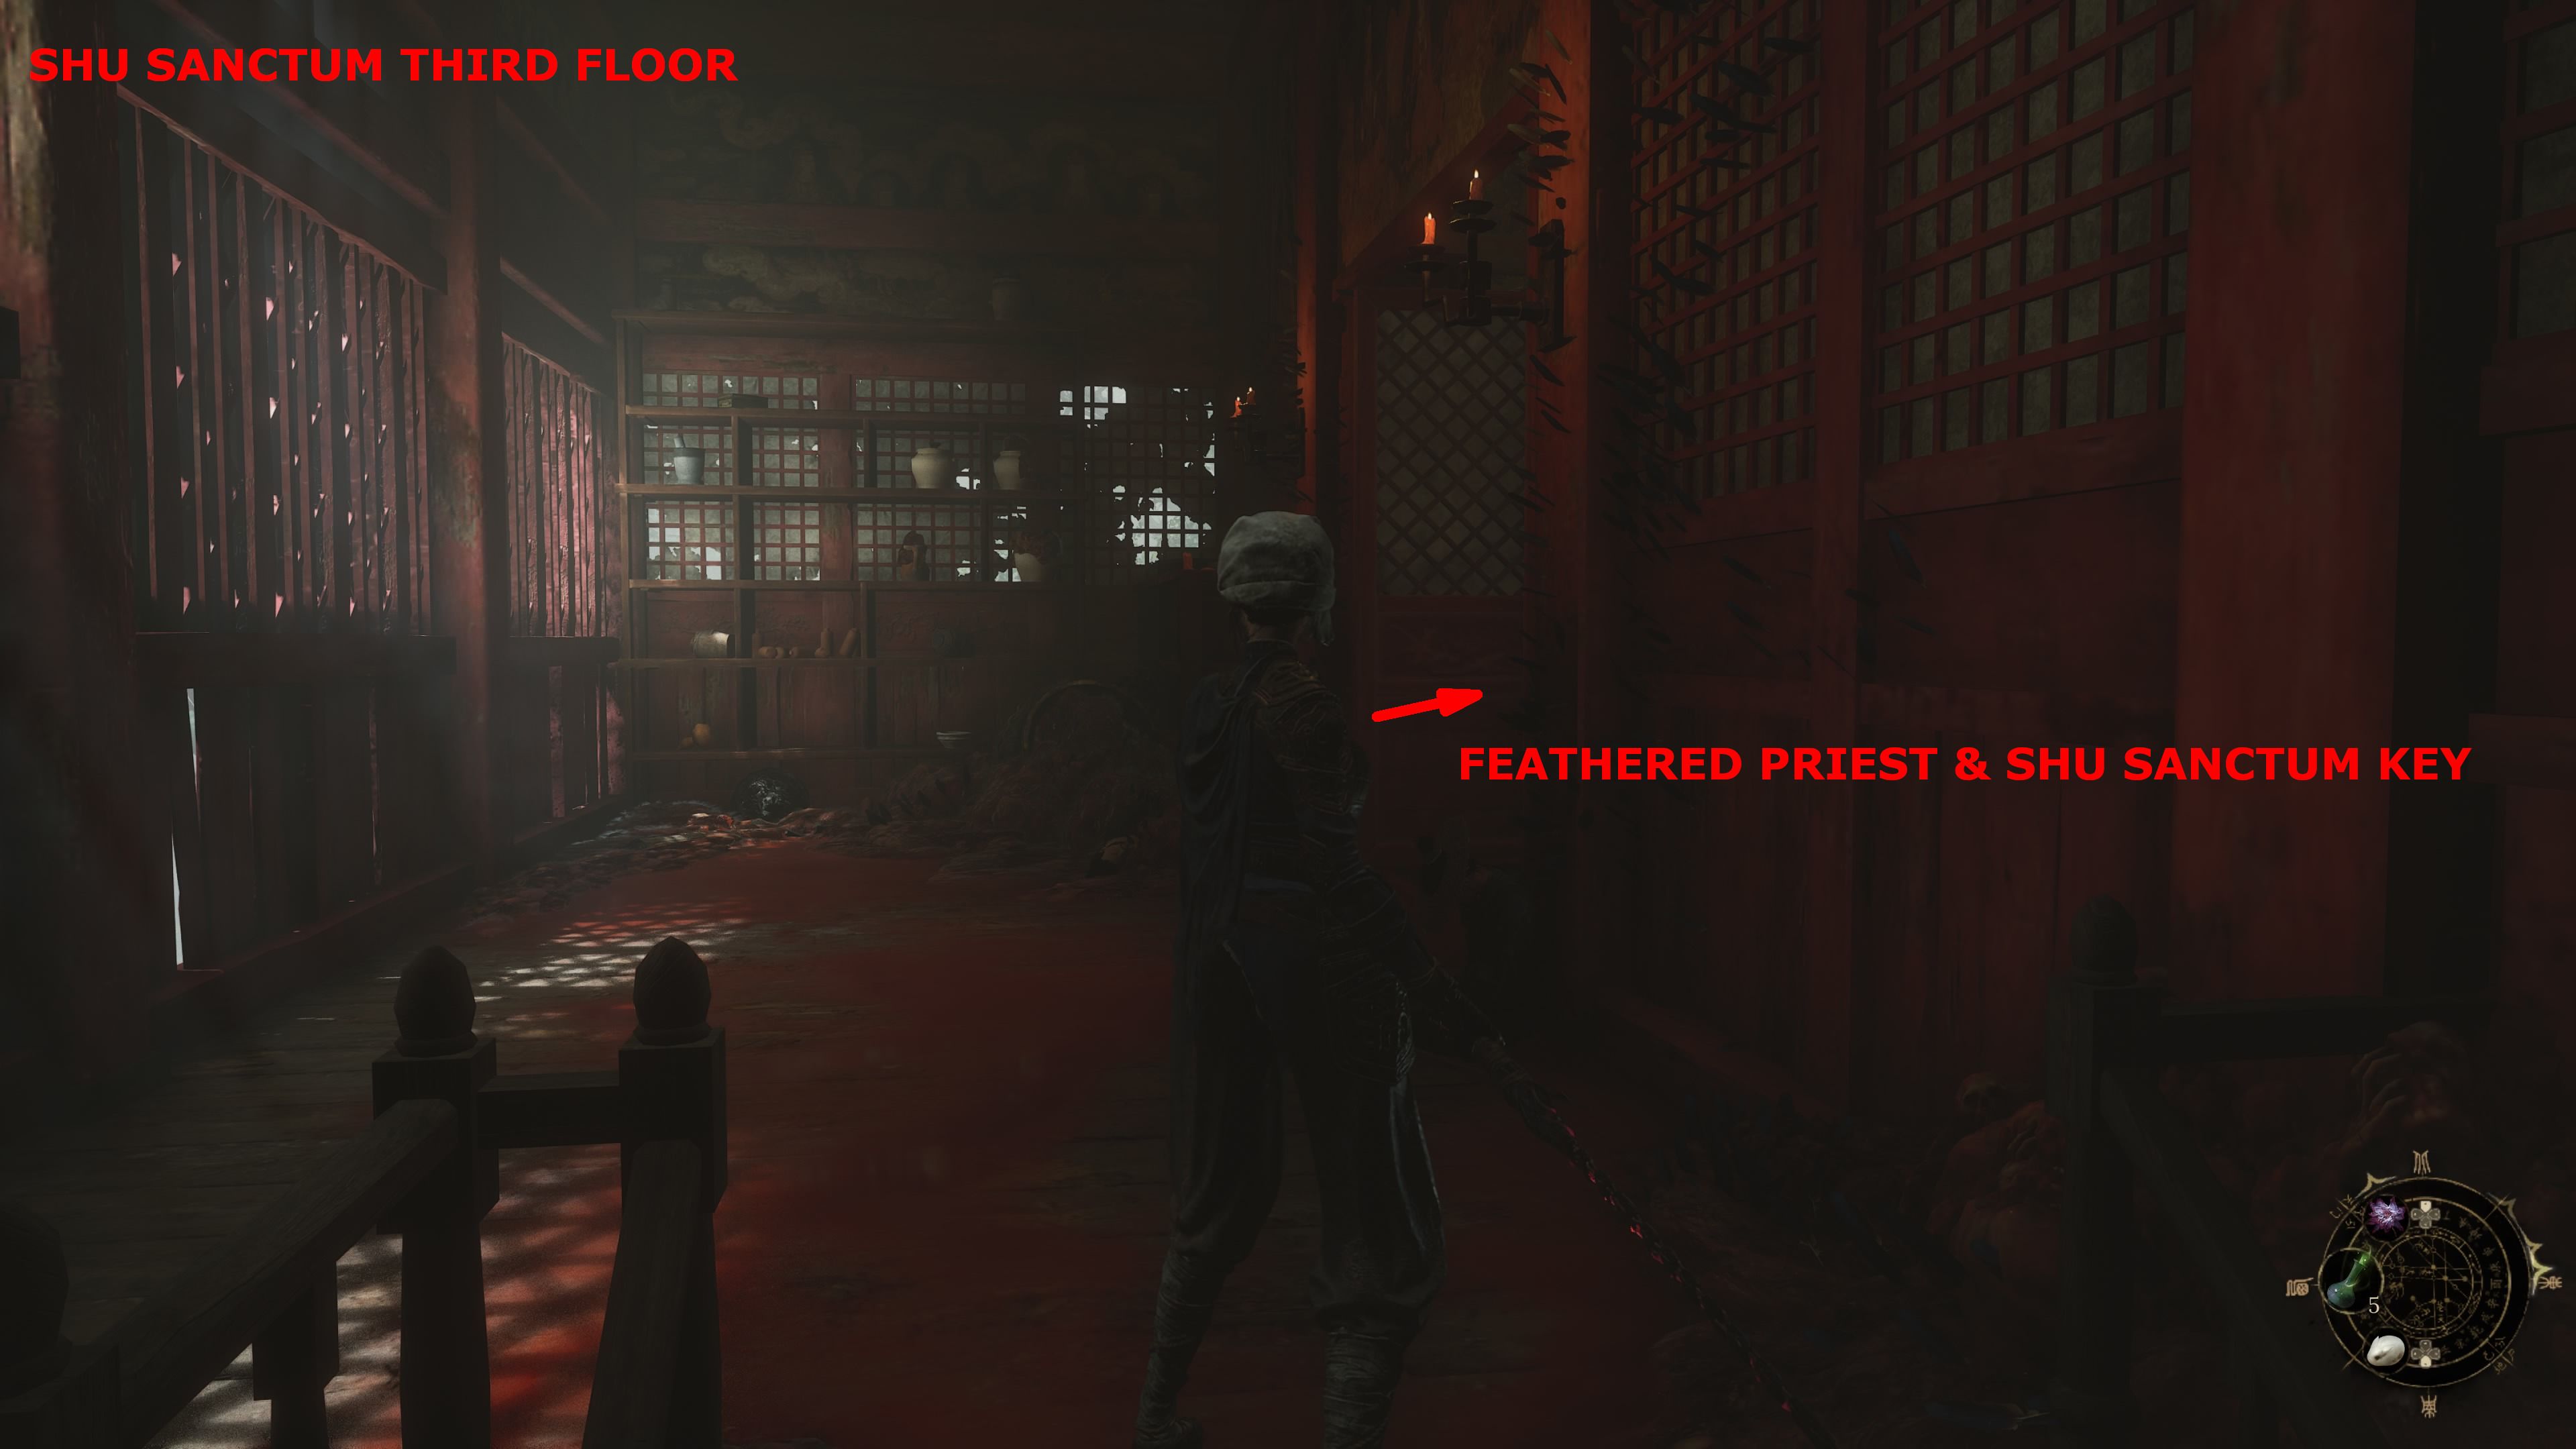
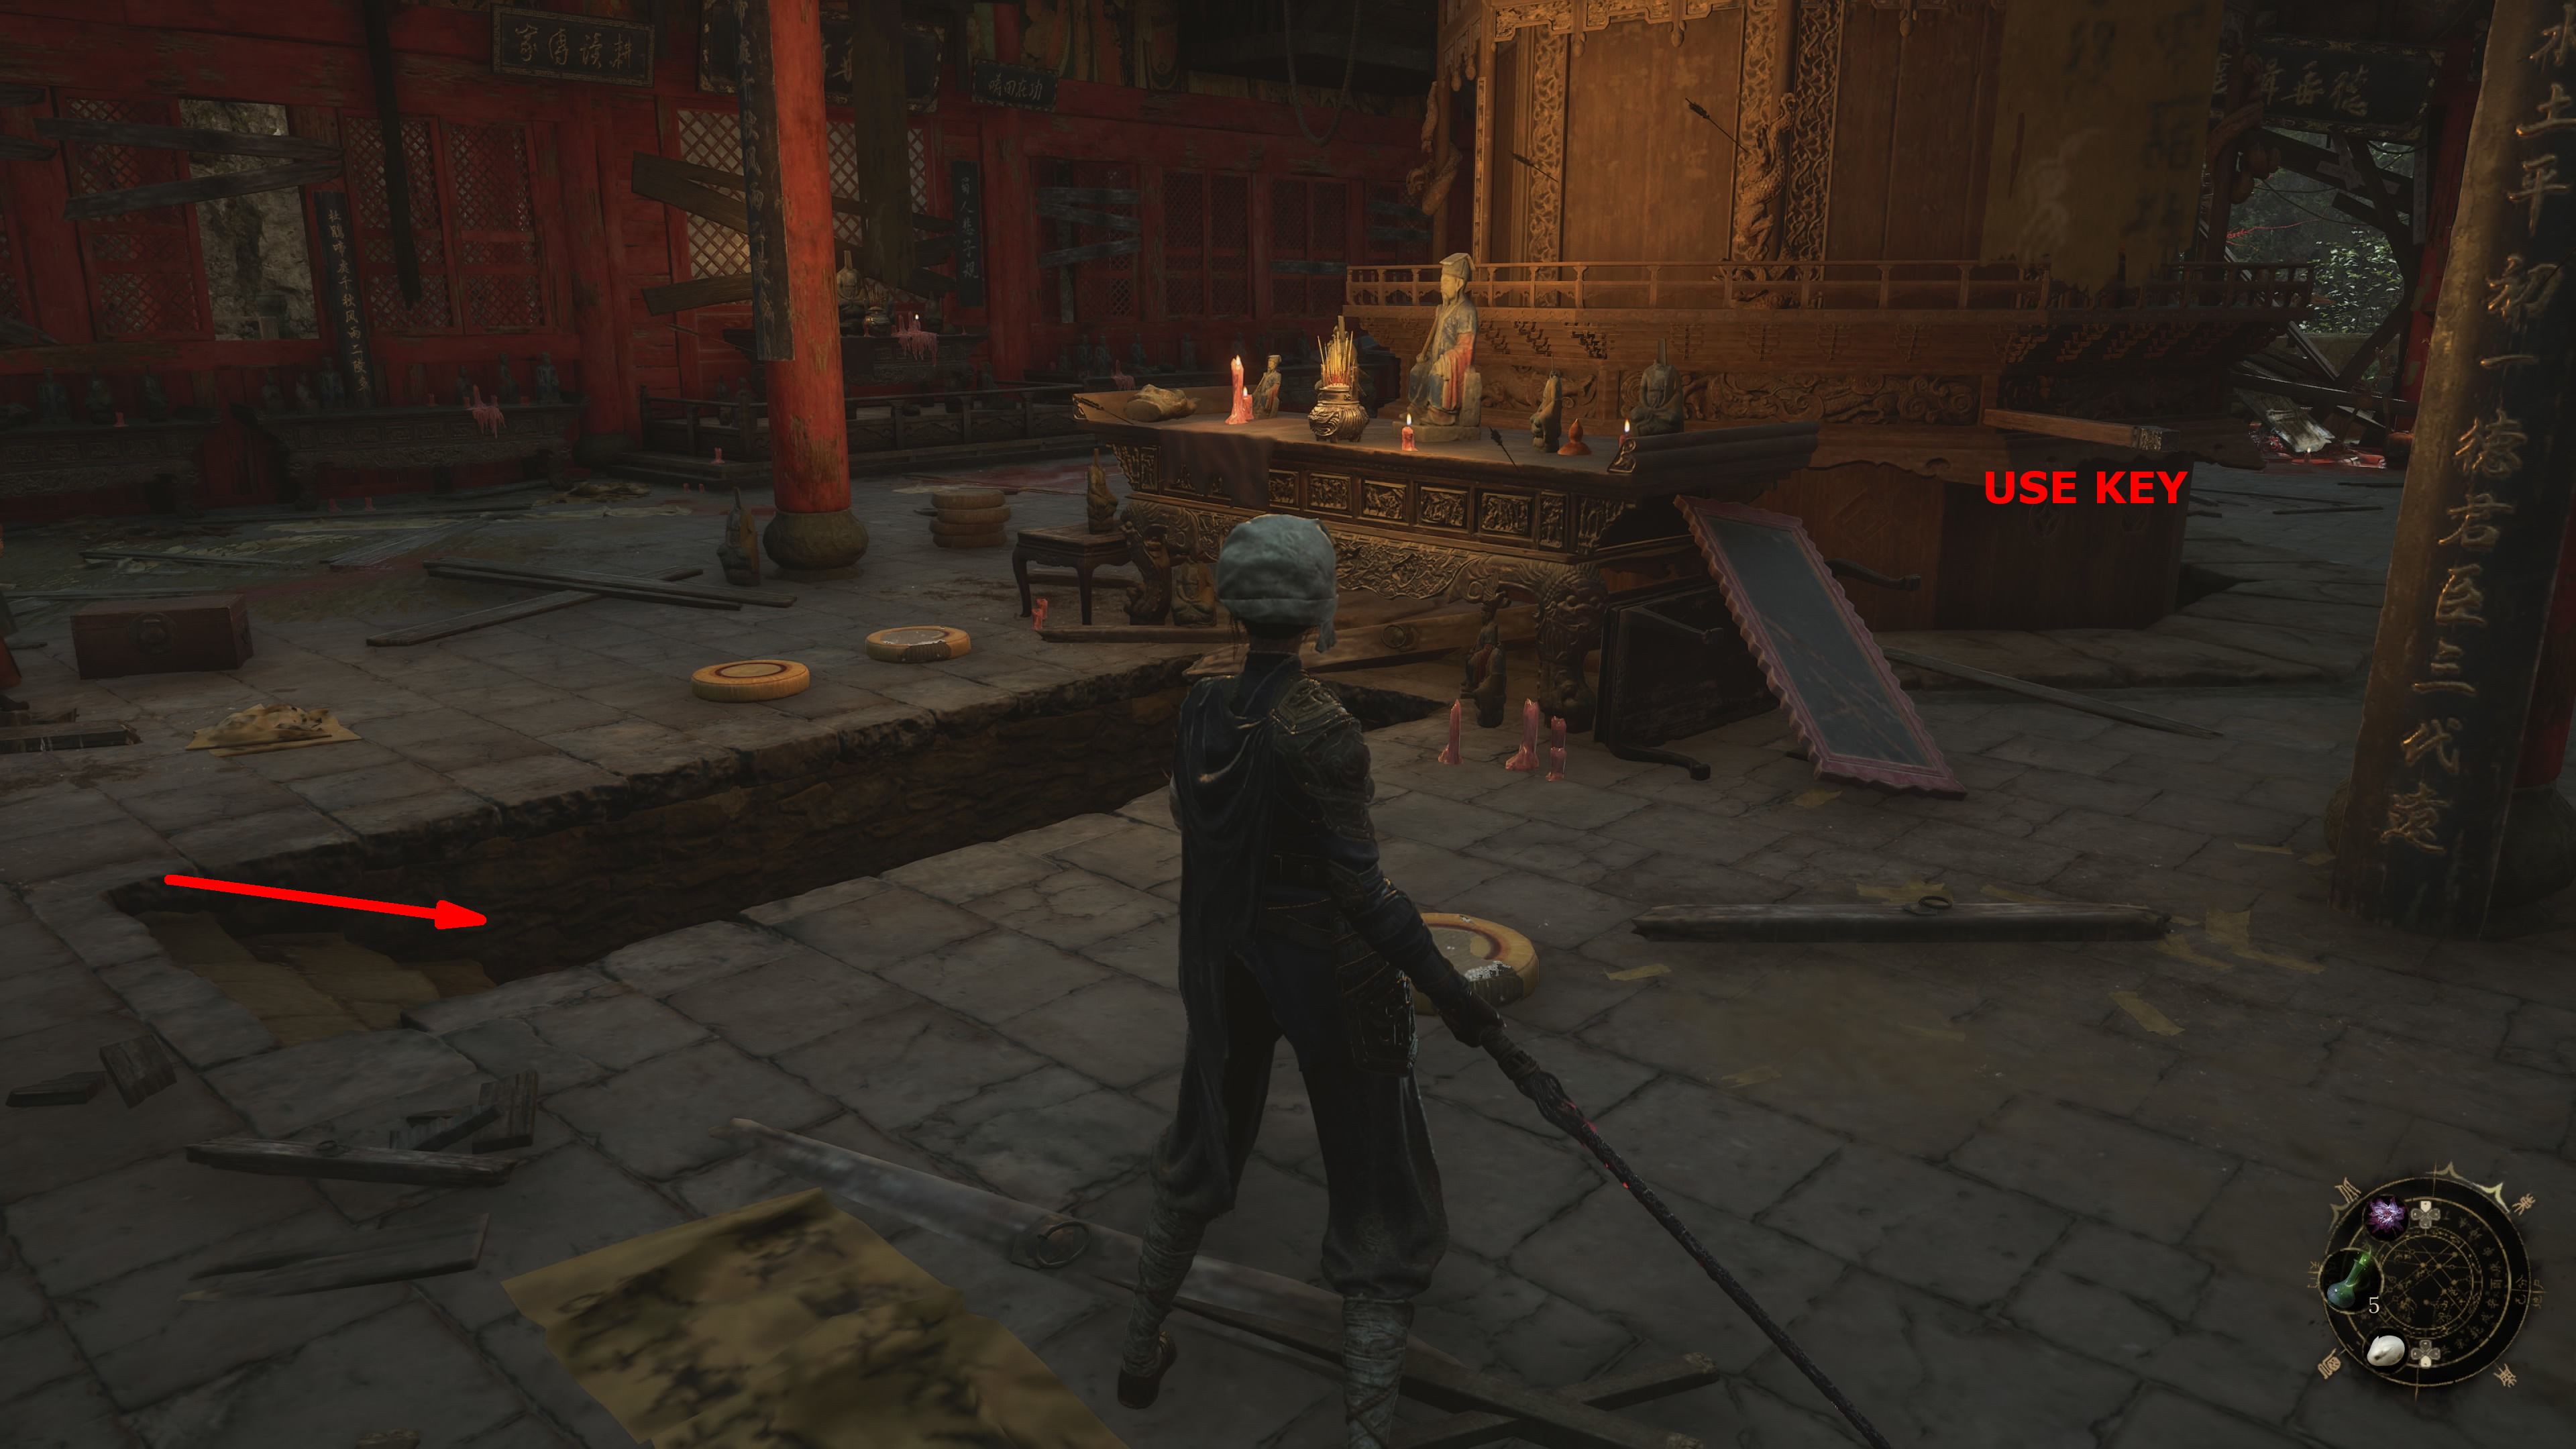
Head back to the Shu Sanctum Shrine, and climb the internal stairways to reach the third level. Up there, gamers will encounter a room housing ‘Feathered Priest – Lu Bingzhang’, whom they must defeat for the acquisition of the Shu Sanctum Key. Subsequently, players should go back to the ground floor, interact with the central column, and find the stairs that appear beside it, which will allow them to move down through the floors.
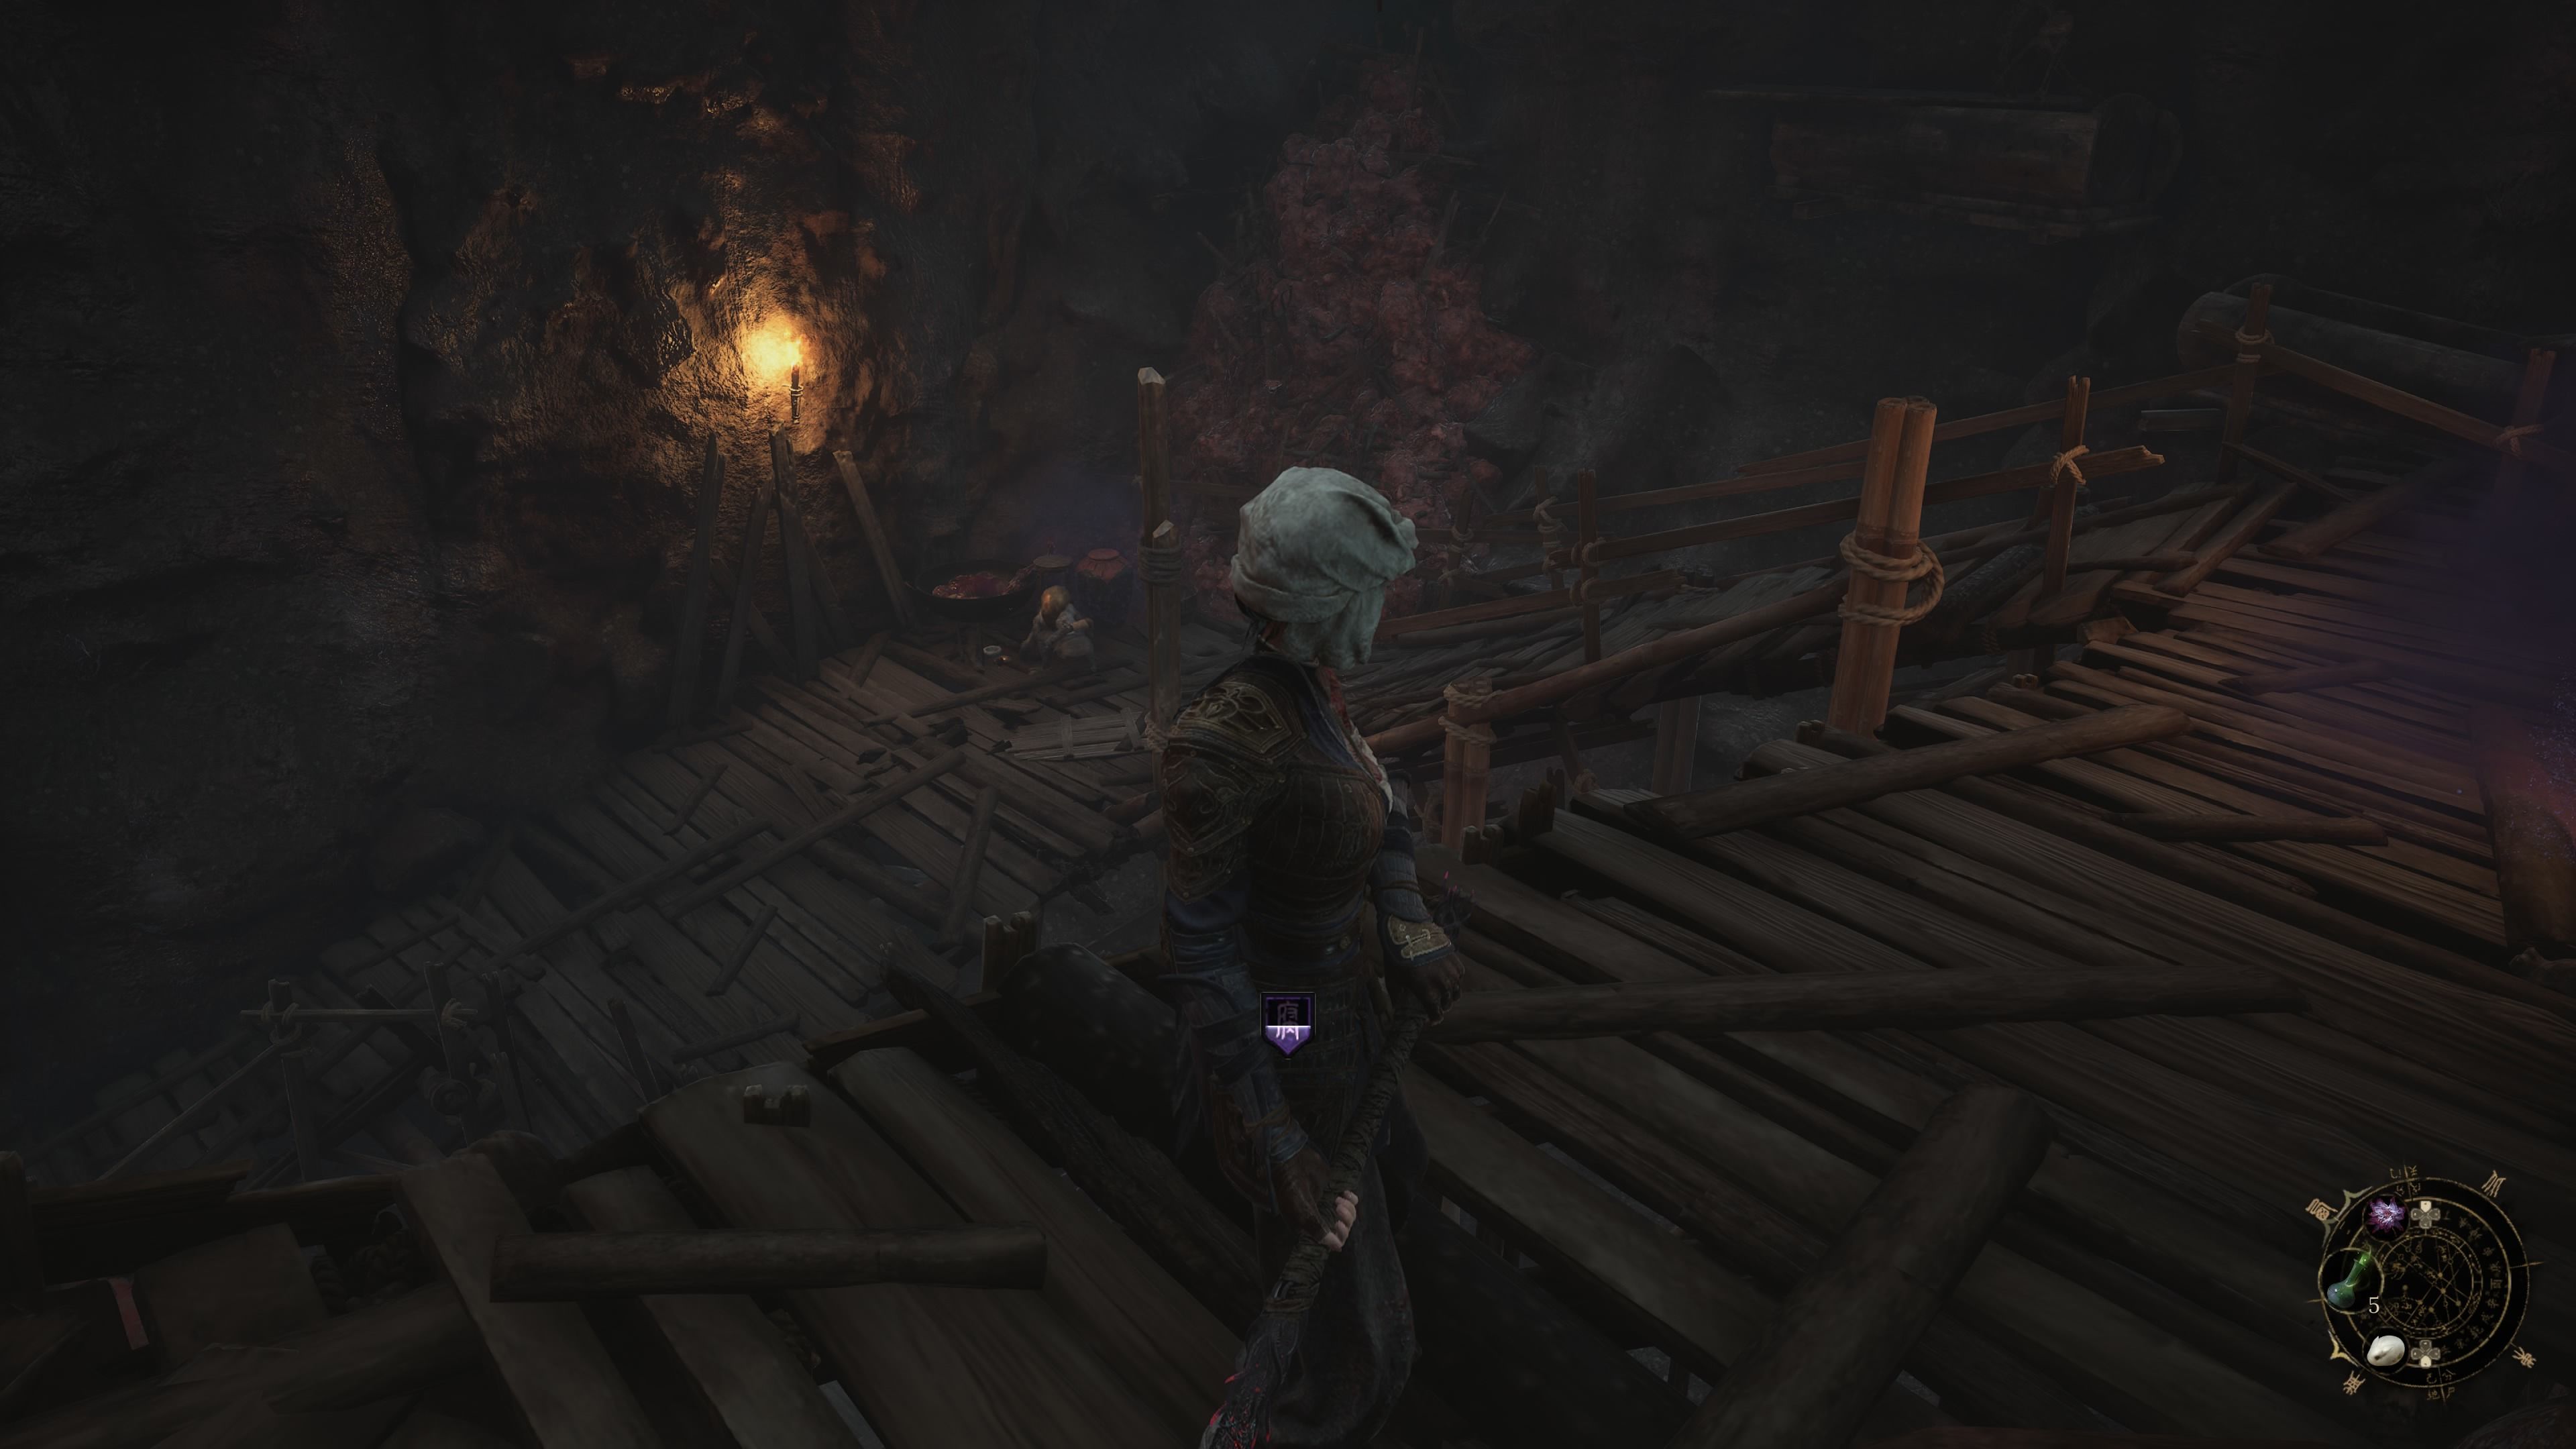
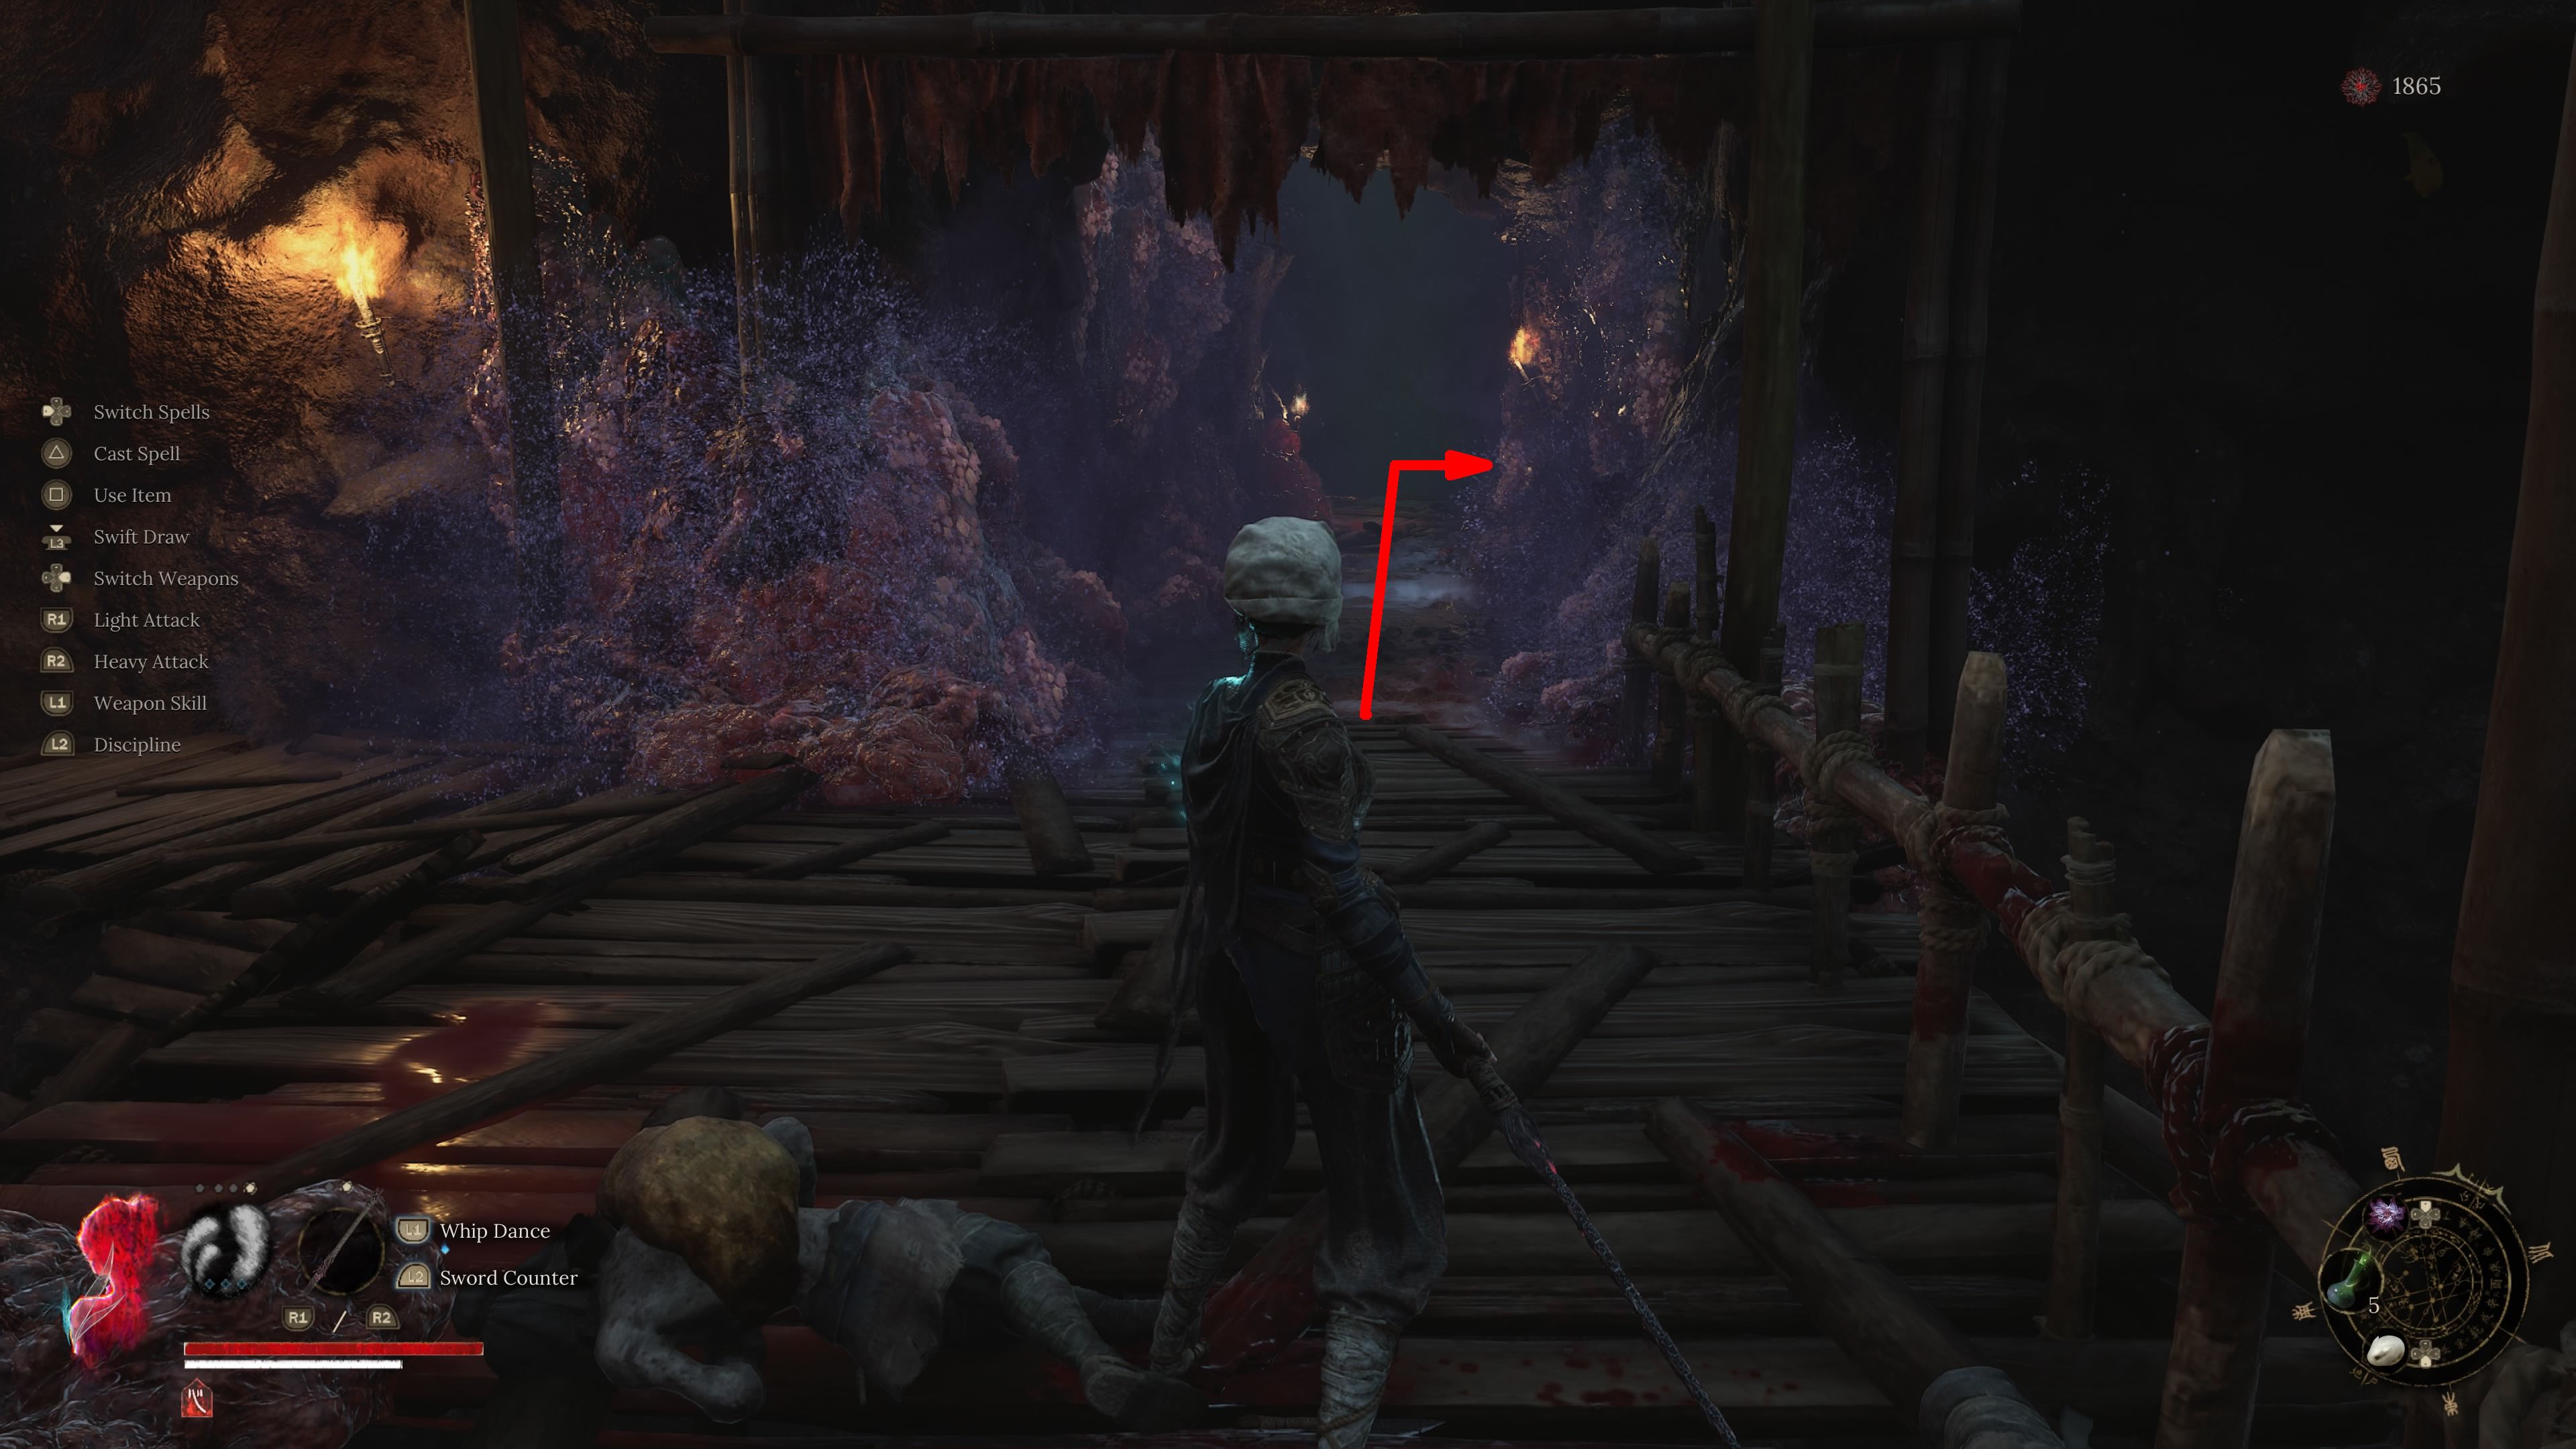
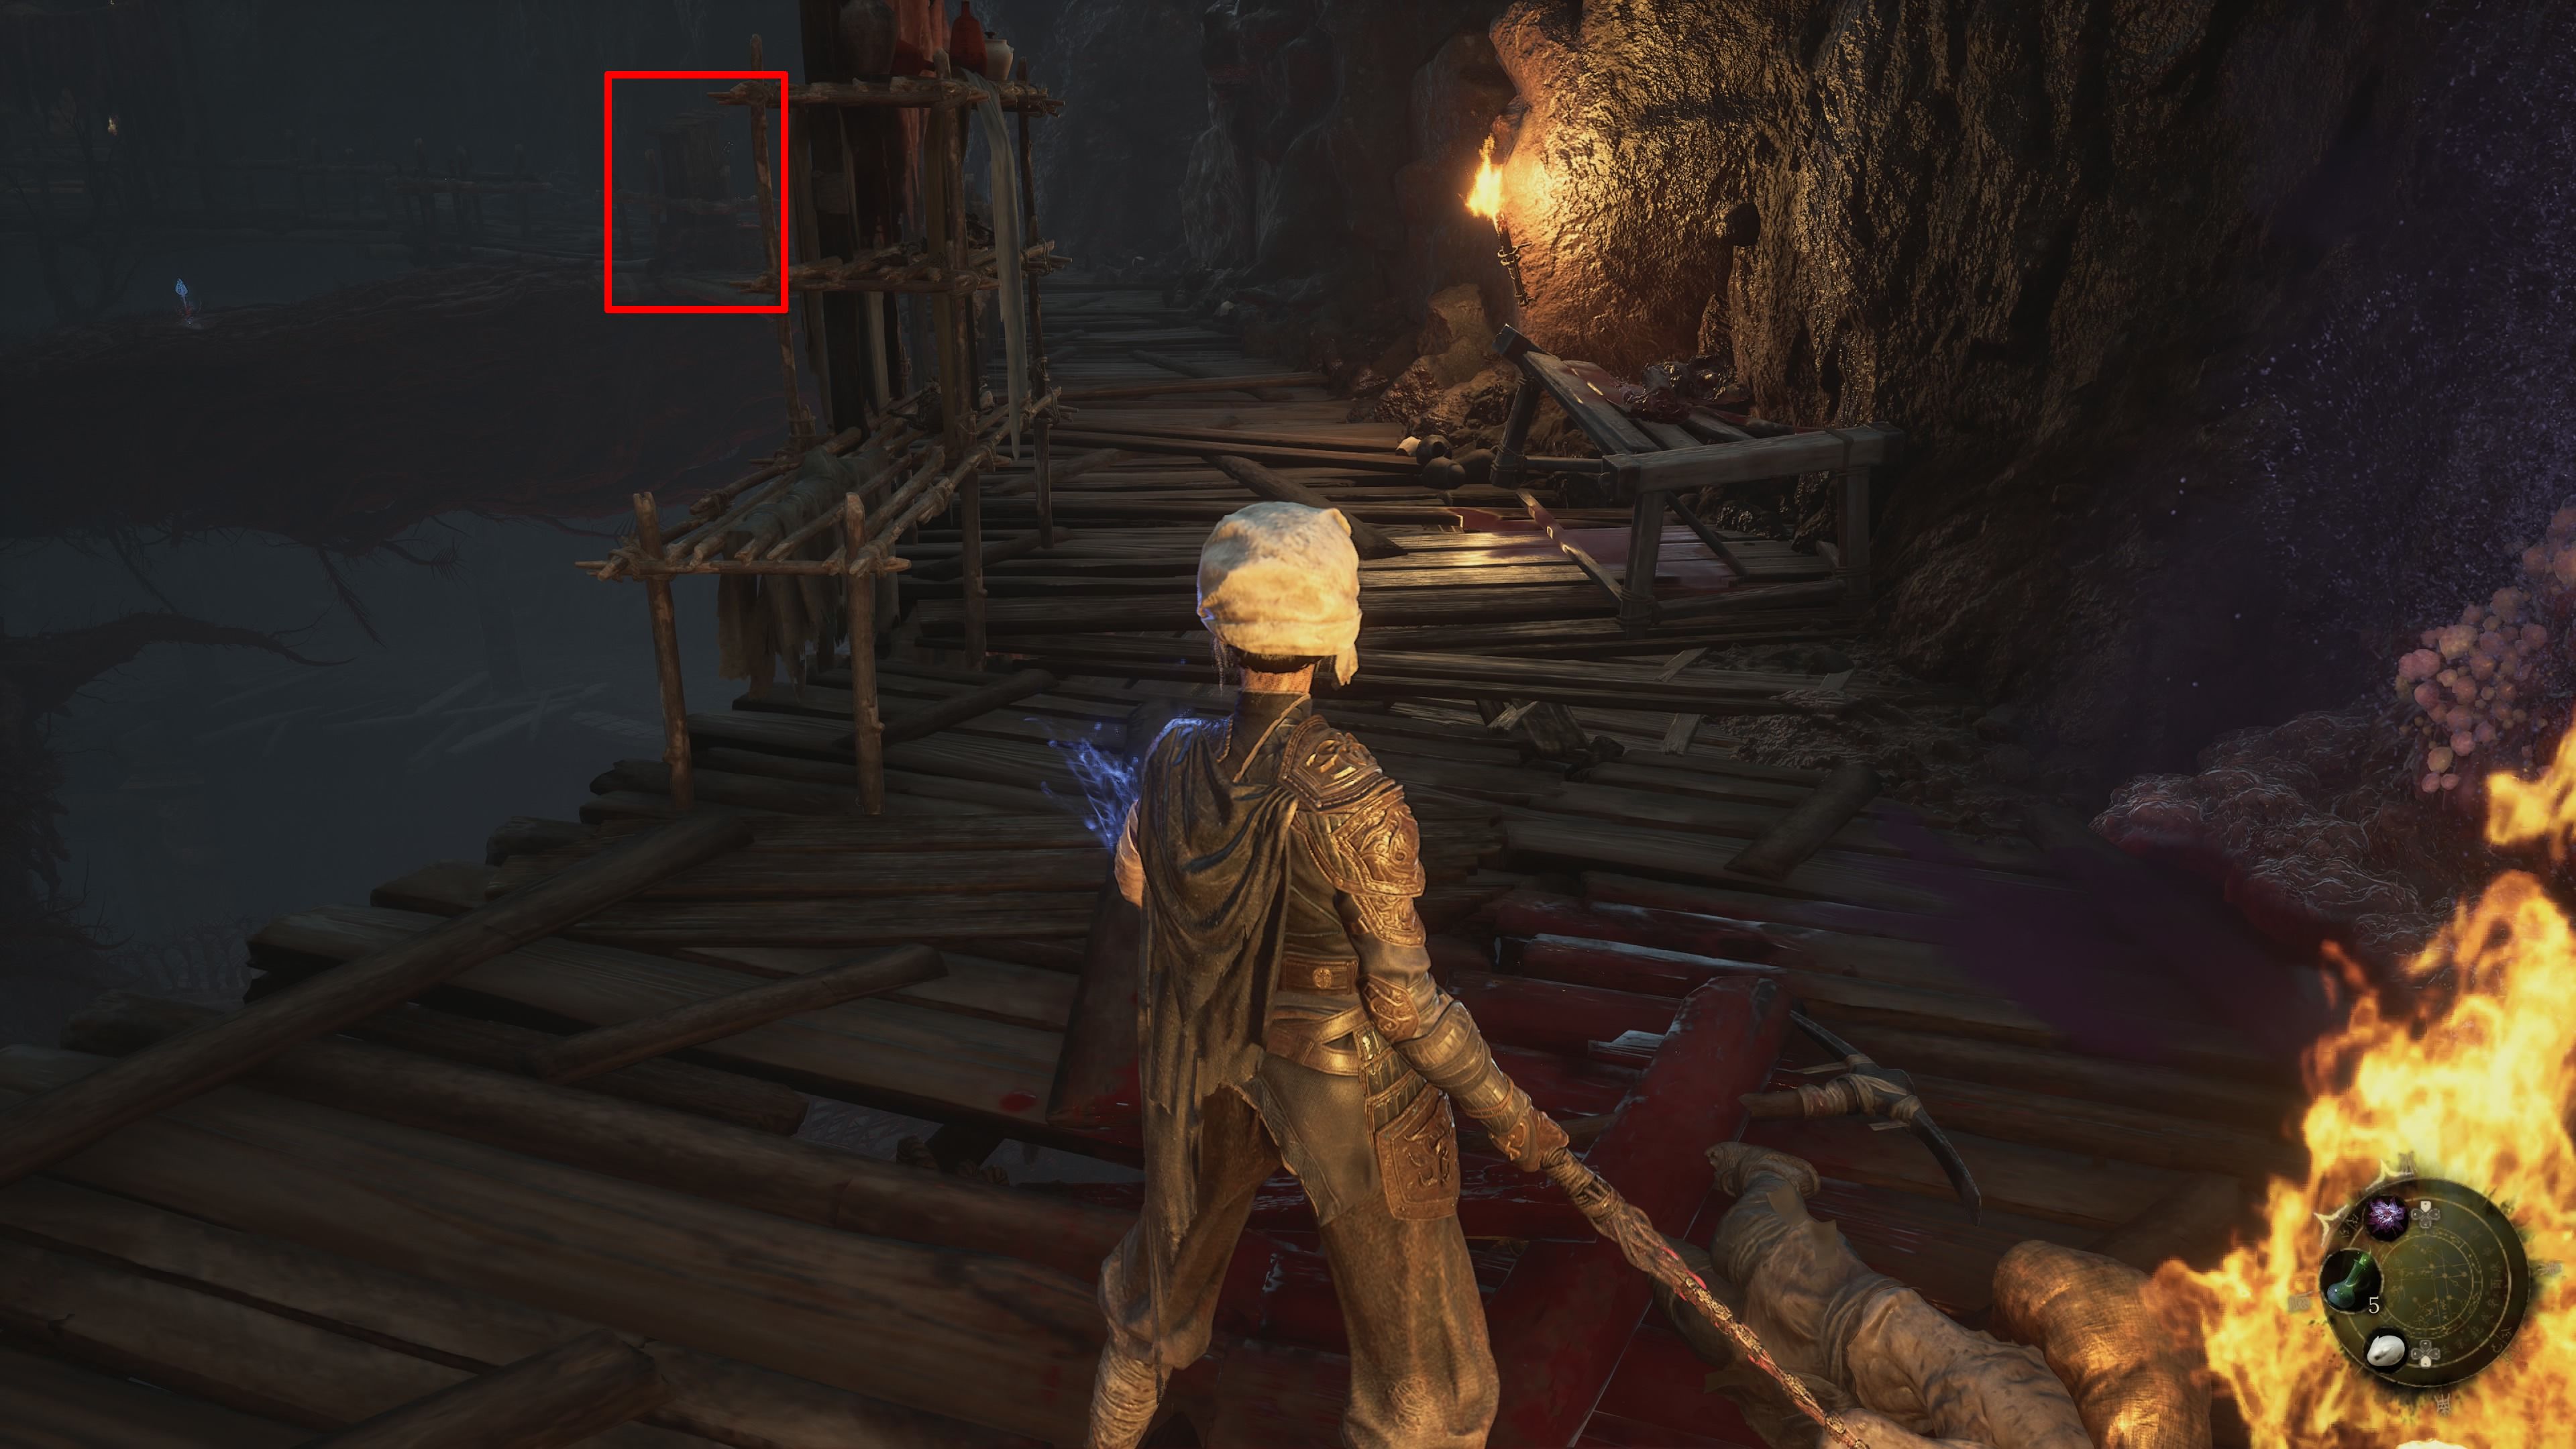
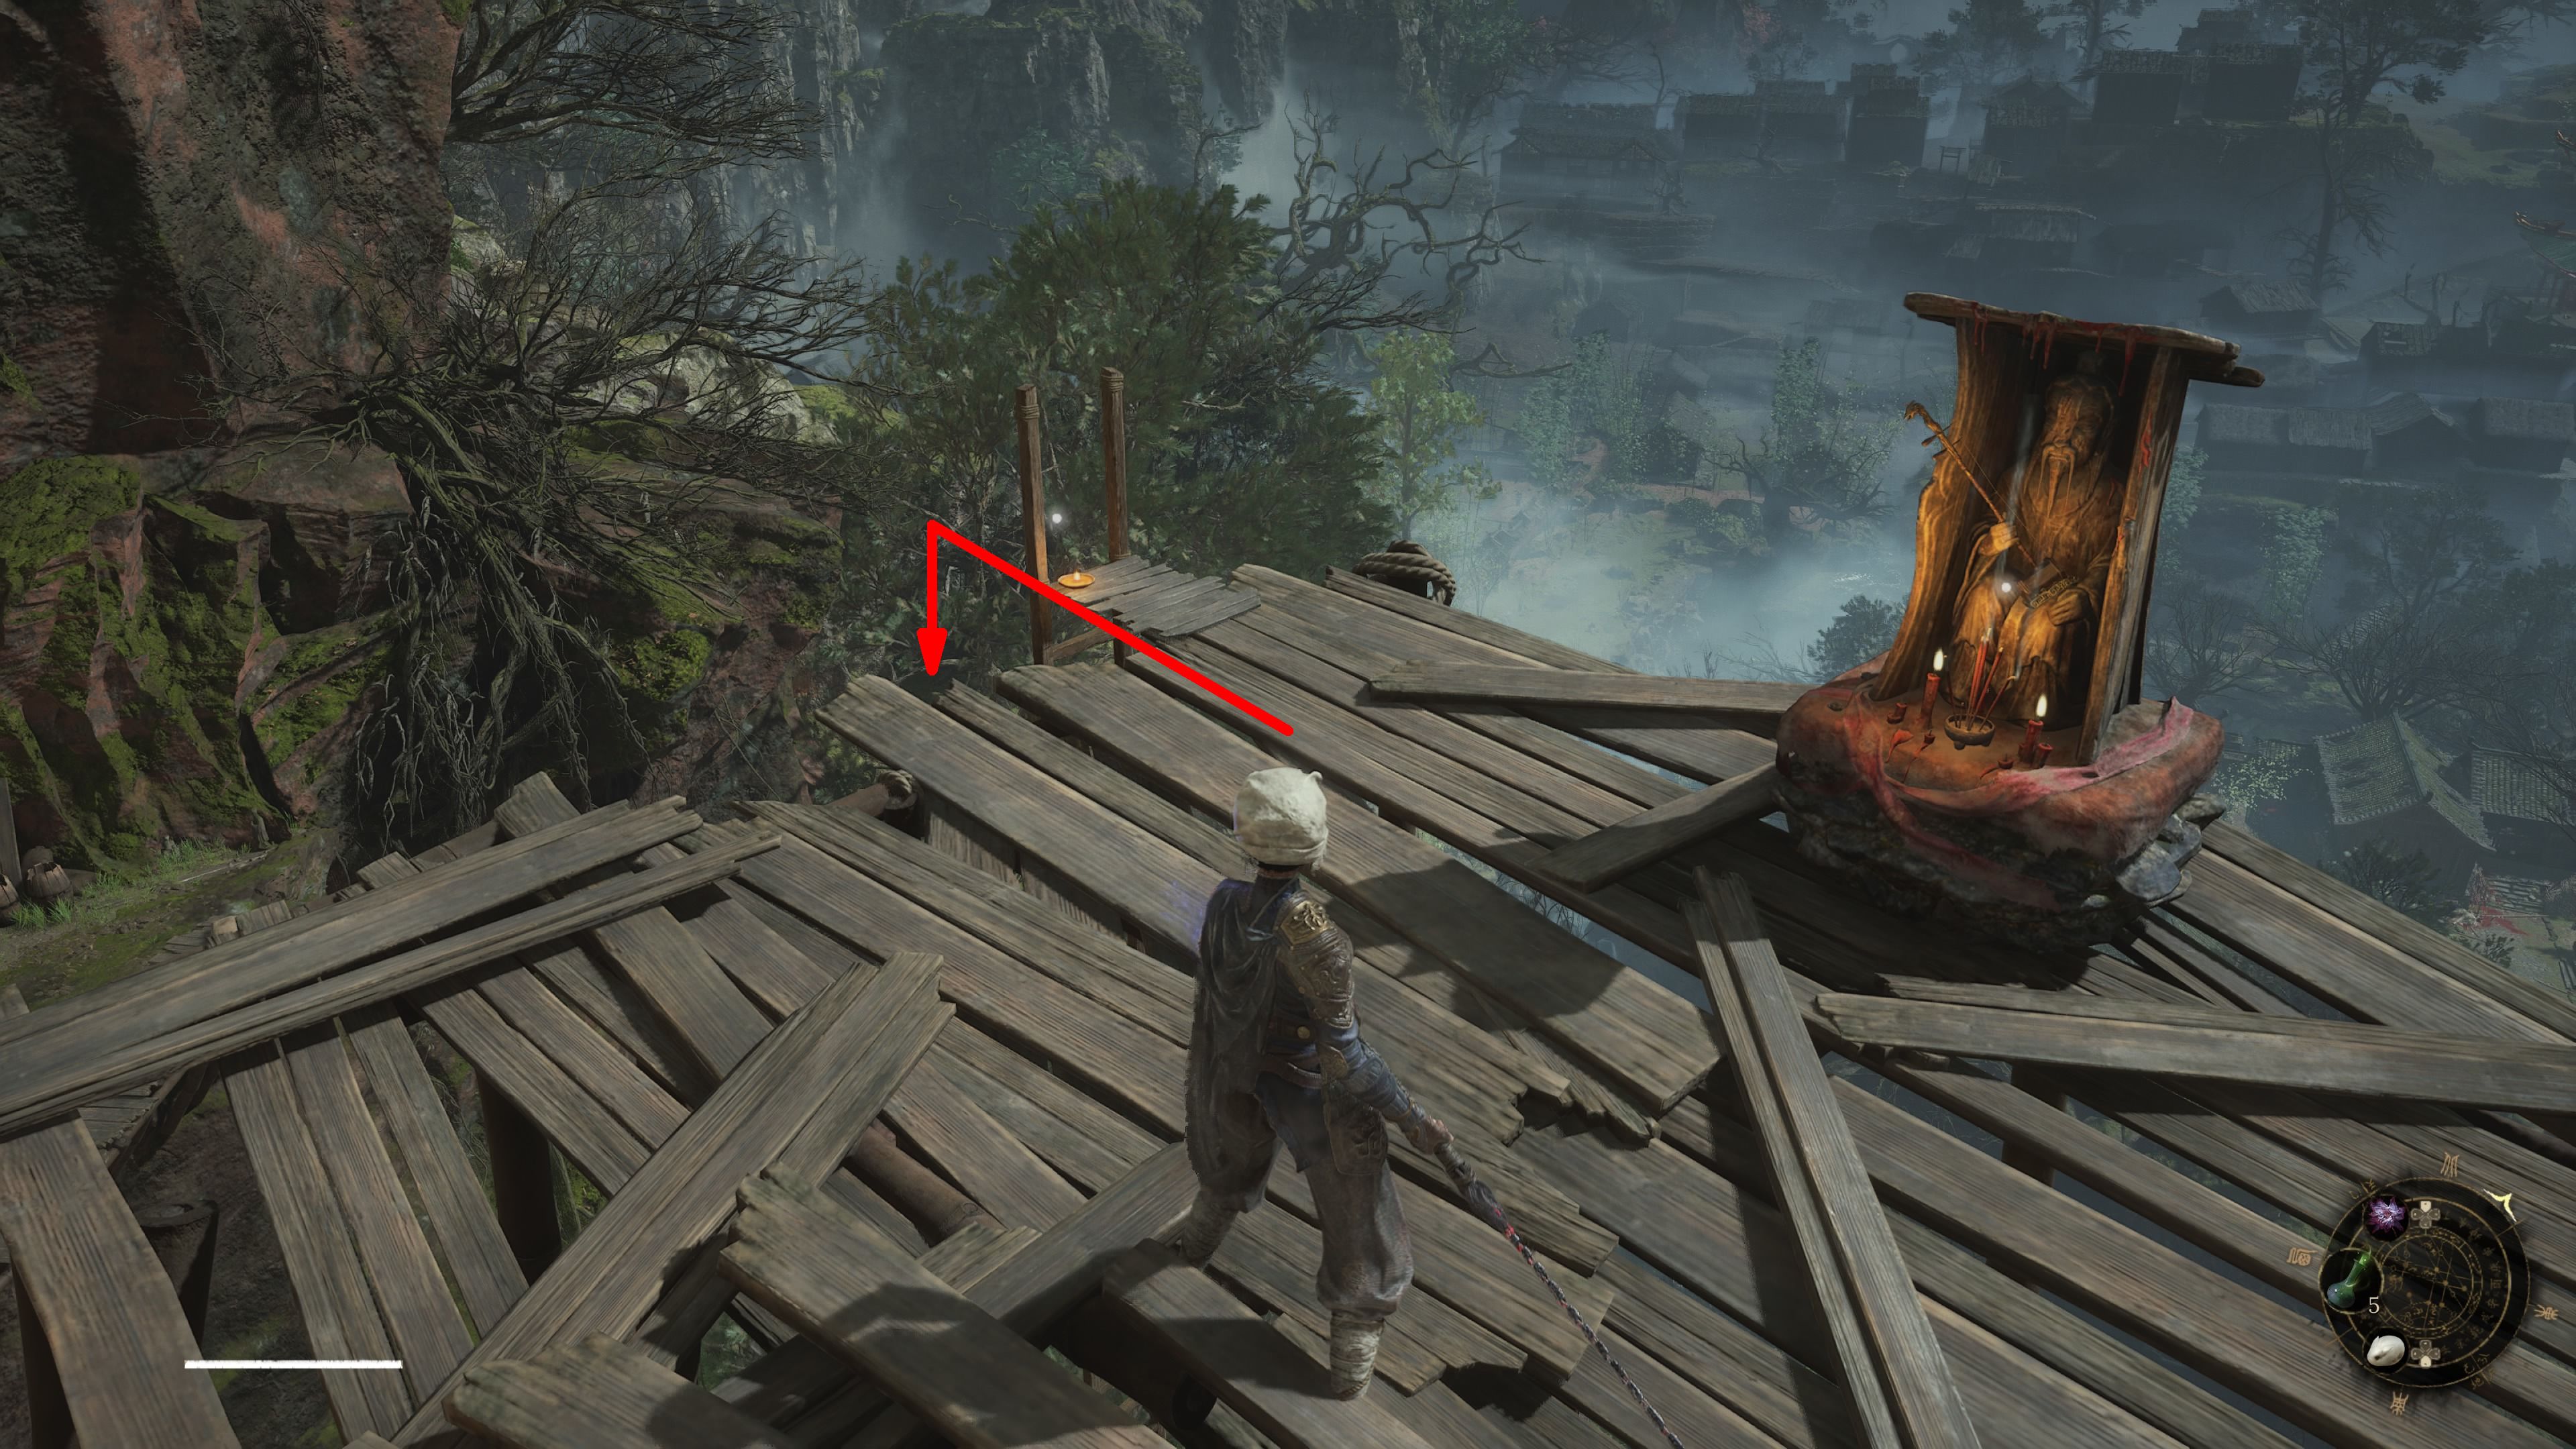
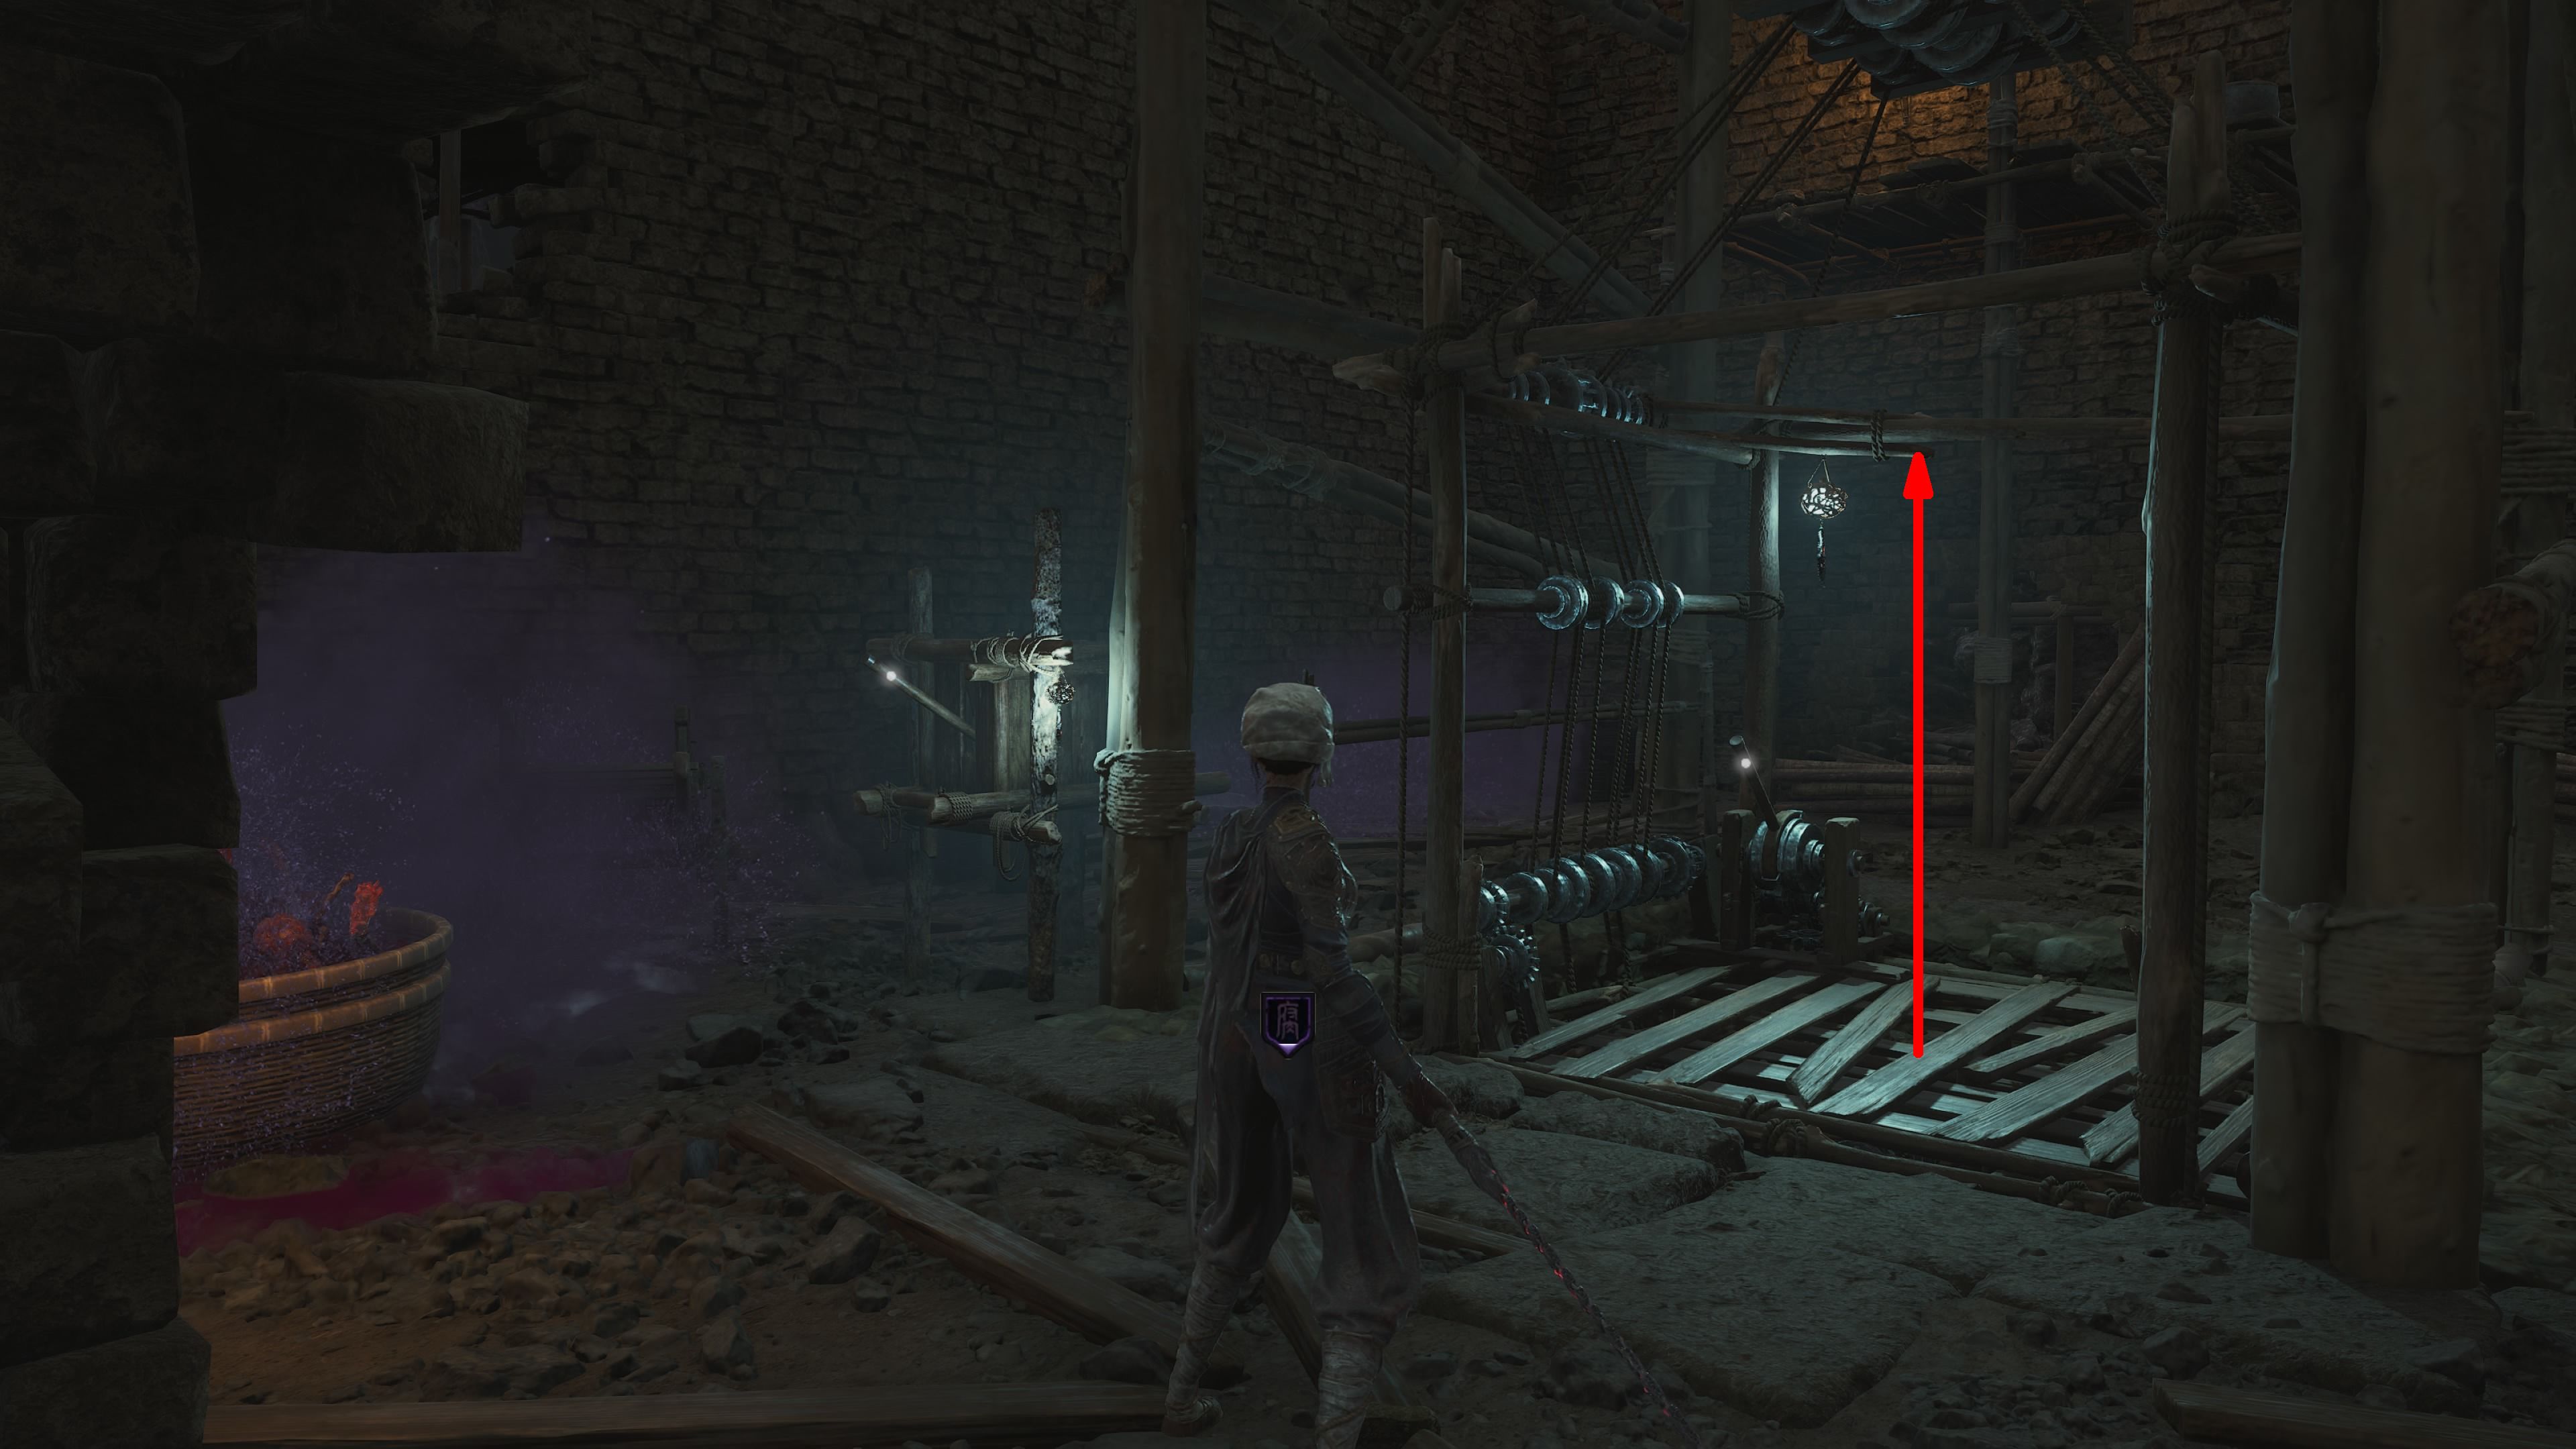
Now, players need to carry on their descent via a wooden platform-like structure. Once they’ve navigated through this part, they should proceed through a brief tunnel and veer right to arrive at the Mercury Workshop Shrine, which will be situated on the left side of the pathway.
Bandit Cave
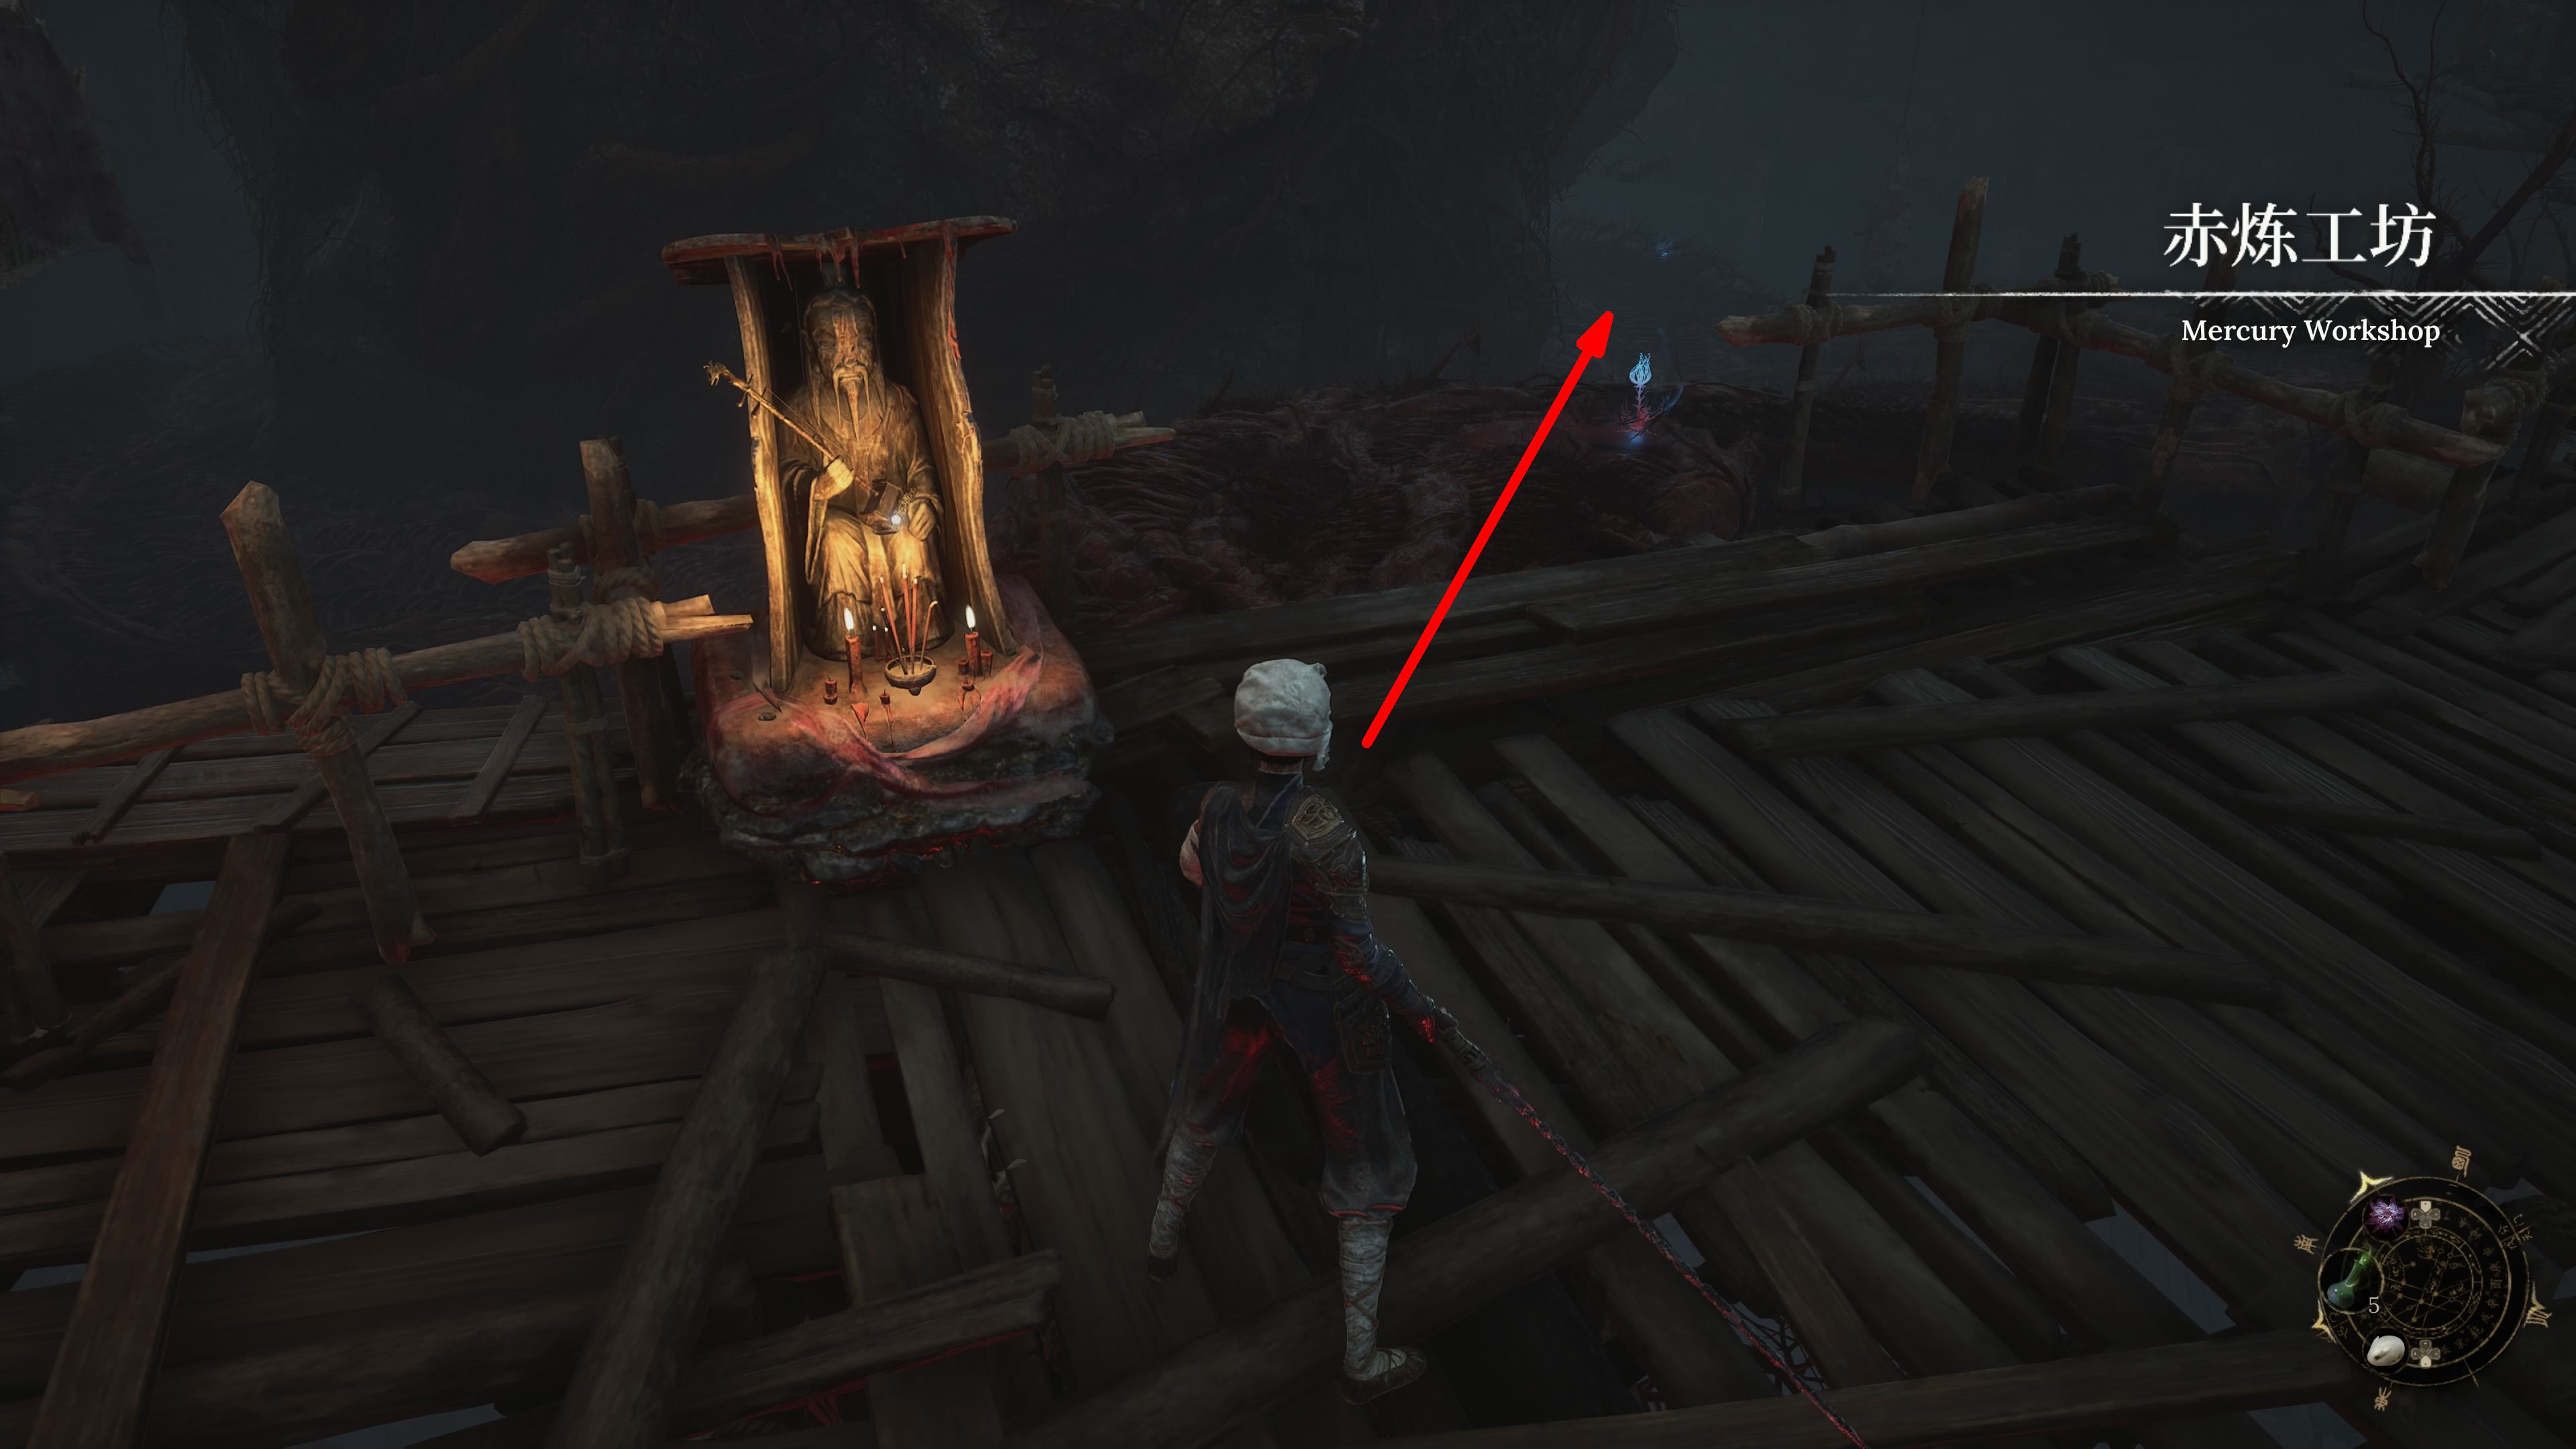
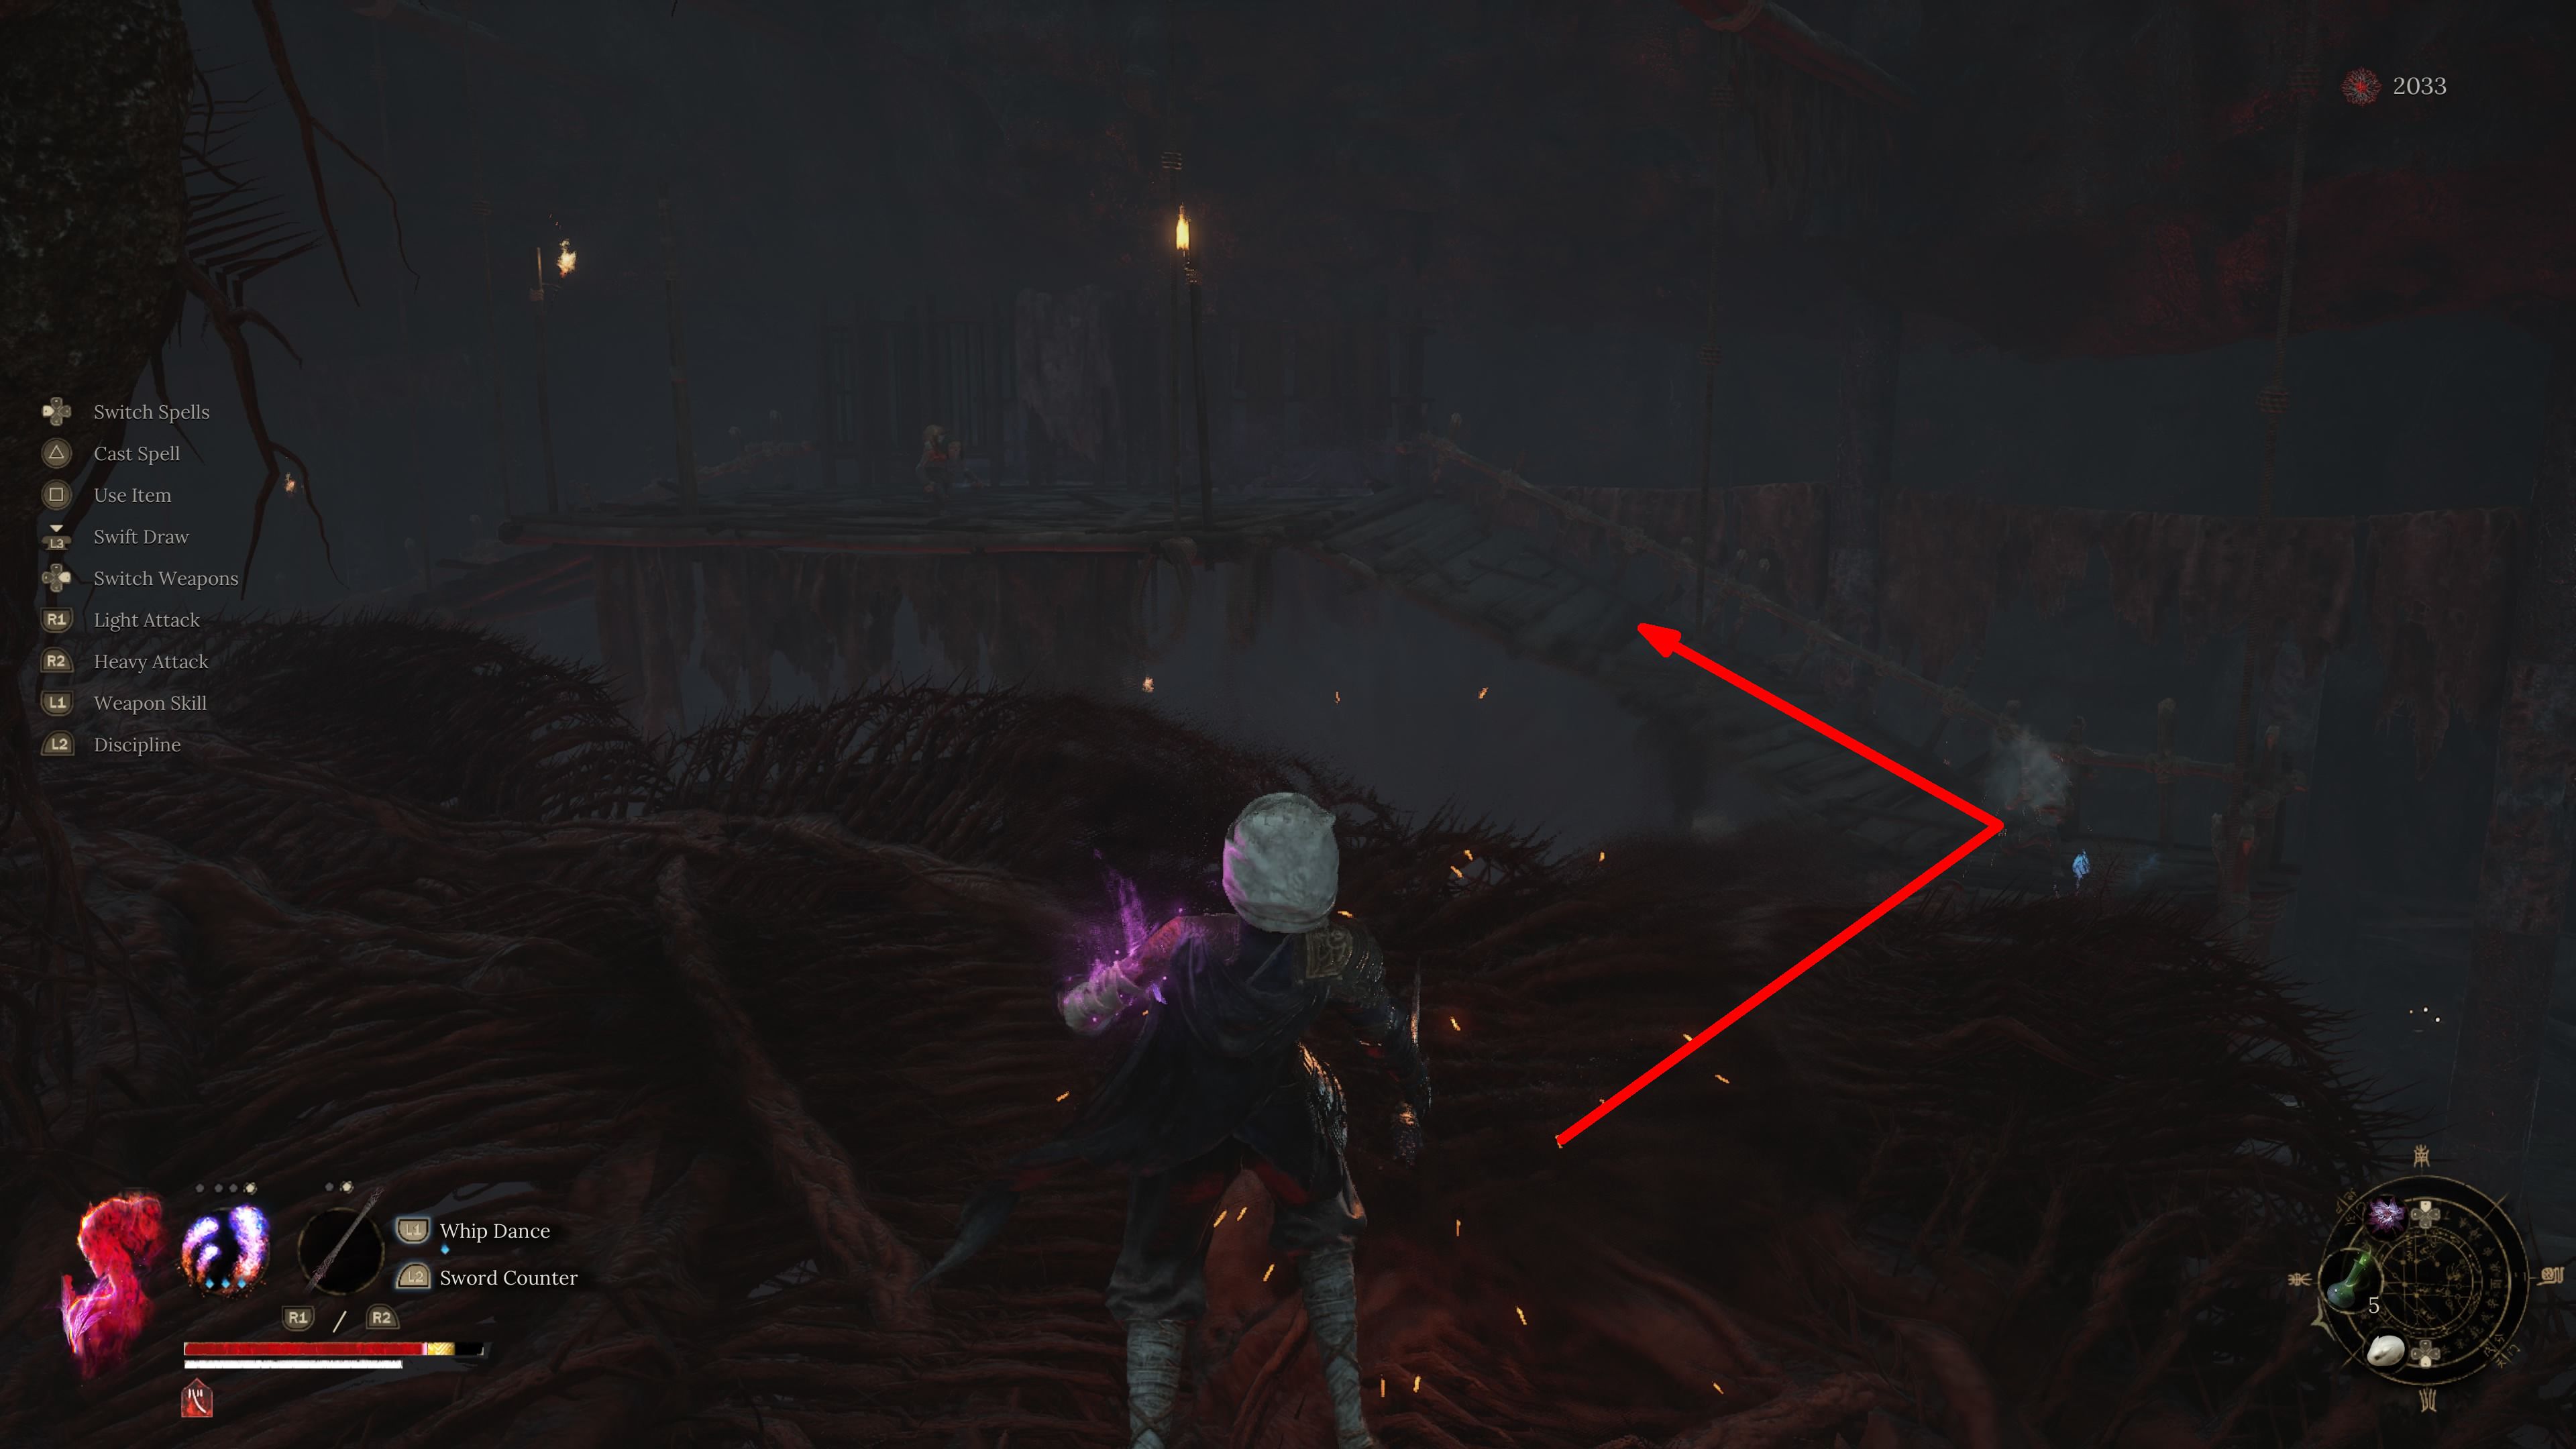
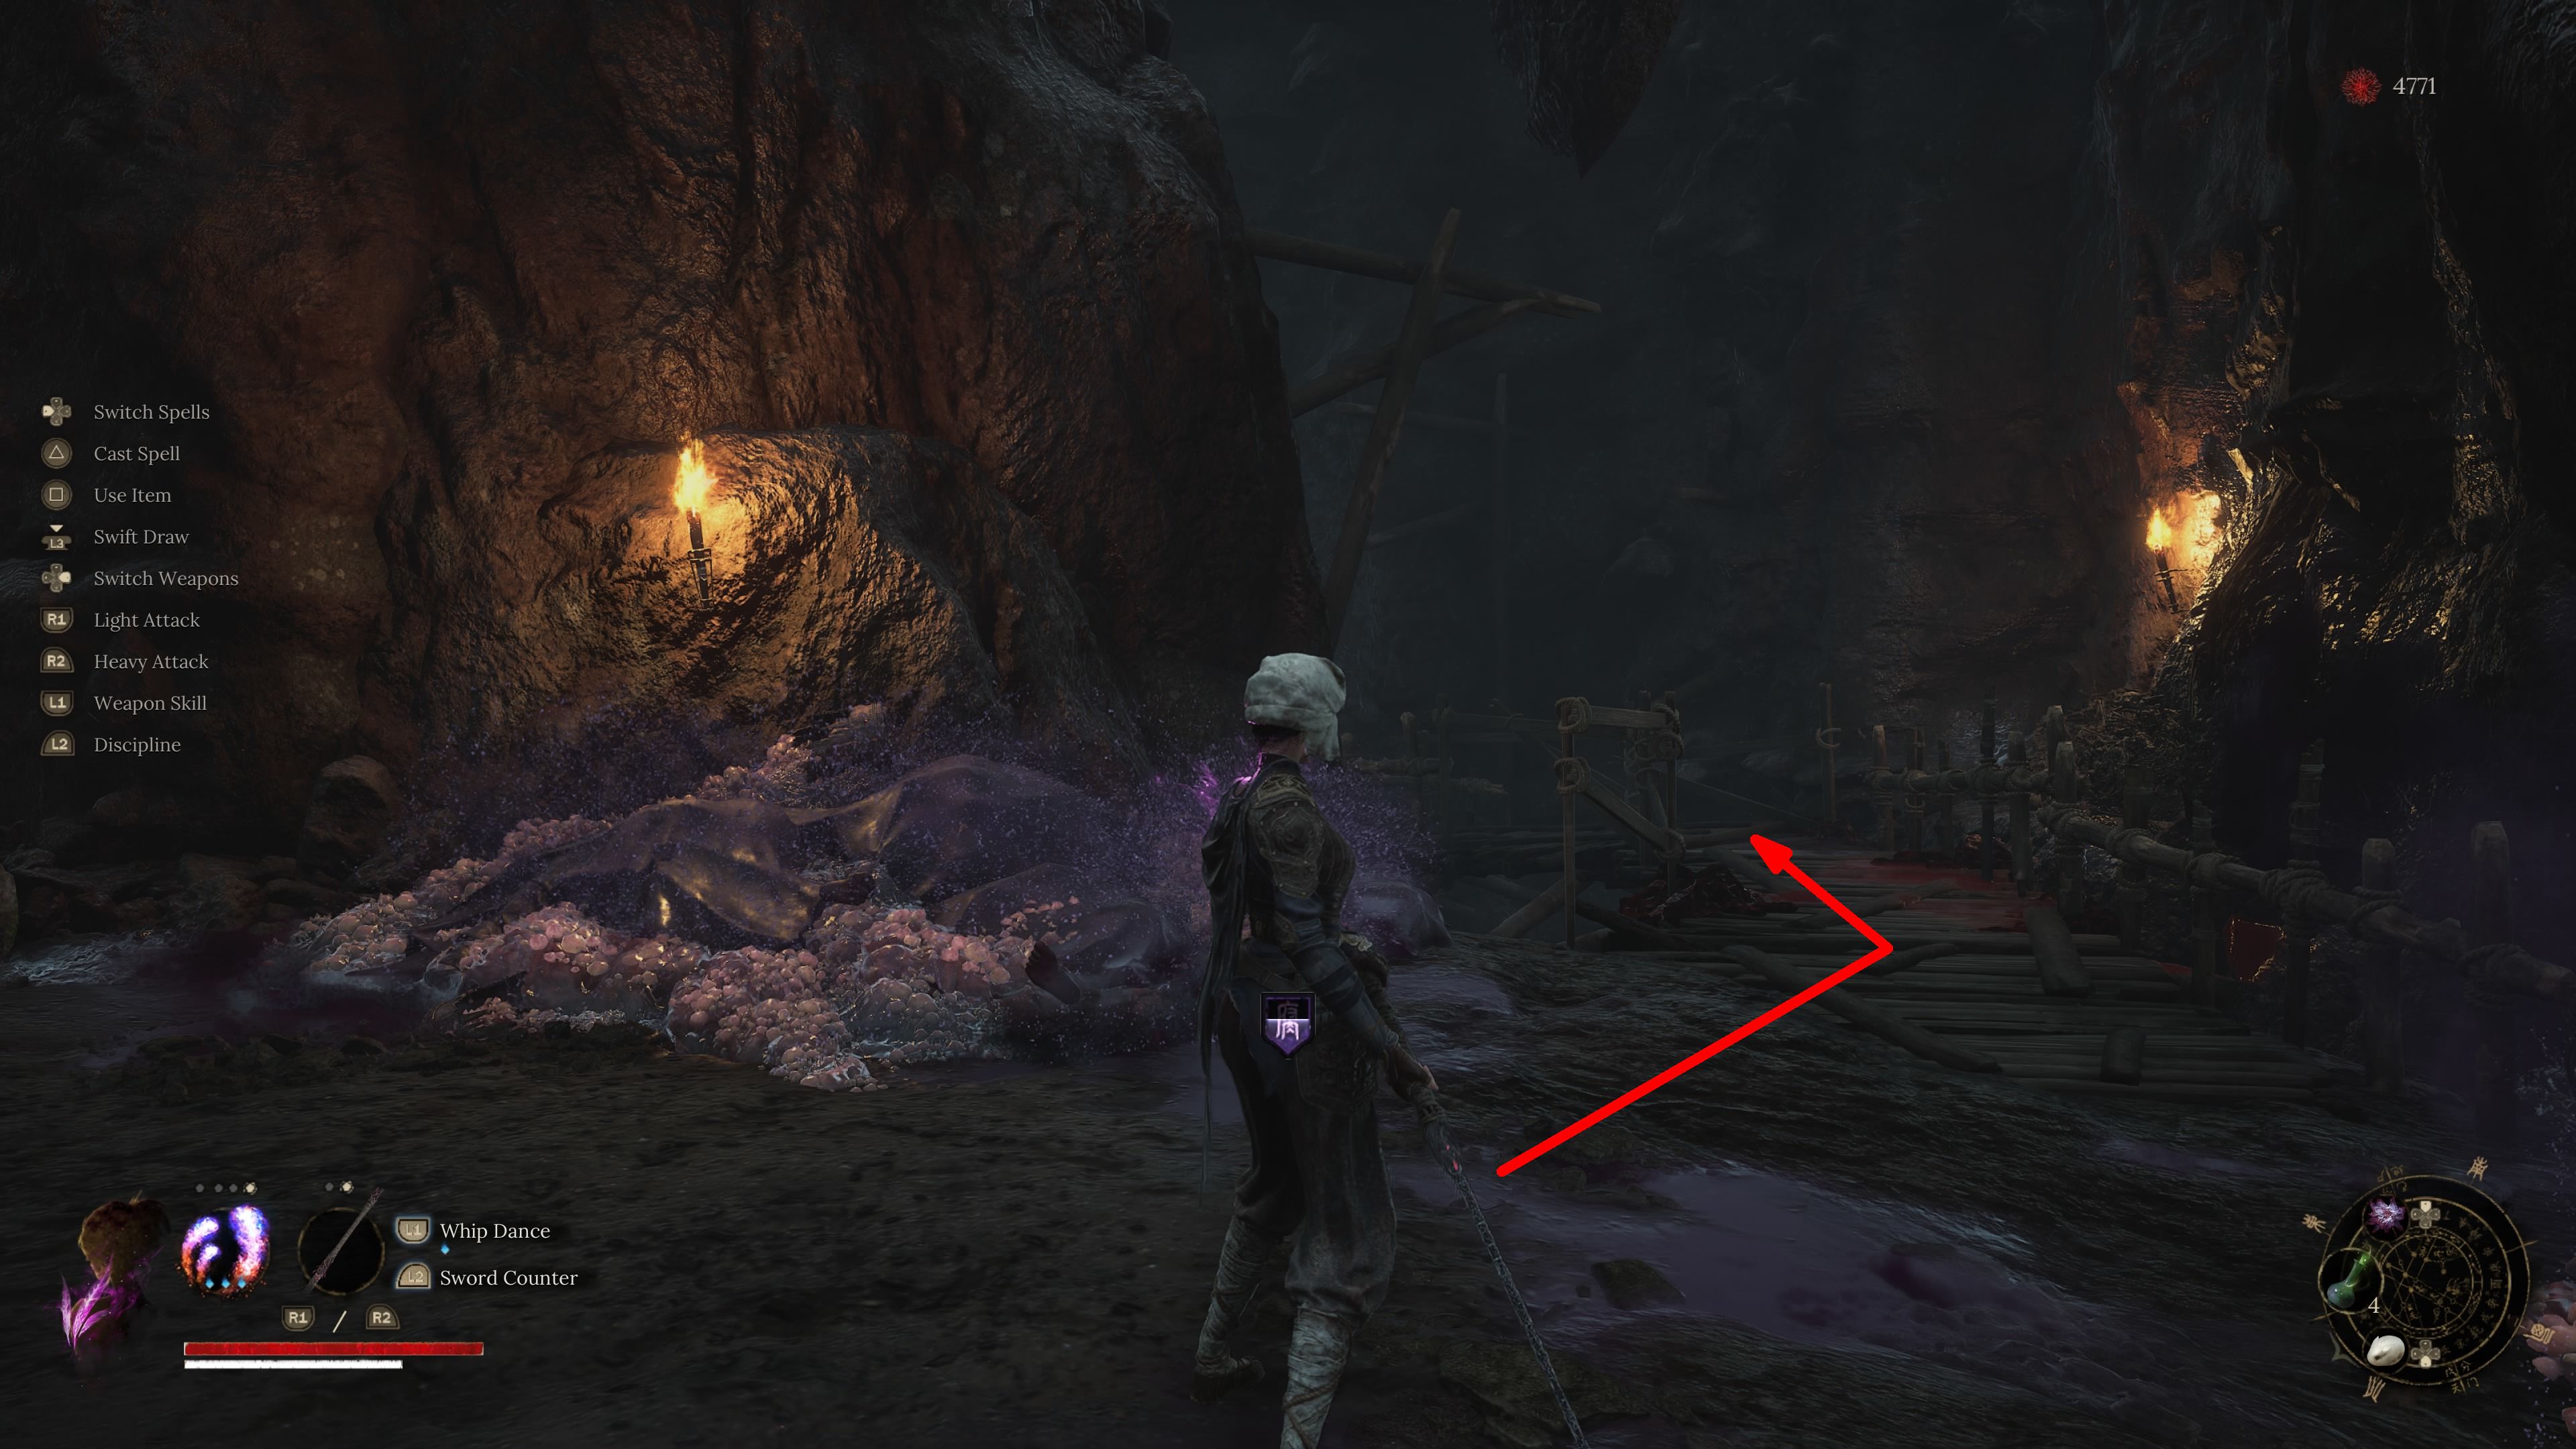
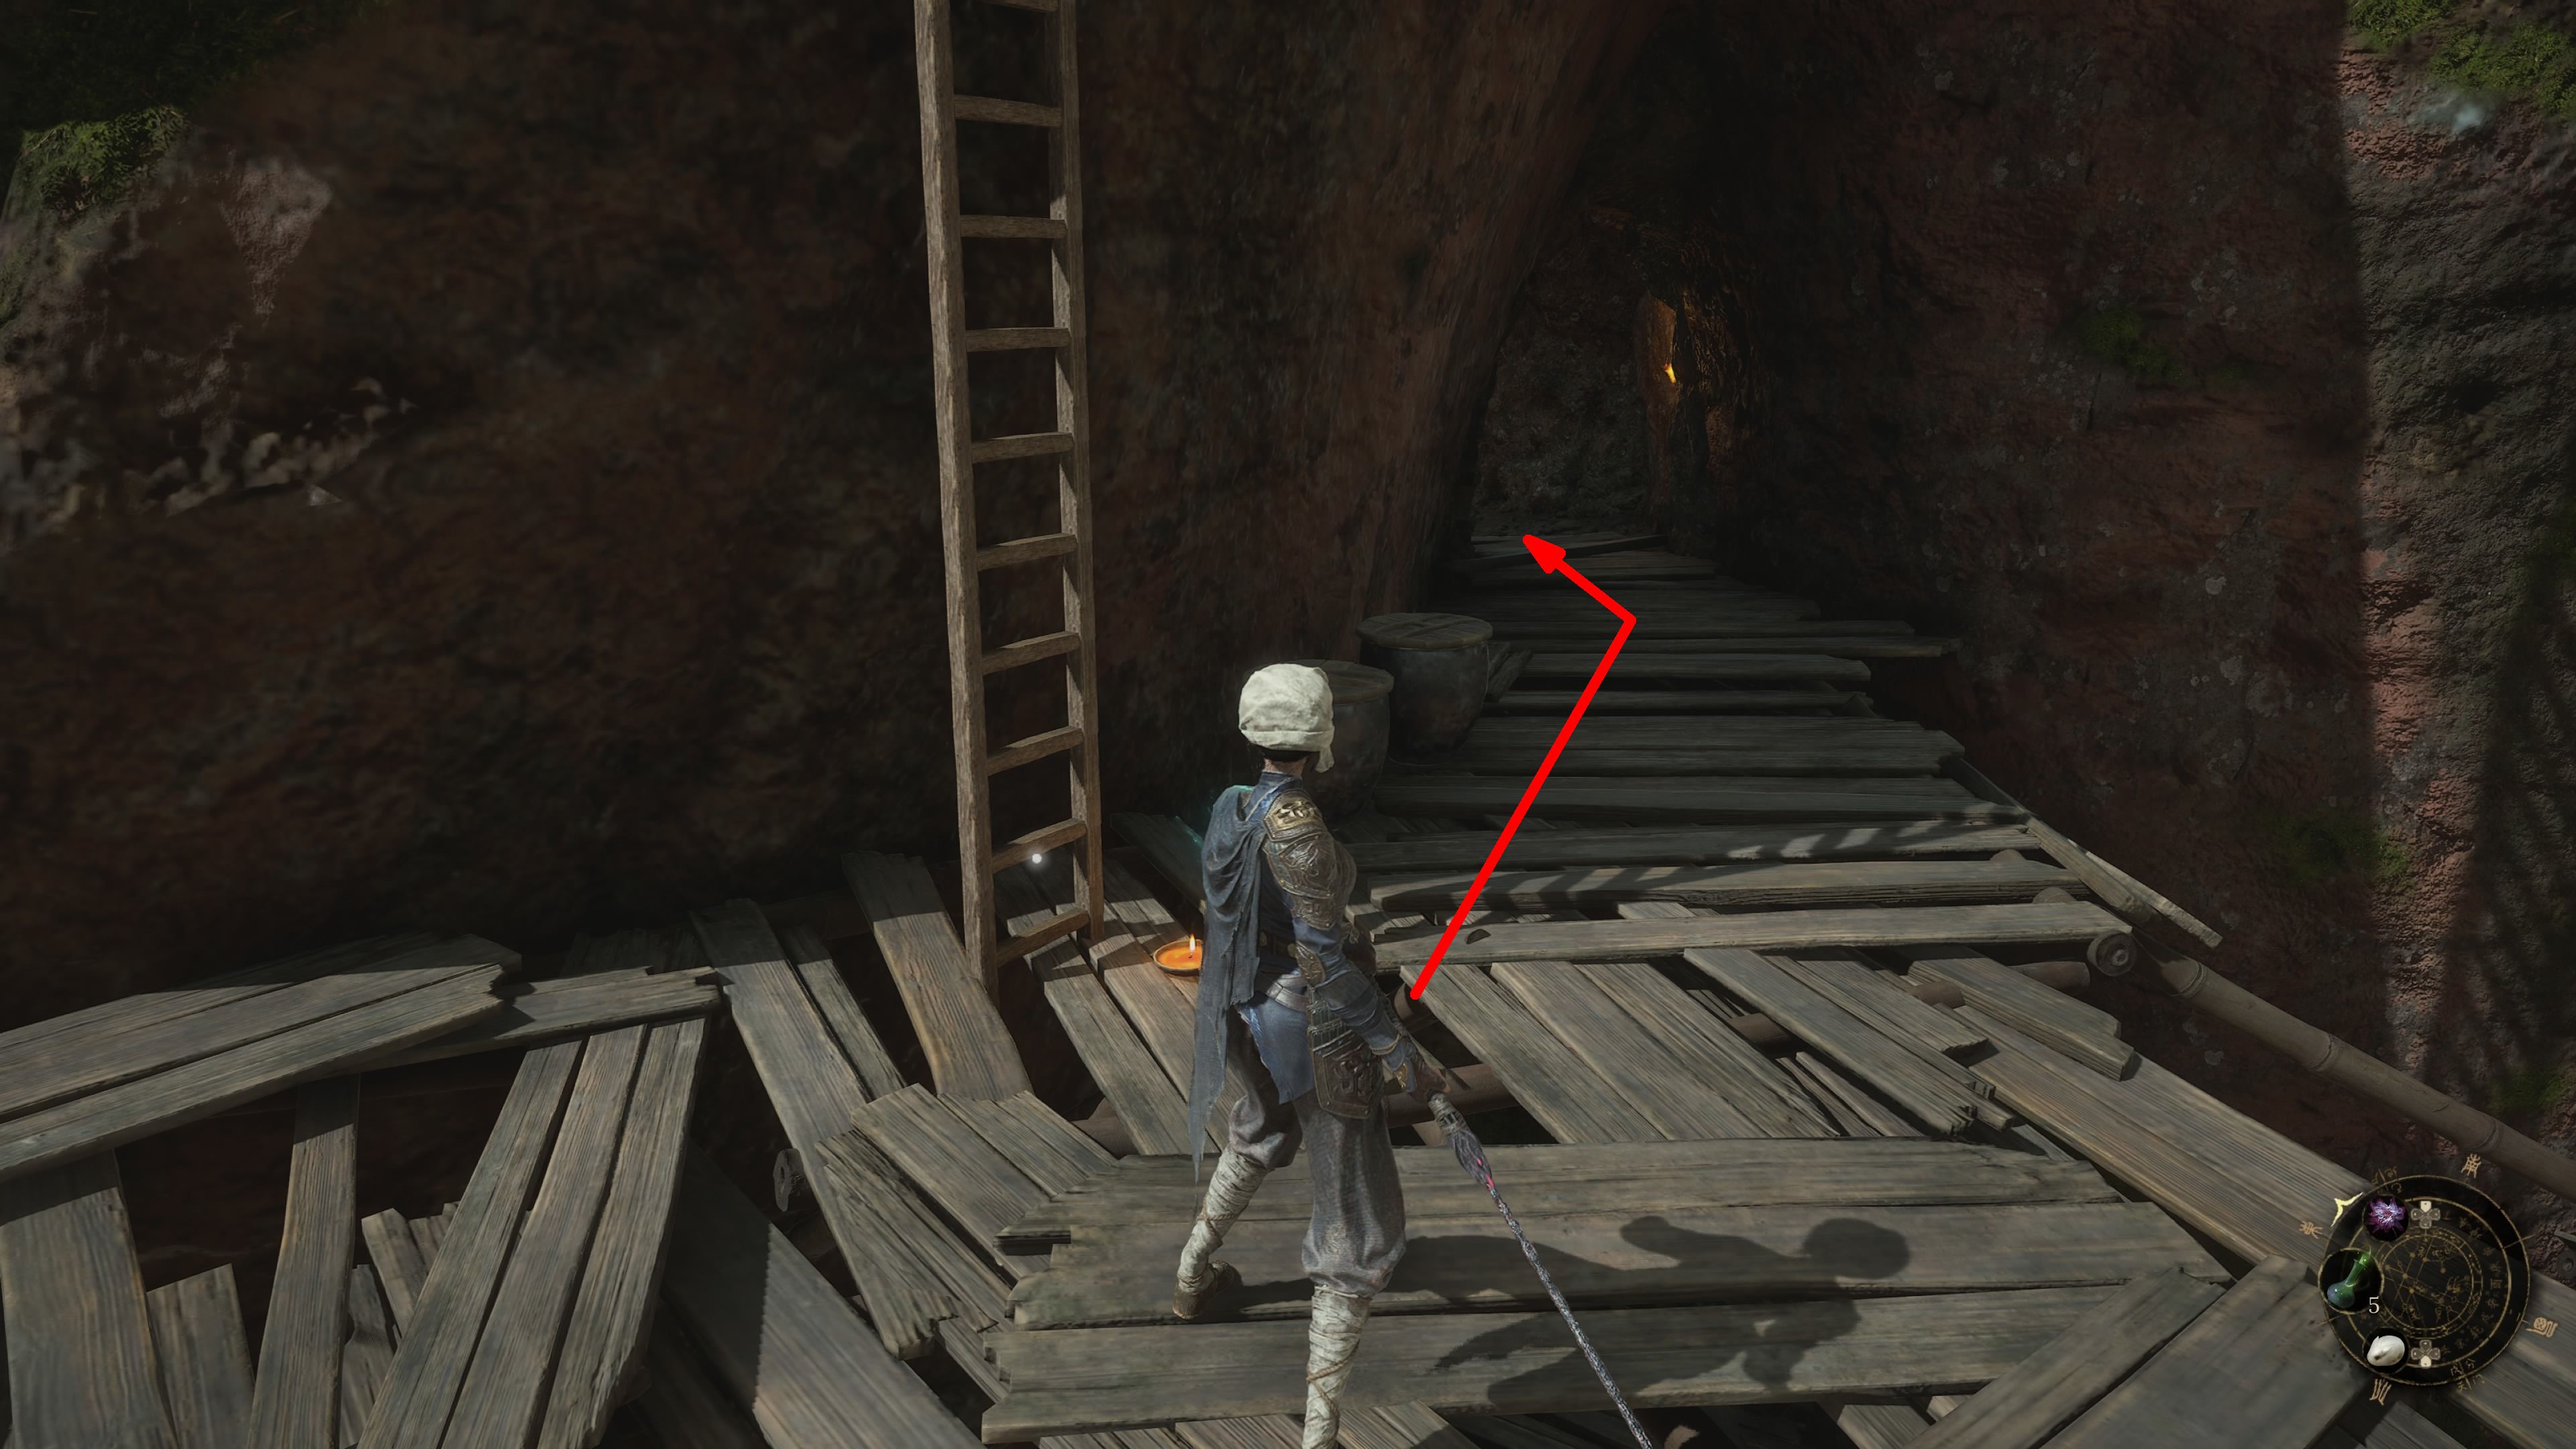
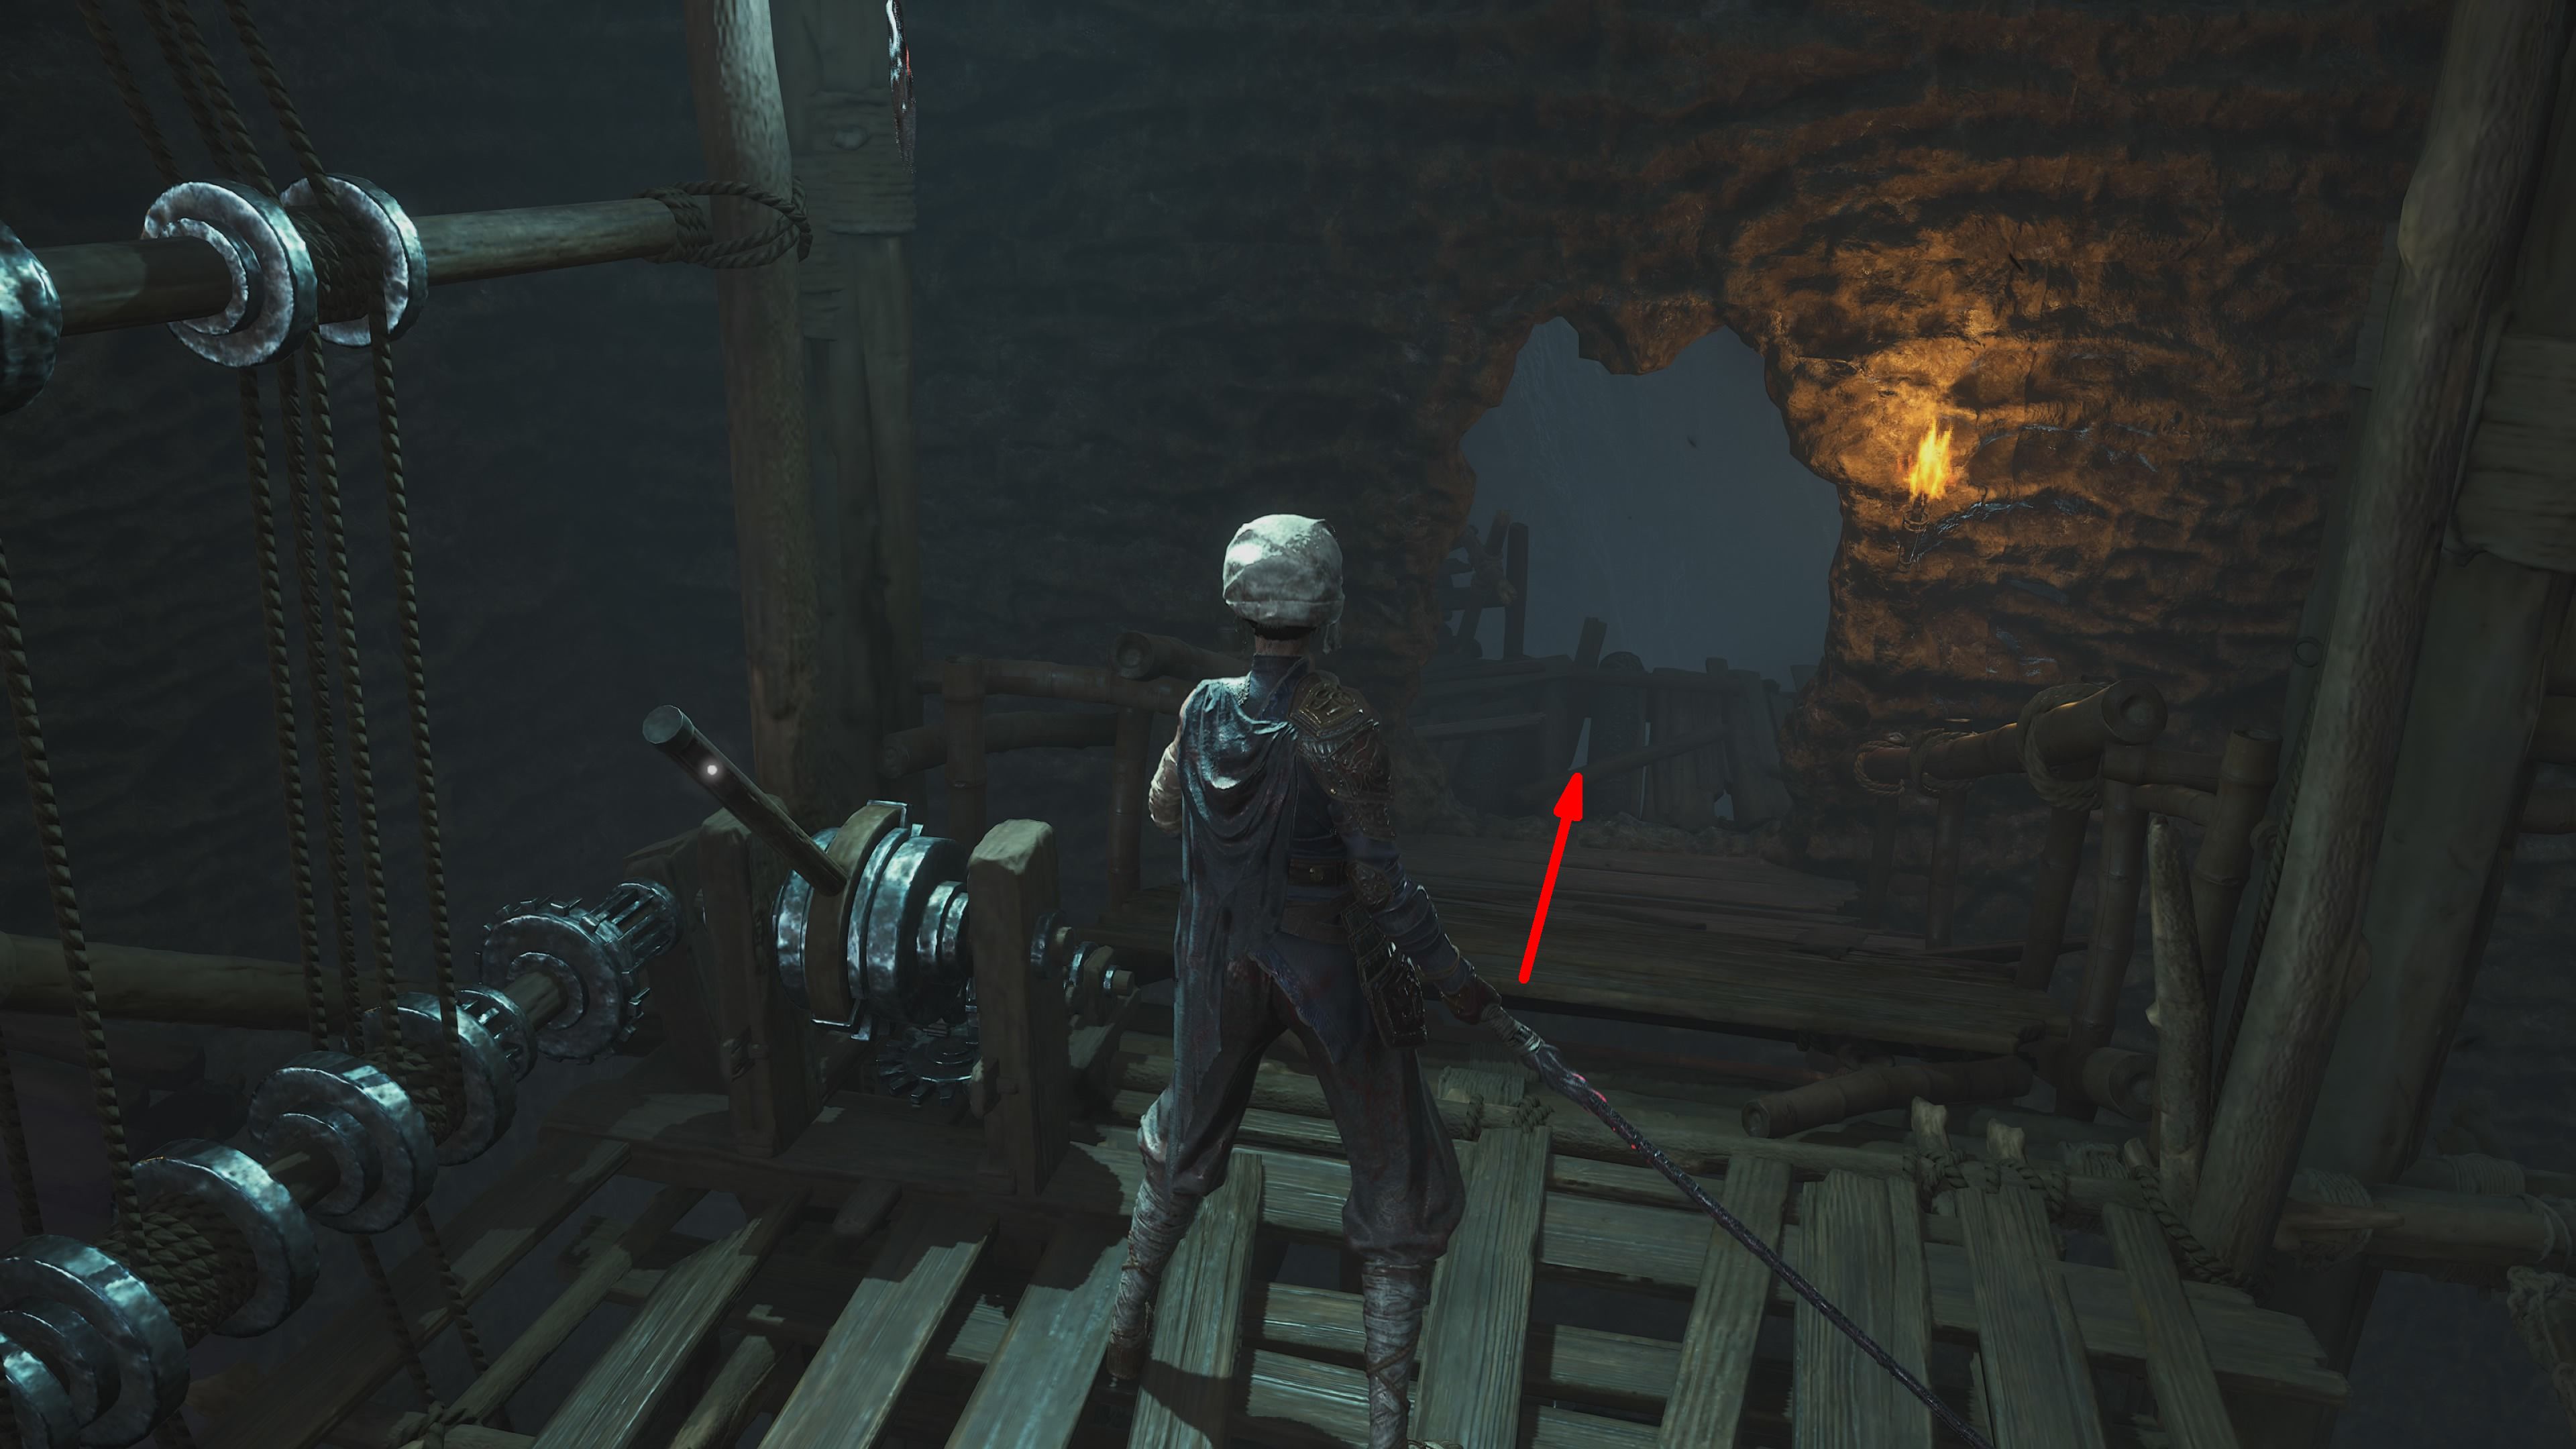
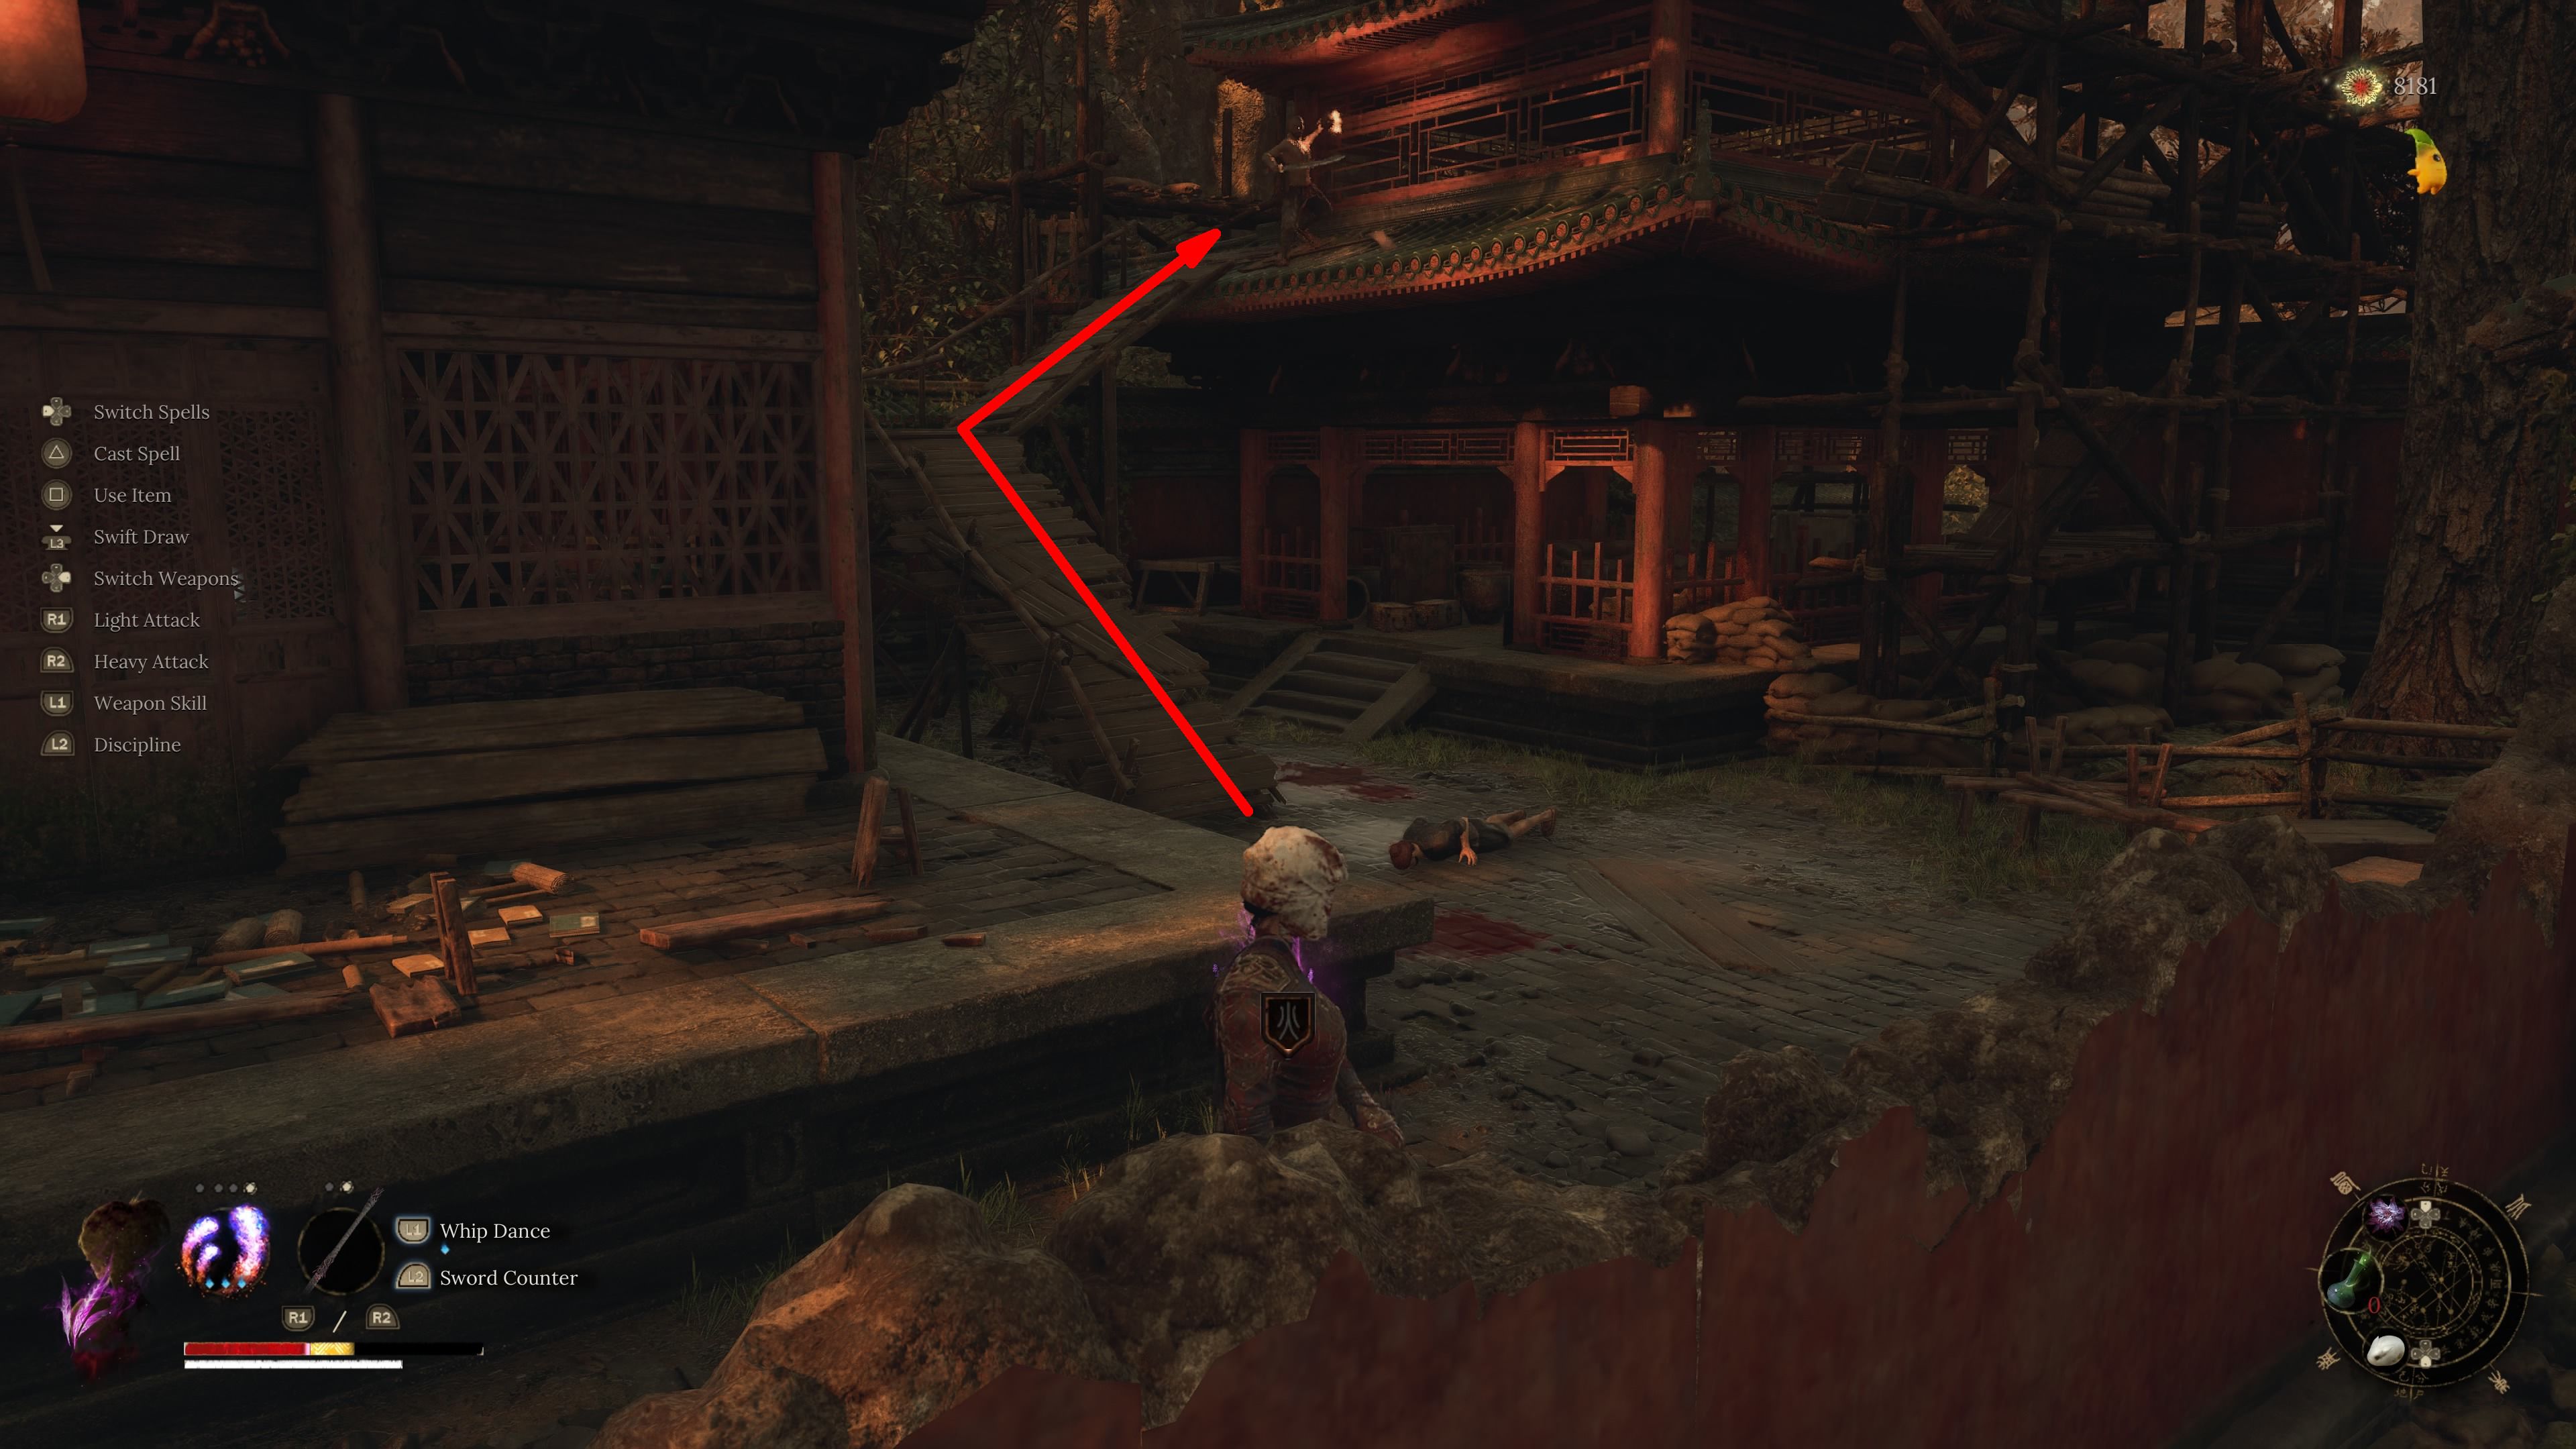
Players are now instructed to step onto the red, plume-like platform situated beside the Mercury Workshop Shrine as a means of accessing some timber scaffolding. This scaffolding initiates a path that eventually takes players down towards the bottom of the area. The journey to the base can be quite perilous, so players are advised to prepare themselves for encounters with Corruption and Blight. However, the route is relatively straightforward and will ultimately lead to a wooden plank path that continues its descent.

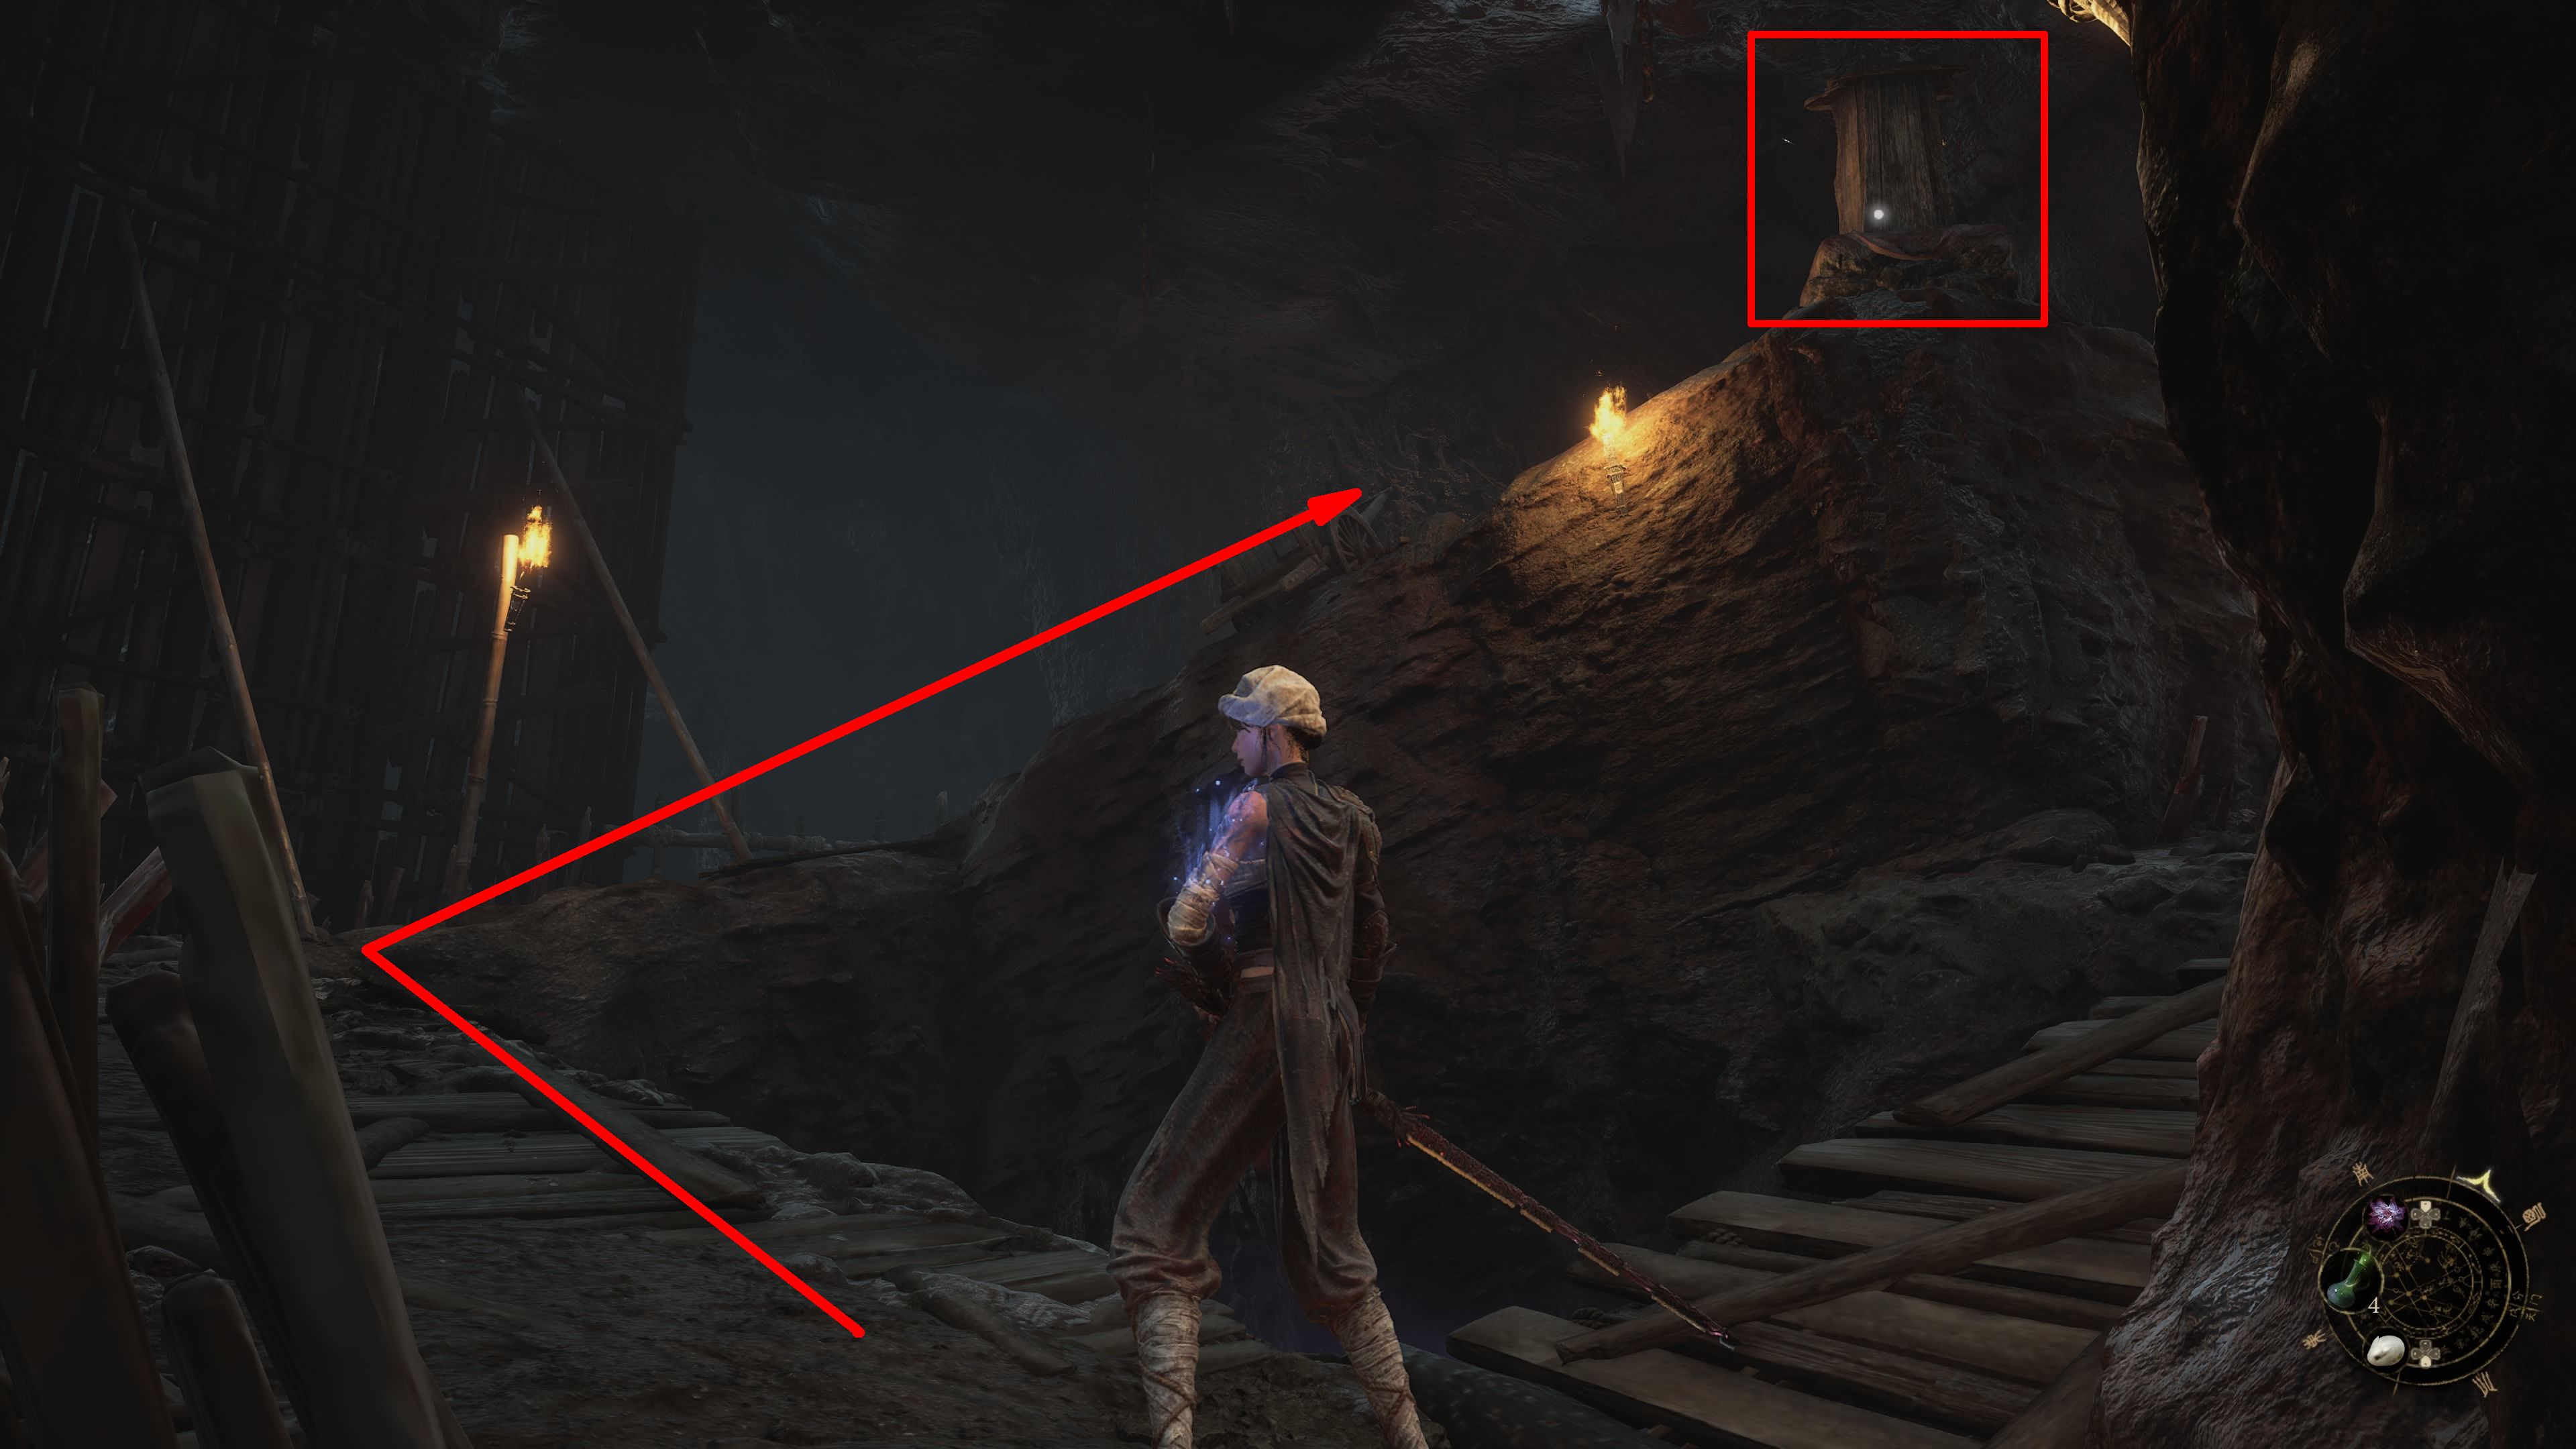
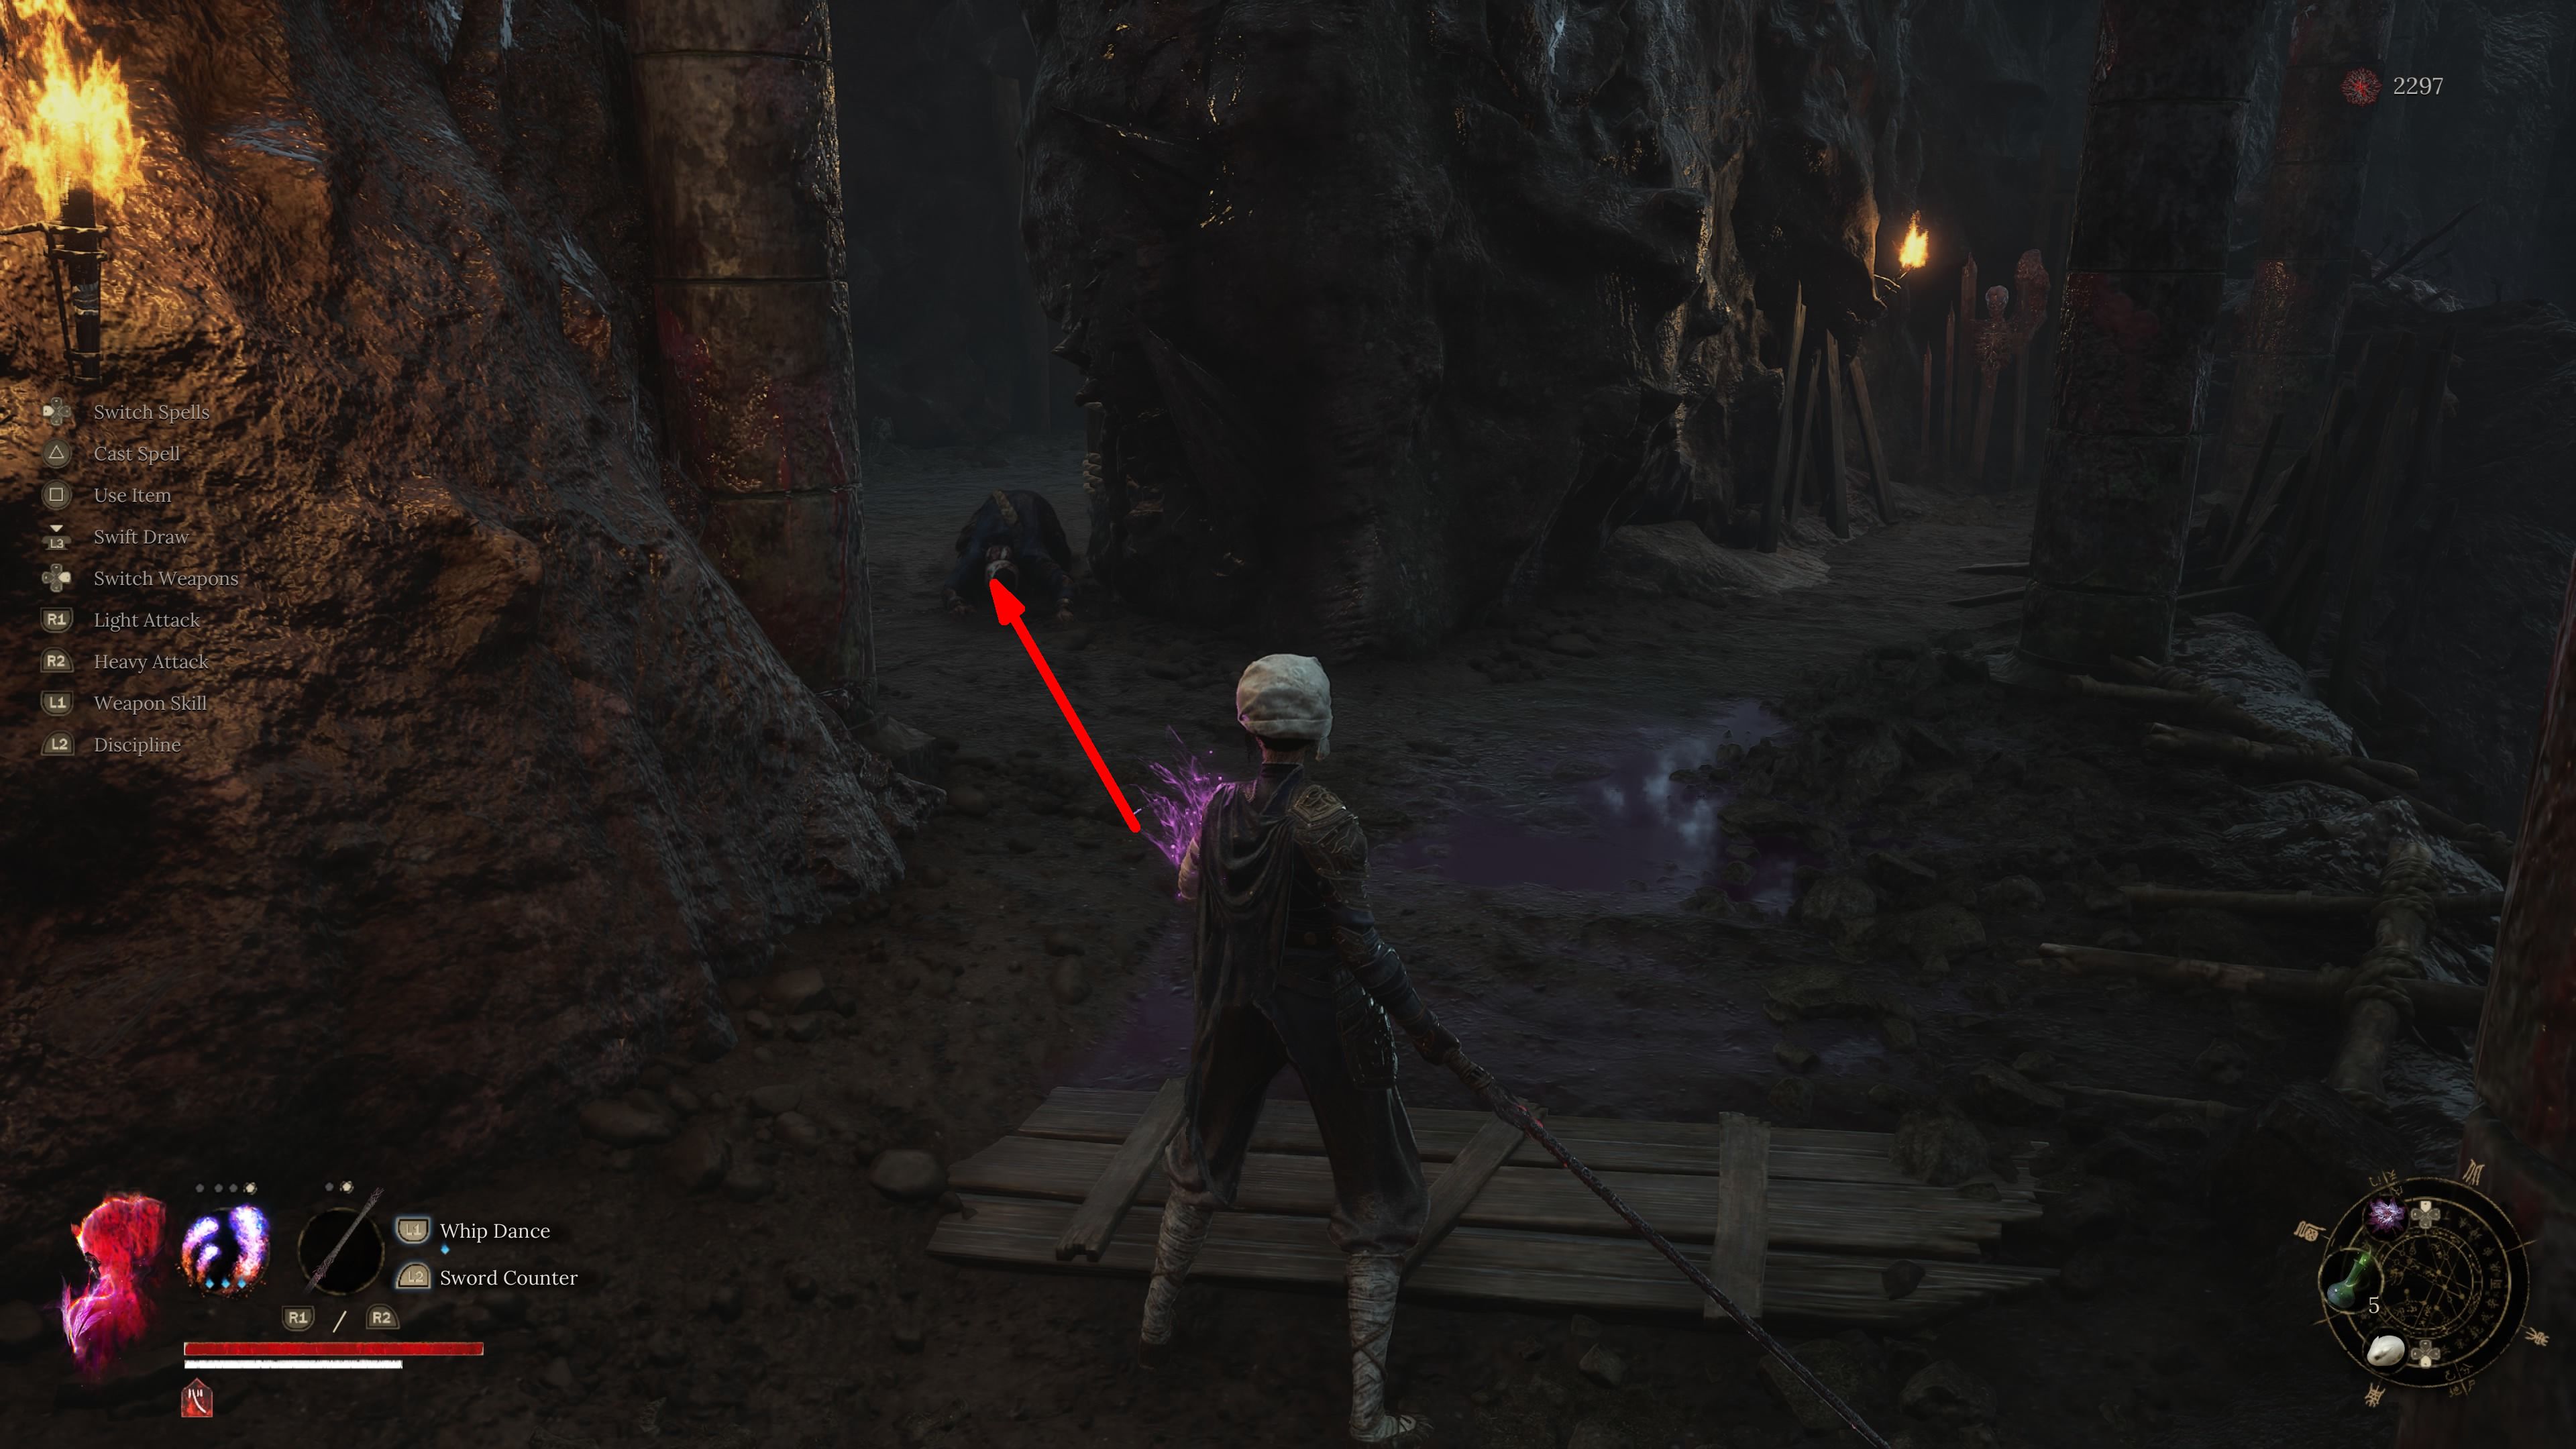
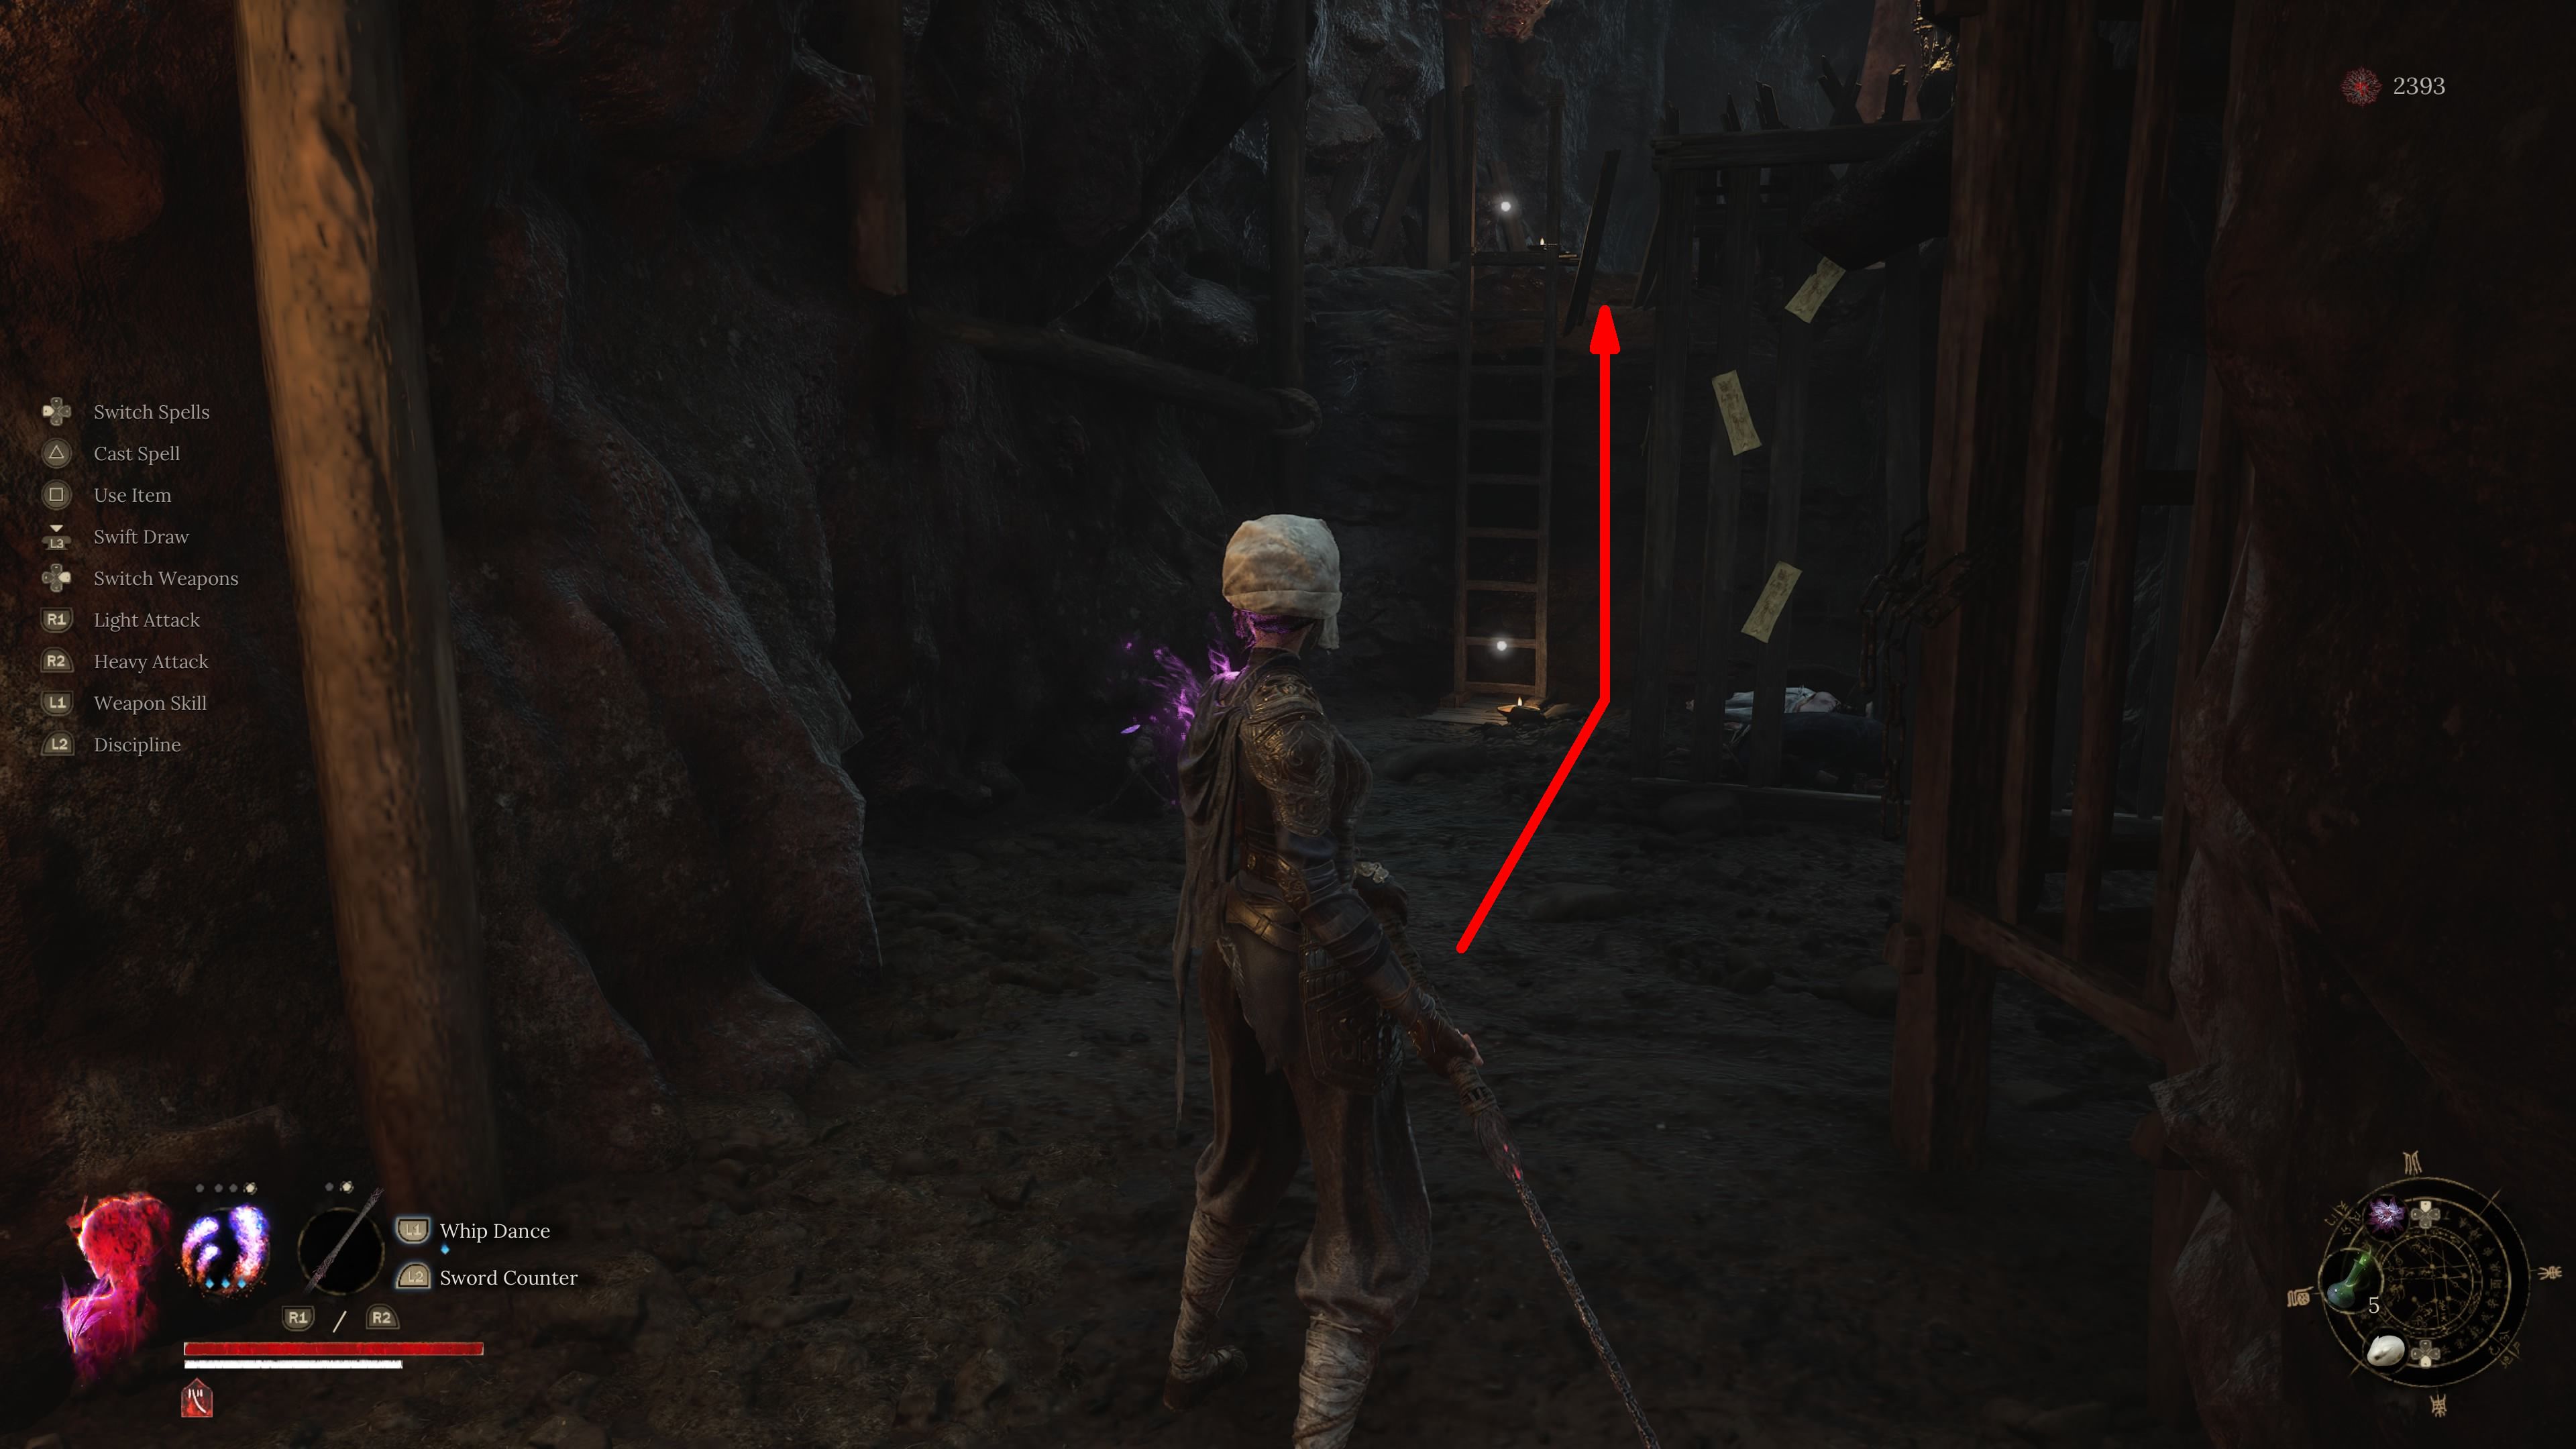
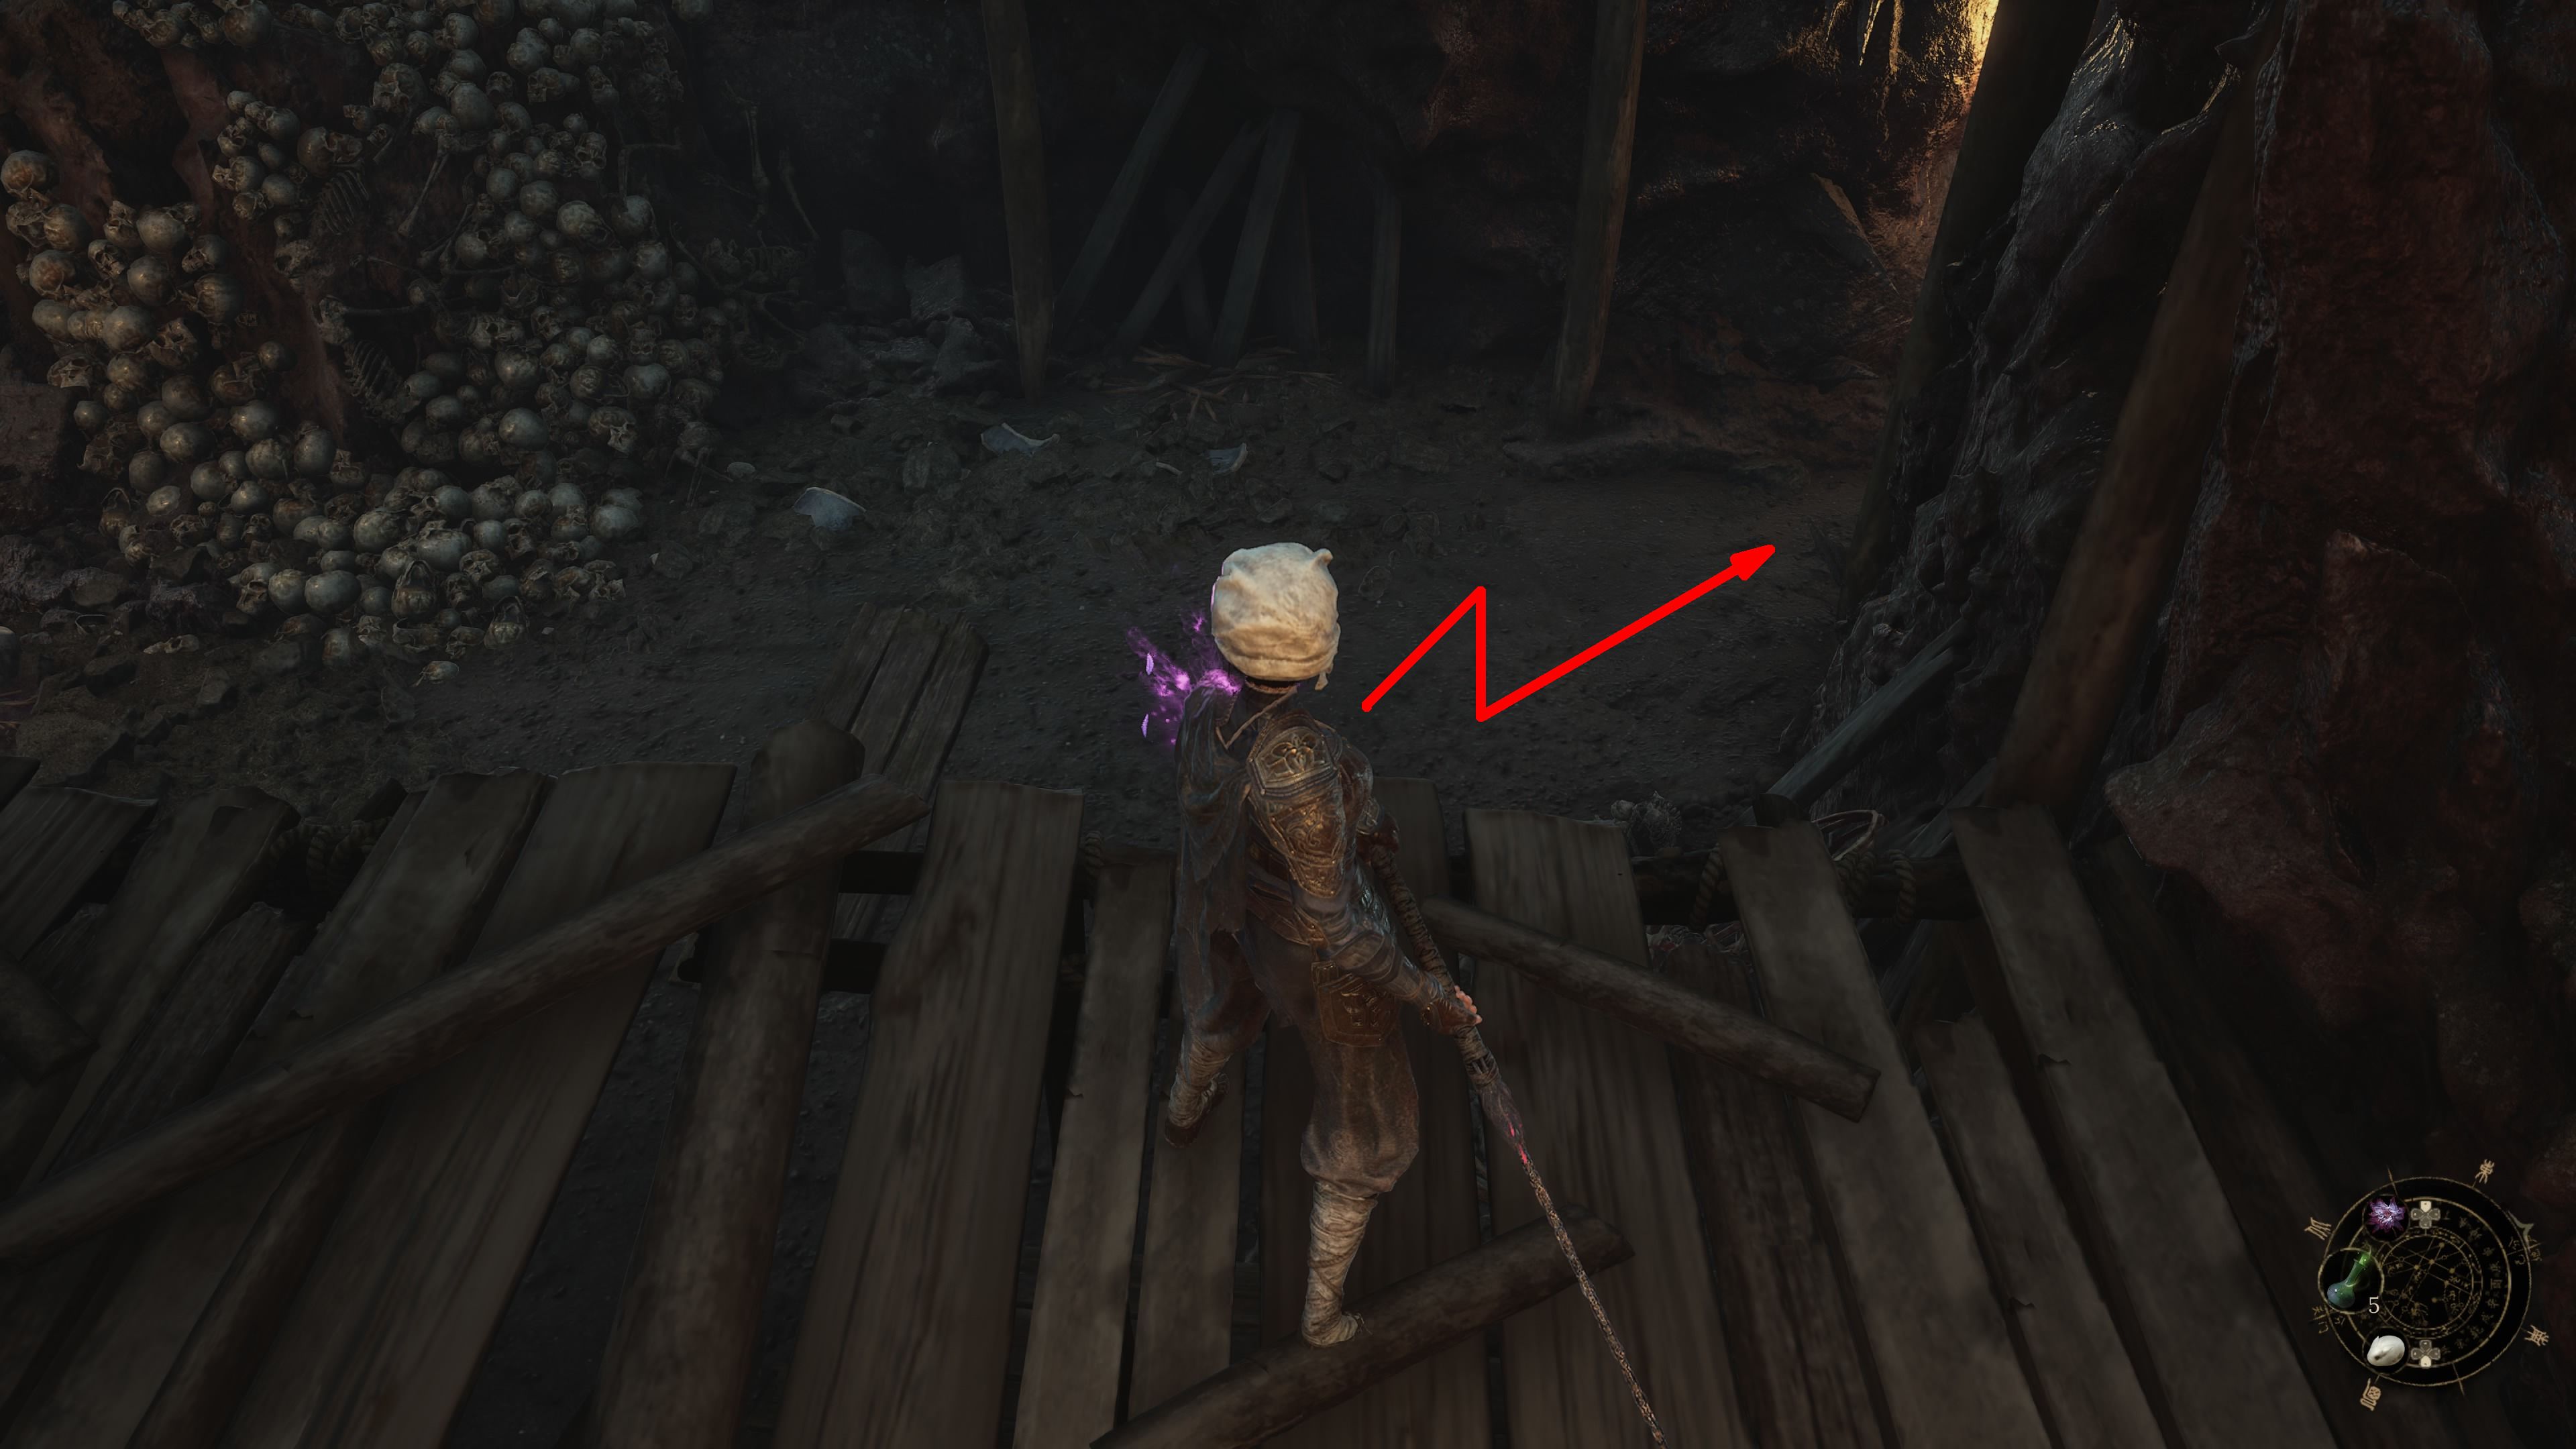
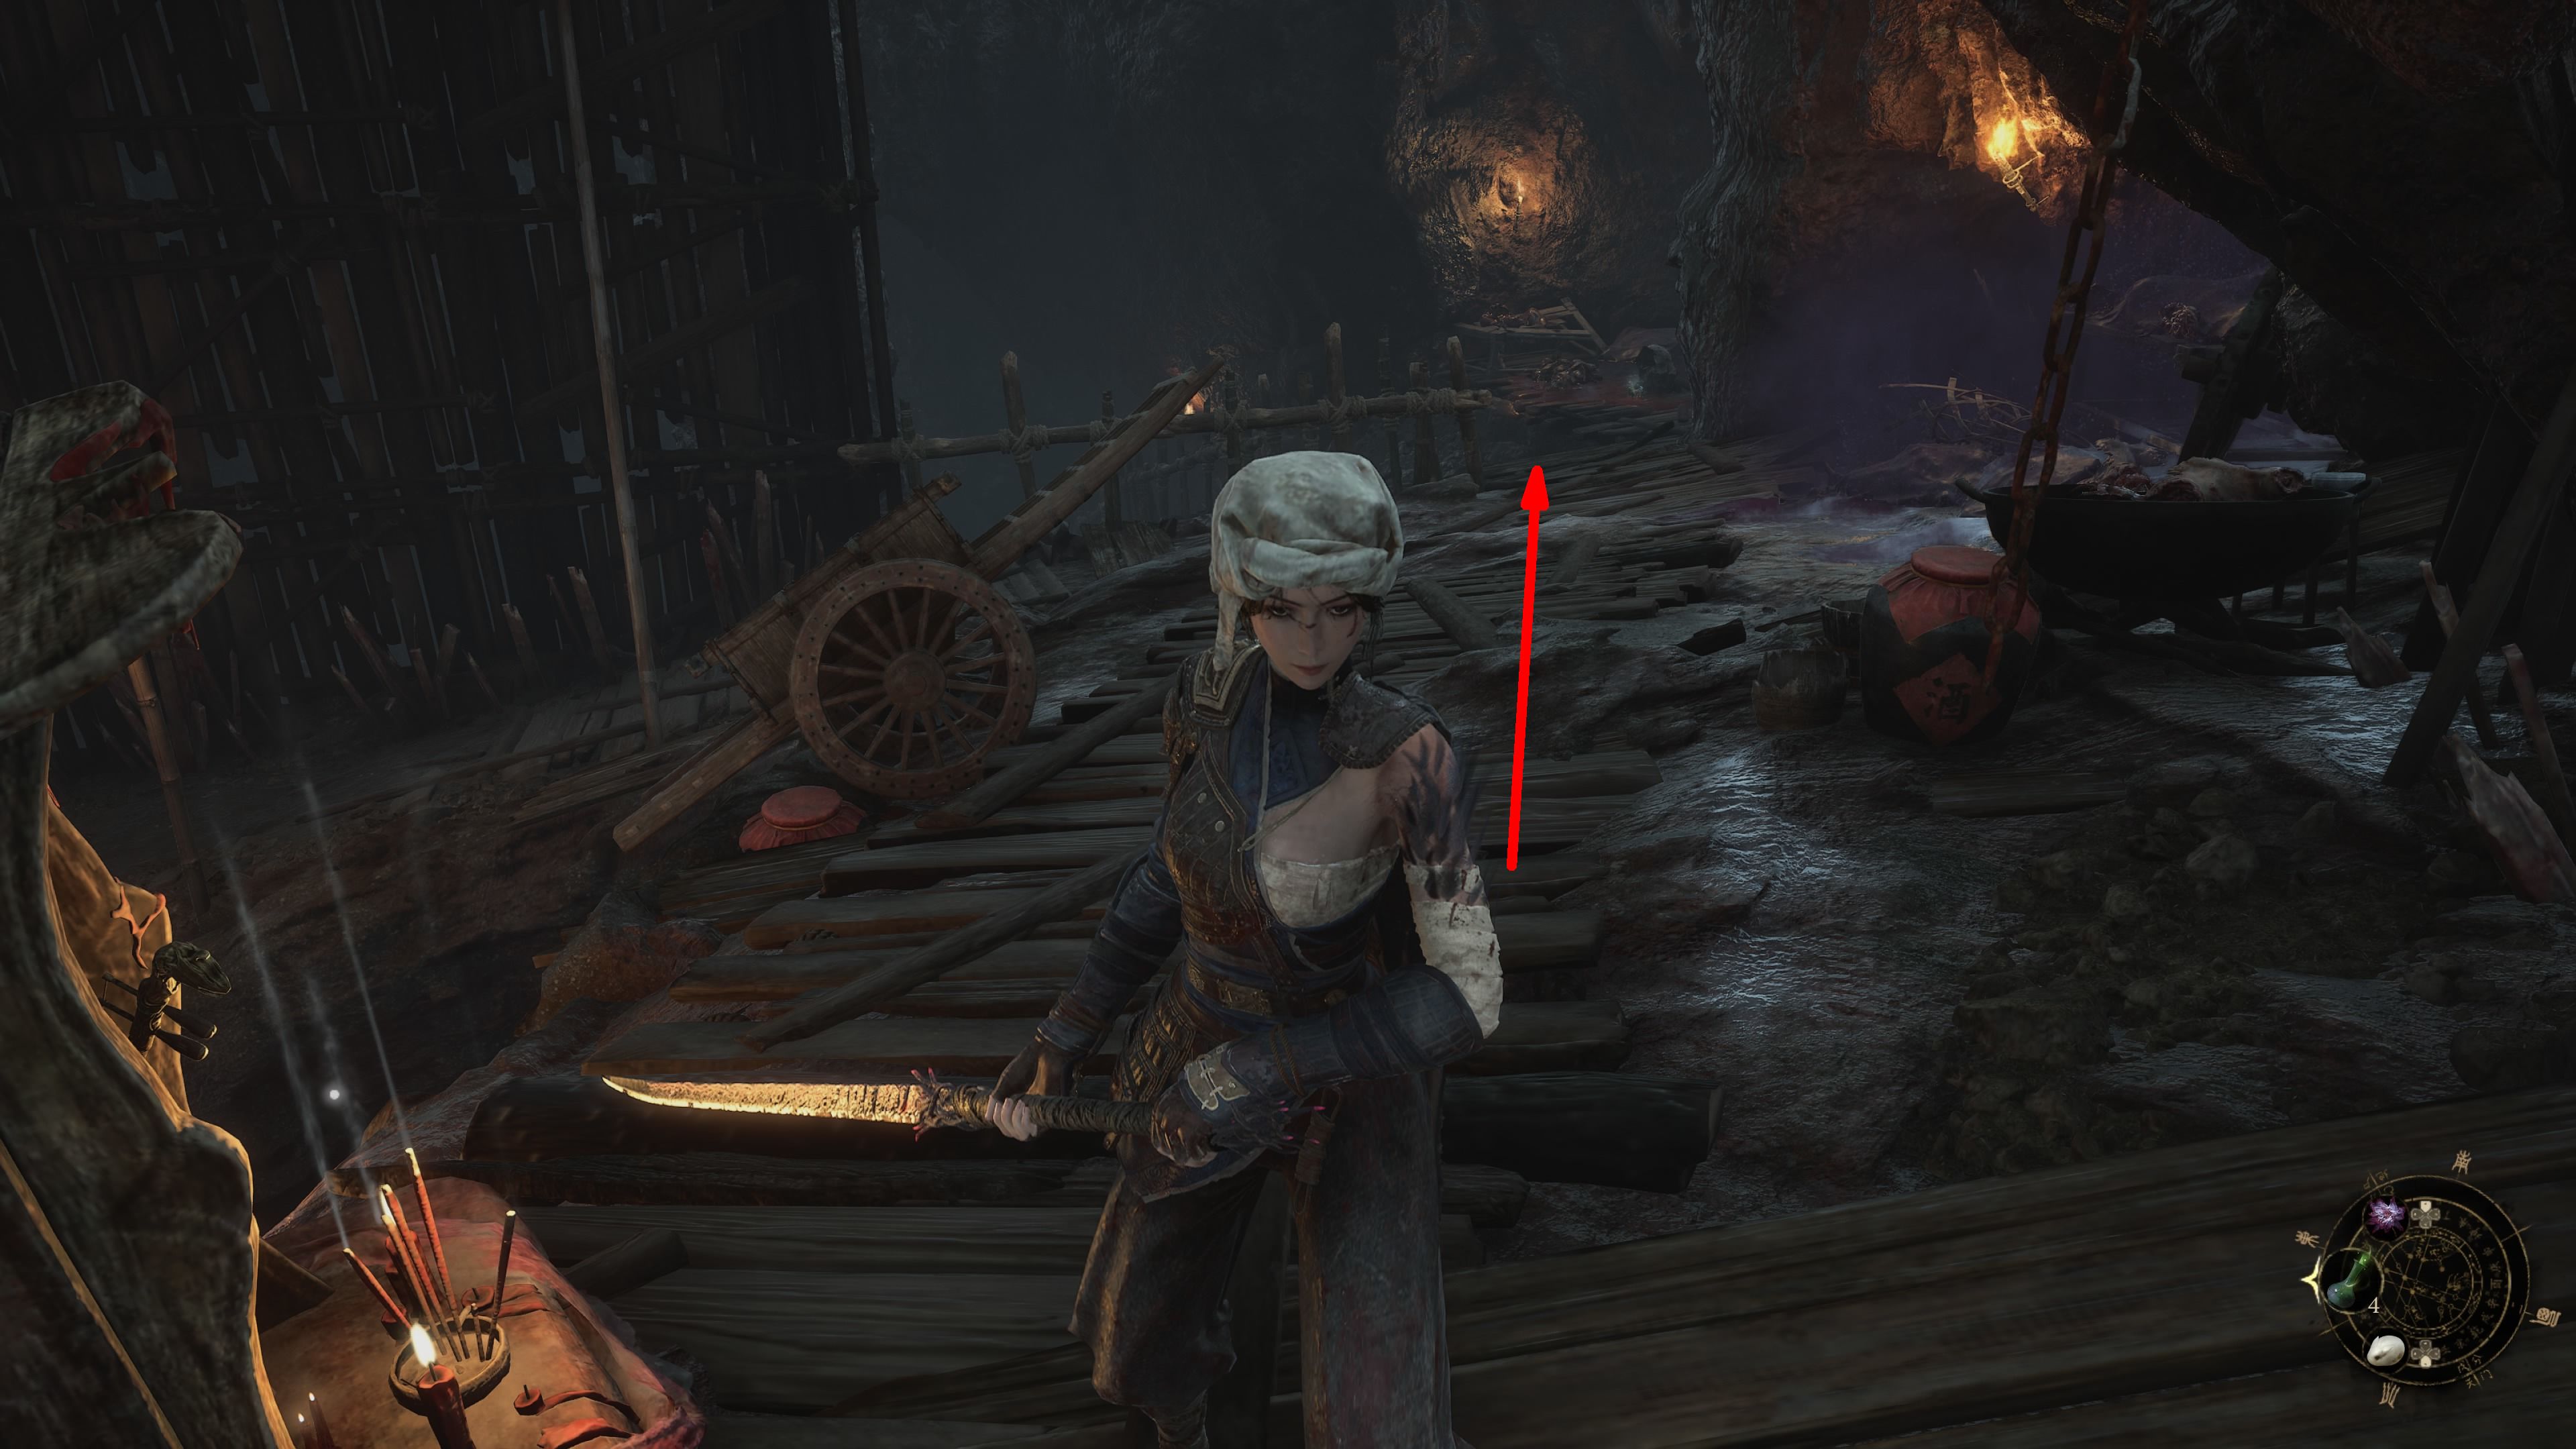
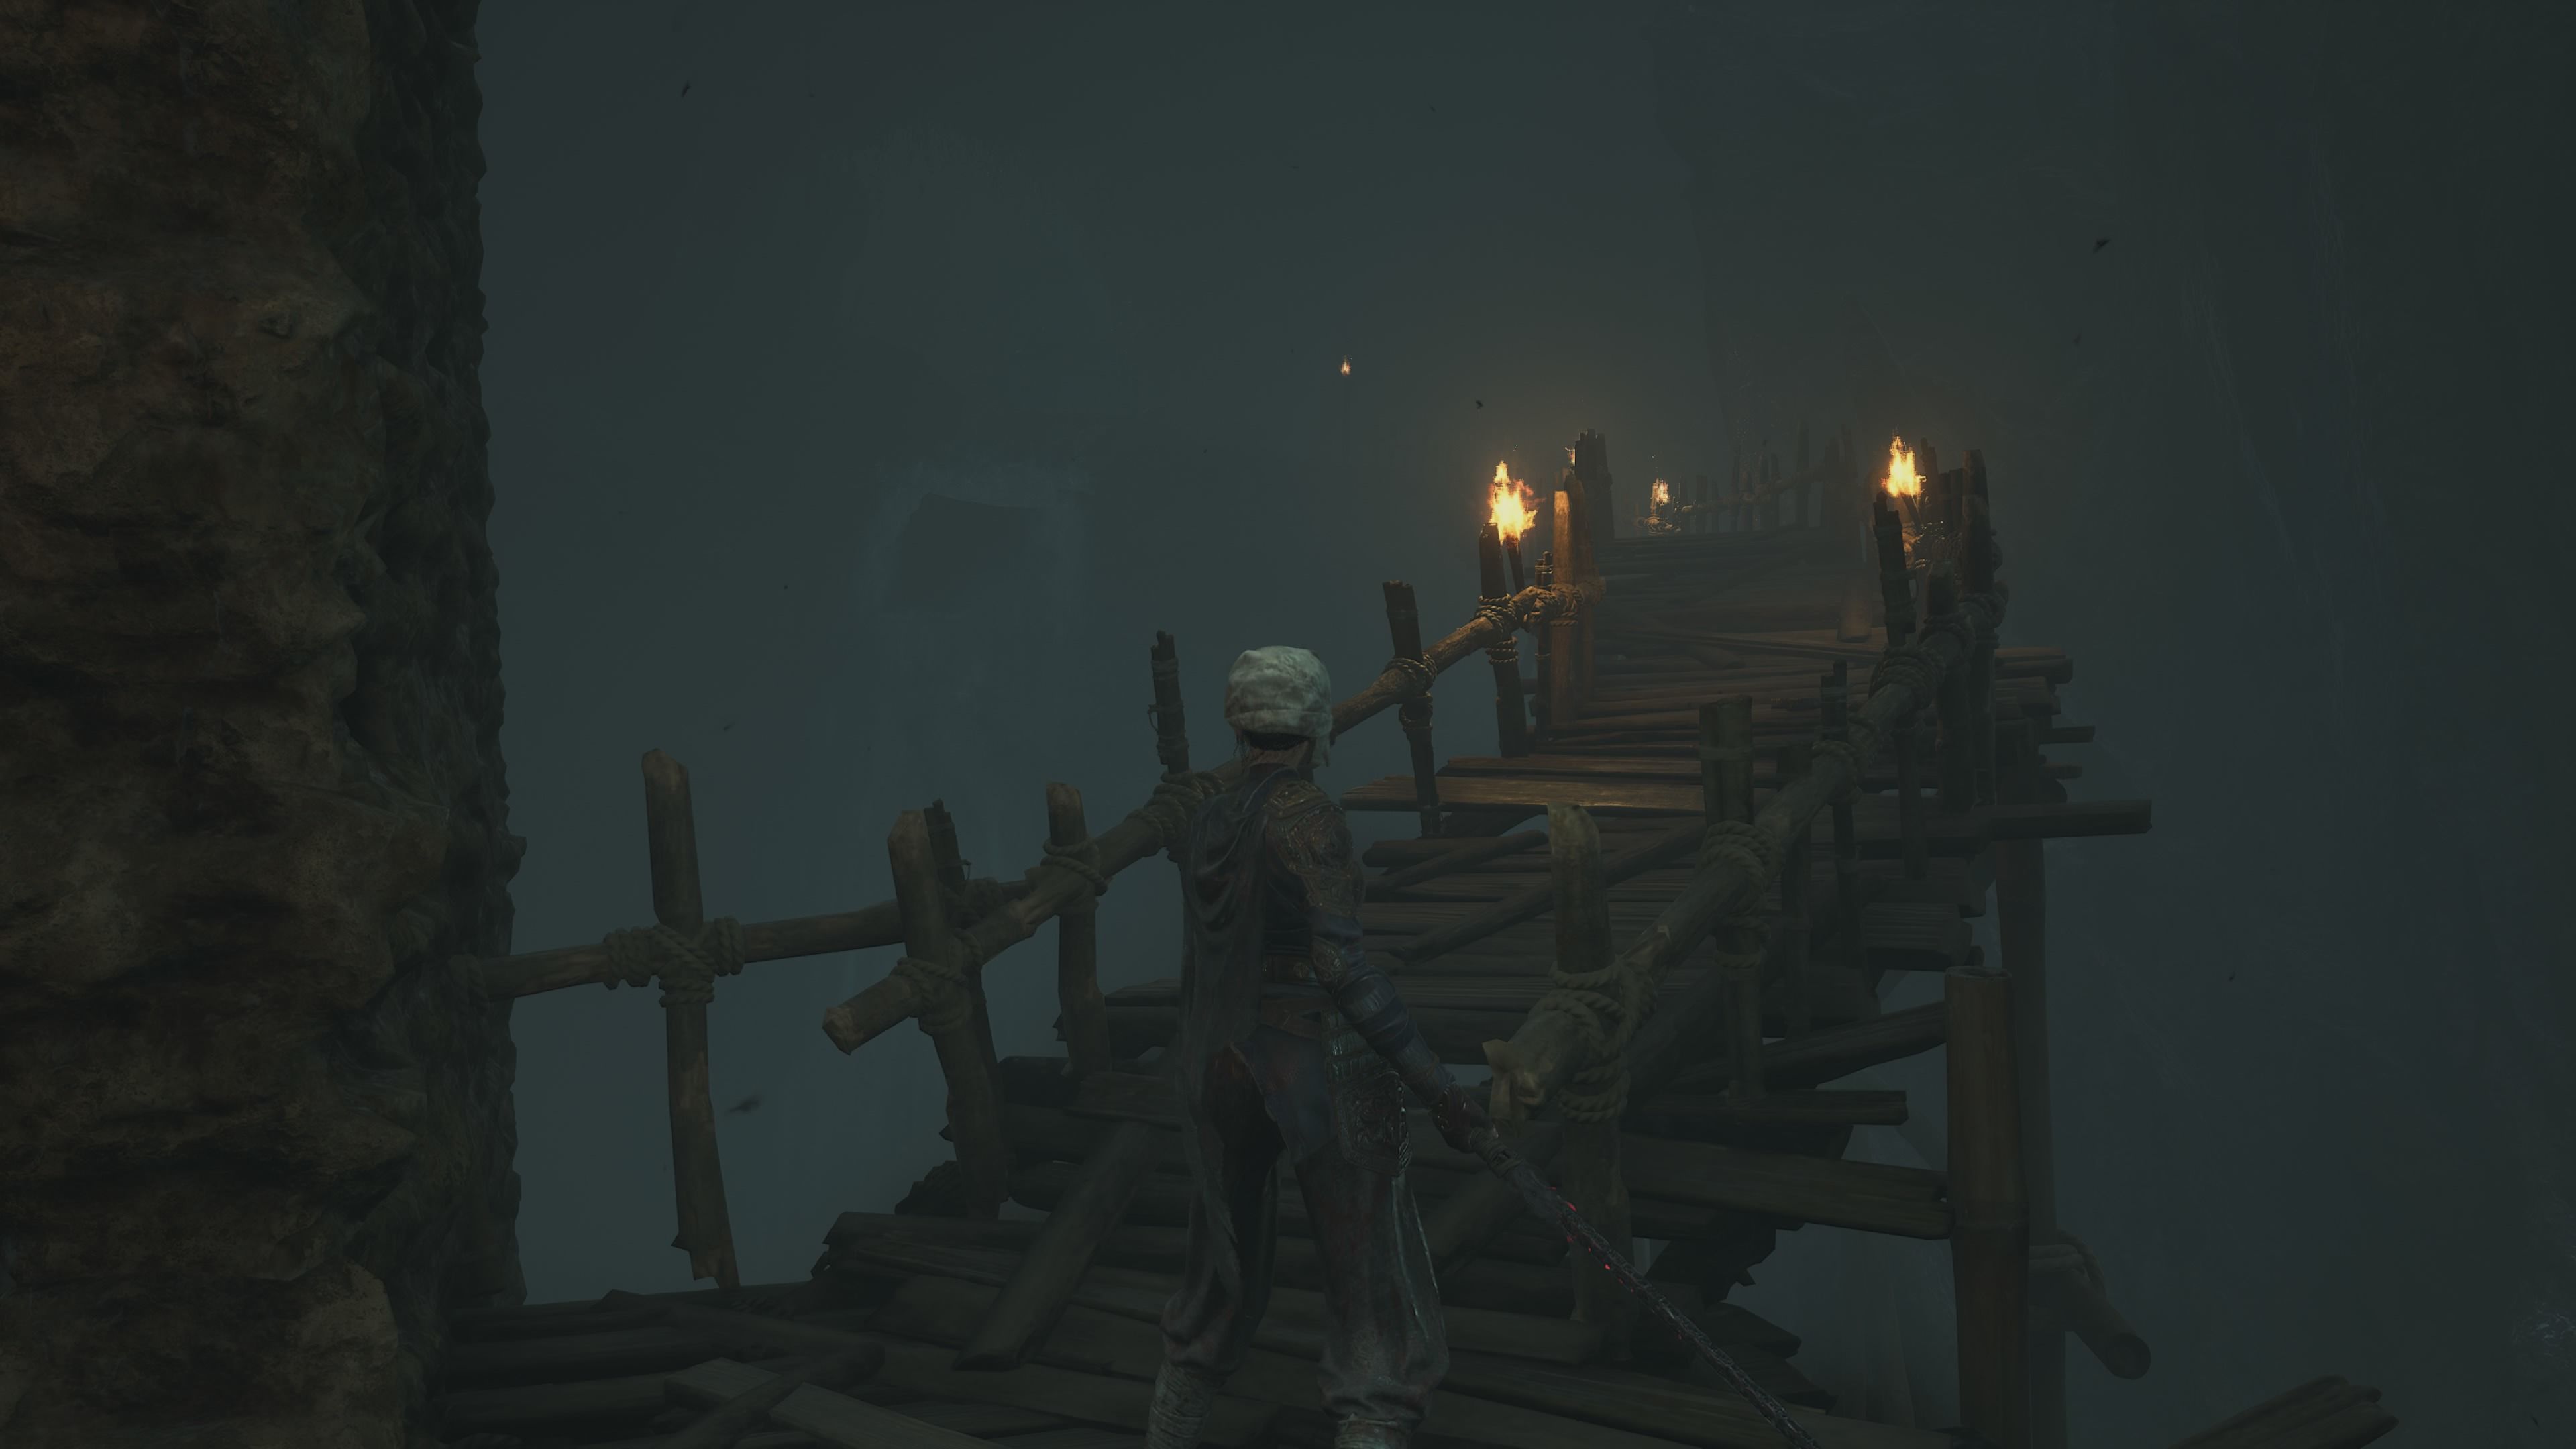
As a gamer, I can tell you that adventurers treading along this route will eventually stumble upon the ominous hideout known as the Bandit Cave. Progressing deeper, they’ll come across a steep U-shaped path that leads to none other than the Bandit Cave Shrine at its peak.
Doomwillow Beach
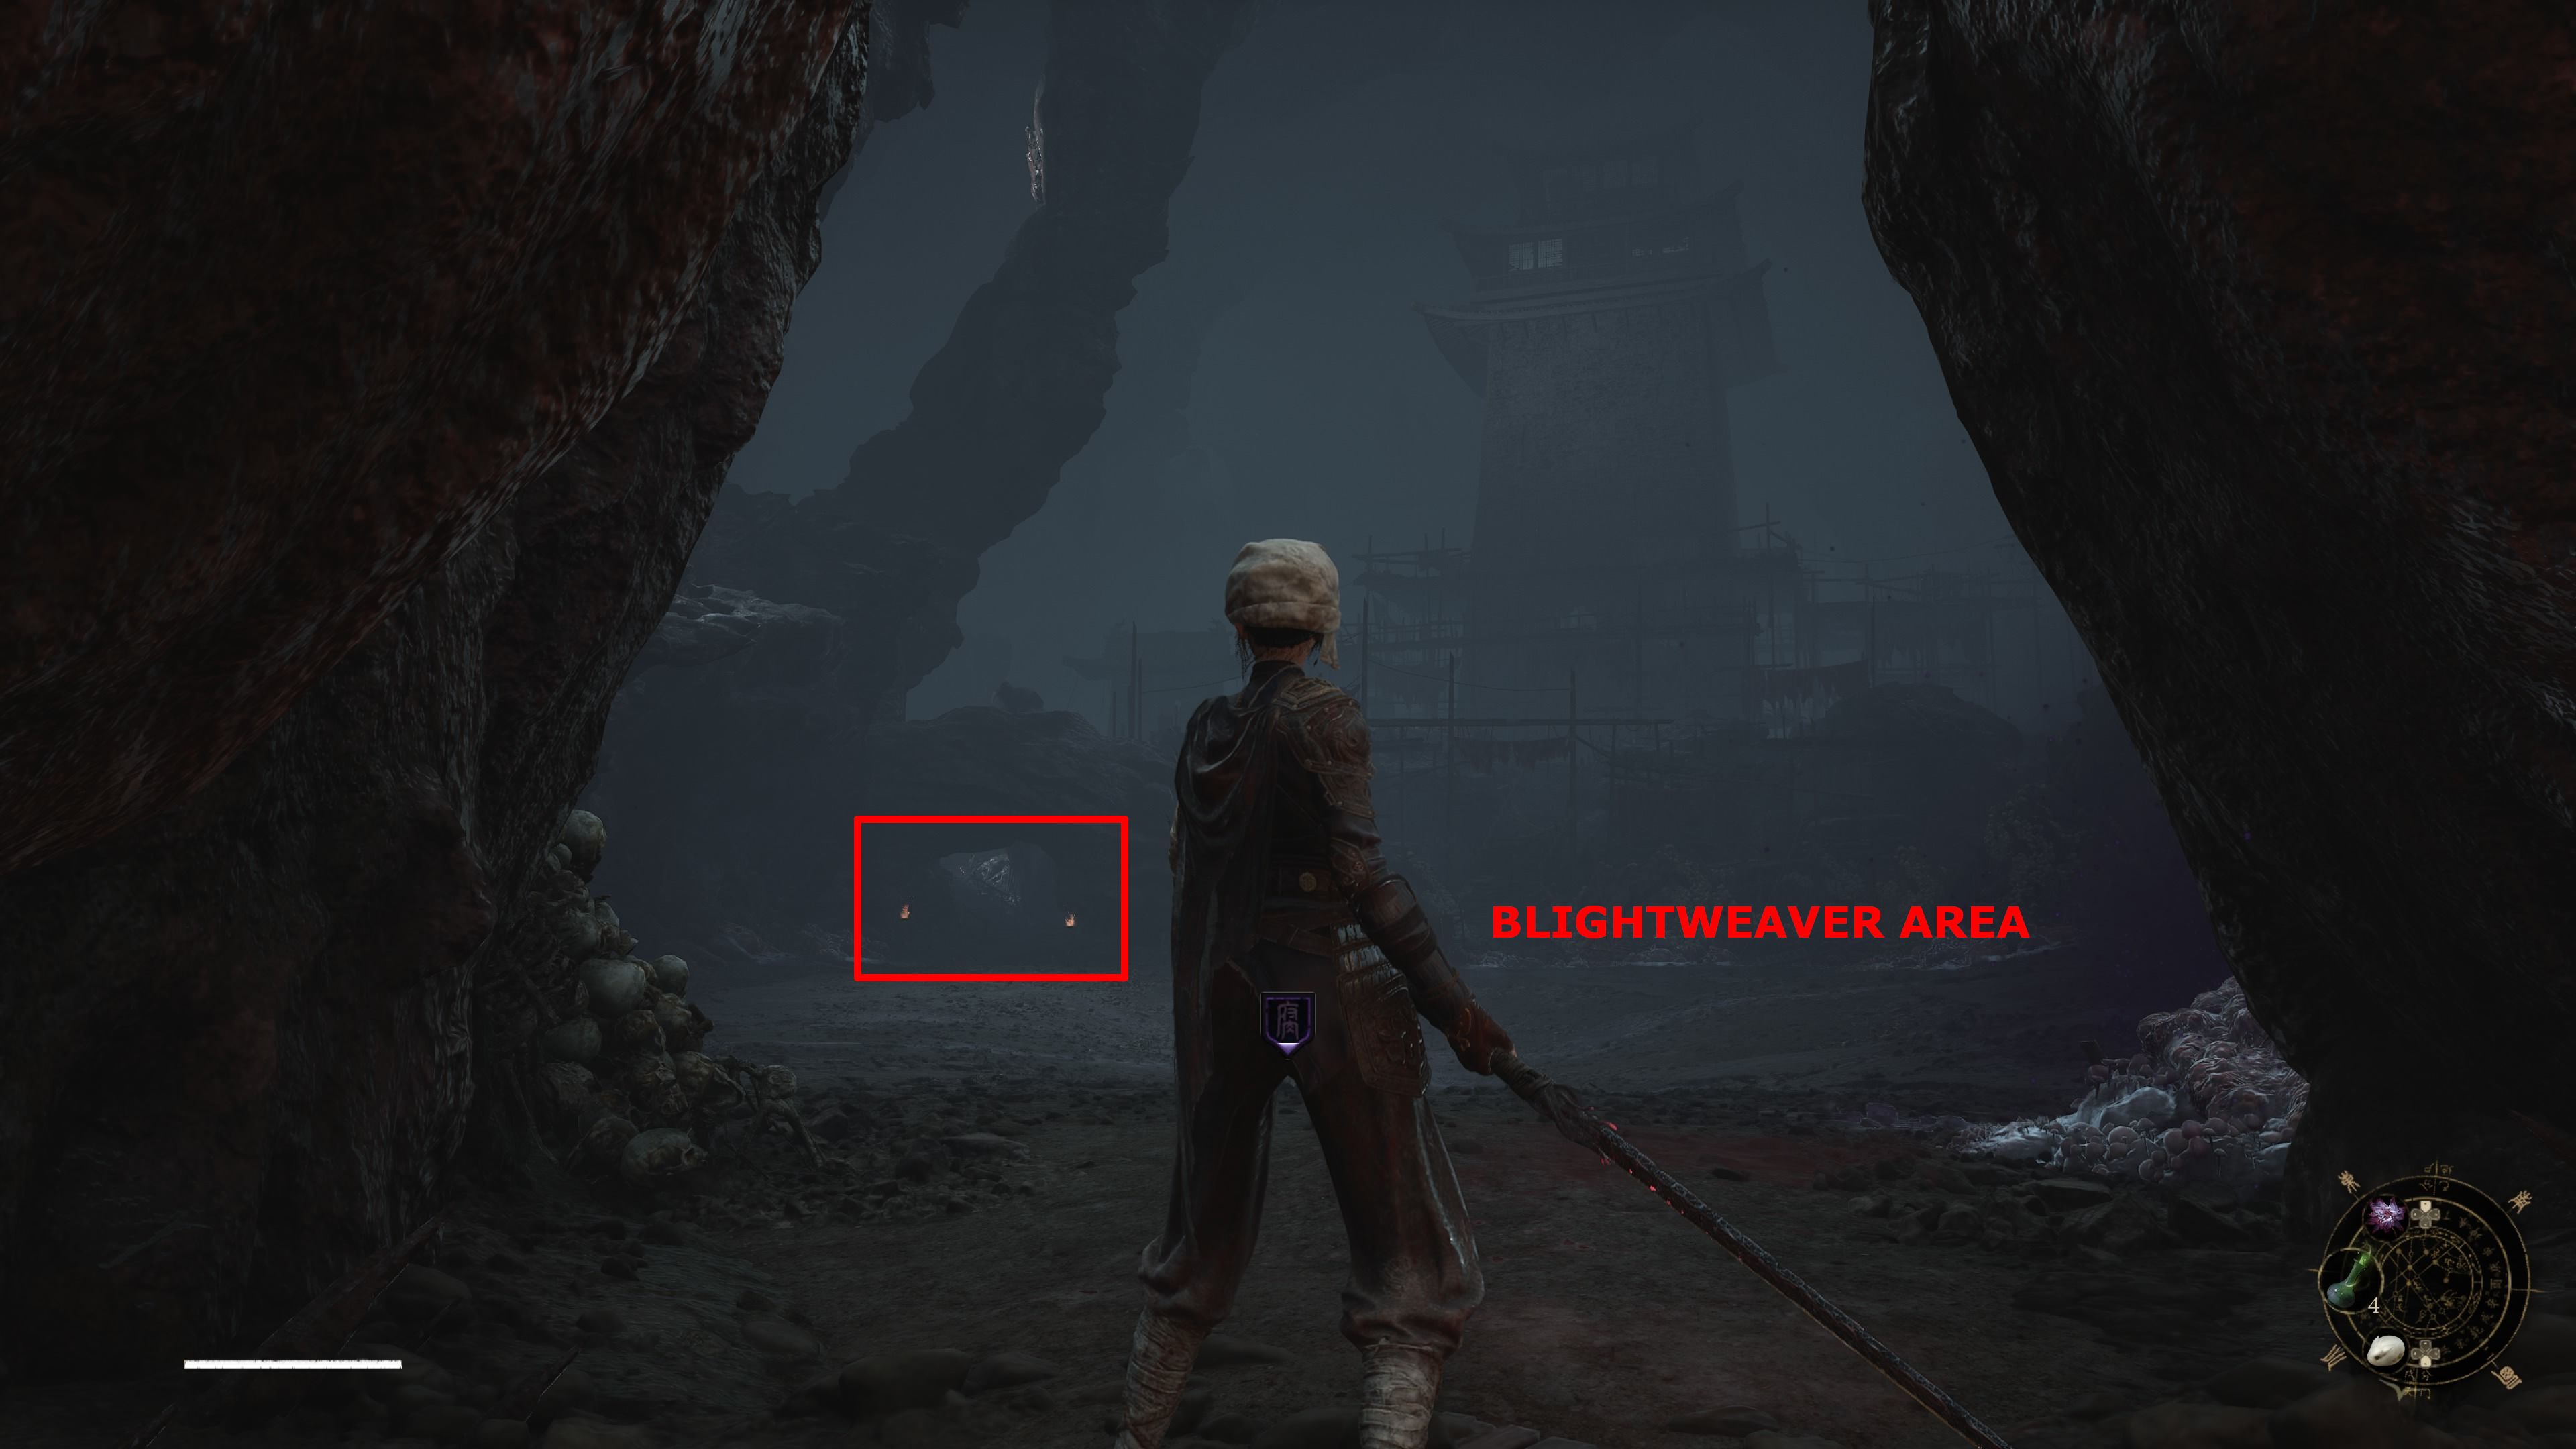
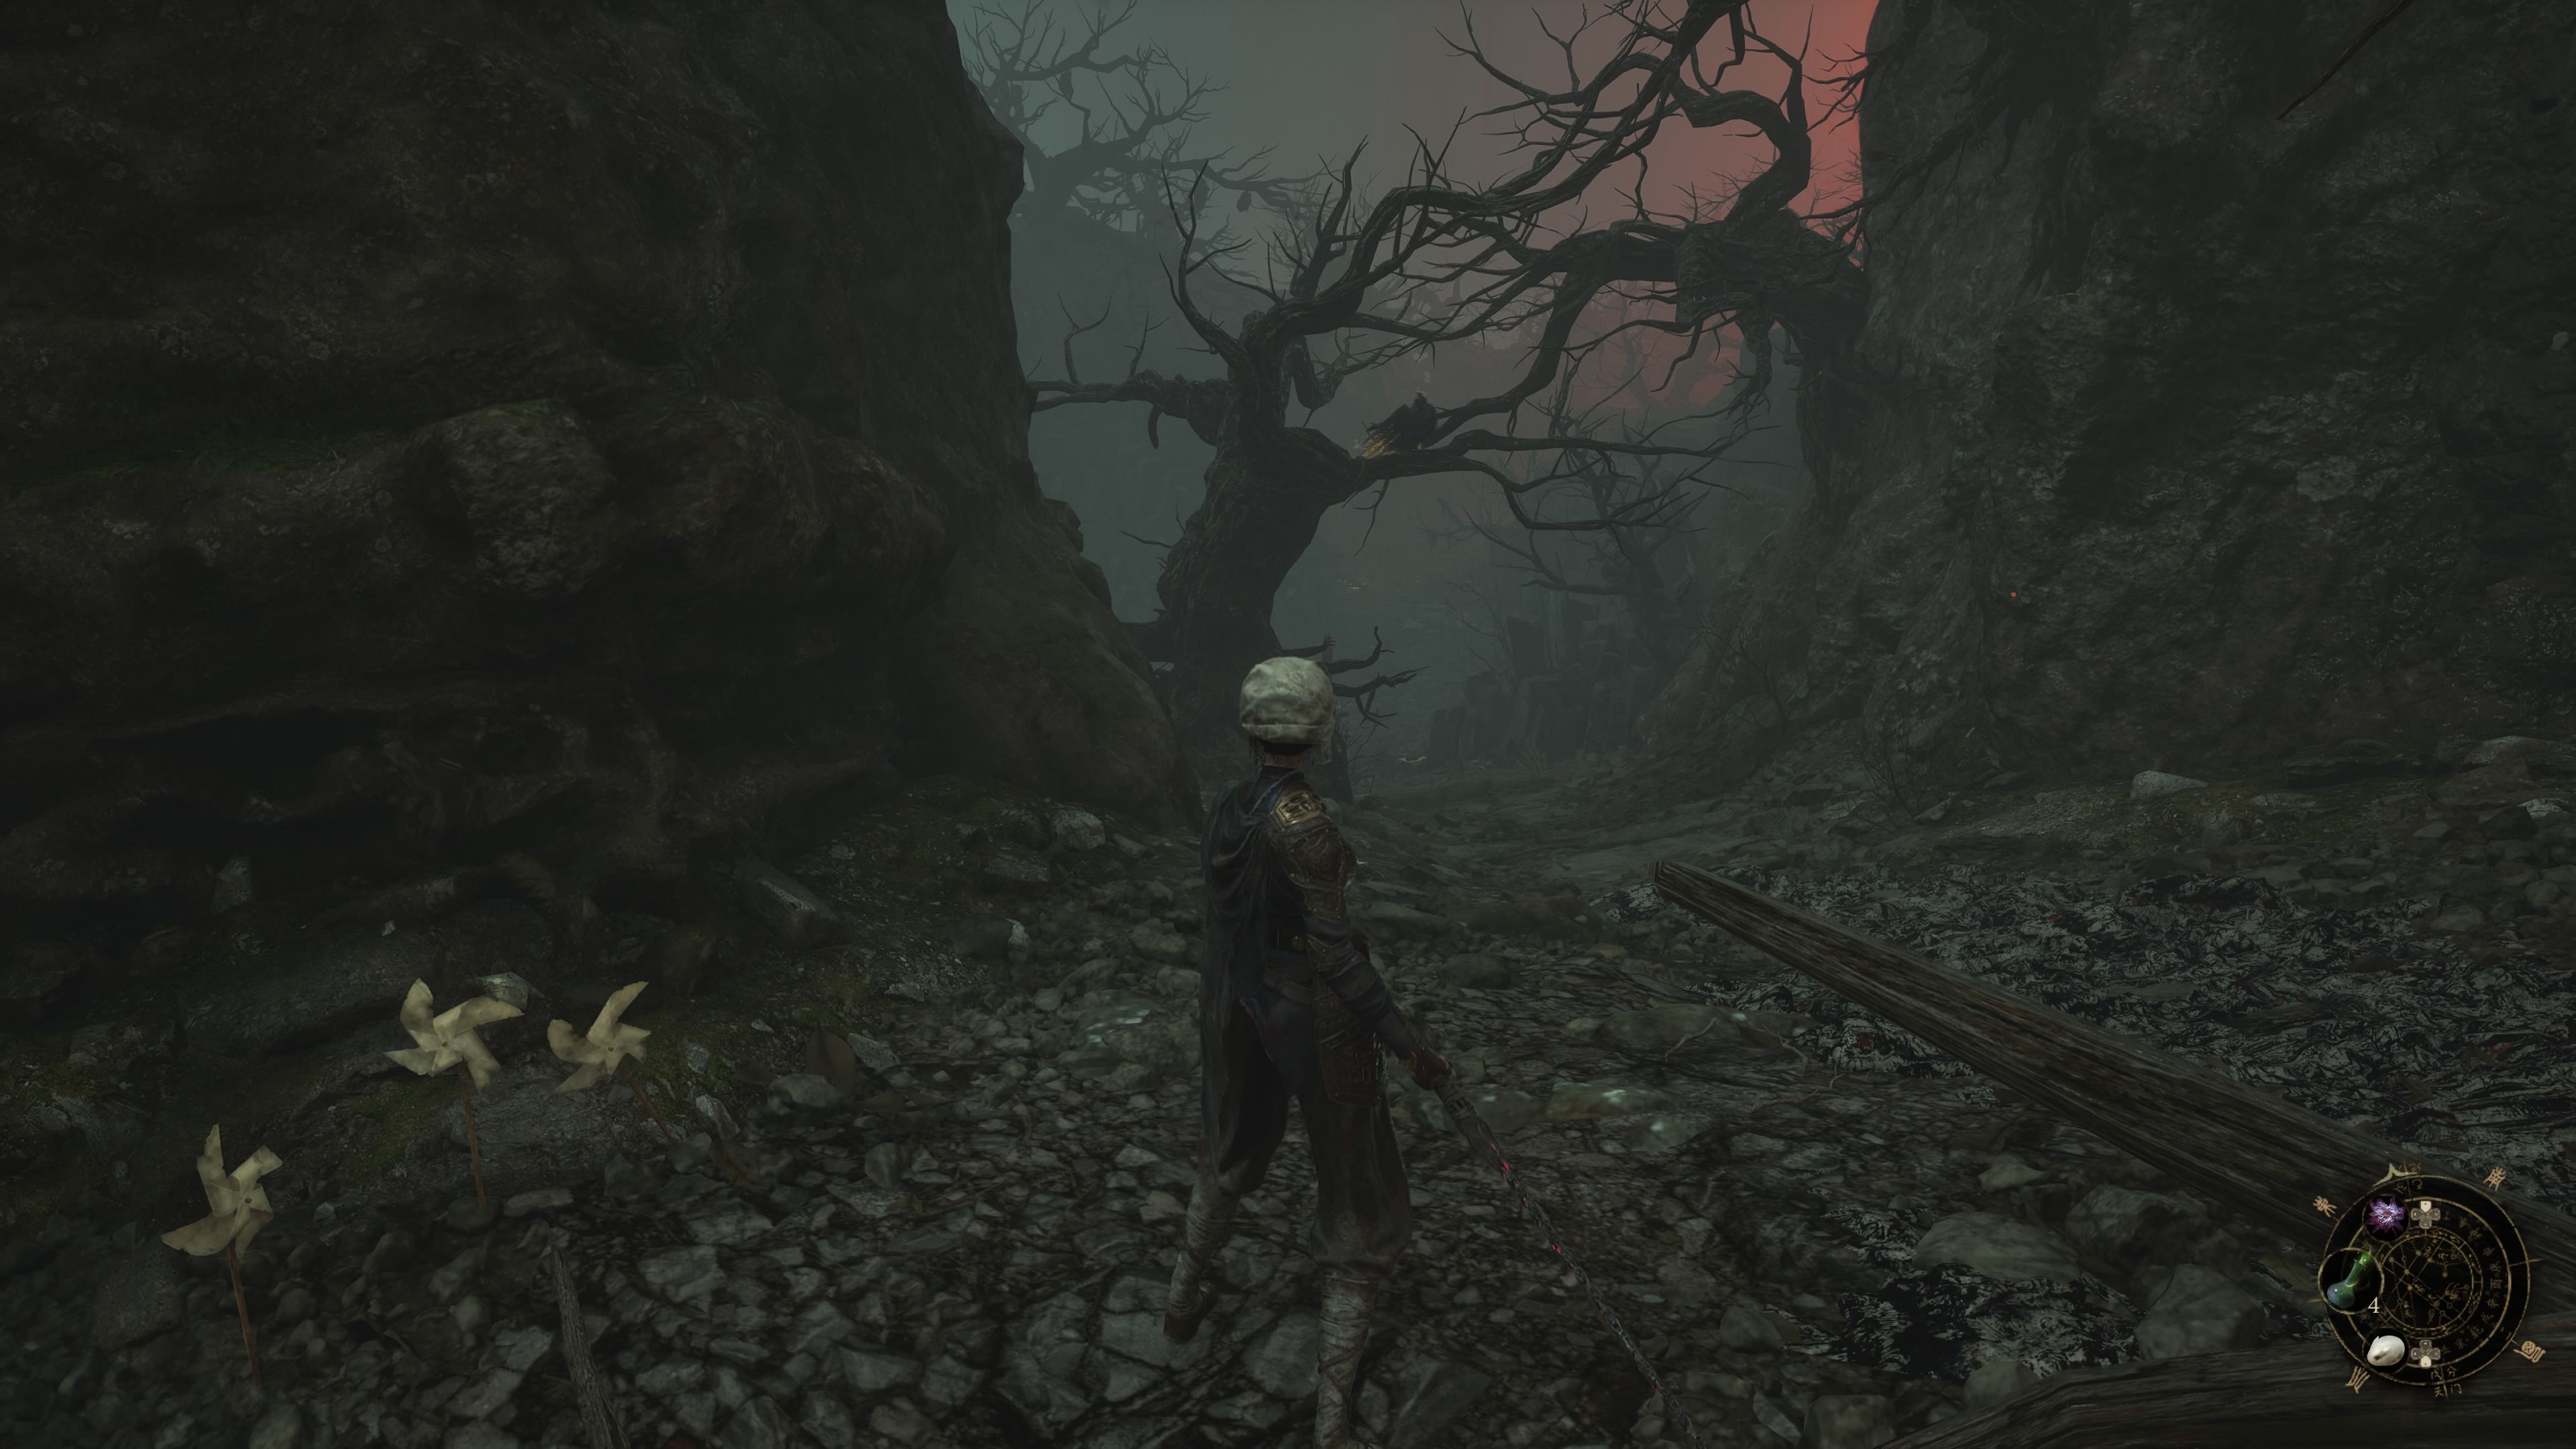
Face away from the Bandit Cave Shrine, then proceed along the path to enter an arena for a battle against Blightweaver – Great Centipede. Defeat this boss in Wuchang: Fallen Feathers, and utilize the path at the end of the arena to get to the Tower of Sacrifice. Inside the tower, take the lift, and continue along the path to reach Doomwillow Beach Shrine on your left.
Lu Mansion
Face away from the Doomwillow Beach Shrine, then take the path that lies ahead and veers to the right. When the path splits, keep moving to the right to reach an open space. The Lu Mansion Shrine is situated on the left side of this open area, close to a lift.
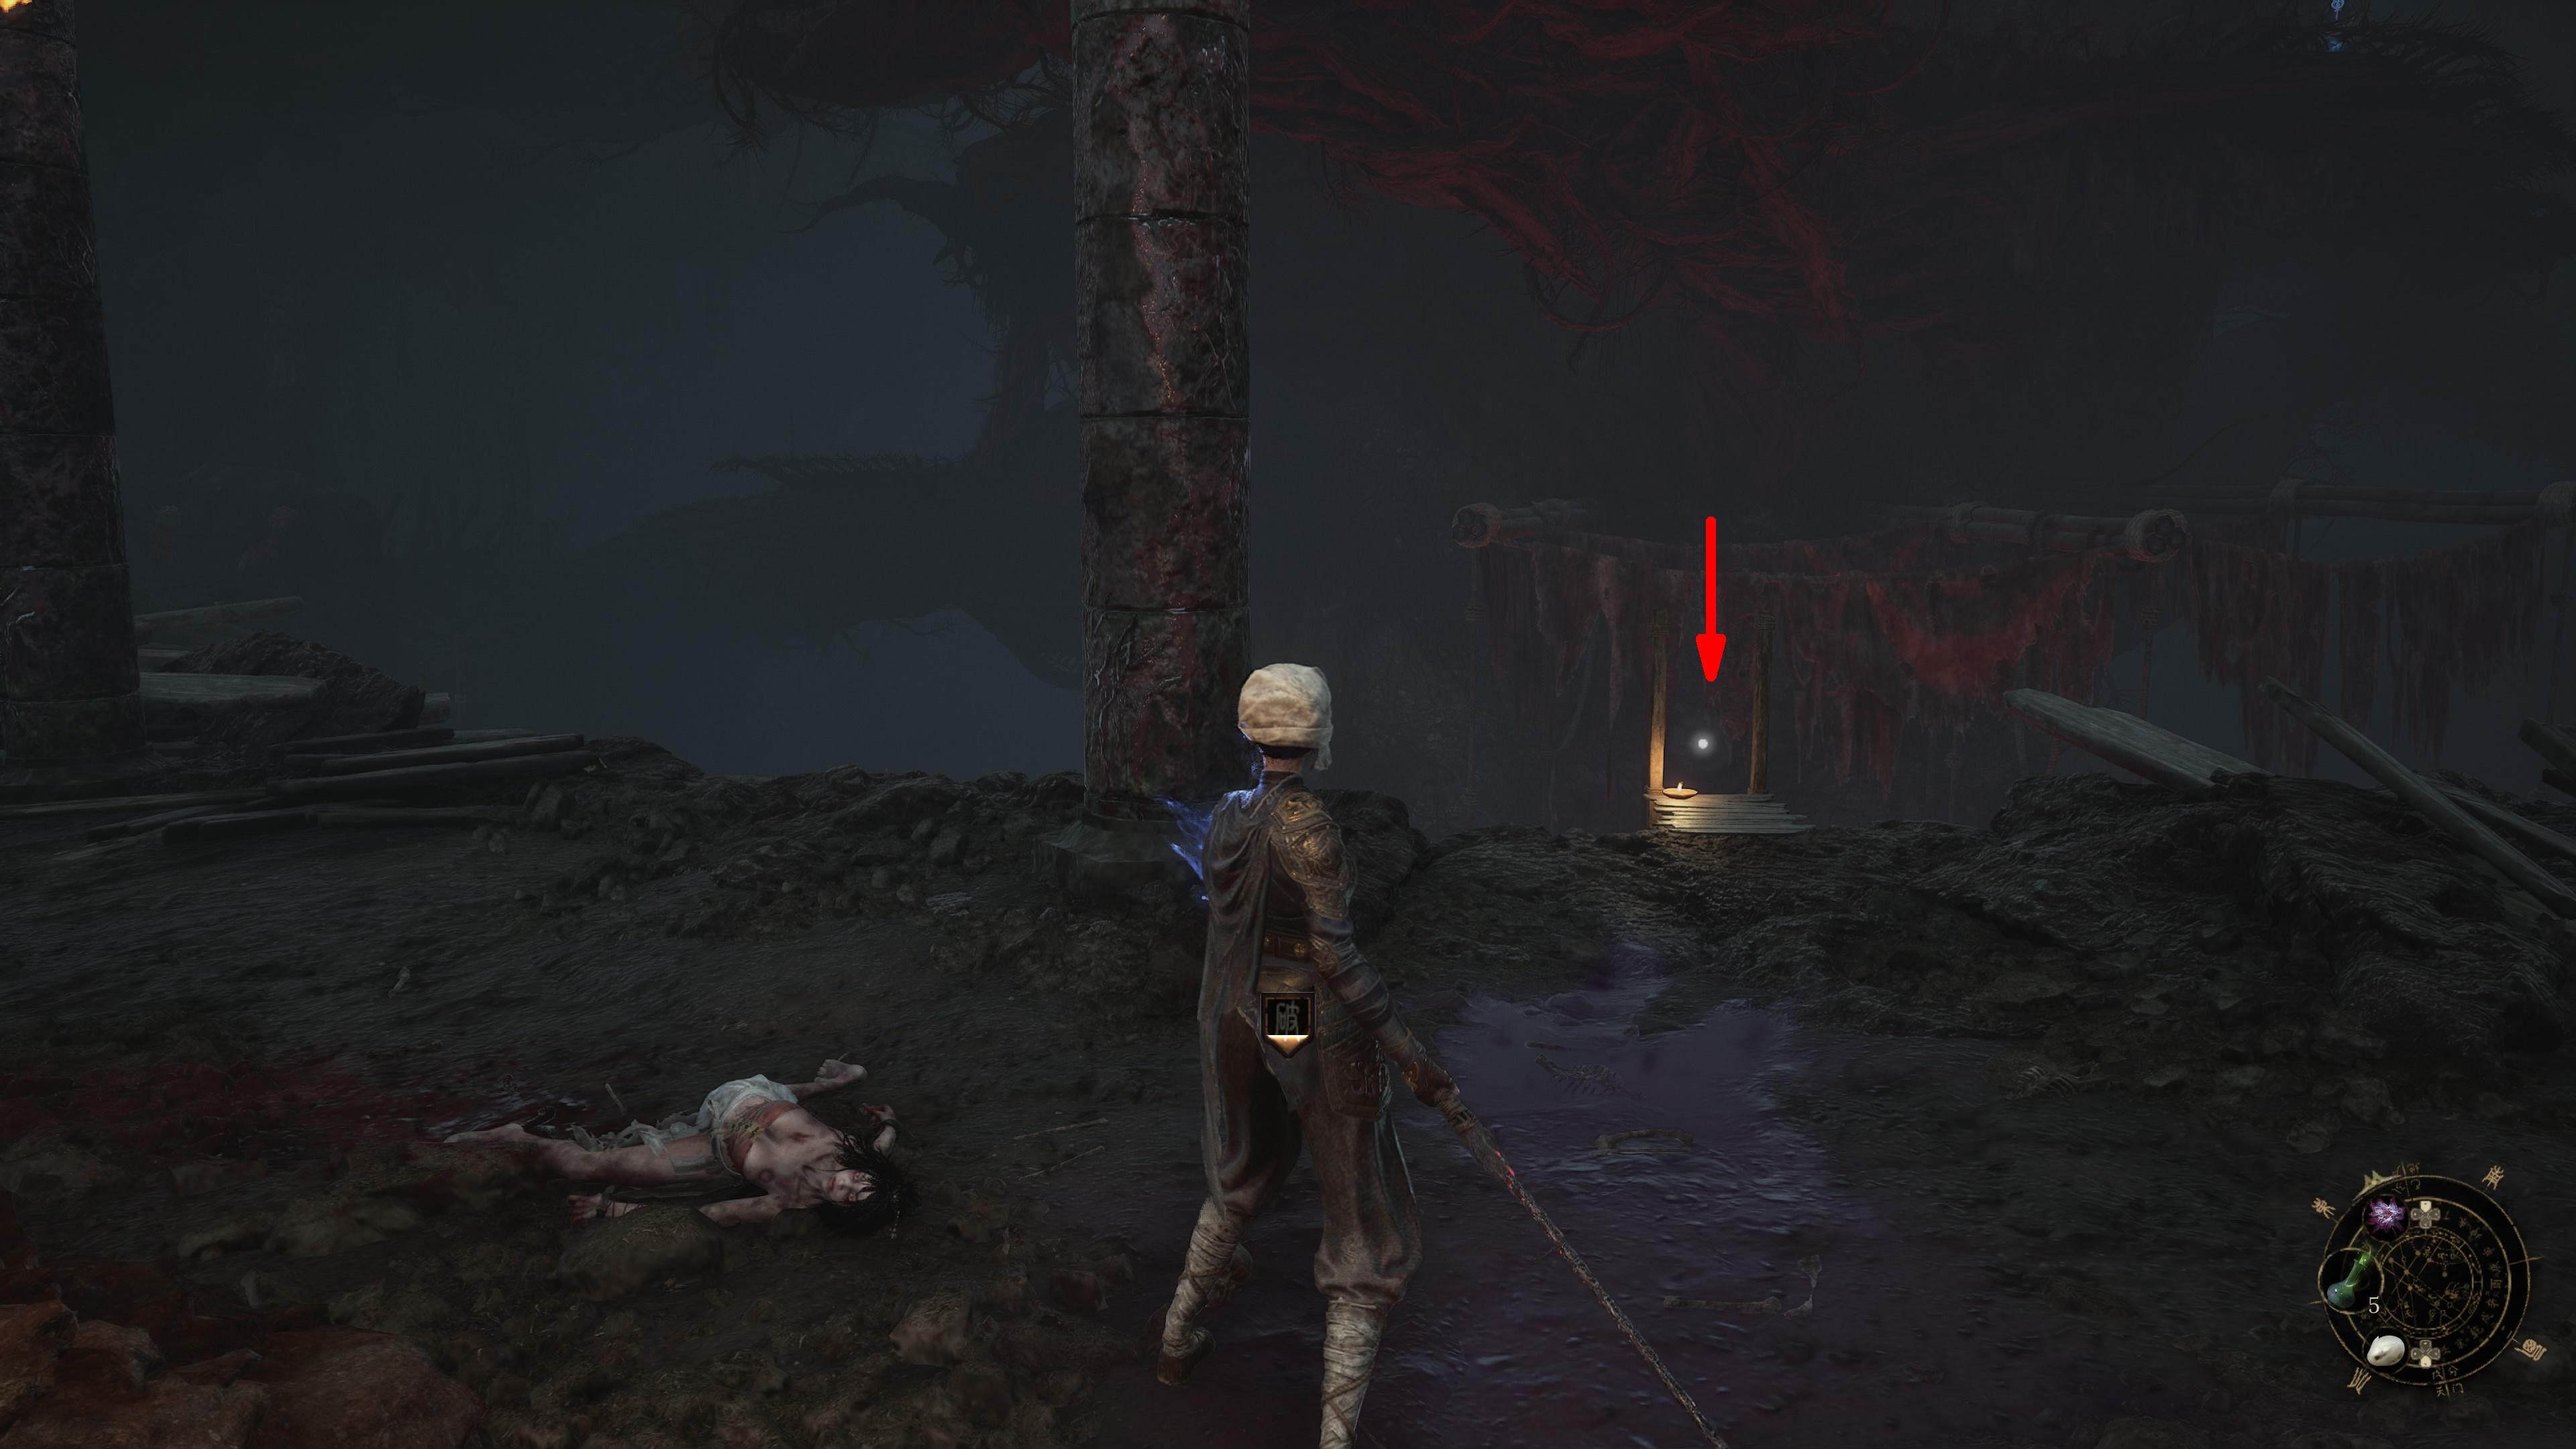
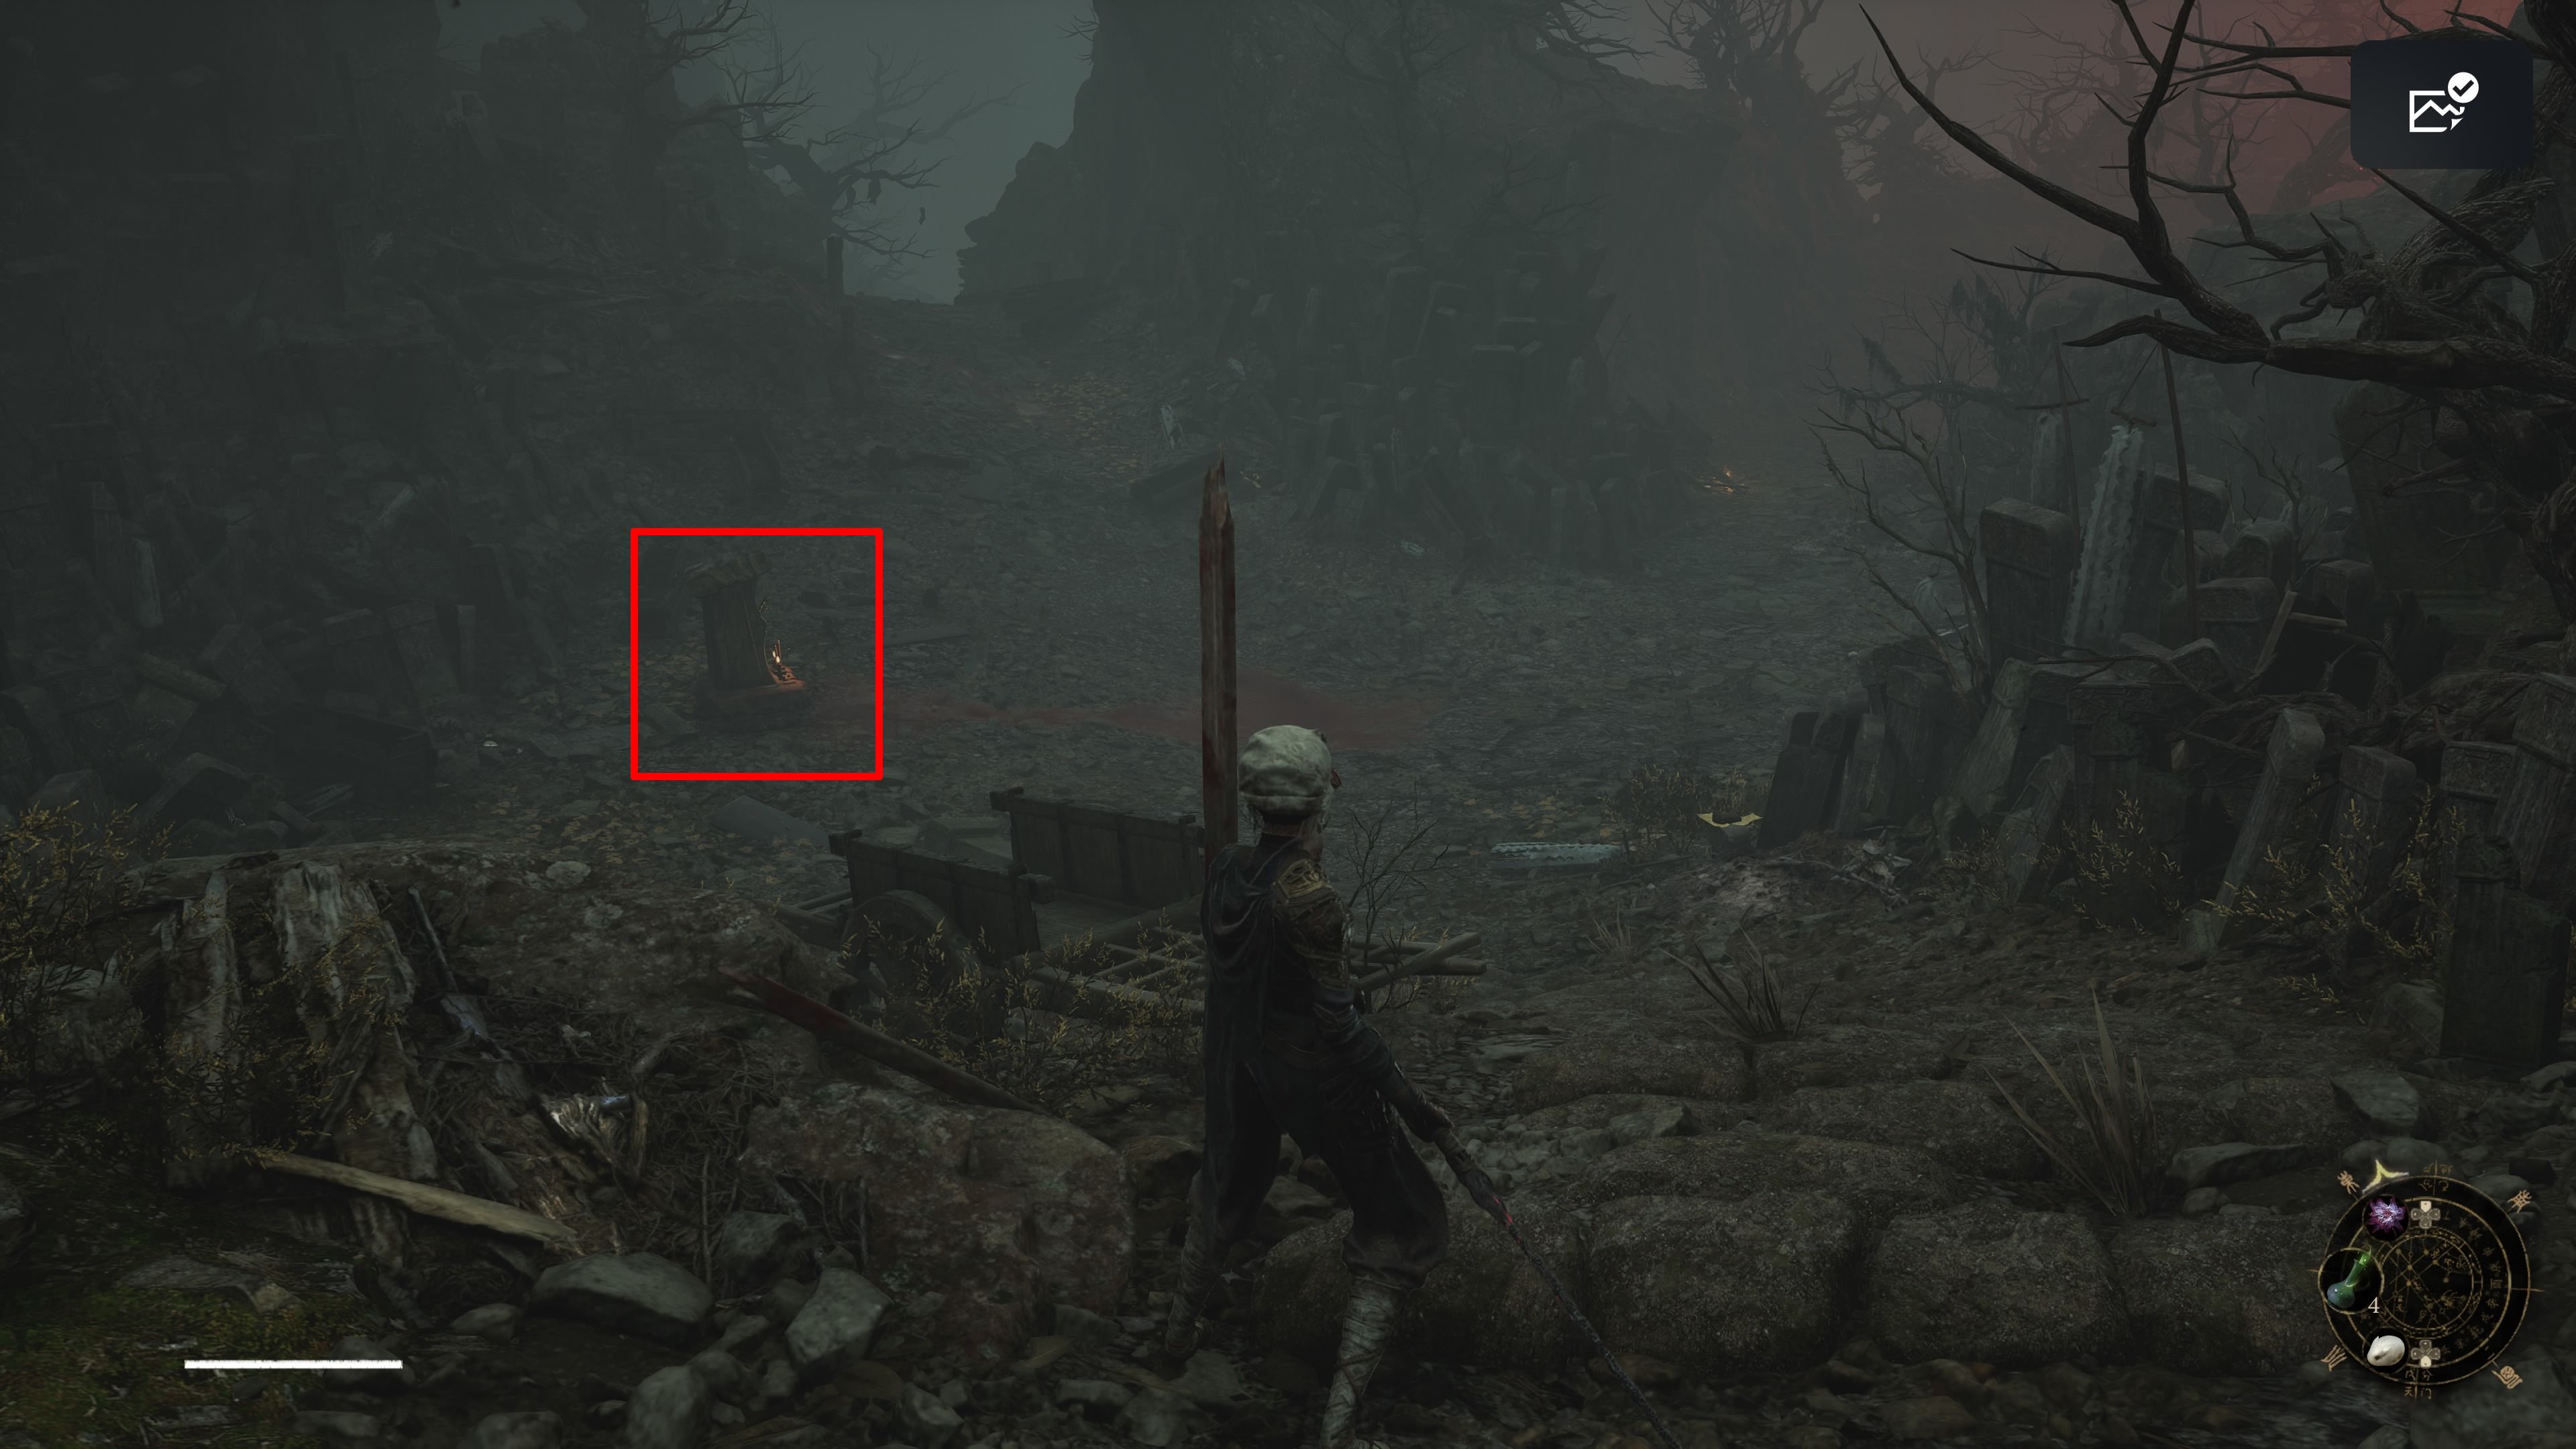
Corpse Pit
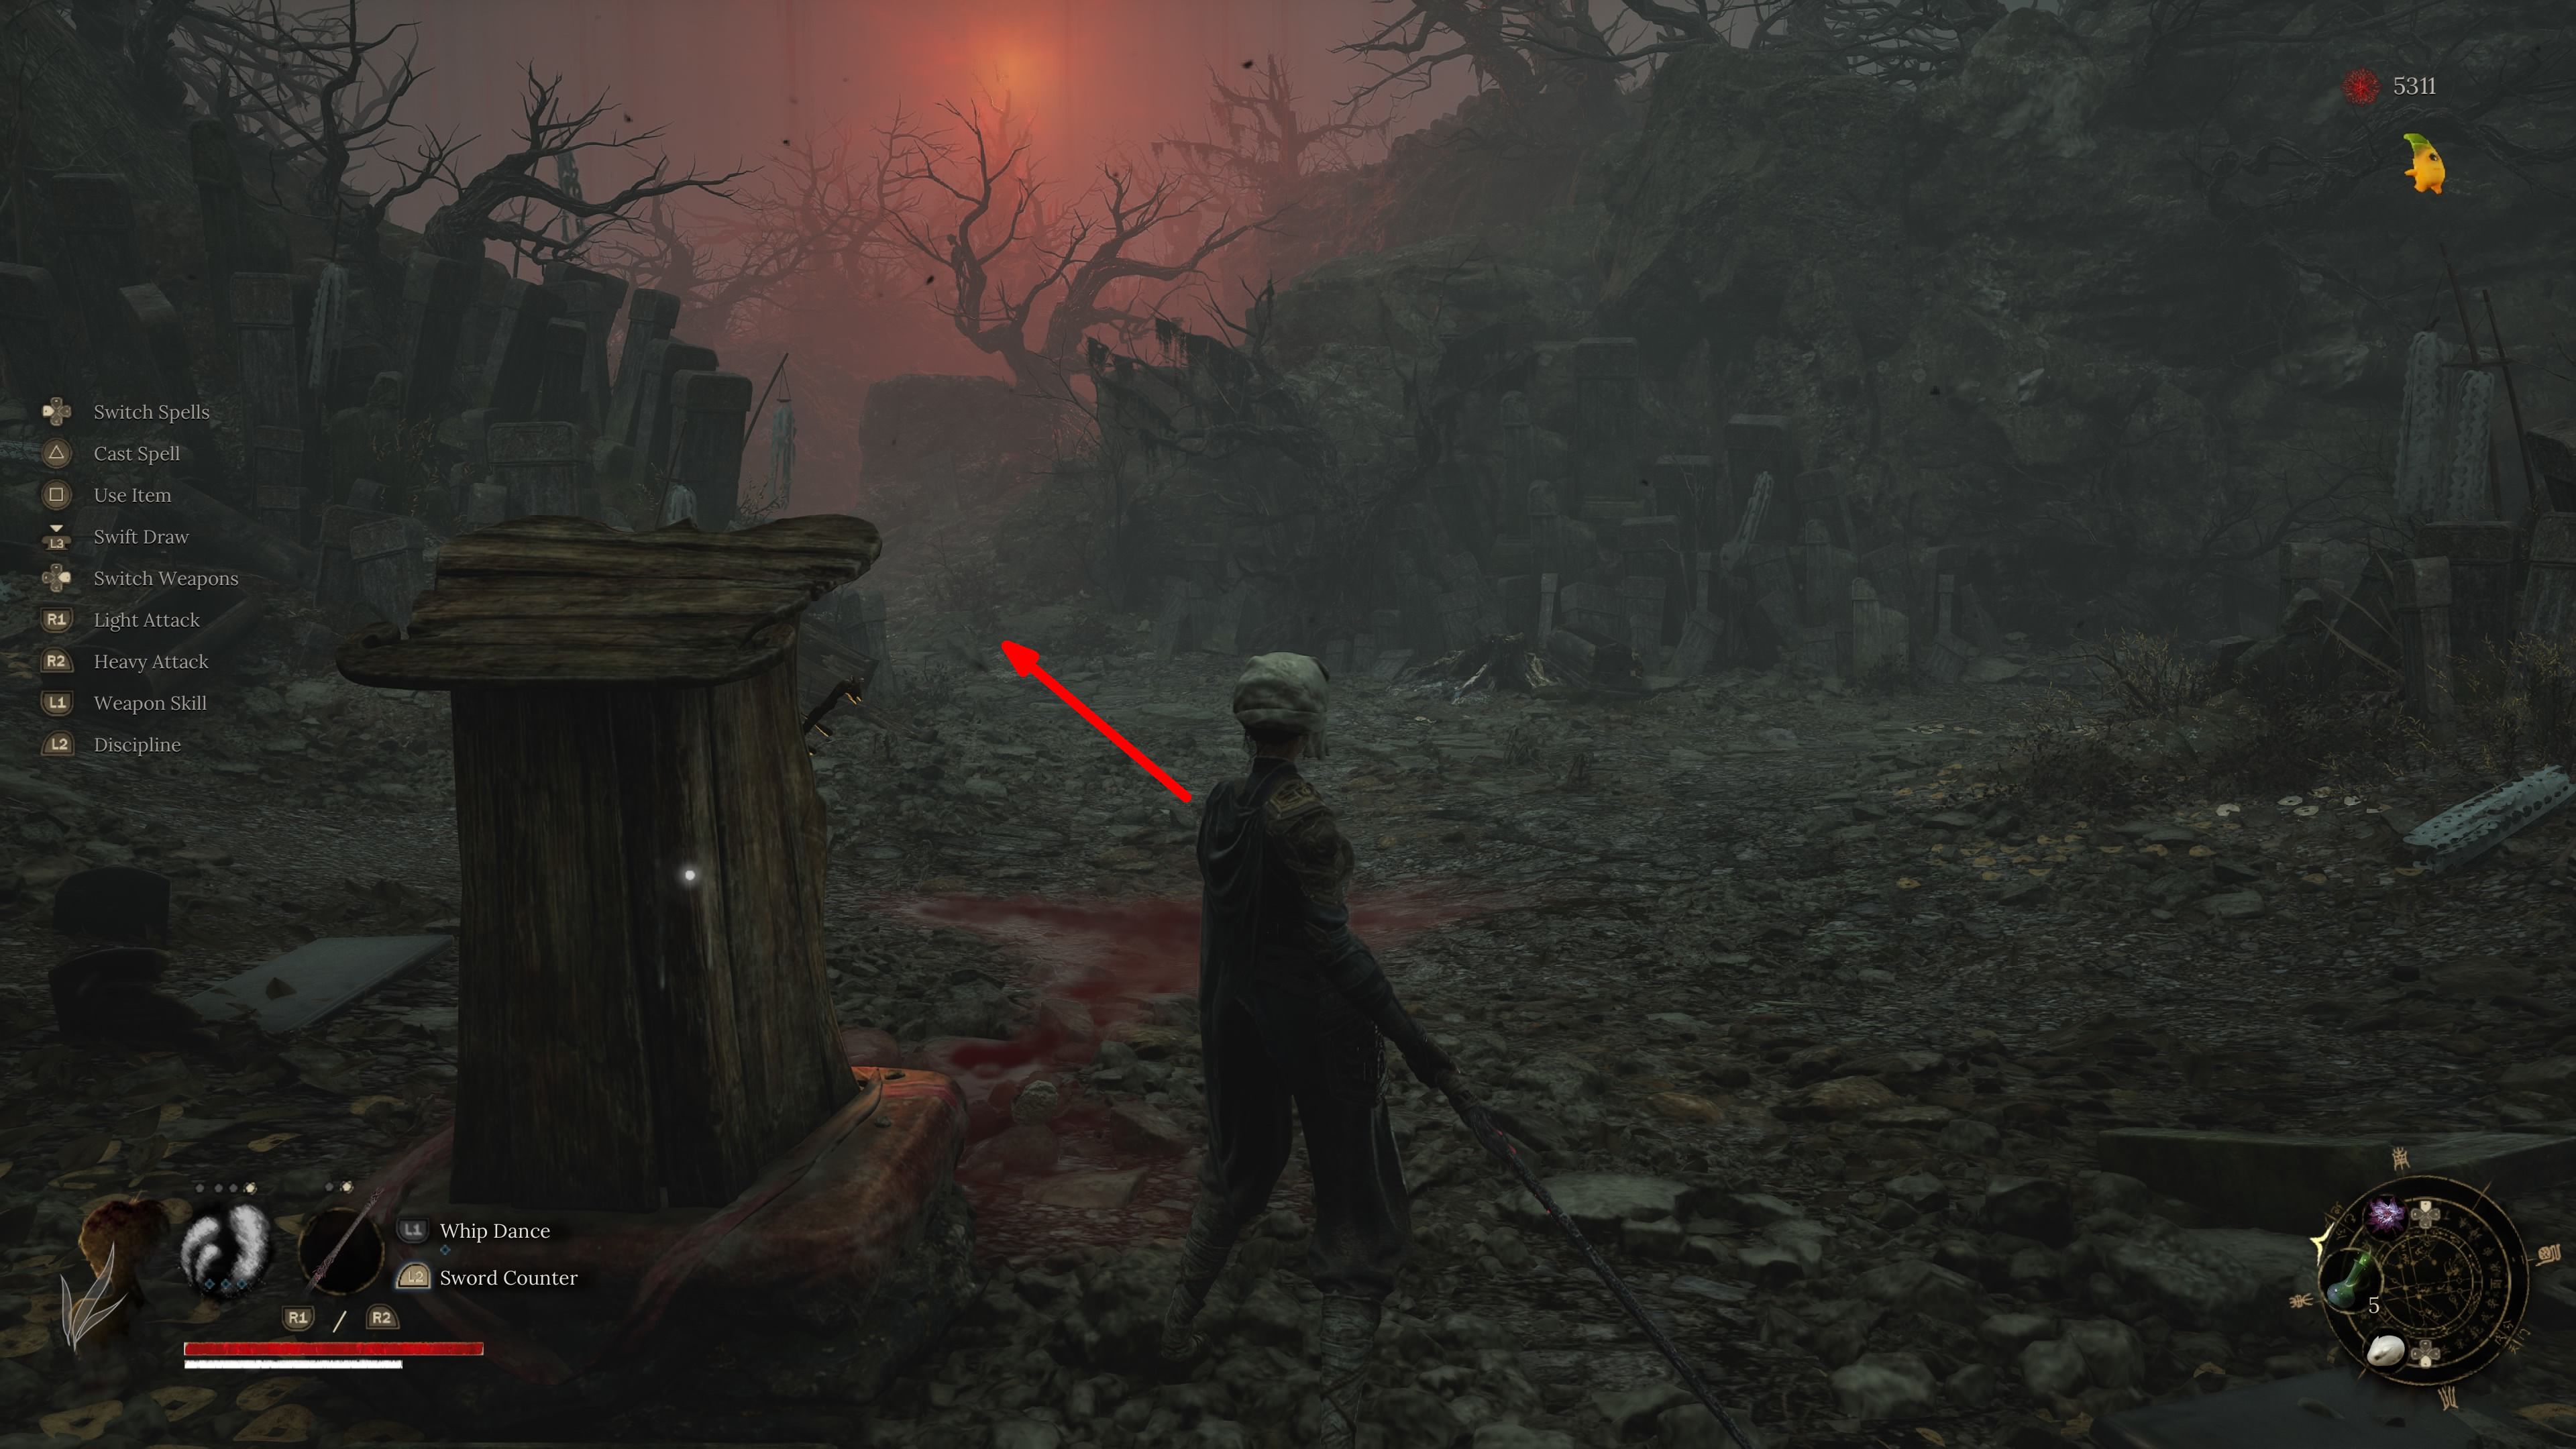
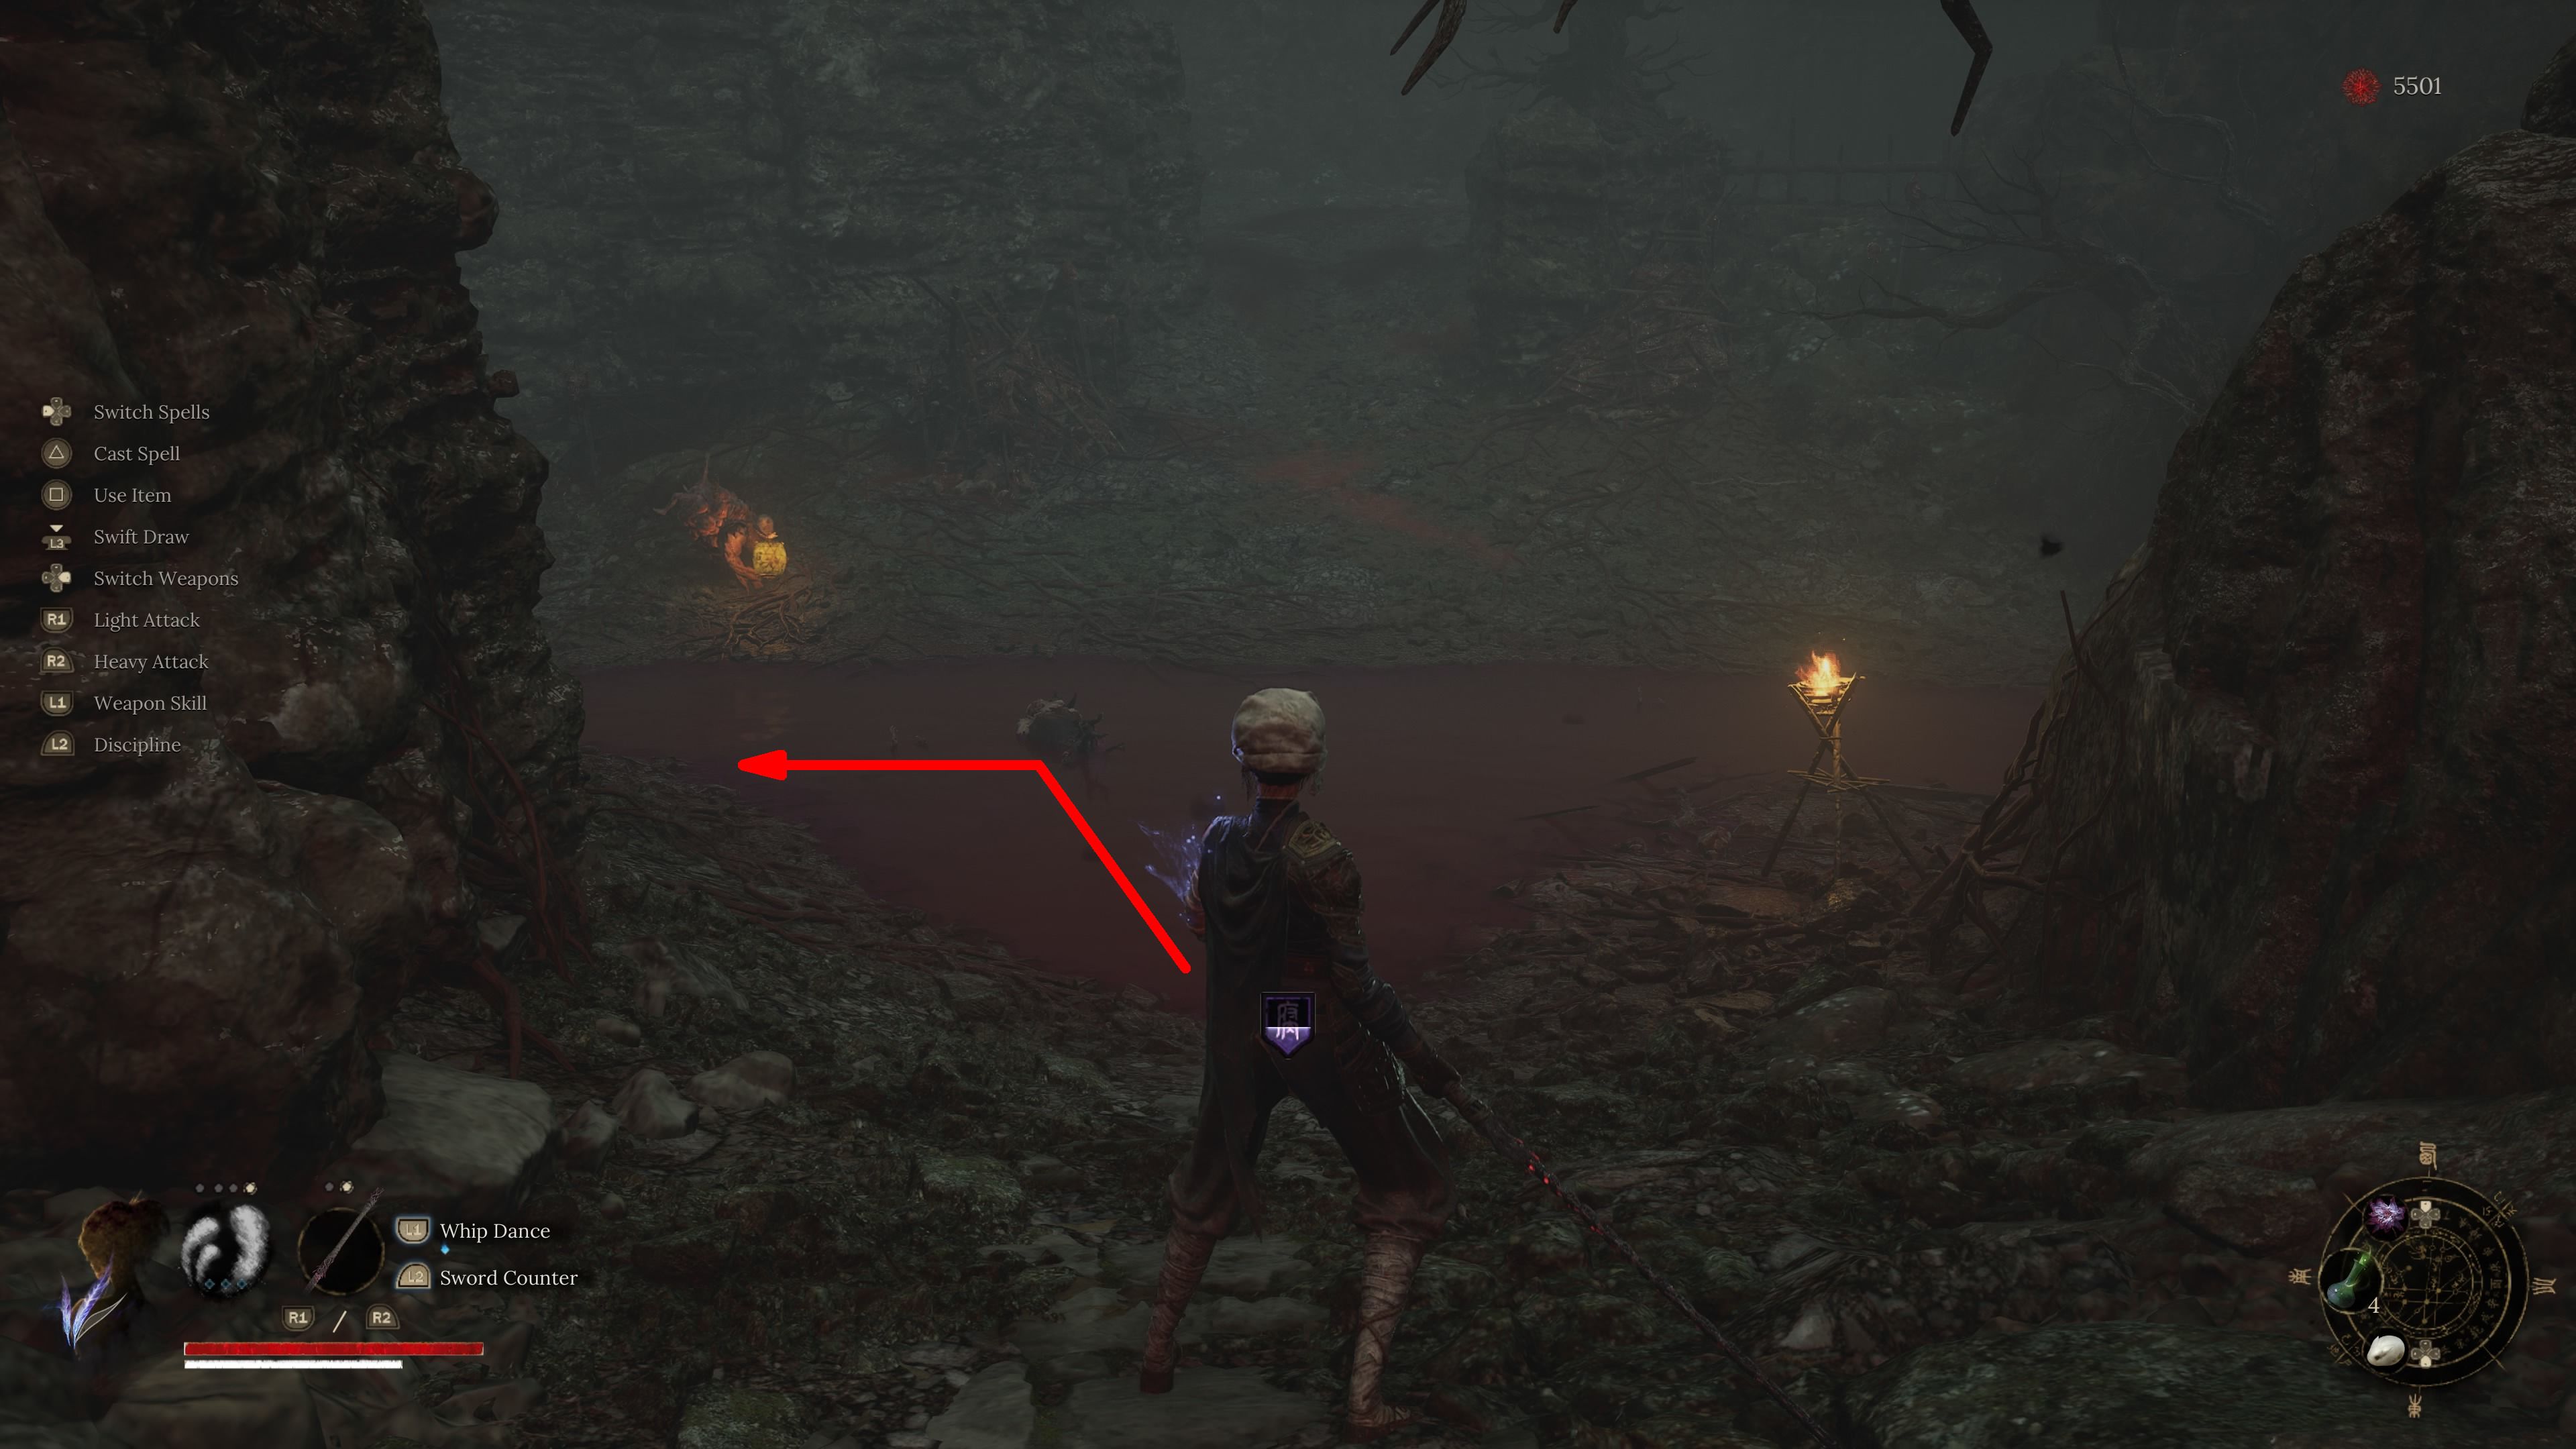
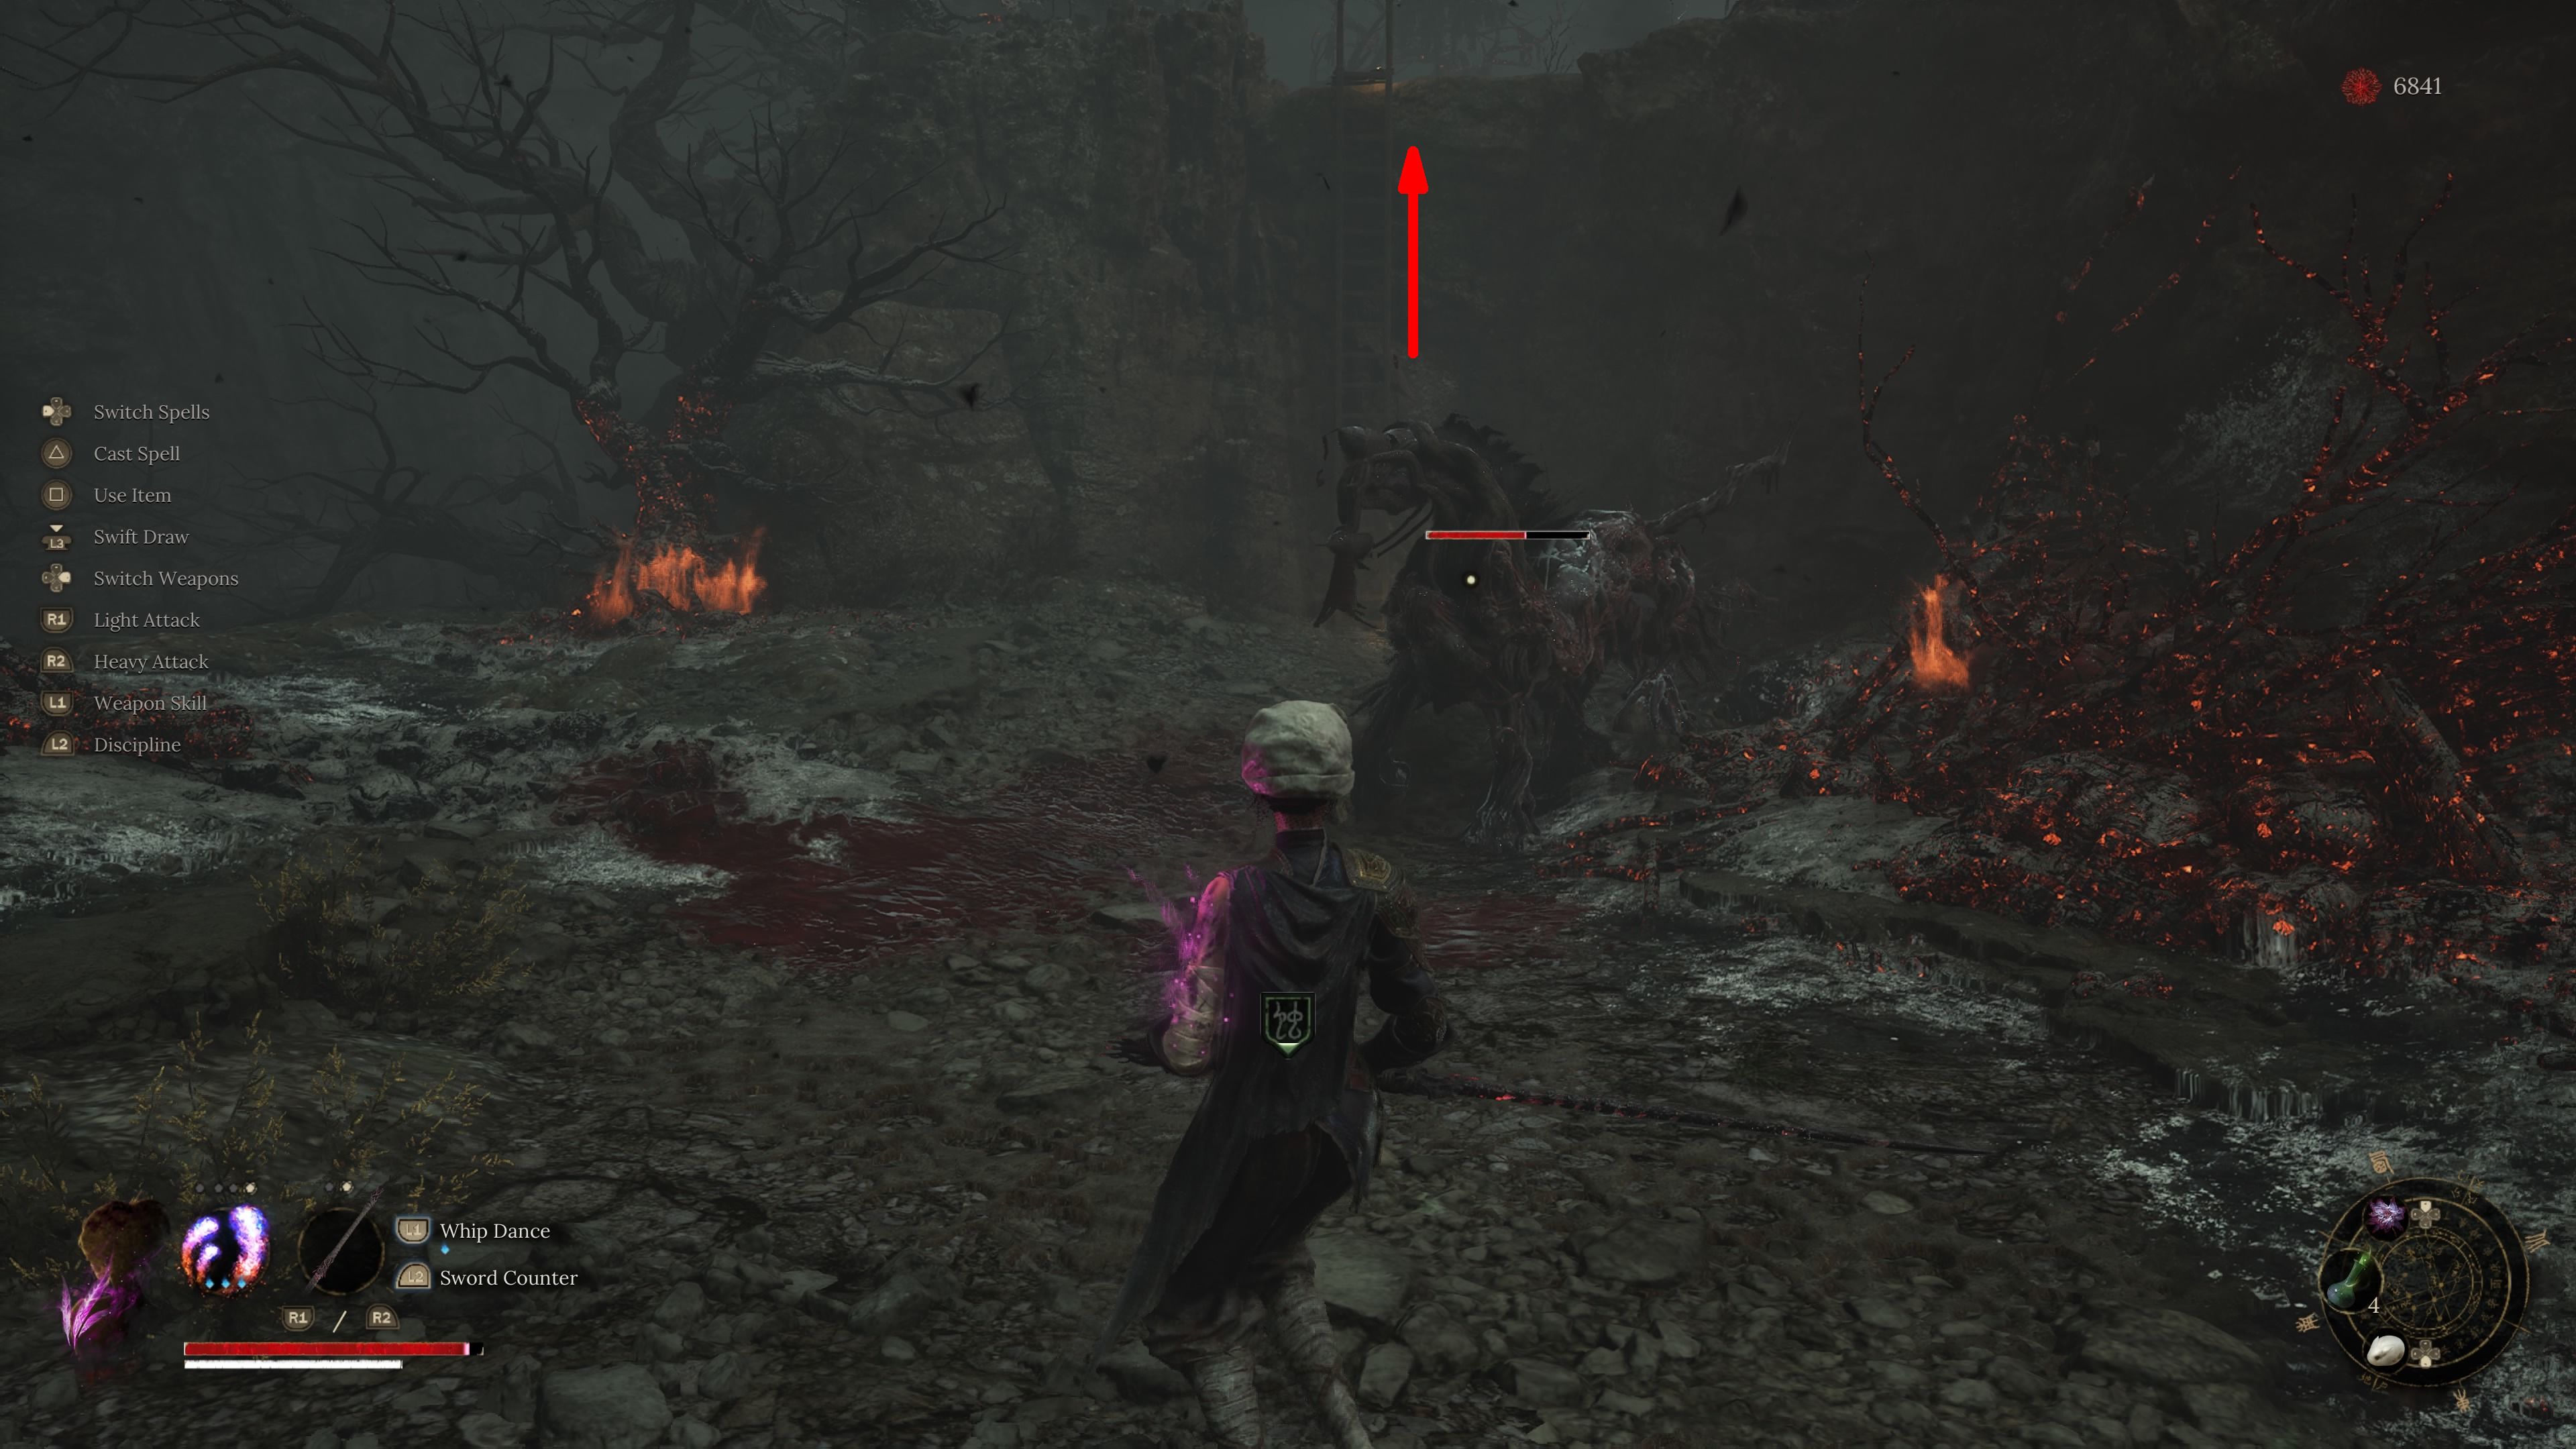
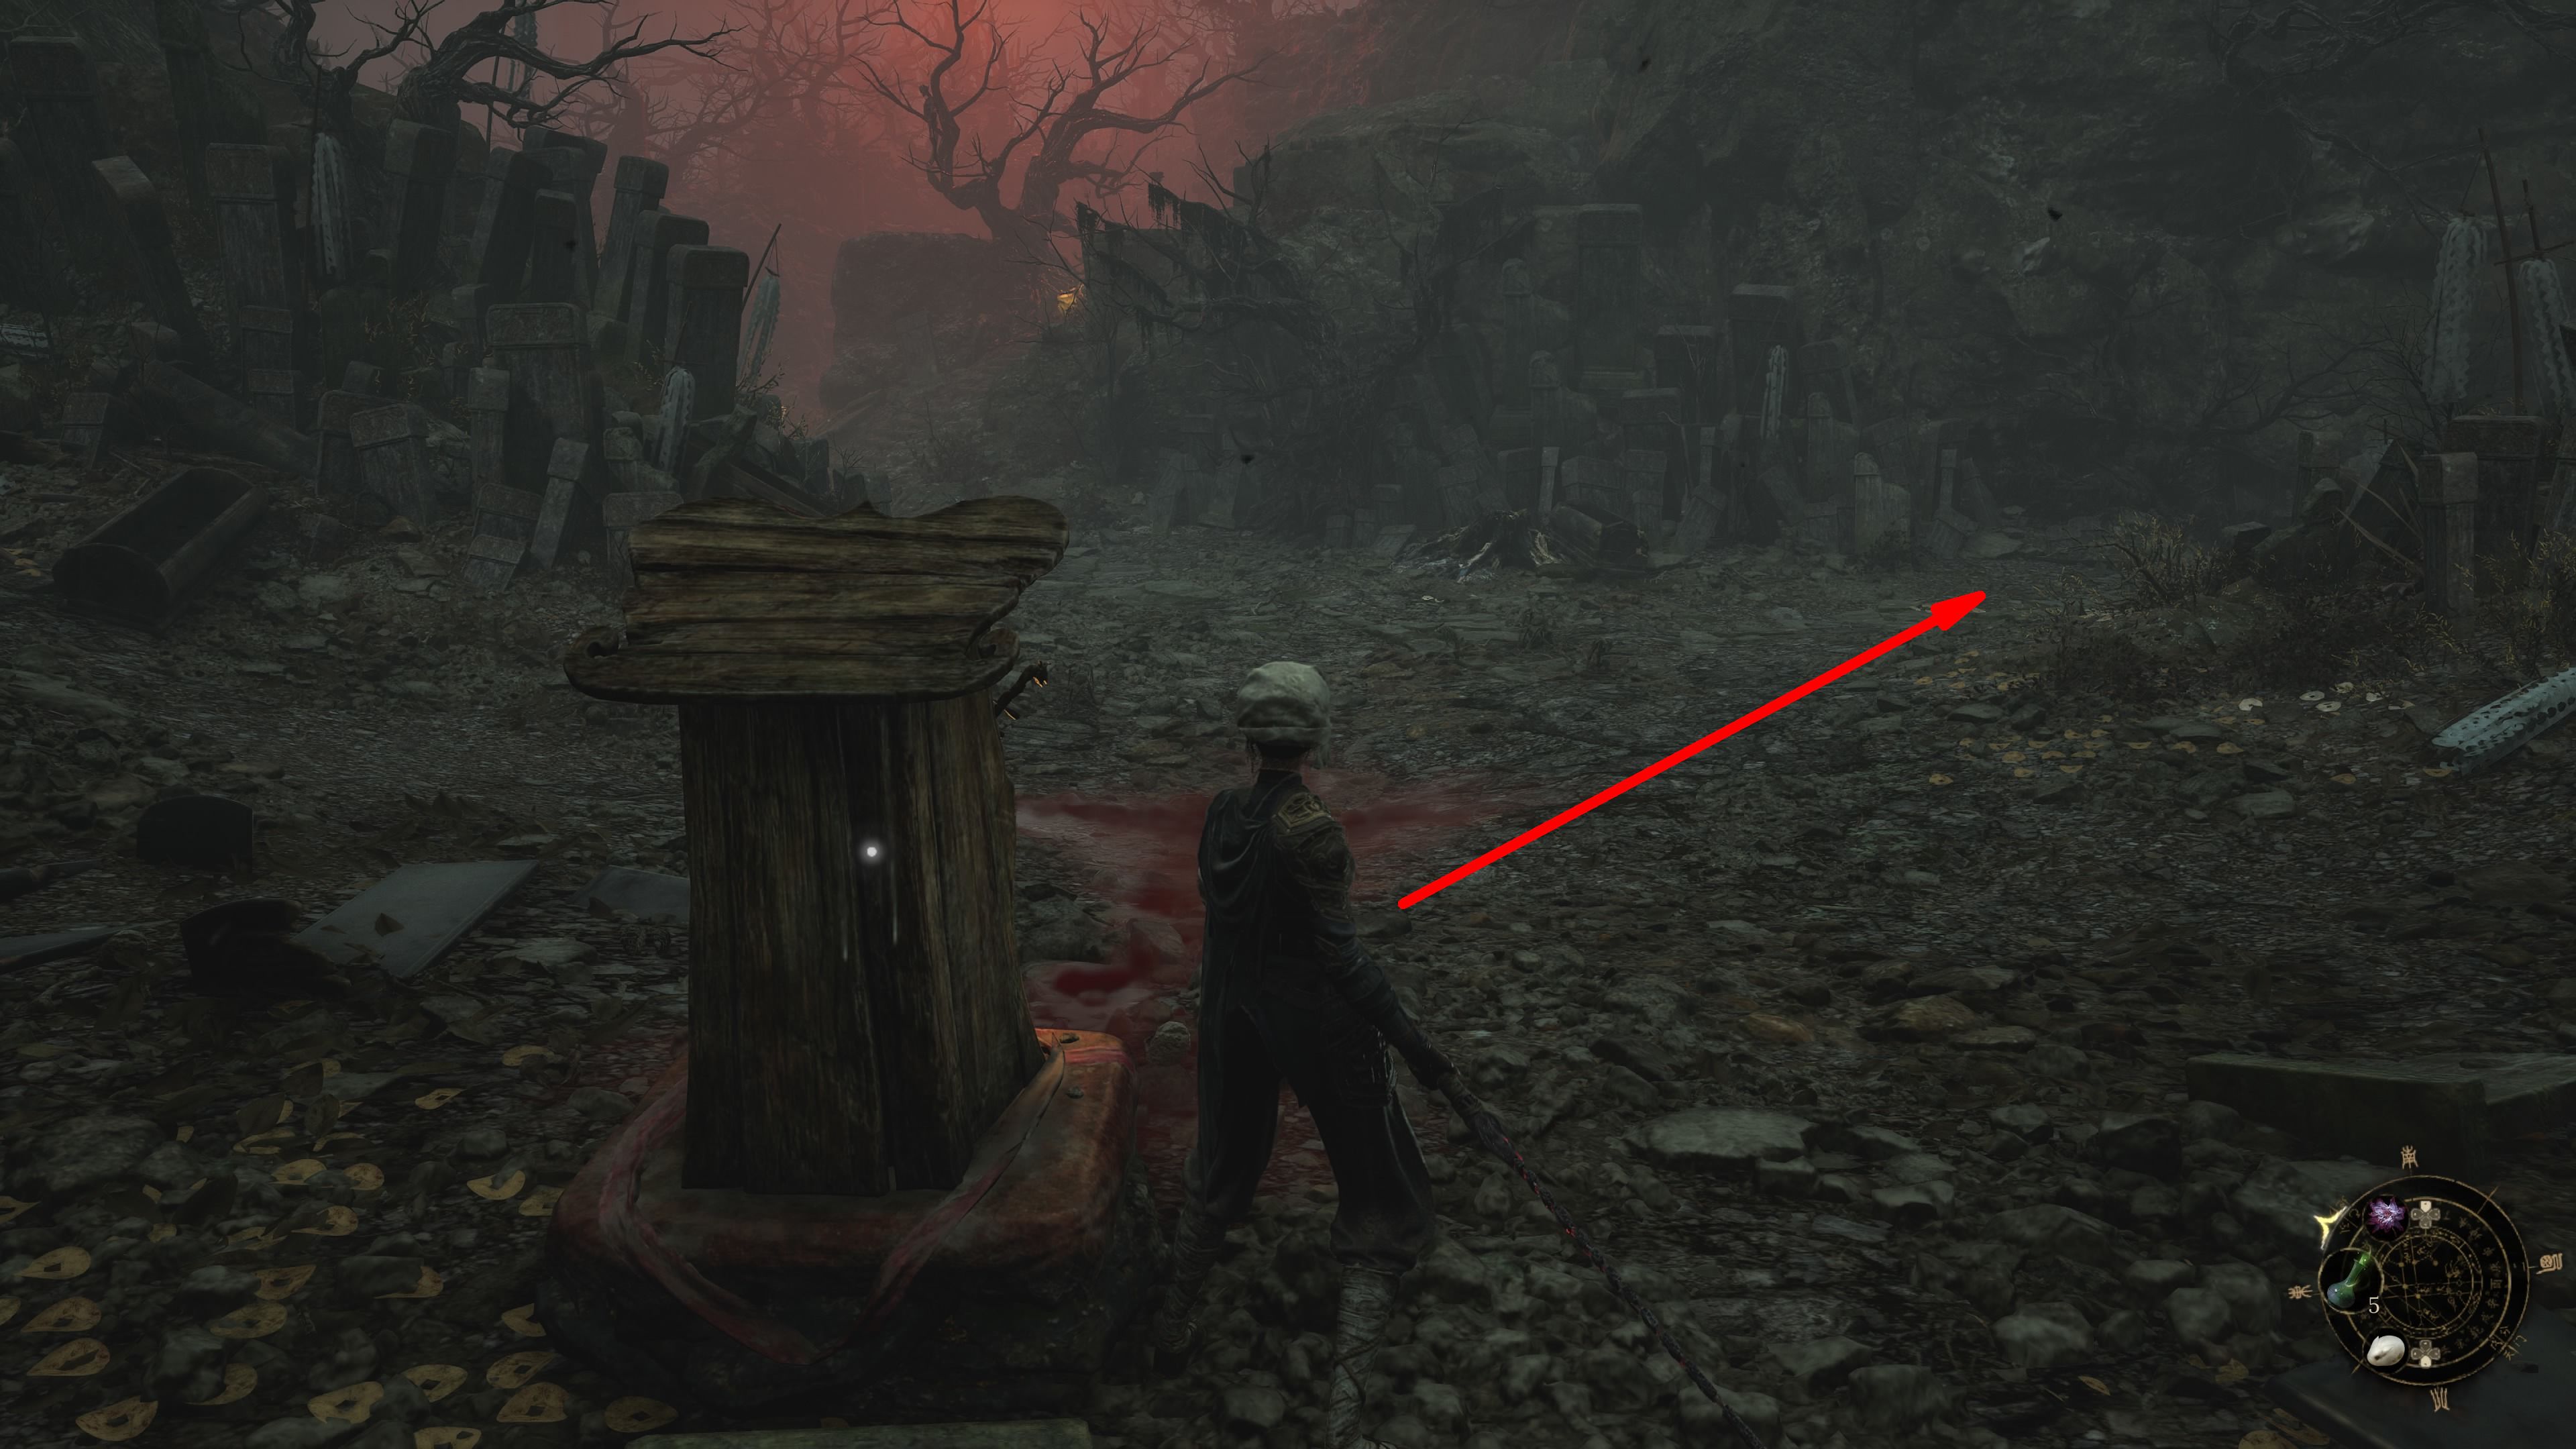
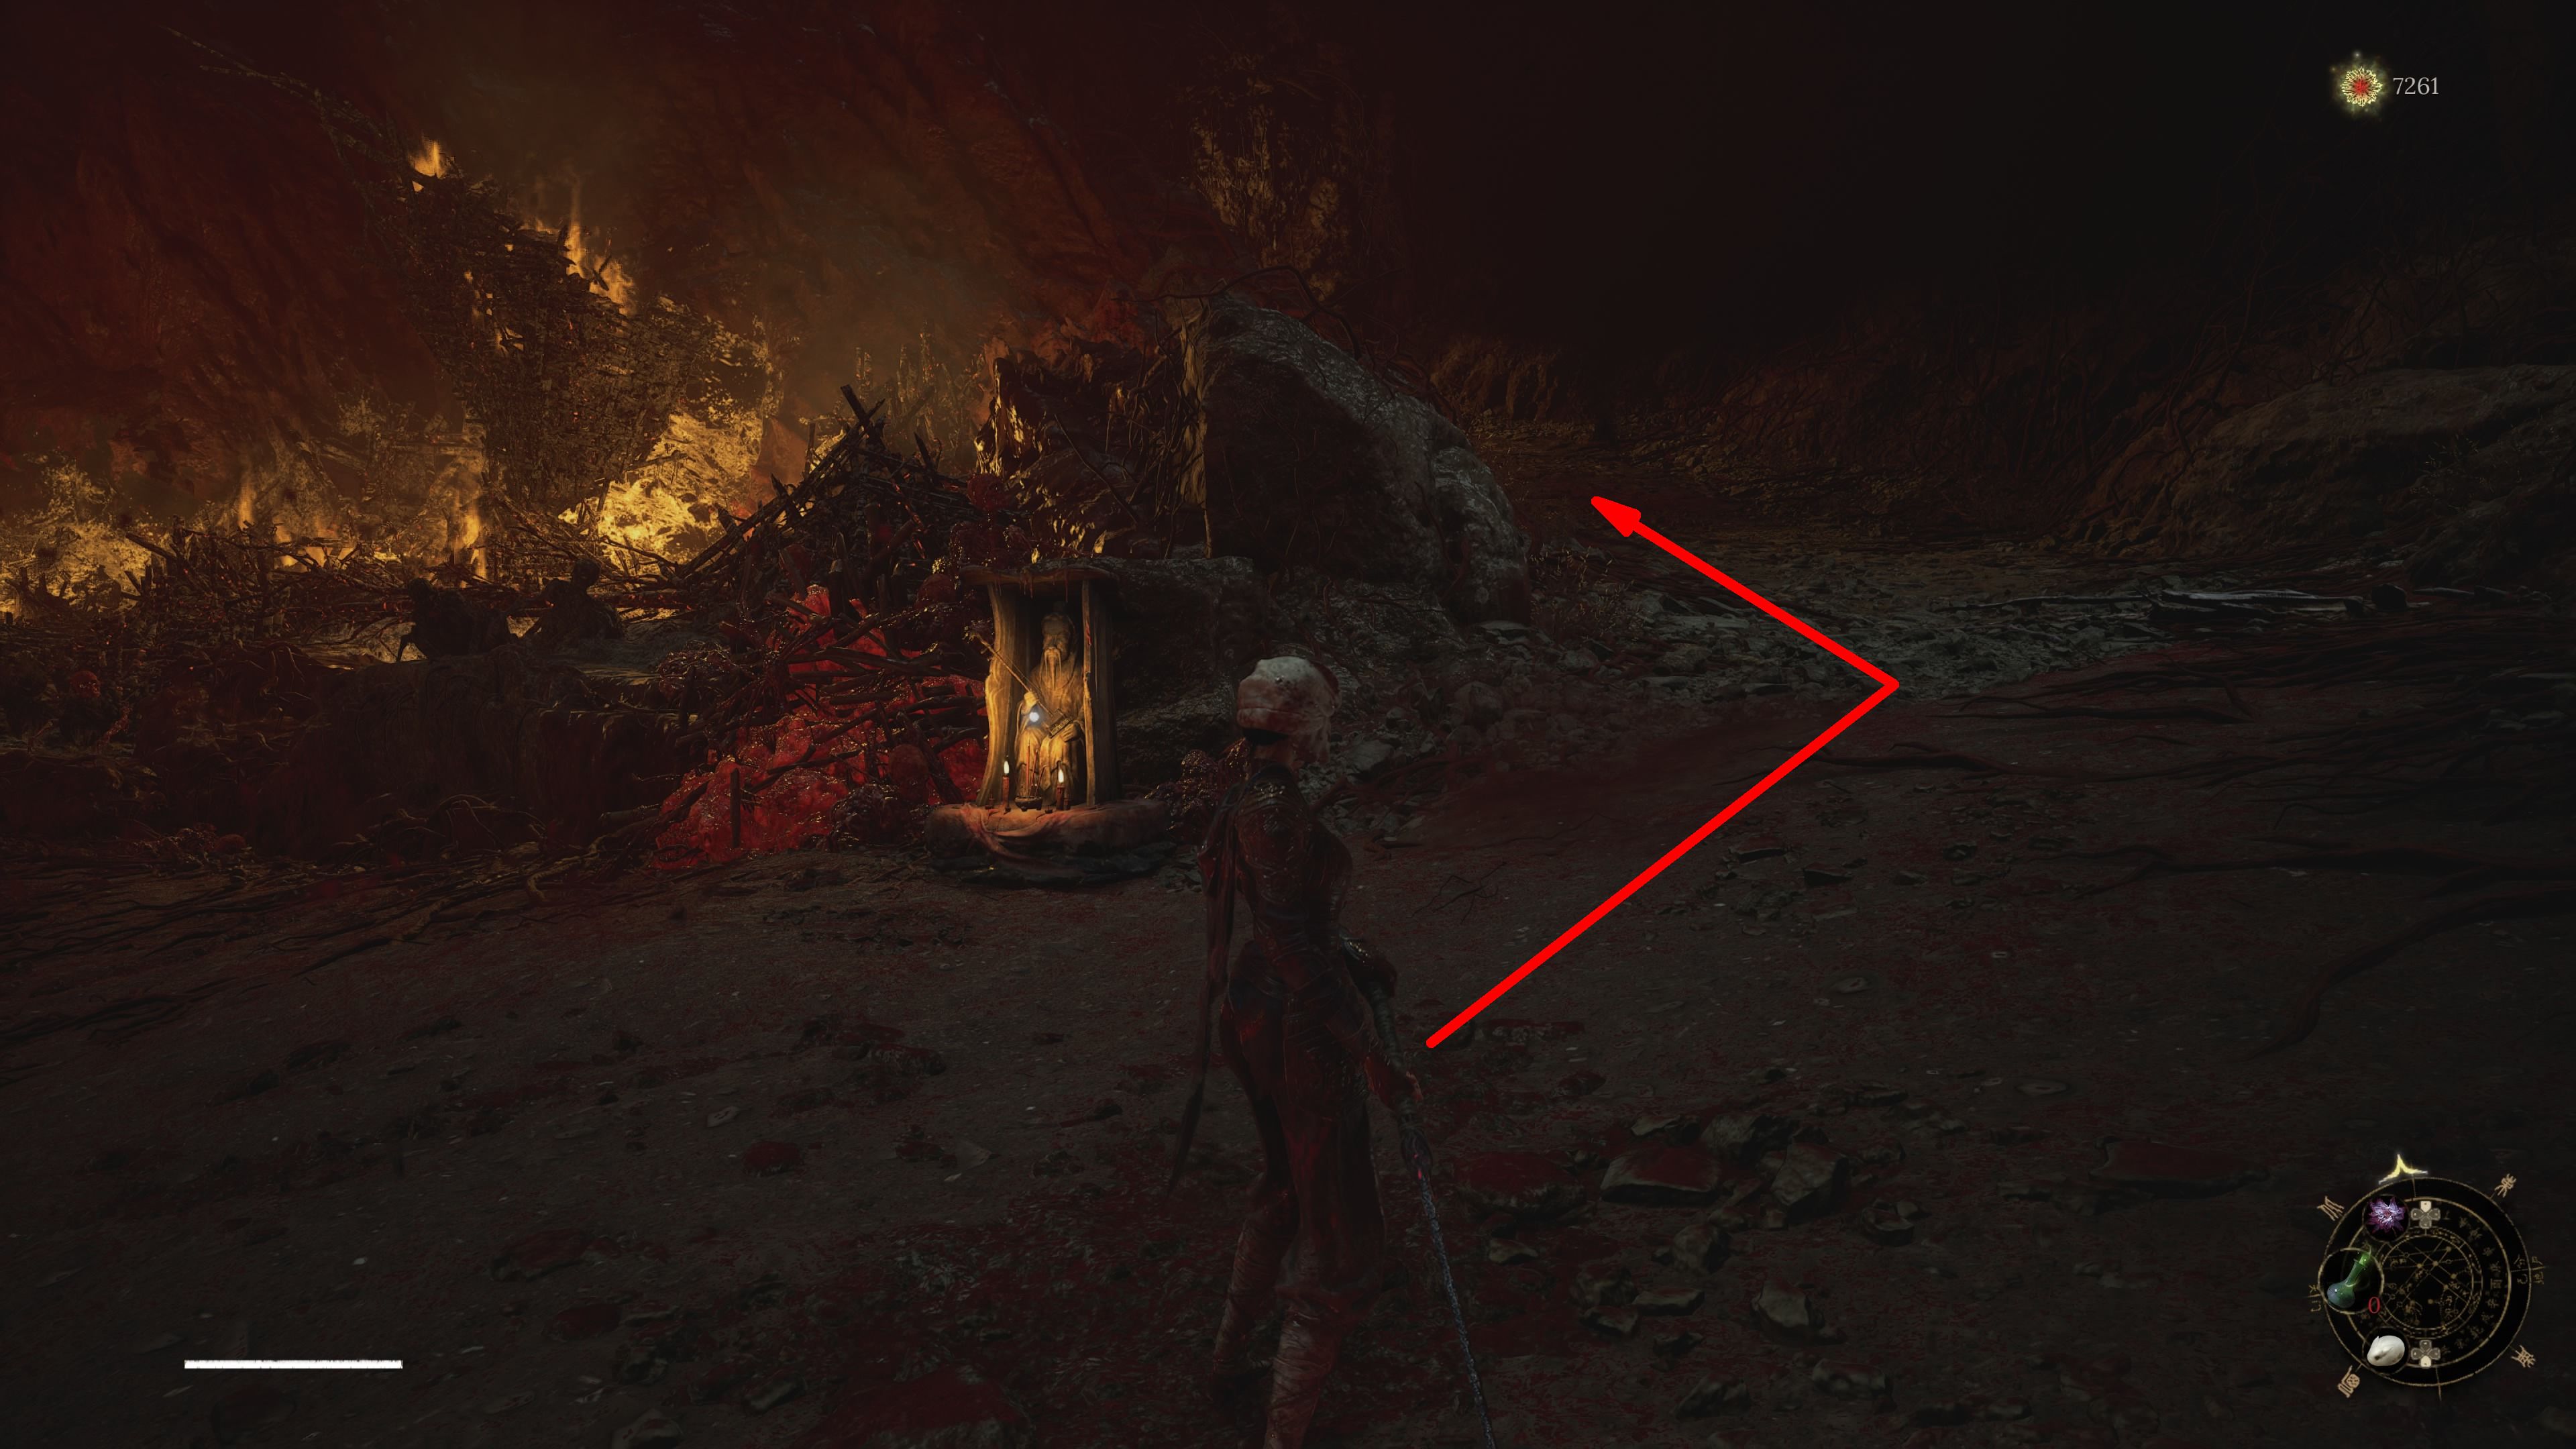
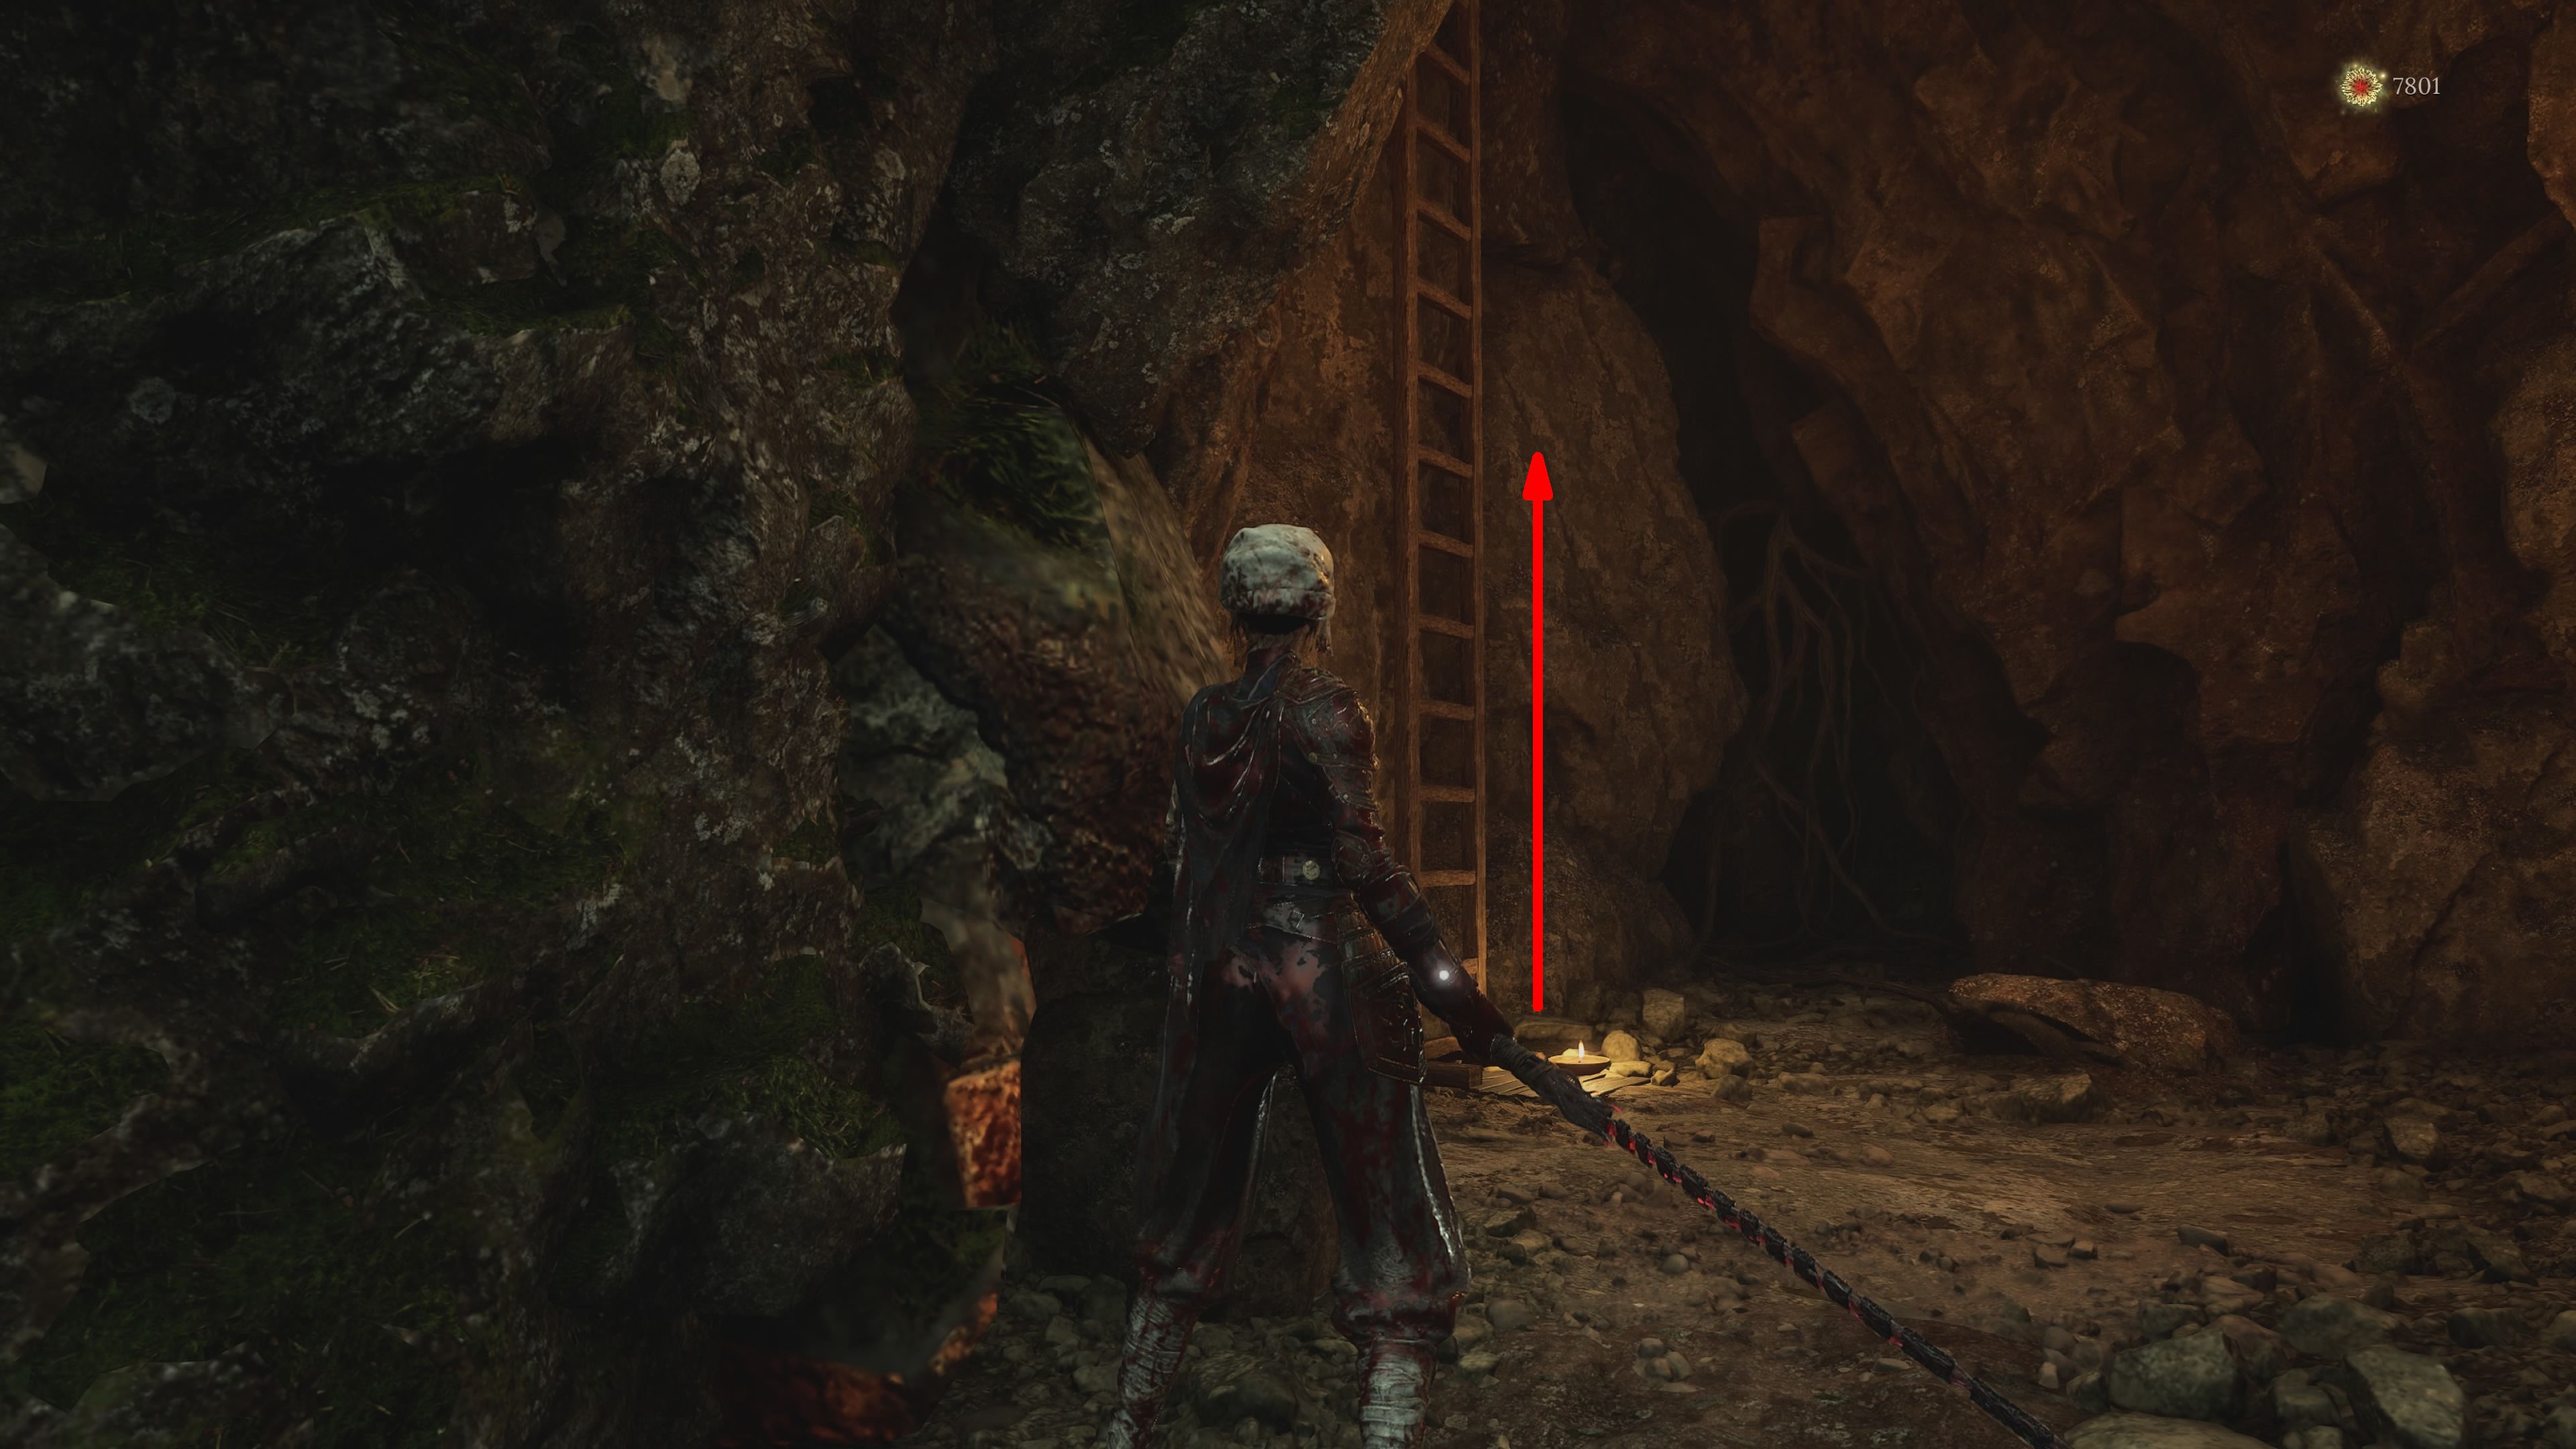
Head back to Doomwillow Beach Shrine, then face away from it. Take the path that veers forward and slightly to your left this time. You’ll find a blood-red river along this path – enter it and move leftward. The path you’re now on will lead you towards an enemy resembling a horse, and there’s a ladder not far beyond that adversary that you should ascend.
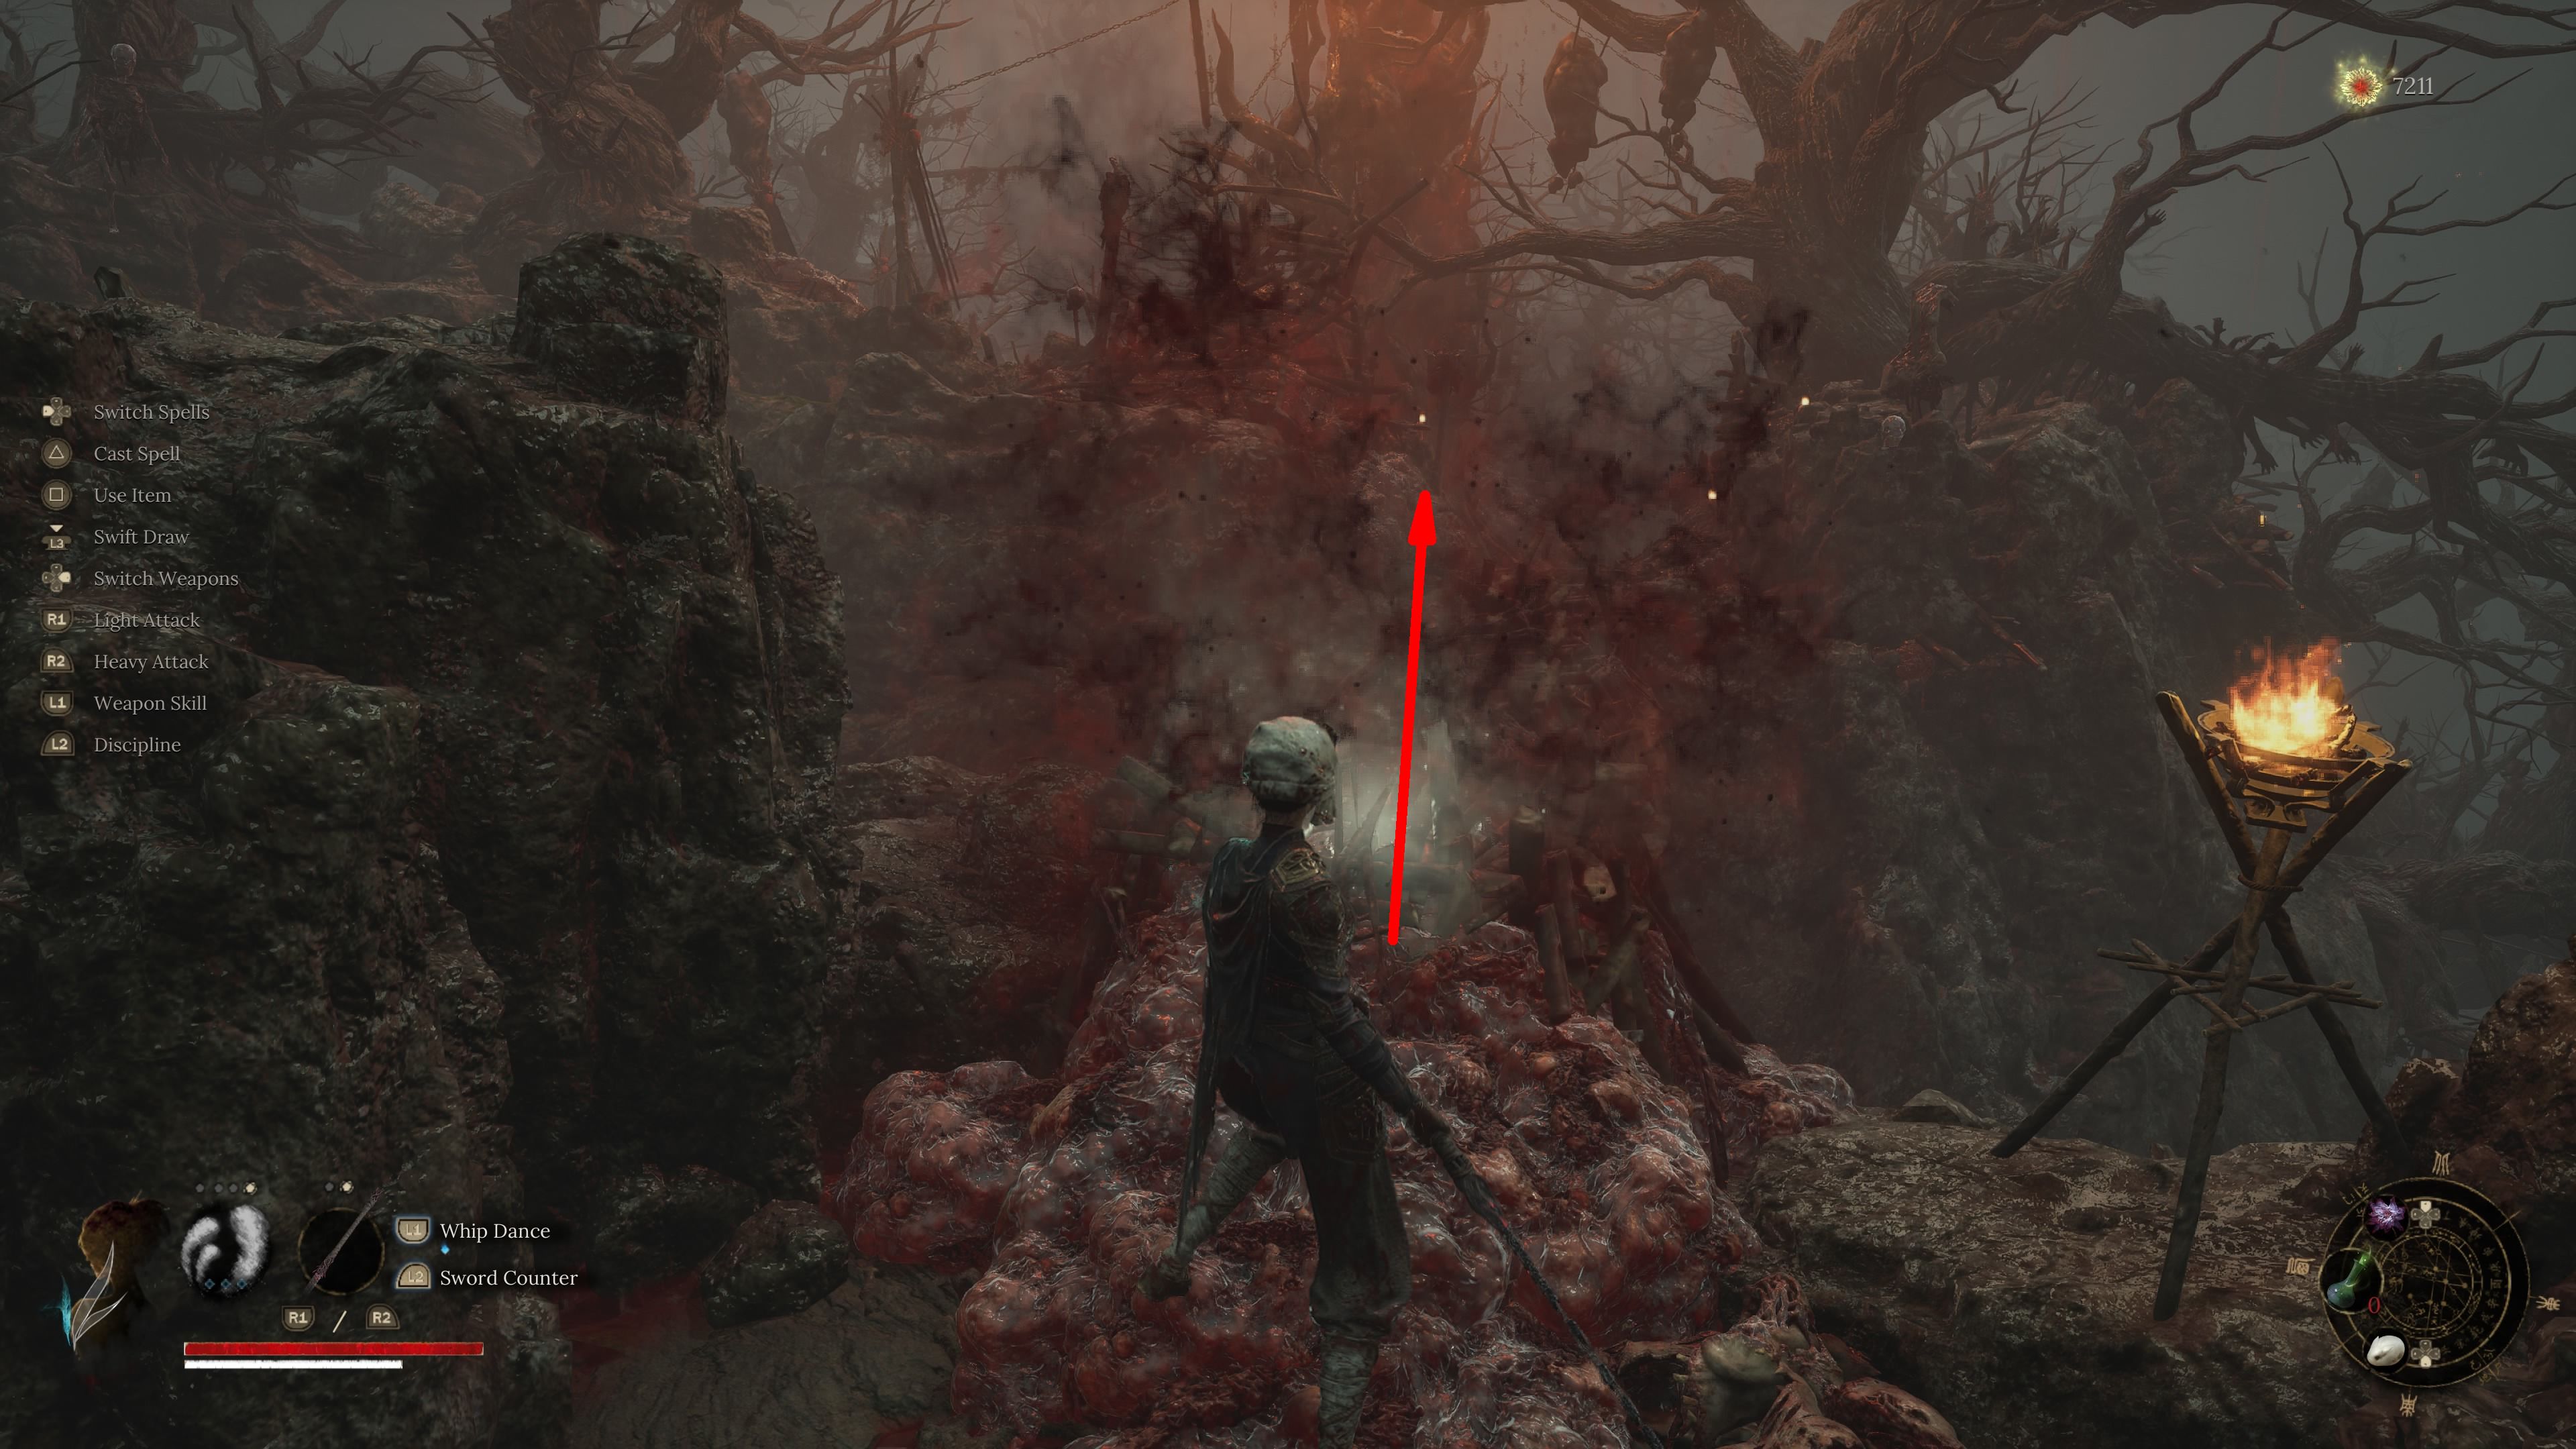
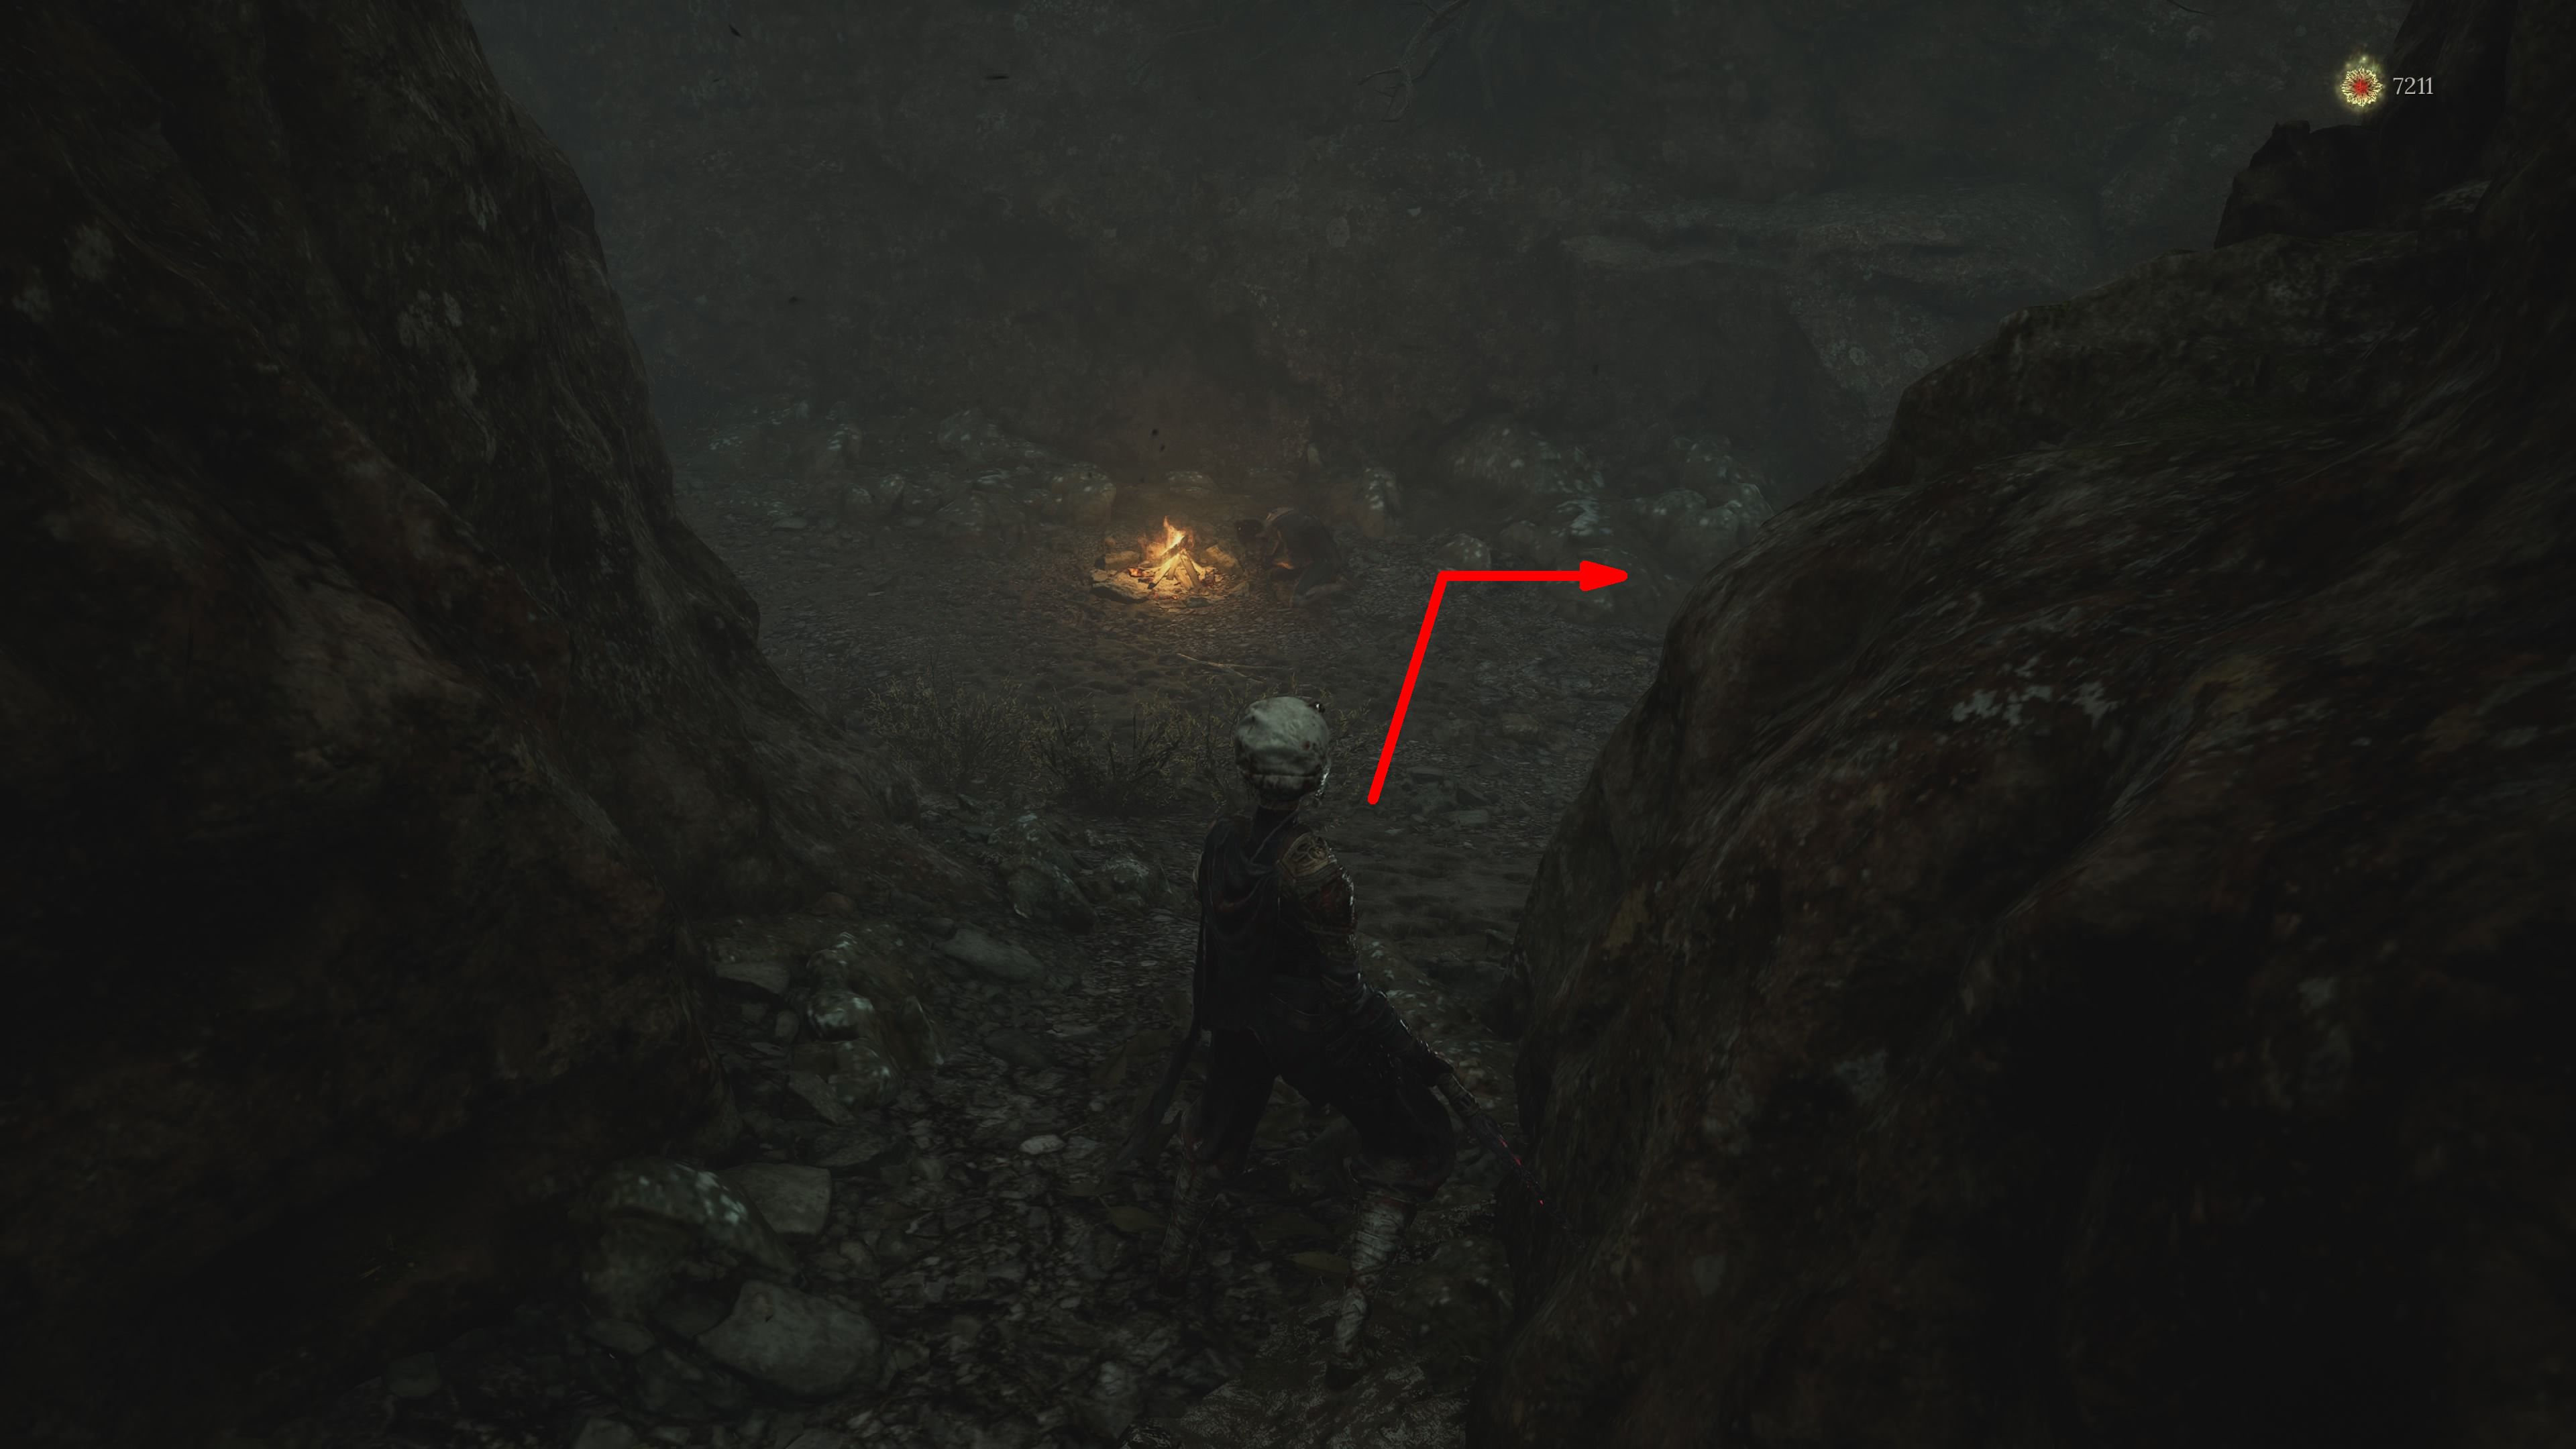
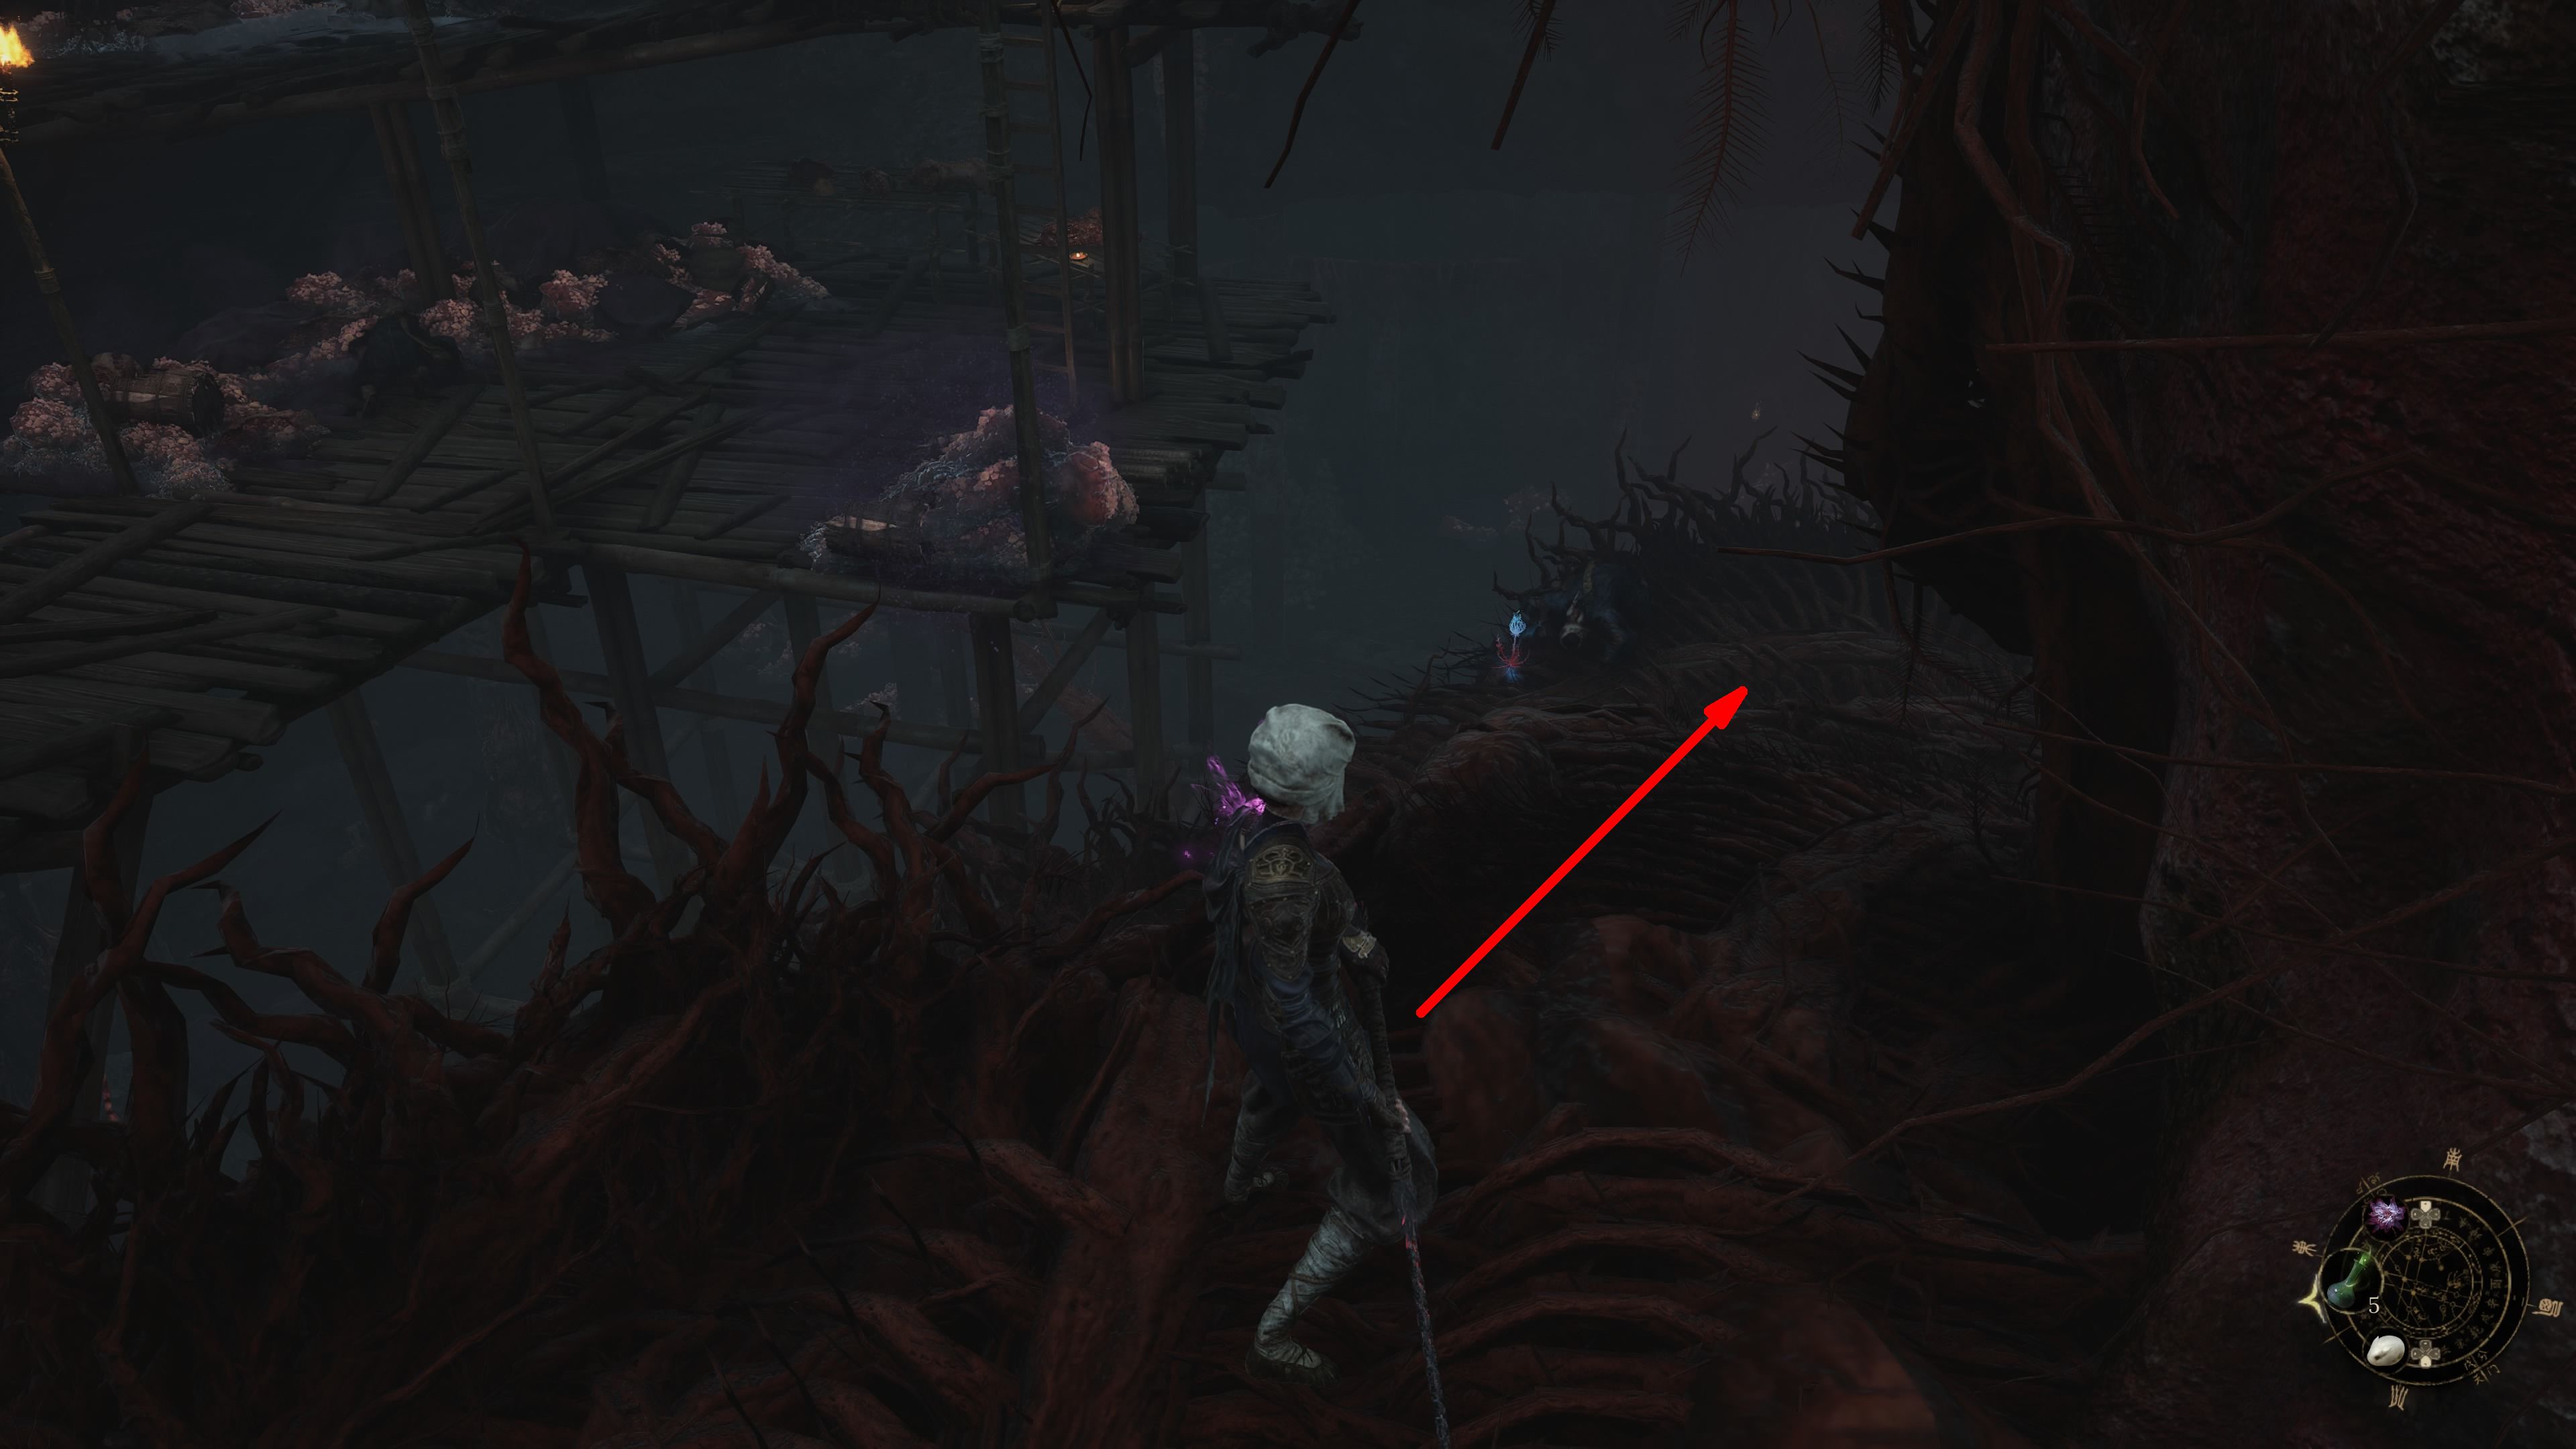
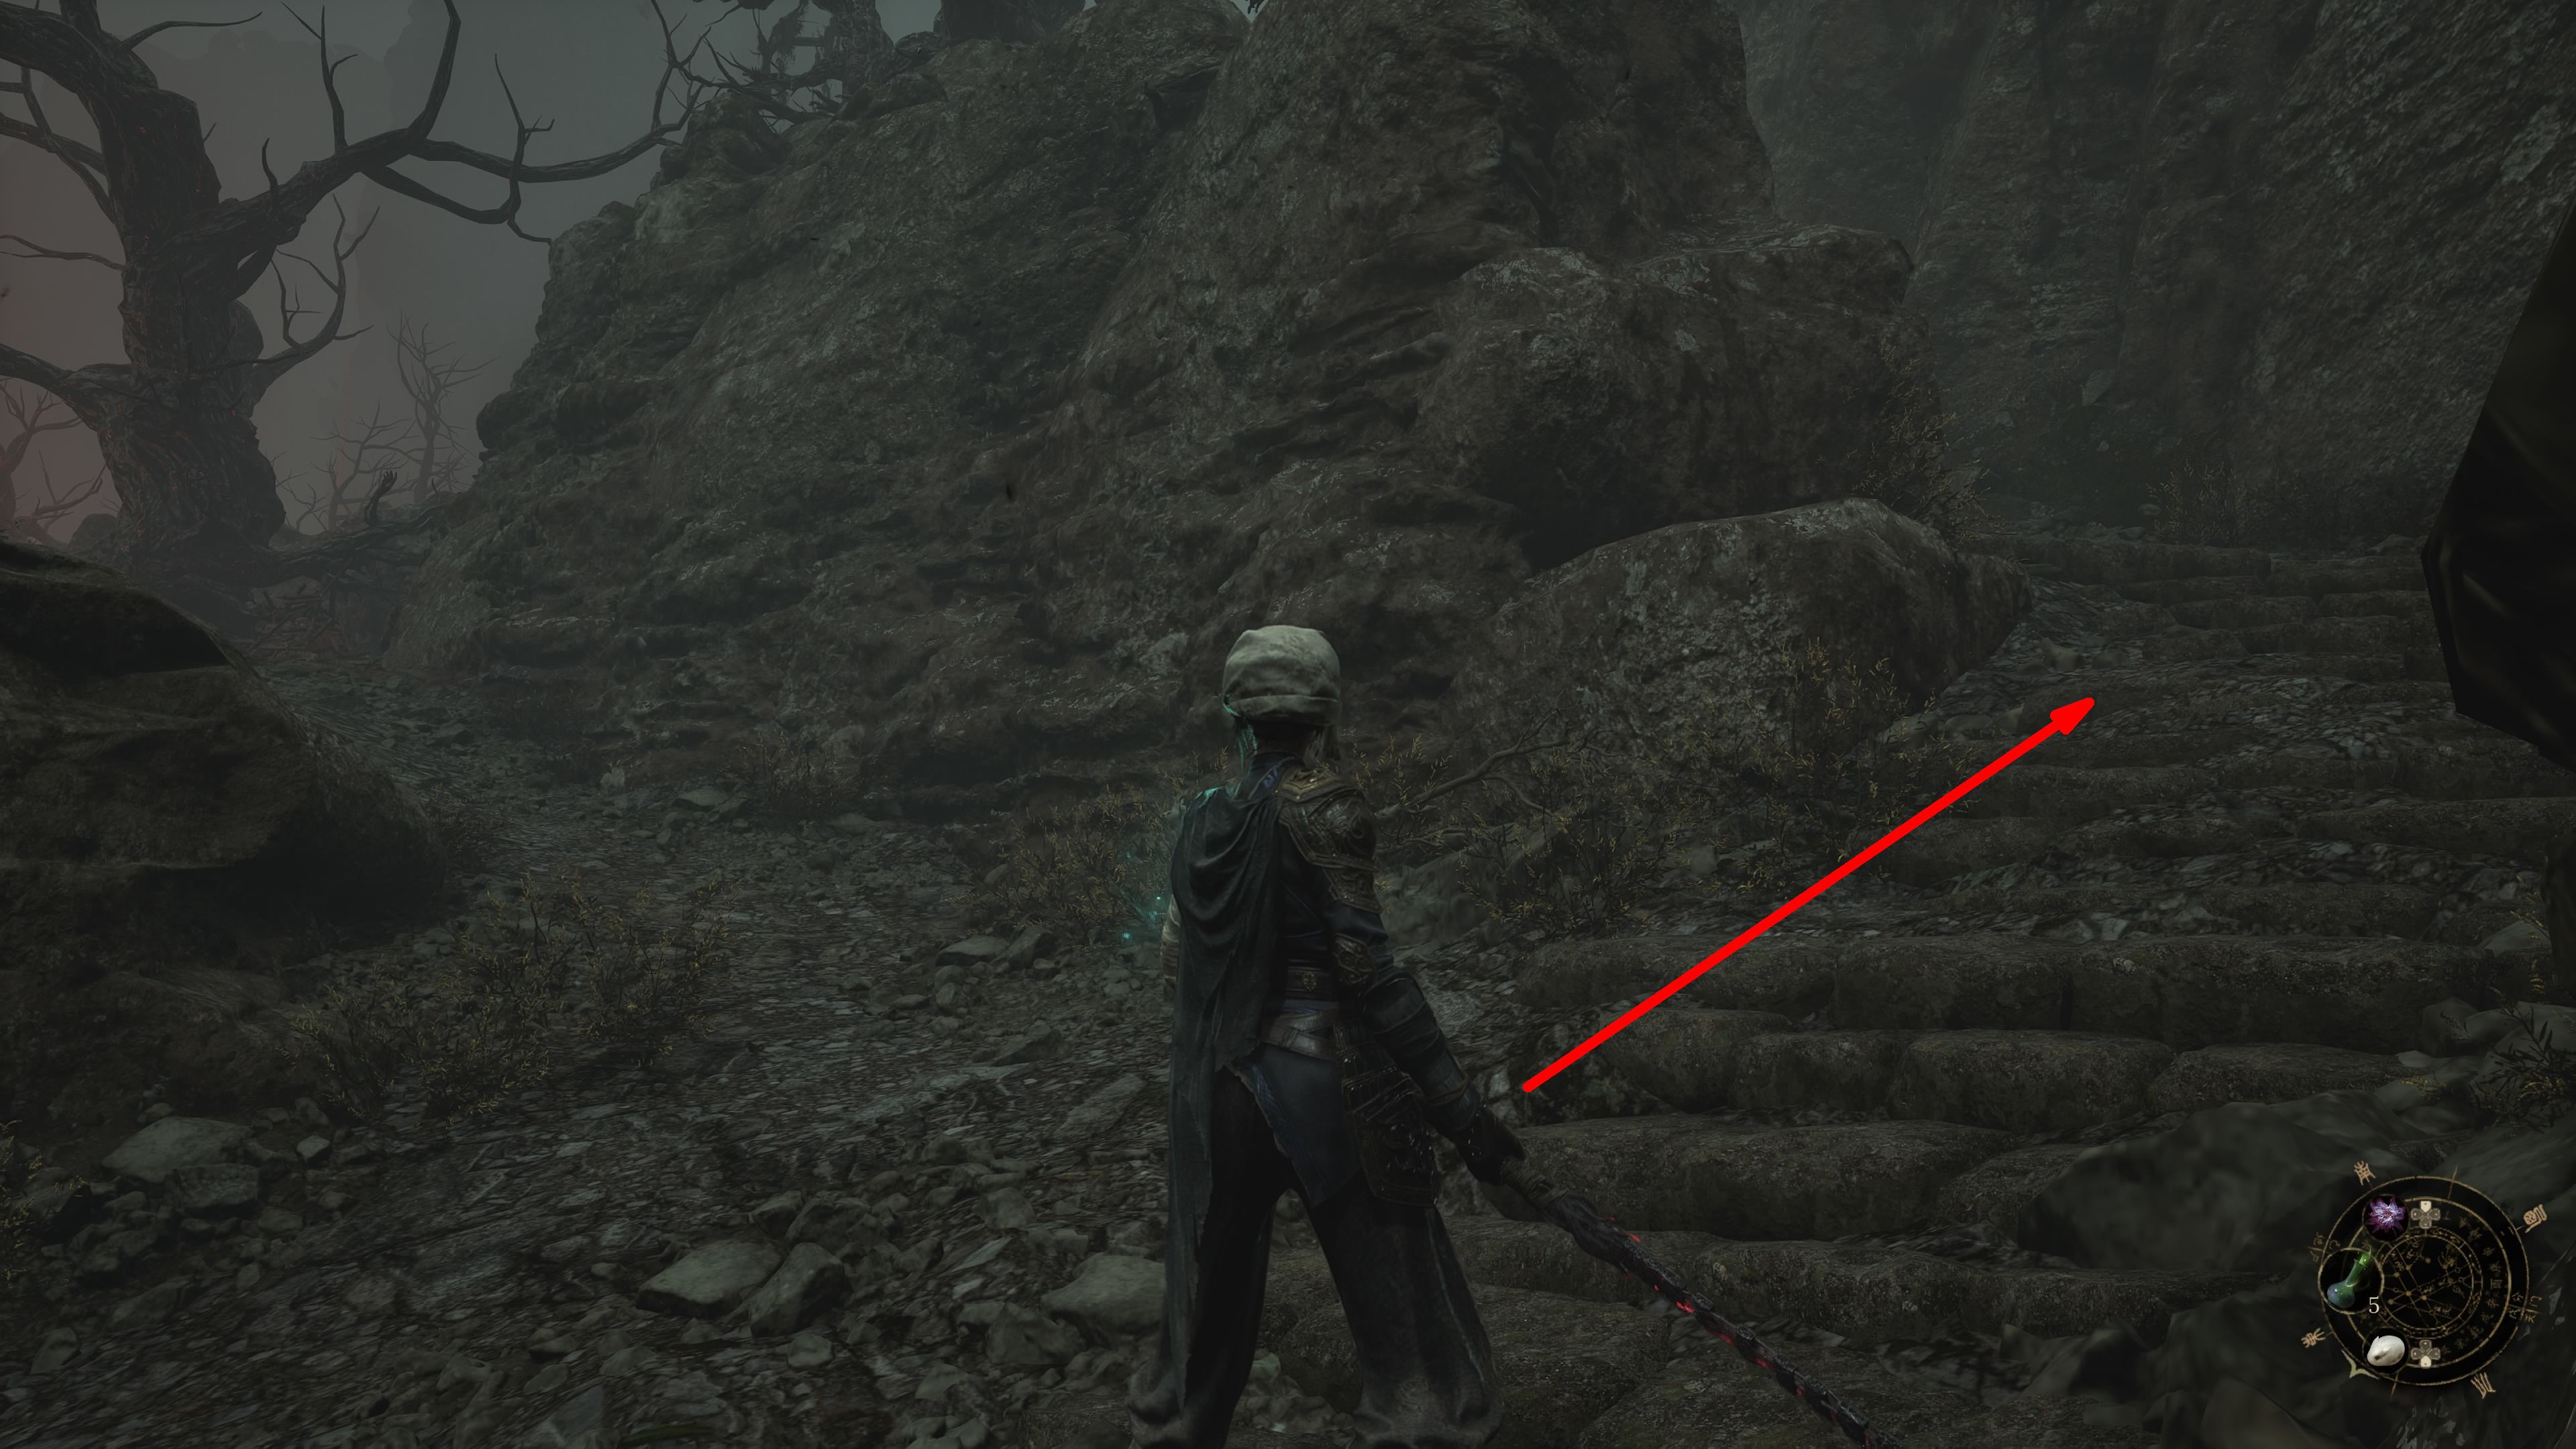
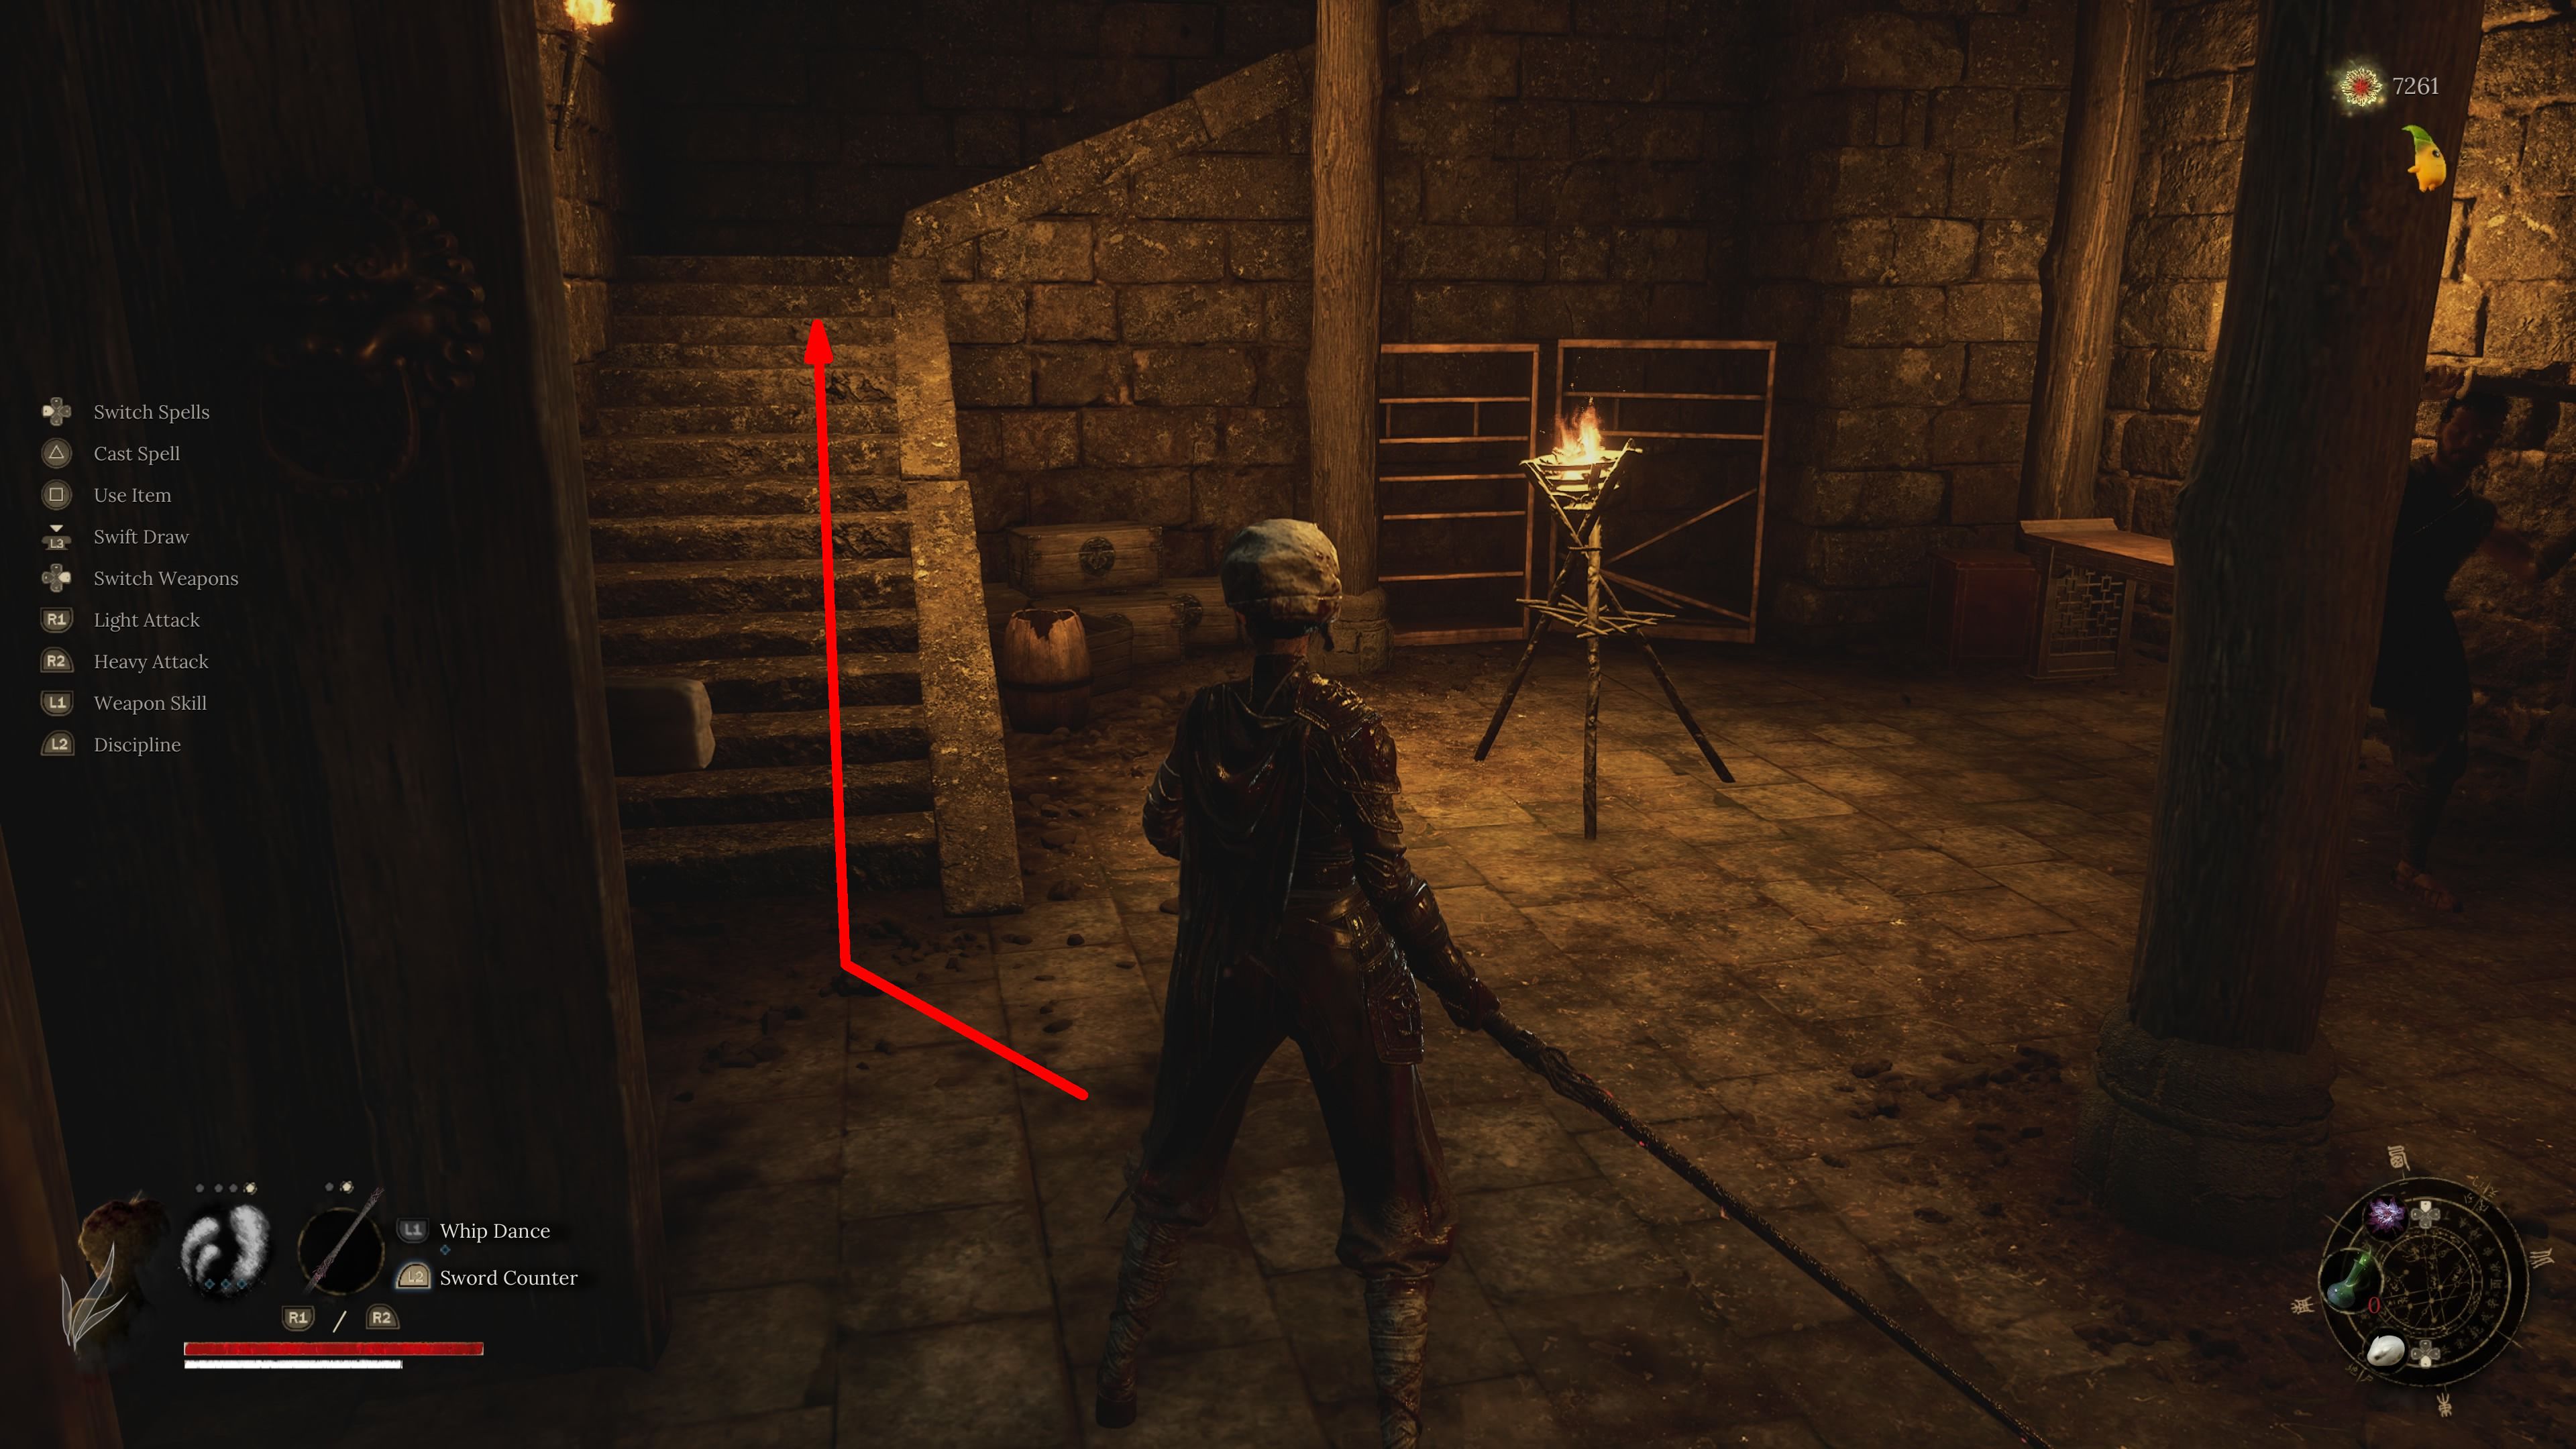
1. Proceed along the upper trail, fell a tree if needed, until you reach a small blaze.
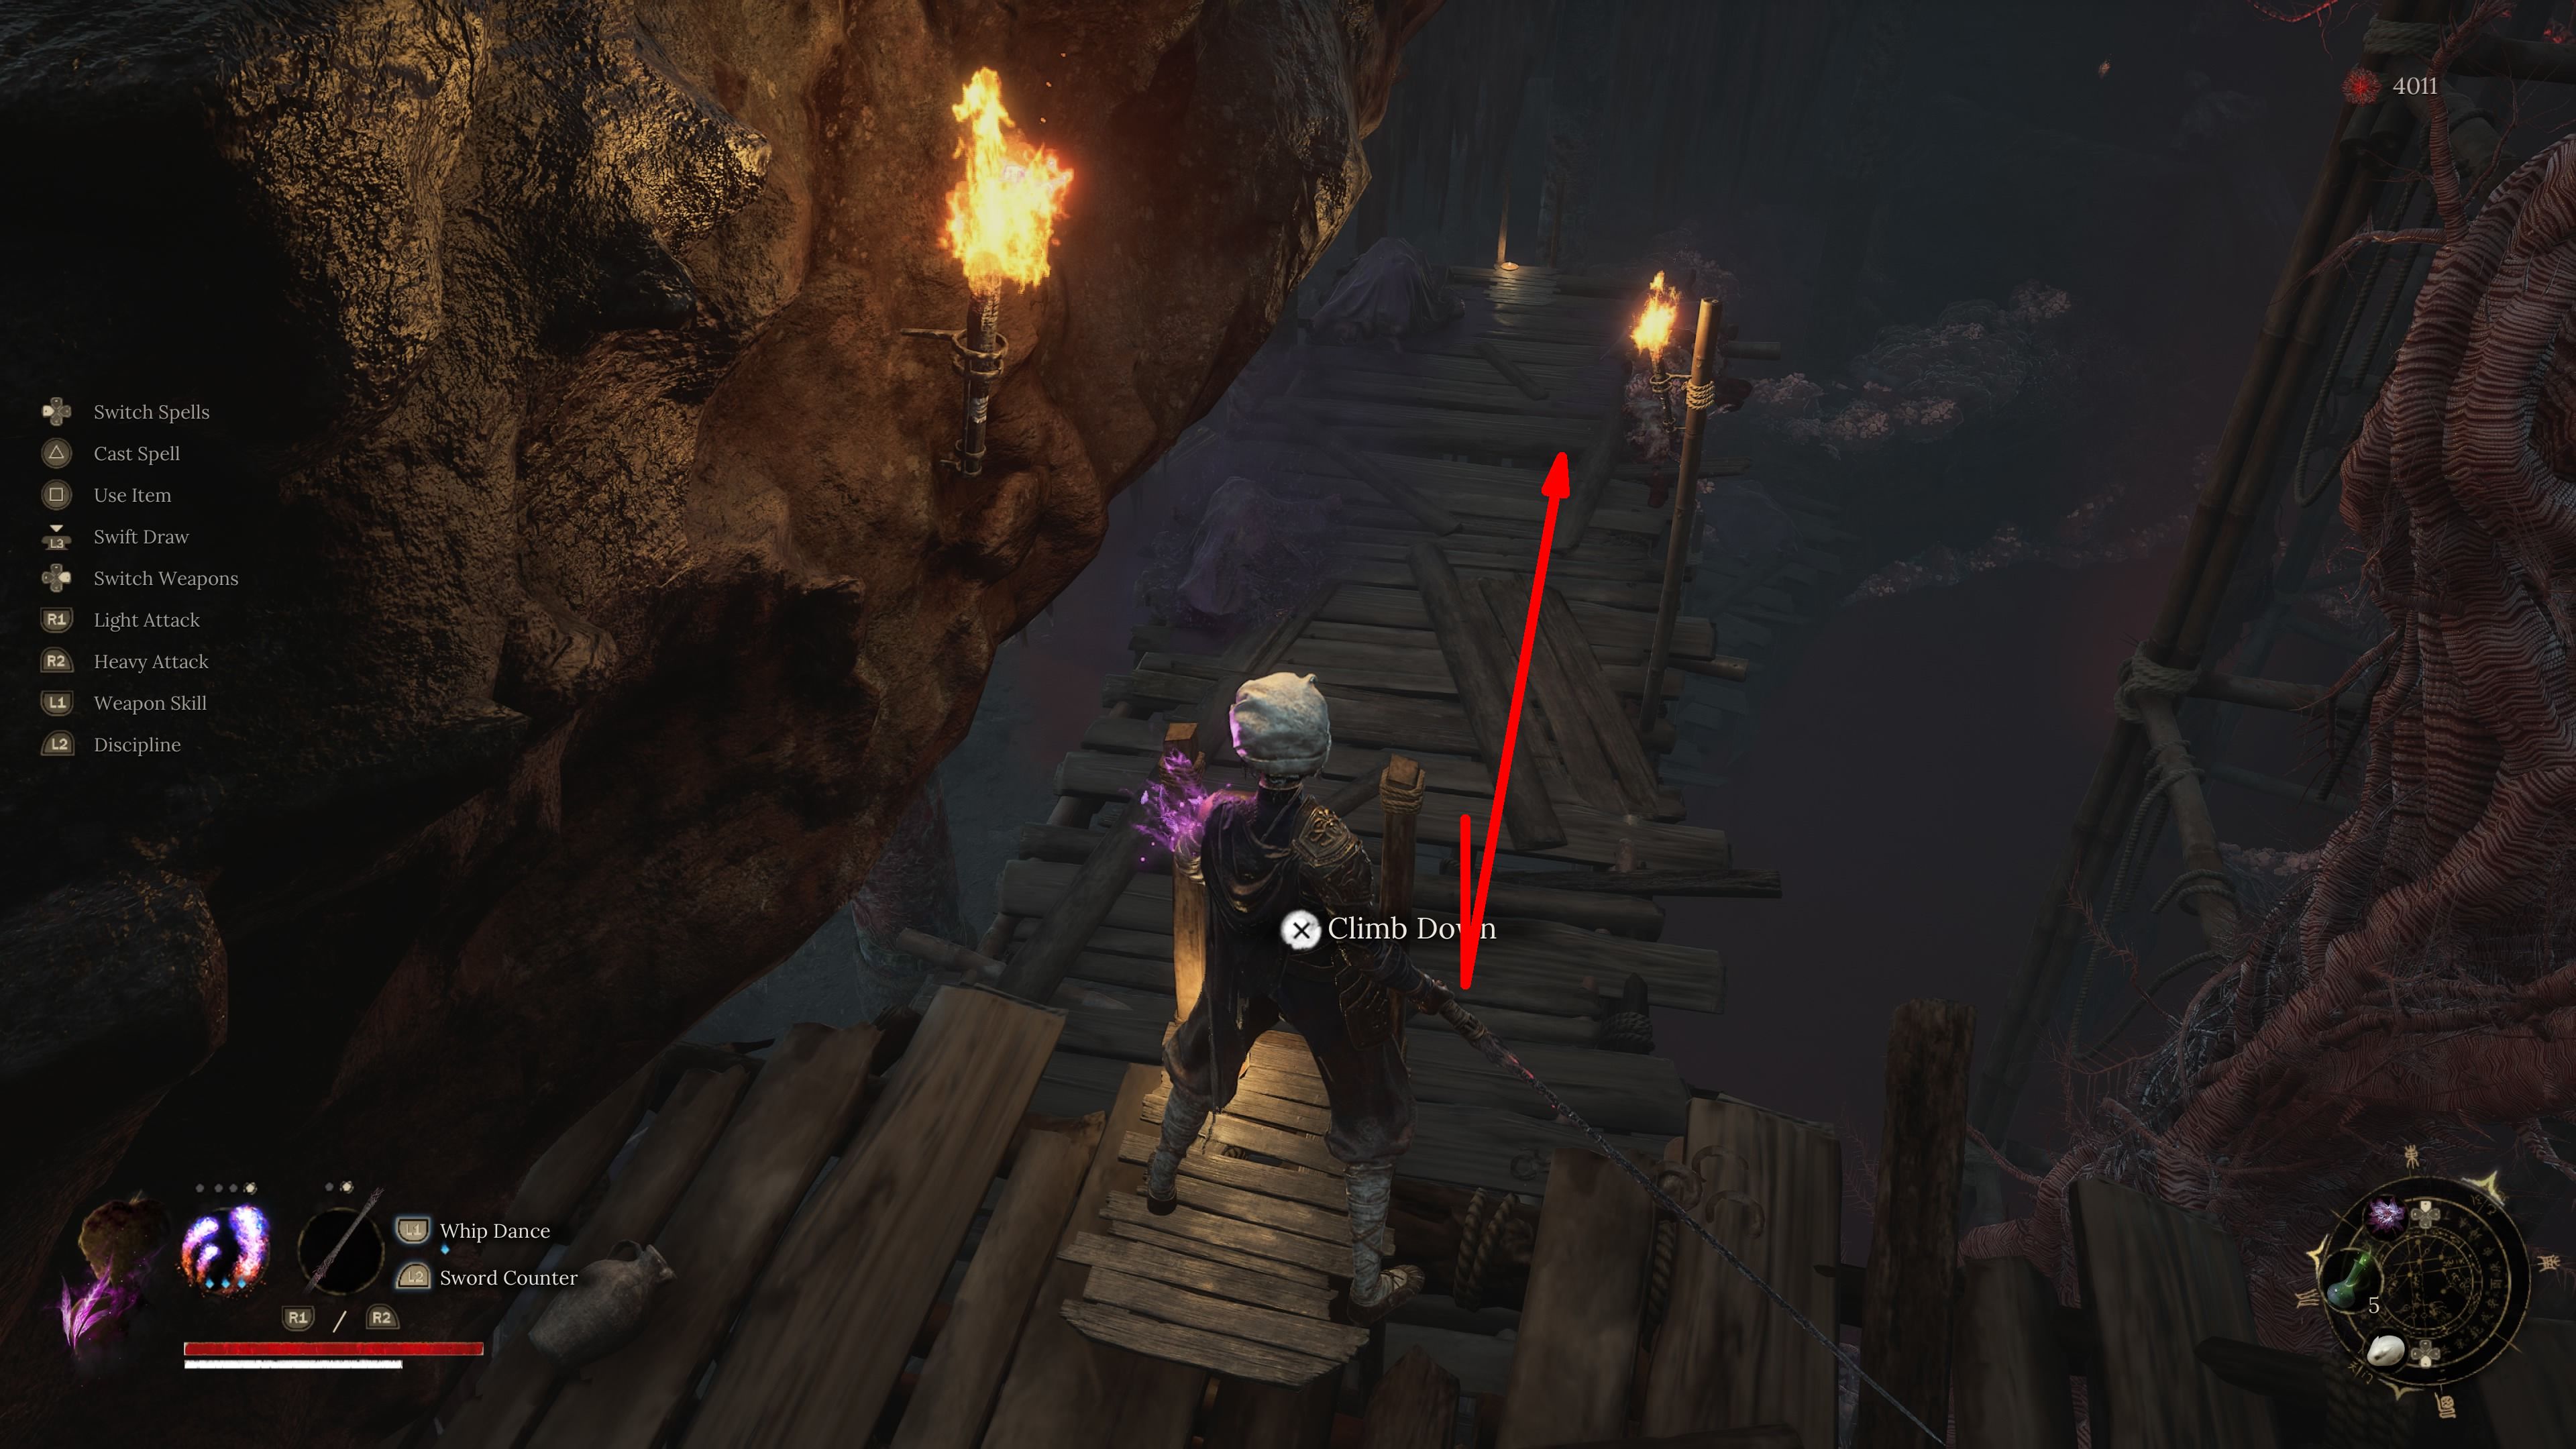
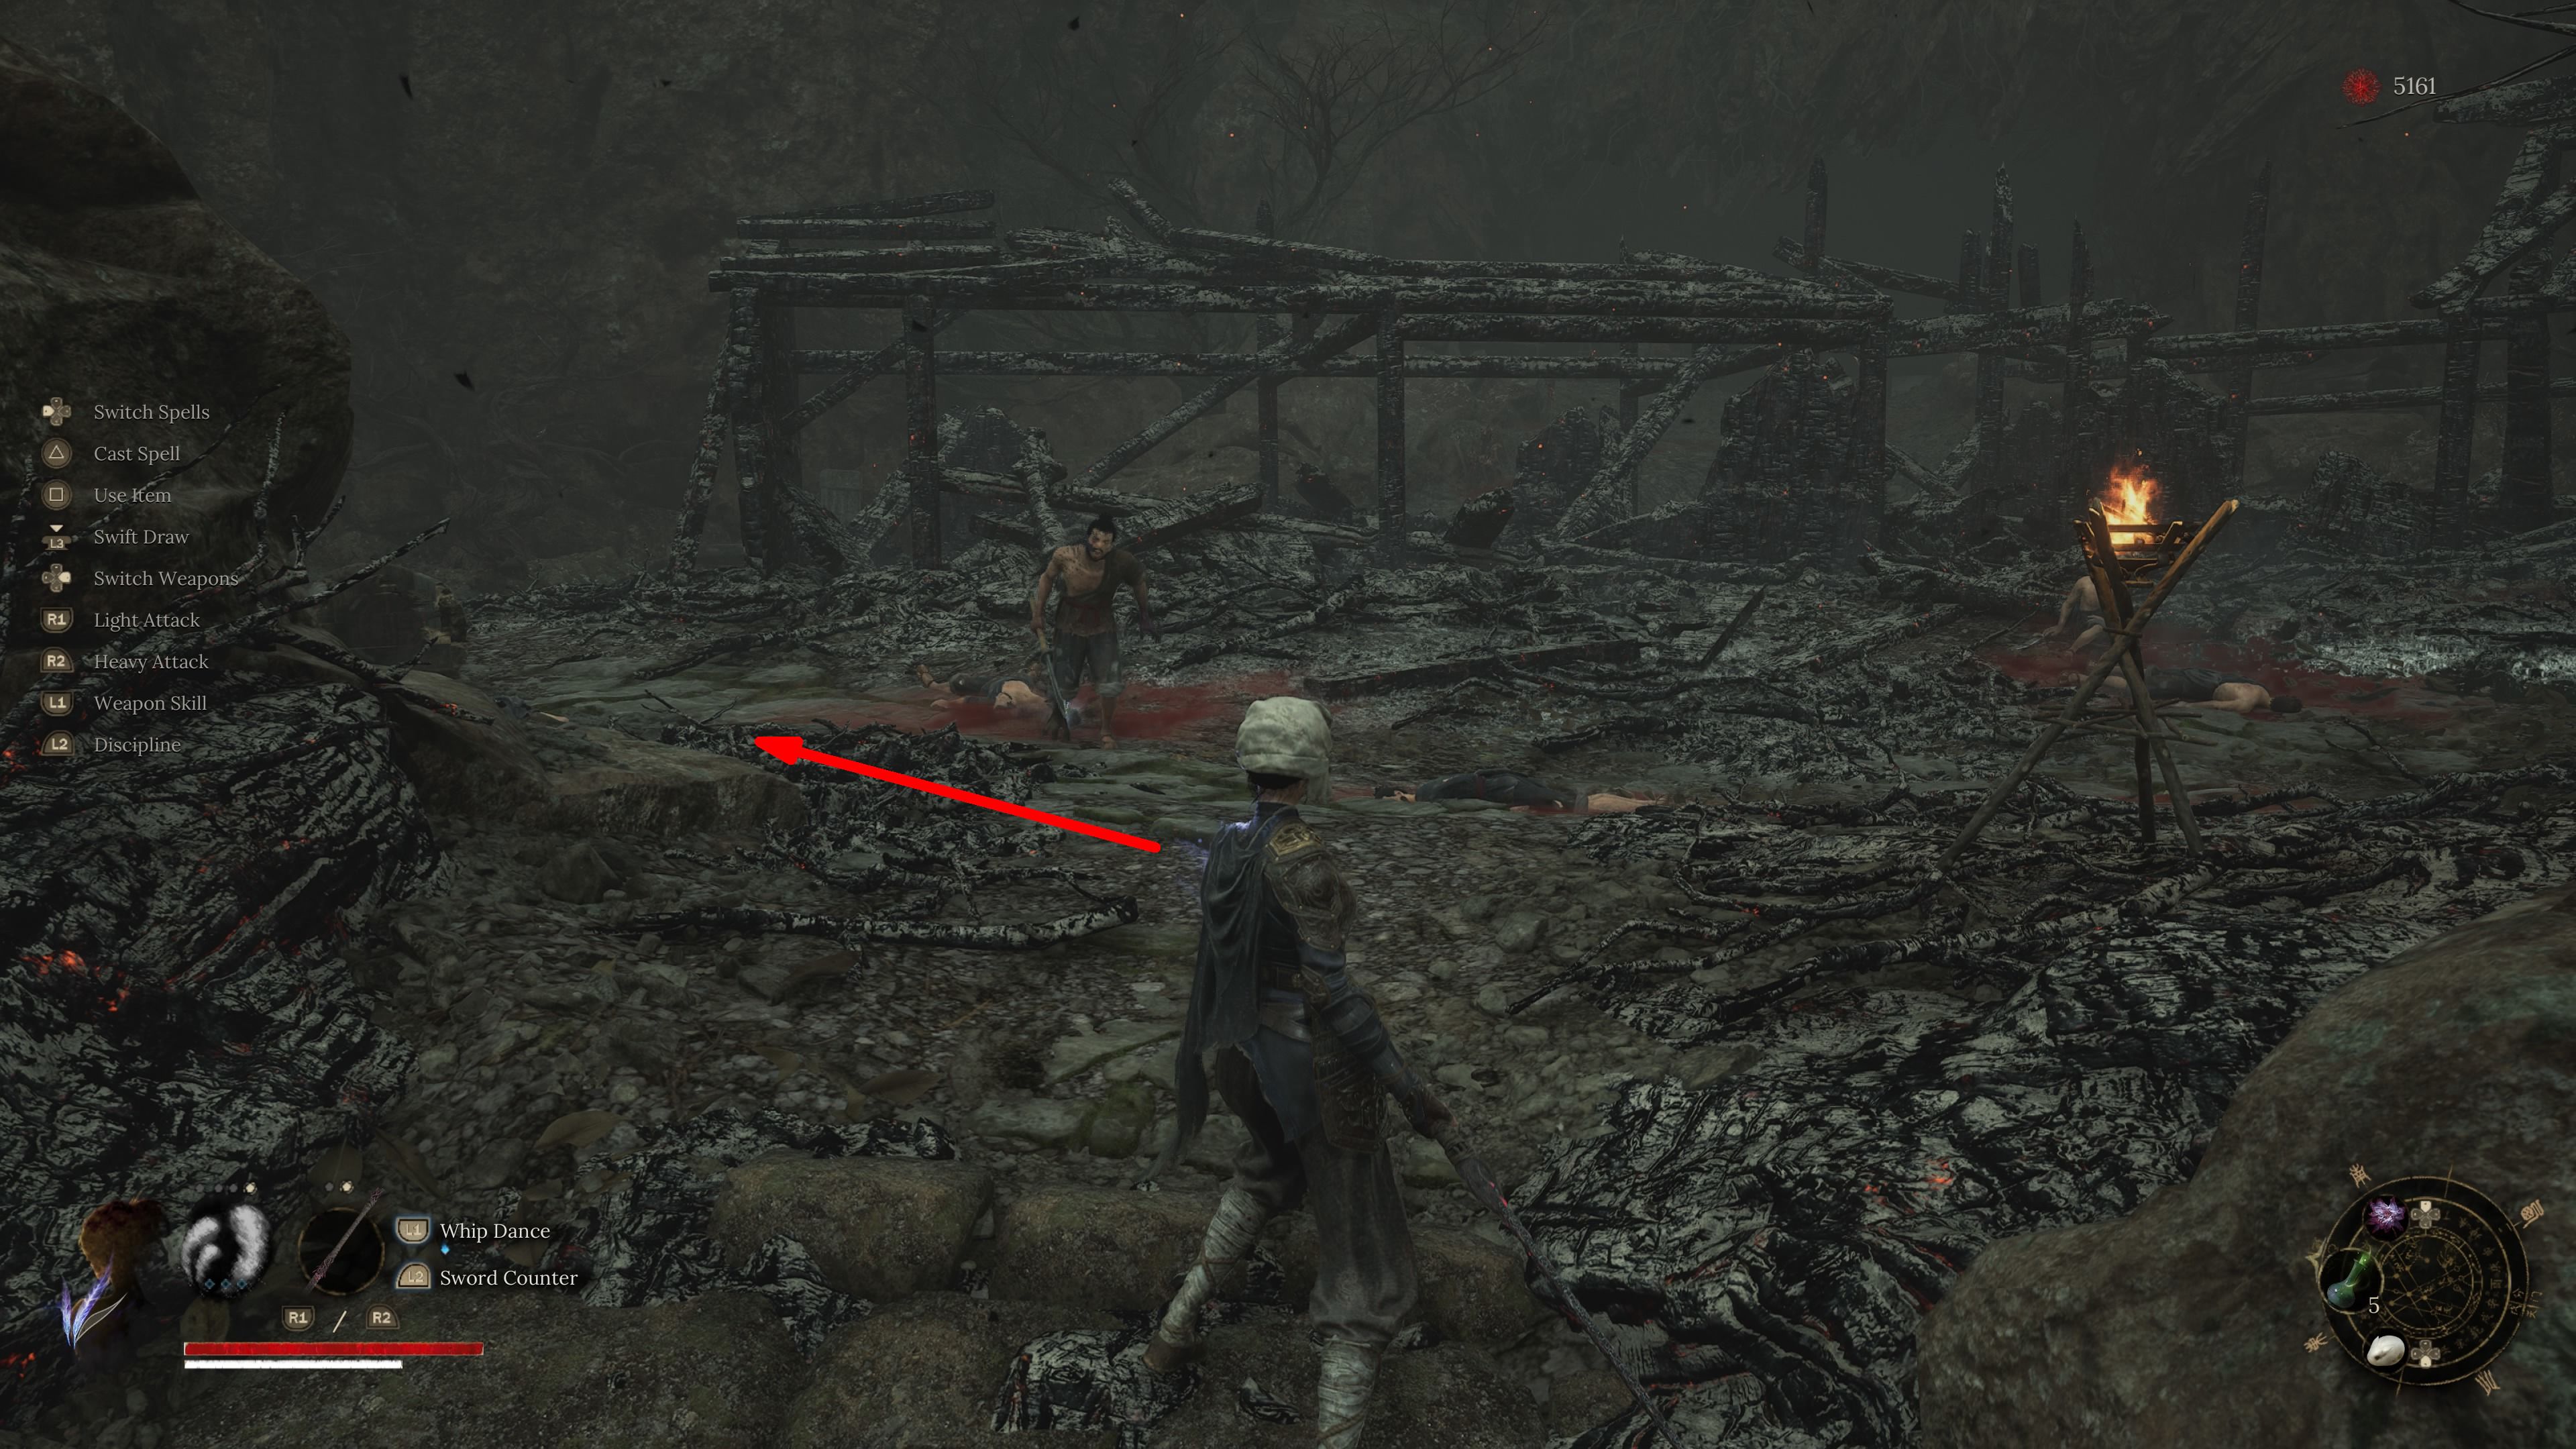
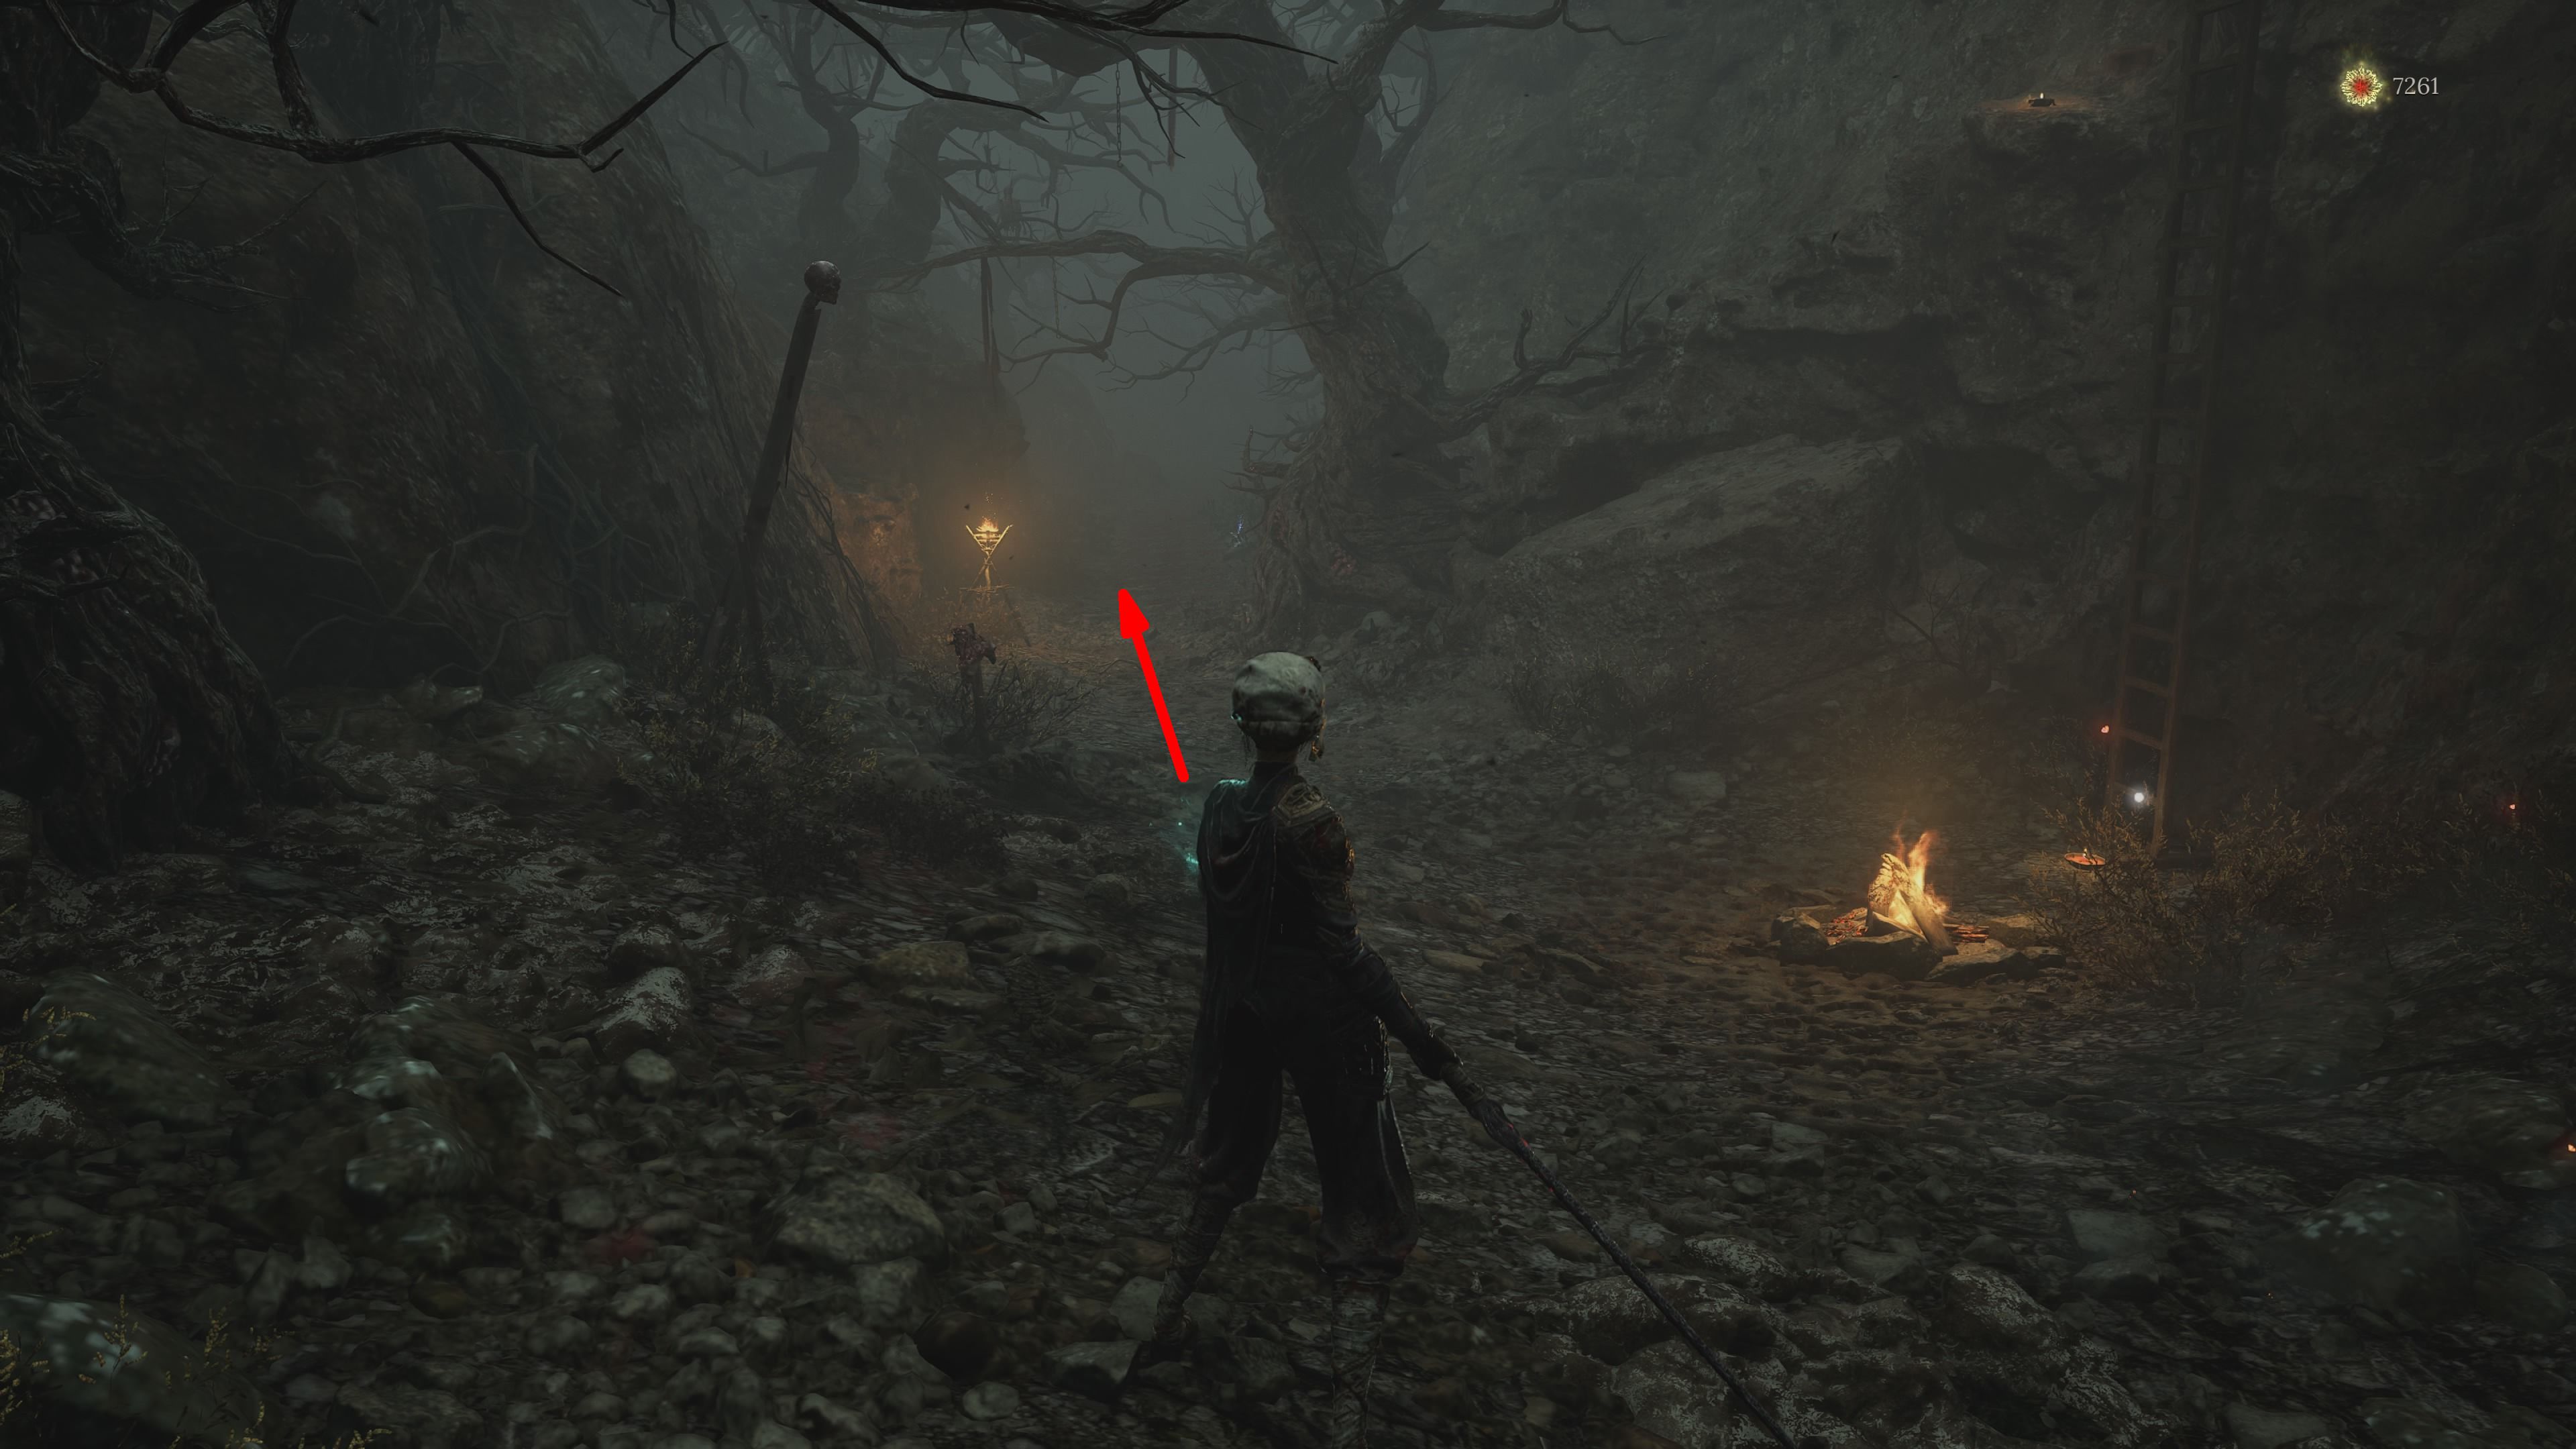
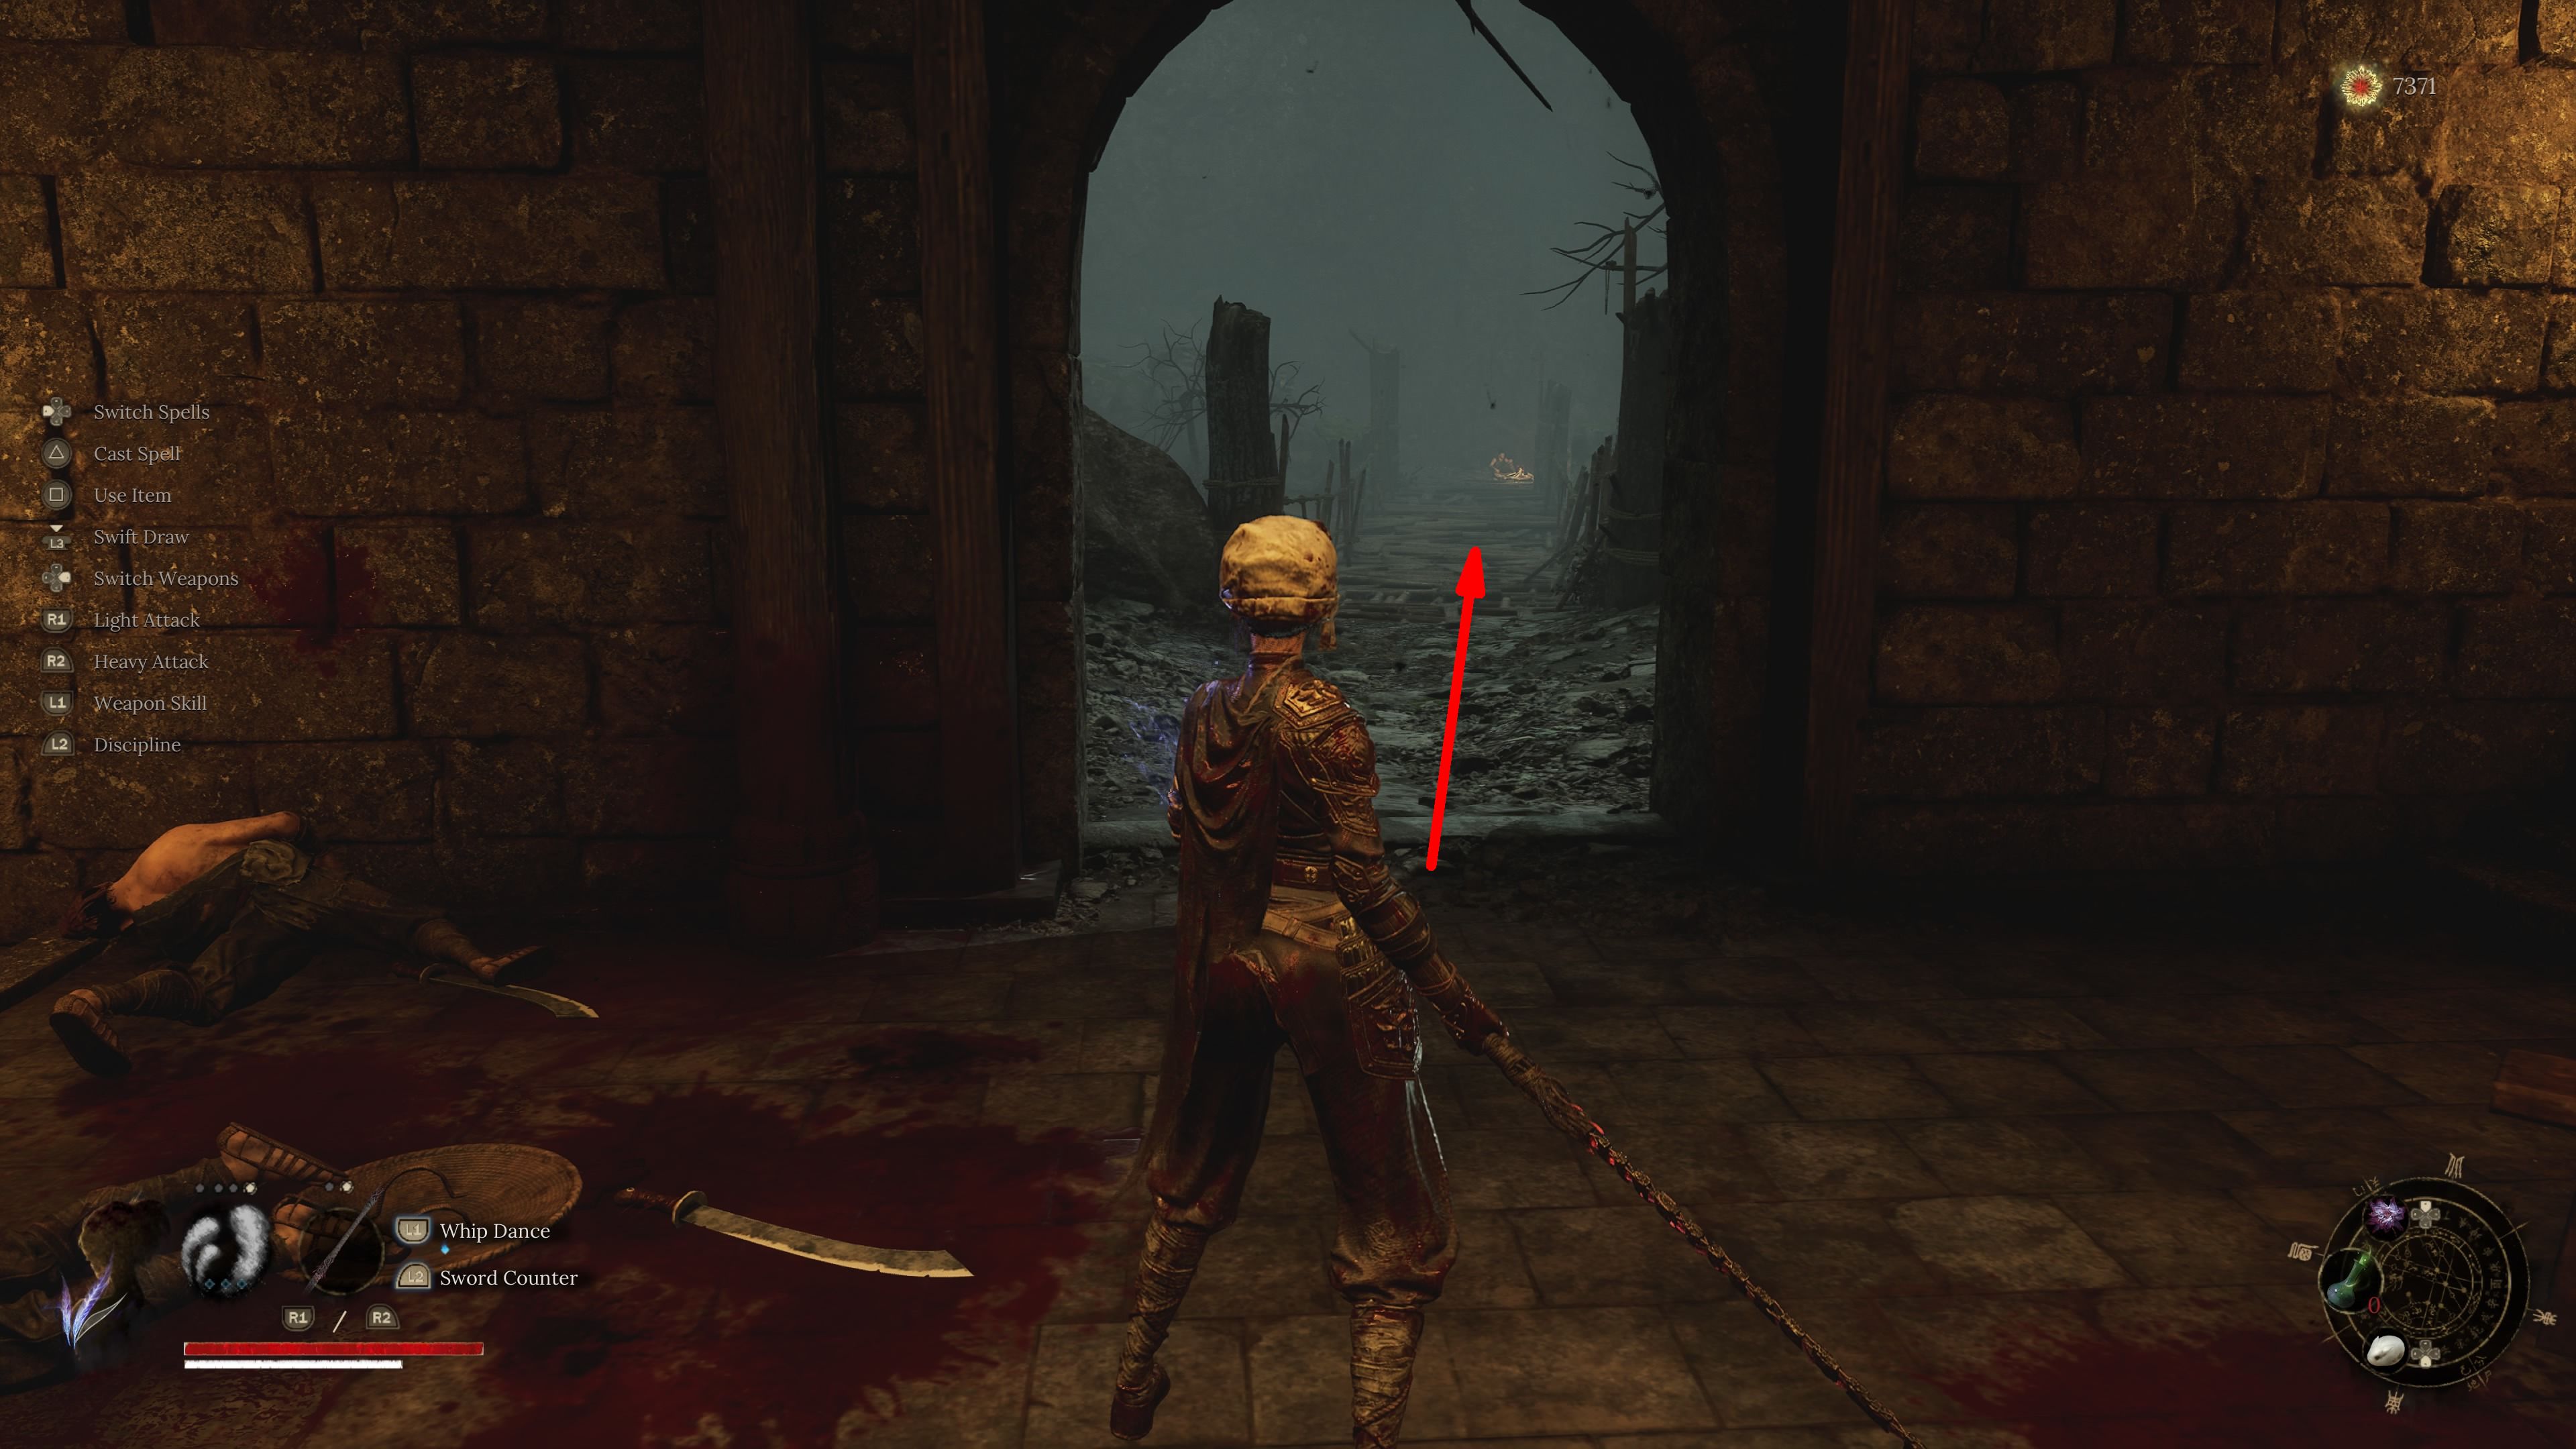
2. Turn right here, keep moving forward, and you’ll pass a ladder on your right-hand side.
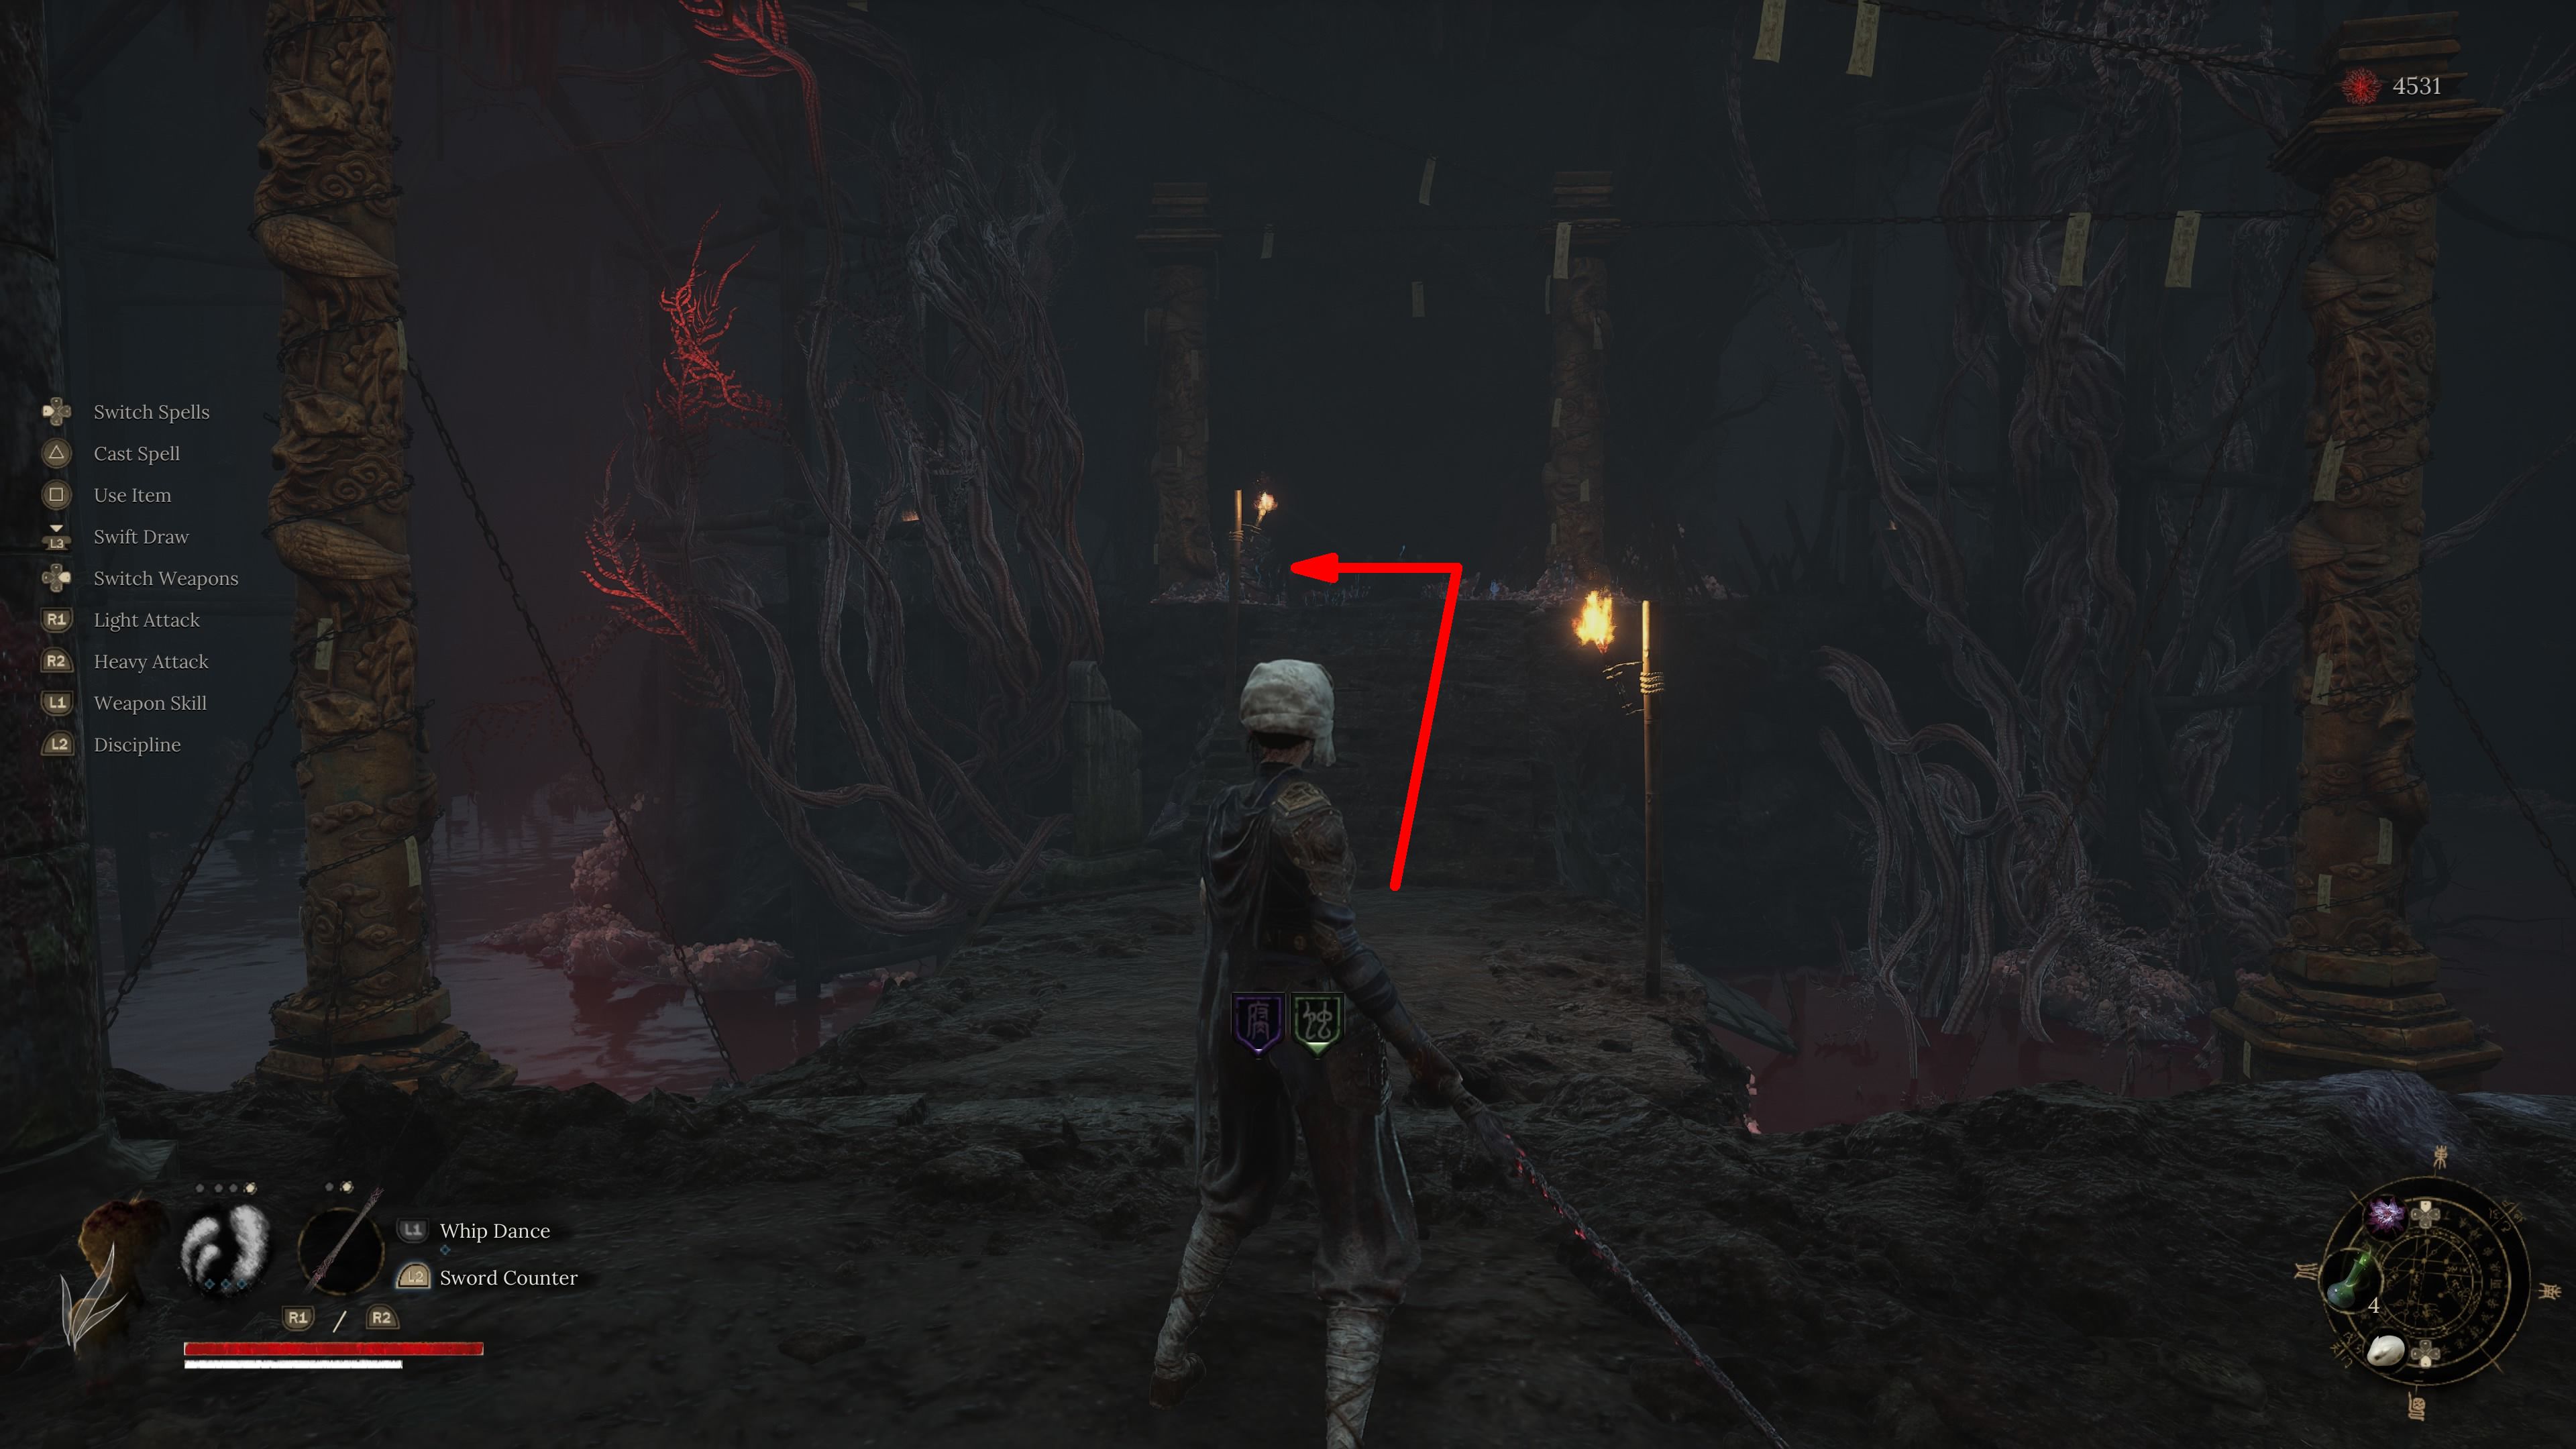
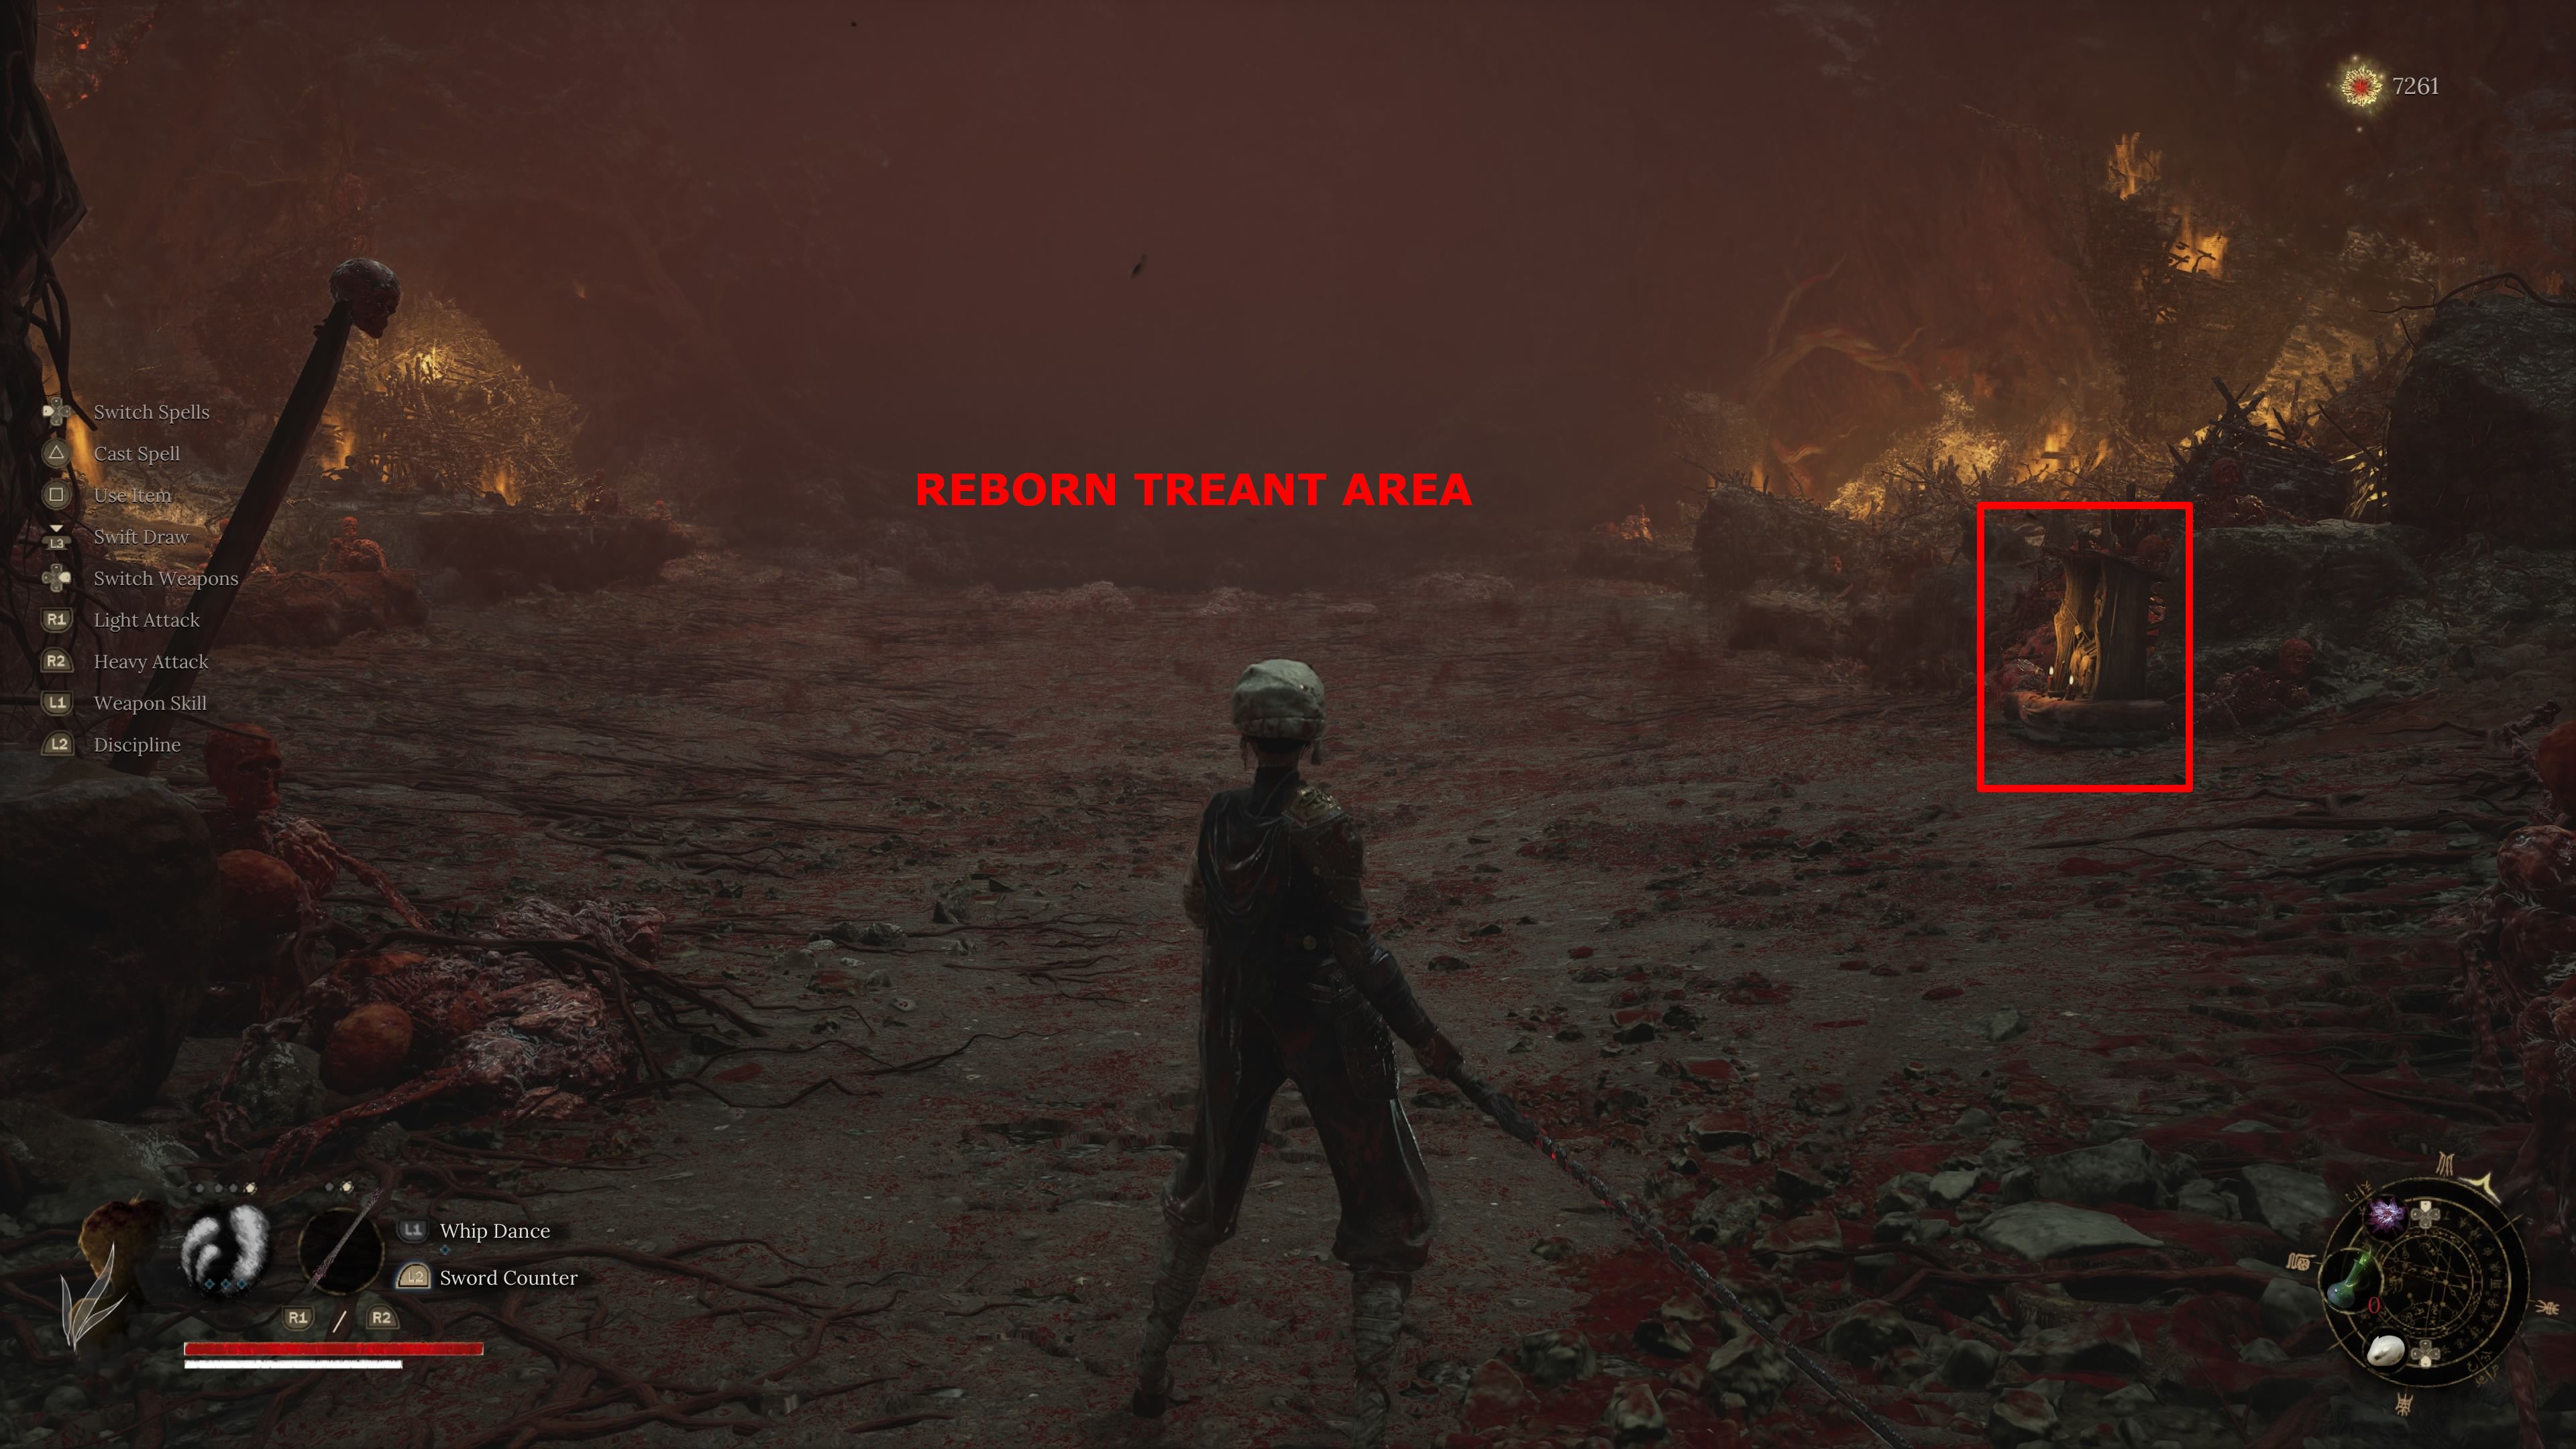
3. A short while after the ladder, players will find themselves in a passage with some tentacles. Beyond it lies Reborn Treant – Soulwood. Defeating this boss brings about the Corpse Pit Shrine appearing in its battlefield.
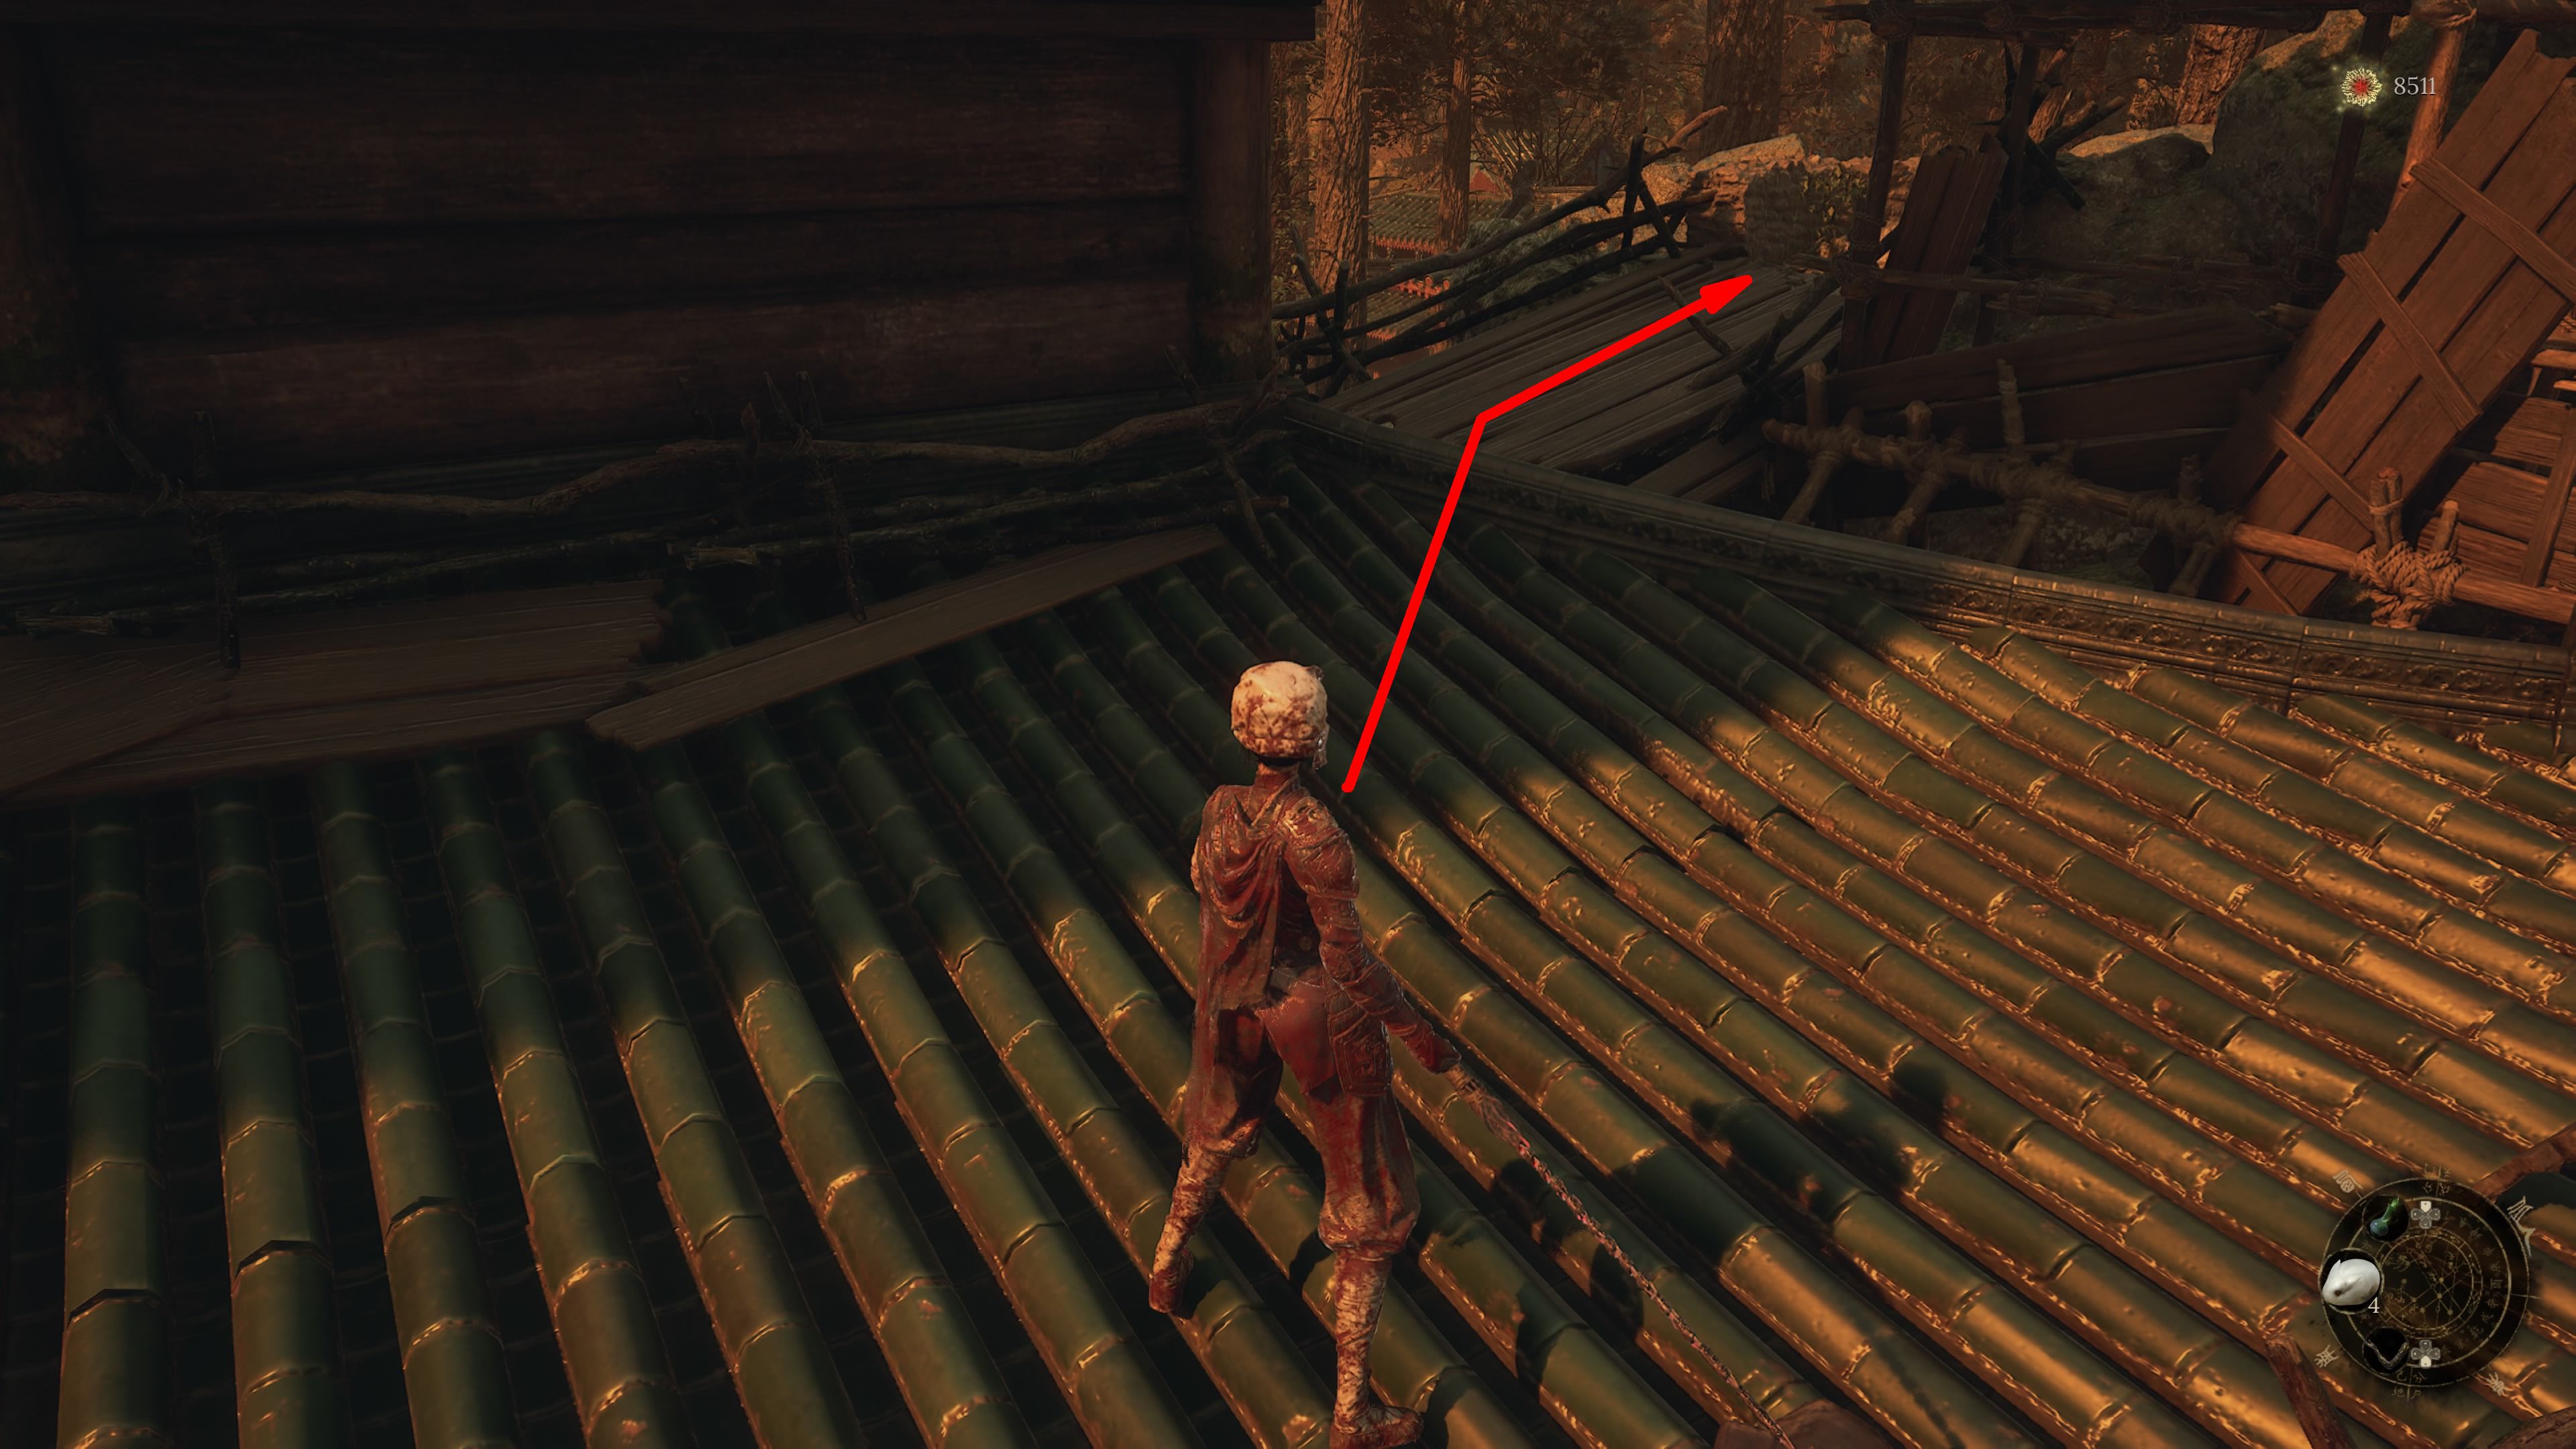
Palace Hill
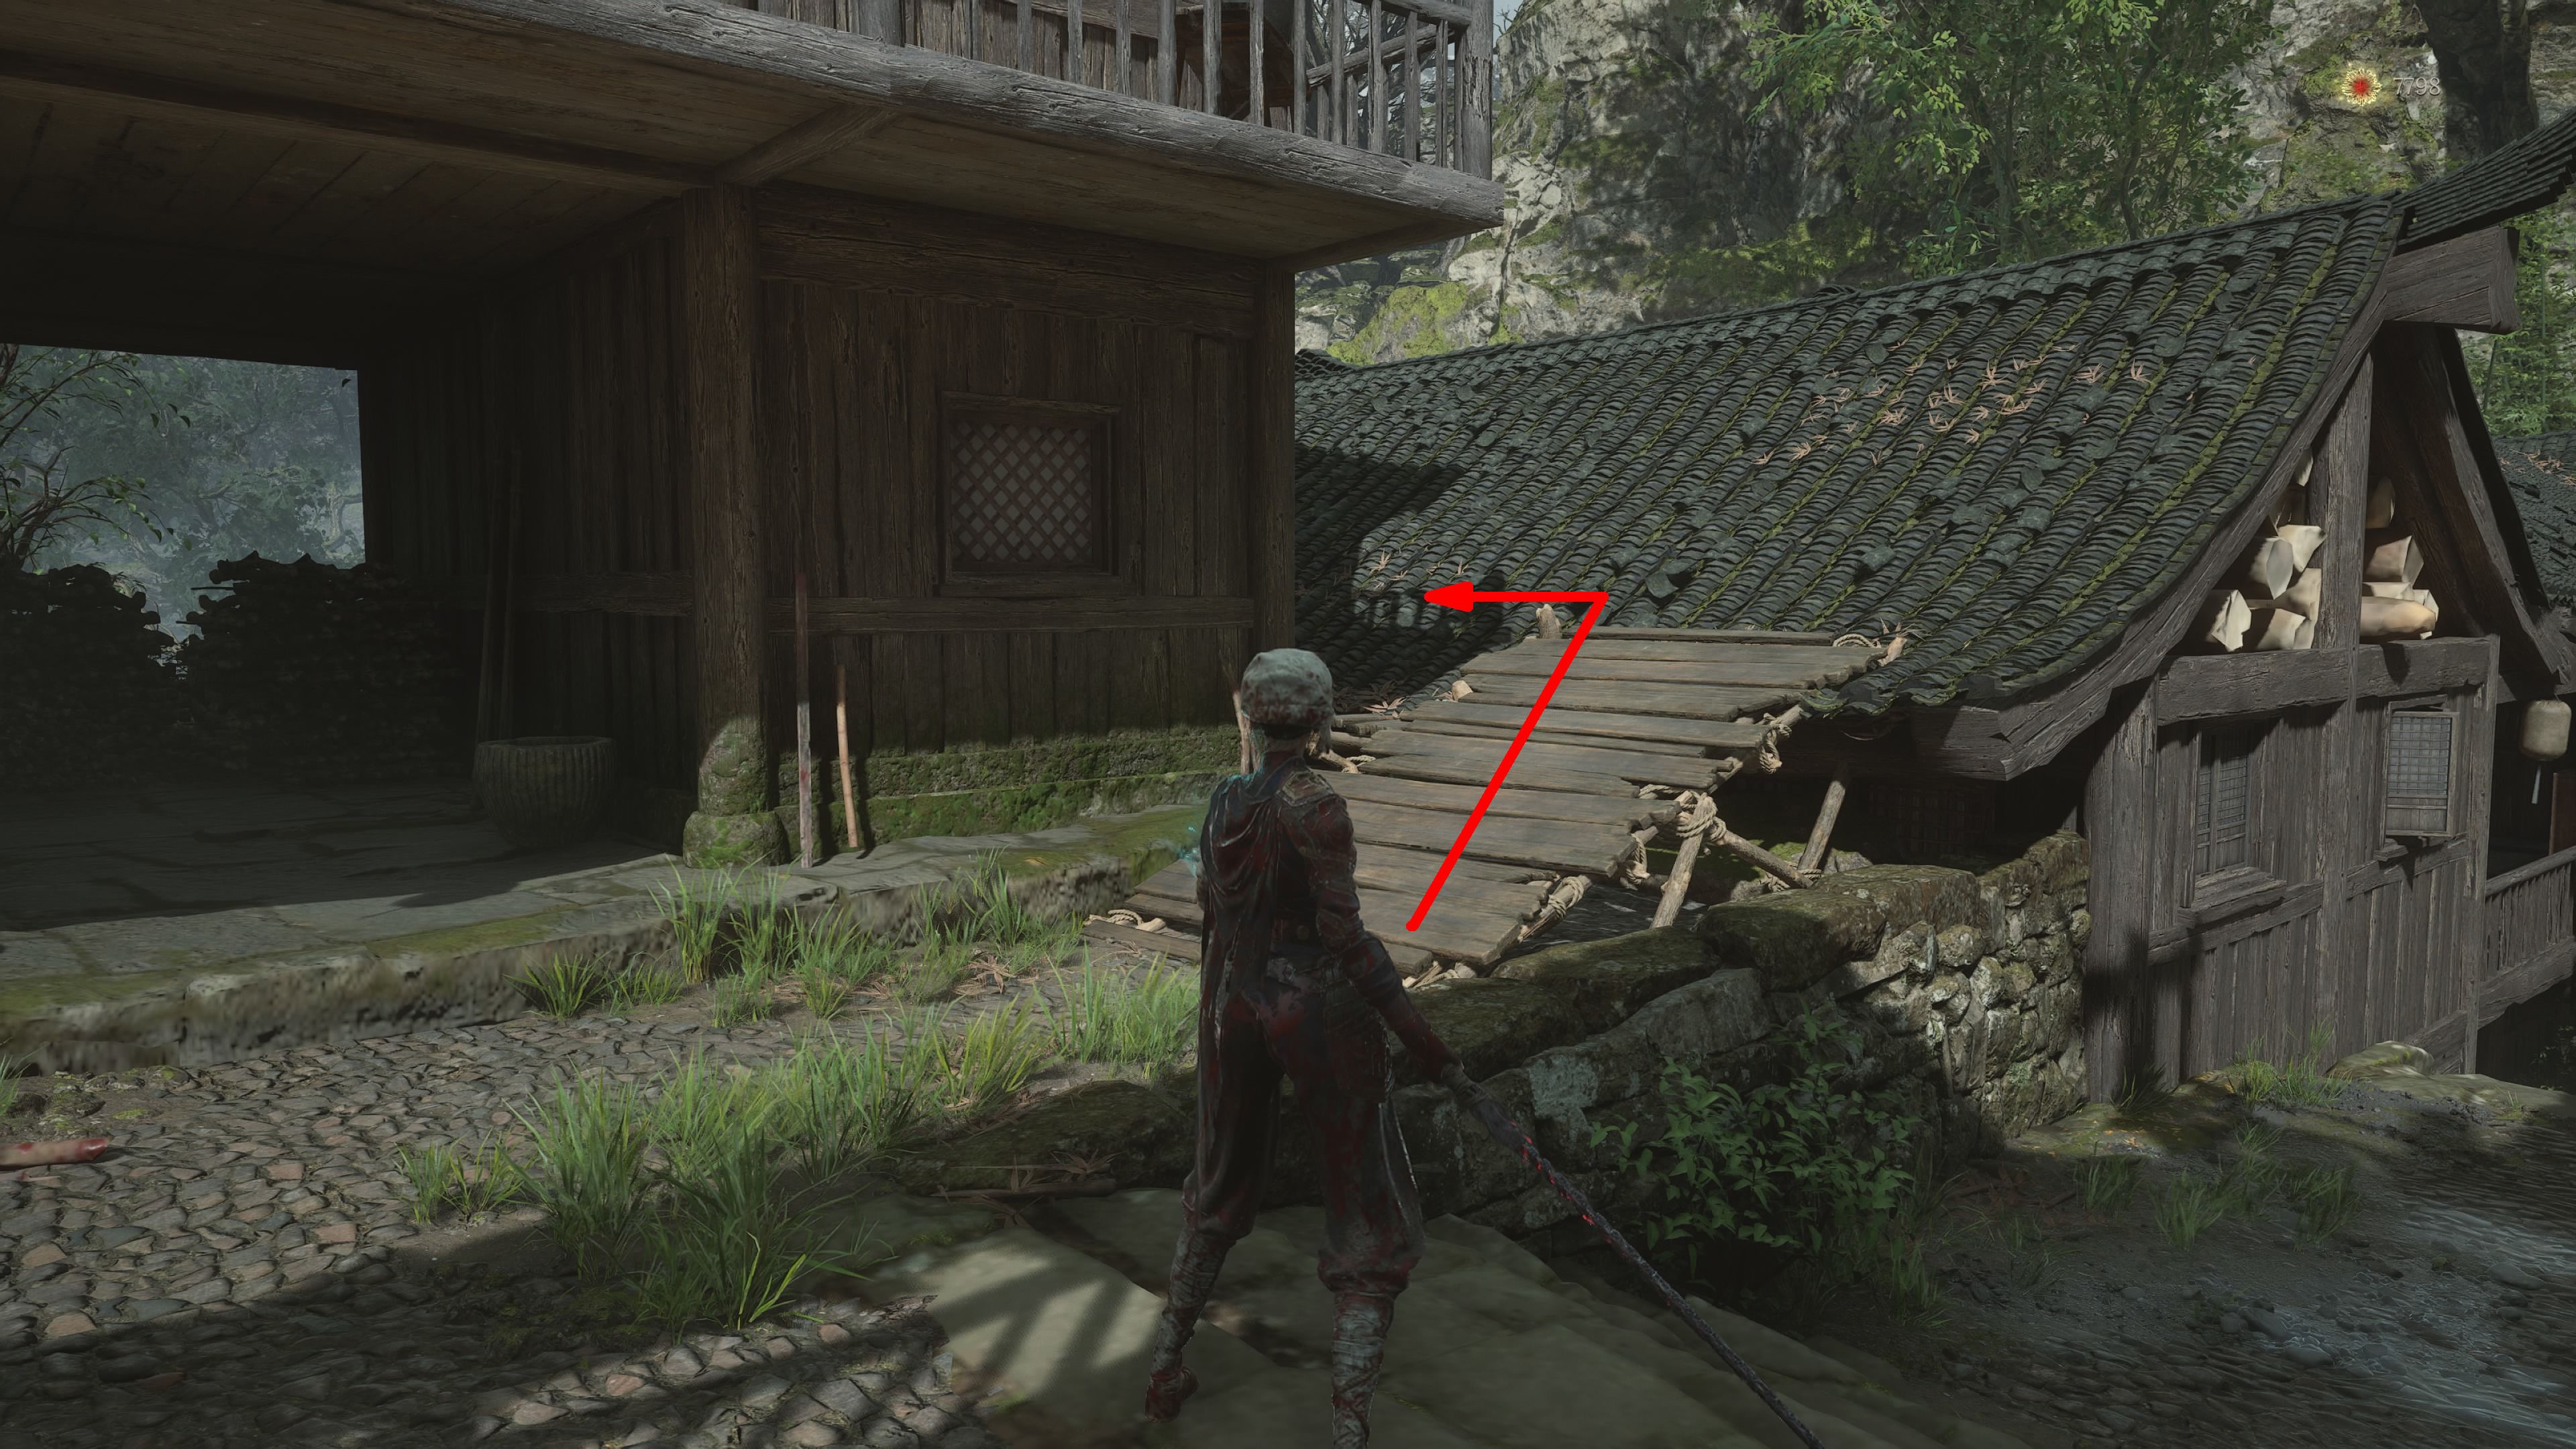
To depart from the Reborn Treant’s arena, utilize the slope adjacent to the Corpse Pit Shrine. This route culminates in a structure, where you should ascend the internal stairs to reach the upper level, or second floor. Upon exiting the building, follow an upward path until you encounter a ladder that needs to be climbed. At the summit, traverse the sunlit area to arrive at Tang Emperor’s Palace.
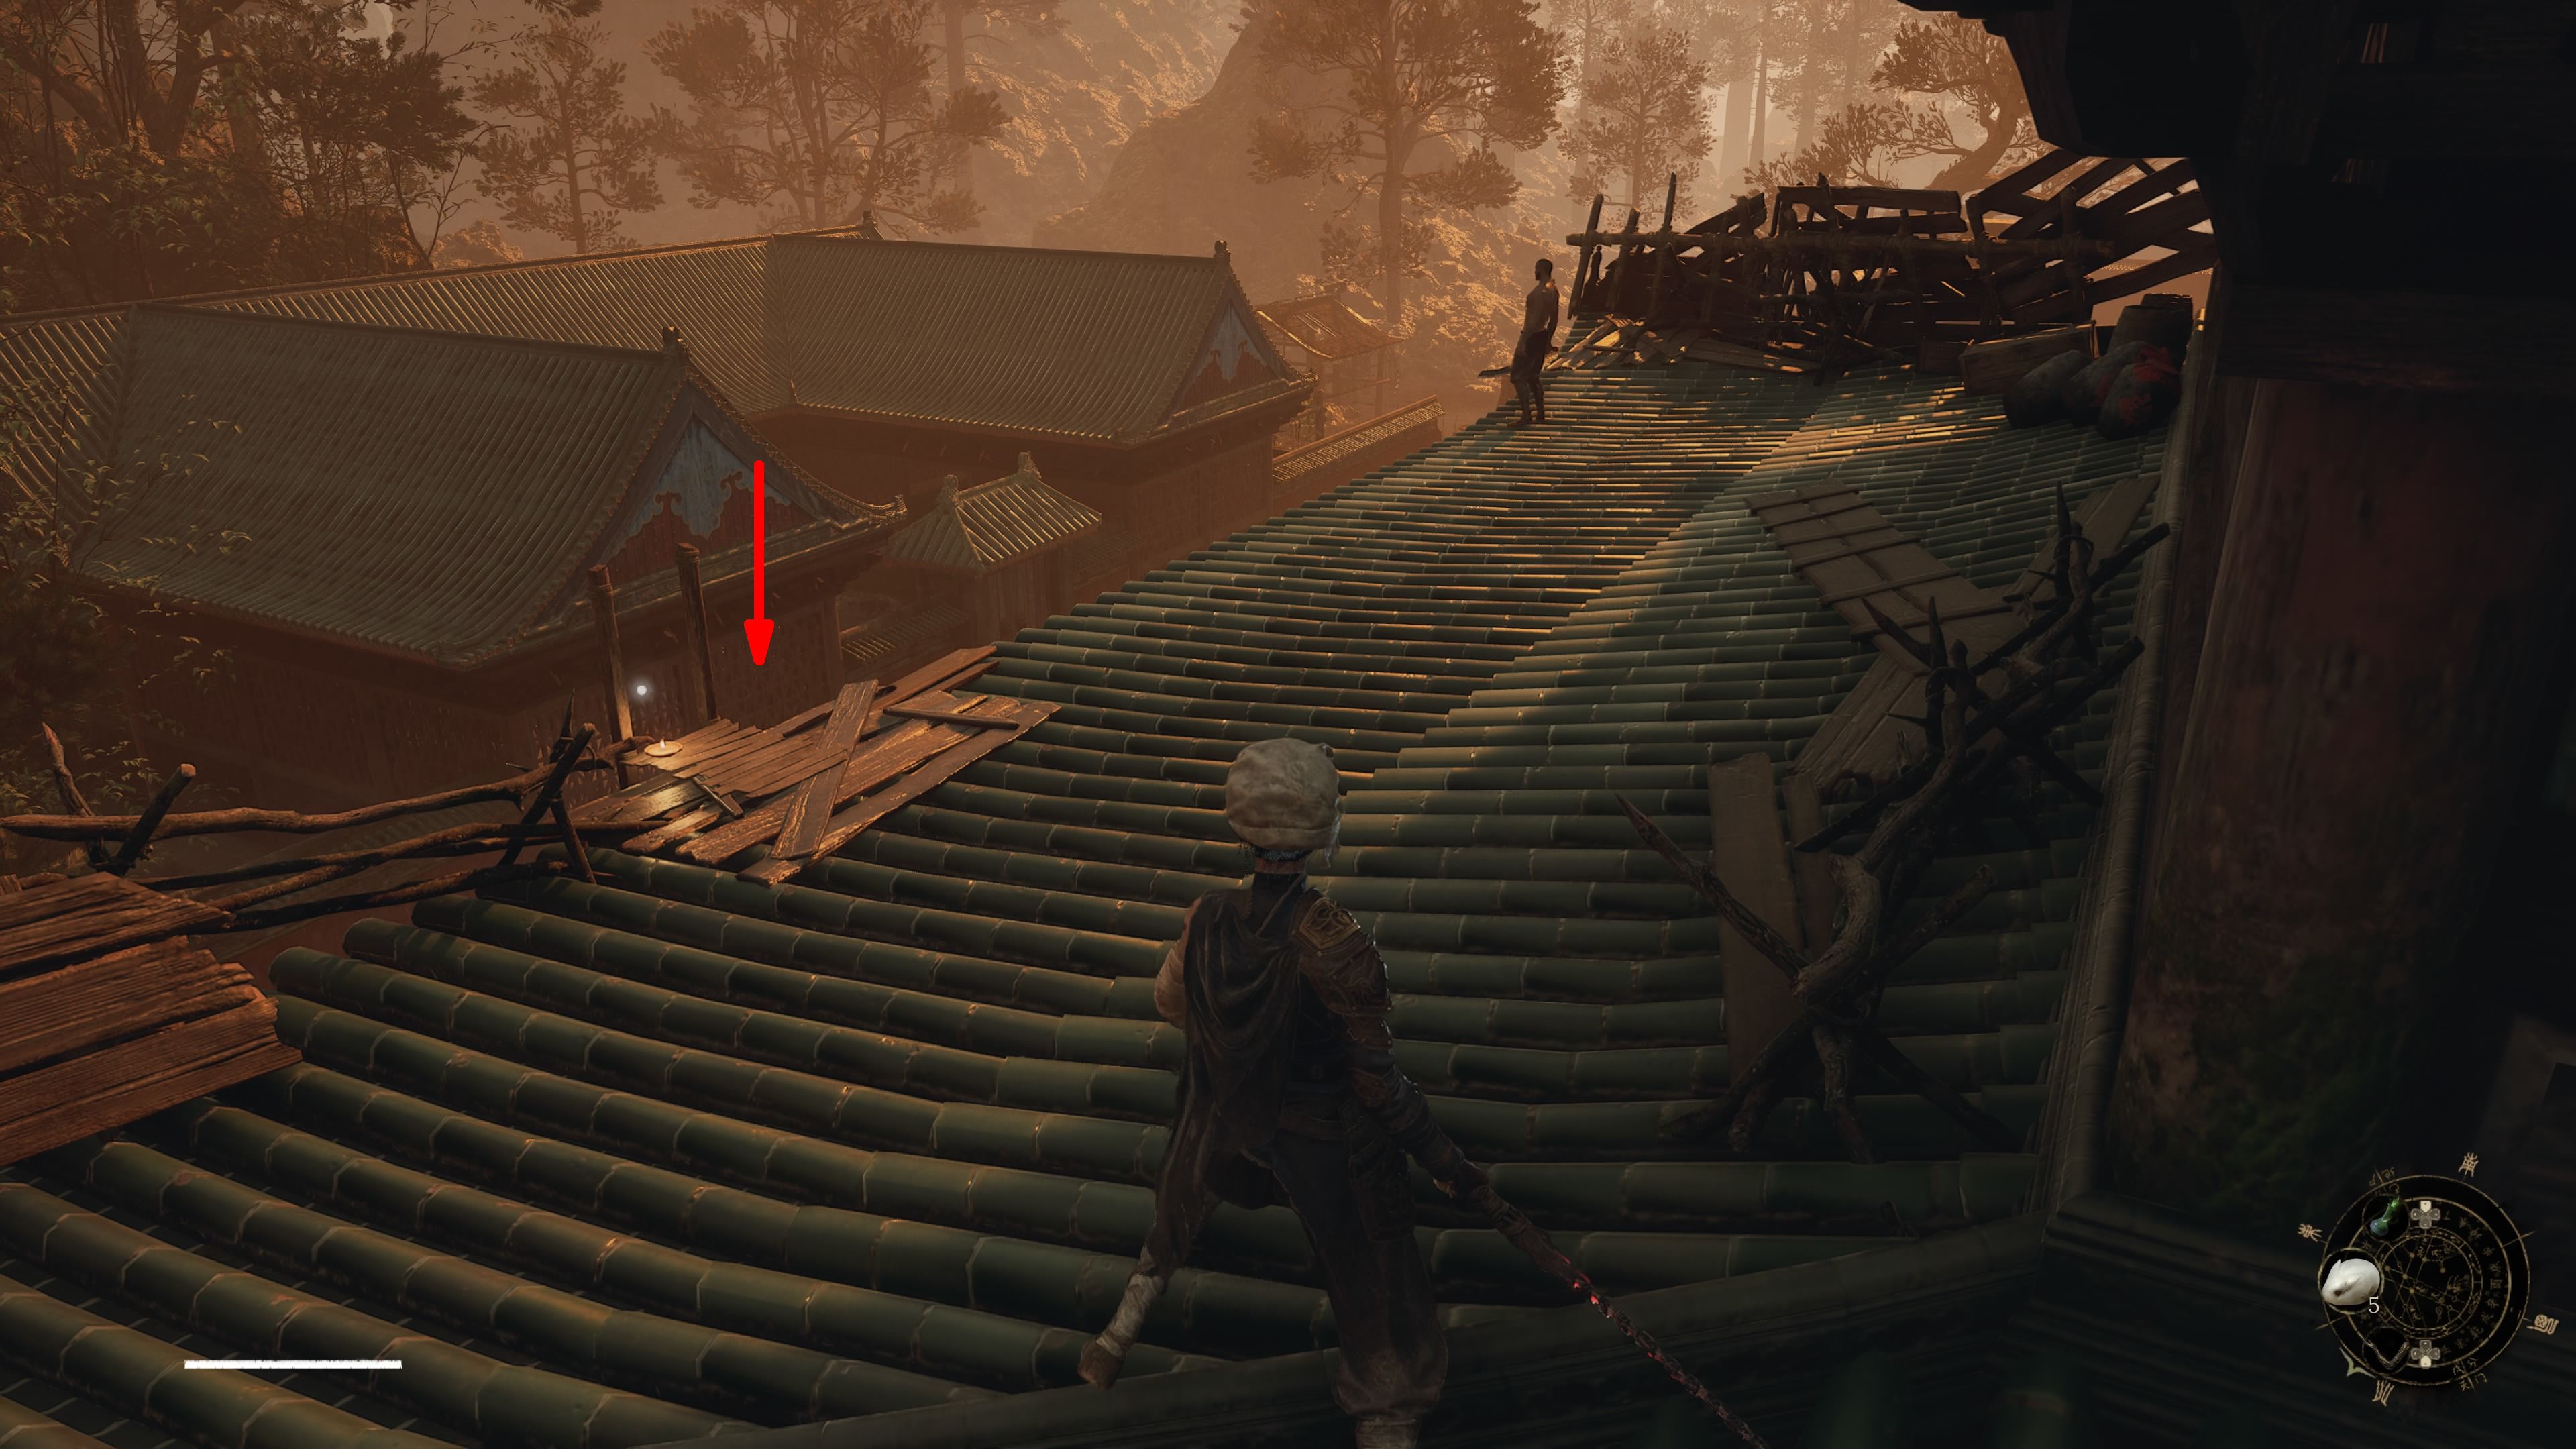
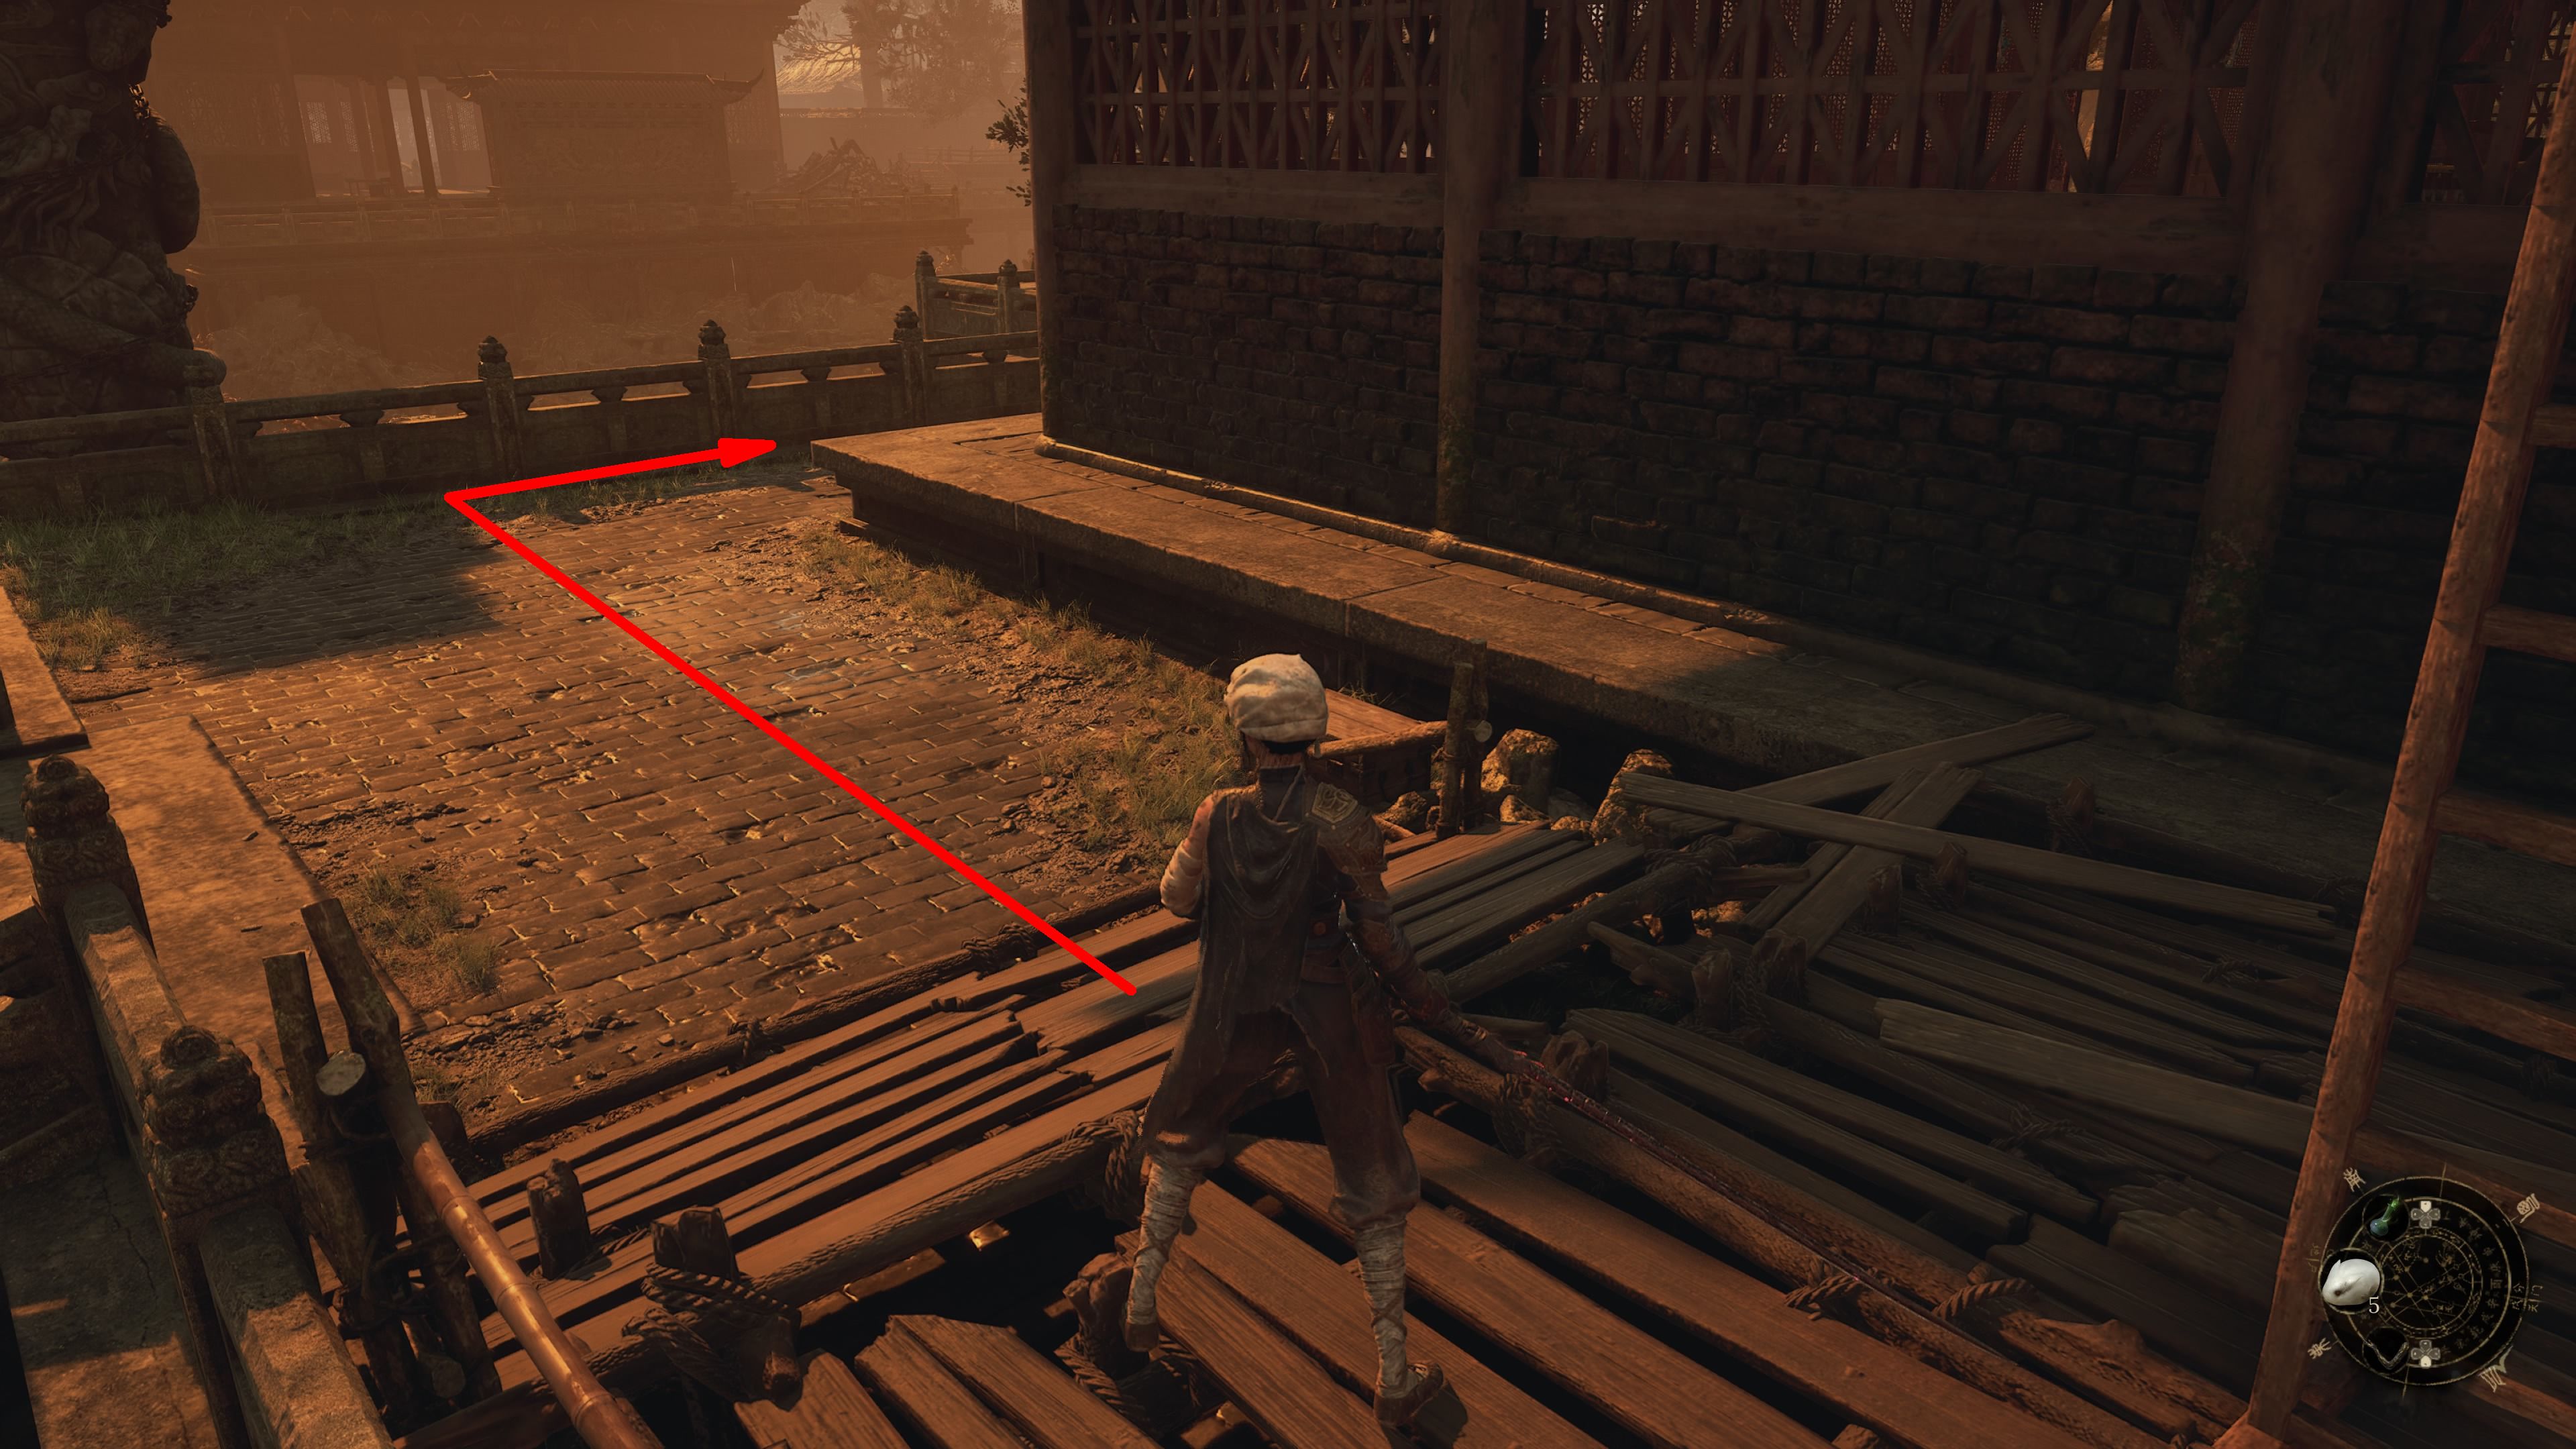
Proceed straight ahead, ascend the steps you see, then go through a gap in the wall to reach a space with some little bridges. Move towards the back-left part of this area to locate a wooden slope that leads up to a rooftop.
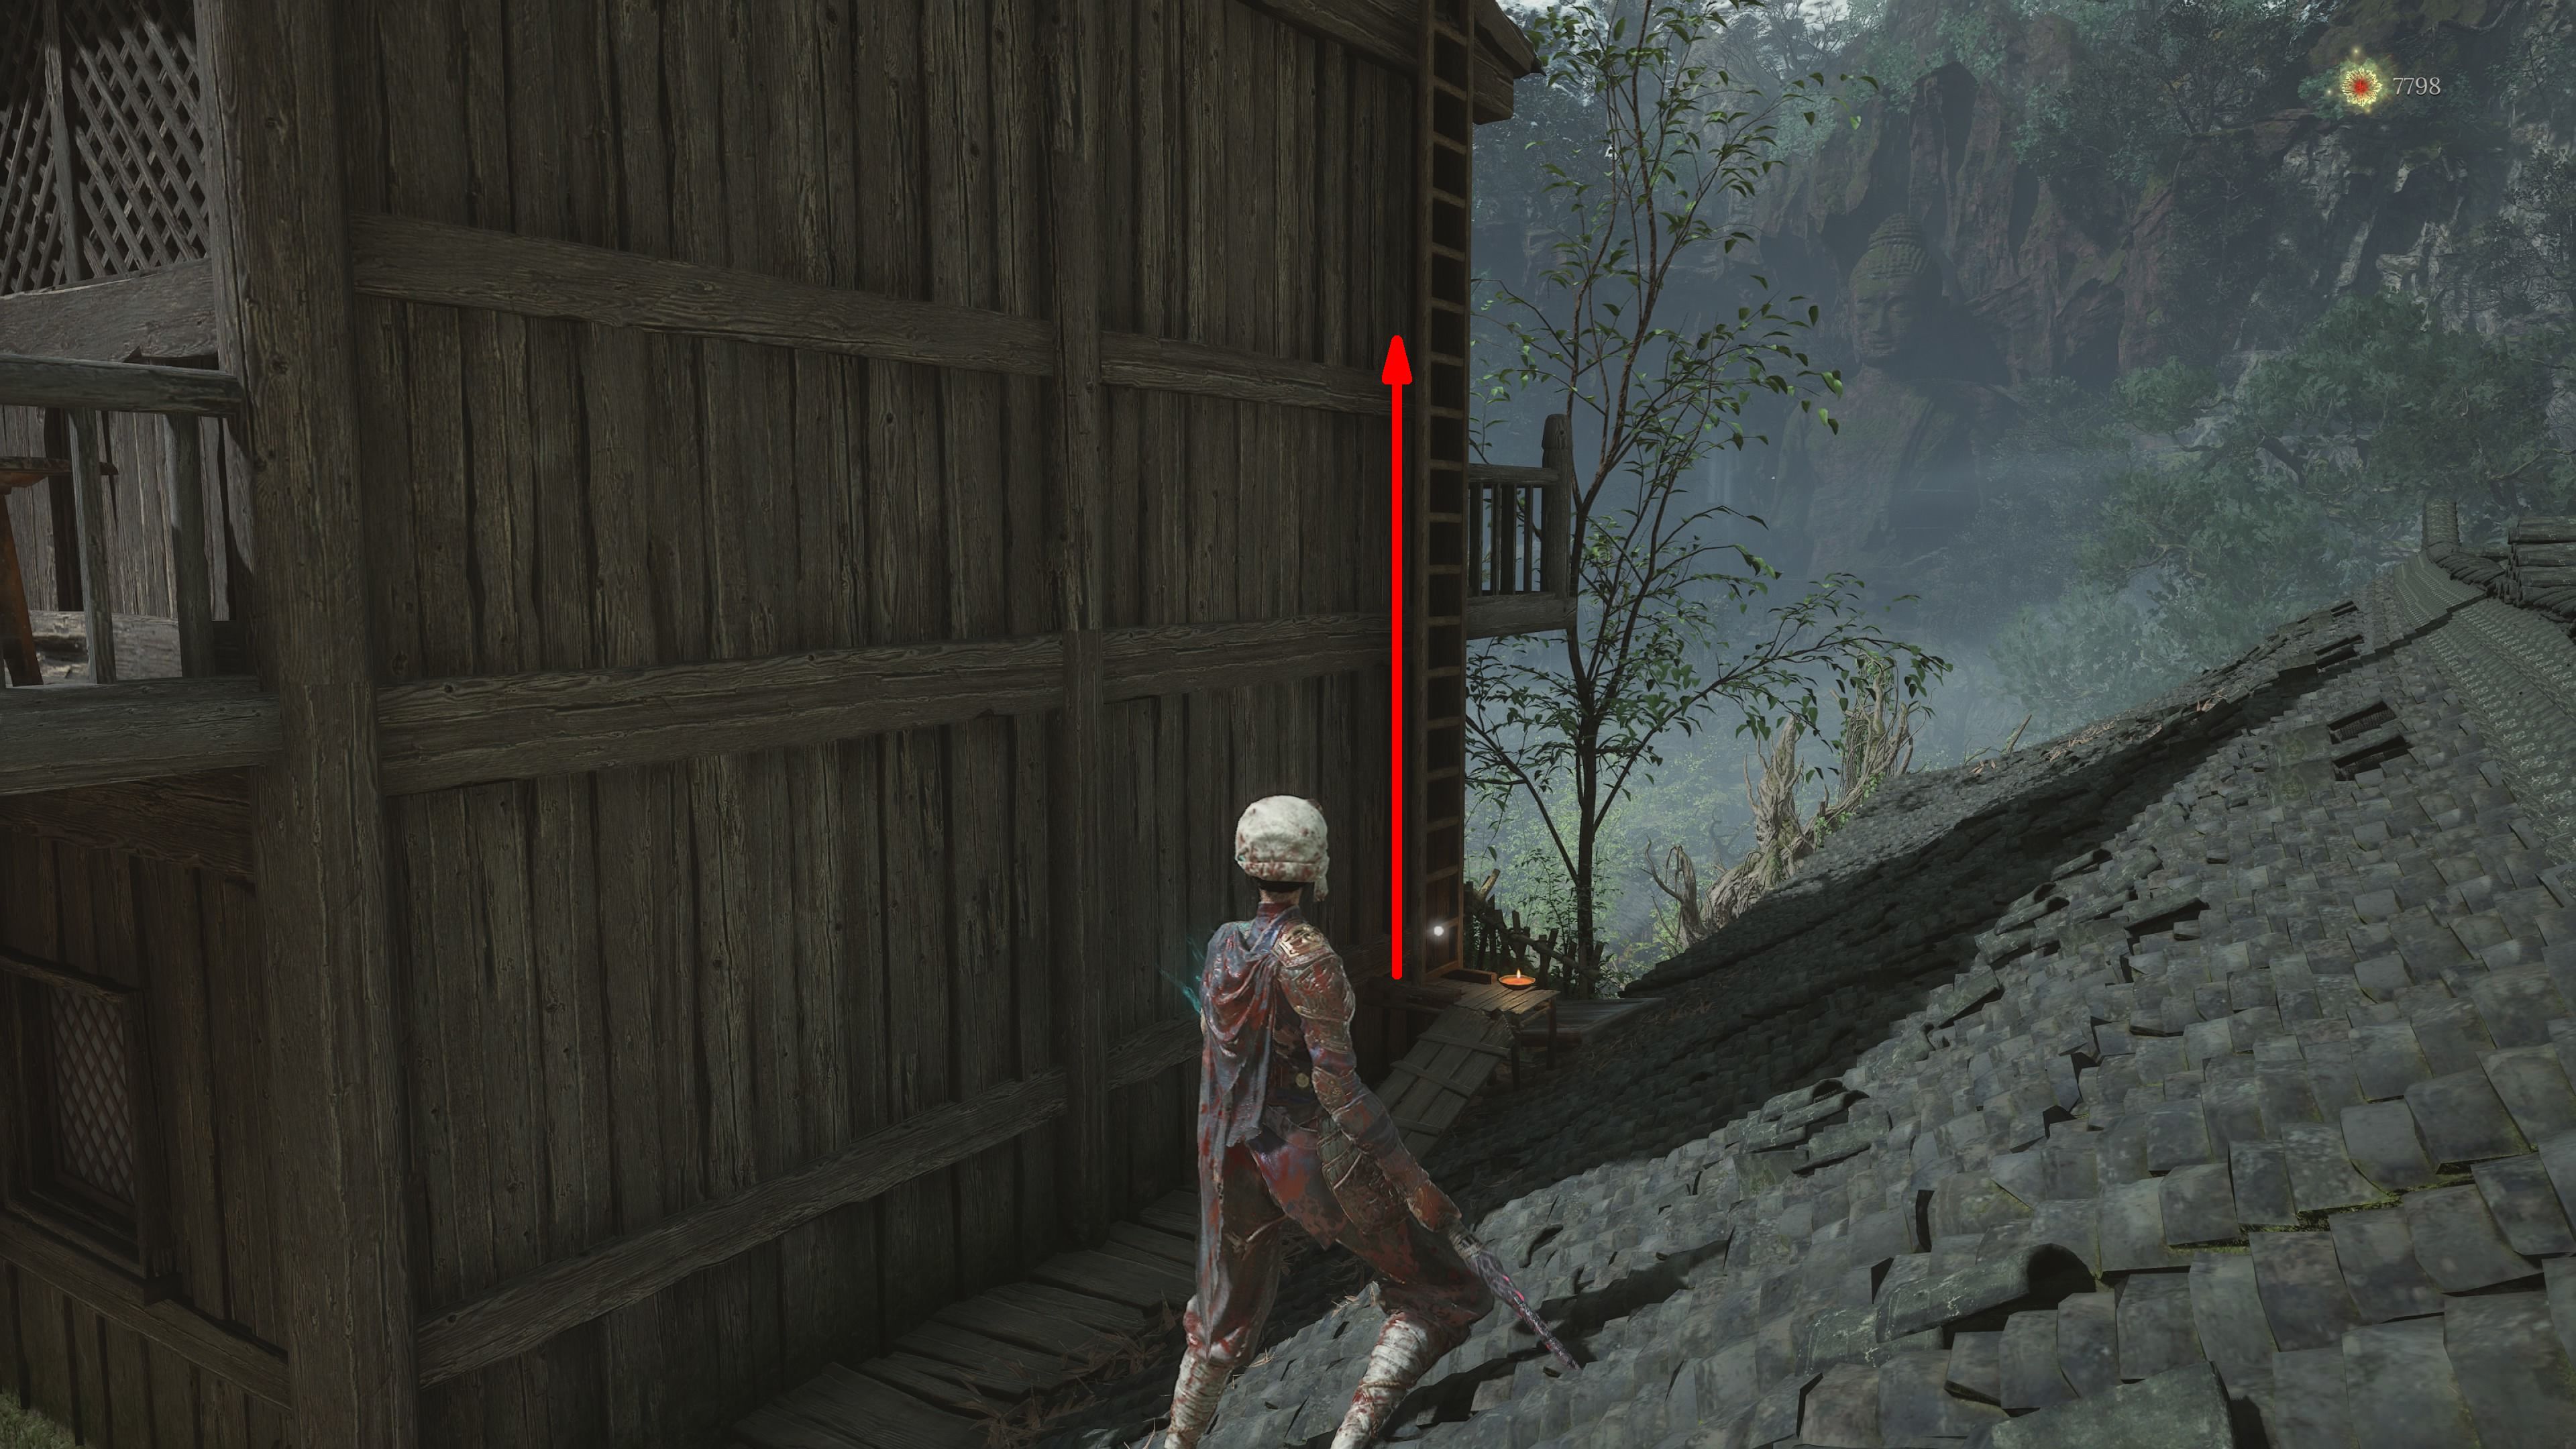
As a gamer, I find myself standing before a roof with a distant ladder on its side. Upon my journey, I’ll need to navigate down that ladder when I reach it. Once I hit ground level, I should keep moving forward until I encounter another ladder. When I do, I’ll climb it and continue my path. On the right, you’ll notice some stairs; take them if you dare!
Further along, there’s a structure on my left side – that’s where you’ll find the Tang Palace Maid. So, keep your eyes peeled, and let’s see what this adventure brings us next!
Once you’ve moved past the structure, glance to your left to spot a climbable ladder for reaching the rooftop. Proceed straight ahead when you reach the peak, then stick to the route to make it to the Palace Hill Shrine.
Lotus Pond
As a gamer, I’d say:
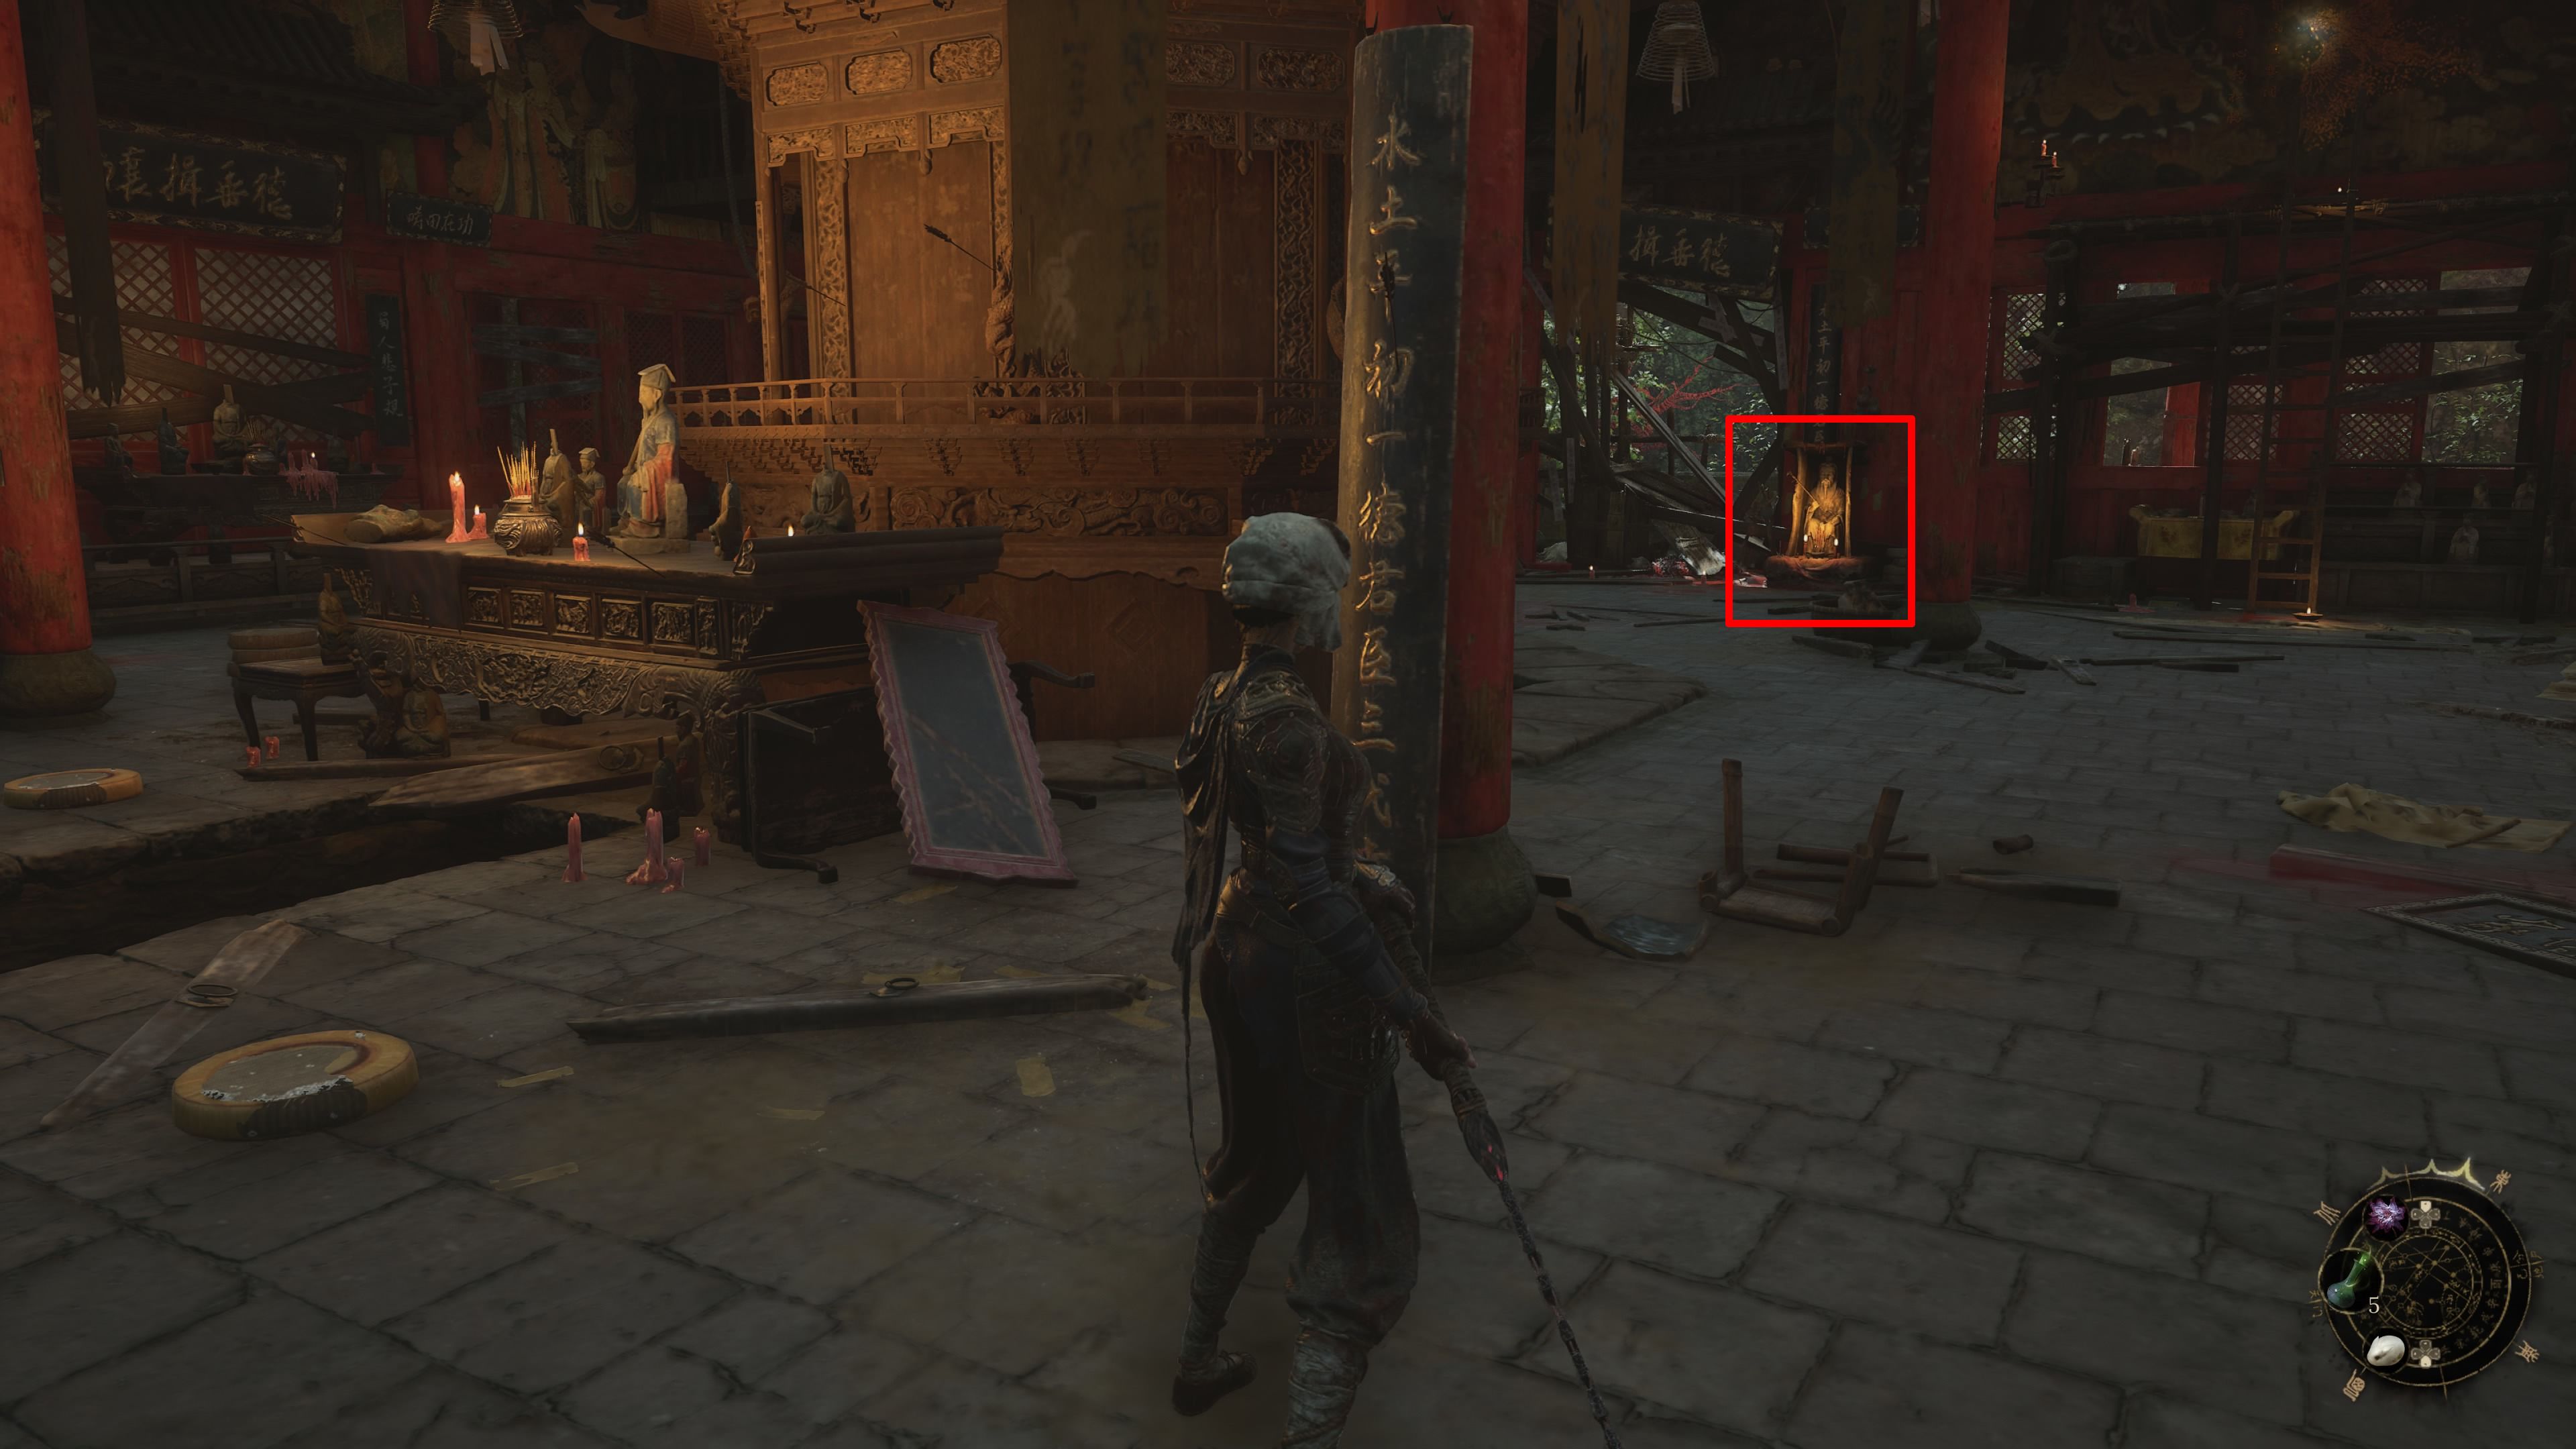
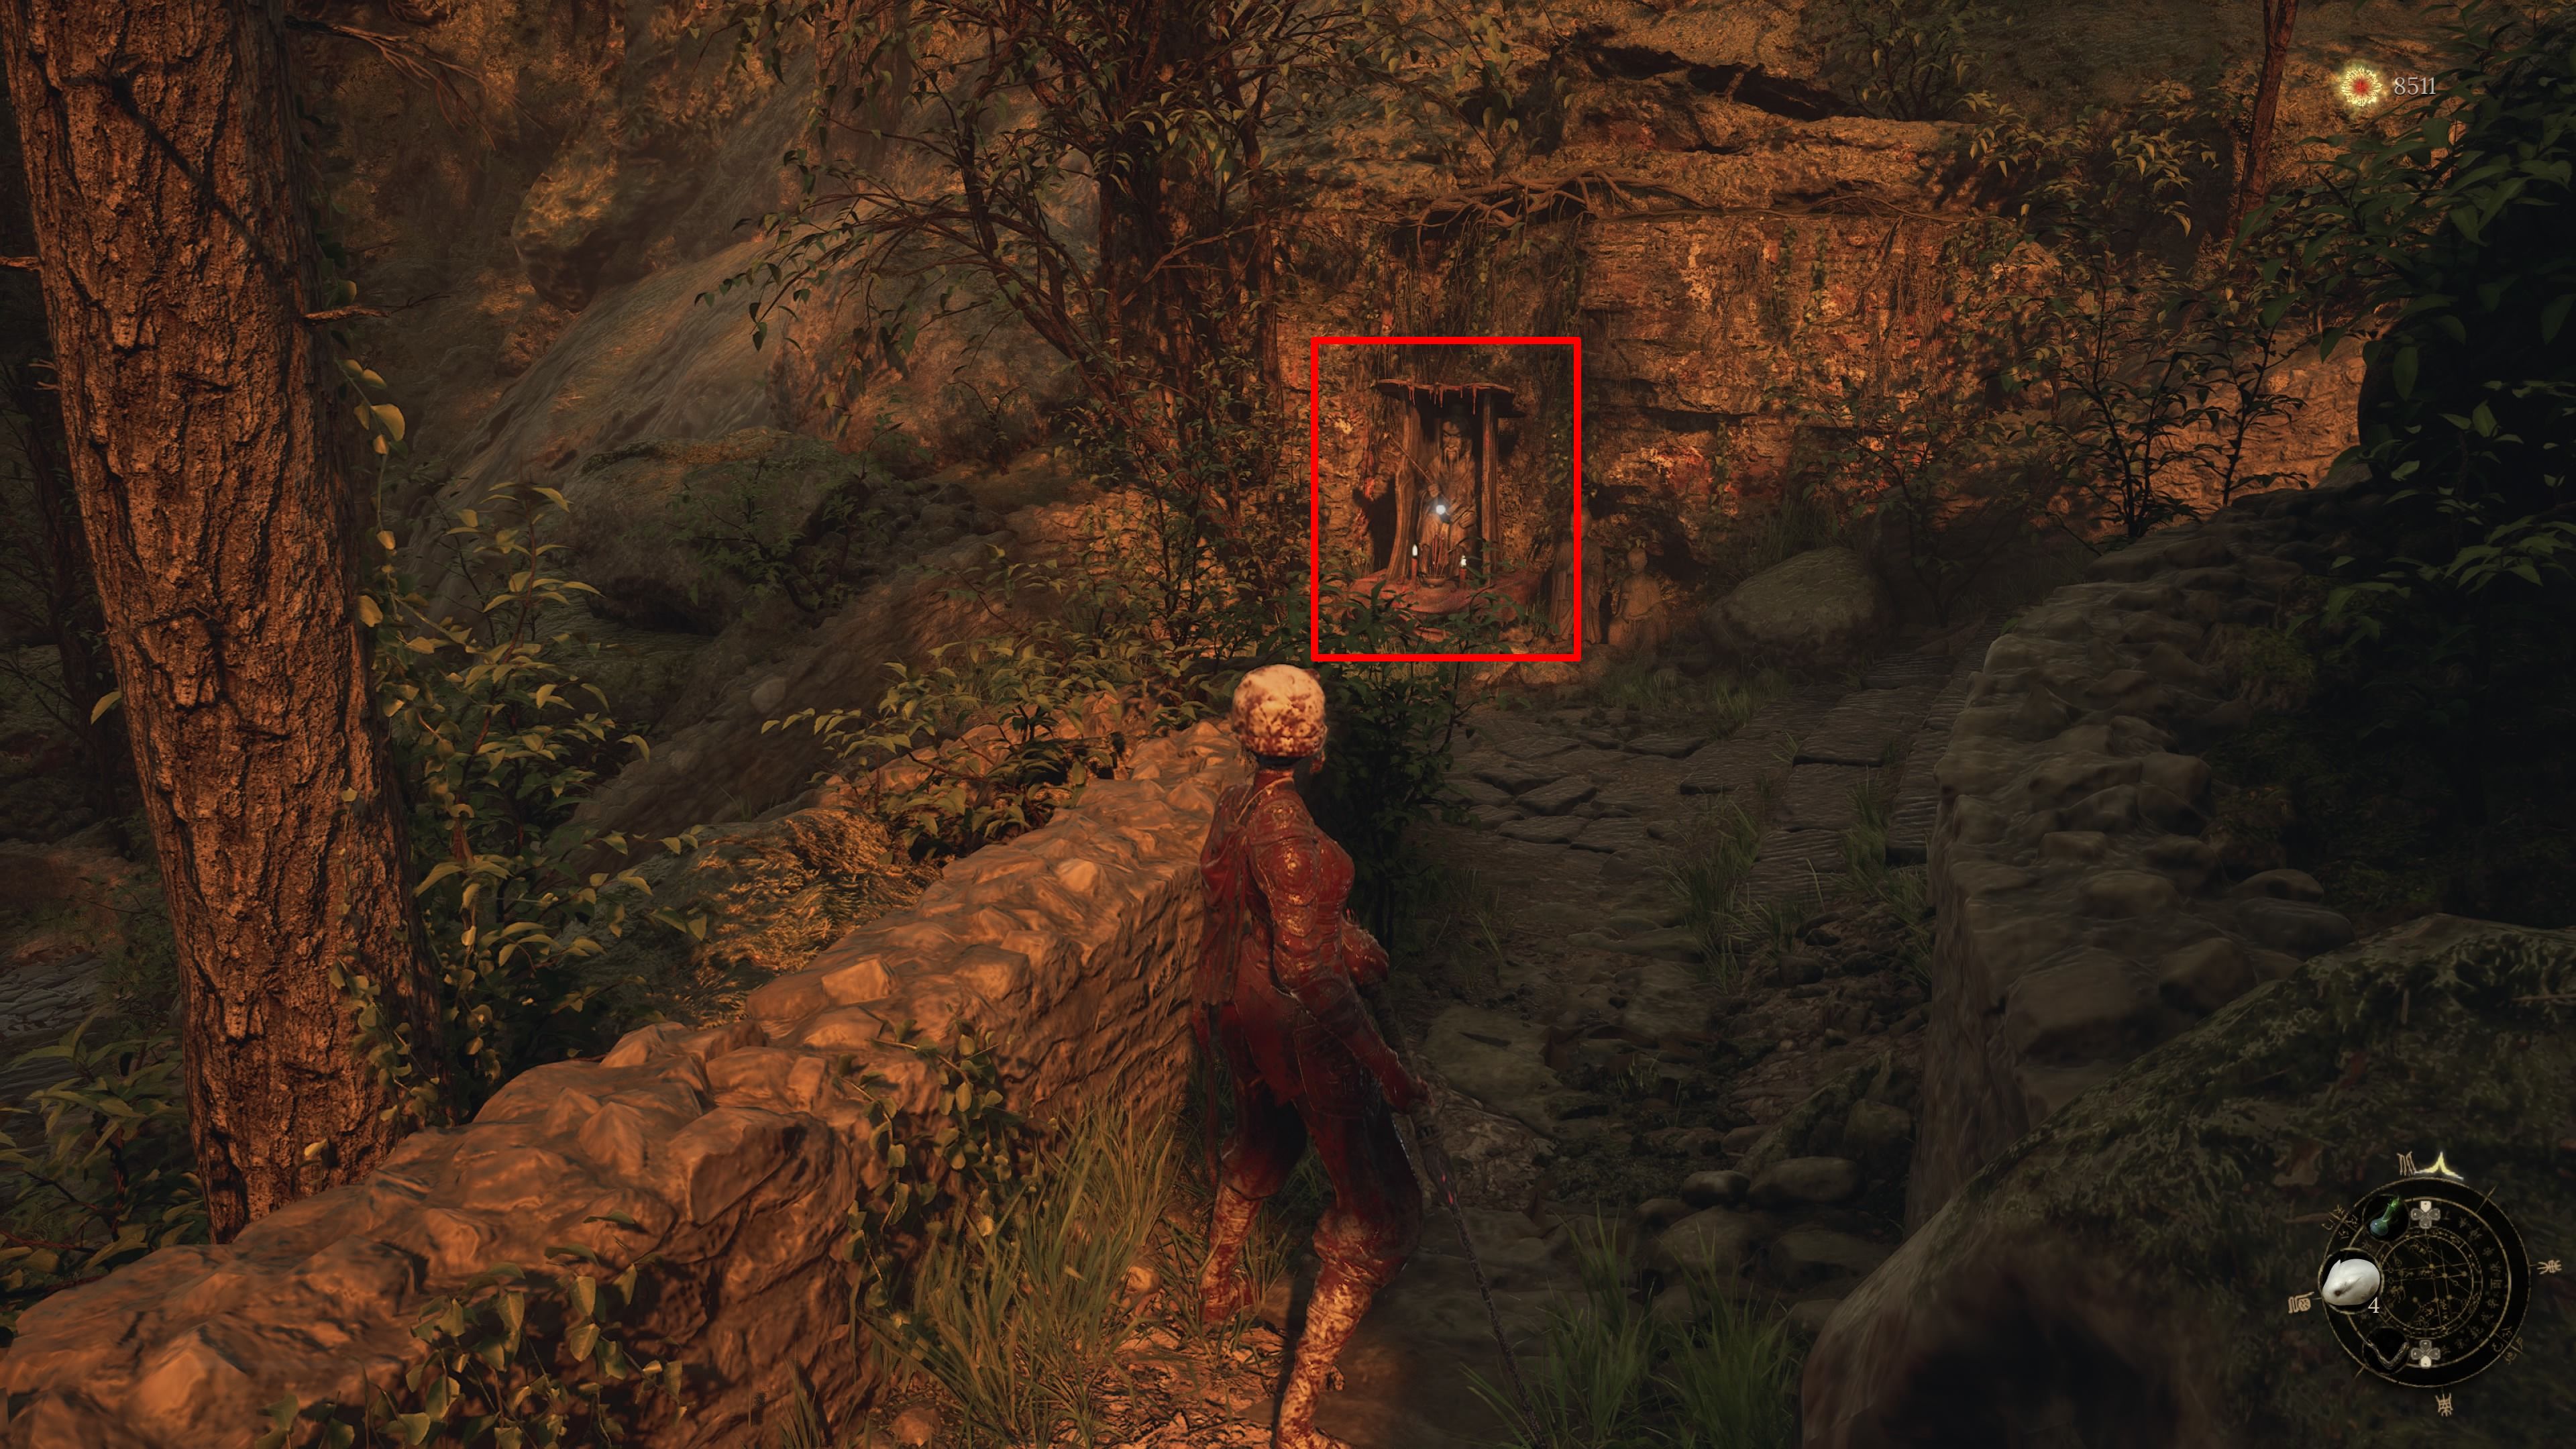
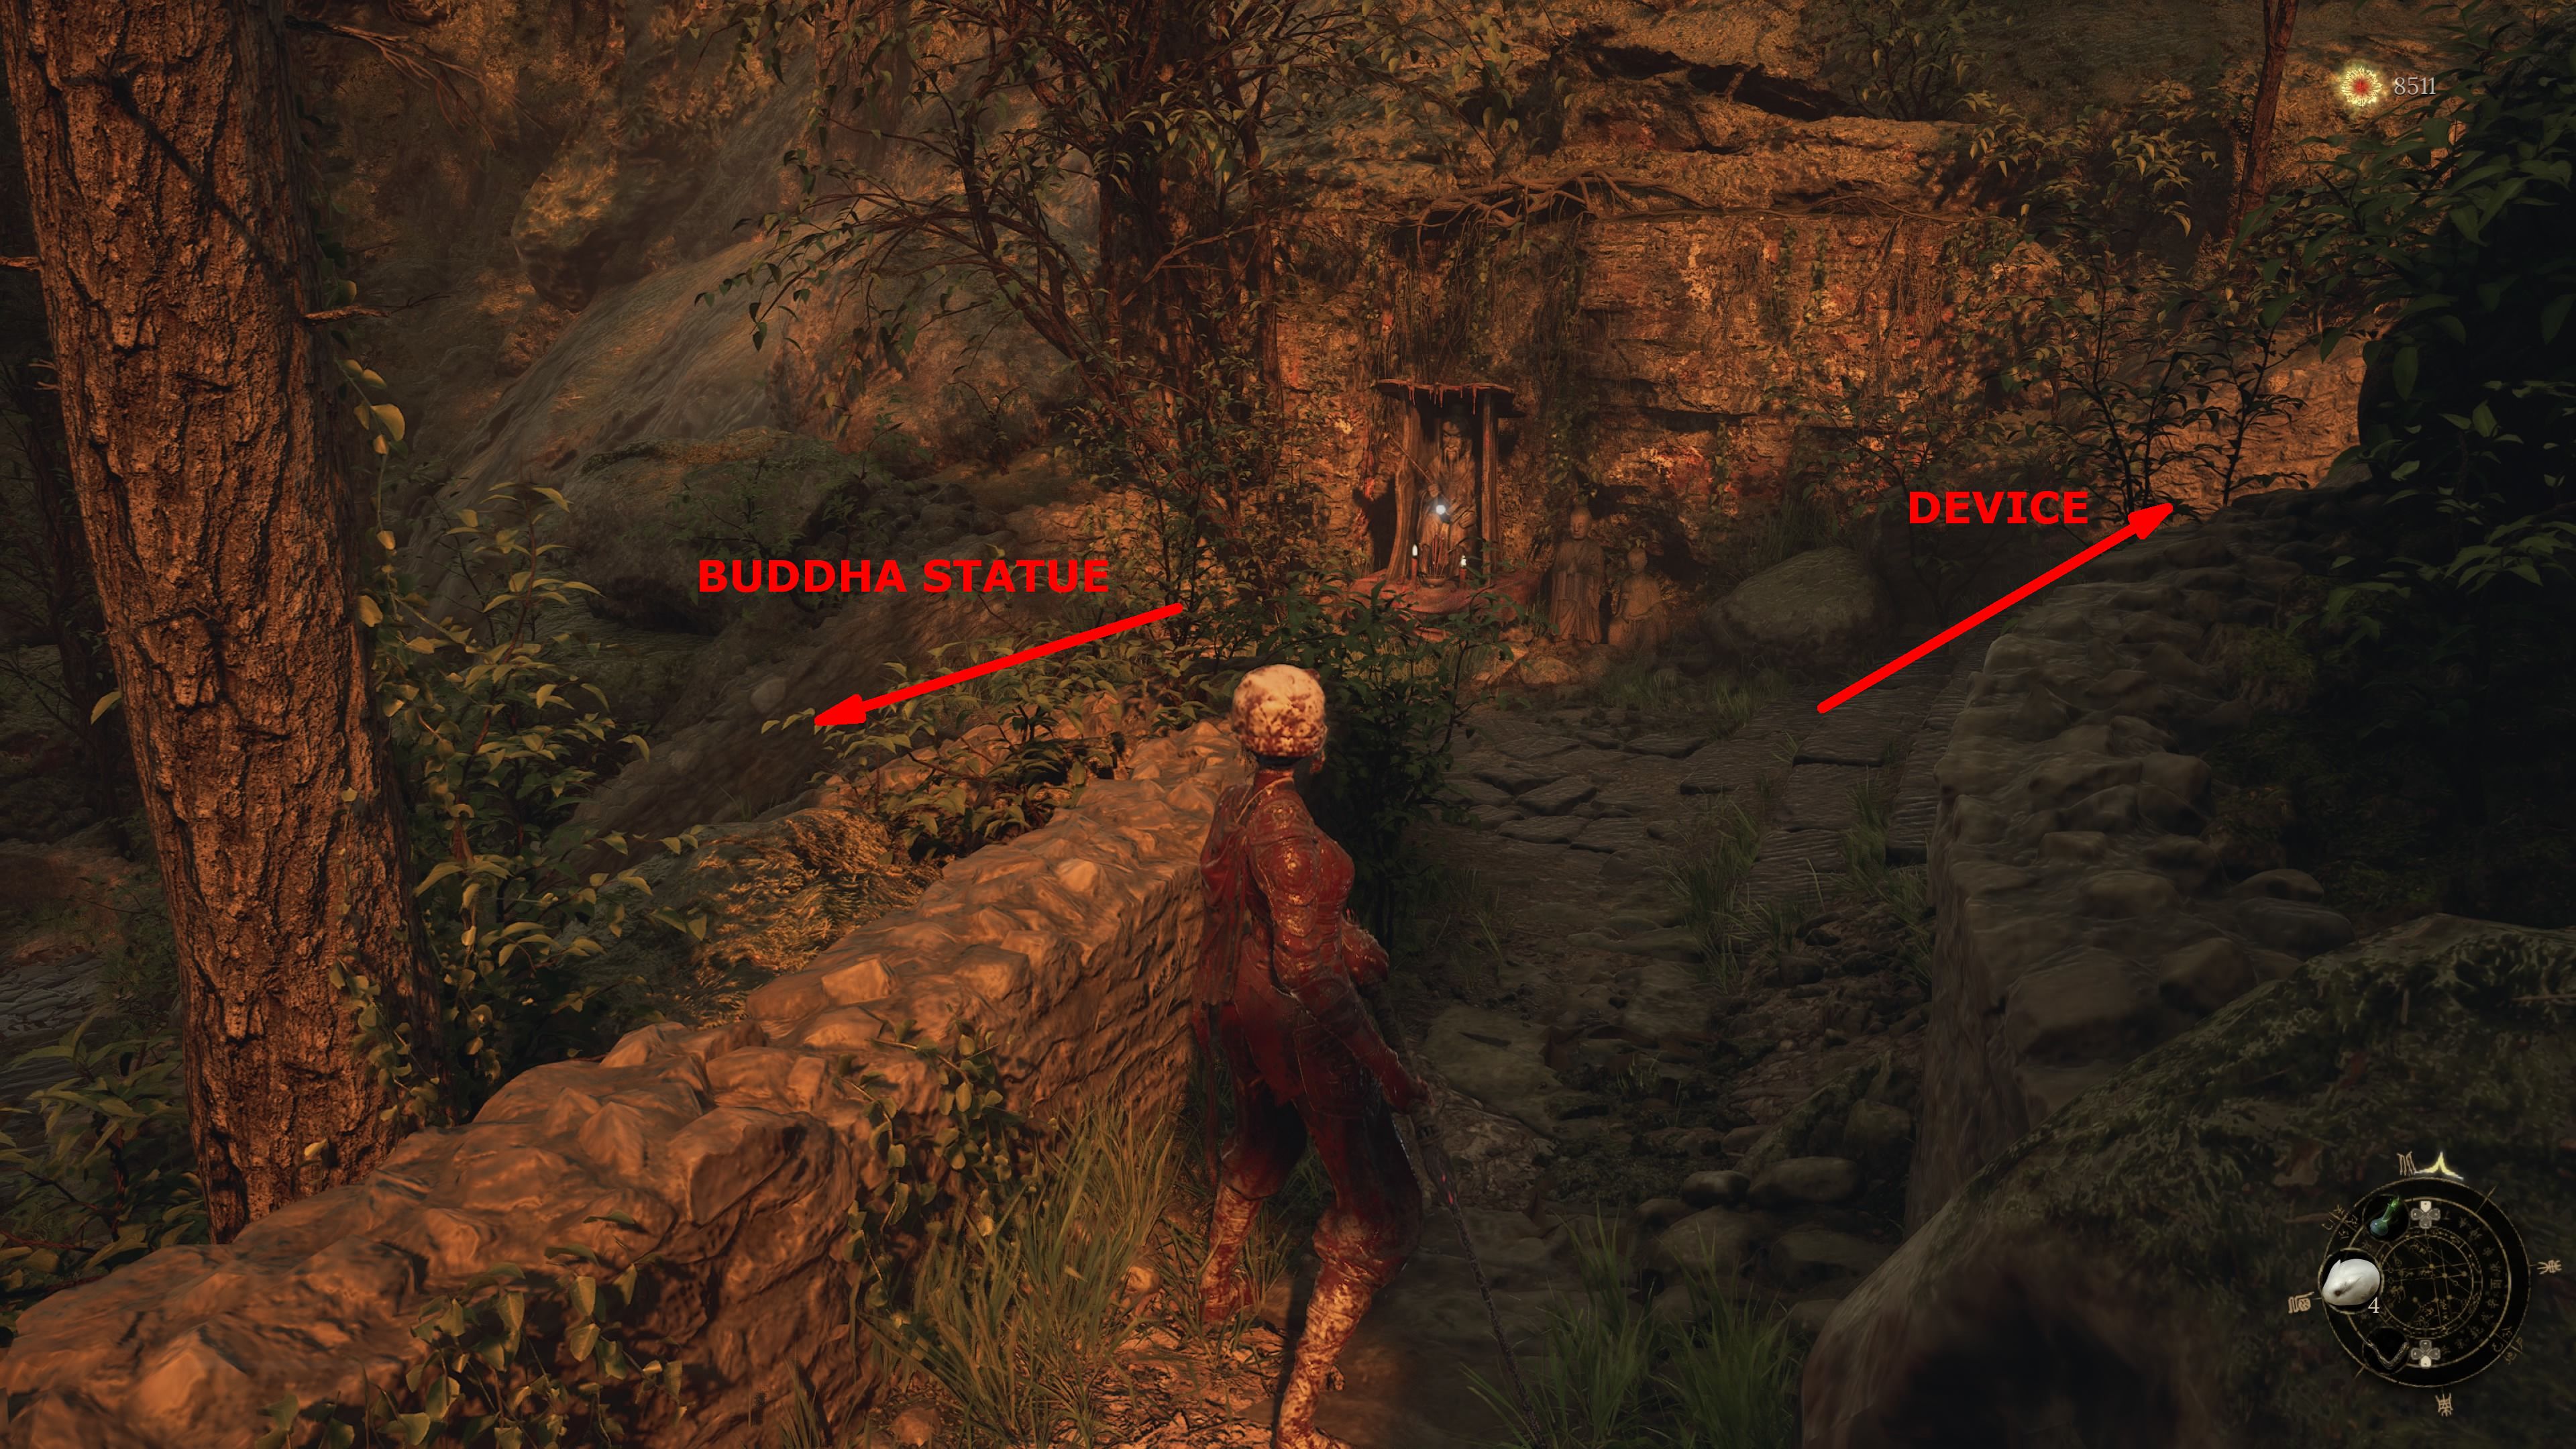
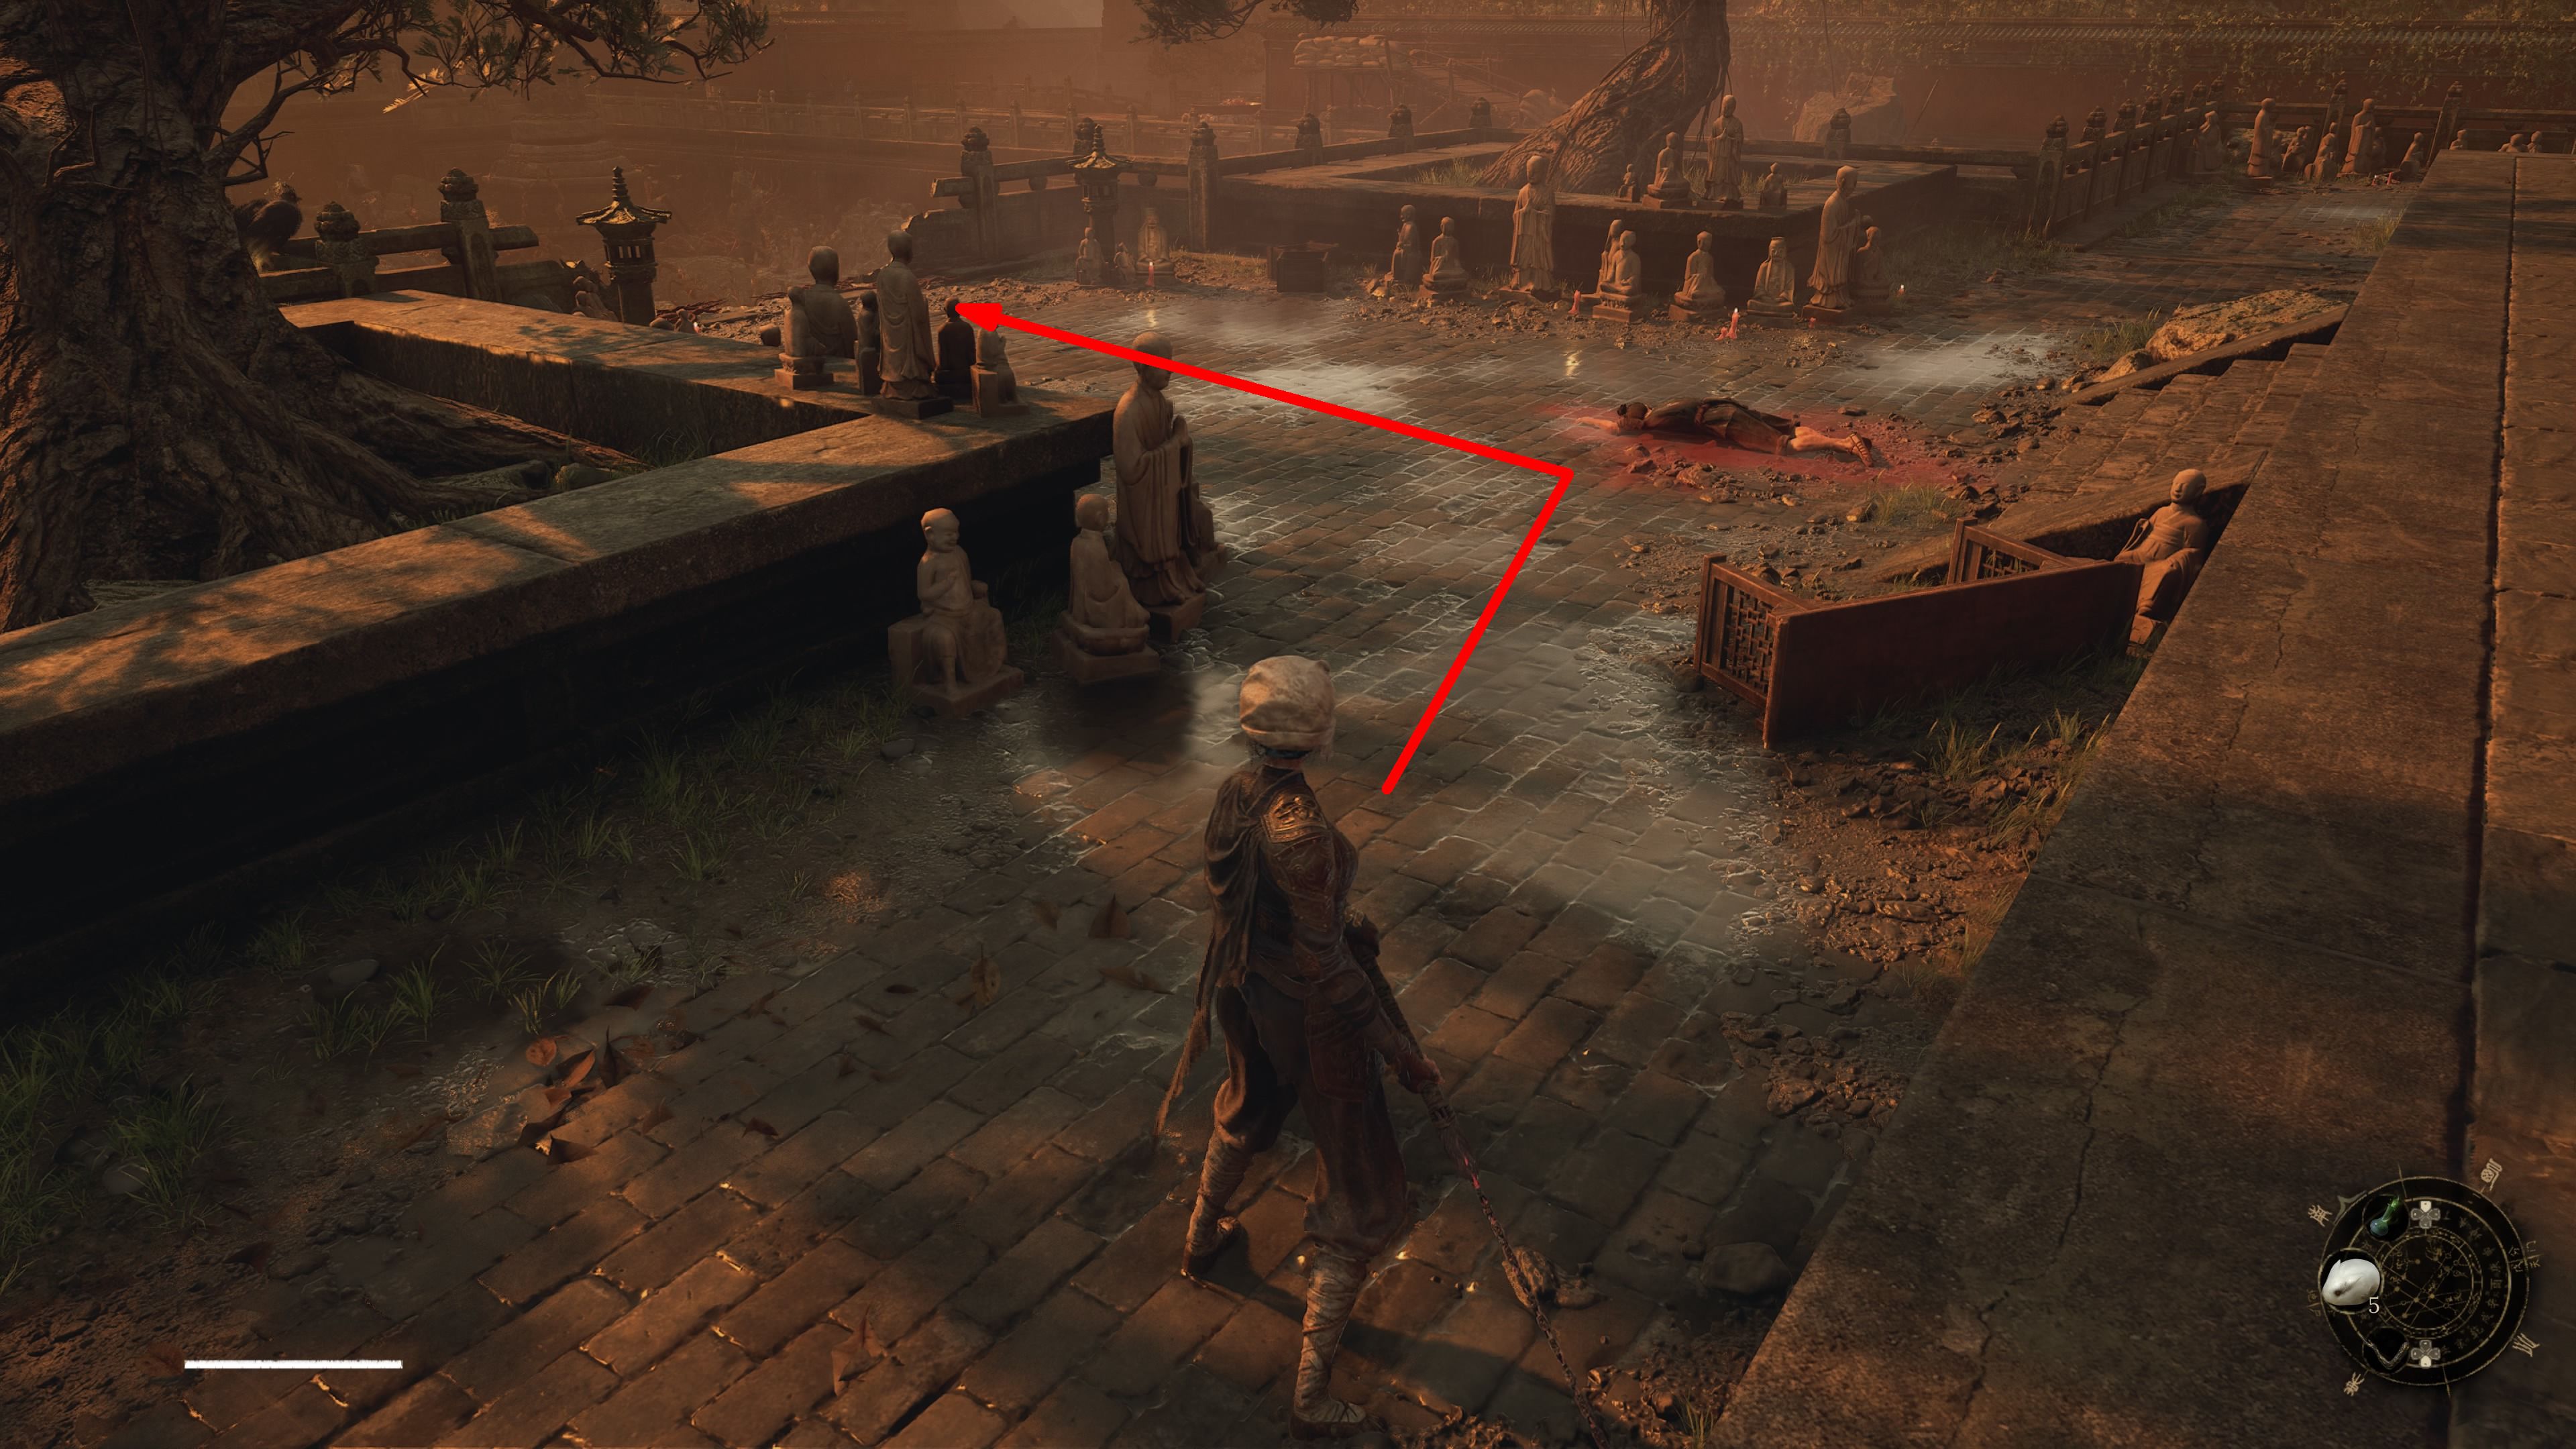
“Head left from Palace Hill Shine to spot a Buddha Statue. Carry that statue over to the spot right beside the Palace Hill Shrine and pop it into the device you’ll discover there. This action will empty the pool opposite the building with the Tang Palace Maid, and diving into that pool will initiate a battle with Commander Honglan.
For your convenience, I’m guiding you on how to reach this pool. Once you defeat Commander Honglan, the Lotus Pond Shrine will materialize in her arena.
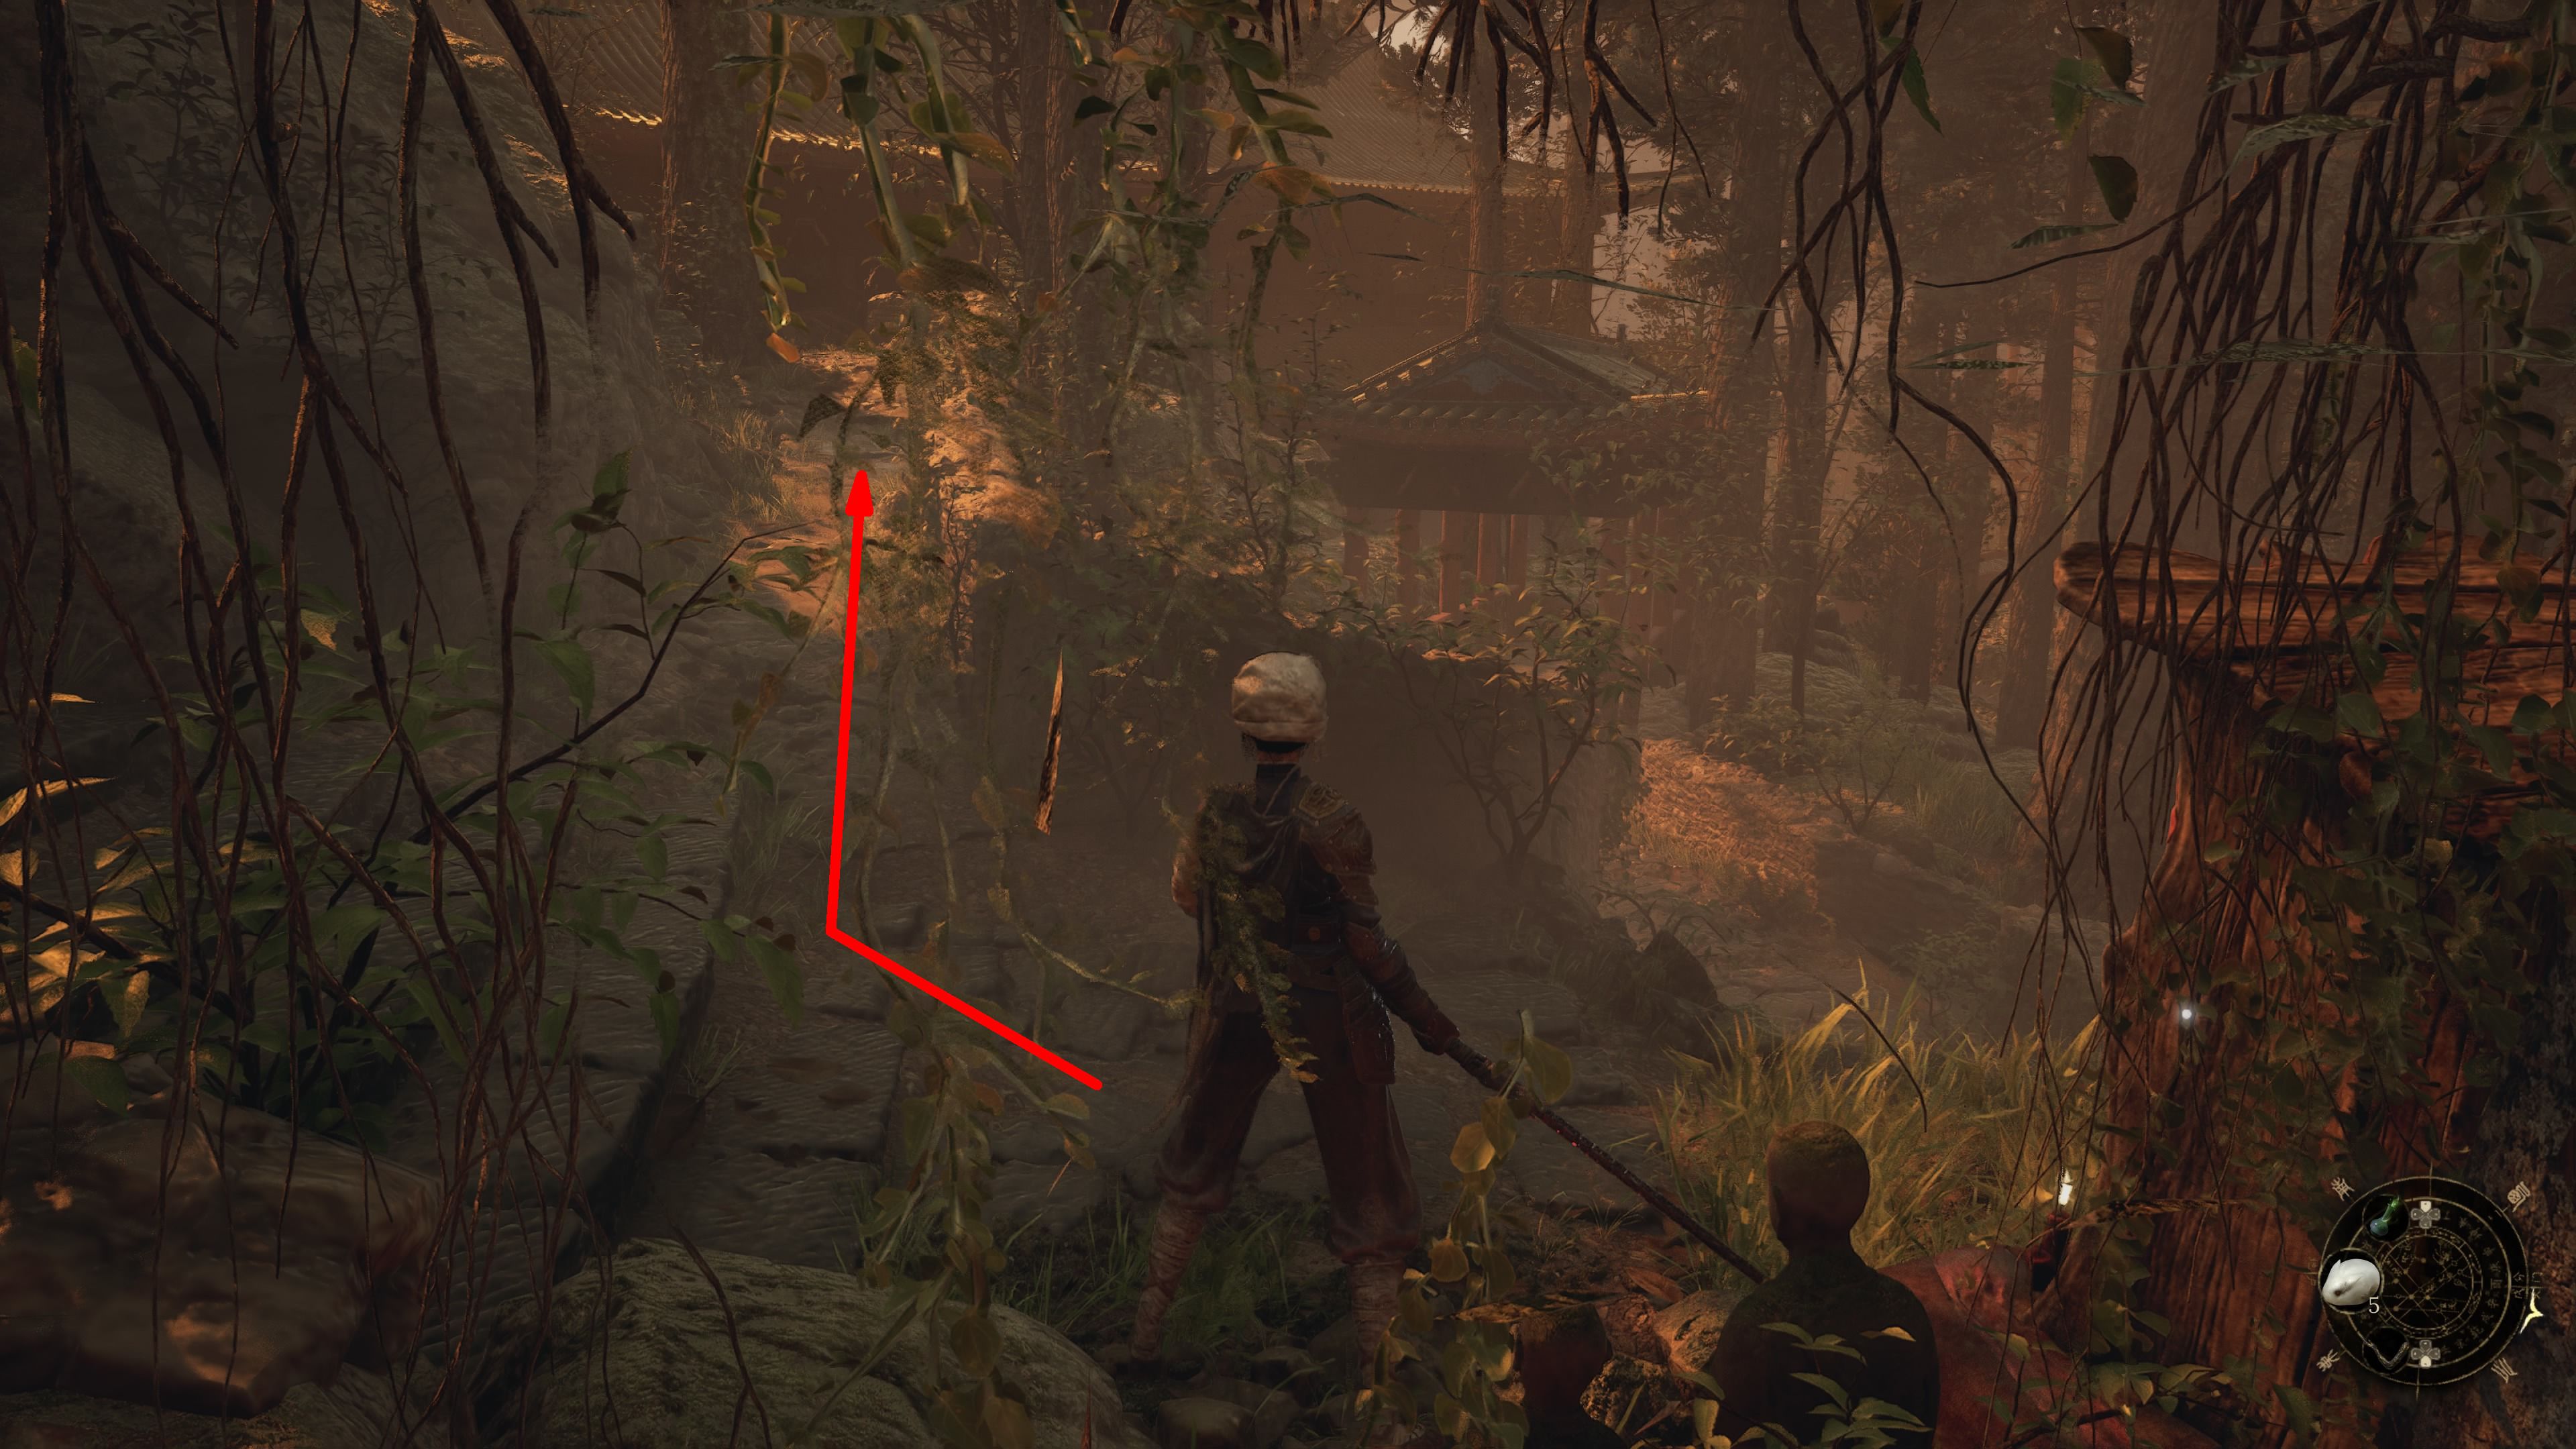
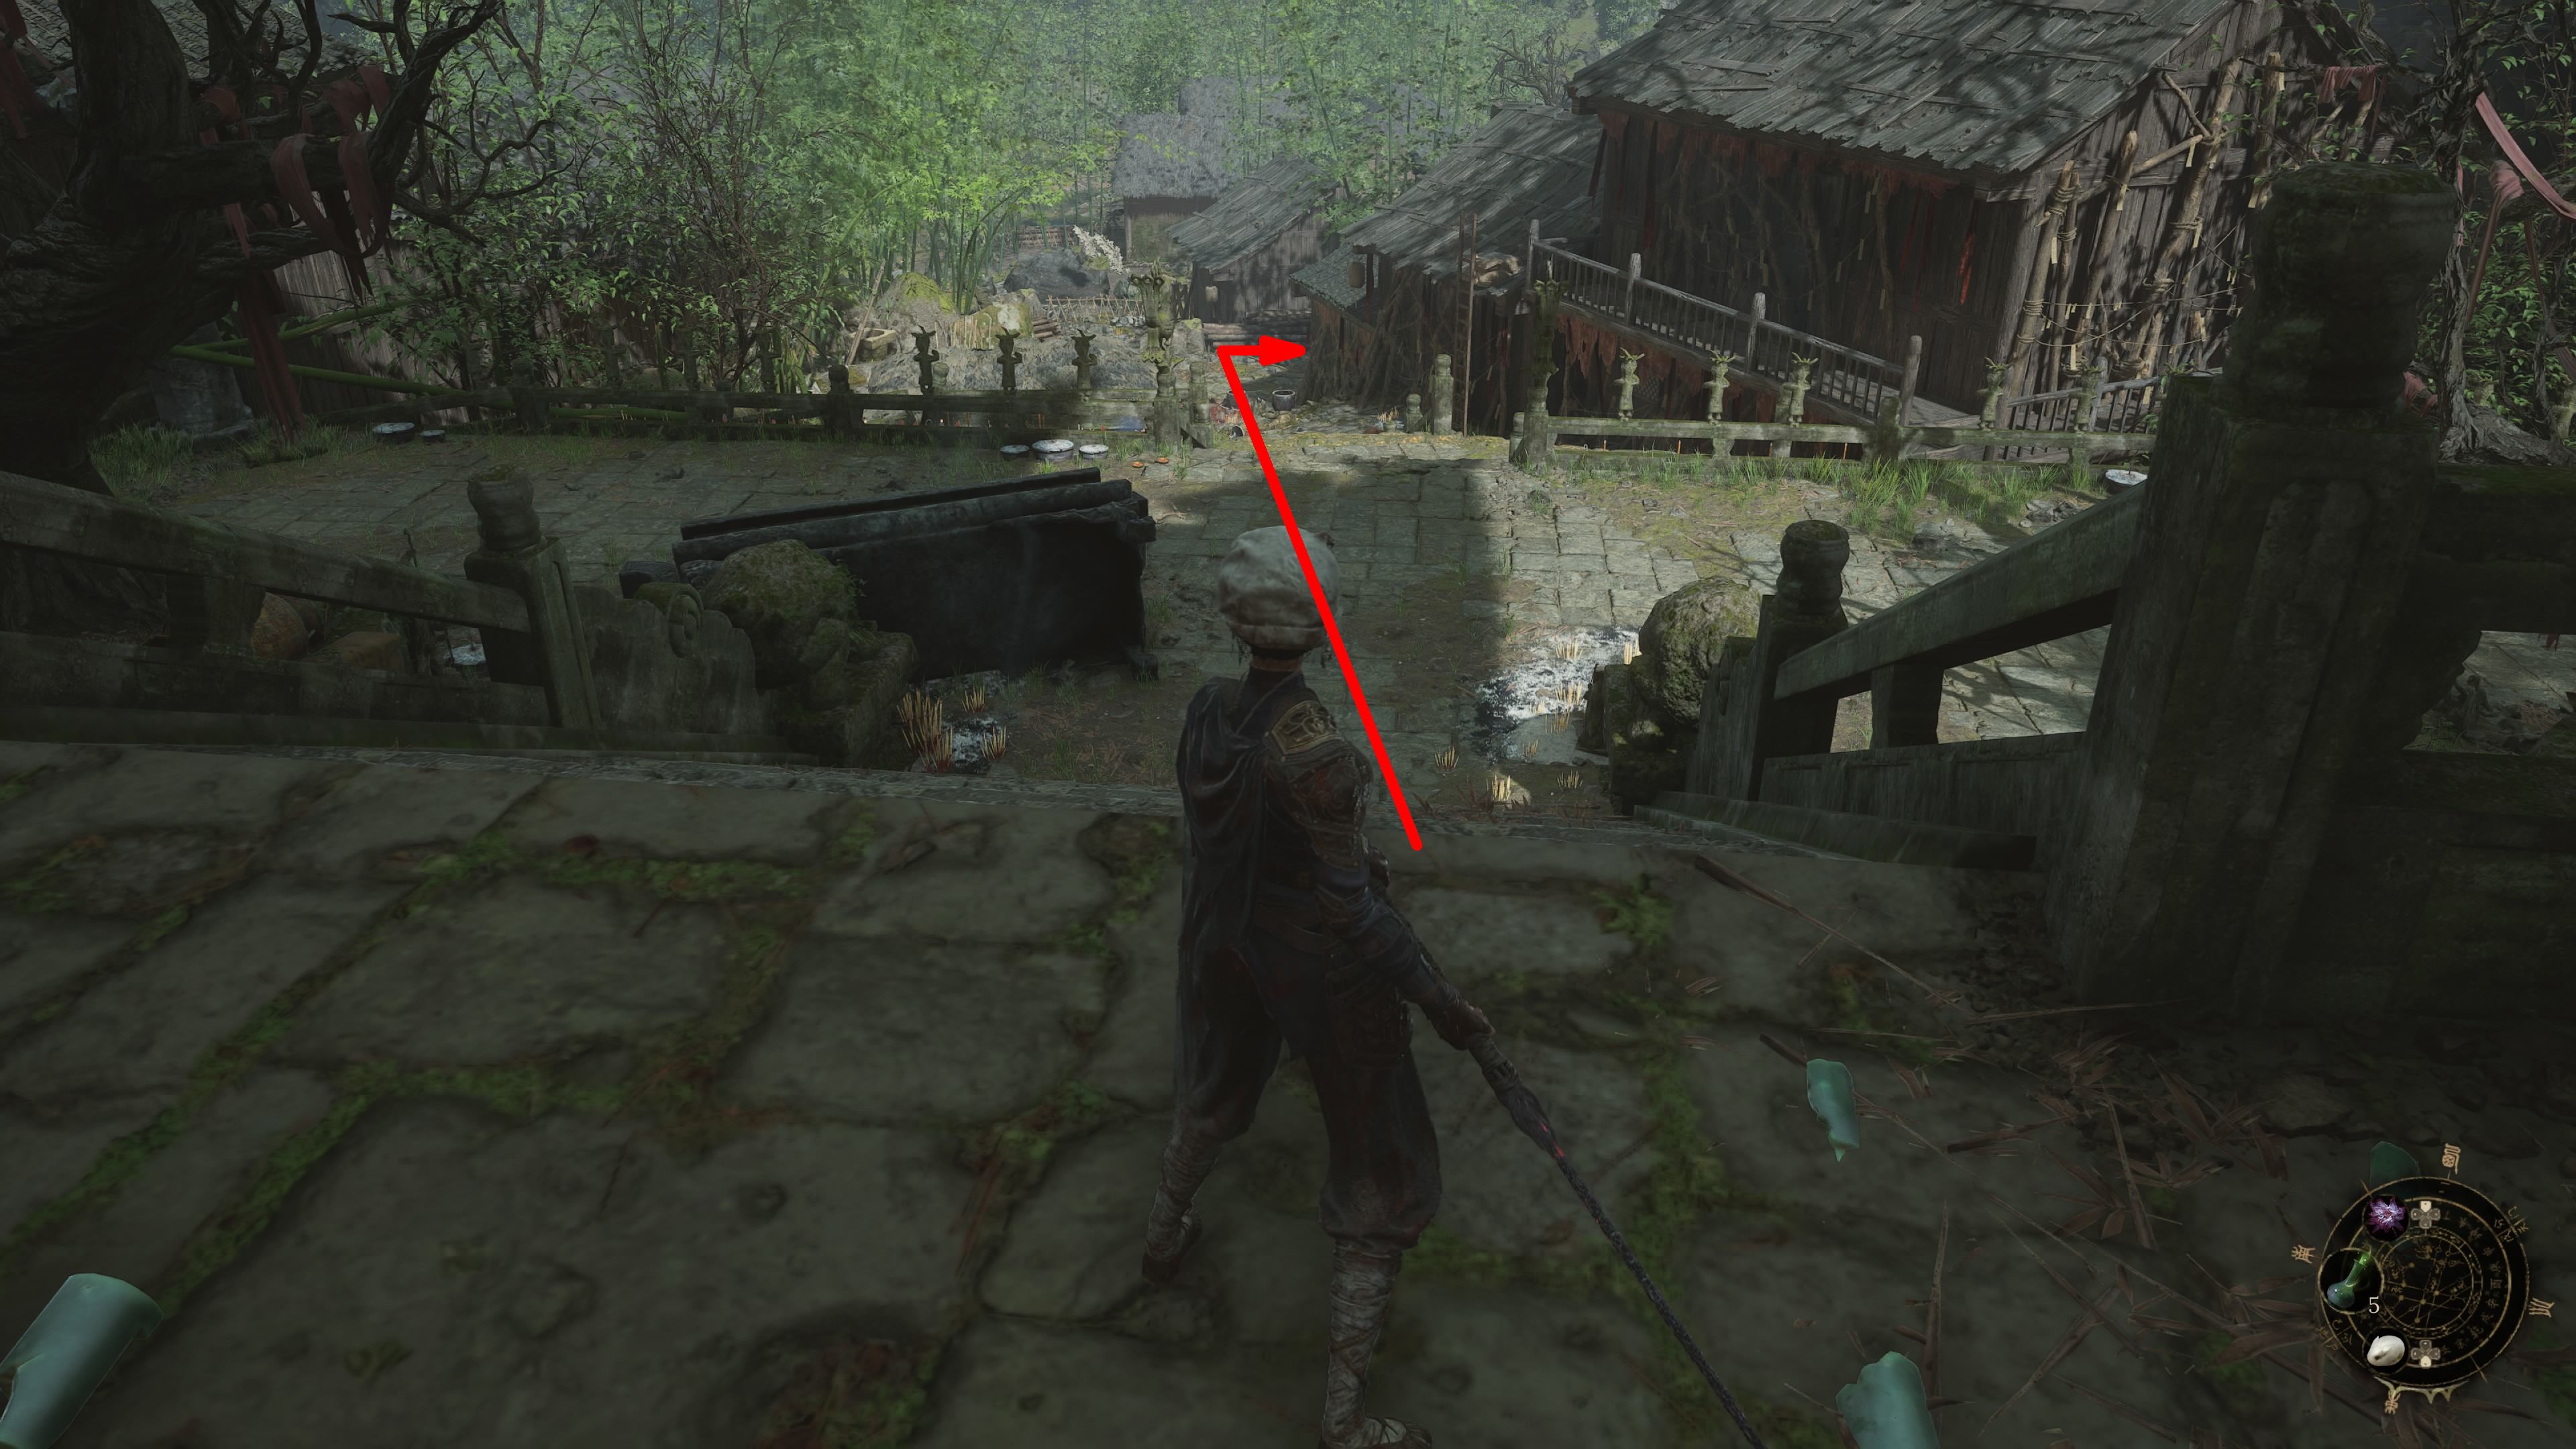
- Use the path across from the Palace Hill Shrine to reach a roof.
- Use the ladder on the left to descend.
- At the bottom, turn left, go forward, and turn right.
- Walk a few paces forward. The entrance to the Lotus Pond pool is now on your left.
In the game ‘Wuchang: Fallen Feathers’, upon defeating Honglan, players are instantly transported to the Reverent Temple. They must then navigate their way back to the Lotus Pond in order to activate its shrine.
Read More
- What Song Is In The New Supergirl Trailer (& What It Means For The DC Movie)
- Gold Rate Forecast
- Eurogamer Gives ARC Raiders 2/5 Over AI Voices, Dropping Metacritic Score from 94 to 84
- Ubisoft’s Best Game From the Last 5 Years Is Surprising
- Steve Rogers’ Return Means the MCU Can Finally Solve Avengers: Endgame’s Last Mystery
- This One Stranger Things Theory Explains a 9-Year-Old Season 1 Mystery, Sets Up the Finale, & is the Key to Future Spinoffs
- 7 Classic TV Shows With Criminally Low Rotten Tomatoes Scores
- Invincible Season 4 Confirms a Major Atom Eve Change From the Comics
- Teresa Giudice’s Real Housewives Season One Salary Revealed
- MOUSE: P.I. For Hire Loops in Caravan Palace for A Catchy New Track Ahead of April 16 Release
2025-07-24 07:07