If your Windows 11 computer has been running for a while, or you’re having problems like slowness, poor battery life, crashes, or viruses, the “Reset this PC” feature can often fix things quickly. It lets you reinstall Windows 11 with a fresh start, and you can choose to keep your personal files or erase everything for a completely clean system.
You have two options for resetting your system: you can restore it to how it was when you first got it while keeping your files and preferences, or you can completely erase everything to fix ongoing problems. This tool also lets you install a fresh copy of the operating system, which can help you avoid unwanted pre-installed software and customizations.
This guide will show you three ways to reset Windows 11 to its original factory state. You can choose to either keep your personal files or completely erase everything.
How to factory reset Windows 11 preserving files
Here’s how to restore your Windows 11 PC to its original factory condition while keeping your personal files intact:
- Open Settings.
- Click on System.
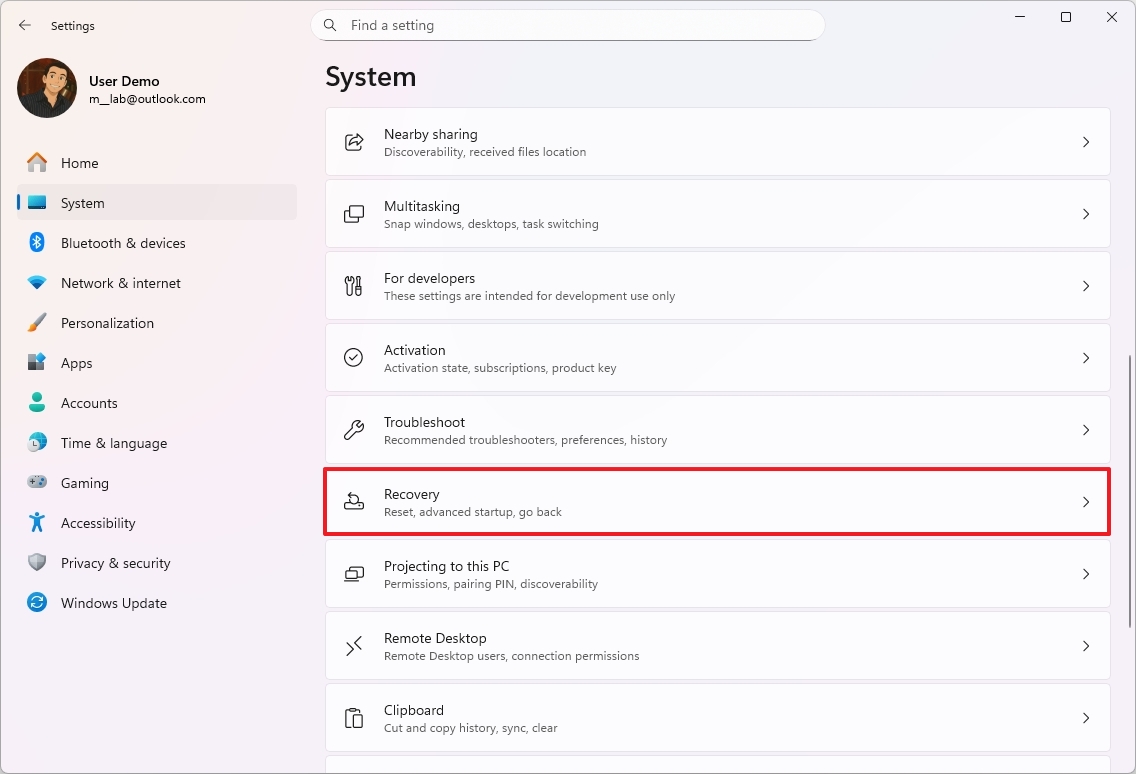
- Click the Recovery page on the right side.
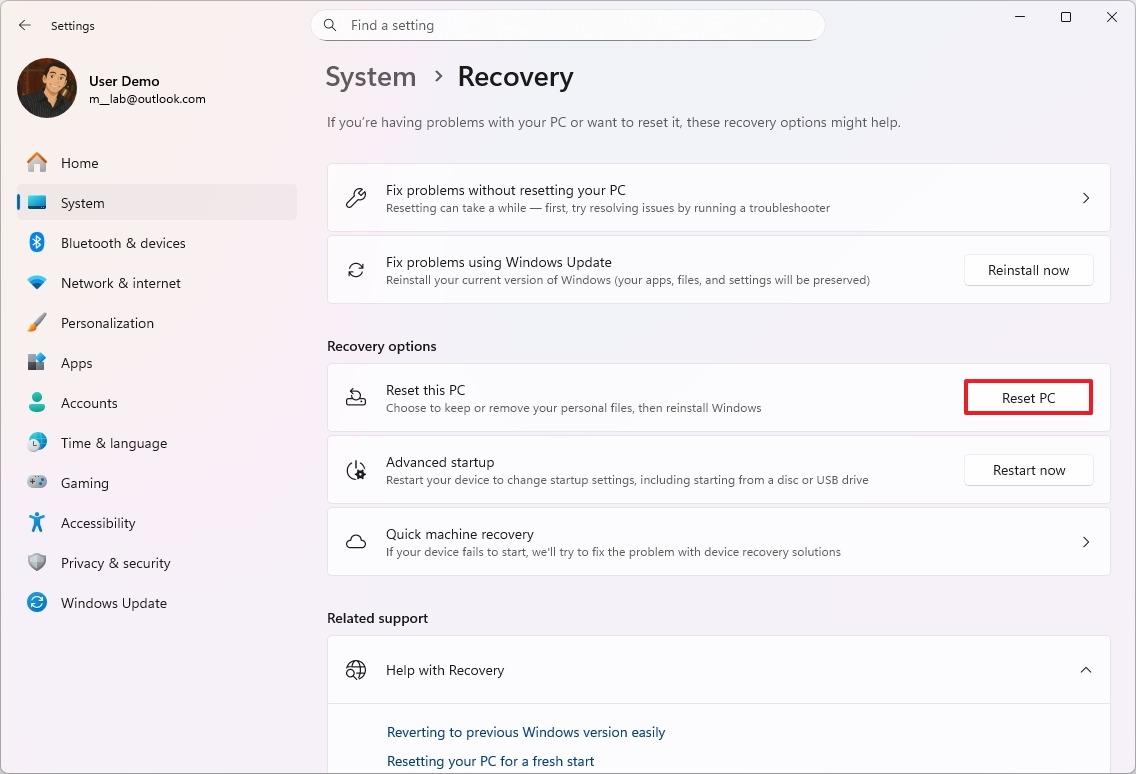
- Click the Reset PC button for the “Reset this PC” feature under the “Recovery options” section.
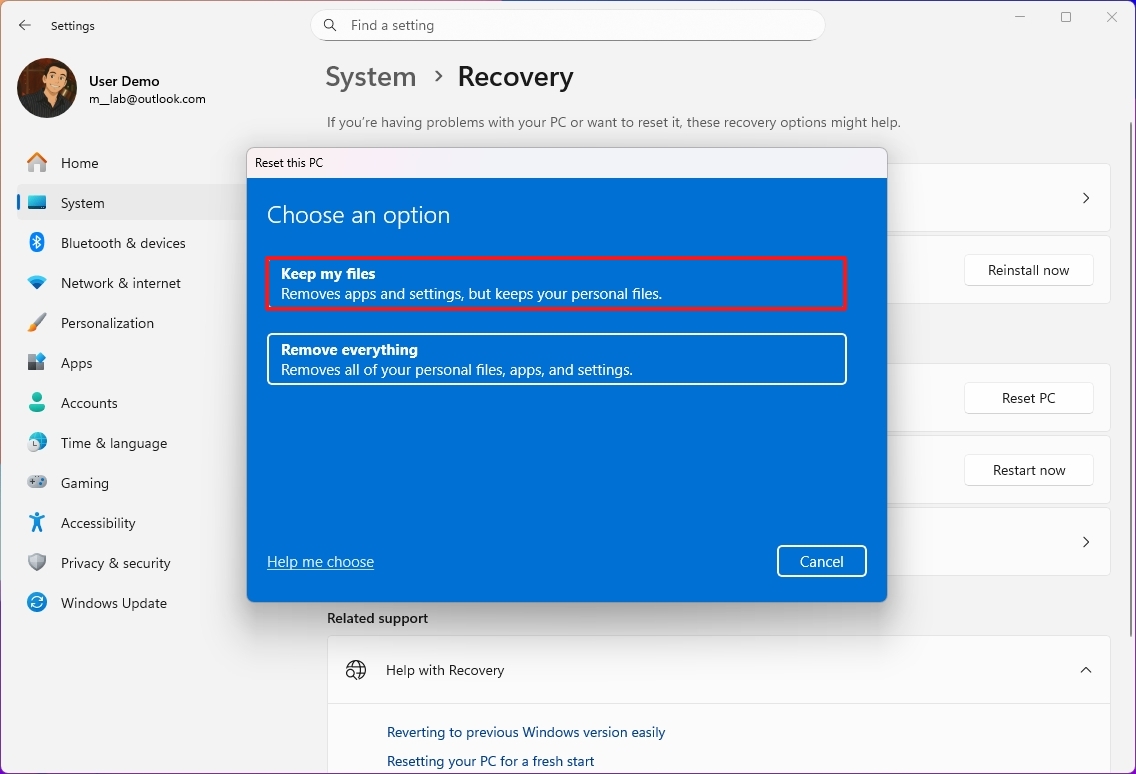
- Click the “Keep my files” option.
- Select the reset method:
- Cloud download: Gets a fresh copy of the installation files from the Microsoft servers and reinstalls Windows 11. However, this option won’t restore the tools, apps, custom drivers, and configuration that may have come with the original image provided by the manufacturer.
- Local reinstall: Uses the files locally available to reset the computer. This process will restore the factory drivers, settings, and tools if this is a branded device (such as Dell, ASUS, Lenovo, etc.).

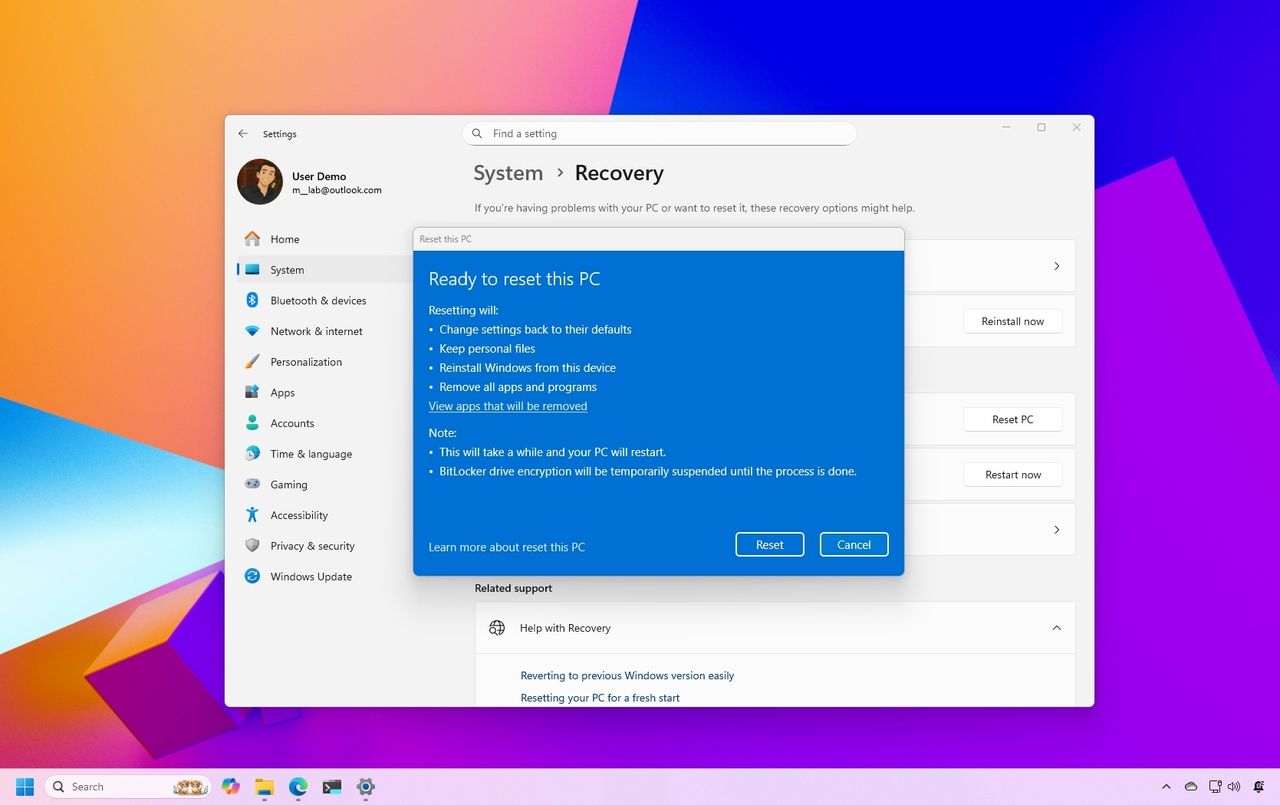
- Review the apps to reinstall after the reset to factory settings.
- Click the Next button.

- Click the Reset button.
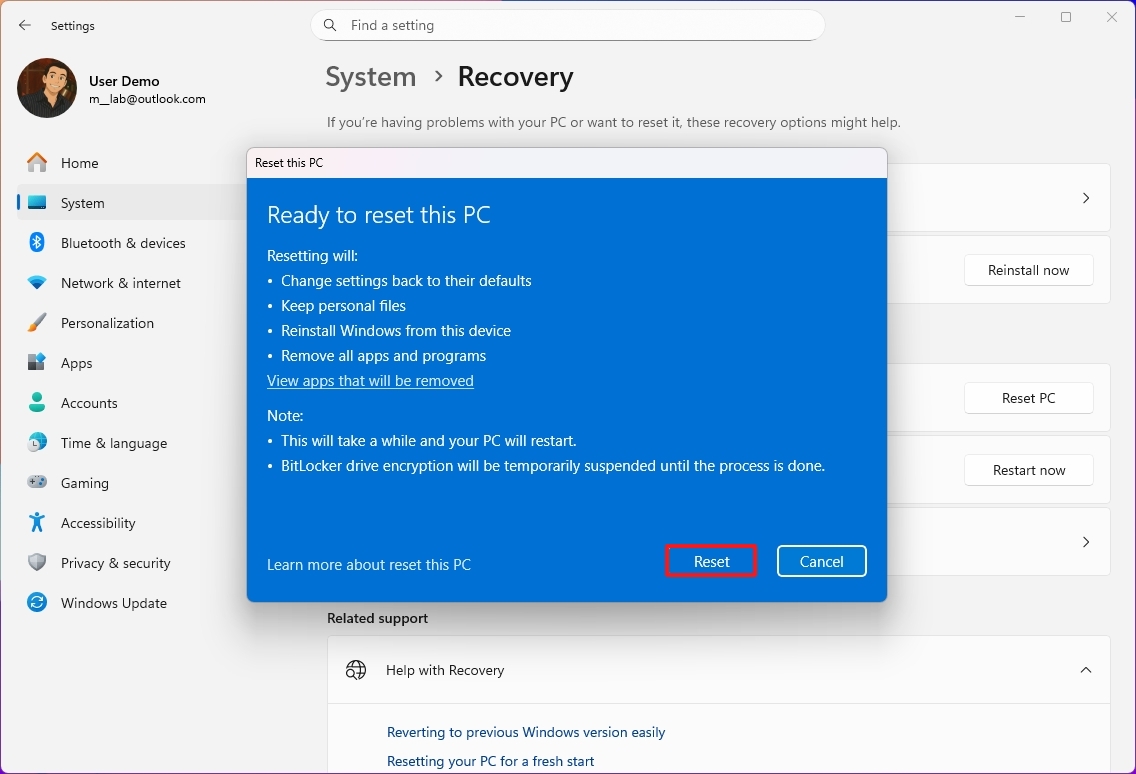
After finishing these steps, your computer will return to its original factory state, but your files will remain safe.
After factory reset
Once your device is reset, it’s best to check for updates to make sure you have the latest security features and drivers. You might also need to reinstall any apps you were using before.
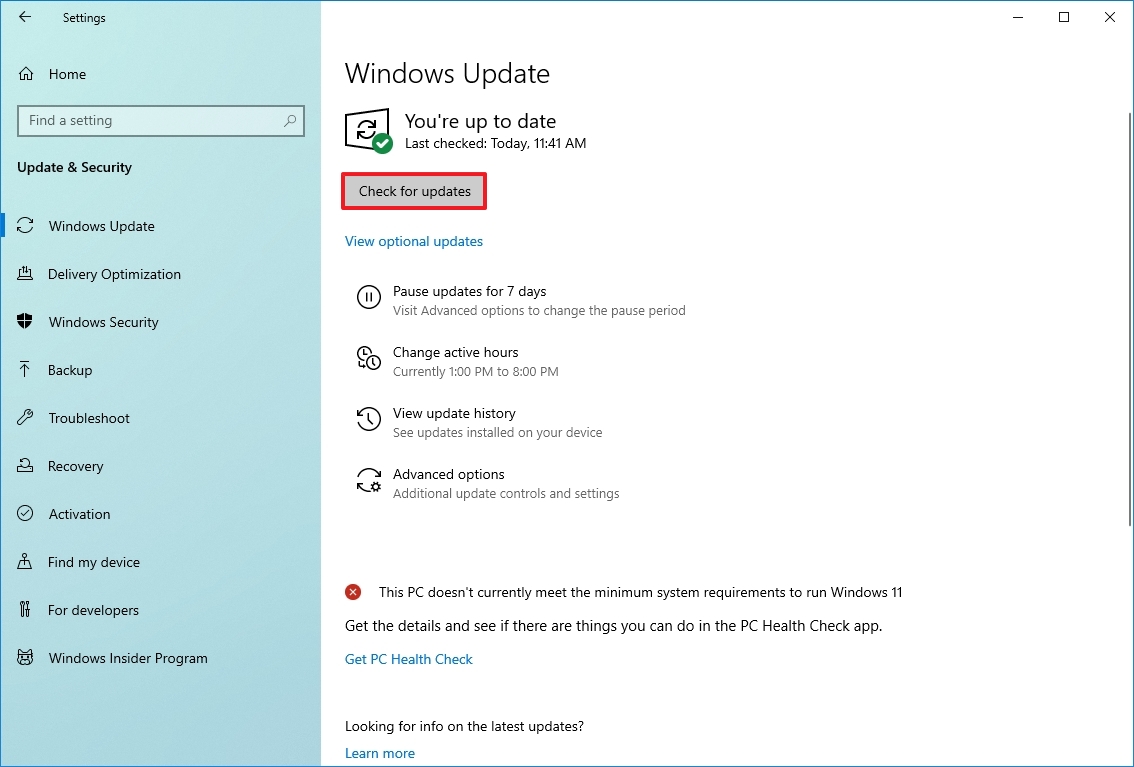
Check for updates
To install updates for Windows 11, use these steps:
- Open Settings.
- Click on Windows Update.
- Click the “Check for updates” button.
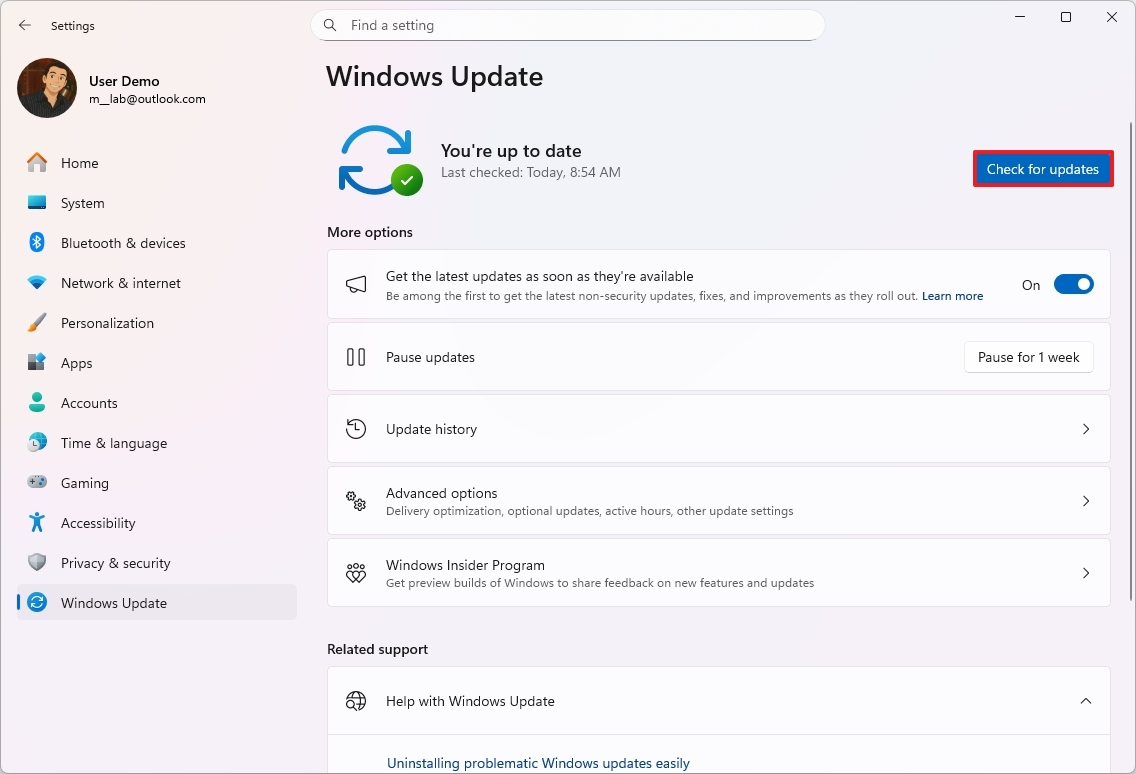
After you finish the setup, Windows Update will automatically download and install any new security fixes and driver updates that are available.
Check for missing drivers
To check for missing drivers after completing the reset of Windows 11, use these steps:
- Open Start.
- Search for Device Manager and click the top result to open the app.
- Confirm that there’s no branch called “Other devices,” which usually lists devices without drivers.
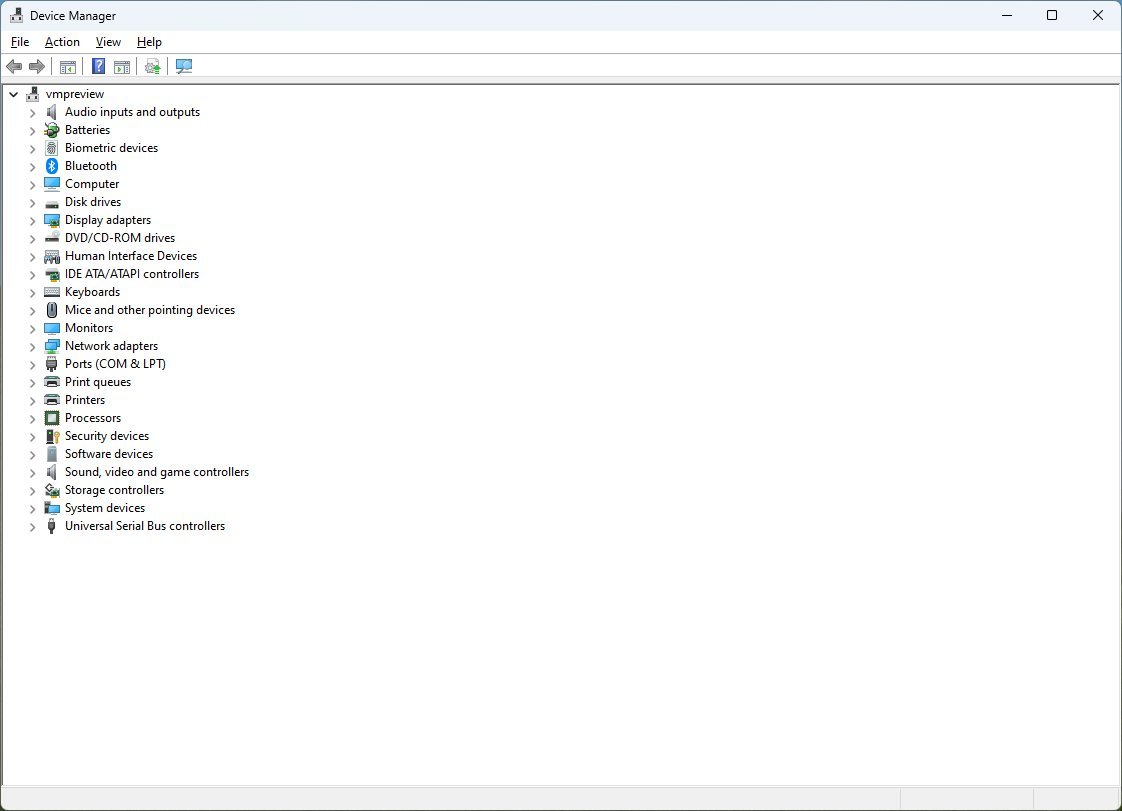
If your computer isn’t recognizing some of its hardware, visit the manufacturer’s website to download and install the newest drivers. This often fixes the problem.
Finally, if you had any apps installed before, reinstall them now.
How to factory reset Windows 11 using remove everything option
If you want to completely reset your computer – the one you use for work or gaming – and erase everything on it, follow these steps:
- Open Settings.
- Click on System.
- Click the Recovery page on the right side.
- Click the Reset PC button for the “Reset this PC” feature under the “Recovery options” section.
- Click the Remove everything option.

- Select the Cloud download or Local reinstall, depending on how you want to reset the system.
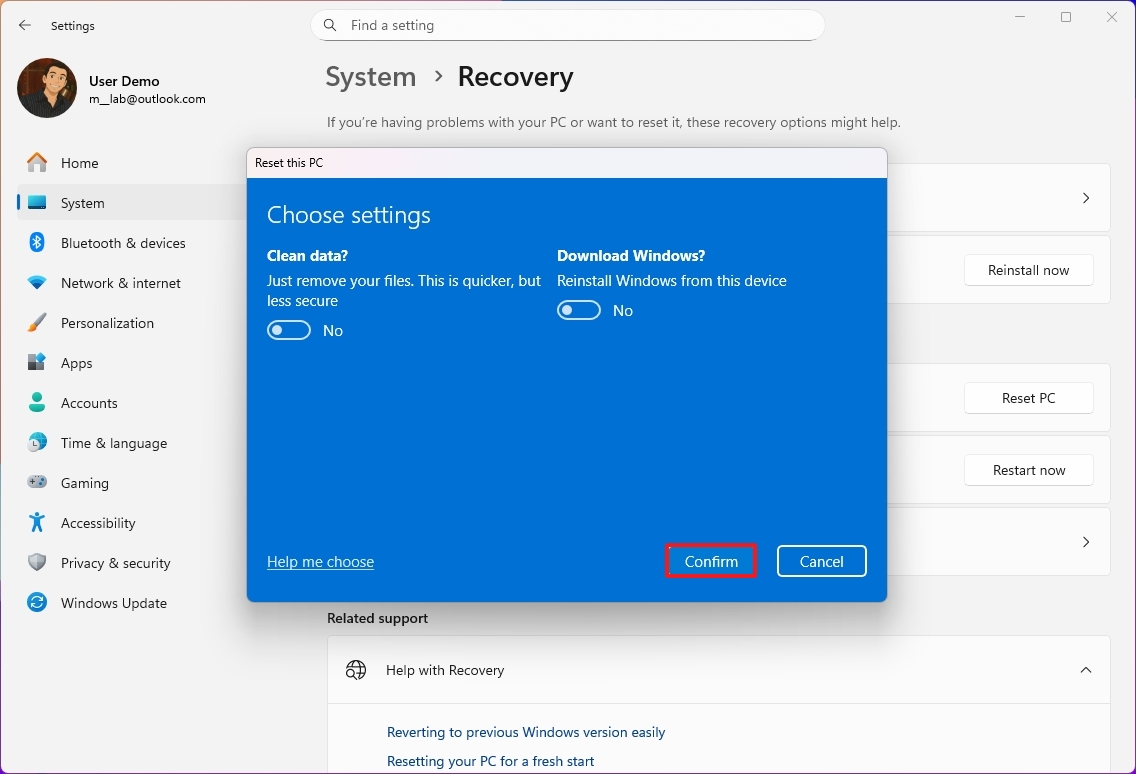
- (Optional) Click the Change settings option.
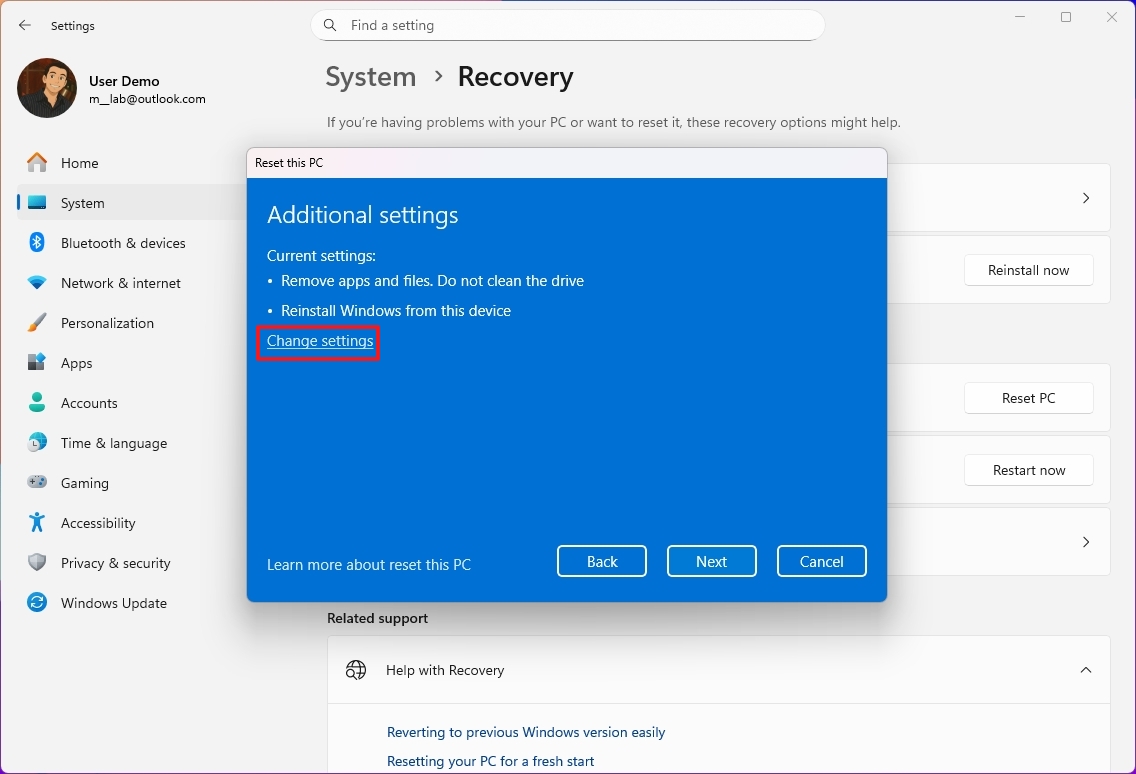
- Turn on the “Data erasure toggle” switch.
- Quick note: Only use this option to prepare the computer to get rid of it. Otherwise, the default reset settings are recommended if you are trying to refresh the installation.
- Turn on the Data drives toggle switch to erase the Windows 11 installation drive and any other storage drive connected to your computer (if applicable).
- Click the Confirm button.
- Review the apps to reinstall after the reset to factory settings.
- Click the Next button.
- Click the Reset button.

Once the steps are finished, your drives will be wiped clean and a fresh copy of the operating system will be installed – the exact process depends on your settings.
After factory reset
If you’re finished with the computer, no further action is needed. But if you want to continue using it, you’ll need to update the system, install any missing drivers, and reinstall your applications. Don’t forget to restore your files from a backup.
Checking for updates
To install updates for Windows 11, use these steps:
- Open Settings.
- Click on Windows Update.
- Click the “Check for updates” button.
After you finish the steps, Windows Update will automatically download and install any updates or drivers that are needed.
Check for missing drivers
To check for missing drivers after the “Reset this PC,” use these steps:
- Open Start.
- Search for Device Manager and click the top result to open the app.
- Confirm that there’s no branch called “Other devices,” which usually lists devices without drivers.
If any of your computer’s parts aren’t working correctly, visit the manufacturer’s website to download and install the newest drivers for them.
Restore files from backup
If you backed up your files, now’s the time to get them back. How you restore them will depend on how you made the backup.
If you’re using OneDrive, your files might already be automatically updated on your device. If not, you may need to adjust the app’s settings again.
If you saved your files to an external hard drive yourself, plug it in and follow these instructions:
- Open File Explorer.
- Click on This PC from the left pane.
- Double-click the storage with the file backup under the “Devices and drives” section.
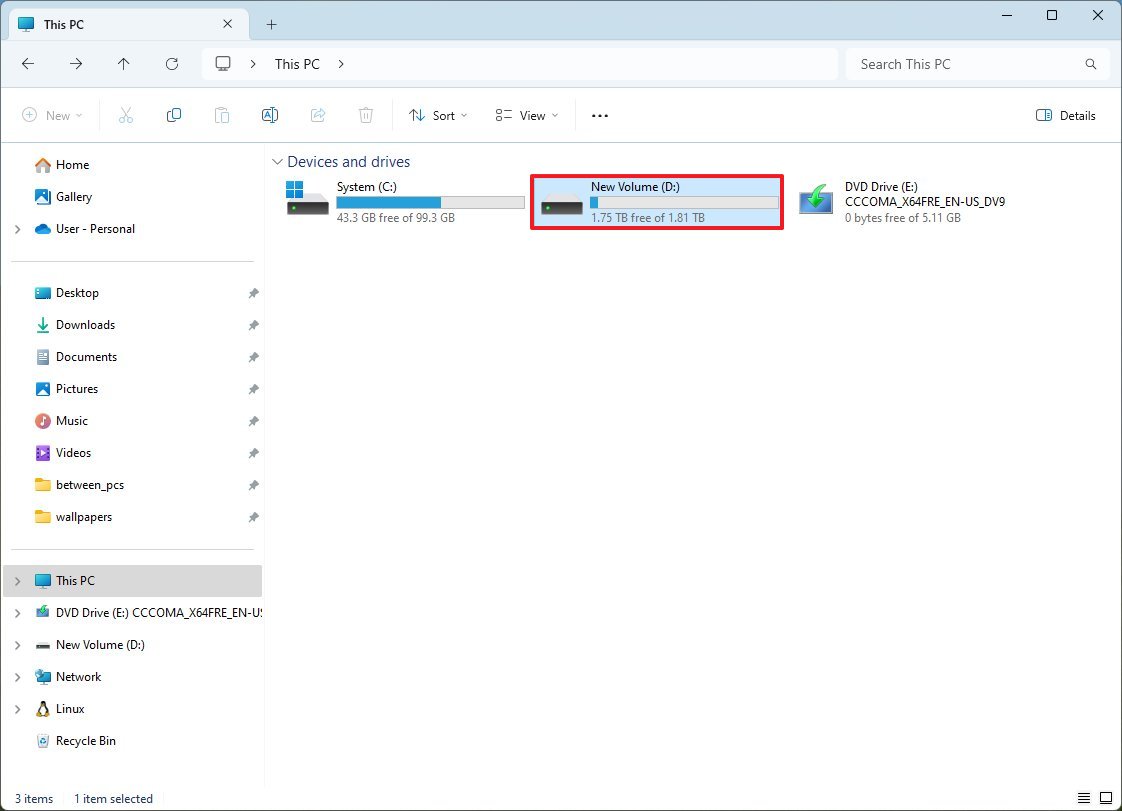
- Select the files and folders.
- Click the Copy button.

- Open the destination folder.
- Click the Paste button from the command bar.
After finishing these steps, you might need to repeat them to recover any other files you need. If you have any apps that are missing, install them now.
More resources
How to factory reset Windows 10 using keep my files option
Windows 10 is generally dependable, but problems can still occur over time. You might experience issues with startup, shutdown, slow performance, high memory usage, or a quickly draining battery. When these things happen, resetting your computer to its factory settings can often help.
If your computer is running slowly or having other performance problems, Windows 10 offers several ways to restore it to like-new condition. You can choose to keep your personal files or remove them during the reset process. Plus, you can use the official Windows installation files instead of the recovery image provided by your computer’s manufacturer, which sometimes includes unnecessary programs and settings.
This guide will show you how to refresh your Windows 10 computer to its original state without losing your personal files or completely wiping it clean.
To reset Windows 10 to the factory default settings without losing your files, use these steps:
- Open Settings.
- Click on Update & Security.
- Click on Recovery.
- Under the “Reset this PC” section, click the Get started button.
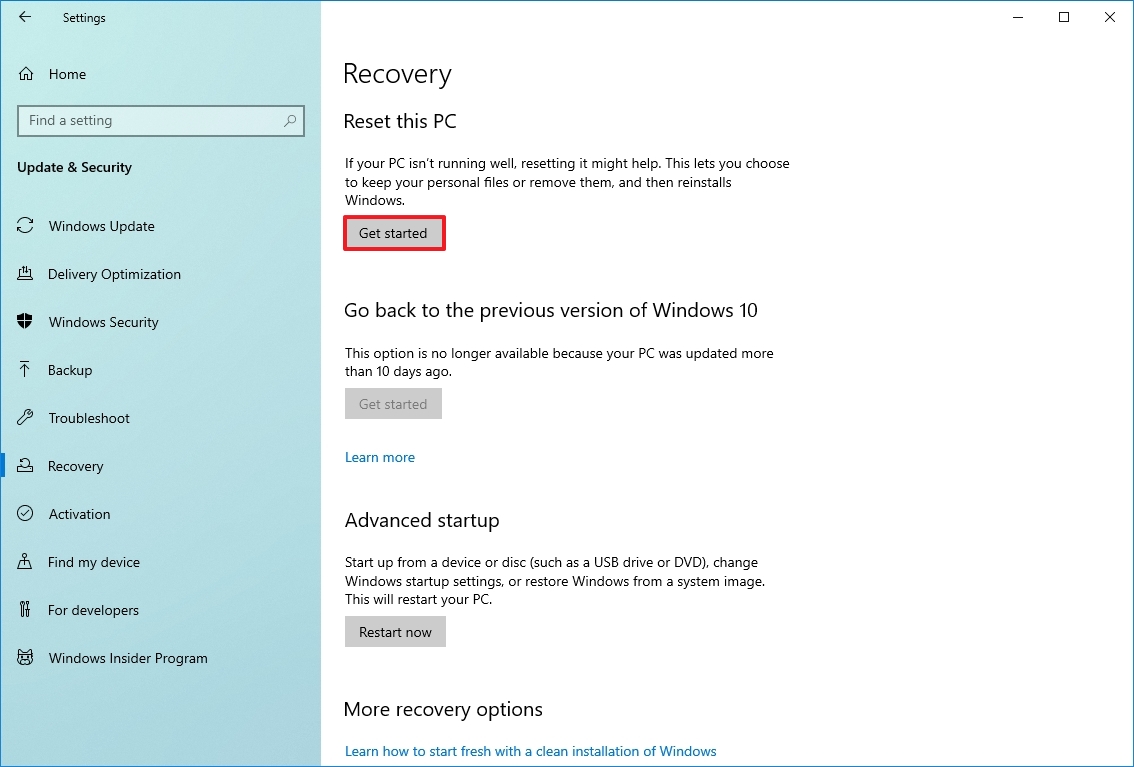
- Click the “Keep my files” option.

- Choose the Windows 10 reset option:
- Cloud download: Download a fresh copy of the installation from the cloud and reinstall Windows 11. However, this option will not restore the tools, apps, and configuration that came with the original image provided by the manufacturer.
- Local reinstall: Uses the files already available to reset the computer. If this is a branded device (such as Dell, ASUS, Lenovo, etc.), this process will restore the factory drivers, settings, and tools.

- Click the Next button.
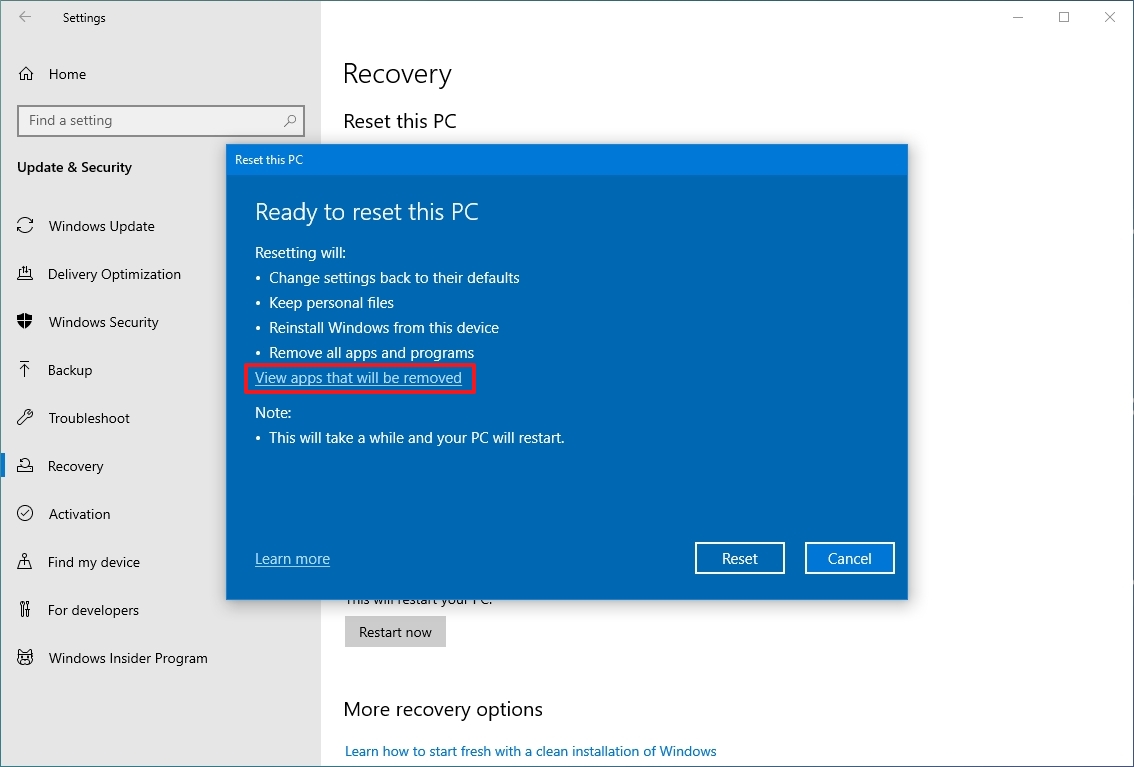
- Check the apps you’ll need to reinstall after resetting factory settings.
- Click the Reset button.
After you finish these steps, your device will return to its original factory condition, but your files will remain safe.
After factory reset steps
Once the reset is finished, be sure to check for updates to get the latest security fixes, patches, and drivers for Windows 10. You’ll also need to reinstall any apps you were using.
Check for updates
To install updates for Windows 10, use these steps:
- Open Settings.
- Click on Update & Security.
- Click on Windows Update.
- Click the Check for updates option.
After you finish these steps, Windows will automatically download and install any updates or drivers that are needed.
Check for drivers
To check for missing drivers after reset, use these steps:
- Open Start.
- Search for Device Manager and click the top result to open the tool.
- Confirm that there’s no branch called “Other devices,” which usually lists any missing device driver.

If your computer or other devices aren’t working correctly because of outdated or missing drivers, these instructions will help you update them.
The last thing left is to reinstall any previously installed app on your computer (if applicable).
How to factory reset Windows 10 using remove everything option
To use the reset feature to remove everything on a computer, use these steps:
- Open Settings.
- Click on Update & Security.
- Click on Recovery.
- Under the “Reset this PC” section, click the Get started button.
- Click the Remove everything option.

- Choose the Windows 10 reset option:
- Cloud download: Download a fresh copy of the installation from the cloud and reinstall Windows 11. However, this option will not restore the tools, apps, and configuration that came with the original image provided by the manufacturer.
- Local reinstall: Uses the files already available to reset the computer. If this is a branded device (such as Dell, ASUS, Lenovo, etc.), this process will restore the factory drivers, settings, and tools.
- (Optional) Click the Change settings option.
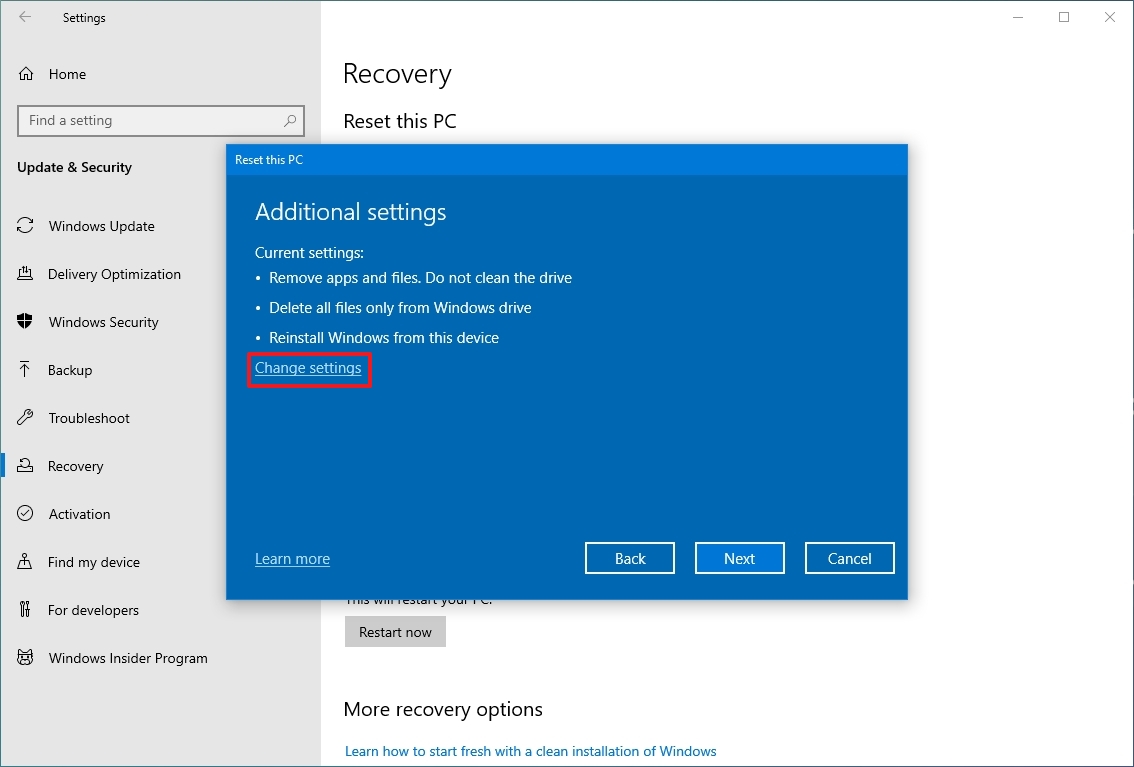
- (Optional) Turn on the “Delete files from all drives” toggle switch if you have multiple drives and you only want to erase the installation storage.
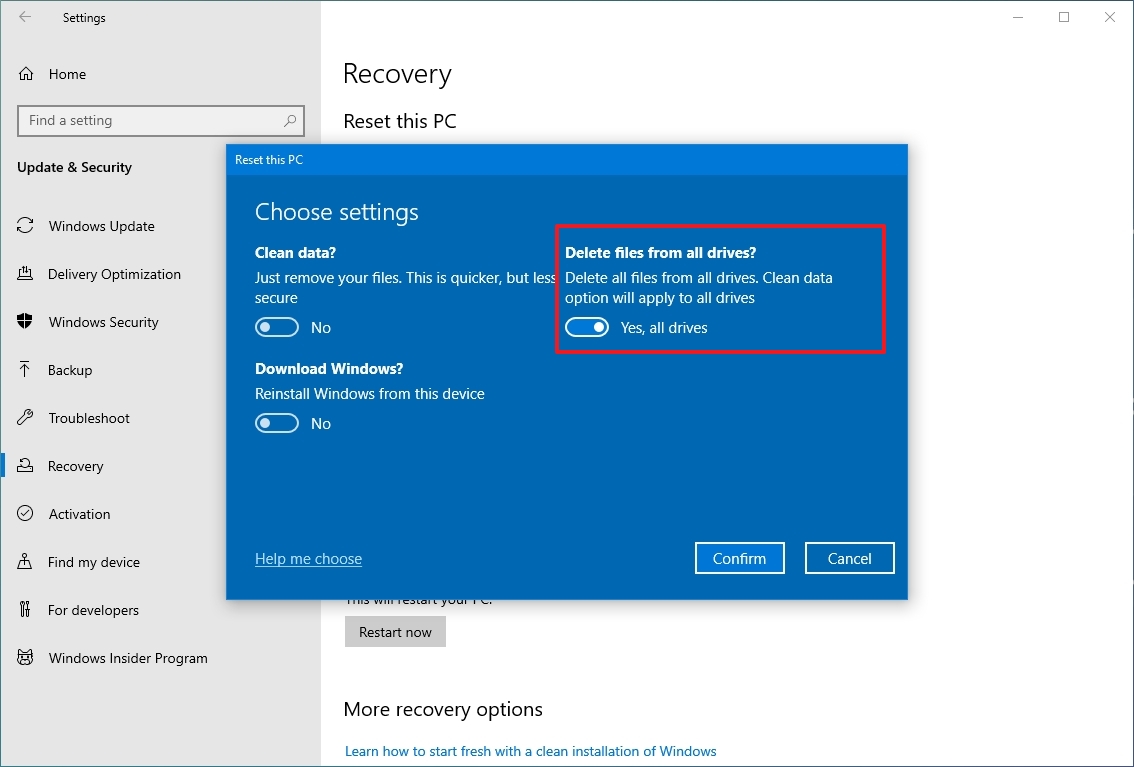
- Click the Confirm button.
- (Optional) Click the “Show me the list of drives that will be affected” option to see drives that will be erased during the reset process.

- Click the Back button.
- Click the Next button.
- Click the Reset button.
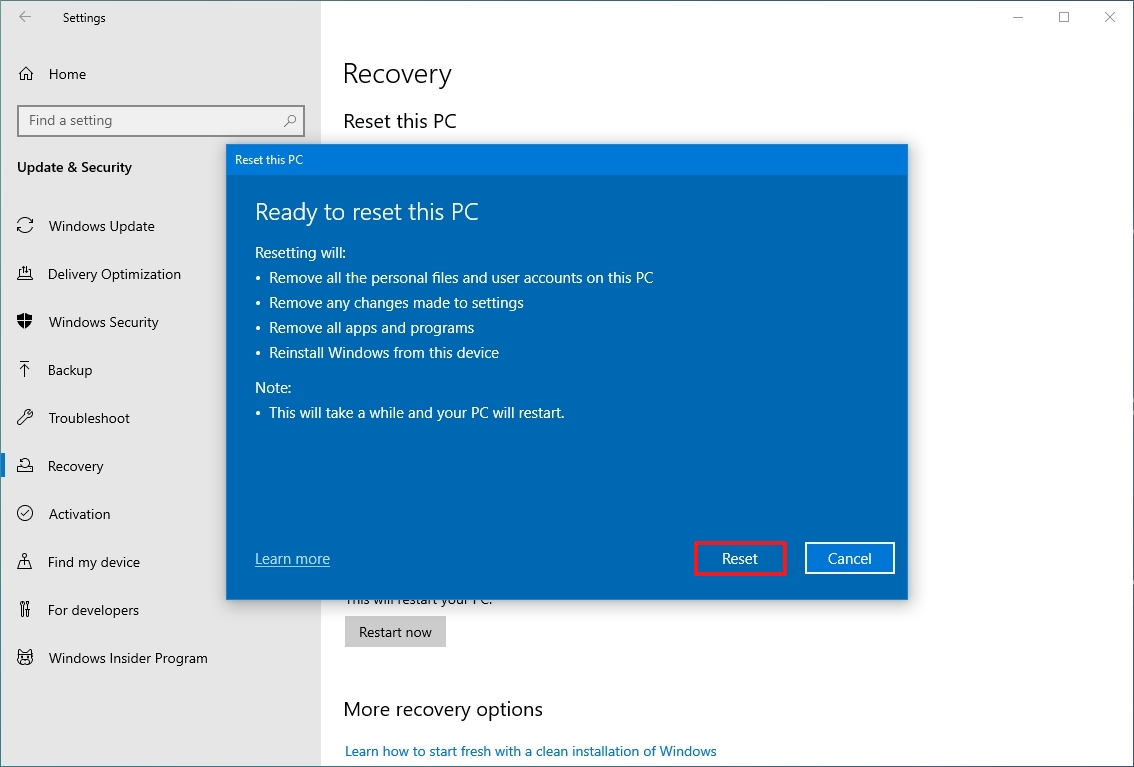
Once you finish the process, the tool will erase your computer’s drives-based on the options you choose-and then install a new version of Windows 10, returning it to how it was when you first got it.
After factory reset steps
If you’re simply selling your computer, you’re all set. But if you want to wipe it clean and start fresh, you’ll still need to install updates, verify all drivers are present, reinstall your applications, and recover your files from a backup.
Checking for updates
To install updates for Windows 10, use these steps:
- Open Settings.
- Click on Update & Security.
- Click on Windows Update.
- Click the Check for updates option.

After you finish these steps, Windows will automatically download and install any updates or drivers it needs.
Check for drivers
To check for missing drivers, use these steps:
- Open Start.
- Search for Device Manager and click the top result to open the tool.
- Confirm that there’s no branch called “Other devices,” which usually lists missing device drivers.
If your computer or other devices aren’t working correctly because of outdated drivers, these instructions will help you update them.
Restore personal files
Okay, so the final step is getting your files back from the backup you made. How you do this will really depend on *how* you originally backed everything up.
If you back up your files with OneDrive, they might already be automatically updating. If not, you may need to set up the app again.
If you backed up your files to an external drive, plug it into your computer and follow these instructions:
- Open File Explorer.
- Click on This PC from the left pane.
- Under the “Devices and drives” section, double-click the storage with the file backup.
- Select the files and folders.
- Click the Copy to button from the “Home” tab.
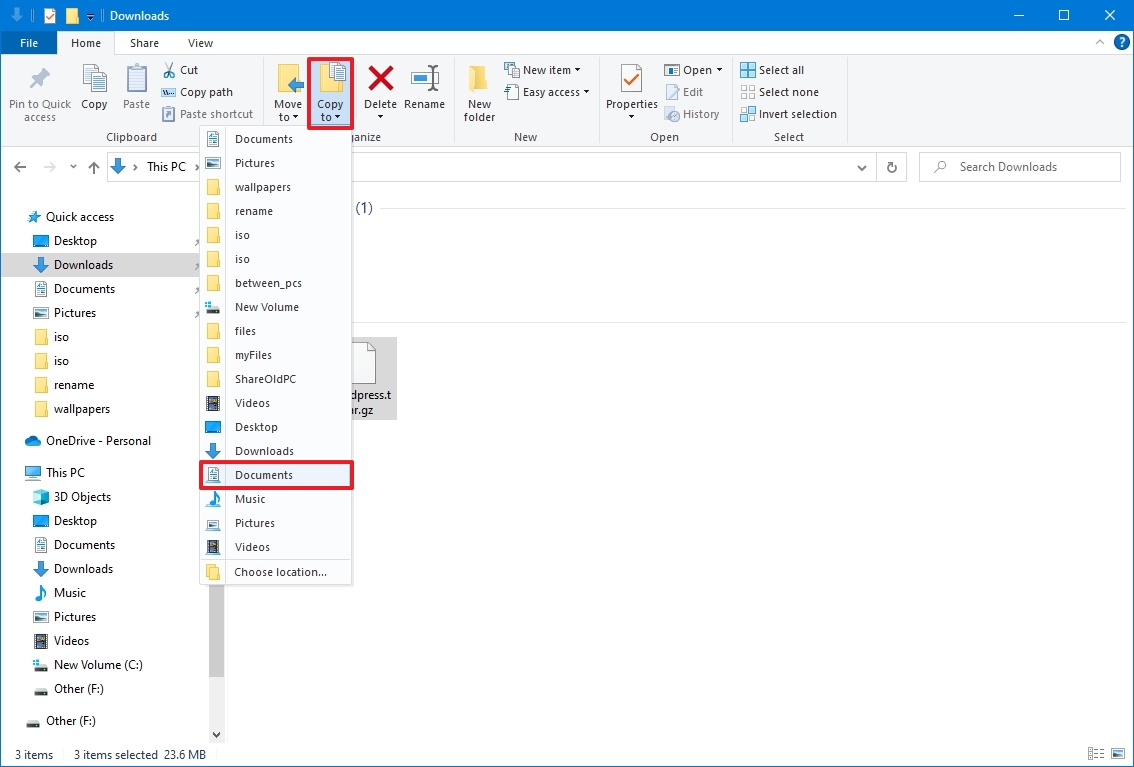
- Select the destination folder.
- Quick tip: You can select the Choose location option to choose another folder.
Once you complete the steps, you may need to repeat the steps to restore additional files.
If you had any apps installed before, go ahead and reinstall them now.
This guide explains how to use the reset tools already included with Windows 10. You can also completely reinstall Windows 10 to restore your computer to its original factory condition.
FAQs
These are common questions about using the reset feature on Windows 11.
How do I restore a PC running Windows 10 to factory settings?
You can restore your computer to its factory settings through the Settings app. First, go to Settings, then Update & Security, and then Recovery. Click “Get started,” and you’ll be able to choose whether to keep your files or delete everything.
How do I set a password for System Restore on Windows 10?
Okay, so I’ve been looking into System Restore, and it turns out you can’t actually set a password for it. That’s because it’s really focused on fixing system files – basically rolling back your operating system to a previous working state. The good news is, it *won’t* touch your personal files like documents or pictures, so no need to worry about those being affected!
How do I set the default browser on Windows 10?
To change your default browser, start by opening your device’s Settings. Then, navigate to Apps and select Default apps. From there, click on the browser that’s currently listed and choose the browser you’d like to use as your default.
How do I set the default microphone on Windows 10?
To change your default microphone, go to your computer’s Settings, then System, and then Sound. In the Input section, you’ll find a dropdown menu where you can choose which microphone you want to use by default.
How do I set the default printer in Windows 10?
To choose a printer that Windows 10 will automatically use, start by opening the Settings app. Then, go to Devices and select Printers & scanners. Find the printer you want to use most often, click ‘Manage’, and then choose ‘Set as default’.
You can also let Windows choose your default printer automatically by selecting the “Let Windows manage my default printer” setting.
How do I reset network settings on Windows 10?
To restore your network settings to their defaults, go to the Settings app, then select Network & Internet, and then Status. Scroll down and tap “Network reset,” then confirm by tapping “Reset now.”
This process will reset your network connection by removing and then re-adding all network adapters, bringing them back to their default settings.
How do I set a static IP address on Windows 10?
To give your device a fixed IP address, start by opening your Settings app, then go to Network & Internet and select either Ethernet (for wired connections) or Wi-Fi. Choose your network connection, then click “Edit” in the “IP assignment” section. Change the setting from “Automatic (DHCP)” to “Manual.”
You can then enter the static IP address, subnet mask, gateway, and DNS server information.
More resources
Read More
- Welcome to Demon School! Iruma-kun season 4 release schedule: When are new episodes on Crunchyroll?
- TV legend Carol Kirkwood reveals the reasons why she decided to retire after 28 years with BBC
- Why is Tech Jacket gender-swapped in Invincible season 4 and who voices her?
- Dune 3 Gets the Huge Update Fans Have Been Waiting For
- Highly Anticipated Strategy RPG Finally Sets Release Date (And It’s Soon)
- The Super Mario Galaxy Movie: 50 Easter Eggs, References & Major Cameos Explained
- Sydney Sweeney’s The Housemaid 2 Sets Streaming Release Date
- All 13 Smash Bros. Characters in the Super Mario Galaxy Movie
- The OG Resident Evil 1, 2 and 3 Are Now Available on Steam With a Heavy Discount (and DRM)
- Crimson Desert – 15 Things I Wish I Knew Before Diving In
2025-09-17 00:14