In Gothic 1 Remake, “The Dreamer’s Nightmare” is a major quest you start in Chapter 5 by entering the Sleeper Temple after completing “The Path Chosen.” This dungeon is the most challenging in the game – you’ll need to solve puzzles, beat five Orc shamans, find five stones, and retrieve the unique sword Uriziel before heading back to Xardas.
This guide will help you finish ‘The Dreamer’s Nightmare’ quest in Gothic 1 Remake. It covers solving the puzzles inside the Sleeper Temple, locating all of the Orc Shamans, and obtaining Uriziel.
Want help finishing all the quests in Gothic 1 Remake? Check out our constantly updated chapter and quest guide – it’s a central resource with lists of confirmed quests and helpful walkthroughs.
How to Start The Dreamer’s Nightmare in Gothic 1 Remake
The Dreamer’s Nightmare quest begins in Chapter 5, after completing The Path Chosen, when you enter the Sleeper Temple. Your main tasks are to defeat five orc shamans, collect the items they leave behind, and locate Uriziel, a unique sword designed to hold those items.
Reaching those objectives will be challenging because this dungeon is significantly more difficult than previous areas. The Sleeper Temple is packed with powerful enemies that can defeat you quickly if you’re not ready, so stock up on health potions, good equipment, and make sure your character’s stats are high before attempting it. Summon scrolls could also prove helpful, especially when facing the orc shamans – consider getting some from Xardas, and boosting your mana beforehand.
This guide shows you the quickest way through the Sleeper Temple, without using tricky climbing sections. You’re welcome to check out extra areas for more treasure, but remember to save your game frequently before venturing off the main path.
All Sleeper Temple Orc Shaman Stones
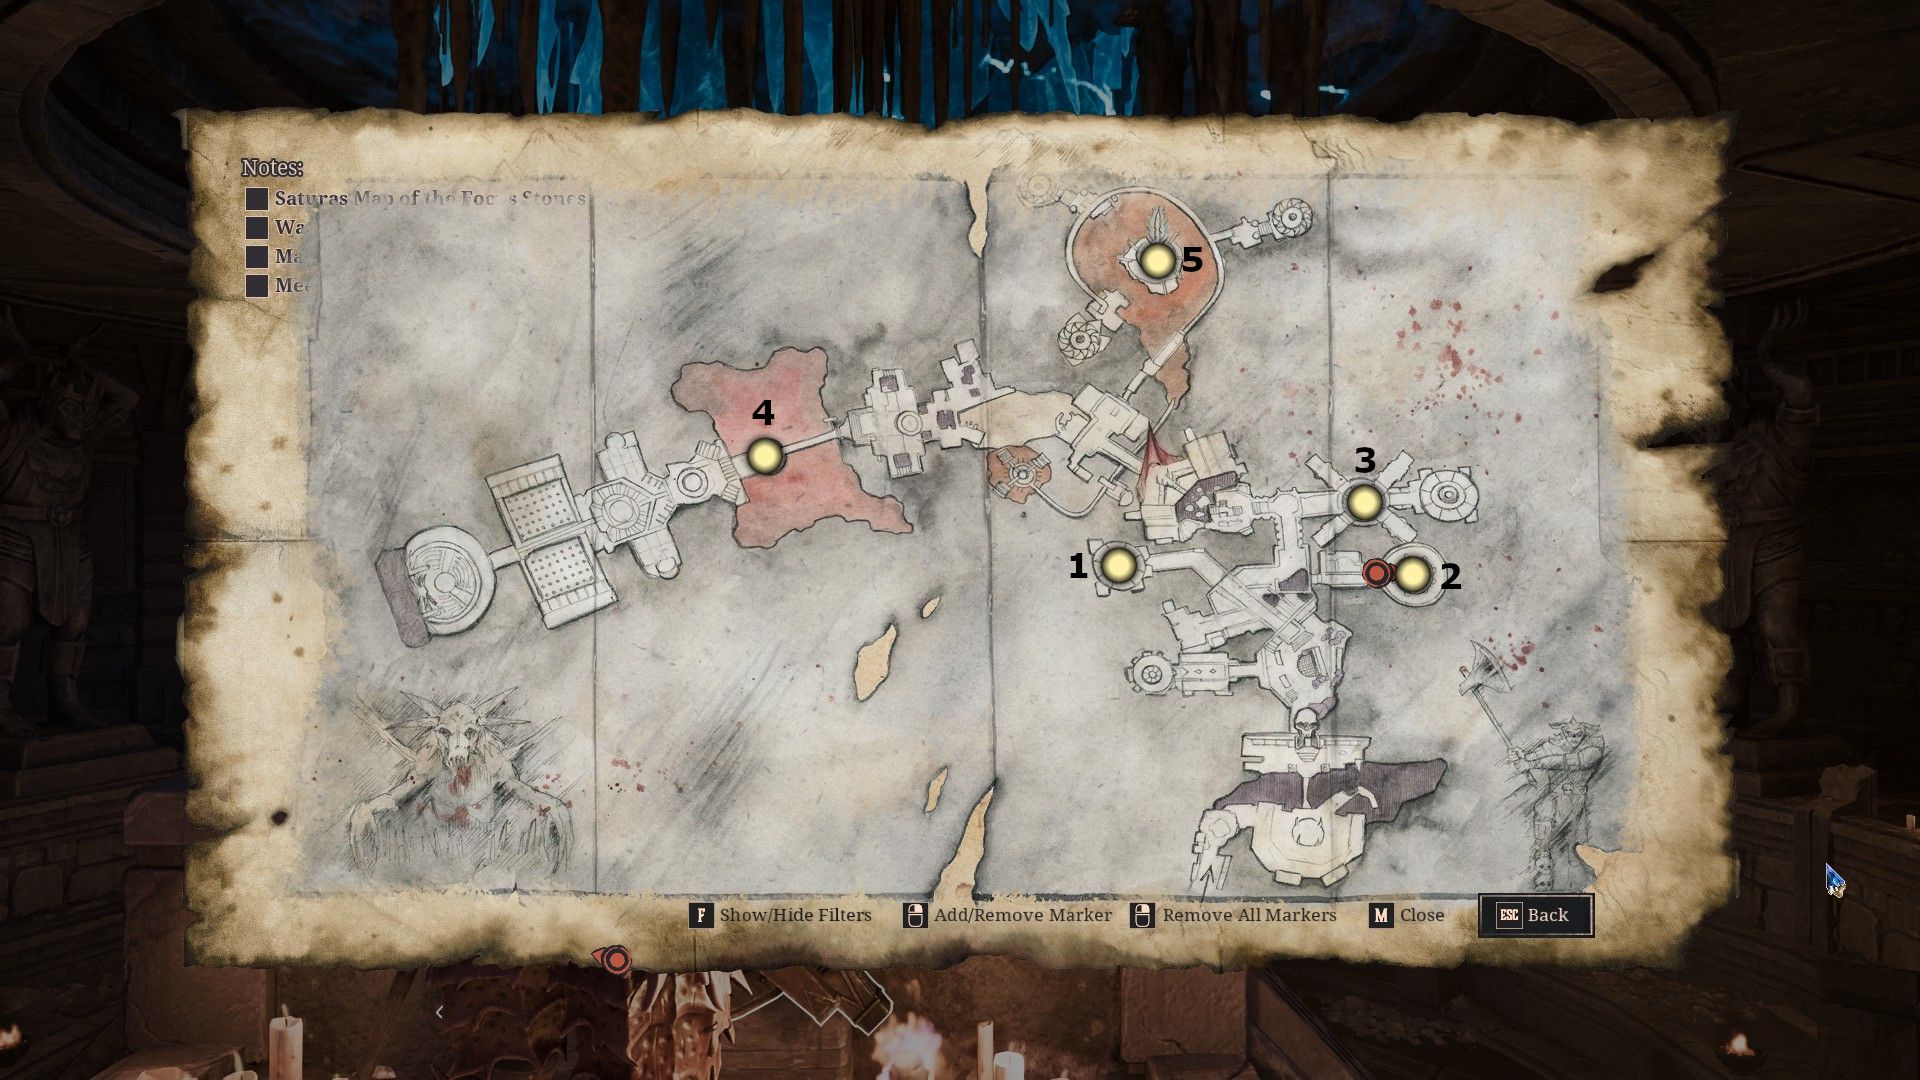
Inside the Sleeper Temple, you’ll find five orc shamans, each of whom carries a unique stone. The map shows where to find all five, and the numbers on the map correspond to the order they’re listed in the table and walkthrough that follows.
| Orc Shaman | Stone | |
|---|---|---|
| 1 | Varrag Hashor | Worldcleaver |
| 2 | Varrag Kasorg | Lightbringer |
| 3 | Varrag Unhilqt | Timesplinter |
| 4 | Varrag Arushat | Banstone |
| 5 | Varrag Ruuushk | Fiendeye |
How to Get the Sleeper Temple Map
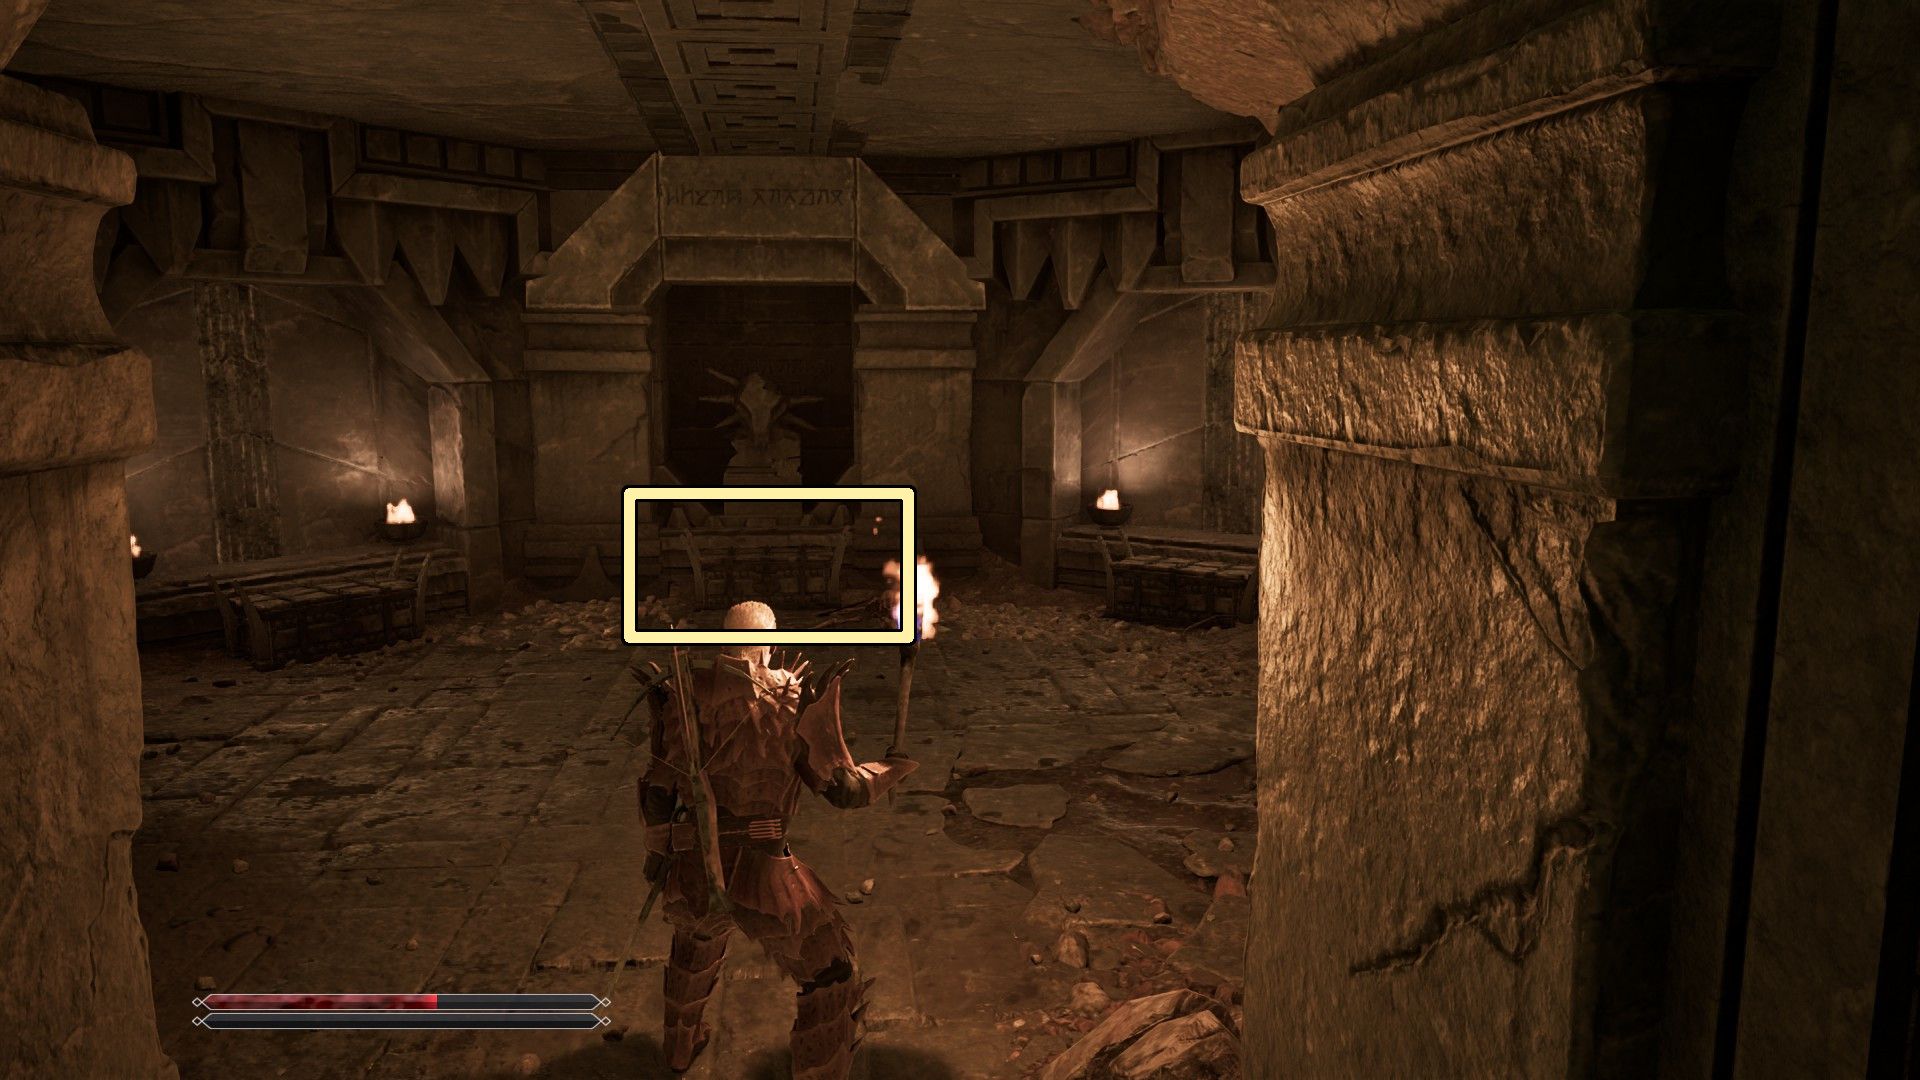
Okay, so when you first walk into the Sleeper Temple, you’ll go straight into this big room. You’ll need to deal with all the skeletons in there – the Warriors, Scouts, and that annoying Mage. Once you’ve cleared them out, head into the room on your left and you’ll spot a statue.
You’ll find a map of the Sleeper Temple near the bottom of the statue – grab it! It’ll help you easily follow along with these instructions.
How to Solve the Three Statues Puzzle
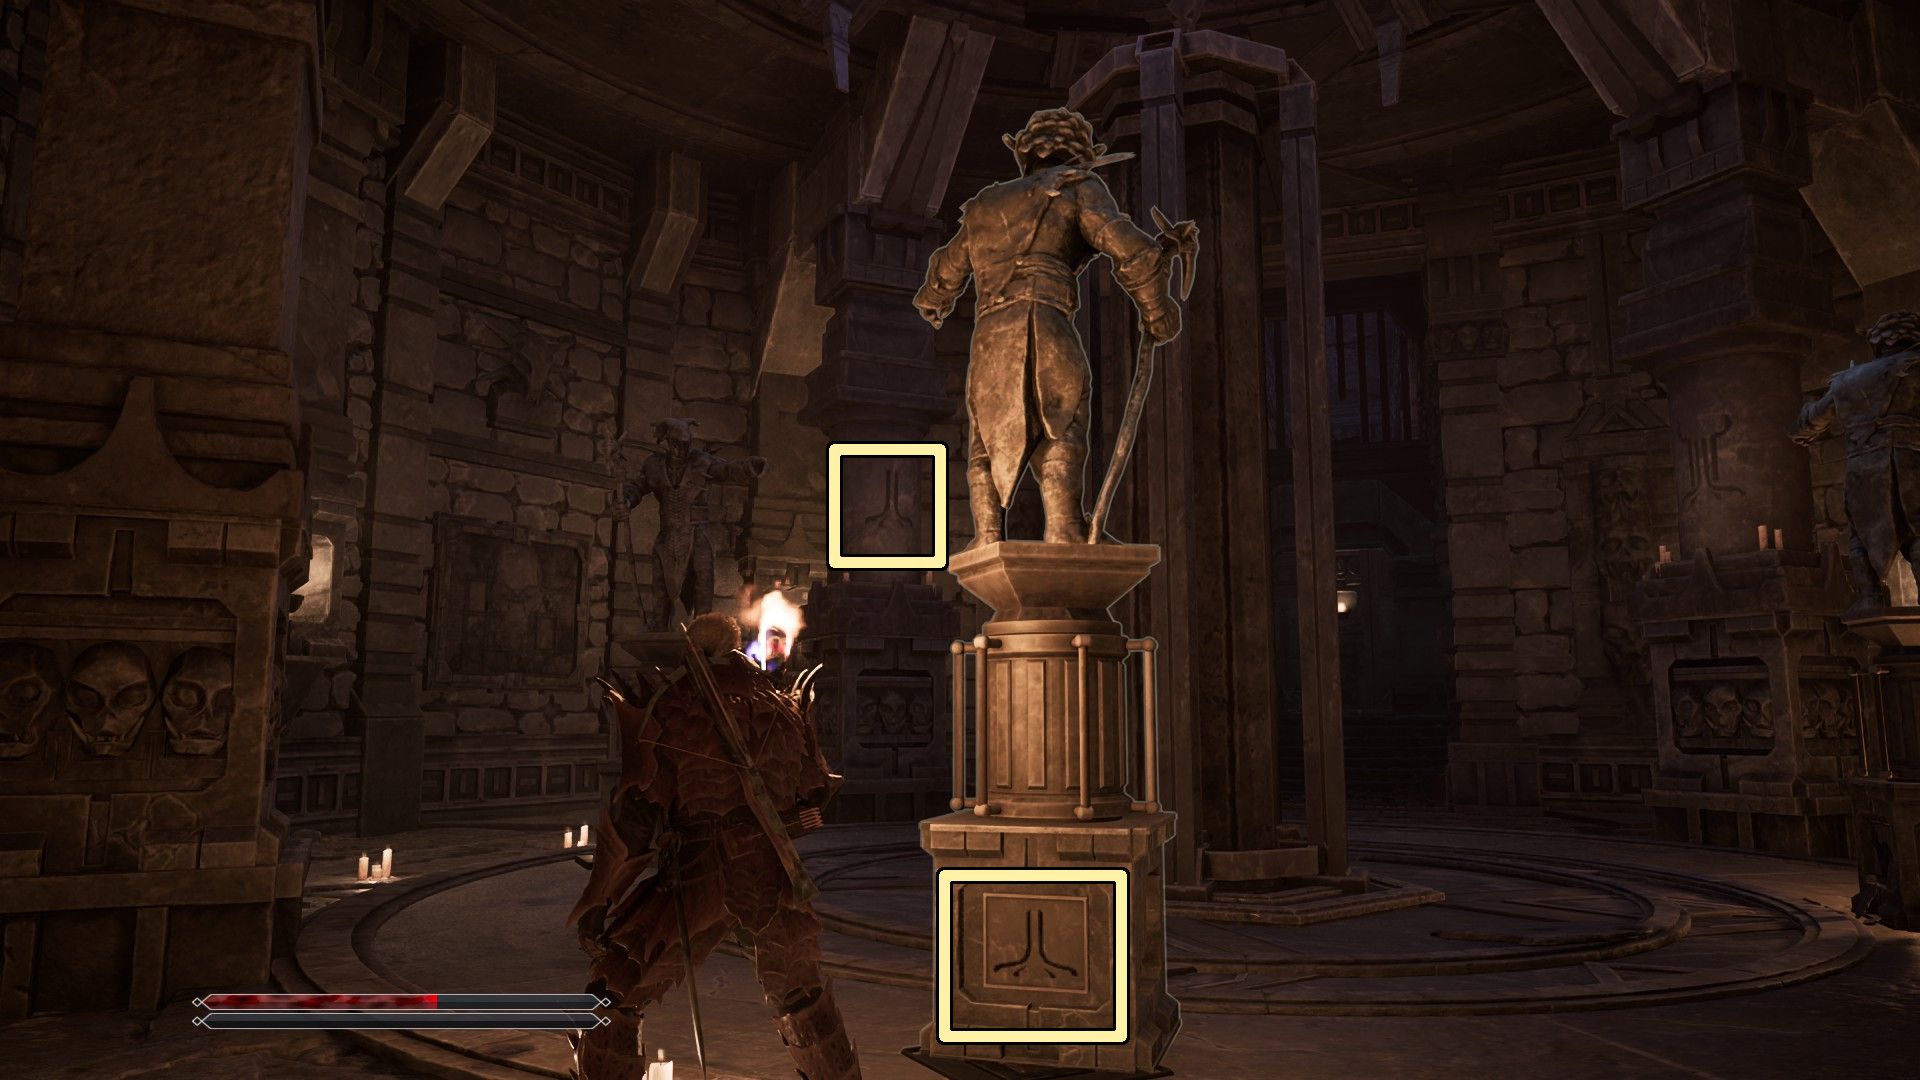
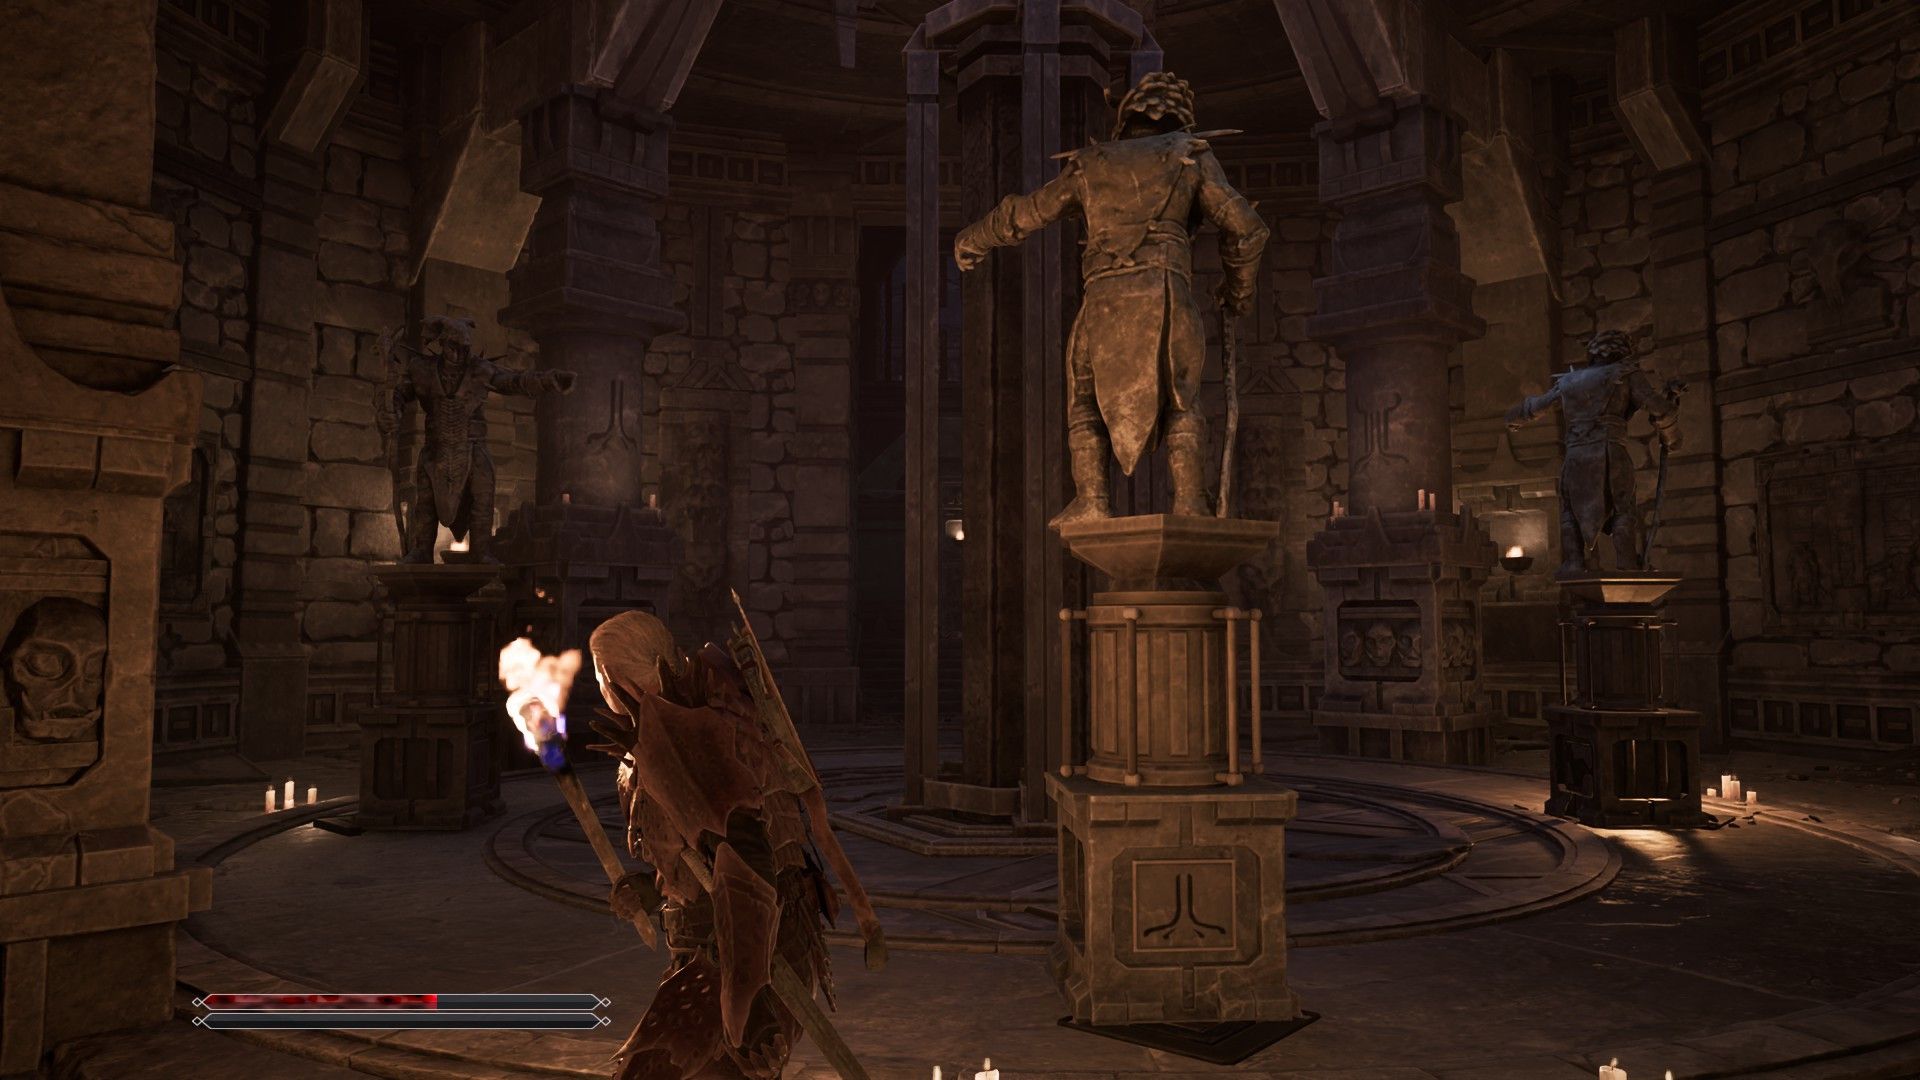
Okay, so I finally got the map to the Sleeper Temple. Now I’m heading down the stairs and I’m in this room with three statues. Two of them have symbols at their bases, and there are also symbols carved into the pillars all around the room. Looks like I need to figure out what these symbols mean!
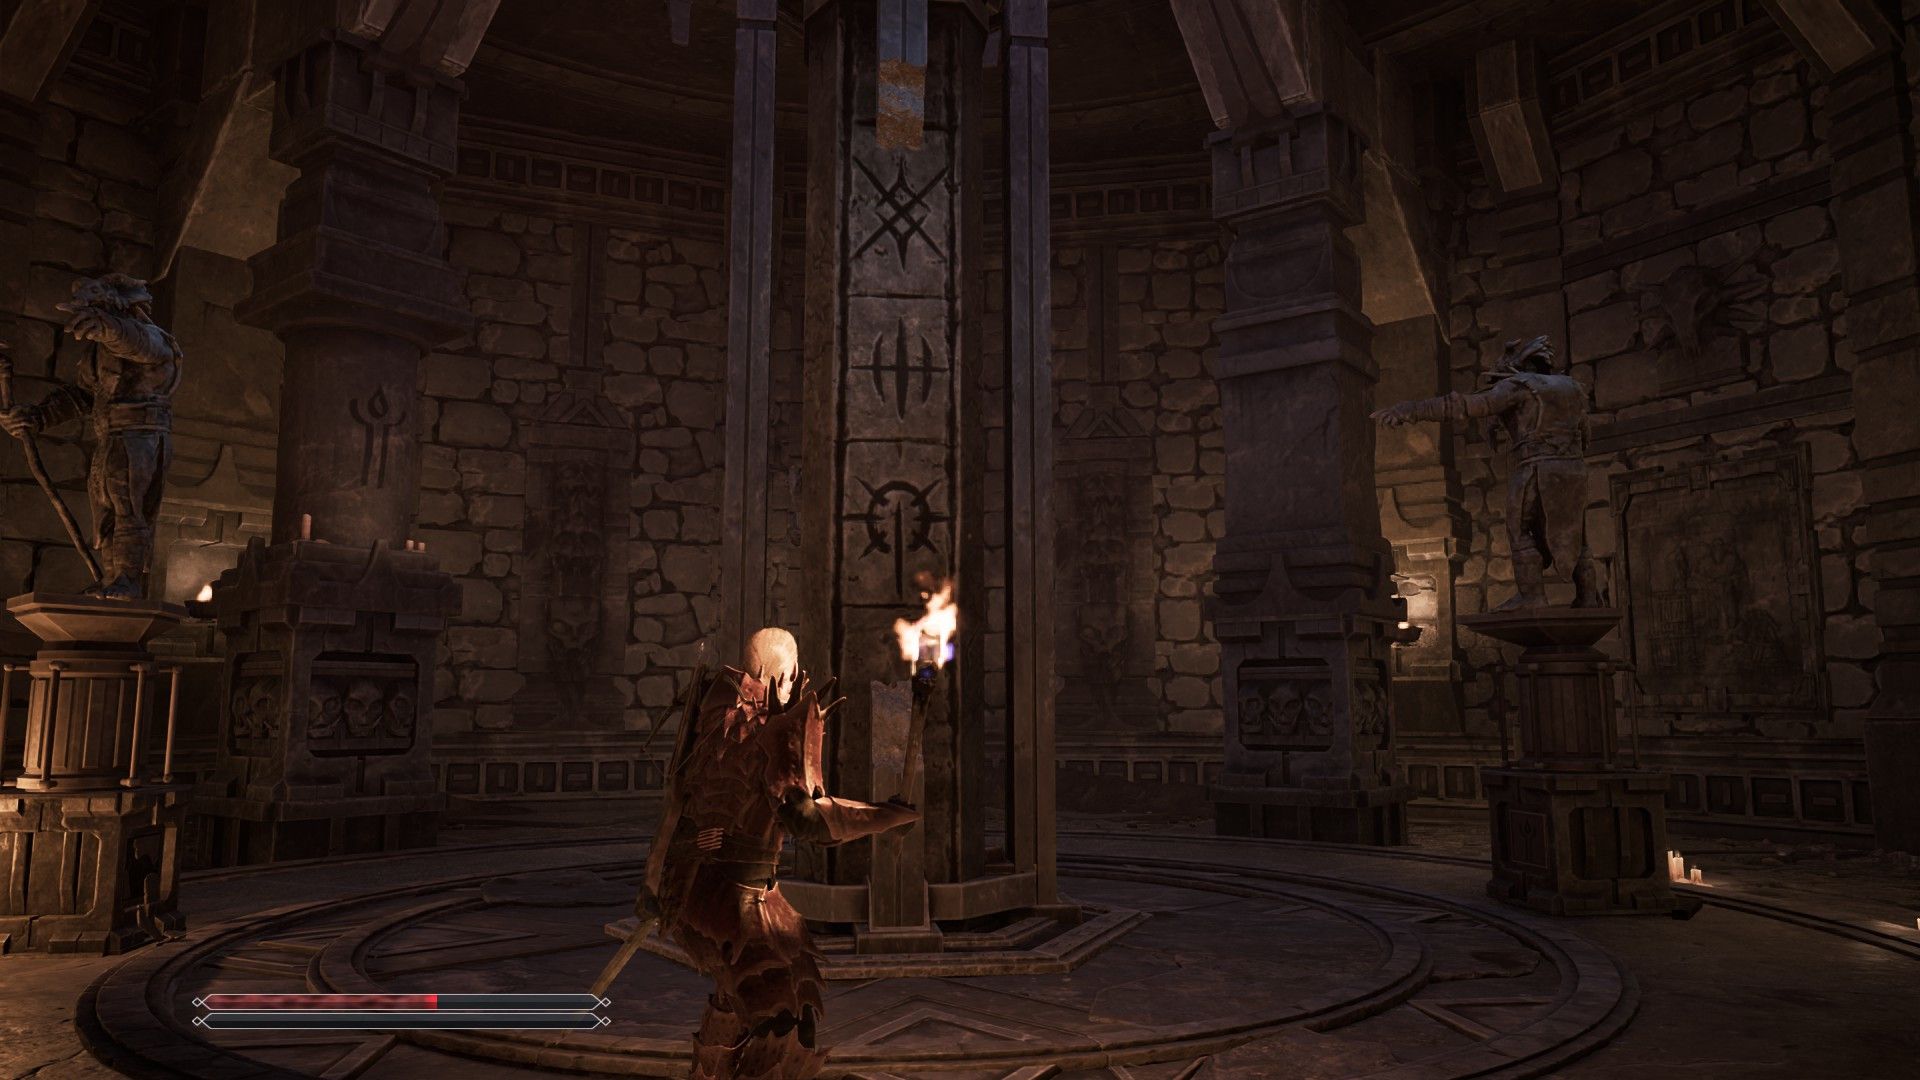
To unlock the puzzle, turn the two statues with symbols until they face the pillars displaying the same symbol. Next, rotate the plain statue until a pillar emerges from the floor in the center of the room. This pillar will show three symbols – make sure to memorize them, as you’ll need them for the next challenge.
How to Open the First Gate in the Sleeper Temple
Go back to the room where you battled the Skeleton Mage. On the opposite side, you’ll see three wheels that change the symbols displayed on a pillar.
Spin the wheel until it shows the same three symbols you saw on the pillar in the statue room. Once you get the correct combination, a gate will open. Go through the gate and prepare for the next room, which contains another Skeleton Mage that can summon skeletons.
How to Find Varrag Hashor and the Worldcleaver Stone
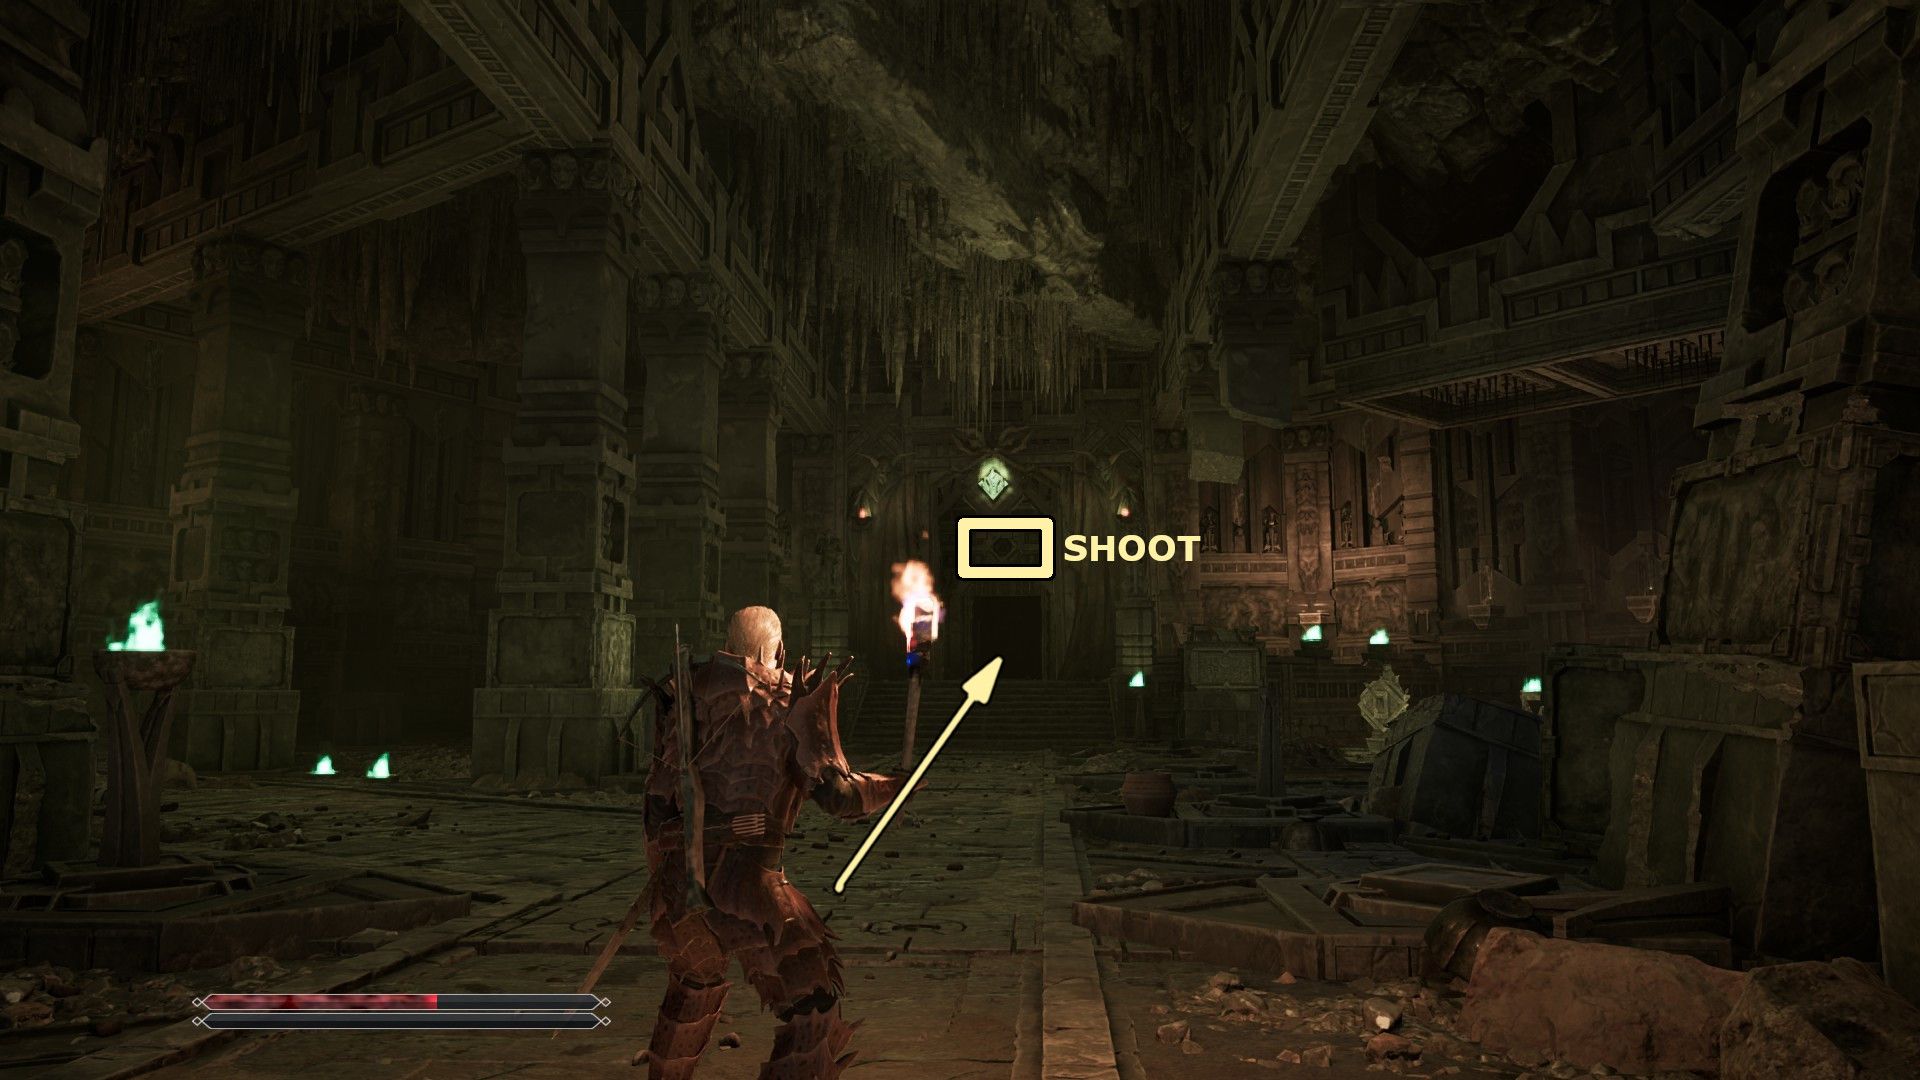
You’ll find a closed door with a glowing green circle above it on the other side of the room. Shoot the circle to unlock the door, then go inside and battle Varrag Hashor, the first orc shaman you’ll face.
Defeat Varrag Hashor and loot his body to receive Worldcleaver, the first stone needed for Uriziel.
How to Reach the Ring Puzzle
Once you’ve beaten Varrag Hashor, go back to the room with the green circle you shot. Find the chasm and jump down. Then, defeat the Minecrawlers at the bottom.
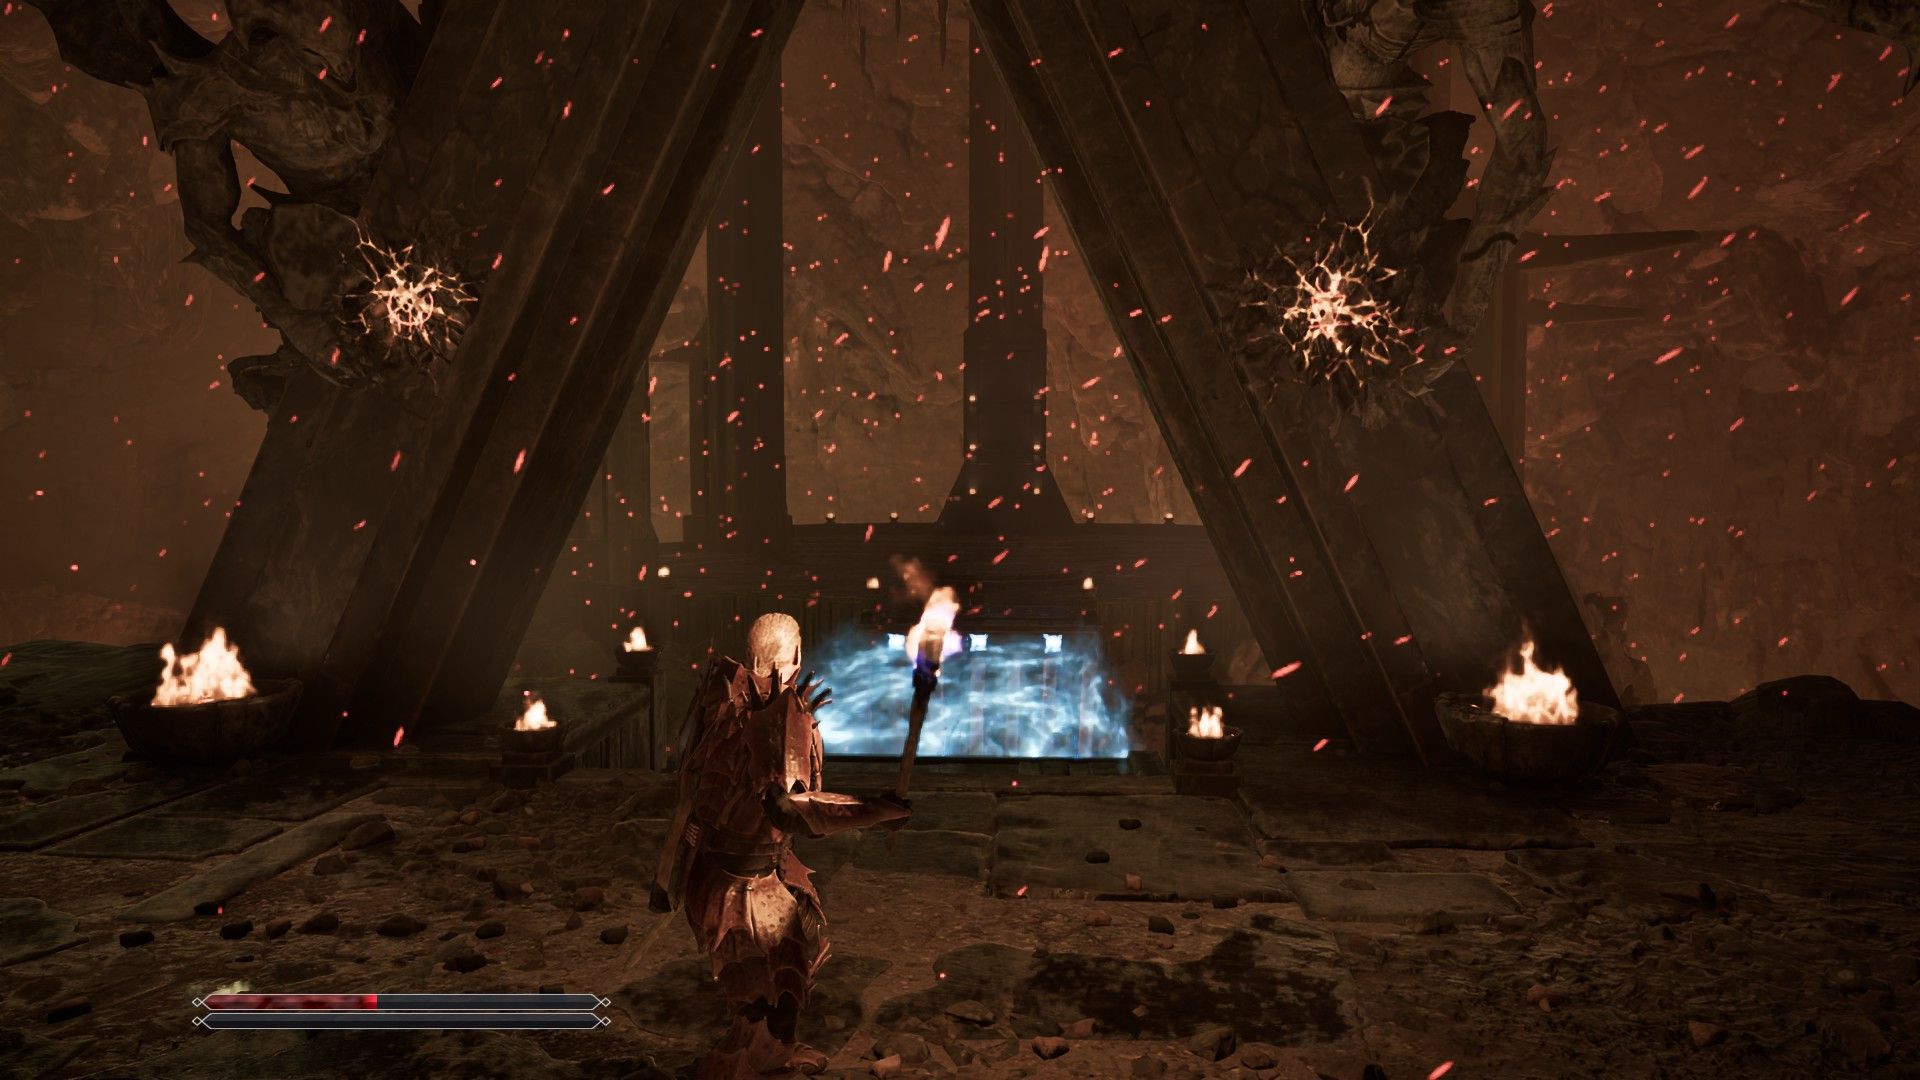
Keep going straight, then turn left when you reach the wall. Follow that path to the edge, jump down, walk forward, and climb up the short ledges until you find a room with blue fire built into the walls.
Okay, so you’ll want to head up those stairs on the left side of the blue fire. Once you’re at the top, turn left again and walk through that hall filled with electricity – it leads right into the next puzzle area!
How to Solve the Ring Puzzle and Get the Lightbringer Stone
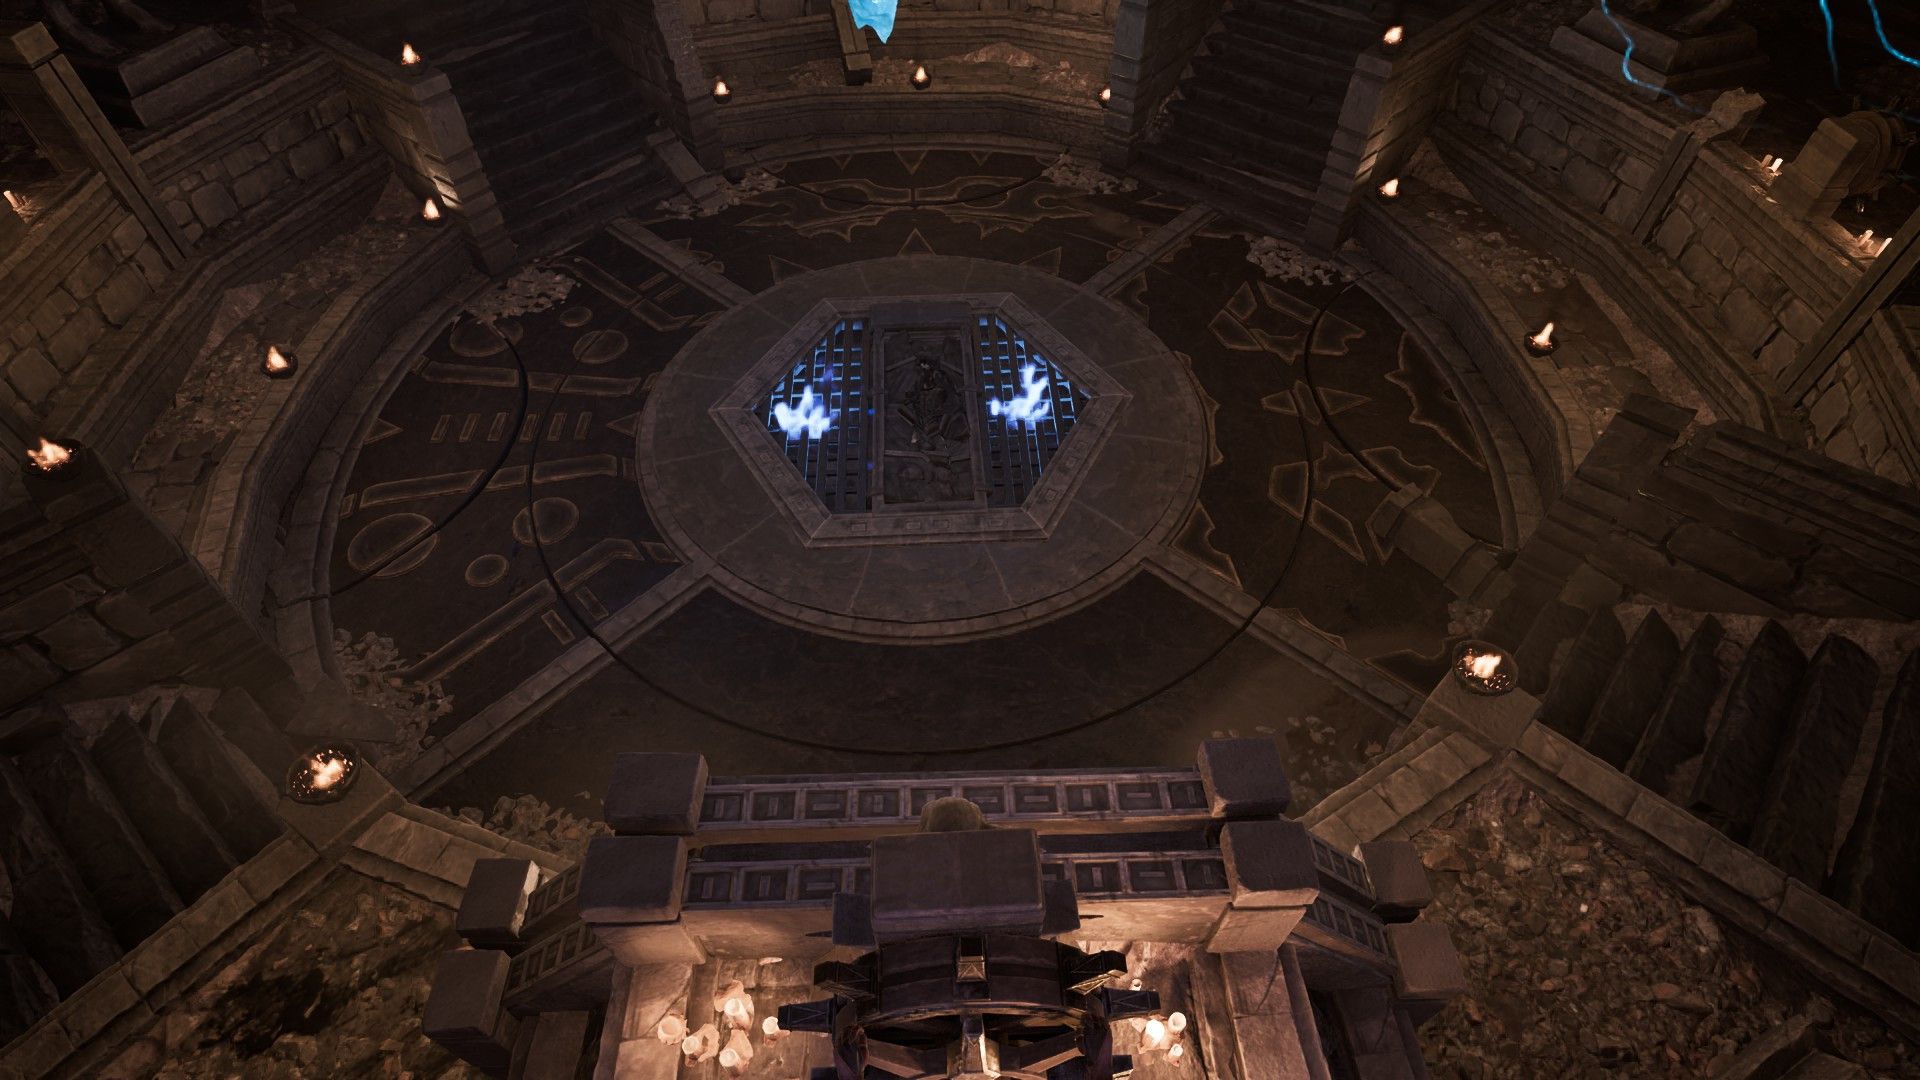
The ring puzzle requires you to turn four wheels until a pattern on the floor lines up correctly. The top wheel controls the center ring, and the other three wheels move smaller parts of the outside ring.
Look at the image to find the right pattern. Once you’ve aligned it correctly, Varrag Kasorg will appear. You’ll need to defeat him and search his remains to get Lightbringer, the second stone required to complete Uriziel.
The battle with the orc shaman starts immediately after you finish the puzzle, and you can’t save your progress once you’ve placed the last piece. It’s best to manually save your game right before you turn the final wheel.
Now that you have the stone, go back through the hallway with the lightning. Keep going forward until you see a ledge looking down at the room where you first fell. Jump down into that room to continue your adventure in the Sleeper Temple.
How to Find the Orc Lever
Go back to the room with the large gap, then climb the stairs opposite it and jump down into the hole. You’ll find a closed door ahead. Pull the lever on the right side to unlock it, and defeat the Temple Guard waiting behind the door.
After getting past the Temple Guard, enter the room with the three chests. Take the Orc Lever from the chest in the middle – you’ll need it for the next puzzle. Then, go back to the room where you originally pulled the lever to open this door.
Okay, so I headed right and found this gate – it opened when I pulled a lever, which was cool! That let me go back to the room where I first fell down. Then, I went all the way back to that room with the big chasm again.
How to Solve the Rising Platform Puzzle
You’ll find three machines beside the gap. One on the left already has a lever in place. Take the Orc Lever you found and put it into the machine in the middle.
First, lift the left platform by pulling the lever on the left side. Once it starts to descend slightly, pull the middle lever to raise the middle platform. Remember that the middle platform falls quicker than the left one, so let the left platform drop a little before activating the middle lever.
After activating the two platforms, run up the stairs to the left and jump across them.
How to Find Varrag Unhilqt and the Timesplinter Stone
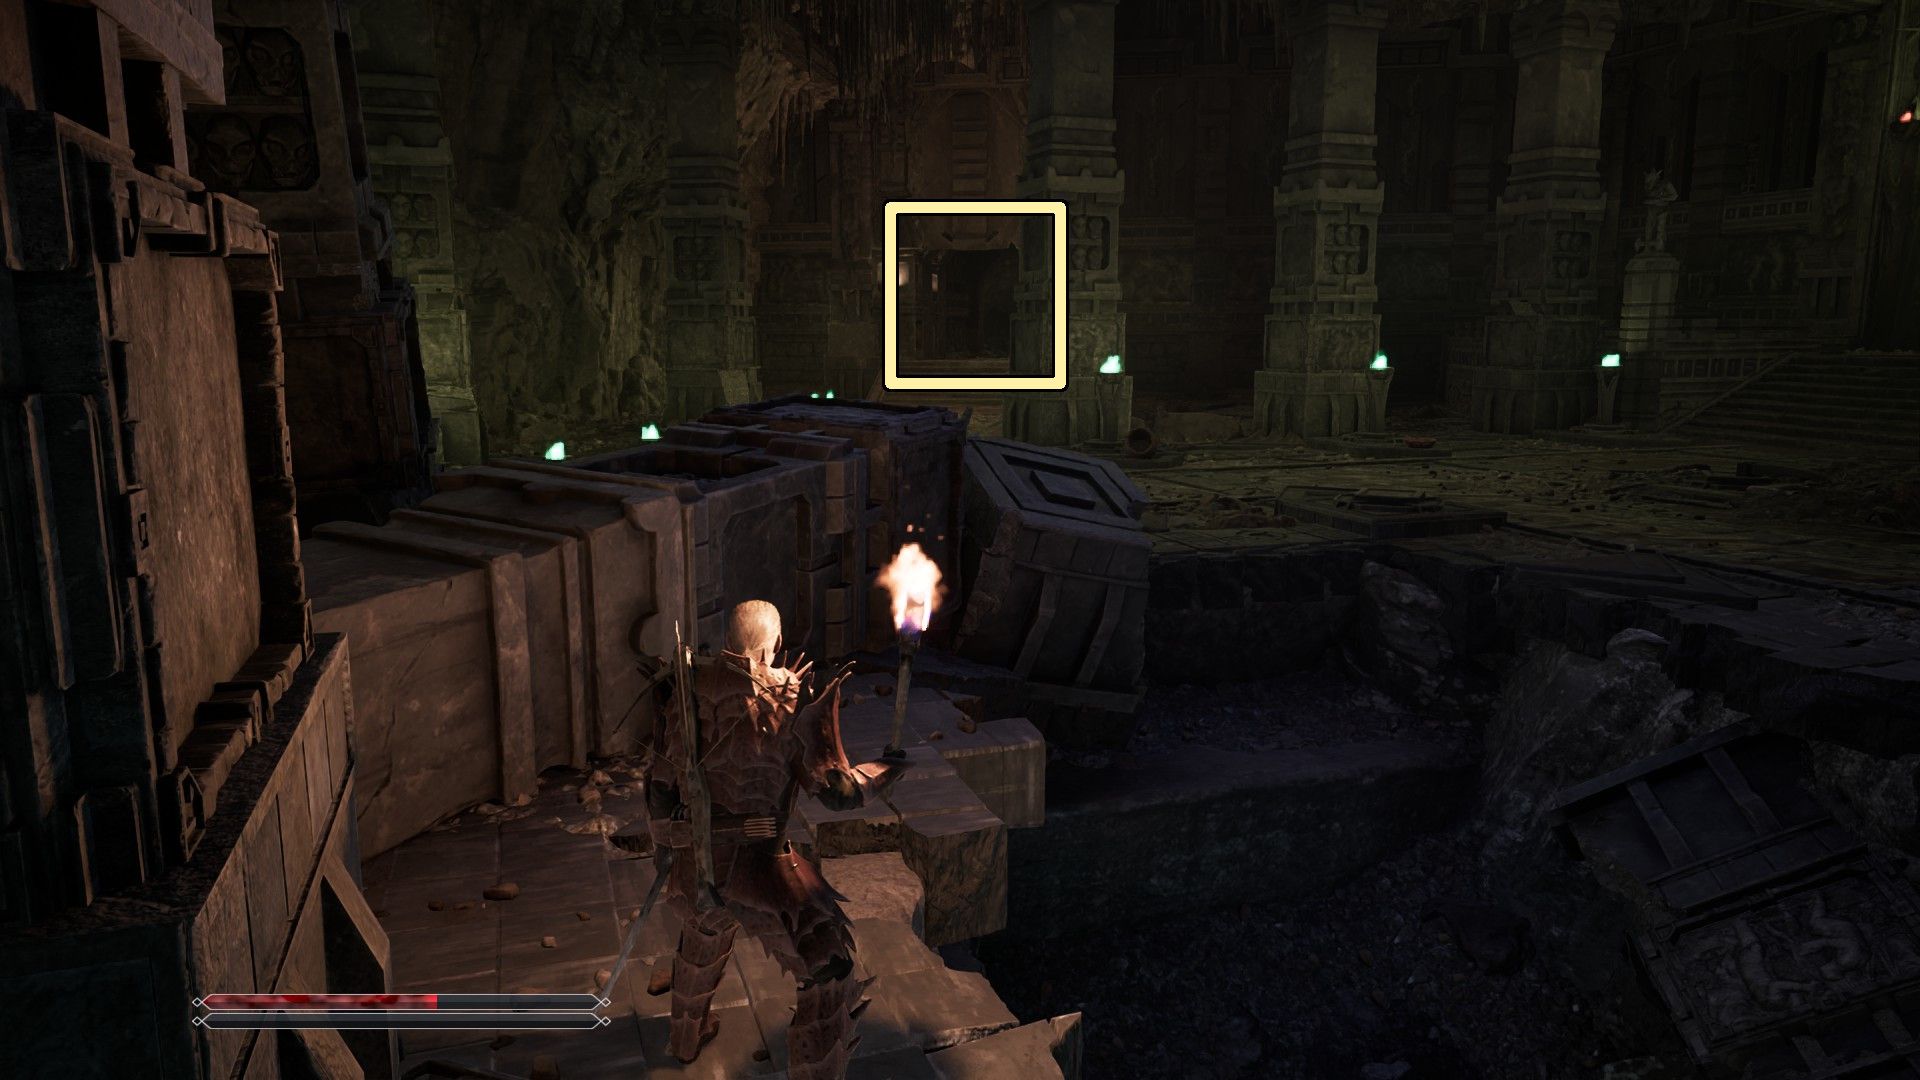
After crossing the moving platforms, go down the stairs to your left and defeat the Temple Guards. Then, look at the door on your right – it has a red circle above it. Shoot the circle with an arrow or other projectile to unlock the room where you’ll find Varrag Unhilqt.
Defeat Varrag Unhilqt and loot his body to claim Timesplinter, the third stone needed for Uriziel.
Once you have the stone, go back the way you came and keep moving forward. You’ll eventually find a room blocked by a red barrier with two Minecrawlers inside. Defeat the Minecrawlers, then prepare to solve some new puzzles.
How to Solve the Blood Fountain Puzzle
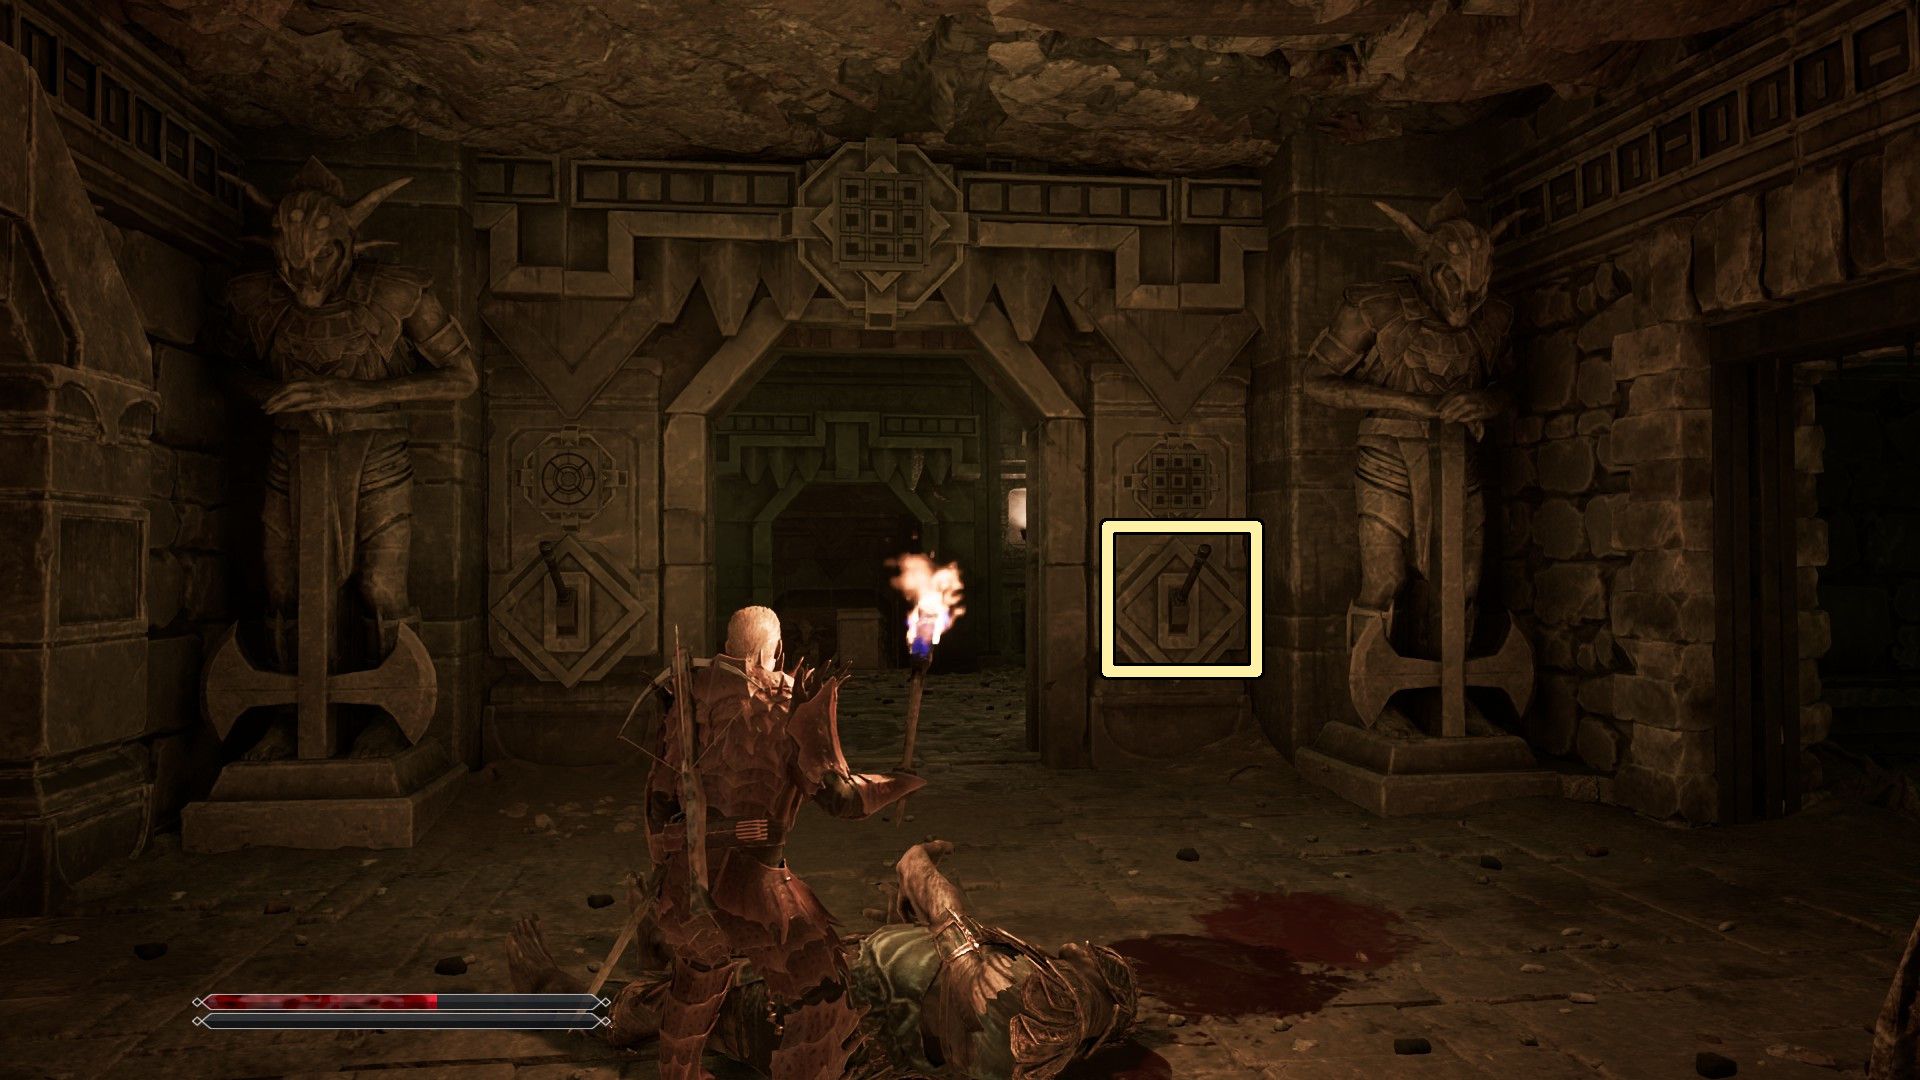
Begin in the room with the red barrier, then enter the room to your right. Once inside, turn around and shoot the red circle above the doorway you came through. This will open a gate on the side of the room. Pull the lever that appears to activate a blood fountain on the back wall.
Once the fountain is full, blood will spill across the floor, flowing towards two rotating plates. Turn both plates so the blood directs towards the nearest walls, activating the faces carved into them and making them appear to bleed.
This action activates another device in the room, linked to a separate plate. Turn that plate to face away from the room, and then rotate the original two plates once more. This will direct the blood flow through the new plate and into the room containing the barrier.
How to Open the Red Barrier
Once you’ve figured out the first part of the blood puzzle, head to the room beyond the barrier. You’ll see a red circle on the back wall – shooting it will prevent spikes from appearing when you go inside.
Once you’re inside, face the entrance and shoot the circle above the door. This will open a gate in the wall, revealing a lever that activates the blood flow into the barrier room.
After the blood flows from the two side chambers into the central room, activate the device that appears by the pool. This will summon a Fire Demon, which you need to defeat. Once it’s gone, you’ll be able to enter the area that was previously blocked.
How to Reach the Lava Machine
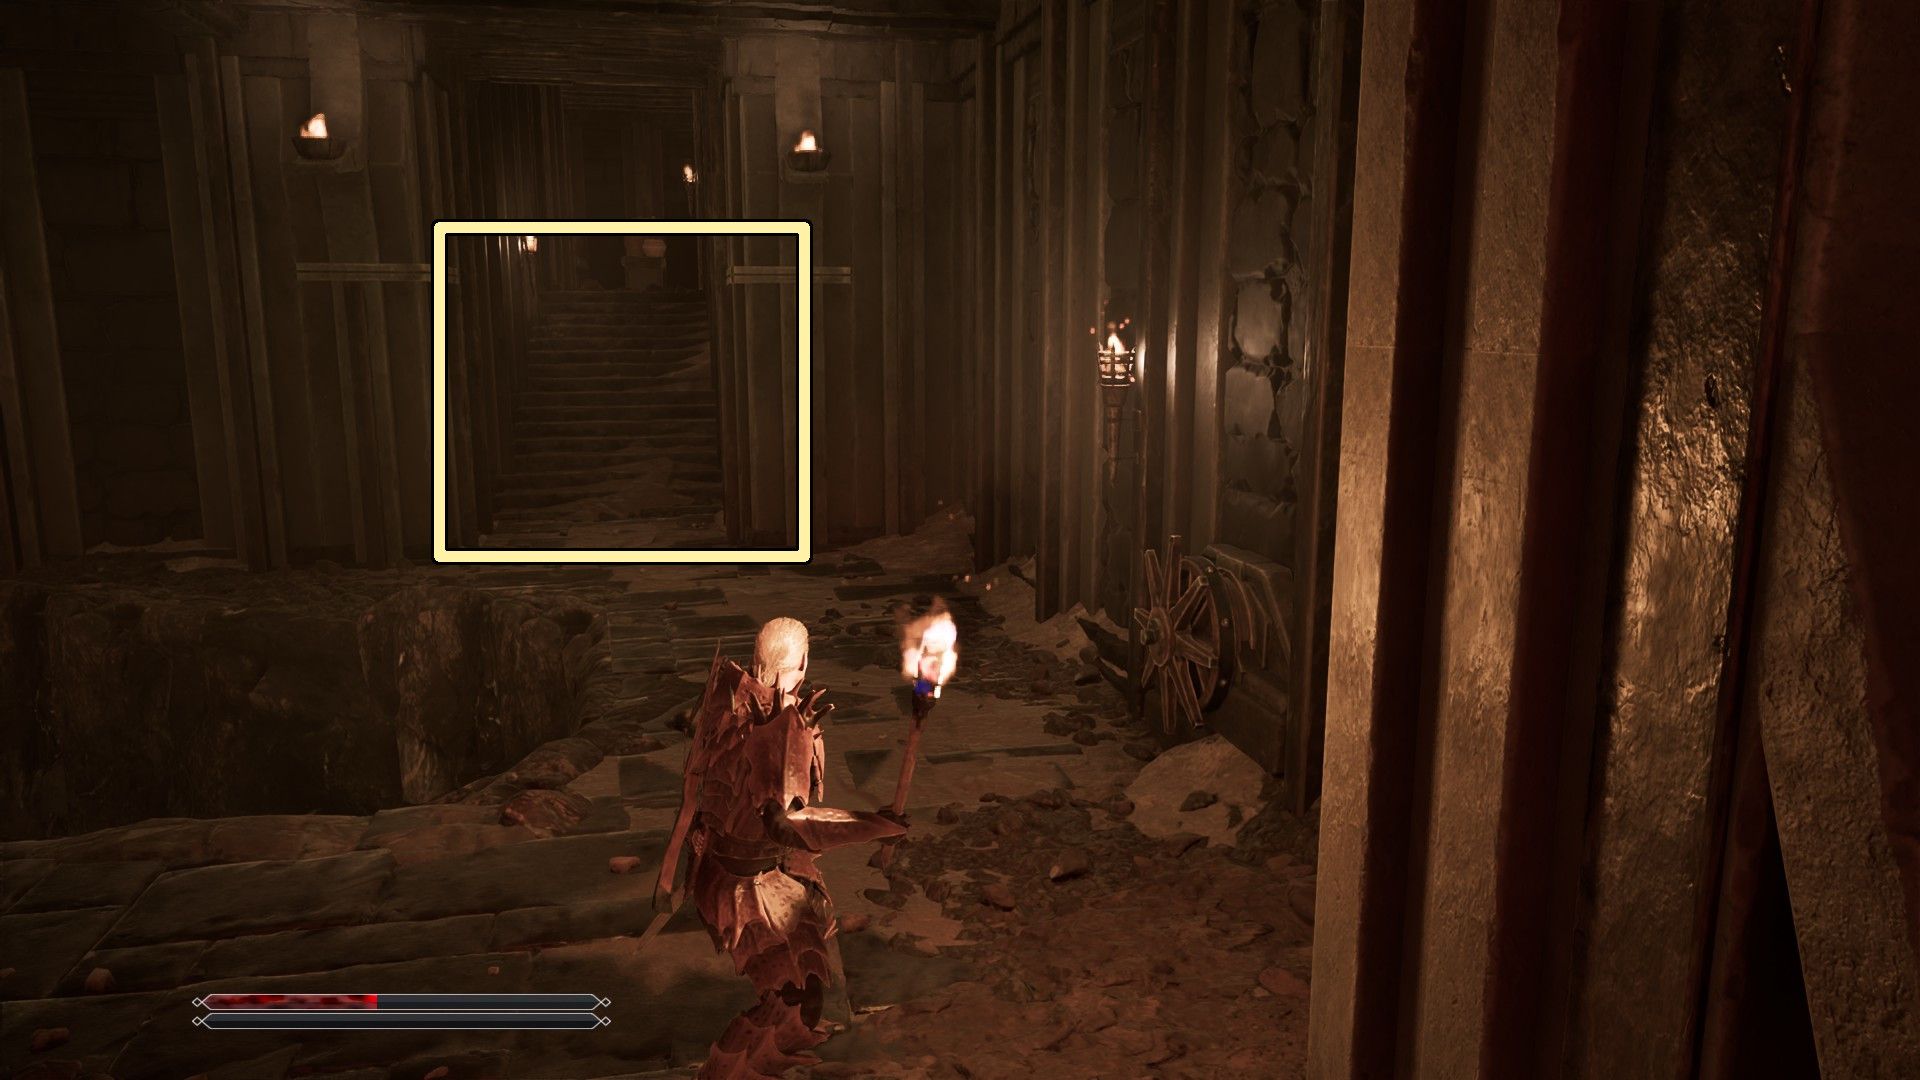
Once you’ve gone through the red barrier, keep moving forward and defeat the Temple Guards. You’ll then enter a room with doors all around it. Take the door on your left, go down the stairs, and continue straight ahead until you reach a small bridge.
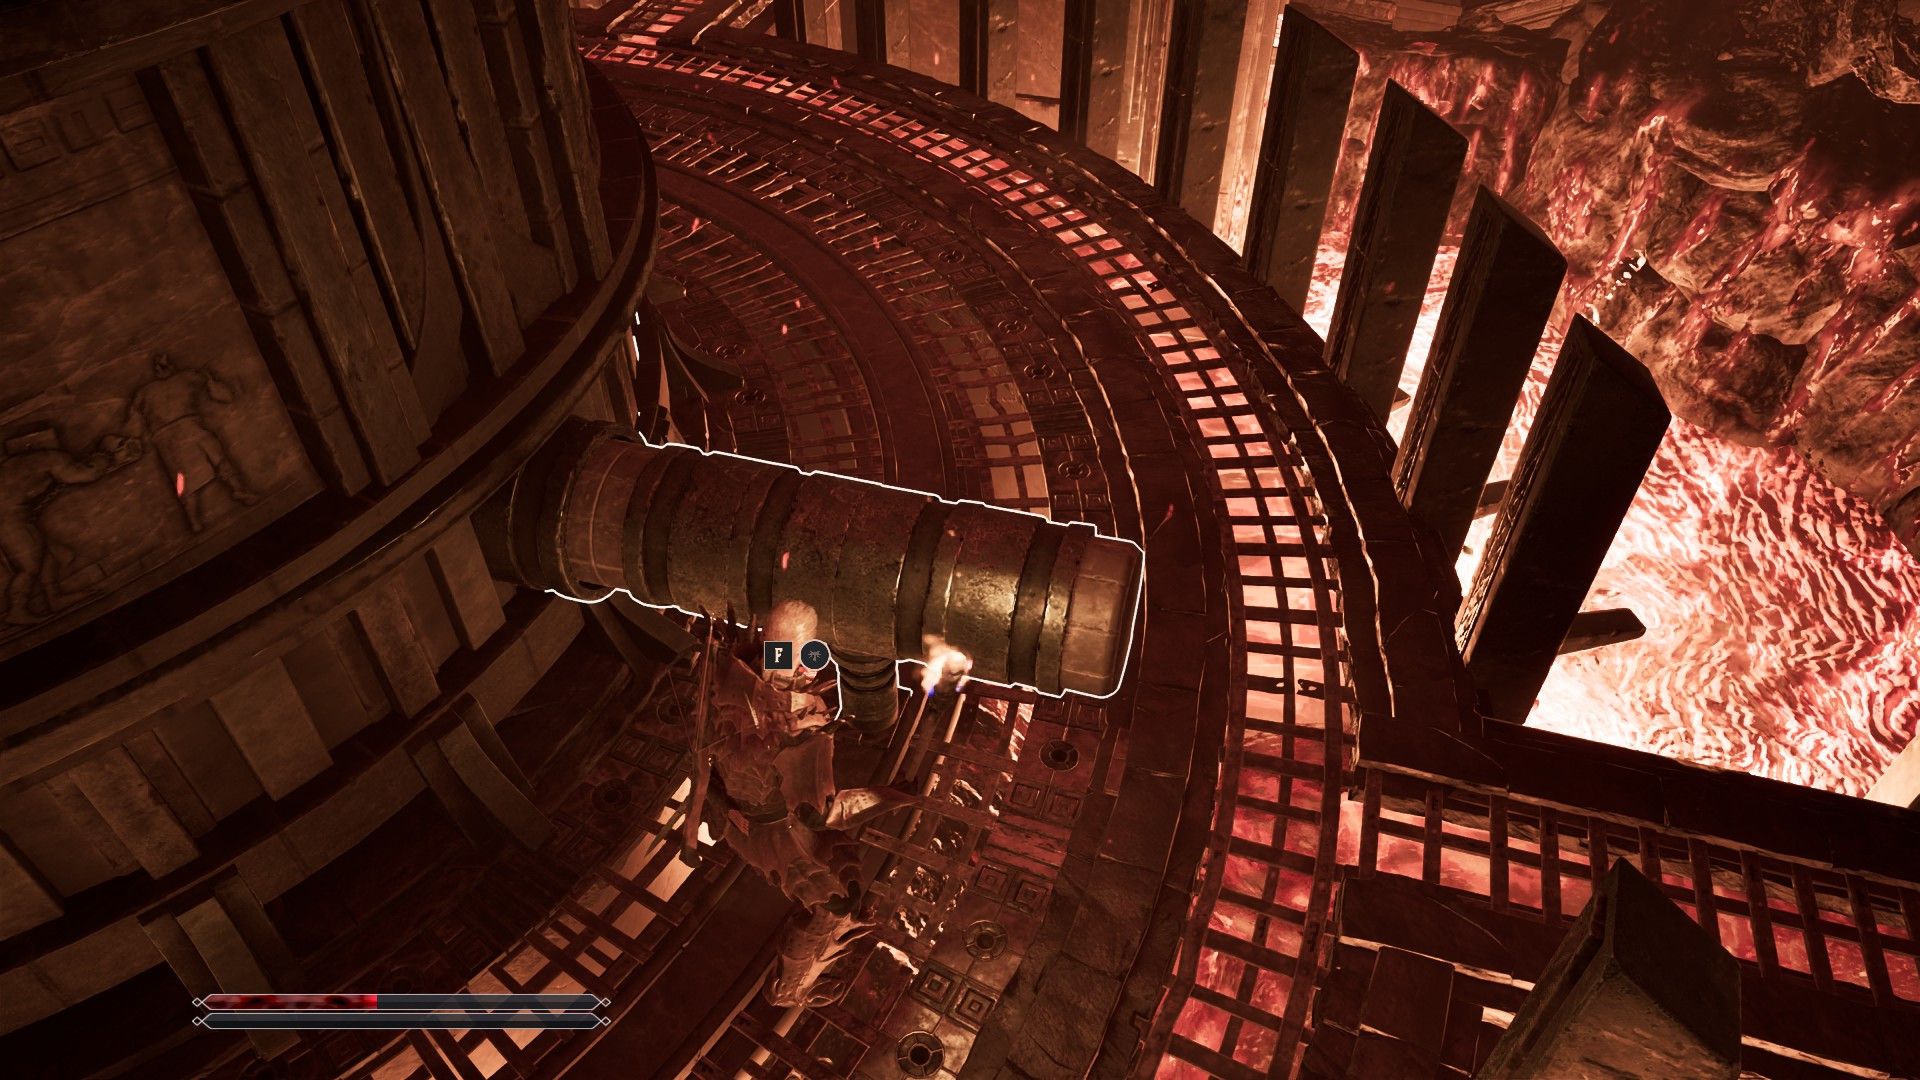
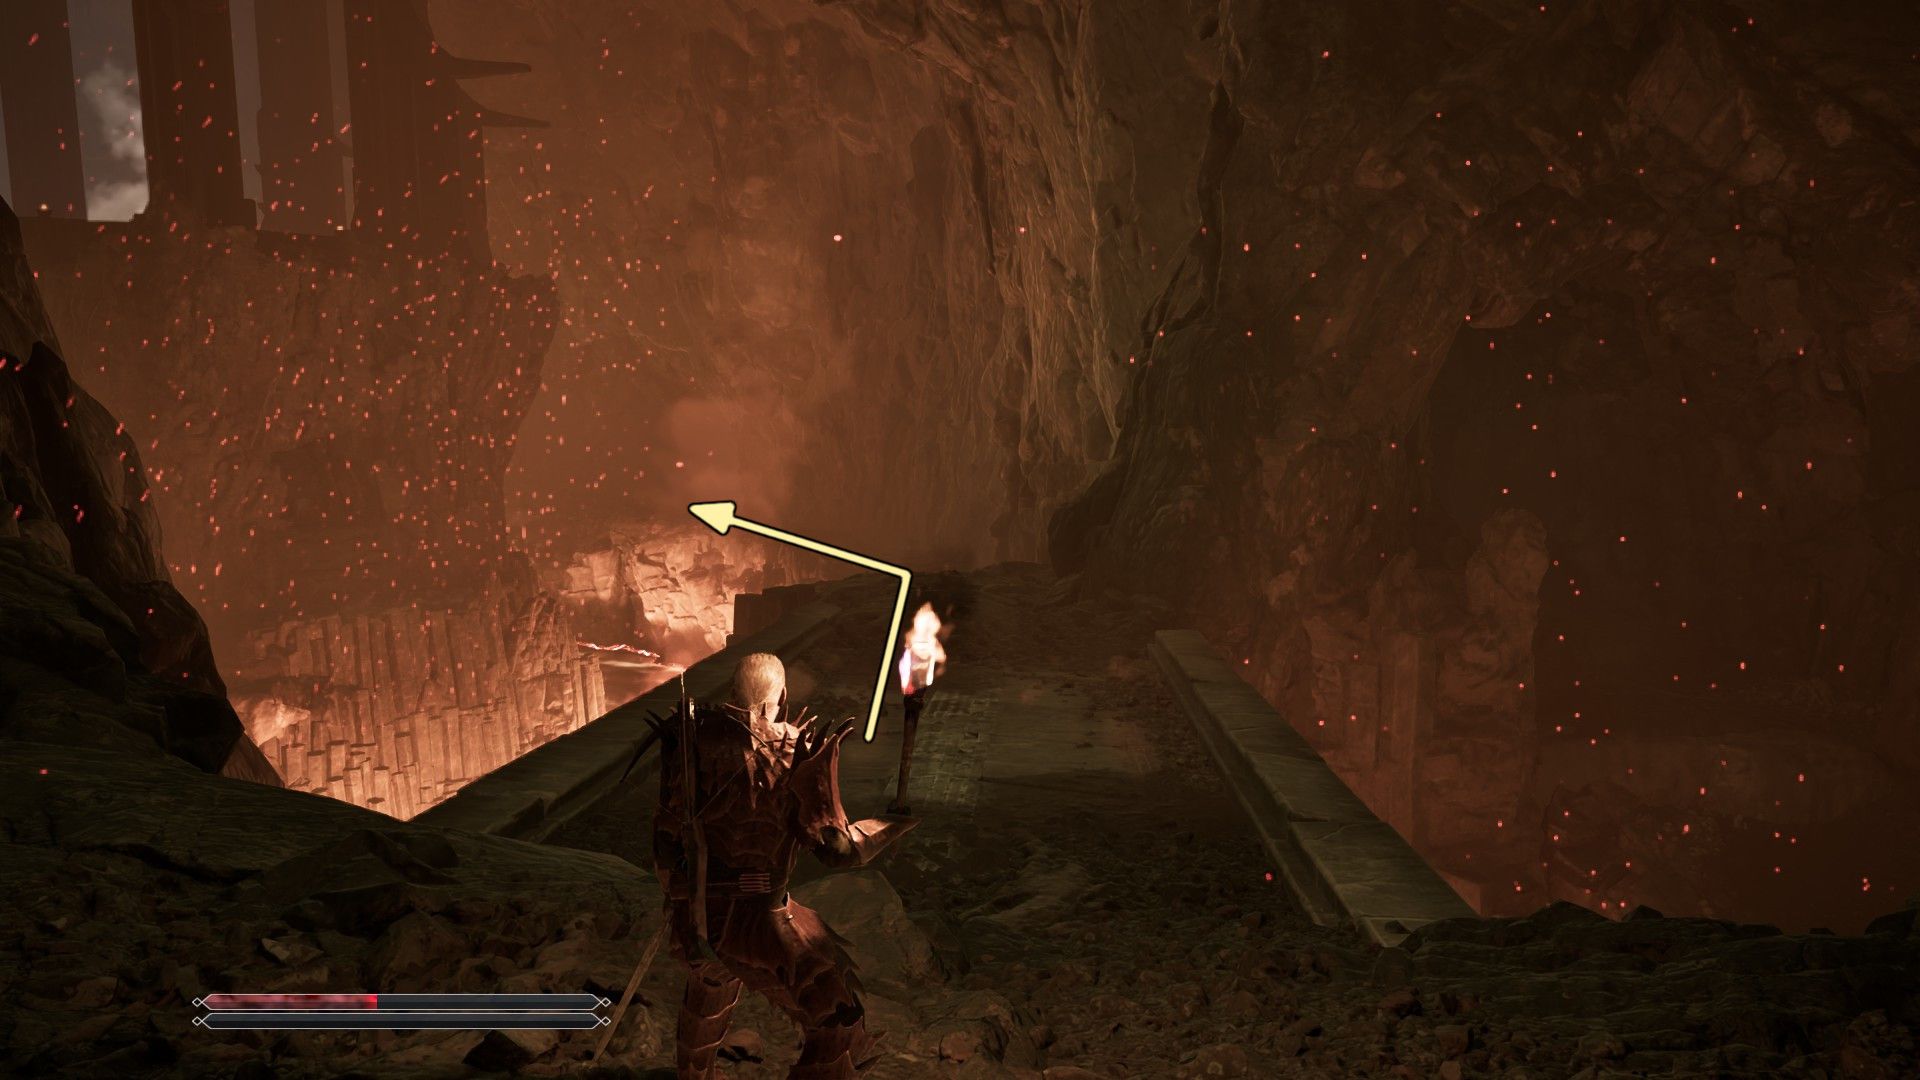
Go down to the right side of the bridge, then follow the path curving to the right. You’ll come to a room containing a large machine. Use the pole sticking out of the machine to push it – this will cause the lava level to drop.
How to Find Varrag Arushat and Banstone
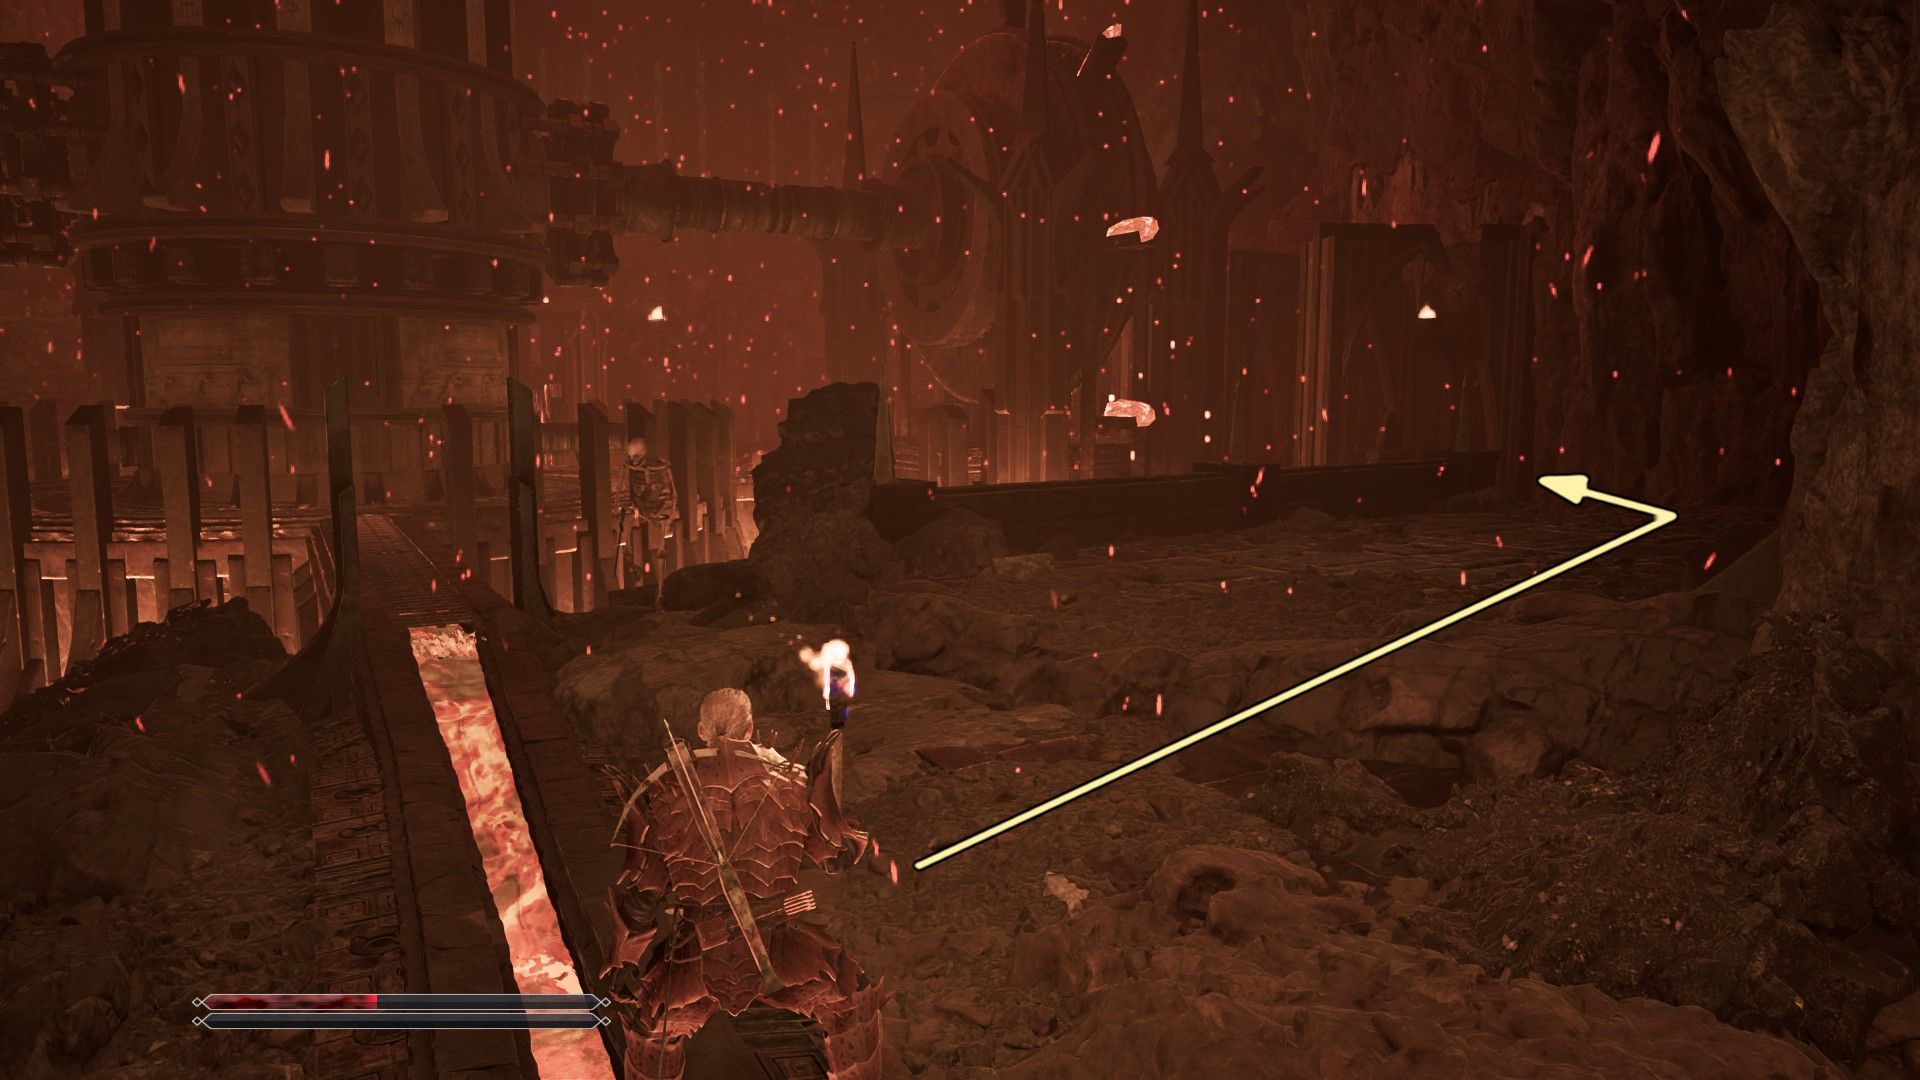


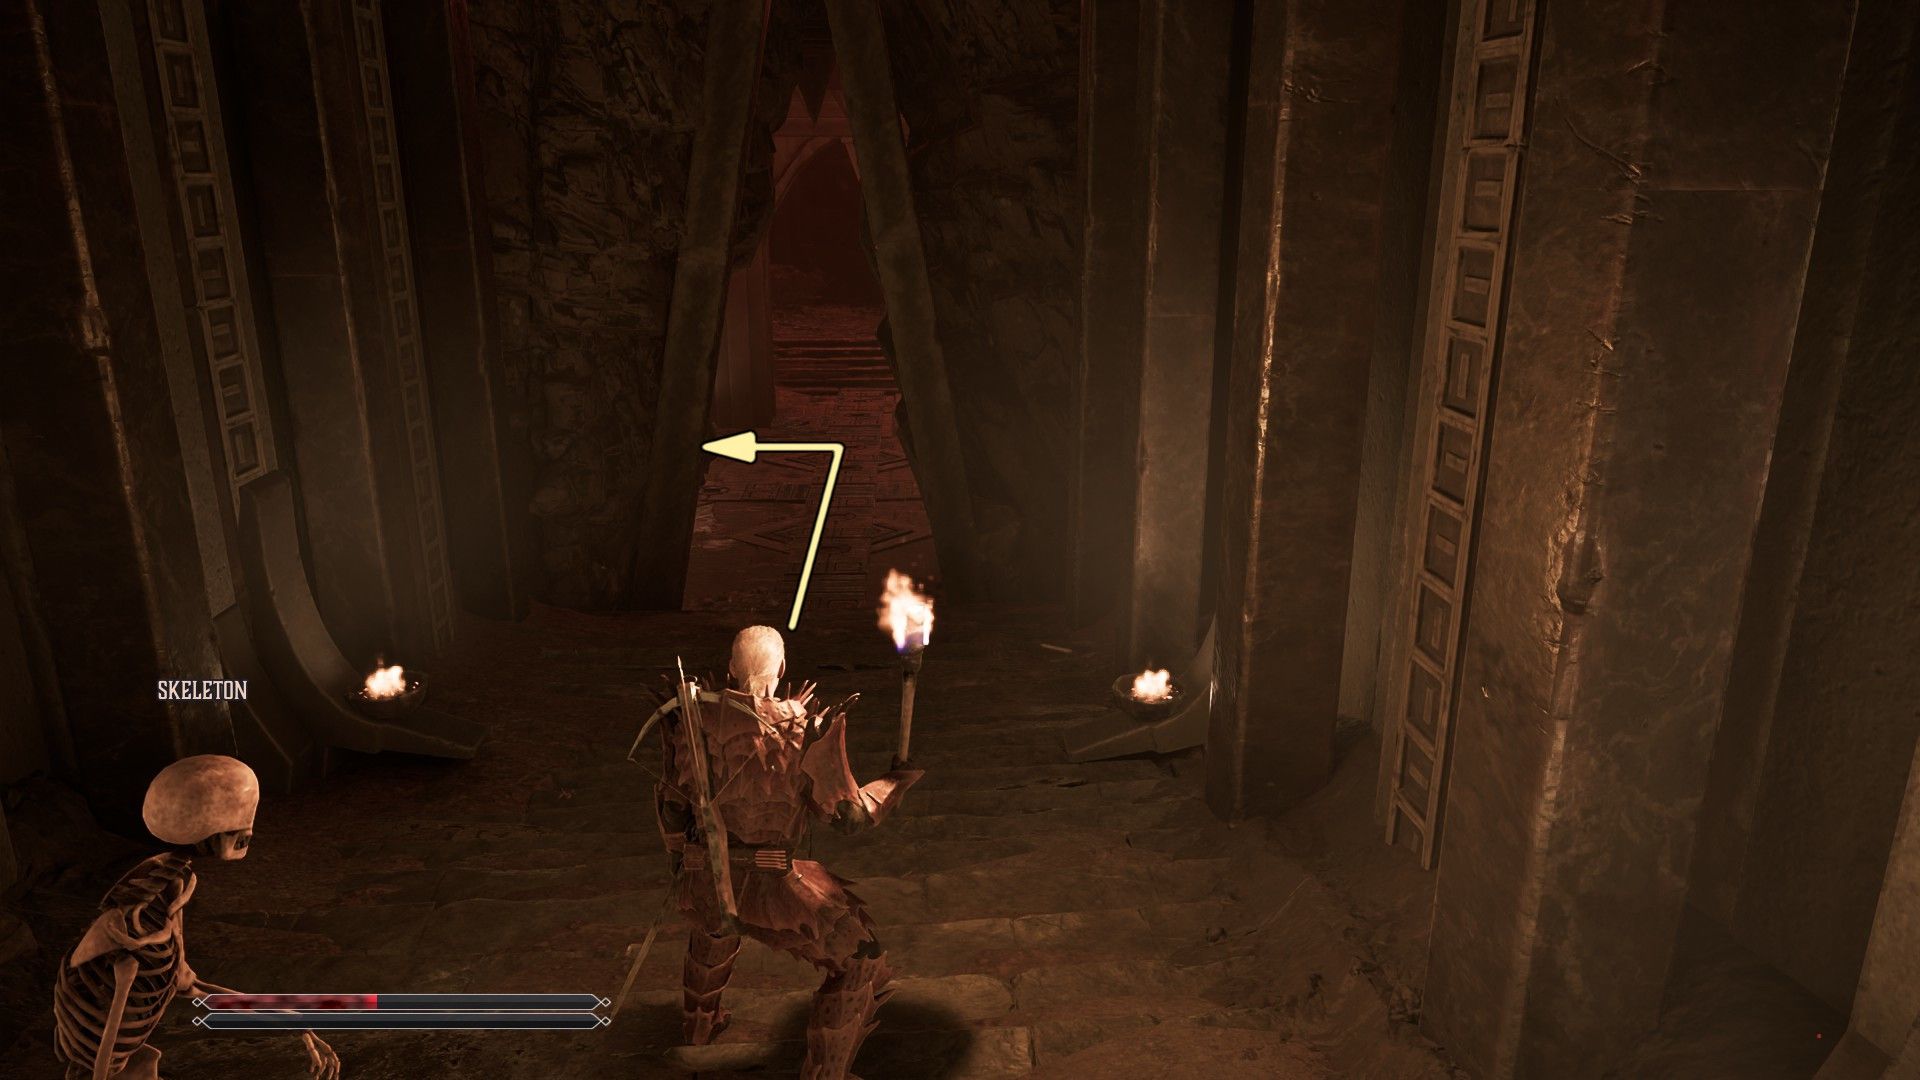
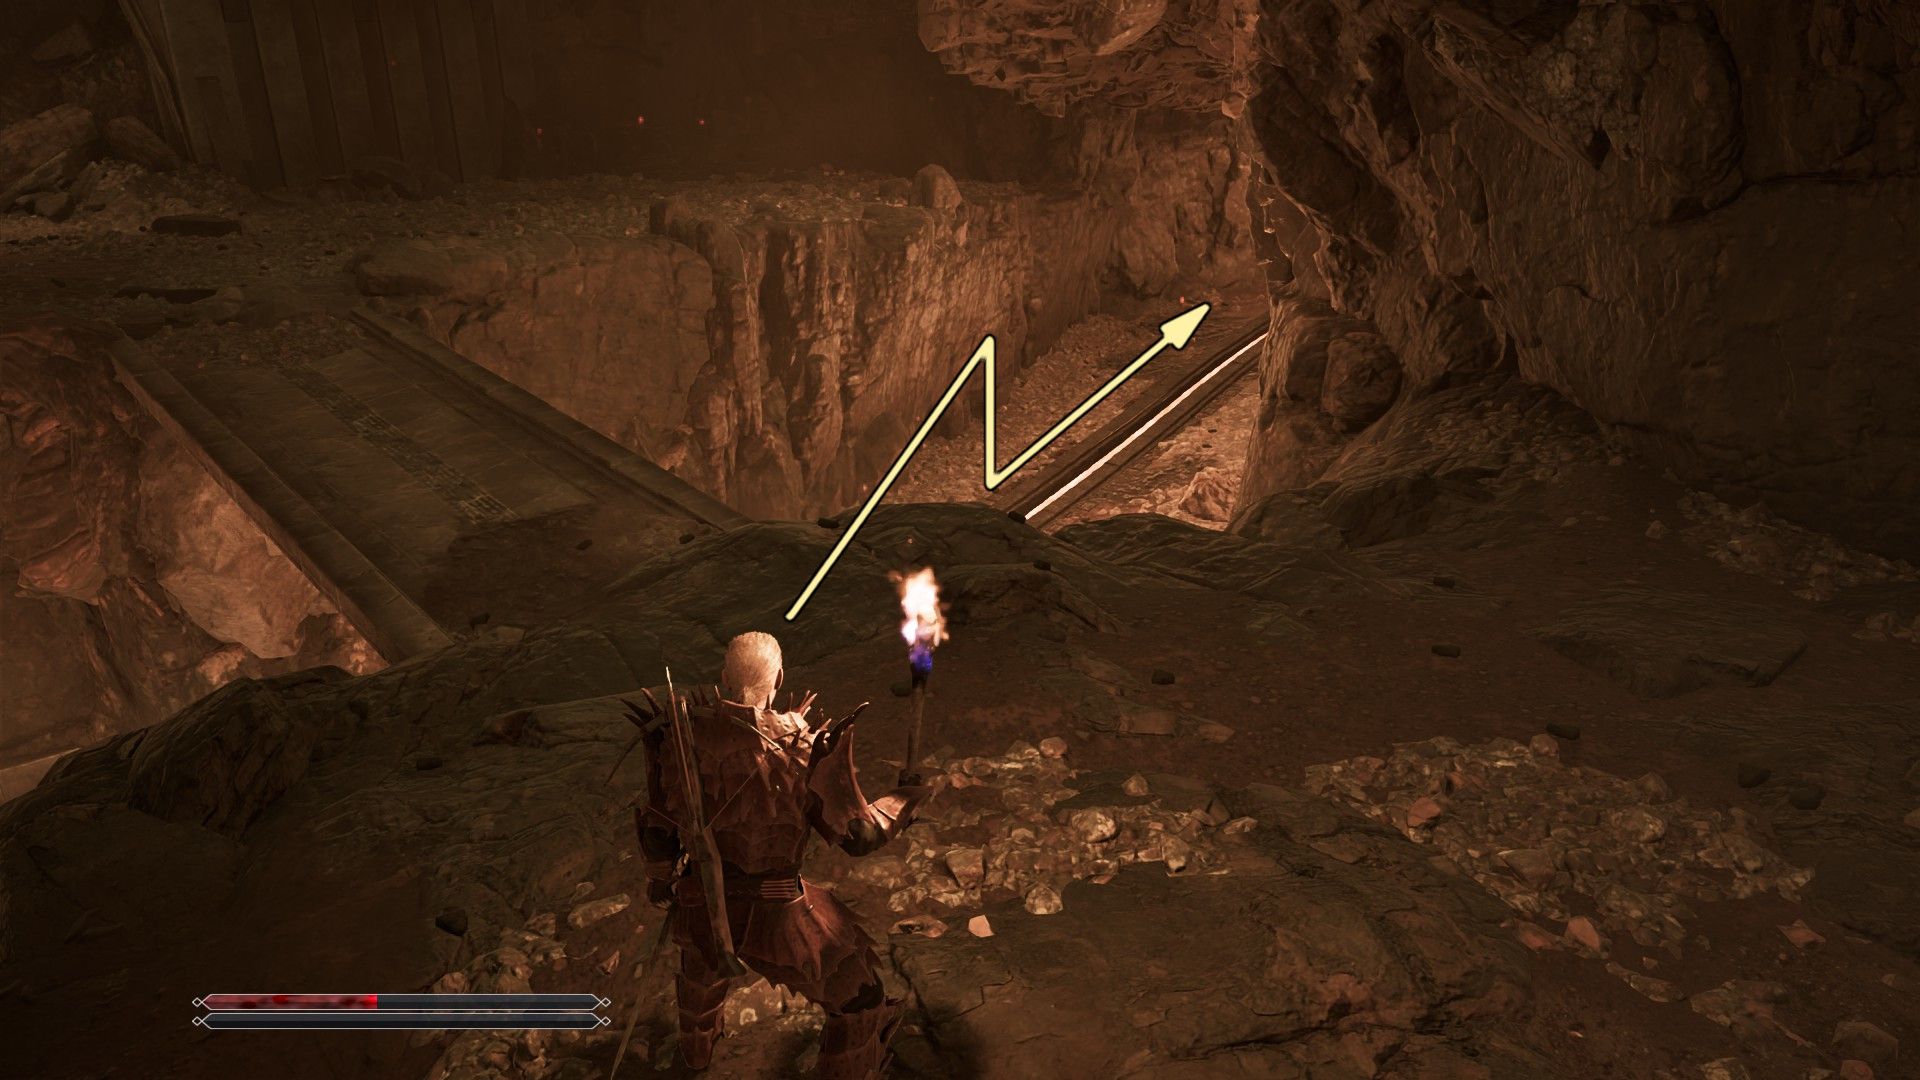
Go right from the machine room entrance and follow the downward path. Continue to the very end – don’t take the small stairs on your right – and you’ll find yourself in an underground area.
When you get to the split in the path, head up the rocky ledges on your right. You’ll enter a room with metal gates and a large wheel. Use the wheel to lift the gates, and then defeat the Temple Guards waiting beyond them.
Return to the room with the first wheel, then climb the stairs and continue along the path until you reach an area where a Temple Guard is standing. Defeat the guard, and you’ll see another wheel nearby on your right. Turn this second wheel – it will raise the large gate next to it.
Jump down from above, go through the newly opened gate, and follow the path until you reach Varrag Arushat. Beat him, then search his remains to get the Banstone – it’s the fourth stone required for Uriziel.

Once you have the Banstone, go back the way you came, through the large gate area. Look to your right for a small set of stairs you already passed. At the bottom, turn left to get back to the big machine. From there, follow the path leading back to the bridge you jumped down from, climb back up, and return to the room with doors all around.
How to Find Varrag Ruuushk and the Fiendeye Stone
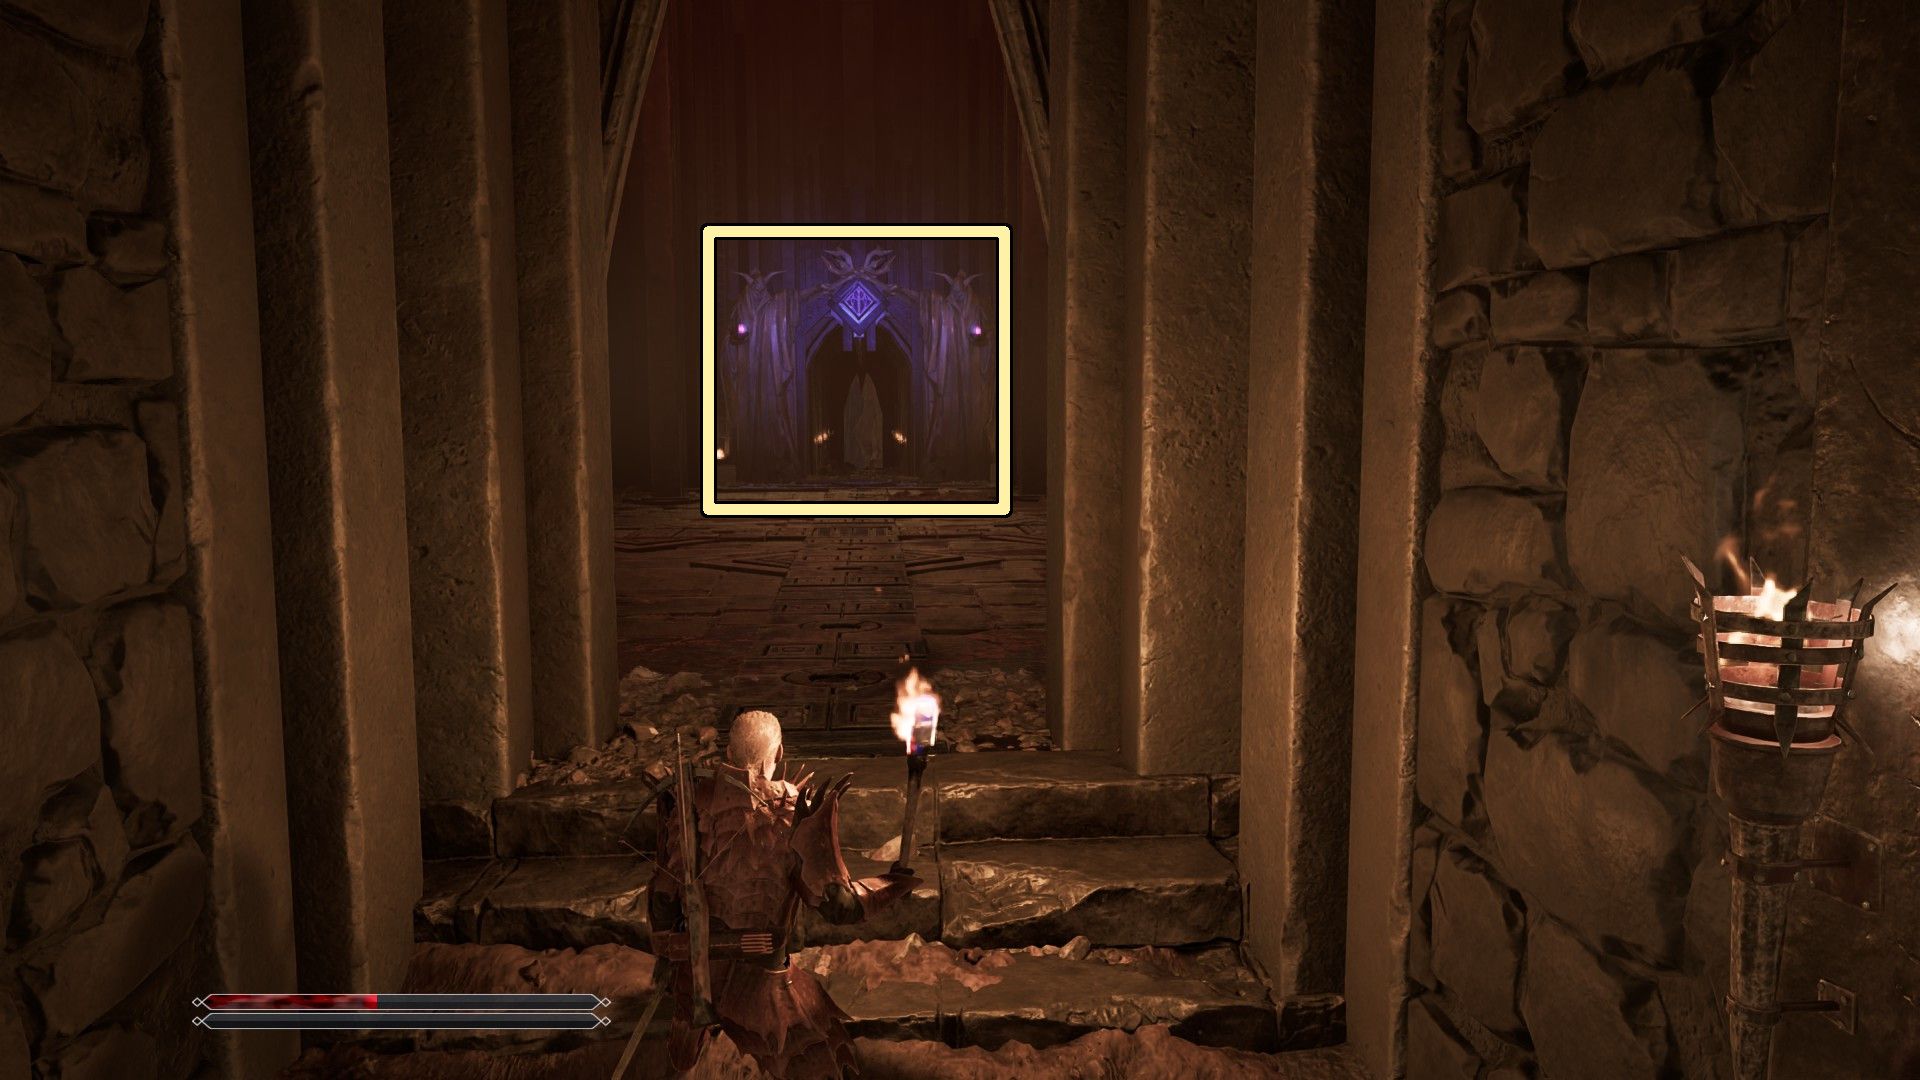
After returning to the room surrounded by doors, go through the door with the purple diamond. Follow the path that curves around the lava river, defeating the Demon Lord in each of the three rooms you encounter along the way as you ascend.
After defeating the Demon Lords at the summit, they’ll form a bridge leading to Varrag Ruuushk, the last orc shaman you need to fight. Once you defeat him and search his remains, you’ll obtain Fiendeye – the fifth and final stone required for Uriziel.
How to Get Uriziel
Once you’ve defeated Varrag Ruuushk, a unique sword will appear where you battled him. This sword, called Uriziel, along with the five stones you’ve collected, needs to be delivered to Xardas.
How to Complete The Dreamer’s Nightmare
After getting Uriziel and collecting all five stones, use Teleport to quickly travel to Xardas’s tower via the Necromancer rune. Talk to Xardas about the sword and the stones to finish ‘The Dreamer’s Nightmare’ quest and begin the next main quest, ‘Uriziel’.
Read More
- Green Game Jam returns with 70 games teaming up to tackle the climate crisis
- PI PREDICTION. PI cryptocurrency
- USD CHF PREDICTION
- USD HKD PREDICTION
- USD THB PREDICTION
- USD MYR PREDICTION
- Brent Oil Forecast
- USD JPY PREDICTION
- USD PHP PREDICTION
- Black Clover Confirms Special Chapter After Manga Finale
2026-06-16 20:41