
Finding weapons in Pragmata works a bit differently than in most shooting games. New weapons aren’t just items you collect – they change how you fight. Only your main weapons have unlimited ammo and stay with you throughout the game. Any other weapon – like attack, tactical, or defensive options – is temporary. Once you run out of ammo, they break and you’ll need to find a new one.
This one key feature is what gives weapon unlocks real importance. Unlike most action games where a weapon guide is just a list of things to find, in Pragmata, it actually shows how you progress. Certain weapons make the beginning of the game much easier, while others become incredibly useful as the hacking challenges get harder. Plus, some weapons are hidden within the Shelter systems, which you might miss if you rush through the missions without exploring.
This guide provides a complete overview of all 15 weapons in Pragmata. You’ll learn where to find each one, which weapons are most useful early on, which are easy to overlook, and which tools are best for tackling bosses, large groups of enemies, and the challenging Red Zones later in the game.
How weapons work in Pragmata
Hugh’s best loadout is built around four categories:
| Weapon Type | What It Does |
|---|---|
| Primary | Permanent weapon with self-recharging ammo |
| Attack | Limited-use damage weapon |
| Tactical | Limited-use control or hacking support weapon |
| Defense | Limited-use survival or space-making tool |
Your main weapon is the core of any setup, as you always have it with you. Other weapons – for attacking, tactical maneuvers, or defense – are best used in specific situations and are more impactful because you only use them once.
The Shelter is your main base of operations as you play. Here, you’ll permanently unlock weapons you find, upgrade Hugh and Diana’s gear, and access helpful systems like the Cabin’s Stamp Club for rewards. Eventually, you’ll also be able to carry more weapons at once – two attack weapons and two tactical weapons – giving you a lot more options in combat.
That’s when the game becomes much more flexible. At first, you mainly pick a single answer for each choice. But as you progress, you can begin combining a versatile tool with a more focused one.
All 15 weapons in Pragmata and where to find them
Here is the full weapon list and each unlock location:
| Weapon | Type | First Available |
|---|---|---|
| Grip Gun | Primary | Starting weapon |
| Pulse Carbine | Primary | Sector 3: Terra Dome, Plant Factory |
| Shockwave Gun | Attack | Sector 1: Solar Panel Plants, Power Distribution Center |
| Charge Piercer | Attack | Sector 2: Mass Production Array, Side Alley |
| Photon Laser | Attack | Sector 3: Terra Dome, Soil Research |
| Homing Missiles | Attack | Sector 4: Lunum Mines, Mine Entrance |
| Jackhammer | Attack | Complete the game |
| Stasis Net | Tactical | Sector 1: Solar Panel Plants, Power Distribution Center |
| Riot Blaster | Tactical | Sector 2: Mass Production Array, Shopping District |
| Sticky Bombs | Tactical | Sector 3: Terra Dome, Eco Modeling Lab |
| Code Generator | Tactical | Specialist Stamp Board, triple bingo |
| Hacking Mines | Tactical | Director Stamp Board, triple bingo |
| Decoy Generator | Defense | Sector 2: Mass Production Array, Lim Recycling Facility |
| Impact Barrier | Defense | Sector 4: Lunum Mines, Crane Operation Yard |
| Drone Hive | Defense | Associate Stamp Board, triple bingo |
The game subtly points to a key aspect of how you get weapons. While most are found as you play through the levels, some powerful ones – like the Code Generator, Hacking Mines, and Drone Hive – are only available through the Cabin’s Stamp Club. The Jackhammer is even harder to get, requiring you to finish the entire game. This means you can actually beat the campaign without finding all the best weapons if you don’t focus on the long-term rewards at the Shelter.
Best weapons to prioritize first
When you unlock new weapons, their impact varies. Some drastically change how you play right away, while others are only useful in certain situations.
Shockwave Gun
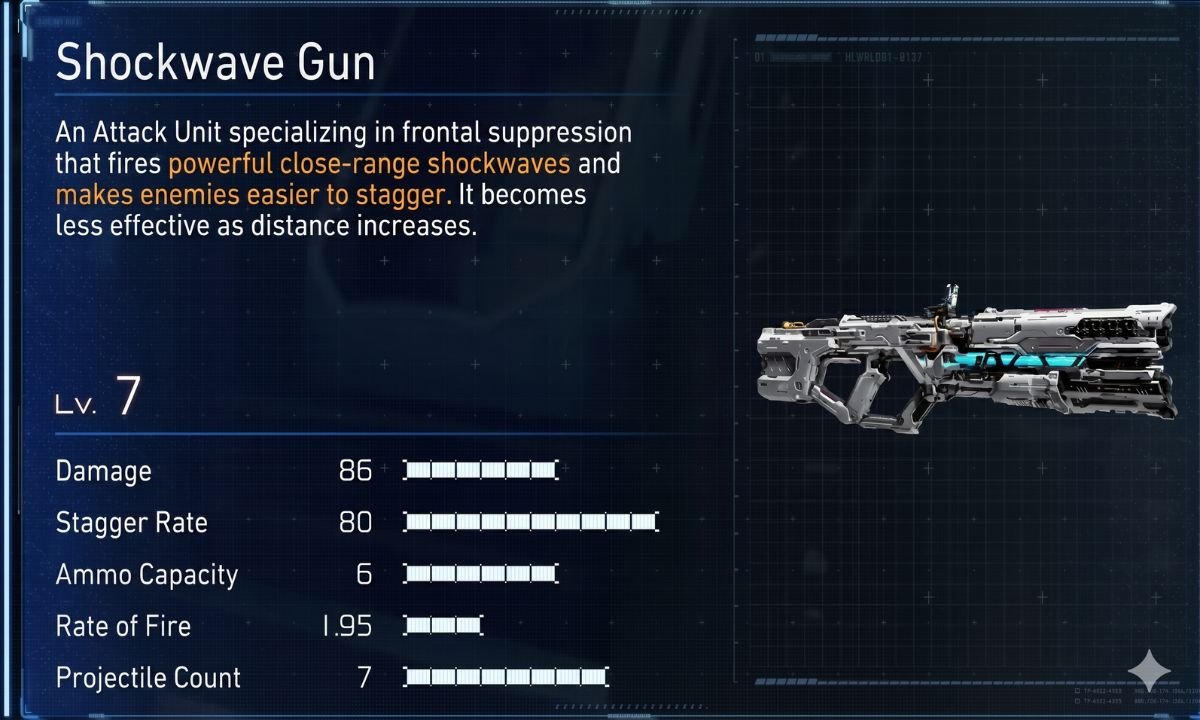
The Shockwave Gun is the first weapon players should prioritize. You get it early in the game, it deals significant damage, consistently staggers enemies, and stays effective even as you unlock other weapons. It’s a simple, reliable choice for regular fights and dealing damage to bosses.
Most importantly, this addresses a common issue at the beginning of the game: a lack of strong attacks when you’re feeling pressured. While you’re still learning to move, hack, and time your attacks, a weapon that provides a quick and powerful result is incredibly helpful.
Stasis Net
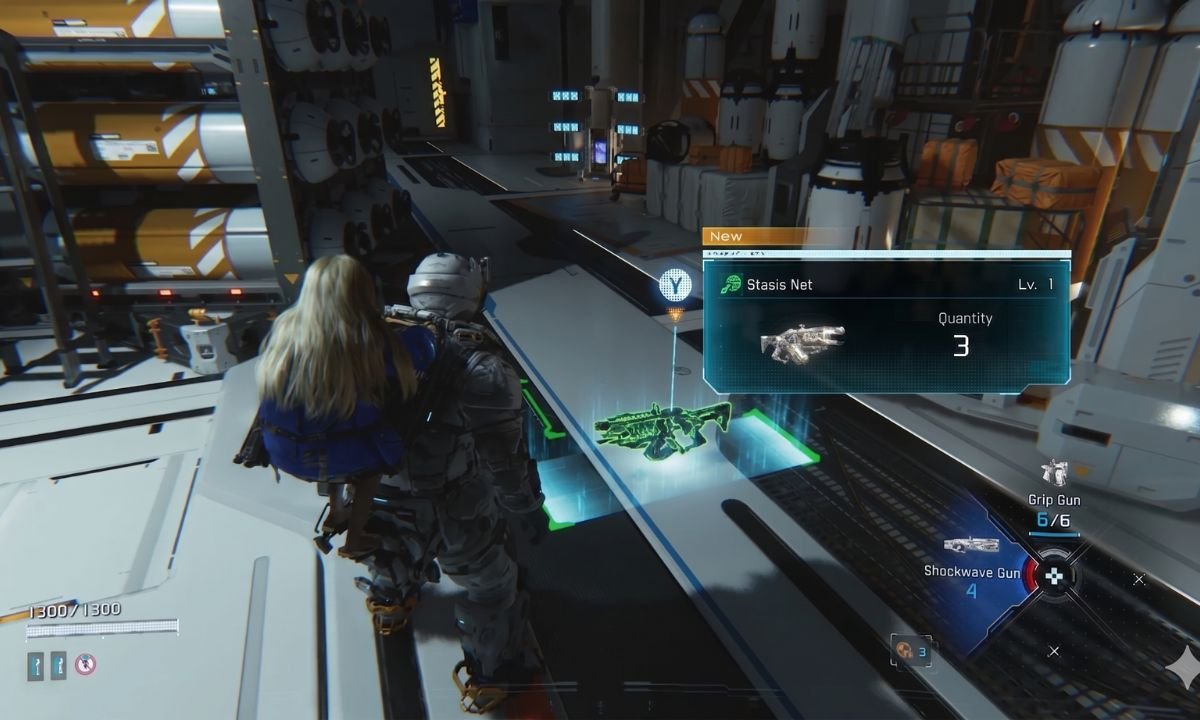
The Stasis Net is another powerful early ability. While it doesn’t deal a lot of damage, it significantly improves your survivability. Being able to temporarily freeze an enemy lets you focus on others, which provides valuable control and can be more helpful than simply dealing more damage in the early stages of the game.
Grip Gun and Pulse Carbine
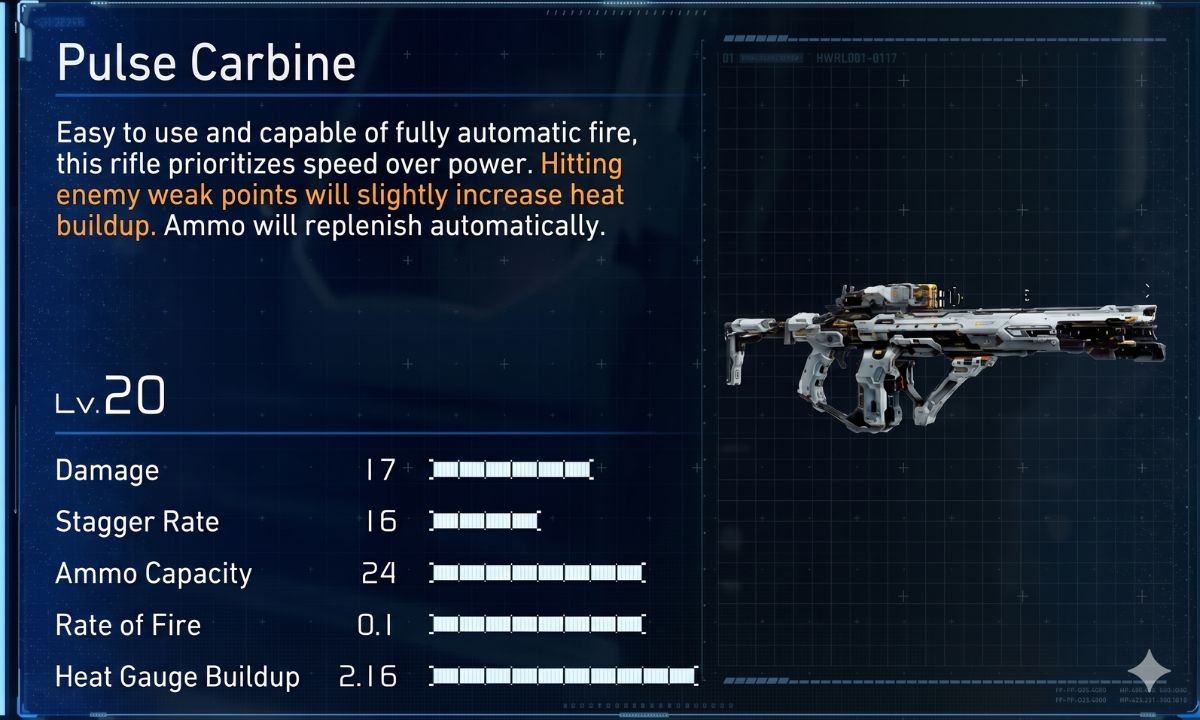
Your Grip Gun is a core part of your equipment and stays with you throughout the game, making it a good choice to upgrade. As you progress, the Pulse Carbine becomes a strong secondary weapon option around Sector 3, particularly if you like weapons that fire continuously rather than the Grip Gun’s more deliberate shots.
While it’s tempting to focus solely on improving your main weapon, don’t forget about the rest of your gear. A well-rounded approach is best. Your primary weapon is reliable, but things like hacking, health boosts, and specialized weapons can often be more crucial for surviving tough situations.
The best early priorities overall
For most players, the best first priorities are:
- Shockwave Gun, because it is strong, early, and easy to use well
- Stasis Net, because it immediately lowers combat pressure
- Hacking support, because hacking is central to how you open enemies up
- Health and survivability, because Pragmata punishes sloppy defensive play
Which weapons are easiest to miss
Certain weapons are easier to find than others. Weapons essential to the main story will usually appear as you explore the game world. The weapons people tend to miss are those locked behind optional challenges or content available after finishing the main story.
Code Generator, Hacking Mines, and Drone Hive
These three weapons are easy to overlook because you get them through the Cabin’s Stamp Club, and not by finding them during missions.
This is important for a couple of reasons. Since Cabin Coins are limited, making bad choices on Stamp Boards can delay you from getting the best rewards. Also, some rewards on the boards are hidden until you uncover them, so it’s easy to spend coins without realizing what you’re getting if you’re not careful.
You’ll probably miss out on some key weapons if you think of the Shelter as just a break from your main tasks, rather than an important part of getting stronger.
Jackhammer
The Jackhammer is the fourth weapon that’s easy to overlook, but not because it’s hidden. Unlike the others, you don’t find it during a normal playthrough—it’s unlocked after you finish the game, so don’t bother looking for it on your first run.
Why this matters
Essentially, Pragmata doesn’t immediately give you all the best items. Many of the most powerful or unique weapons are earned by consistently using and improving your Shelter, not just by exploring the world. If you want to collect every weapon, you’ll need to focus on completing missions and understanding how the Cabin’s reward system works.
Best weapons by situation
In Pragmata, the most effective weapon changes depending on the challenge you face. While a well-rounded setup can be helpful, the game truly shines when you adapt your tools to each unique combat scenario.
Best weapons for a standard first playthrough
For a first run, the safest general setup is built around:
- Grip Gun or Pulse Carbine
- Shockwave Gun
- Stasis Net
- Decoy Generator
Later, Sticky Bombs become worth rotating into that setup once Sector 3 opens up.
This setup is great for your first time because it’s simple and effective. Your main weapon provides steady damage, while the Shockwave Gun lets you quickly eliminate threats. The Stasis Net helps you manage enemies, and the Decoy Generator gives you breathing room when you’re overwhelmed.
While there are other viable options, this particular setup is one of the most reliable choices throughout the game.
Best weapons for bosses
Boss fights change the rules. You get fewer clean damage windows, and every wasted shot hurts more.
Charge Piercer
The Charge Piercer really shines during boss battles, more so than when dealing with regular enemies. It’s most effective when you have brief opportunities to attack, and it encourages careful timing over rushing in. If a boss requires you to wait for a specific opening, the Charge Piercer is a great choice because it matches that slower, more deliberate pace better than many other weapons.
Sticky Bombs
Sticky Bombs are really useful during boss battles, not because of the damage they do directly, but because they make it easier to quickly hack the systems needed to expose the boss’s weak points. When bosses constantly attack, saving time on hacking can be a game-changer.
Homing Missiles
Homing missiles aren’t always the best choice, but they’re really useful against bosses that move around a lot or fly frequently. They make those fights less frustrating by automatically tracking tricky targets, so you don’t have to.
Best weapons for crowd control
Once a battle gets crowded with enemies, focusing on quickly defeating one at a time becomes less important than managing the overall chaos and staying safe.
Stasis Net
The Stasis Net is still a very effective way to manage enemies. You can quickly freeze one opponent, focus on another, and then return to the first before the freeze wears off. It’s a simple tactic, but consistently successful.
Riot Blaster
Riot Blaster becomes a stronger option once you’ve unlocked your second Tactical slot. While not as broadly useful as Stasis Net, it’s great for dealing with groups of enemies where focusing on one at a time isn’t the most effective approach.
Best weapons for late-game and Red Zones
As you progress in the game and enter challenging areas like Red Zones, you’ll need to carefully plan your gear. These encounters are more difficult because enemies are tougher, mistakes are costly, and there’s less room for error.
Code Generator
The Code Generator is a powerful tool later in the game because it boosts your hacking ability, which is often more useful than simply dealing more damage. In challenging situations, this support can be more valuable than extra attack power. It’s a great example of a weapon that gets better as the game gets harder.
Sticky Bombs
Sticky Bombs remain effective throughout a campaign because as the game progresses, enemy hacking grids get increasingly complex and dangerous. Anything that simplifies those grids becomes more and more useful.
Photon Laser and Charge Piercer
When you unlock your second attack slot, Photon Laser and Charge Piercer can be a powerful combination depending on the situation. Photon Laser excels at long distances, while Charge Piercer is great for dealing a lot of damage quickly in close-range encounters.
Stamp Board weapons explained clearly
The Cabin Stamp Club might seem like just a small extra thing to do, but it’s actually a really important part of how you improve over the long run in the game.
The game works like this: you collect Cabin Coins and use them to play bingo in the Shelter. As you complete rows and reach bingo, you’ll earn rewards. These rewards range from cosmetic items and helpful tools to powerful combat gear.
For weapons, the key Stamp Board rewards are:
- Drone Hive — Associate Board, triple bingo
- Code Generator — Specialist Board, triple bingo
- Hacking Mines — Director Board, triple bingo
That means two things.
Ignoring Stamp Boards isn’t just about missing out on extra details—it means you’re actually passing up legitimate ways to fight.
Also, since Cabin Coins are rare and many rewards aren’t shown until you earn them, be mindful of how you spend them. The Stamp Club isn’t just for collecting – it helps you get stronger as you play.
The most important takeaway
The most important thing to remember about Pragmata is that it’s not just about gathering weapons. It’s about knowing why each weapon was created and what purpose it serves.
Most players will find the Shockwave Gun, Stasis Net, and upgrades to hacking, health, and your main weapon most helpful early in the game. It’s easy to overlook the three weapons hidden behind the Cabin’s Stamp Club, as well as the Jackhammer you unlock after finishing the game. For your first playthrough, a good strategy is to use the Shockwave Gun, either the Stasis Net or Sticky Bombs, and the Decoy Generator. Later on, when you face tough bosses or challenging rooms, Charge Piercer, Homing Missiles, and the Code Generator will become more useful.
What sets Pragmata’s weapons apart is how they connect to the player’s progress. They aren’t just collectibles; they reflect your growing skills and abilities. Starting with basic survival tools, you’ll unlock weapons that improve control, enhance hacking, and ultimately provide powerful late-game options for players who actively explore and utilize the Shelter, rather than passively waiting.
Read More
- Trails in the Sky 2nd Chapter launches September 17
- HBO Max Just Added the Final Episodes of a Modern Adult Swim Classic
- Paradox codes (April 2026): Full list of codes and how to redeem them
- Pragmata Shows Off Even More Gorgeous RTX Path Tracing Ahead of Launch
- Crimson Desert’s Momentum Continues With 10 Incredible New Changes
- PRAGMATA ‘Eight’ trailer
- Dragon Quest Smash/Grow launches April 21
- How Could We Forget About SOL Shogunate, the PS5 Action RPG About Samurai on the Moon?
- Solo Leveling’s New Character Gets a New Story Amid Season 3 Delay
- Hulu Just Added One of the Most Quotable Movies Ever Made (But It’s Sequel Is Impossible To Stream)
2026-04-18 21:04